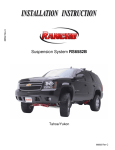
1
ReadyLift® (Part# 69-3015) Installation Instructions
New GM SUV 1500 6-Lug New Body Style 2wd & 4wd
Tahoe, Suburban, Avalanche, Yukon, Yukon XL
Please read instructions thoroughly and completely before beginning installation.
Check www.Readylift.com for any installation instruction updates
Installation by a trained mechanic is recommended.
11. To remove the strut, lower it down through the
control arm, then upwards and out over the spindle.
12. Install the new ReadyLift® strut extension
spacer onto the top of the factory strut. Unlike some
kits, you don’t need to cut the studs off or swap the
struts from side to side. The ReadyLift aluminum
spacer is designed to provide the necessary lift while
retaining the use of the factory strut studs. This is a
great advantage should you ever want to return the
vehicle to stock such as with a lease vehicle.
13. Carefully install the strut with the ReadyLift
spacer on top into the upper frame pocket. Secure
the strut with the provided new nuts. Leave the nuts
only hand tight so the bottom of the strut can be adjusted when the lower control arm is raised up.
14. Place a jack under the lower control arm and raise it up. Then place the new
ReadyLift lower strut mount spacer over the factory control arm holes as shown.
15. Position the strut and nut clips over the spacer
and install the factory bolts to permanently secure
the assembly.
ReadyLift Suspension Inc.
3201 W. MacArthur Blvd. Santa Ana, CA 92704B-1, Costa Mesa, CA 92627
Toll Free (877) 751 -1119 Fax (714)862 -2972
Revised 7/10