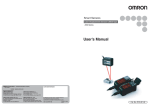
1
UNION SWITCH & SIGNAL
A member 01 the ANSALDO Group
5800 Corporate Drive. Pittsturgtt, PA 15237
j~¶J
SERVICE MANUAL 6400A
Vital Application Logic Programming
MICROLOK®
Vital Interlocking Control System
C
MICROLOK-PLUS~
Vital
+
Non-Vital Control Package
(Vital Section)
October, 1991 (RevIsed December, 1993)
B-i2/93-2774
COPYRIGI4T I9~. UNION SWITCI4 £ SIGNAL INC.
PRINThO IN USA
~DO
REv:s:04 :~DEx
Revised pages o~ this manual are listed by page number and date of revision.
Rev
2—1
12—93
CONTENTS
Sect ion
I
INTRODUCTION TO MANUAL
1~.l
1.2
II
Page
1—1
1—1
PURPOSE
FAMILY OF MANUALS
I —~
GENERAL INFORMATION
MICROLOK
2.1
INTRODUCTION
2.1.1
Gene ral
2.1.2
Application and Executive Software
2.2
COMPONENTS
2.2.1
Cardfi les
2.2.2
Other Equipment Rack Units
2.3
SPECI FICATIONS
-
2—1
2—1
2—I
2—I
2—4
2—4
2—7/8
2—7/8
III GENERAL INFORMATION
MICROLOK PLUS
3.1
INTRODUCTION
3.1.1
Overall System
3.1.2
Vital Section L~asic Functions
3.1.3
Application and Executive Software
3.2
COMPONENTS
3.2.1
Cardfi le
3.2.2
Vital Section PCBs
Related Equipment
3.2.3
VITAL SECTION SPECIFICATIONS (Programming Related)
3.3
3—1
3—1
3—1
3—1
3—3
3—4
3—4
3—5
3—7/8
3—7/S
IV
4—1
4—1
4—1
4—I
4—1
4—2
4—2
4—3
4—4
4—4
4—4
4—4
4—5
4—5
4—6
4—6
4—6
4—7
4—7
4—7
4—7
4—8
4—8
4—8
4—9
4—9
4—9
-
FUNCTIONAL DESCRIPTION
MICROLOK AND MICROLOK PLUS
4.1
ELEMENTS OF VITAL OPERATIONS
4.1.1
General
4.1.2
Vital—Kill and Vital Power—Off
4.1.3
Closed—Loop Monitors
4.2
VITAL SERIAL COMMUNICATIONS
4.2.1
General
4.2.2
Communications Modes
4.2.3
Message Components
4.2.4
Pollinq of Slave Units
4.2.4.1
General
4.2.4.2
MIPSUM (Master Interval Parameter Summation)
4.2.5
Message—to—Message Delay (‘Stale’ Data)
4.2.6
Vital Assurance Functions
4.2.7
Line Noise and Recovery
4.3
VITAL LOCAL COMMUNICATIONS
4.3.1
Acquiring Input Data
4.3.2
Vitality of Inputs
4.3.2.1
Redundant Reading
4.3.2.2
Verification of Less Restrictive Bit
4.3.2.3
Bit Latching
4.3.2.4
Stuck Bit Check
4.3.2.5
Shorted Input Check
4.3.3
Delivering Output Data
4.3.4
Vitality of Outputs
4.3.4.1
Stability Interval
4.3.4.2
Reading Monitors
-
i
CONTENTS (Cont’d)
Sect ion
V
Paoe
4.3.4.3
Stuck Output
4.3.4.4
Fast Output—Off Check
(‘Flip’) Check
4.3.4.5
4.3.4.6
4.3.4.7
4.4
4.4.1
4.4.2
4.4.2.1
4.4.2.2
4.4.2.3
4.4.2.4
4.5
4.5.1
4.5.2
4.5.3
4.5.4
4.5.4.1
4.5.4.2
4.5.5
Bi—Polar Output Check
Lamp Filament Tests
Suspend Test
NON—VITAL SERIAL LINK
Introduction
Non—Vital Intertace
General
Communication Start—Up and Termination
Vital CPU—to—Code System Messages
Code System—to—Vital CPU Messages
CPU FAILOVER SYSTEM
MICROLOK ONLY
Configuration
Selection at Power—Up
In—Service Failover
Special Configurations
Lock—Off/Lock—On
Forced Start—Up Priority
Monitoring Health of Off—Line Computer
-
PROGRAMMING PROCEDURES
MICROLOK AND MICROLOK PLUS
5.1
INTRODUCTION
5.2
PROGRAMMING LANGUAGE
GENERAL DESCRIPTION
5.2.1
Main Program Sections and Statements
5.2.2
Basic Format
5.2.3
Comments
5.2.3.1
General
5.2.3.2
Compiler Switches
5.2.4
Tokens
5.2.4.1
General
5.2.4.2
Reserved Words
5.2.4.3
Delimiters
5.2.4.4
User—Defined Bits
5.2.5
Bit Types and Uses
5.2.5.1
Status in an ASSIGN Statement
5.2.5.2
Bits Attributes
5.2.5.3
Pre—Defined Bits
5.3
PROGRAMMING LANGUAGE
DETAILED DESCRIPTION
5.3.1
Main Program Sections and Statements
5.3.1.1
General
5.3.1.2
Program Statement
5.3.1.3
INTERFACE Section
5.3.1.4
Internal Bits
5.3.1.5
Bit Attributes
5.3.1.6
BEGIN Statement
5.3.1.7
ASSIGN Statement
5.4
SUMMARY OF PROGRAM STRUCTURE
5.5
SUMMARY OF PROGRAMMING RULES
5.6
PROGRAMMER GUIDELINES
PROGRAM EXECUTION
—
-
-
—
ii
49
4—10
4—10
4—11
4—11
4—12
4—12
4—12
4—12
4—14
4-15
4-16
4—17
4—17
4—17
4—19
4—19
4—19
4—19
4—20
5—1
5—i
5-1
5-1
5—2
5—3
5.3
5—3
5—6
5—6
5—7
5—7
5—8
5—8
5-10
5—10
5—10
5—10
5-10
5—17
5—18
5—20
5—21
5—24
5—25
5—26
CONTENTS
(Cont’d)
Sect ion
5.6.1
5.6.2
5.6.3
5.6.3.1
5.6.3.2
5.6.4
5.6.5
5.7
5.8
5.9
5.9.1
5.9.2
5.9.3
5.10
5.10.1
5.10.2
5.10.3
5.10.4
5.10.4.1
5.10.4.2
5. 10.4. 3
5. 10.4 .4
5.10.4.5
5.10.4.6
5.10.4.7
5. 10.4.8
5.10.4.9
5.10.4.10
5.10.4.11
5.10.4.12
5.10.4.13
5.10.4.14
5.10.4.15
5.10.4.16
5.10.4.17
5.10.4.18
5. 10.4.19
5.10.4.20
5.10.5
5.11
5.11.1
5.11.2
5.11.3
5.11.4
5.11.5
5.11.6
5.11.7
5.11.8
5.12
5.12.1
5.12.2
Pac~e
General
Timer List
Trigger List
General
Breaks—Before—Makes Rule
Sample Execution — Timer and Triqger Lists
Cyclic Logic
MICROLOK DEVELOPMENT SYSTEM (M.0.s.) - GENERAL
M.D.S. - AVAILABLE FILES
M.D.S. - COMPILER
General
Symbol Table Listing
Comments Symbol and Page Generator Compiler Switch
M.D.S. - SIMULATOR
5—26
General
Access to Simulator
Standard Formats
Simulator Operation
General
Sample Program
Help Screen
Display 10 Command
Display Triggers Command
Display Relays Command
Remove Command
Input Command
Relay Set and Clear Commands
Increment Command
Display Timers Command
Execute Command
Trace Command
Run Command
Value Command
Read Command
Print Command
No Display
Reset and Quit Commands
Color/Monochrome Commands
Simulator Diagnostics
M.D.S.
EPROM PROGRAMMER
General
Initial Config. File
M.D.S. Versions 1.01 and Higher
Prog. Operation
M.D.S. Versions 1.01 and Higher
Error Messages
Communications Inter rupt
Initial Configuration
File
M.D.S. Version 1.00
Programmer Operation
M.D.S. Version 1.00
EPROM Programmer Driver
Color Display
M.D.S.
SCAN TIME ESTIMATES PROGRAM
General
All Versions
Features
Versions 4.00 and Higher
5—34
5—34
5—35
5—36
5—36
5—36
5—39
-
—
—
—
—
-
—
—
—
iii
5—26
5—26
5—26
5—26
5—28
5—29
5—30
5—30
5—31
5—31
5—32
5—34
5—34
5—40
5—40
5—42
5—43
5—44
5—45
5—46
5—46
5—46
5—47
5—48
5—49
5—49
5—50
5—51
5—51
5—51
5—52
5—52
5—52
5—53
5—54
5—56
5—59
5—59
5—59
5—61
5—61
5—61
5—63/64
CONTENTS
(Cont’d)
Sect ion
VI
Paqe
SUPPLEMENTAL
DATA
—
MICROLOK AND MICROLOK
PLUS
6.1
APPLICATION PROGRAM COMPILER SWITCHES
6.1.1
6.1.3
6.1.4
6.1.5
6.1.6
Master Baud Rate
Slave Baud Rate
Master Key—On Delay
Slave Key—On Delay
Master Key—Off Delay
Slave Key—Off Delay
6.1.7
6.1.8
6.1.8.1
6.1.8.2
6.1.9
6.1.9.1
6.1.9.2
6.1.10
6.1.10.1
6.1.10.2
6.1.11
6.1.12
6.1.13
6.2
6.2.1
6.2.2
6.3
6.3.1
6.3.2
6.3.3
6.4
6.5
6.6
Master Waiting for Response Time—Out
Master Interval Parameter Summation (MIPSUM)
Switch Options
Application Considerations
Master Stale Data Time-Out
Switch Options
Application Considerations
Slave Stale Data Time-Out
Switch Options
Application Considerations
Debug
Symbol Table Listing
Page Generator
STATUS BYTE ALLOCATION IN NON-VITAL CONTROLLER
General
Indication and Status Bit Mapping
COMPILER ERROR MESSAGES
Token Errors
Syntax Errors
Semantic Errors
BAUD RATE SELECTION FOR CURRENT LOOP INTERFACE
PERIPHERAL PCB SWITCH AND JUMPER ADJUSTMENTS
CODE SYSTEM INTERFACE PCB SWITCH ADJUSTMENTS
6.1.2
APPENDIX A
PARTS LIST (MICROLOK Development System Equipment)
iv
6—1
6—1
6—1
6—1
6—1
6—2
6—2
6—2
6—2
6—3
6—3
6—3
6—4
6—4
6—4
6—5
6—5
6—5
6—5
6—5
6—6
6—6
6—6
6—8
6—10
6—10
6—10
6—11
6—13
6—14
6—16
C
ILLUSTRATIONS
Page
Figure
K
2—I
Basic MICROLOK System
2—2
2—2
MICROLOK Vital Serial Communications
2—3
2—3
MICROLOK CPU Cardfile PCB Arrangements
2—5
2—4
MICROLOK I/O Cardfile PCB Arrangements
2—6
3—1
Basic MICROLOK PLUS System
3—2
3—2
MICROLOK PLUS Application and Executive Software
3—4
3—3
MICROLOK PLUS Cardfile PCB Arrangement
3—6
4—1
Vital Cut—Offs and Closed—Loop Monitors
4—2
4—2
Serial Link Between Vital CPU and Non—Vital
Cont roller
4—13
4—3
MICROLOK Computer Failover
4—18
5—1
Master/Slave
5—2
ASSIGN Operators,
5—3
MICROLOK Development
6—1
Baud Rate Vs. Distance
6—2
Peripheral
6—3
Code System Interface
and LEDs
System
Programming Reference
Diagram
5—22
Sample Execution
System Basic Diagram
for Current
PCB Manual Adjustments
Loop Interface
and LEDs
PCB Manual Adjustments
v
5—14
5—30
6—13
6—15
6—17
)
0
L.
0
CU
a-
a0
0
0.
U,
0
a-
0
0
0
CU
C.)
C’)
-J
0~
0
-a
0
C.)
C.)
0
-a
0
C.
SECTION I
INTRODUCTION TO MANUAL
1.1
PURPOSE
This manual provides instructi3ns for programming the vital application
software of both the MICROLOK Vital Interlocking Control System and the vital
section of the MICROLOK—PLUS Vital + Non—Vital Control Package. These systems
share identical vital logic and interface circuit boards, as well as executive
and application software. Vital software revisions affect both systems.
1.2
FAMILY OF MANUALS
This manual is one of eight manuals that cover the MICROLOK Vital Interlockino
Control System, the MICROLOK PLUS Vital
Non—Vital Control Package and/or the
The following table summarizes these
GENISYS Non—Vital Logic Emulator.
manuals:
-~
SM No.
System(s) Covered
Purpose
6300A
GENISYS, MICROLOK PLUS
Both Systems: Programming of Non—Vital
Application Logic
63008
GENISYS, MICROLOK PLUS
GENISYS:
Hardware Installation, Local
and Serial Data Interfacing, Field
Troubleshooting
MICROLOK PLUS:
Local/Serial Data
Interfacing and Field Troubleshooting
of Non—Vital Section (refer to SM—6400B
for MICROLOK PLUS hardware installation)
6300C
GENISYS, MICROLOK PLUS
Both Systems: Shop Troubleshooting of
Non—Vital Printed Circuit Boards
6301
GENISYS, MICROLOK PLUS
Both Systems:
Installation of GENISYS
Development System (G.D.S.)
Hard and
Dual—Floppy Disks
—
6400A
MICROLOK, MICROLOK PLUS
Both Systems: Programinin~ of Vital
Application Logic
64008
MICROLOK, MICROLOK PLUS
MICROLOK: Hardware Installation, Power
and Data Interfacing
MICROLOK PLUS:
Hardware Installation,
Power Interfacing, Data Interfacing of
Vital Section (refer to SM—6300B for
non—vital data interfacing)
6400A, p. 1—1
SM No.
System(s)
Covered
6400C
MICROLOK, MICROLOK PLUS
Purpose
MICROLOK:
Field Troubleshooting
MICROLOK PLUS:
Field Troubleshooting
of Vital Section
6401
MICROLOK, MICROLOK PLUS
Both Systems:
Installation of
MICROLOK Development System (M.D.S.)
Hard and Dual—Floppy Disks
—
U
6400A, p.
1—2
SECTION II
GENEPAL INFORMATION
2.1.
2.1.1
-
MICP.OLOK
INTRODUCTION (See Figure 2—1)
General
MICROLOK is a microprocessor—based loaic controller designed specifically for
railroad vital lnterlocldng applications. Its basic function is to process
various inputs according to a program designed by the application engineer,
and create the appropriate outputs. Inputs and outputs may be through direct
interfaces with MICROLOK, or through serial communications with other vital or
non—vital controllers.
Direct inputs include track circuit occupancy, state
of switch machine point contacts, state of signal relay or mechanism contacts,
and traffic and line circuits. Outputs eventually interface to control signal
mechanism drives, signal lamp drives, switch control contactors and traffic
and line control circuits.
Local input options include standard off/on (bit 0/1) voltaae inouts, or
bi—polar voltage inputs (bit 0 or 1 for each polarity). Two voltage input
ranges are available with these options:
12 or 24 Vdc (nominal). Local
output ootions include standard (single pole) relay drive, or bi—Polar relay
drive.
Special lamp filament—compatible outputs are available to drive 18, 25
or 36 watt signal lamps.
More than one MICROLOK unit can be linked through serial communications to
form a single system, using a Master/Slave communications protocol.
Up to 16
Slave units may be controlled by a Master MICROLOK unit.
Serial links can
also include the MICROLOK PLUS Vital + Non—Vital Control Package (vital
section) as either a Master or Slave unit.
Communications are formatted to
EIA RS—423 standards, and derated to operate under the RS-232C standards (see
Figure 2—2). A 20 mA current loop option is also available for direct serial
communications between MICROLOK and/or MICROLOK PLUS systems in adjacent
wayside houses.
This option is designed for maximum noise immunity and may be
operated over a maximum distance of 5000 ft. (or a total cable path of 10,000 ft.)
The MICROLOK processing logic can also be configured to operate as a single
computer, or in a on—line/standby computer arrangement.
A failure of the
on—line unit will be sensed by the off—line unit, initiating
a cold restart.
2.1.2
Application and Executive Software
MICROLOK incorporates two types of software.
One is the special application
program developed by the user.
This program is written and ‘compiled’ on a
computer, using a language that enables the system logic to be expressed in a
manner relevant to the applications engineer. The finished program is
converted into a form that can be burned into EPROM chios used on the MICROLOK
Peripheral board.
The optional MICROLOK Development System (M.D.S.) enables
the user to conduct all phases of application program development, including
compiling on a personal computer, debugging, scan time estimates, and final
checking and programming into the Peripheral board EPROMs.
k.
6400A, p. 2—1
1 TR
Figure 2—1.
Basic MICROLOK System
6400A, p. 2—2
SLAVE STRING
.
CENTRALIZED CONTROL
16 SLAvE UNITS. MAX.
MASTERISLAVE STRING
-
DISTRIBUTED CONTROL
SB FT MAE ICARLE I.EHGTHI
50 FT MAE ICARE.E LEHEThI
MODEM APPLICATION (EIA RS-423 OR RS-232)
USED BEYOND
SO FT.
IMAK. CABLE LENGTh
ALLOW!C)
CURRENT LOOP
I
I
MASTER
—
WAYSIDE HOUSE
———
a
I
*
WAYSIDE HOUSE
—
SLAVE
———
*ERI
•
I/O
I
PHERAI.
PCI
I
BUS
PCI
I
I
I
I
I
———
I
—
SIA RS-423/RS-332
20 mA CURRENT LOOP
5000 FT. DISTANCE
10,000 FT. TOTAL CABLE RUN
[.1
4
SERIAL COMM. ADAPTER PAPIBI.
I.
Figure 2—2.
MICROLOK Vital Serial Communications
6400A, p. 2—3
I
I
I
EIA RS-423/RS 232
SERIAL COMM. ADAPTER PANEL
—
.
The second type of MICROLOK software is the standard, executive logic common
to all MICROLOK systems. This software contains routines designed to (a)
verify the states of vital inputs and outputs, (b) insure that all vital
outputs are fully controllable, and (c) remove mower to vital outputs in all
cases where a system failure has occurred.
Vital assurance is applied to
local inputs and outputs, and to serial communications with other N¶ICROLOK
units (expanded system). The standard MICROLOK software also performs the
input, internal and output logic operations defined in the user’s application
program, as well as diagnostic routines at different operational levels.
2.2
2.2.1
COMPONENTS
Cardfiles
The MICROLOK interfacing and logic electronics are contained in two cardfiles
designed to hold plug-in printed circuit boards. All logic PCBs are housed in
a central processing unit or ‘CPU’ cardfile, while all input/output PCBs are
housed in an ‘I/O’ cardfile.
The CPU cardfile
is equipped with 16 PCB plug—in slots.
In most applications,
a maximum of 8 PCBs will be distributed
among these slots according to the
type of cardfile and application. This unit is designed to hold up to eight
PCBs in eight slots at the middle of the cardfile (four empty slots on both
sides).
There are four different types of MICROLOK logic boards used in the
CPU cardfile:
Name
US&S Part No
Processor PCB
I/O Bus Interface PCB
Code System Interface PCB
Peripheral PCB
N451441—5701
N451441—6001
N451441—5302
N451441—5502
One set of these boards makes up one complete MICROLOK computer. The computer
must consist of at least the Processor and Peripheral PCBs.
A maximum of two
MICROLOK computers (dual—computer version) are installed in one CPU cardfile.
In the single—CPU version, the computer boards are installed in four slots
adjacent to the center line of the cardfile. The Processor PCB is always in
the left—most board in the set, and the Peripheral board is always in the
right—most.
In the dual—computer version, the computer boards are installed
in the eight center—most slots of the cardfile. The complete combinations of
CPU cardfile PCB arrangements for the CPU cardfile is summarized in Figure 2—3.
6400A, p. 2—4
1
2
3
5
6
7
8
9
10
SLOT NO.
SLOTS
I
12
13
14
15
16
0
0
0
1-4,
13.16
I
NOT USED
CARDFILE
FRONT
VIEW
I III
0
PR
—
PROCESSOR PCI
N451441-5701
10
•
I/O BUS
INTERFACE PCI
N451 441.6001
CS
u
CODE SYSTEM
INTERFACE PCI
N451 441.5302
PL
•
PERIPHERAL PCB
N451 441.5502
I u
C
11
I
0
1/OBUSOR
CODE SYSTEM
PCI
$4.
CONFIGURATIONS~
1.
2.
3.
4.
SINGLE CPU,
SINGLE CPU.
REDUNDANT
REDUNDANT
LOCAL I/O OR NON-VITAL SERIAL LINK ONLY
LOCAL I/O AND NON.VITAL SERIAL LINK
CPU. LOCAL I/O OR NON-VITAL SERIAL UNK ONLY
CPU, LOCAL I/O AND NON-VITAL SERIAL UNK
Figure 2—3.
WALL CONFIGURAllONS HAVE
MASTER PORT FOR VITAL
SERIAL LINK (PERIPHERAL PCI)
ONLY CONFIGURATiONS WITH
I/O BUS PCI HAVE SLAVE
VITAL SERIAL LINK
MICROLOK CPU Cardfile PCB Arrangements
K
6400A, p. 2—5
.
The I/O Cardfile is equipped with 15 PCB slots.
From 1 to 15 slots may be
used, as determined by application. There are eight different types of PCBS
compatible with this cardfile for use on specific types of external circuits.
Name
Type
Standard Input
Standard Input
Standard Relay Driver
Bi-Polar Relay Driver
Voltage—Limited Driver
DC Lamp Driver
DC Lamp Driver
DC Lamp Driver
US&S Part No
Input (20 V, max.)
Input (32 V, max.)
Output
Output
Output
Output (18 W)
Output (25 W)
Output (36 W)
N451 441—8802
N451 441—8803
N451441—8601
N451441—8701
N451441—8501
N451 441—6702
N451441—6703
N451441—7301
As viewed from the front of the cardfile, output boards are always installed,
as a group, to the left of the input boards, starting with the far left—hand
slot.
If no output boards are used in the particular system, the first input
board is installed in the far left-hand slot.
Any combination of board types
is possible within the input or output groups. The general arrangement of I/O
Cardfile PCBs is summarized in Figure 2—4.
EXAMPLE: 6 OUTPUT PCBS ONLY
SLOTNO —b.
1ST
OUTPUT
PCB
EXAMPLE: 7 INPUT PCBS ONLY
1
SLOT NO.
~
I
15
1ST INPUT PCB
L
NO
EMPTY SLOTS
BETWEEN PCBS
L
TYPE
Standard Relay Driver
Voltage-Limited Relay Drive
Bi-Polar Relay Driver
DC Lamp Driver. (18 W)
DC Lamp Driver. (25 W)
DC Lamp Driver. (36 W)
Standard Input (12 V nom.)
Standard Input (24V nom.)
Output
Output
Output
Output
Output
Output
Input
Input
BETWEEN PCBS
EXAMPLE: 3 OUTPUT AND 3 INPUT PCBS
MICROLOK I/O PRINTED CIRCUIT BOARDS
DESCRIPTION
NO EMPTY SLOTS
PART NO.
N451441-8601
N451441-8501
N451441-8701
N451441-6702
N451441-6703
N451441-7301
N451441-BBO2
N451441-8803
SLOTNO —p.
NOTE
1ST OUTPUT PCB
IF MORE THAN ONE TYPE OF OUTPUT OR INPUT
BOARD IS USED. ARRANGEMENT OF BOARDS
WITHIN OUTPUT OR INPUT BOARD GROUP MAY VARY
Figure 2—4.
L
iST INPUT PCB AFTER 3RD
OUTPUT PCB
NO EMPTY SLOTS BETWEEN PCBS
MICROLOK I/O Cardfile PCB Arrangement
6400A, p. 2—6
2.2.2
Other Equipment Rack Units
Two different dc-to-dc power supply panels are mounted on the MICROLOK rack.
Panel N451460—2201 provides power to the CPU cardfile.
Panel N451460—2301
provides power for the T/O cardfile.
When required by the aoplication, the rack may also be equipped with the
Serial Communications Adapter panel.
This panel permits 20 mA current loop
communications between, the following pairs of systems:
A.
B.
C.
MICROLOK and M ICROLOK
MICROLOK and MICROLOK PLUS (vital section)
MICROLOK and US&S—specified diqital coded track circuit
system
A US&S PN—l5OHD plug relay (N322505—701, with base) is also mounted in the
MICROLOK rack.
This relay is the Vital Cut—Off Relay (VCOR), and is
controlled by the system software to cut off power to all vital outputs in the
event of. a major system failure.
When MICROLOK is interfaced to local inputs and outputs, the rack must contain
the following units:
A.
B
C.
One CPU Cardfile
One I/O Cardfile
One I/O Power Supply Panel
D.
E.
F.
One CPU power supply panel.
One terminal strip.
One US&S PN—l5OHD relay (VCOR).
When MICROLOK is only interfaced to remote systems over a serial data
interface, the rack must contain the following units:
A.
B
2.3
One CPU Cardfile
One CPU power supply panel
SPECIFICATIONS
I/O Capacity:
Up to 15 PCBs (application—dependent)
Master/Slave System Capacities:
Up to 16 MICROLOK or MICROLOK PLUS
(vital section) Slaves per Master
Serial Bit Rates:
Master and Slave Ports:
EIA: 150, 300, 600, 1200, 1800, or 2400
20 mA C.L.: Distance—dependent
Total Bits:
1000 bits (max.) divided between local
I/O, serial I/O, Internal.
Active Timing Elements:
Vital Timers: 1014 bytes
10 x timers
+ 14 coded outputs
(refer to section
5.3.1.5, part A.)
Logic Equations Triggered:
Max. make = 150, max. break
Total queued = 250
(#Make + #Break
250)
6400A, p. 2—7/8
=
150
C
SECTION III
GENERAL INFORMATION - MICROLOK PLUS
3.1
3.1.1
INTRODUCTION
Overall System (See Figure 3—1)
The MICROLOK PLUS Vital and Non—Vital Control Packaoe is a multi—purpose,
microprocessor—based device desiqned for use in both vital and/or non—vital
railroad control systems. It is typically used for smaller applications, such
as a single end—of—siding, that do not require the large input/output
capabilities
of seperate vital and non—vital controllers. The device can be
configured with a vital control section only, or with vital and non—vital
control sections.
(A non—vital—only configuration is also possible, but not
typical.)
In a typical single end—of-siding application, both sections are utilized.
The vital section controls the interlocking loQic, nana~es switch machines,
signals and track circuits in the control area: while the non—vital section
provides an interface point for a local control panel, processes CTC office
commands, and transmits indications from the vital section. Another typical
end—of—siding configuration could consist of the vital section only, with code
system inputs and outputs processed within the vital section (no local control
panel).
The MICROLOK PLUS system is derived from the US&S MICROLOK Vital Interlocking
Control System and the GENISYS Non—Vital Logic Emulator.
It uses the same
plug—in printed circuit boards, the same Executive software, and the same
application logic compilers as the MICROLOK and GENISYS systems.
C
3.1.2
Vital Section Basic Functions
The vital section of MICROLOK PLUS unit is designed specifically for railroad
vital interlocking applications.
Its basic function is to process various
inputs according to a program designed by the application engineer, and create
the appropriate outputs. This program takes inputs, performs logic and timing
functions on those inputs and produces an output.
The program operates in the
same manner as a conventional vital relay logic system.
Inputs and outputs consist of ‘local’ and ‘serial”.
Local inputs typically
include track circuit occupancy, state of switch machine point contacts, state
of signal relay or mechanism contacts, and traffic and line circuits. Local
outputs eventually interface to control signal mechanism drives, signal lamp
drives, switch control contactors and traffic and line control circuits.
Serial inputs and outputs typically carry vital and non—vital control and
indication messages between the MICROLOK PLUS system and other vital and
non—vital controllers, or between the vital and non—vital sections of the unit.
Local input options include standard off/on (bit 0/1) voltage inputs, or
bi—polar voltage inputs (bit 0 or 1 for each polarity). Two voltage input
ranges are available with these options: 12 or 24 Vdc (nominal). Local
output options include standard (single pole) relay drive, or bi—polar relay
drive.
Special lamp filament—compatible outputs are available to drive 18, 25
or 36 watt signal lamps.
6400A, p.
3—1
gz
-~
OA~
~
I—
OL~a
-4~
O..i
a.
~
-J---
~eI4
Q
4
0 I—’,,
I-~
5L~.4
‘1--
r
~
k-LU
00
I
ZLi~~
a
o
~
I—
~
I
I
U
I
0
a
—4
0O
~
~>
I
-‘
I
LU
3
I
014
,4
~
IA
I
.~
<I.—
‘—0
0—i
I-
a-
>LU
•
0..
I
1:3
LJ0ZU
~
o~
z
~
30.
I
4—
a~i
-4>
0
,
4
a-
U~1
0
2
I
I
34
-4
:3~.J
~4
10
4
12
I-ET1 w136 634 m142 634 lSBT
2
+
-4~
L.J~
~
4~
O~~•v~
~LU
>~
o
o
0
z>. uO~
~
z
•
.
0.
30.
Z
‘~0
40. — U
30.
z
cCZ~
L
ou~
ZU
0.0
4
z
—
L
-~
IA
12
0
I—
0.
Z
-40.
-I-
0
a
AL
3
330..
~0O
-J 0 ~
a. U
-~
LII
I
L\L\
I- -~O
z
o
-~O
ca~4~
V2VK
0.
330.
0.
4-
40.
0
I-
9
U
0.1
ZZ
LU
U
0.
4
a.
z
U
m
a~
-
-J
‘4
uJ
4>0.
.4~U
>5Li0.0.
—A
~
oO~
OI.jZ
-I
4—
I-—
.Oa.0.
LI
—
~O0—
5,1
0
a
o~ZO
Z
U—. 4.’.0.
~4o
>50.
z
U—
0.
0~
0.
0.0.0
ZI-
-J
4—
0.A0.0.
u.~a.
U
1-
tV\I~
-4
z
z
0
O
>0
LU
4-
-J
U
U
4
00
0.
-
a-ET1 w144 473 m149 473 lSBT
y~U)
•
I
I
I-
I
0
0
~;
—
T
I>
I
0
0.
4—
2~0.
0.1
LU
01-401
Z
>~0.
I
0~
U
2
-J
- Ii —
4>0.
~4O
>~0.
4
4-4~I.L2
4
a-
a—
-4
a—’
LII
~
I~j
I-
0
~0.1-0.
z
0.
4
z
a-ET1 w148 263 m154 263 lSBT
0.
~
-4
4-
ii
U
4
z
O
U
cz4~
~
IA
•
4
0
4-
IA
—
—
I
I
I
—
—
-4
I-
2
0
2
140401
~UJ
-J~
<IA
~~)—IA
ZO
g~z
~
-a
-4
LU
aa-
0IA
-4
IA
II
~
c~Z
_
•
0
U
a-
0
.4
U
Figure
3—1.
Basic MICROLOK PLUS System
6400A, p. 3—2
The MICROLOK PLUS unit is equipped with ‘ports’ for serially communicated
data.
The vital section includes a Master port that enables the device to
serve as the managing unit of a vital Master/Slave system. Up to 16 Slave
units can be controlled from this port.
The Slave units for such a system
might include additional MICROLOK PLUS or MICROLOK units, or a combination of
both. The vital Slave port enables the unit to function as a Slave to another
Master unit (MICROLOK PLUS or MICROLOK).
A 20 mA current loop option is also available for vital or non—vital serial
communications between the MICROLOK PLUS system and related systems installed
in different wayside houses. This option is designed for maximum noise
immunity and may be operated over a maximum distance of 10,000 feet (total
loop length). A separate Current Loop Adapter Panel, not included with the
basic MICROLOI( PLUS unit, is required for this option.
When required by the application, the vital section of the MICROLOK PLUS unit
can incorporate a non—vital port for communications with a non—vital
controller such as the US&S GENISYS system or the unit’s own non—vital
section. This port is typically used when the external GENISYS unit or
MICROLOK PLUS non—vital section is used as the field unit in an office/field
code system, or the interface to a local control panel.
In this
configuration, the non—vital controller serves as the Master unit and the
MICROLOK PLUS vital section as a Slave to that Master.
Vital serial link communications are formatted to EIA RS—423 standards, and
derated to operate under the RS—232C standards. This enables the MICROLOK
PLUS vital serial ports to be interfaced to an EIA—compatible modem for remote
communicat ions.
3.1.3
Application and Executive Software (see Figure 3—2)
MICROLOK PLUS incorporates two types of software. One is the special
application program developed by the user. This program is written and
‘compiled’ on a computer, using a language that enables the system logic to be
expressed in a manner relevant to the applications
engineer.
The finished
program is converted into a form that can be burned into EPROM chips used on
the Peripheral board.
The optional MICROLOK Development System (M.D.S.)
enables the user to conduct all phases of application program development,
including compiling on a personal computer, debugging, scan time estimates,
and final checking and programming into the Peripheral board EPROMs.
The second type of MICROLOK software is the standard, executive logic common
to all MICROLOK systems. This software contains routines designed to (a)
verify the states of vital inputs and outputs, (b) Insure that all vital
outputs are fully controllable, and (c) remove power to vital outputs in all
cases where a system failure has occurred. Vital assurance is applied to
local inputs and outputs, and to serial communications with other MICROLOK
units (expanded system). The standard MICROLOK software also performs the
input, internal and output logic operations defined in the user’s application
program, as well as diagnostic routines at different operational levels,
K
6400A, p. 3—3
MICROLOK’ AND GENISYS’ DEVELOPMENT SYSTEMS
PC
•
COMPILE AND SIMULATE
APPLICATION LOGIC
EPROM
PROGRAMMER
APPLICATION
LOGIC EPROM
• CHECK EPROM
• LOAD APPLICATION
LOGIC.
DEVELOPMENT SYSTEM SOFTWARE FOR PC
PERIPHERAL PCB N451441-5502
• COMPILER PROGRAMS
• SIMULATOR PROGRAM
• EPROM PROGRAMMER DRIVER
• THREE EXECUTIVE EPROMS (1C20, 21, 22)
• UP TO THREE APPLICATION LOGIC EPROMS
(IC 15, 16, 19)
•
8K X 8
USES MICROLOK’ DEVELOPMENT SYSTEM
FOR APPLICATION LOGIC EPROMS
CONTROLLER PCB N451441-5602
• ONE EXECUTIVE EPROM (1C29)
CODE SYSTEM INTERFACE
PCB N451441-5302
• ONE EXECUTIVE EPROM
(IC 14)
CPu
PC!
• DOES NOT USE APPLICATION LOGIC EPROMS OR
DEVELOPMENT SYSTEM
4—
I/O BUS
NTB RB
PC!
CODE
SYS.
NT! RP
Pce
PBRI-
VITAL
Pt-I!RAL
PC!
‘JO
PCBS
CONTROLLER
PC!
NONi/O
PCBS
VITAL SECTION
• APPLICATION OPTION: CODE SYS.
EMULATION, OR:
VITAL
NONVITAL
SECTION
•
UP TO 5 APPLICATION LOGIC
EPROMS (IC 24, 25. 26, 27, 28)
•
USES GENISYS DEVELOPMENT
SYSTEM FOR APPLICATION LOGIC
EPROMS
NOTE
MICROLOK PLUSTM
NON-VITAL APPLICATION LOGIC
COVERED IN THIS MANUAL REFER
TO SM-6400A FOR
VITAL APPUCA.
TION LOGIC PROGRAMMING.
Figure 3—2.
3.2
3.2.1
MICROLOK PLUS Application and Executive Software
COMPONENTS
Cardfile
The MICROLOK PLUS package is housed in a single PCB cardfile
(17 slots) with a
combination hinged and removable front cover.
Circuit board installation
options and LED configurations are shown on a label attached to the inside of
the cover.
The cardfile is typically mounted in a standard 19 inch equipment
rack, but may also be shelf mounted.
The unit incorporates a slide—out drawer
containing the unit’s power supply converter.
(No external power supply panel
or plug—in converter board is required.)
6400A, p. 3—4
.
3.2.2
Vital Section
PCBs (see Figure 3—3)
The following PCBs are used in the MICROLOK PLUS vital CPU:
US&S Part No
Name
Processor PCB
I/O Bus Interface PCB
Code System Interface PCB
Peripheral PCB
N451 441—5701
N451441—6001
N451441—5302
N451 441—5502
The following PCBs are used in the MICROLOK PLUS vital I/O section:
Name
Standard Input
Standard Input
Standard Relay Driver
Ri—Polar Relay Driver
Voltage—Limited Driver
DC Lamp Driver
DC Lamp Driver
DC Lamp Driver
Type
Input (20 V, max.)
Input (32 V, max.)
Output
Output
Output
Output (18 W)
Output (25 W)
Output (36 W)
US&S Part No
N451 441—8802
N451 441—8803
N451441—8601
N451441—8701
N451441—8501
N451441—6702
N451441—6703
N451 441—7301
Slots A through D of the MICROLOK PLUS cardfile contain the vital section
logic or ‘CPU’.
a.
All MICROLOK PLUS units used for vital control applications are always
equipped with a Processor PCB in slot A and a Peripheral PCB in slot D.
b.
When the unit is connected to another vital controller (MICROLOK PLUS or
MICROLOK) through a serial data link, or local vital inputs/outputs are
required, an I/O Bus Interface PCB is installed in slot B.
c.
When the unit is connected to an external non—vital controller (GENISYS)
or cross—connected to its own non—vital section, a Code System Interface
PCB is installed in slot C.
When the MICROLOK PLUS system is interfaced to vital local circuits, various
arrangements of vital—output (relay—driver, lamp—driver) and vital—input
boards are installed in slots E through N, according to the application.
a.
When the application requires relay and/or lamp driver boards only, these
are always installed starting in slot E.
b.
When the application requires vital input boards only, these are also
installed starting in slot E.
c.
When the application requires both vital output (relay and/or lamp driver)
and vital input boards, the output boards are always installed starting in
slot E. The first input board is installed after the last output board,.
d.
No empty slots are permitted between vital output and input boards.
6400A, p. 3—5
C
1.i
-402
—z
0~
0..
IA
I—
0..
—
.-
U
U
~
~
~
Li
0.
I..,
IA
LU
0.
0~
~
IA
LU
~
0
—
C
U
A’
2
~
-
I—
IA
4
-
_
I—
z ~
0 <
z 0..
2
0
2
6
1—
s a.
—
00
.J
-A
IA
2)
-~
6—
CA’
C
0.
2
~
0.0.
0
04
0
4
O~Oz
A’ A’ A’ A’ A’
22222
£
_
_
0.0 0.
LA
0.
222
A’
A’
0.,.. 2
0.Li
UU4,
4
~
000
ma
:1
z
I..O
U-
:z
-
4
ma ma
0
7
U
ii
LU
In
0
A CO
t 0. AL
4.
U
a-
a.
a-
0
Q
-
z
—
-4
- I:)
4
—
>
~:
-
—
I~)
LU
In
4
UIn
4~
In
0
LU
0
-44
U
I
—
0
—
a-O.I
— U. I—
0
~
>0.0
— ~
•C-4
o
—I
—
LU
N,
Oz
—
I
IA
~
LI
a.
a..
LI
IA
LU
0
z
_
0
I—
LI
LU
IA
I—
~
0.
O~0.~,0.
0.
La
x
-4
U
0.
LU
0
a- LU
In
a-a-
z
z
U
aa-
0.’~
2
~
>52>
~
44~4
A’A’A’~
4
~
0.JO
0000
A’
2
-
A’A’A’A’
00
0.A-U0.
0
Z
I—
~
4-40.4
44~4
u~
.-r,,-e
>-
i....
0~
•
~
IA
LI
IA
~
LI
~••
LU
0
Z
0
—
—
LI—
LU
IA
—J
~
44400
=0.A’.ONq
-
0.
—4
a
-__________
0
IA
40.UO
a.~U0.
Figure
0
-A
IA
3—3.
4—
1 LU
0. LU
LU a-
U—
LU
a-
Z
4
x
0.
LU
-J
I-ET1 w356 245 m363 245 lSBT
4
In
U
a-
2
In
a-
aaa-
2
4
3~~-.’40.
0. LU
U
a.
4
—-4
—4
a
-__________
-4
22222222
LU
-4
2
4
x
—
LU
MICROLOK PLUS Cardfile
6400A, p.
3—6
In
~iLJ
InO~
In
aA’A’A’LA
LAC
2
~
In
In
0.
-aU
-4
2
0.
In
a-
a0.4-4-422
4~0.
44
,.0
.
A’>0.000A’A’
0
Z
ZO
_
LU
0
O,r.e.r..IN
~
0.0.0.1~4>>>0.0.
~
0~~ooo~
a-
-4
In
z
0.0.0.
~
LU
IL?
IIA
—
LU
LU
x
0
z
~
_______
OclI
z
a.
0 —
InO-
aa-
4
ZZU2
~iC~
0.0.0.0.
~
_________
IA
LU
-A
2
-A
U
a-In
LU
In
0
000
—3:
In
-4
0.
2
~.—
4
a-
a-a‘o
0
4~1
-4
a-LU
LU
>~
—
22
.4
a~
0
LI
aInZ
~0
a-
-~2~
V
4
0.
~-4 In
~ m
U
t~I
A’
0.4
a-
0
—
—
1• A’
I
m
U
In
>0.0
I
a-
0
______
0.
a- o.
2
:2:::.
LU
0
3:
z
o
:2::.;:U§..
0
2
0
0-
z
0’
~3~z
a-,
‘...~..
U
-
~
4
I-
LU
LU
a.
IA
aU
-4
0
I
0A-~
a
0
0
A- A-
A’
U
0
a-
C
0
2-
~~CC
< 0
~ Z
4
.~
—
zzz~=
COCA-A-
LU
0.
C
a. A C
‘—a
~
LI
4
U
-,
0.
2
~
0
~.2.A0.AC~ACZZ
~
I.—
LI
LU
=0
cz
A’
4
a
:2
0
-..
—
4
LI
PCB Arrangement
I
a- LU
LU
4-0.
2
3.2.3
Related Equipment
When required by the application, a MICROLOK PLUS system may also be augmented
with the Serial Communications Adapter panel. This panel permits 20 mA
current loop communications between the following pairs of systems:
A.
B.
C.
MICROLOK PLUS and MICROLOK PLUS (vital sections)
MICROLOK PLUS and MICROLOK
MICROLOK PLUS and US&S—specified digital coded track circuit system
A US&S PN—l5OHD plug relay (N322505—701, with base) is also used with the
MICROLOK PLUS system.
This relay is the Vital Cut—Off Relay (VCOR), and is
controlled by the system software to cut off power to all vital outputs in the
event of a major system failure.
3.3
VITAL SECTION SPECIFICATIONS (Programming Related)
Up to 10 PCBs (application—dependent)
I/O Capacity:
Master/Slave
System Capacities:
Up to 16 MICROLOK PLUS or MICROLOK
Slaves per Master.
Serial Bit Rates:
Vital Master and Slave Ports:
150, 300, 600, 1200, 1800, or 2400
EIA:
20 mA C.L.:
Distance—dependent
Total Bits:
1000 bits (max.) divided between local
I/O, serial I/O, internal.
Active Timing Elements:
Vital Timers:
1014 bytes = 10 x timers
+ 14 coded outputs (refer to section
5.3.1.5, part A.)
Logic Equations Triggered:
Max. make = 150, max. break
Total queued = 250
(#Make + #Break < 250)
6400A, p. 3—7/8
=
150
C
SECTION IV
FUNCTIONAL DESCRIPTION - MICROLOK AND MICROLOK PLUS
4.1
4.1.1
ELEMENTS OF VITAL OPERATIONS
General
The vital processor software is not required to take any specific action to
change vital external circuits to the most restrictive state.
Instead, the
system is configured so that loss of software control, for any reason,
automatically results in a change to the more restrictive state. Software
control is only maintained when a variety of diagnostics are passed.
Loss of
software control can happen two ways. First, the software itself can observe
a potentially unsafe condition, such as an output circuit stuck in the less
restrictive state, and perform a system shutdown according to a programmed
routine.
Second, a hardware failure can interrupt the processor circuitry
(therefore, software operations), automatically resulting in downgraded vital
outputs.
The majority of MICROLOK and MICROLOK PLUS hardware does not
incorporate vital design features in the traditional sense. Vital operation
is primarily contained in the software.
4.1.2
Vital—Kill
and Vital Power—Off (See Figure 4—1)
The MICROLOK and MICROLOK PLUS vital systems incorporate two types of
circuitry to downgrade outputs to the most restrictive state: Vital Kill and
Vital Power—Off. These operate in an overlapping manner to insure that no
outputs are generated after a system malfunction. The Vital Kill circuit
generates the regulated 5 volts that powers the microprocessor. However, it
can only do so on the condition that a 500 Hz clock signal is output by the
microprocessor. When a fault occurs, the microprocessor removes the clock
signal, thus its own source of power. Microprocessor operation can only be
restarted manually or automatically at power-up.
The Vital Power—Off
circuitry is an extension of the Vital Kill circuit. A separate 500 Hz check
signal from the microprocessor is used (after various conversions) to pick and
hold the external VCOR (vital cut—off relay) which, in turn, controls power to
all output circuits. Thus, if the microprocessor clock signal is removed, no
output voltage will be available.
4.1.3
Closed—Loop Monitors (See Figure 4—1)
The vital software is based, in part, on closed—loop feedback principles,
where all vital outputs and inputs are checked before any output is actually
delivered.
All MICROLOK and MICROLOK PLUS vital controls are monitored at the output
point (prior to external delivery) with a monitor circuit that reports the
state of the output back to the microprocessor.
If the monitored output is
not in agreement with the intended output, the microprocessor interrupts an
ongoing 500 Hz clock signal to a conditional power circuit on the I/O Bus
6400A, p. 4—1
EXTERNAL
VITAL
OUTPUT
VITAL
INPUT
Figure
4—1.
Vital Cut—Offs and Closed—Loop Monitors
Interface PCB. The loss of this signal, in turn, causes loss of power on the
vital output via the external VCOR (Vital Cut—Off Relay). This process is
supplemented with several automatic cycling procedures that verify the output
circuit during normal operation.
They also verify that the feedback loop
itself is operating properly.
Any deviations in these checks also result in
the removal of power to all vital outputs.
Vital inputs to the MICROLOK and MICROLOK PLUS systems also Incorporate vital
monitors.
When an input line is in the ‘on” state, the vital input monitor is
commanded by the microprocessor to momentarily shunt the signal (equivalent to
an ‘off’ input).
During this interval, the input is checked by the processor
to verify that it is, in fact, changed to the ‘off’ state.
If not, the input
is changed to the more restrictive
state.
This procedure also verifies the
condition of the input monitor circuit itself.
4.2
4.2.1
VITAL SERIAL COMMUNICATIONS (See Figure 4—2)
General
Each MICROLOK and MICROLOK PLUS system is equipped with two vital serial data
ports, Master and Slave, for vital communications between two or more units.
These may be used to couple several units to accommodate a large size
interlocking, or allow more efficient transfer of controls and indications
between two remote points controlled by different units.
The ports consist of
two fully independent communications circuits, one on the Peripheral PCB
6400A, p. 4—2
(Master Port)
communications
PLUS units is
the data link
regardless of
4.2.2
and the other on the I/O Bus Interfac= PCB (Slave Port). The
channel between serial ports on several MICROLOK or MICROLOK
referred to as the Vital Serial Link.
The vital operation of
is maintained by re—communicating all data at a station,
whether input bits have changed.
Communications Modes
The Master and Slave ports utilize EIA RS—423 (RS—232 compatible) serial
communications.
(In the 20 mA current 1oop system, EIA communication is still
used between the CPU cardfile and the Serial Communications Adapter, which
converts ETA to current loop and vice—versa.)
The communications differ only
in protocol and control (hand—shaking) signals. Each link operates in the
full—duplex mode, however messages never overlap. Only control signals
overlap.
A communication on a vital serial link consists of a string of data bits
transferred sequentially.
These bits make up a message that includes an
address section (identifying
the intended remote unit), and the specific
operating data intended for the remote unit.
All messages are steered by
means of ‘stations’, which are defined in the application program (refer to
section 5.3.1.3).
In systems of more than one Slave unit tied to a Master
unit, the Slaves communicate over the same line.
In such a system, the Master
polls the Slaves in a sequence defined in the application program. The Slave
responds by transmitting an immediate acknowledgement message. Combined
Master—to—Slave and Slave—to—Master messages are called a dialog.
When these
messages successfully repeat, a vital serial link is established.
The principal
follows:
differences
between the Master and Slave communications
are as
a.
Only the Master unit initiates
communications.
Initially,
the Slave
is a passive receiver for the first Master communication.
The Slave
only returns a message when it receives the proper address code from
the Master unit.
b.
A Slave can communicate with a Master using different addresses
(defined in the application program), but it can not report to more
than one Master.
At a Master port, the stations may go to different
Slave units.
c.
Slave station addressing (at each Slave Unit) can be performed in the
application program, or on the unit hardware (Peripheral PCB
jumpers).
When defining the address with the jumpers, the
application program address must be set to zero. Master station
addressing can only be performed in the application program.
6400A, p.
4—3
4.2.3
Message Components
A Vital Serial Link message contains:
a.
A header byte to pass over the initial noise caused by some modems.
b.
A byte containing
c.
0 to 16 bytes of data.
These define the state of all the bits of the
port.
The last data byte will be padded with zeros if the number of
bits is not divisible by 8.
d.
Three cyclic
the Station Address of the intended
and some control bits used by the system.
remote port,
redundancy code bytes (BCH type).
Therefore, a minimum-length message contains five bytes.
A 5—byte message is
called an Empty or a Null message and is used if either the input or the
output section of a port has no bits defined.
4.2.4
4.2.4.1
Polling of Slave Units
General
During routine operation,
the Master pol1s all Slaves in a defined order.
One
round of polling constitutes
a scan.
If a Slave does not answer, the Master
waits for a period defined in the application program called Master Wait for
Response’ (refer to section 6.1.7) and polls the same Slave a second time.
However, if the last message from the Slave contained an error, the Master
would not conduct a second poll, and would poll the next Slave unit in the
sequence.
A Slave unit will not respond to a poll if it has been shutdown due
to a failure, or if it received a faulty message during the last
transmission. The latter condition is designed to prevent two or more Slave
units from answering (when only one was polled), due to a discrepancy in the
station address.
At the end of a scan, the Master will start a new scan if the previous scan
lasted as long or longer than a scan—cycle value specified in the application
program.
(This function is referred to as ‘MIPSUM’; refer to section
4.2.4.2).
Otherwise, the Master will wait long enough to meet the programmed
period before initiating
a new cycle.
4.2.4.2
MIPSUM (Master
Interval
Parameter Summation)
A compiler switch, called ‘MIPSUM’, is available in the Master unit
application
logic to set the shortest amount of time required for a complete
scan of all Slave units,
Specifically,
the Master communicates with each
Slave unit once every MIPSUM seconds.
For example, the Master begins its poll
of the Slave units at time ‘T’ and completes one polling cycle.
If the Master
unit’s MIPSUM is set to 5 seconds, the next polling cycle will not start until
‘T’ + 5 seconds.
6400A, p.
4—4
Too short a setting of this switch may affect system operational reliability
(due to overloading of the processor). Too long a setting may affect
operational safety (due to delays in recognizing changes in system
condition). Refer to section 6.1.8 for available switch values, and
application reliability/safety considerations.
4.2.5
Message—to—Message Delay Interval (‘Stale’ Data)
The interval between one serial transmission and the next must not exceed a
specified maximum time.
This interval is defined in the application program
as the Master Stale Data Time—Out, or Slave Stale Data Time—Out.
If the
interval is exceeded, the entire input body of information on the port is
classified as ‘stale’ (potentially outdated). This forces the system into the
more restrictive state.
Example: Slave unit Stale Data Time-Out = 10 seconds. The Master unit sends
a message to this Slave, and the message sets the value of TEST to 1. When
the Slave receives the message, it starts a timer set to expire in 10 seconds,
the value set in the Stale Data Time—Out switch.
(Every valid message
received restarts this 10 second timer.) However, the Master stops
transmitting because of a failure. Communications are not reestablished at
the time—out of the timer (10 seconds).
Therefore, the receiving Slave unit
forces all of its input data to the more restrictive state. This sets the
value bf TEST to 0.
The Stale Data Time—Out must be carefully determined.
If too long a time—out
is specified, it takes too long for the receiving unit to know that it has
stale data. If too short a time—out is specified, the information may be
prematurely forced into the more restrictive state.
Since all Slave addresses
must have the same Master, this causes all data on all stations of a Slave
unit to be cleared, even though a ‘stale’ data condition may have only
occurred on one port. At the Master unit, however, each station’s serial data
base has a dedicated timer. Therefore a stale data condition on one port does
not affect the other ports.
Refer to sections 6.1.9 and 6.1.10, respectively,
for the Master and Slave Stale—Data Time—Out available switch values and
application considerations that will determine the optimum switch settings.
Refer to section 6.1.8 for available switch values, and application
reliability/safety considerations.
4.2.6
Vital Assurance Functions
A variety of methods are used to secure the operation of a MICROLOK or
MICROLOK PLUS vital serial link.
One uses a confirmation procedure.
When a transition occurs toward the less
restrictive state, the protocol only accepts the transition after the new
state has been stable for two consecutive received valid messages.
If a fast
toggling bit (such as a flasher) is sent over the serial link, enough time
must be allocated to transfer the ‘on’ state, otherwise the receiving port
might ‘latch’ it to a constant off state (a ‘1’ bit requires twice as much
time to be received as a ‘0’ bit).
6400A, p. 4—5
The vital serial link is also Lecured through the use of priority bits.
Such
bits must be ‘latched’ to make certain that a brief ‘0’ state is transferred
to the unit using this bit, even if the interval is shorter than a scan time.
(For example, a locomotive moving quickly through a short track circuit could
create this condition, especially if there is excessive noise on the serial
line). All indication bits acquired by Master and Slave units through a vital
serial link are considered priority bits:
Every change towards a more
restrictive state is stored and extended until two correct ‘receipt
acknowledgments’ are received from the transmitting unit (Master or Slave).
Summary:
—
—
—
—
4.2.7
A ‘1’ must be received twice before it is accepted.
If the ‘1’ is present for less than 2 scan cycles, the receiving unit
will not ‘see’ the ‘1’.
A ‘0’ is always latched until the receiving unit has accepted the
change.
Even if the ‘0’ is only present for a short time, the unit will latch
it until it is received (opposite of ‘1’).
Line Noise and Recovery
Serial communication links may receive or generate unwanted transient
signals. The MICROLOK and MICROLOK PLUS systems are designed to prevent such
signals from creating repeated, annoyance shutdown problems, without degrading
vital functions.
Various diagnostics routines are structured to filter out
occasional noise—generated bits, or ignore occasional lost bits erased by line
noise.
However, if a large amount of line noise is present and the majority
of messages received consist only of noise, a shutdown of the serial link will
occur.
In this event, a number of good dialogs may be needed to restore full
communications.
4.3
VITAL LOCAL COMMUNICATIONS
4.3.1
Acquiring Input Data
Vital inputs to the MICROLOK and MICROLOK PLUS systems are acquired through a
board-by-board sampling process that is completed once every 200
milliseconds.
The general procedure during a normal (non—fault) input cycle
is as follows:
1.
All inputs on a board are scanned.
2.
The new input values are compared against values sampled during the
previous board scan to identify bits that have changed state.
(a)
If a bit has changed from a less restrictive state (‘1’) to a
more restrictive
state (‘0’), the change is immediately accepted
(continue to step 3 of this procedure).
6400A, o. 4—6
(b)
If a bit has changed from a more restrictive state (‘0’) to a
less restrictive state (‘1), then it will not be accepted as a
“1’ until the next scan cycle, and then only if it is still a
‘1’ (during the two scan cycles, the input will remain ‘0’, e.g.
it must see a ‘1’ twice).
3.
4.3.2
Accepted bits are put into the memory, triggering all application
program equations that make use of these bits.
vitality of Inputs
4.3.2.1
Redundant Reading
Each scan of the board inputs consists of quadruple reads of those inputs.
This function is designed to filter Out transient state changes that may be
caused by interfering external signals, such as a high—frequency ac signal.
In most cases reads match, validating the bit. However, if a discrepancy is
observed, the read is repeated.
If the discrepancy persists, the read is
repeated a second time (three total reads).
4.3.2.2
C
Verification of Less Restrictive Bit
During normal operation, a change of an input bit from a more restrictive to
less restrictive state is accepted after the bit is present during a second
board scan (step 2, section 4.3.1).
If the less restrictive state is not
verified (‘0’ on second scan), the bit stays at the more restrictive state.
No error is logged. The bit must read as ‘1’ on both scans to be accepted as
a less restrictive input. This process implies that an input signal must be
present for two consecutive scans (200 msec. apart) to be accepted with a new
state.
A less restrictive—going input lasting less than 200 msec. is
ignored. All pulses lasting longer than 400 msec. are accepted.
4.3.2.3
Bit Latching
Bit latching is the process of securing in memory any input that changes to
the more restrictive state, no matter how briefly. The zero state of the
input is held until the processor can act on it. For example, if an external
relay contact feeds voltage to the MICROLOT( or MICROLOK PLUS system and the
relay momentarily drops and picks, the loss of the voltage will be recorded as
zero and will be latched as dropped (zero), even if the relay returns to the
‘one’ state. This action allows the zero state to be recognized and
processed. After the ‘0’ has been processed, the system wil then accept the
one
6400A, p. 4—7
4.3.2.4
Stuck
Input Bit Check
In order to verify that all input circuits can place a bit in the more
restrictive state, a standard diagnostic test is performed. This test is run
approximately every 200 msec.
The following is performed for each input PCB:
I.
All individual inputs on a given board are forced to the more
restrictive state through the closed loop monitors.
2.
All inputs are read and verified that they can, in fact, be forced to
the more restrictive state.
(This test verifies that no circuit
malfunctions have occurred that could stick an input in the less
restrictive state.)
3.
Any input stuck in the less restrictive state (‘1’) is internally
forced to the more restrictive state (‘0’). The input will not take
a less restrictive value (‘1’) until the input is at the less
restrictive state and passes the stuck bit test two consecutive times.
4.3.2.5
Shorted Input Check
Once every 600 msec. (approx.) all input bits are tested for possible shorts
between them, using a standard diagnostic routine. This test verifies that
none of the input circuits have malfunctioned in a way that masks the true
condition of other inputs on the board under test.
It involves sequential
scanning of every input on every input PCB:
1.
The input under test is forced into the more restrictive state.
2.
The other inputs on the board are tested to verify that none have
also gone to the more restrictive state.
3.
The initially forced input is returned to the less restrictive state.
4.
The next input is forced to the more restrictive state and all other
inputs are checked that none have also undergone the same change.
5.
Any shorted inputs will be regarded as zeros by the system until they
pass the above test.
4.3.3
Delivering Output Data
Vital outputs from the MICROLOK and MICROLOK PLUS systems are delivered
according to the order and timing specified in the application program. The
general procedure during a normal (non—fault) output cycle is as follows:
1.
Once the system reaches a stable state (no logic remains to be
executed and no timers expired), the system will prepare to deliver
outputs.
2.
Output bits are delivered by the CPU to the sr,ecified output boards.
6400A, p. 4—8
3.
Monitors at the ends of the output circuits~ return end point data
bits to the CPU.
4.
Memory—stored bits and resultant bits from the output board are
compared by the CPU.
4.3.4
4.3.4.1
vitality of Outputs
Stability Interval
When a change of input occurs and logic processing commences, the system is
considered ‘unstable’. Output bits cannot be delivered since their states may
be uncertain. This action is designed to assure that all deliverable output
bits are in the most recent states.
4.3.4.2
Reading Monitors
A separate diagnostic routine reads the monitor circuit on each
test is conducted once every 50 milliseconds. The output value
compared to the bit received from the output monitor.
If these
agreement, a system shutdown occurs.
This test is performed to
the outputs are in the correct state.
output. This
in memory is
are not in
determine if
NOTE
In Executive software Revisions 6 and higher, the
system will tolerate certain periods of noise on an
output circuit without classifying the output as
incorrect and performing a shutdown. Refer to SM—6400C,
error code 27x.
£2
4.3.4.3
Stuck Output (‘Flip’) Check
The stuck output or ‘flip’ test determines whether an output circuit can, in
fact, change state. This test is applied in different ways for the three
basic output boards (Standard, Bi—polar and Lamp Driver).
It is conducted
approximately once every 800 milliseconds, and holds the output in the
opposite state for no more than 0.4 milliseconds. This test can be suspended
under certain conditions; refer to section 4.4.3.7.
For the Standard and Voltage—Limited Relay Driver PCBs, the present state of
the output circuit is read and stored in the data base. The CPU then
generates an opposite—state output signal and reads the return signal from the
monitor.
If the return signal is not in agreement with the test signal (stuck
in prior state), a system shutdown is performed.
6400A, p. 4—9
For the Bi—Polar Relay Driver PCB, the test and monitor signals consist of two
bits:
0—1 or 1—0. These are flipped as follows to verify both halves of the
bi—polar output circuits:
Output Values
Test States
0—0
0—1 (first test)
1—0 (second test)
1—0
0—0
0—1
0—0
For the DC Lamp Driver PCB, all ‘on’ lamps are turned off. ‘Off’ lamps are
tested in sequence. All lamps are tested, regardless of whether or not they
are defined. If the return signal from the lamp driver monitor does not agree
with the original software value, a system shutdown is performed.
NOTES:
With Executive Software Revisions 5 and higher, lamp flip tests (lamp
on) are performed in sequence (1st lamp1 2nd lamp, etc.) when the
Lamp Driver board is controlling more than one lamp. This is
intended to minimize inrush current. In earlier revisions, the lamps
are tested simultaneously.
Also in Revisions 5 and higher, a lamp filament check is performed
when an ‘off’ lamp output is turned on. This test is described in
section 4.3.4.6, part B.
4.3.4.4
Fast Output—Off Check (Relay Driver PCBs Only)
This test is performed by toggling the FREQ system bus signal, which normally
supplies a constant 93.75 kHz signal to the relay driver circuits. This test
involves a complete relay driver board, rather than individual bits, and is
performed once every 0.8 seconds. The FREQ signal is removed from the output
PCB. Then its output monitors are examined. FREQ is then restored and the
next output PCB (next in left—to-right cardfile position) is examined in the
same way. FREQ goes to all relay-driver boards, but only one is examined in
each test. This round—robbin procedure goes from test to test.
4.3.4.5
Bi—Polar Output Check
The Bi—Polar Output Check verifies that no ‘1
1’ bit pairs will be produced
by the Bi—Polar Relay Driver PCB. Since this PCB generates two bits for both
states (normal and reverse current), there are four possible bit combinations:
0—1, 1—0, 1—1 and 0—0. The 0—1 and 1—0 bit combinations are normal energized
outputs. Combination 0—0 represents no power applied to the output.
Combination 1—1 is an ambiguous combination. In the Bi—Polar Output Check,
the output data base is scanned for a possible 1—1 bit combination. If this
combination is generated, the CPU powers off the output (0—0) and flags the
error in the software.
—
6400A, p. 4—10
4.3.4.6
A.
Lamp Filament Tests
Hot Filament Test
To determine whether a signal lamp has a missing or damaged bulb (broken
filament), the ‘Hot Filament Test’ is performed every 0.6 to 1.2 seconds
(typically closer to 0.6 sec.). Each driver circuit is equipped with a
current flow monitor connected to the actual lamp circuit.
It produces an
output bit to determine if, in fact, current is flowing through the filament
circuit. If the system sends a lamp—on bit and the monitor shows no current,
a recoverable error is placed in memory. This type of lamp—fail bit is
accessible in the application logic so that corrective action is automatically
taken (refer to section 4.3.1.3, part B). If the system sends a lamp—off
signal and the monitor shows current flowing through the circuit, a vital
error is recorded and a system shutdown is performed (power removed from the
lamp driver circuit and all other outputs).
B.
Filament ‘Flip’ Test
During the Lamp Driver flip test (refer to section 4.3.4.3), the continuity of
the lamp filament is checked when an ‘off’ lamp output is briefly turned on.
This test is only provided in Executive software Revisions 5 and higher. If
no current flow is recorded during this test, a light out bit is set in the
application logic.
In Executive software Revisions 0 through 4, only the ‘Hot Filament Test’ is
performed. In these revisions, light—out bits in the application
logic are only recorded when a signal lamp is turned on. If a lamp has a
burned—out filament and the output is turned on, the light—out bit in
the application logic is set to ‘1’. However, when the output to the
burned—out lamp is turned off, the light—out bit is cleared (no state
recorded).
4.3.4.7
Suspend Test
The Suspend Test function enables one of the automatic output tests on the
relay—driver output boards to be cancelled, as may be required by the
application. This function is selected in the application logic and cannot be
used on the lamp driver outputs (refer also to section 4.3.1.2, part B). In
addition, the only test that can be suspended is the turn—on of an inactive
output during the Stuck Output Check (refer to section 4.3.4.3.). The output
test is cancelled when the Suspend test bit is high (‘1’). If the application
logic turns on both the output and the Suspend Test bit, the output is
checked. If the output is turned off and the Suspend Test bit is turned on,
the test of the output does not occur.
NOTE
This test should not be done for long periods of time.
Several faults would remain undetected which, in turn,
could lead to an undetected output failure.
6400A, p. 4—11
4.4
NON-VITAL SERIAL LINI(
4.4.1
Introduction (See Figure 4—2)
Each MICROLOK and MICROLOK PLUS unit is equipped with one serial data port
(Code System Interface PCB) for non—vital communications between the
interlocking and a code system field unit.
On the MICROLOK PLUS unit, the
non—vital section can serve as the local code unit: a cable is available for
carrying code system communications between the vital and non—vital sections
of the unit.
The Code System Interface PCB controls all communications between the code
unit and the vital MICROLOK CPU (Processor and Peripheral PCBS). It is
controlled by its own microprocessor and contains program memory that emulates
the communications protocols of the assigned code system. (This arrangement
is designed
to conserve
processing
capacity
in the vital
CPU section.)
Adjacent serial data circuits on the Code System Interface PCB serve as the
‘remote’ communication ports between the microprocessors on the Processor and
Code System Interface PCBs. They are linked in the same fashion, for example,
as the vital serial link ports on two physically separate MICROLOK units using
EIA data and line control signals.
The code system emulation software reformats input, output and status messages
between vital CPU and the code system, and does not modify the content of
these messages. Communications rates, delays etc. are set by manual switches
on the Code System board.
MICROLOK Only: In the dual—CPU version of MICROLOK, the I—ON—LINE signal from
the Peripheral PCB is used to enable the communications drivers on the Code
System PCB (of the on—line CPU) in the same manner as the Vital Serial Link
Drivers on the Peripheral and I/O Bus Interface PCB5. I—ON—LINE prevents the
Code System PCB of the off—line CPU from transmitting extraneous data to the
code system.
4.4.2
4.4.2.1
Non—Vital Interface
General
Code System PCB N451441—5302 is typically used for the following interfaces:
A.
MICROLOK with GENISYS system (GENISYS programmed as a code unit
(office or field) in an office/field digital code system). In such a
system, the GENISYS system at the interlocking is typically a Slave
to office GENISYS unit (or other computer). This same non—vital
GENISYS unit also functions as a Master to the MICROLOK unit. Thus,
both serial ports on the local GENISYS unit are active.
6400A, p. 4—12
MICROLOK: TYPICAL NON-VITAL LINK TO GENISYS
MICROLOK’ UNIT
GENISYS UNIT
MICROLOK PLUSTM: TYPICAL NON-VITAL LINK TO EXTERNAL GENISYS’
OR INTERNAL NON-VITAL SECTION
GENISYS’ UNIT
TO EXTERNAL CONTROL
SYSTEM (I.E. OFFICE
COMPUTER)
MICROLOK PLUSTM UNIT
Figure 4—2.
Serial Link Between Vital CPU and Non—Vital Controller
6400A, p.
4—13
‘1
B.
MICROLOK PLUS vital section with MICROLOK PLUS non—vital section
(non—vital section programmed as a code unit (office or field) in an
office/field digital code system). In such a system, the MICROLOK
PLUS non—vital controller at the interlocking is typically a Slave to
office GENISYS unit (or other computer). This same non—vital
controller also functions as a Master to the MICROLOK PLUS vital
section. Thus, both serial norts on the MICROLOK PLUS non—vital
controller are active.
Within the MICROLOK or MICROLOK PLUS unit, the vital CPU section functions as
the Master and the Code System board as the Slave.
This enables the vital CPU
to periodically ignore the Code System board so that vital functions can take
priority.
4.4.2.2
Communication Start—Up and Termination
After power—up of the MICROLOK or MICROLOK PLUS unit, the Code System PCB
microprocessor waits for a valid communication from the vital CPU. All
communications start with a header byte that outlines the type of message.
Until the Code System board receives this communication, no inputs from
GENISYS will be processed. The Code System PCB will wait an indefinite period
for a valid initial communication. If this communication is garbled or
incomplete (i.e. picked up midway through the message), the Code System
microprocessor sends an error message. The vital CPU reads this message as a
request to repeat the previous communication. If the second and third
attempts also fail, the message is disposed and communications is attempted
again using the next consecutive message.
If the vital CPU is shut down due to a vital fault, its corresponding serial
port on the Code System board is reset. At the same time, the non—vital
serial port is disabled by a low I—ON—LINE signal. If the Code System board
was communicating with the non—vital controller (input or output) at this
time, the in—process message would be lost. The Code System board will remain
active for five seconds after shutdown of the vital CPU. If communications
are not reestablished, the board undergoes an internal reset. The five second
delay allows the CPU time to perform vital operations (which take priority
over non—vital operations) and then return to the Code System board for
non—vital communications. Otherwise, communications would have to be
reinitialized every time the CPU ceases non-vital communications in favor of
vital operations.
If the Code System board itself fails, its corresponding serial port on the
Code System board will be reset and communications terminated. The vital CPU
will attempt to reinitialize the Code System board, but will not shut itself
down. If the restart fails, the application program COMMON.MODE bit will be
cleared. Any in—process messages are erased. Refer to section 5.2.5.3.
If the vital/non—vital serial link fails, the Code System board will no longer
respond to the vital CPU. The vital CPU cannot distinquish between an
on—board failure of the Code System board and a failure in the code line.
Therefore, it will again try to reinitialize the Code System board and clear
the COMMON.MODE bit if reinitialization fails.
1400A, p.
4—14
4.4.2.3
Vital CPU—to—Code System Messages
The vital CPU will only communicate with the Code System board if (a) a change
is detected in one or more routine indications bits, (b) a change is detected
in any of the 15 system status bits, or (c) when the vital CPU wants to poll
the code system.
A communication from the vital CPU contains four standard
messages:
Indication, Station Table Initialize, Indication Initialize and
Vital Status. There is also one contingency message, Negative Acknowledge
Command, which is sent to the Code System PCB when the vital CPU has not
received a proper message.
The Indication Message informs the code system office (through the Code System
PCB) when an indication bit changes value. This message is also used to poll
the PCB for any pending messages, and as an acknowledge of a previous message
(any type) received from the code system. When the vital CPU goes into an
idle loop’ (no vital interlocking operations in progress), it will send the
code system indication messages that have not changed value. This message is
used to p011 the code system and update the Code System PCBs data base.
The Station Table Initialize message enables the Code System PCB to convert
incoming messages (Code System—to—Vital CPU) to a format readable by the vital
CPU. It is sent when a reset occurs with the vital CPU, or when requested by
the Code System PCB.
The Indication Initialize message sets up the Code System PCB software tables
to receive indication bits from the non—vital controller. This message is
always sent immediately after the Station Table Initialize message has been
sent and acknowledged by the Code System PCB.
The Vital Status message indicates the operating state of the MICROLOK or
MICROLOK PLUS vital system. The system is programmed to report 15 bytes of
system status information immediately after the routine output data. This
information is automatically provided by the Executive software; there is no
requirement to define special system status bit locations in the vital
application program.
Status information includes,
for example, a listing of any SYSERR.X messages
(refer to section 5.2.5.3, part B). The user has the option of ignoring some
or all of vital status bytes. Requested vital status bytes must be given
specific bit locations in the non—vital application program. Also, a switch
must be set on the Code System PCB indicating the starting point of the status
information after the routine input data, so that it will enter the
appropriate bit locations defined in the non—vital application program.
programming aspects of this procedure are described in section 6.2.
switch adjustments are described in section 6.5, part B.
6400A, p.
4—15
The
The
4.4.2.4
Code System-To—Vital CPU Messages
A communication from the Code System PCB contains four standard rnessaqes:
Control Message Format, Office Status Message Format, Request Initialization
Command and Acknowledge Command.
There is also one contingency message,
Negative Acknowledge Command, which is sent to the vital CPU when the Code
System PCB has not received a proper message.
The Control Message Format is used to transfer control information (received
from the non—vital controller) to the vital CPU. It is also used to
acknowledge a previous message (any type) received from the vital CPU.
The Office Status Message Format is used to transfer office status
information, as received by the non—vital field unit, to the vital CPU.
This
message is also used to acknowledge the previous message (any type) from the
vital CPU.
The Request Initialization Command is sent by the Code System PCB when it
requires initialization of its station tables and indications (refer to
‘Station Table Initialize’ message: previous section). This message is only
required if the Code System PCB is reset and the vital CPU is not reset. It
is sent when the Code System PCB is polled by the vital CPU.
The Acknowledge Command is sent to the vital CPU to indicate that the previous
message was properly received and no further messages are pending.
C
K
6400A, p. 4—16
4.5
4.5.1
CPU FAILOVER SYSTEM
—
MICROLOK ONLY
Configuration (See Figure 4—3)
MICROLOK can be equipped with two independent computer systems, A and B, to
control the same set of interlocking inputs and outputs.
This is accomplished
by installing two identical sets of logic PCBs (Processor, Perpheral, I/O Bus
Interface and Code System Interface) in the CPU cardfile.
Each computer is
provided its own external power source and I/O cabling (local or serial).
However, both computers share the same I/O cardfile PCBs and VCOR relay. The
failover control system consists of discrete circuits on both Peripheral PCBs,
and two system bus communications lines, called ‘I—ON—LINE’ and
‘OTHER-ON-LINE’.
Either computer can serve as the on—line or off—line system.
During routine
operations, one computer is selected for on—line status at power—up. This
computer is manually selected (refer to section 6.5, part D) and designated as
the ‘A’ computer. The selection process does not involve a software program
routine. A vital internal error in one computer (i.e., microprocessor circuit
malfunction) will cause failover to the B computer. A vital fault in the I/O
cardfile outputs (i.e. stuck bit) will also cause a failover to the B
computer. Refer to section 4.5.5 for the off—line CPU health monitoring
function available with Executive software revision 9.
4.5.2
Selection at Power—Up
At system power-up, the respective I—ON—LINE lines are in a high logic state.
In all cases, there is a small time differential in the initialization of the
failover circuits. The first of these circuits to complete its start—up
routine pulls its output I—ON—LINE line to the low logic state (its computer
becomes the A unit). The alternate failover circuit, still in its
initialization routine, is interrupted by the low signal on its OTHER—ON—LINE
line (its computer becomes the B unit). This failover circuit maintains its
I—ON—LINE line in the high state to verify (to the alternate computer) that it
has not been started.
The failover circuit in the A computer sends two ‘on—line’ bits to its
respective microprocessor to indicate active status. These bits indicate the
states of the two I—ON—LINE lines. The failover circuit in the B computer
sends equivalent ‘off—line’ bits to its respective microprocessor, causing a
local shutdown. During the next system power—up, this procedure is repeated,
and either computer may assume on—line status. (The Peripheral PCB failover
circuit is also initialized in the single—computer version of MICROLOK.
However, since the alternate computer is absent, the OTHER—ON—LINE line is
permanently tied high. The initialization routine proceeds as though the
‘alternate computer’ initialized too late.)
(
6400A, p. 4—17
C
Figure 4—3.
MICROLOK Computer Failover System
6400A, p.
4—18
4.5.3
In—Service Failover (Normal Configuration)
When a shutdown occurs on the A computer, control is removed from the failover
circuit. This event pulls the I—ON—LINE line to the high logic state.
Assuming the B computer is in a ready’ state, the high I—ON—LINE signal
(input to its failover circuit) is read by B unit microorocessor. The ‘B’
system microprocessor initiates a reset that triggers its failover circuit.
In turn, the I—ON—LINE is pulled low.
If the A computer is capable of
assuming ~ ready condition, it will detect the ‘B unit on—line’ signal and
remain off—line.
After the A unit relinquishes control to the B unit, the A unit attempts to
reset itself for possible resumption of control. The A unit will not become
ready if it detects (a) any five vital errors within three seconds, or (b) the
same local I/O error twice in a row within three seconds. If it passes
diagnostics, it will then reset the system software. The on—line B unit will
continue to monitor the two ‘I—ON—LINE’ bits.
The I—ON—LINE signal is used on the I/O Bus Interface PCB to control the
microprocessor 500 Hz signal that clocks the drive circuit for the VCOR
relay. When the respective computer goes off—line (I—ON—LINE changes state),
the drive circuit is disabled. This assures that only the I/O Bus Interface
PCB Drive circuit on the on—line computer will control the power—off relay.
I—ON—LINE is also used to enable the driver chips for the serial ports on the
peripheral, I/O Bus Interface and Code System Ir.terface (non—vital) PCBs.
This prevents any communications from this port during the off—line period.
4.5.4
4.5.4.1
Special Configurations
Lock—Off/Lock-On
The dual—computer version of MICROLOK can be manually controlled to force one
or the other computer to the on—line or off—line state.
This is performed
with a 3—position toggle switch on the Peripheral PCB (refer to section 4.5,
part A). When this switch is placed in the ‘AUTO’ position, failovers will
occur as described in section 4.5.3. When this switch is placed in the
LOCK—OFF position, the respective computer is forced to off—line status. If
LOCK—OFF is set while the respective computer is on—line, a failover will
occur to the alternate computer. Conversely, when the switch is set to the
LOCK—ON position, the respective computer is forced to maintain on—line
status. If LOCK—ON is set while the computer is off—line, the computer will
attempt to reset.
shutdown.
4.5.4.2
However, if vital errors are detected, the computer will
Forced Start—Up Priority
The dual—computer MICROLOK is configured to always select a particular
computer as the first on—line computer at power—up. One DIP switch rocker on
each peripheral PCB is used for this purpose. When both rockers (one per
peripheral PCB) are set to the same position (on or off), the system will
intialize as described in section 4.5.2. When these rockers are set to
different positions, the computer with the ‘on’ rocker will be the first to
initialize.
6400A, p. 4—19
4.5.5
Monitoring Health of Off—Line Computer
NOTE
This function is only applicable to Executive software
revision 9 and higher.
The health of the off-line computer in a dual—CPU MICROLOK system can be
monitored. A single bit of information is logged, indicating whether the
off—line computer is capable of accepting control in the event of a failover
from the on-line computer.
A cable is available for connecting the Peripheral PCBs of both computers
(refer to SM—6400B). The off—line computer passes the status bit to the
on—line computer via this cable.
The health of the off—line unit is logged in two places:
A.
A bit in the Status Bytes sent to the non—vital controller (e.g.
GENISYS). Refer to section 6.2 for additional information.
B.
SYSERR.10.
Refer to sections 5.2.5.3 and 6.2 for additional information.
If a MICROEJOK system contains only one computer, or the special cable is not
installed, the status information indicates that the ‘off—line unit’ is not
hea 1thy.
C
6400A, p.
4—20
SECTION V
PROGRAMMING PROCEDURES
MICROLOK AND MICROLOK PLUS
-
5.1
INTRODUCTION
In the user’s application program, various bits (input, output, internals
etc.) and logic procedures are defined in a text data file on a computer.
Input and output statements can be written to internally connect the system,
to interconnect other MICROLOK and/or MICROLOK PLUS units on either of two
serial lines (Master, Slave), and to connect the vital system to the non—vital
code system. Timing values indicate the set (pick—up) and/or clear (drop
away) delays of the system relays. Roolean statements are used to describe
the system logic. The completed program is referred to as the source
program.
It is processed by the compiler and converted into program tables.
In turn, these tables are ‘burned’ into one or several EPROMS. The EPROMs are
then plugged into the Peripheral PCB. Sections 5.7 through 5.11 describe how
these basic procedures are conducted with the US&S MICROLOK Development System.
5.2
PROGRAMMING LANGUAGE
5.2.1
-
GENERAL DESCRIPTION
Main Program Sections and Statements
The vital program language is divided into standard sections and statements,
each of which perform a different function. These sections and statements are
described in greater detail, starting with section 5.3. The main sections and
statements include:
a.
PROGRAM Statement (MICROLOK PROGRAM EXAMPLEl;)
The PROGRAM statement identifies the particular program.
b.
INTERFACE Section
The INTERFACE section defines all outputs and inputs to the MICROLOK or
MICROLOK PLUS unit (LOCAL, MASTER, SLAVE, CODE LINE):
(1)
LOCAL Section
MICROLOK: The LOCAL section defines inputs and outputs interfaced
directly with the unit at the I/O cardfile.
MICROLOK PLUS: The LOCAL section defines inputs and outputs
interfaced directly with the vital I/O section of the cardfile.
(2)
MASTER and SLAVE Sections
If the application includes other MICROLOK or MICROLOK PLUS units
linked as a single system, MASTER and SLAVE define the remote Master
and Slave units and the vital I/O between them.
(3)
CODE LINE Section
The CODE LINE section defines the non—vital code line I/O (with a
GENISYS unit or the non—vital section of a MICROLOK PLUS unit).
6400A, p. 5—1
c.
VAR Section
The VAR section allows the definition of any internal bits needed to aid
logic calculations.
d.
Bit Attributes
(1)
TIMER Section
The TIMER section is used to define set and clear delays for timer
relays.
(2)
CODED OUTPUT Section
The CODED OUTPUT section is used to simulate coded relays.
e.
BEGIN Statement
The BEGIN statement marks the point where all inputs, outputs and
internals have been defined and the logical processing of these elements
begins.
f.
ASSIGN Section
The ASSIGN Section is used to create the actual system logic.
g.
END Statement
The END statement informs the compiler that the program is completed.
5.2.2
Basic Format
The vital programming language uses a free format. Source program statements
may span several lines, or be placed on a single line. The format used should
be easy to read, for example, to enable others to immediately understand the
program and make future modifications. The line indentation and spacing
formats presented in this manual are recommended guidelines. The only
restrictions on the format of a source program are as follows:
a.
The maximum allowable line length is 100 characters.
be truncated and generate an error message.
b.
There is no distinction between upper and lower case letters. All lower
case letters (a—z) are converted by the compiler to their corresponding
upper case letters (A—Z). For example, the bit leat would be read the
same as lEAT.
6400A, p. 5—2
A longer line will
5.2.3
5.2.3.1
Comments
General
The source program may include instructive comments that are not processed as
part of the program. The comment can
a particular point in the program. A
program and use any number of lines.
percent sign, followed by the text of
For example:
be used to describe what is happening at
comment may be entered anywhere in a
The syntax for entering a comment is a
the comment, followed by a backslash.
% Any text which appears between the PERCENT SIGN and
the BACKSLASH is ignored\
5.2.3.2
A.
Compiler Switches
General Format
Compiler switches are used to select options that modify the operations of
both the language and the run time system. Some of these switches control the
communication between two units (baud rate, ‘stale’ data time out, polling
interval, etc.). They are specified within a comment (between percent sign
(%) and backslash (\)):
%~ (switch)
(value)
comment string\
To be recognized as a compiler switch, the percent sign must be immediately
followed by a dollar sign (i).
The dollar sign is then followed by the
switch. The switch is identified by one or two letters and followed by its
value.
NOTE
Refer to section 6.5 for manual switch settings.
B.
Initial Output Inhibit Delay Switch
Whenever a MICROLOK or MICROLOK PLUS unit begins operations, a certain period
of time must elapse before any vital output is delivered.
(This is analagous
to running time locking when cancelling a signal.) The compiler switch that
defines this delay must be specified in the source program before the VAR
statement. This switch has no default value, therefore it must be specified
in all application programs. The syntax for specifying the run time is:
%~L (value)\
( Value) is
an integer between 0 and 2495 that specifes the number of minutes
to delay vital outputs after a reset.
6400A, p. 5—3
C.
Vital Serial Link Compiler Switches
Table 5—1 describes all of the switches that control communications between
two MICROLOK and/or MICROLOK PLUS units.
Each switch has a default value
(automatically used by the compiler if not otherwise specified by the
programmer), and the valid ranges for that switch.
For a complete description
of these switches refer to section 6.1.
Table 5-1.
Compiler Switch Options for Vital Serial Communications
Switch
Default
MB
SB
MN
SN
MF
SF
R
I
MT
ST
4
4
0
0
0
0
(1)
1.0
(2)
(2)
Range
Unit
1
6*
1
6*
0
255
0
255
0
255
0
255
0
2550
0.0—10.0
0.0—25.0
0.0—25.0
Usage
baud code
baud code
bit time
bit time
bit time
bit time
milliseconds
seconds
seconds
seconds
—
—
—
—
—
—
—
Master Baud Rate
Slave Baud Rate
Master Key On Delay
Slave Key On Delay
Master Key Off Delay
Slave Key Off Delay
Master Waiting Time—Out
Master Interval Scan Sum
Master Stale Data Time—Out
Slave Stale Data Time—Out
(1) Default is minimum of (Slave Key—On Delay, 50 milliseconds)
80
*
Master Bit Time
(2) Default is minimum of (4
*
D.
+
*
MIPSUM f~I], 25.2)
Refers to specific baud rates (range 150 to 2400 BPS)
Compilation Switches
There are switches that do not affect the run—time system, but are processed
during compilation: debug, symbol table listing and page generator. The
syntax for these switches is as follows:
% ~D
(value) debug switch\
~value) symbol table listing\
value) page generator\
The (value) for these switches is
+
(ON) or
—
(OFF).
The debug switch (&D) is used to create a debug file that will be used when
simulating the execution of a program. If a program is to be used in the
Simulator, then debug must be turned on (~D+). The ~D+ switch does not affect
the EPROM code file; it only generates an additional debug file. The default
for the debug switch is OFF.
6400A, p.
5—4
The symbol table listing switch is used to suppress the bit listing included
at the end of the compiler listing. The default for this switch is ON (bit
listing included).
The page generator switch is used in the compiler listing to place the next
source line at the top of a new page (refer also to section 6.1.13).
NOTE
The page generator switch is only available with
M.D.S. Version 4.01 and higher.
5.2.4
5.2.4.1
Tokens
General
When a MICROLOK or MICROLOK PLUS program is being processed (or compiled), it
is automatically checked for errors. This is accomplished by constructing the
program with special components called ‘tokens’. Tokens are divided into
several types, including Reserved Words, User-Defined Bits and Delimiters.
5.2.4.2
Reserved Words
Reserved words are tokens with a pre—defined meaning in the program. They
consist of an alphanumeric string of 12 or less characters, and can only be
used in a certain context. For example, AND cannot be a bit name. Table 5—2
lists all Reserved Words:
Table 5—2.
ADDRESS
BEGIN
CODED
DC. BIPOLAR
IF
LINE
MIN
OUTPUT
SLAVE
TO
XOR
AND
BETWEEN
CPH
DC • LAMP
I NP UT
LOCAL
MSEC
PROGRAM
SUSPEND
TOGGLE
ASSIGN
Reserved Words
CLEAR
CP M
DC. LIMITED
DC .STANDARD
I NTERFACE
MASTER
NOT
SEC
TEST
VAR
6400A, p. 5—5
AT
CODE
CPS
END
LAMPOUT
MICRO LOK
OR
SET
TIMER
WORD
5.2.4.3
DelimiterS
Delimiters are special tokens used as separaters between Reserved Words and
User—Defined Bits.
They are required to give each Reserved Word or
User—Define Identifier a unique identity in a statement.
Table 5—3 lists all
of the valid delimiters:
Table 5—3.
space
tab
colon
(:)
backslash (\)
‘at’
(@)
semicolon
equal sign
comma
percent
plus sign
Delimiters
(1)
(=)
(,)
(%)
(+)
open parenthesis
(()
close parenthesis
carriage return
tilda
asterisk
U)
CR
(*)
Operator symbols (refer also to section 5.3.1.7):
*
+
@
shorthand
shorthand
shorthand
shorthand
for
for
for
for
‘AND’
‘OR’
‘XOR’
‘NOT’
The following statement shows the use of several delimiters:
ASSIGN A AND B*C
TO D;
ASSIGN and TO are the Reserved Words. A B C and D are the User—Defined
Bits. The space delimiter between ASSIGN and A indicates where the Reserved
Word ends and the User-Defined Bit begins. The “‘ also serves as a delimiter
between B and C.
5.2.4.4
User—Defined Bits
User—Defined Bits are tokens created by the user. Unlike Reserved Words, they
do not have restricted uses in the program. They enable bits such as relays
to be given relevant names in the source program. The following rules apply
to User—Defined Bits:
a.
The name must consist of no more than 12 characters.
b.
The name can only be composed of the characters A—Z, a—z, 0—9,
and ‘t’.
c.
The name must contain at least one non—digit character.
Following are several valid and invalid identifiers:
EAT
Valid
123
.123
lamp. indic. 13
I TK
Invalid:
Valid
All digits
Invalid:
Valid
Exceeds 12 characters
6400A, p.
5—6
‘.‘,
‘
C
5.2.5
5.2.5.1
Bit Types and Uses
Status in an ASSIGN Statement
A bit (or bits) that is given a value from an ASSIGN statement is called the
object
ASSIGN
bits A
object
of that ASSIGN statement.
A bit that contributes to the value of the
object, in turn, is called an operand.
In the following statement,
and B are operands of the ASSIGN statement, while bits C and D are the
of the ASSIGN statement:
ASSIGN
A AND B
TO C,D;
The tabulation below describes the different general uses of bits in the
programming language, and their handling in the ASSIGN statements:
Bit Type
Basic Use
Comments
Local Input
Receive input from the
local input boards,
Can be operands in an ASSIGN
statement, but not an object of an
ASSIGN statement.
Local Output
Send output to the
local output boards,
Can be operands in or the
object of an ASSIGN statement.
When used as an operand, the
current value of that output bit
is used. When used as the object,
the value of the ASSIGN statement
is assigned to the output bit.
Master/Slave
Input
Receive data from the
specified Master/Slave,
Can be operands in an ASSIGN
statement, but not an object
of an ASSIGN statement.
Master/Slave
Send data to the speci—
Same behavior as local output
Output
fied Master/Slave,
bits.
Code Line Input
Receive bits from the
CODE LINE.
Can be operands in or the
object of an ASSIGN statement.
Code Line Output
Send bits over the
CODE LINE.
Same behavior as local output
bits.
Internals
Defined in VAR section;
only used internally,
Neither input or output bits,
but may be assigned the values
from input bits or assigned to
output bits.
Generally used to
hold intermediate values while
performing logic and timing
functions. Internals can be
operands and objects.
Refer to section 5.2.5.3 for rules on pre—defined bits.
6400A, p.
5—7
5.2.5.2
Bit Attributes
Certain types of bits have attributes that allow them to be modified to
enhance or change the way they behave in the program. There are two such bits
in the program language:
TIMERS and CODED OUTPUTS.
TIMER bits are used to specify a set (pick—up) or clear (drop) delay for a
bit. Only an output or internal bit may have a timer value. Whenever such a
bit is commanded to change state, a specified amount of time must elapse
before that bit will actually change state.
CODED OUTPUTS are used to toggle output bits or internal bits at certain rates.
When an output bit is defined as a coded output, it will be toggled at certain
rates depending on how it was defined. Coded output bits may not be the
object of an ASSIGN statement.
CAUTION
Care should be taken when defining internal bits as
coded outputs. Since internal bits may trigger other
logic equations, defining them as coded outputs may
overload the system (refer to section 5.3.1.5, part C).
Coded outputs are intended for lamp driving, not code—
following relays. Use caution when operating code—
following relays.
5.2.5.3
Pre—Defined Bits
Certain bits are pre—defined in the program language. These bits have special
meanings and cannot be redefined by the user. They include spare bits, system
bits and communications bits.
A.
SPARE Bit
A SPARE bit is simply used to occupy a space between active bits. For
example, if a local input board has four defined input bits, but only the
first and fourth bit are required in the application program, the input word
would be defined as:
INPUT WORD:
inpl,spare,spare,inP4;
By defining the input word in this manner, only the first and fourth bits are
accessible to the user. It is not necessary to supply SPARE’s to locations
that do not fall between two active bits. For example, the following entry
makes unnecessary use of SPARE bits:
OUTPUT WORD:
IMP 1, IMP 2, SPARE,SPARE,SPARE,SPARE:
6400A, p. 5—8
)
NOTE
If the above word was a Lamp Driver output, the
spares would cause light—out errors from the auto-
matic filament tests. If a Lamp Driver word is to
include outputs that are not actually connected to a
signal lamp, a load must be placed on these outputs
to prevent the light—out errors
(refer to SM—6400B).
The following statement would suffice for this entry.
OUTPUT WORD:
B.
INP_1,
INP_2;
System Bits (KILL, RESET, SYSERR’s
System bits are provided to determine or alter the state of the system. Table
5—4 lists these bits and their general functions. Note that Table 5—4
indicates if the system bit is to be read (operand in an ASSIGN statement) or
written (the object of an ASSIGN statement).
Table 5—4.
System Bit General Uses
System Bit
Use
Description
RESET*
write (object)
Reset the MICROLOK hardware
KILL*
SYSERR.CLEAR
SYSERR
SYSERR.1
SYSERR.2
SYSERR.3
SYSERR.4
SYSERR.5
SYSERR.6
SYSERR.7
SYSERR.8
SYSERR.9
SYSERR.l0**
write
‘
write
‘
read (operand)
read
‘
read
‘
read
‘
read
‘
read
‘
read
‘
read
‘
read
‘
read
‘
read
‘
Shut down the MICROLOK hardware
Clear all SYSERR.x bits
Set if SYSERR.1 — SYSERR.9 is 1
MASTER link down
SLAVE link down
MASTER/SLAVE link error
Not Used
Hardware slave address error
Physical input error
Light—out detected
Illegal bi—polar output
Not used
Off—line computer is not healthy.
*RESET and KILL may be used in an ASSIGN statement, but the value as such will
always be zero. (When RESET or KILL goes to 1, the system resets, shuts
down; the ASSIGN statement will never ‘see’ the 1.)
**This error is only defined in Executive software revision 9 and higher.
Refer to section 4.5.5 for additional information.
If any of the SYSERR.x bits is set to 1, they will remain set until the
SYSERR.CLEAR bit is set to 1, or until error codes are manually cleared on the
Peripheral PCB switches (refer also to SM—6400C).
6400A, p.
5—9
C.
Communication Bits
Communication bits are used to determine the state of any communications.
Table 5—5 lists these bits and their general functions. Note in Table 5—5
that all communications bits are read only (operand in an ASSIGN statement).
Table 5—5.
5.3
System Bit
Use
Description
COMMON.MODE
SLAVE.ON.x
MASTER.ON
read (operand)
read
‘
read
‘
Status of the CODE LINE
Status of SLAVE #x
Status of your MASTER
PROGRAMMING LANGUAGE
5.3.1
5.3.1.1
Communications Bit General Uses
-
DETAILED DESCRIPTION
Main Program Sections and Statements
General
The following sections describe in detail the syntax for each program section
or statement, and any options therein. In these sections, the term (id)
refers to a User—Defined Bit. The term (id list) refers to a list of
user—defined bits, separated by commas.
5.3.1.2
Program Statement
Every MICROLOK or MICROLOK PLUS program must begin with a program statement.
This identifies the name of the program. The syntax for the program statement
is:
MICROLOK PROGRAM
5.3.1.3
A.
(id)
INTERFACE Section
General
The INTERFACE section is used to define the I/O configuration of the MICROLOK
or MICROLOK PLUS unit. This section is divided into four sub—sections:
a.
b.
c.
d.
Vital
Vital
Vital
Vital
Local Output and Input Description
Master Output and Input Description
Slave Output and Input Description
Code Line Output and Input Description
6400A, p. 5—10
The INTERFACE section is required in all application programs, and must
include at least one of the above sub-sections.
If more than one of the
sub-sections above are used, they must be defined in the above order and
cannot be duplicated.
The INTERFACE section begins with the word INTERFACE.
this section is below:
The general syntax of
IINTERFACE
LOCAL
OUTPUT <type> WORD : <id list>;
OUTPUT <type> WORD
INPUT
INPUT <type>
<type> WORD
WORD
<id list>;
<id
<id list>;
list>;
9
MICROLOK’: 15 BOARDS
TM
MAX.
MICROLOK PLUS
_____
10 BOARDS MAX.
MASTER
ADDRESS:
OUTPUT <id list>
INPUT : <id list>
ADDRESS
OUTPUT <id list>
INPUT <Id list>
SLAVE
ADDRESS:
OUTPUT : <id list>
INPUT : <id list>
ADDRESS:
OUTPUT : <id list>
INPUT : <id list>
CODE
B.
LINE
ADDRESS:
OUTPUT : <id list>
INPUT : <id list>
LOCAL I/O
The LOCAL I/O sub—section is used to define the type of I/O boards.
MICROLOK: A maximum of 15 OUTPUT WORD’s and INPUT WORD’S may be defined in
the LOCAL sub-section.
MICROLOK PLUS: A maximum of 10 OUTPUT WORD’s and INPUT WORD’s may be defined
in the LOCAL sub—section.
Each OUTPUT/INPUT WORD corresponds to one board. Since output boards must
precede (left to right) all input boards in the cardfile, all OUTPUT WORD
declarations must precede all INPUT WORD declarations (top to bottom) in the
program.
6400A, p.
5—11
(a)
OUTPUT
Each defined OUTPUT WORD corresponds to a different output board in the
cardfile, with the first OUTPUT WORD corresponding to the left-most slot in
the cardfile.
The syntax for defining an OUTPUT WORD Is:
OUTPUT (type)
WORD
(id list)
Where:
(type) defines the output board type. (The output boards are referred to by
specific names in the application program. These names differ slightly from
the name printed on the board silkscreen.)
(id list) defines the bits associated with that output board.
The number of bits permitted in the (id list) will be limited by the (type) of
board used.
(type) is optional; if not specified, the default will be used
(DC.STANDARD). To avoid confusion the (type) should always be specified.
Table 5—6 reviews the different MICROLOK output boards and the maximum number
of output bits permitted.
Table 5—6.
Output Board Program Parameters
Board Hardware Name
Board Program Name
Maximum No.
Of Bits
Check Bits
Voltage Limited Relay
DC.LIMITED
4
SUSPEND TEST
Standard Relay Driver
DC.STANDARD (default)
4
SUSPEND TEST
Bi-Polar Relay Driver
DC.BIPOLAR
4
SUSPEND TEST
DC Lamp Driver
DC.LAMP
4
LAMPOUT
Driver
Output boards also have associated check bits. The DC.STANDARD, DC.LIMITED
and DC.BIPOLAR boards support SUSPEND TEST bits that may be used to disable
testing during normal operations. (This may be required in special
circumstances where the momentary switching test of the output (0 to 1)
actually changes the external relay. Refer to section 4.3.4.7). The DC.LAMP
board supports LAMP.OUT bits that can be read to determine if a lamp has
burned out. The syntax for defining these check bits is:
OUTPUT (type)
(check type)
If (type)
WORD : (id list #1) ;
(id list #2) ;
is DC.LAMP, then
(check type)
DC.STANDARD, DC.LIMITED or DC.BIPOLAR, then
TEST.
6400A, p.
must be LAMPOUT.
(check type)
5—12
If (type)
must be SUSPEND
is
The number of identifiers in (id list #2)
identifiers in (id list ~i)
may not be more than the number of
The following two examples demonstrate the check bits:
OUTPUT DC.LAMP WORD:
lamp.l, lamp.2, lamp.3;
LAMPOUT: lampout.l, lampout.2,
lampout.3, lampout.4;
OUTPUT DC.STANDARD WORD:
SUSPEND TEST: rly.l.act,
rly.l, rly.2, rly.3:
rly.2.act;
The first output word is invalid since only three output bits are defined
while four LAMPOUT are requested.
The second output word shows a correct
SUSPEND TEST definition.
Note that even though three output bits were
defined, definition of only two SUSPEND TEST bits is permitted. Also note
that LAMPOUT bits may only be operands in ASSIGN statements, while SUSPEND
TEST bits may be both operands in and an object of an ASSIGN statement.
(b)
Input
Each defined INPUT WORD corresponds to a different input board in the MICROLOK
or MICROLOK PLUS cardfile, where the first INPUT WORD corresponds to the first
left—hand slot in the cardfile that contains an input board. This can be the
first slot to the right of the last output board, or the left—most slot in the
cardfile (no output boards used). The syntax for defining an INPUT WORD is:
INPUT (type) WORD :
( id
list)
;
Where:
(
type) defines the input board type. (The input boards are referred to by
specific names in the application program. These names differ slightly from
the name printed on the board silkscreen.)
Kid list)
defines the bits associated with that input board.
(
The number of bits permitted in the id list) will be limited by the (type) of
board used.
(type) is optional. If not specified, the default will be used
(DC.STANDARD). To avoid confusion the (type) should always be specified.
Table 5—7 reviews the single input board and the maximum number of output bits
permitted.
Table 5—7. Input Board Program Parameters
Board Hardware Name
Board Program Name
Maximum No.
Of Bits
Standard Input
DC.STANDARD (default)
6400A, p. 5—13
8
C.
Master I/O (See Figure 5—1)
The Master I/O sub—section is used to define the attendant MICROLOK or
MICROLOK PLUS unit as a Master to one or more other units.
The definition of
a Master is divided into two parts:
Slave Address (the address to which the
slave responds), and Slave I/o for each slave. The following is the correct
syntax for specifying a MASTER:
MASTER
ADDRESS: (number)
OUTPUT: (id list #1)
INPUT
(id list #2)
;
Where:
K number)
(id list)
is an address in the range 1 through 31
contains no more than 128 bits.
The previous MASTER definition indicates this unit is a MASTER to the SLAVE at
ADDRESS (number) . It also indicates the bits in (id list #1) are the
outputs to that SLAVE, and the bits in (id list #2) are the inputs from that
SLAVE
When a MASTER is defined, a new bit SLAVE.ON. address is automatically
created and available for use in the application program to determine the
status of the SLAVE. When a MASTER successfully communicates with a SLAVE,
the corresponding SLAVE.ON.x bit will be 1. When this communication fails,
the bit is 0.
MASTER
ADDRESS: 5
OUTPUT:
INPUT:
ADDRESS: 9
OUTPUT:
INPUT:
MASTER UNIT
SLAVE
sS.ol. s5.o2;
s5.il;
s9.ol;
s9.i1. s9.i2:
SLAVE
ADDRESS: 5
OUTPUT: mo;
INPUT: mi,1, mi.2;
Figure 5—1.
ADDRESS: 9
OUTPUT: mo.1,mo.2;
INPUT: mi;
Master/Slave Programming Reference Diagram
6400A, p. 5—14
C
A program cannot have more than 16 addresses defined under the MASTER portion
of the INTERFACE section. The following program segment shows the correct
syntax for defining a unit as a multiple master.
This automatically creates
two new bits, SLAVE.ON.5 and SLAVE.ON.9 which may be used to determine the
status of these slaves.
MASTER
ADDRESS: 5
OUTPUT:
INPUT :
sS,ol, s5.o2;
sS.il;
ADDRESS: 9
OUTPUT:
INPUT :
s9.ol;
s9.il, s9.i2:
The following limitations are imposed on the MASTER portion of the INTERFACE
section:
a.
b.
c.
d.
e.
D.
A given unit can be designated as a MASTER to a maximum of 16 SLAVEs.
Valid SLAVE addresses are I through 31.
No two specified SLAVE addresses can be the same.
The maximum number of bits in a single (hi list) (either for input
or output) cannot exceed 128.
Either the OUTPUT or INPUT sub-section may be absent, but at least
one must be present.
Slave I/O
The SLAVE I/O sub-section Is used to define the local MICROLOK or MICROLOK
PLUS unit as a Slave to remote Master unit. The definition of a slave is
divided into two parts:
1.
2.
SLAVE Address (the address to which the SLAVE responds)
I/O for that SLAVE.
The following is the correct syntax for specifing a SLAVE:
SLAVE
ADDRESS: number
OUTP UT: (id list #1) ;
INPUT: (i d list #2?
Where:
(number)
(id list)
is an address in the range 0 through 31
contains no more than 128 bits.
When the specified address is zero, the station address jumpers on the
Peripheral PCB are used as the address for that particular SLAVE (refer also
to section 6.5, part E). The addresses specified by jumpers are in the range
1 through 15.
6400A, p. 5—15
The above SLAVE definition indicates that this SLAVE unit responds to
ADt~RESS: (number) . Also, the bits in
(id list #1) are the outputs from
that SLAVE (to the corresponding Master), and the bits in (id list #2) are
the inputs to that SLAVE (from the corresponding Master).
When the attendant unit is defined as a Slave, a new bit called MASTER.ON is
automatically created.
This bit can be used to determine the status of the
Master. Unlike the SLAVE.ON.x bits, only one MASTER.ON bit is needed because
all of the Slaves defined are connected to a single Master. The MASTER.ON bit
behaves the same as the SLAVE.ON bit.
The following program example shows how to define the MASTER for SLAVE #5 in
the previous example:
SLAVE
ADDRESS: 5
OUTPUT:
INPUT:
mo.l;
mi.l, mi.2;
Even though a Slave unit only communicates with one Master unit, mutiple Slave
addresses can be given to that Slave Unit in the SLAVE sub—section. A program
cannot have more than 16 such addresses and they all must be the object of the
same Master. The program segment on the next page demonstrates the correct
syntax for defining a unit as a multiple Slave. This example uses the
previous diagram, but assumes that SLAVE addresses 5 and 9 are the same
physical unit:
SLAVE
ADDRESS: 5
OUTPUT:
INPUT :
ADDRESS: 9
OUTPUT:
INPUT :
s5.ol;
s5.il, s5.i2;
s9.ol, s9.o2:
s9.il;
The capability of a SLAVE having two links to its MASTER is required so that
more than 128 bits can be passed in the same direction.
The following limitations are imposed on the SLAVE portion of the INTERFACE
section:
a.
b.
c.
d.
e.
f.
A single unit can be defined as having a maximum of 16 SLAVE ports to
a single MASTER.
Valid Slave addresses are 0 through 31 (0 = address specified by
jumpers on Peripheral PCB, not in the program)
No two Multiple—Slave addresses can be the same.
The maximum number of bits in a single (id list) (either for input
or output) cannot exceed 128.
Either the OUTPUT or INPUT sub—section may be absent, but at least one
must be present.
All Slaves must report to the same Master.
6400A, p.
5—16
E.
Code Line I/O
The CODE LINE I/O sub-section defines any bits used in code line
communications. The definition of a code line is divided into two parts:
Code Line Address and Code Line I/O. The following is the correct syntax for
specifying a CODE LINE:
CODE LINE
ADDRESS: (number)
OUTPUT : (id list #1)
INPUT
(id list #2)
Where:
(~ number)
id list)
is an address in the range 0 through 127
contains no more than 255 bits.
The above CODE LINE definition indicates that a Code System Interface PCB is
present in the cardfile. Also, bits in (id list #1) are the output to the
CODE LINE (indications) and the bits in
id list #2) are the input from the
CODE LINE (controls).
When a CODE LINE is defined, a new bit COMMOM.MODE is automatically created
and available for use in the application program to determine the status of
the code line. This bit behaves the same as the other communications bits.
A single MICROLOK or MICROLOK PLUS unit may only communicate over one CODE
LINE. The address specified has no particular meaning in the program, but
should be used for reference purposes.
In a link between vital and non—vital systems, the non—vital unit (e.g.
GENISYS, Master port interface) must be programmed with the address specified
on the Code System Interface PCB. Therefore, it is recommended that the
address specified on the CODE LINE statement match that of the Code System
Interface PCB.
5.3.1.4
Internal Bits
Bits needed in the program for internal logic processing (not for input,
output or system bits) are defined as internals. An internal bit may be used
to hold temporary values during logic processing, and may also be a repeater.
The syntax for declaring internal bits is:
VAR
(id list)
;
(Sometimes it is necessary to assign a constant value of 0 or 1 to an internal
bit. These constants are not provided in the MICROLOK programming language.
This can be done by defining an internal bit named ZERO. Do not assign this
bit a value. When a ‘0’ is needed, use ZERO. When a ‘1’ is needed,
use ‘.‘~‘ ZERO.)
6400A, p.
5—17
5.3.1.5
A.
Bit Attributes
General
A bit attribute is used to adjust the way a defined bit behaves under certain
circumstances.
Two types of bit attributes are available for use in MICROLOK
and MICROLOK PLUS: TIMERS and CODED OUTPUTS. Both may be used with output or
internal bits.
Definitions for bit attributes must be allocated memory in the MICROLOK or
MICROLOK PLUS RAM. Therefore, a limit of 1014 bytes is imposed on the total
memory used for such bits. Every TIMER bit is reserved 10 bytes, while every
CODED OUTPUT bit is reserved 14 bytes. The following formula may be used to
determine if the amount of RAM used for TIMER’s and CODED OUTPUT’s exceeds
1014:
(No. of Timer Bits
B.
x
10)
+
(No. of Coded Output Bits
x
14) < 1014
Timers
Any internal or output bit may be further defined with a timer attribute.
This attribute is used to specify the set (pick—up) and clear (drop—out)
delays, enabling the bit to operate like a timer relay.
The syntax for a timer description is:
(id list)
: SET
=
(number)
(unit)
CLEAR
=
(number)
(unit)
Where:
(number)
is an integer in the range 0 through 9999
(unit) is a time unit:
MSEC, SEC or MIN
The previous timer description is divided into three parts:
a.
b.
c.
The (id list) is the list of identifier bits calibrated by the
timer attribute.
The set delay clause specifies the set (pick—up) delay time.
The clear delay clause specifies the clear (drop out) delay time.
The full timer delay range available with MICROLOK and MICROLOK PLUS is as
follows:
Milliseconds: 50 to 9990 in increments of 10 msec.
Seconds: 1 to 9999 in increments of 1 sec.
Minutes: 1 to 2795 in increments of 1 mm.
6400A, p. 5—18
The following is an example of some timer descriptions:
TIMER
ONE, TWO, THREE: SET
FOUR
: SET
FORE
: SET
FIVE
SET
SIX
100: MSEC
1
SEC
1000: MSEC
0
:
MIN
CLEAR
CLEAR
CLEAR
CLEAR
CLEAR
•:SET~ 195: MSEC
SEC;
0: MSEC;
0: MSEC;
0:
7
12:
SEC;
2:
=
=
=
=
In the above example, bits ONE, TWO and THREE are defined with a set delay of
100 milliseconds and a clear delay of 2 seconds. This means that whenever a
‘1’ is assigned to any of those bits, 100 milliseconds will elapse before that
bit is set. Whenever a “0’ is assigned to any of those bits, 2 seconds must
elapse before it will actually be assigned the ‘0’. The definitions of bits
FOUR and FORE have the same set and clear delay because 1 second is equal to
1000 milliseconds.
When specifying a timer delay, a range of 0 through 9999 must be observed,
regardless of the unit of measurement. For example, 1000 MSEC may be used
instead of 1 SEC. But 60000 MSEC cannot be used for 1 MIN because 60000 is
beyond the 0
9999 range.
—
A set or clear delay of 0 implies that a change of state will occur
immediately with the request. In the above examples, the timer definition of
bit FIVE is illegal since both the set and clear delays are equal to zero.
The timer definition for bit SIX is invalid because 195 milliseconds is not at
the required 10 millisecond increment (180 MSEC or 190 MSEC would be valid).
C.
Coded Outputs
A coded output is used to toggle a bit at a certain rate, similar to coded
relays. Only output and internal bits may be toggled. The definition of
coded outputs is divided into two parts: the bit to be toggled, and the
toggle rates with controlling bits. The following is the syntax for coded
outputs:
CODED OUTPUT
TOGGLE (id) AT
(number)
~ number?
number)
(unit)
~unit~
(unit)
IF
IF
(controlling bit>
~controlling bit~
~controlling bit~
Where:
‘TOGGLE (id)
AT’ specifies which bit will be toggled.
‘(number) : (unit) IF (controlling bit)
is the controlling clause that
determines the toggle rate, based on the controlling bit.
‘
6400A, p.
5—19
(
Only output and internal bits may be the
bit) . Any type of bit may be
the (controlling bit)
Whenever a (controlling bit) is set (‘1’), the
(toggle bit) is alternated at the rate specified by the corresponding
(~number): (unit) clause.
The unit is specified in cycles per second
(CPS), cycles per minute (CPM) or cycles per hour (CPH). The toggling rate
ranges from 3 CPS to 1 CPH. All of the identifiers specified in a toggle
statement must have been previously defined.
.
The following example is provided for the description of coded outputs:
CODED OUTPUT
TOGGLE LAMP.1 AT
TOGGLE LAMP.2 AT
3: CPS IF IND.A;
2: CPS IF IND.B,
10: CPM IF IND.C,
50: CPM IF IND.D;
When IND.A is assigned a “0’, LAMP.l will be ‘0’. When IND.A is assigned a
‘1’, LAMP.1 will be alternated 3 times per second. Since LAMP.2 has more than
one controlling bit, the order in which the controlling bits are specified
determines the toggle rate. To determine this rate, the controlling bits are
scanned from top to bottom. The first controlling bit that is found to be ‘1’
will determine the toggle rate. If IND.B and IND.C are both ‘0’, and IND.D is
‘1’ then LAMP.2 will be alternated 50 times per minute. However, if more than
one of the controlling bits are ‘1’ (i.e. TND.B and IND.D), then the first
set—controlling bit in the TOGGLE statement will decide the toggle rate.
(Therefore, LAMP.2 will alternate 2 times per second.)
CAUTION
Coded outputs should only be used at the final output
stage. Avoid using coded outputs as internal bits or
in a logic equation, otherwise an excessive amount of
time may be required to process an active coded output.
Coded outputs are intended for lamp—driving applications,
not code—following relays. Use caution when driving
code—following relays.
5.3.1.6
BEGIN Statement
The BEGIN statement is used to mark the beginning of the logic portion of the
program.
defined.
As of this statement, all hits used in the program must have been
This enables the compiler to check for any incorrect usage (i.e.,
trying to assign to an input bit).
simply:
The syntax of the BEGIN statement is
BEGIN
6400A, p. 5—20
5.3.1.7
A.
ASSIGN Statement
General
The logic used to specify the central operations in a MICROLOK or MICROLOK
PLUS program is a simple form of Boolean algebra. The basic ASSIGN statement
consists of an expression (the logic), and a bit or list of bits to which the
expression is assigned.
The syntax of the ASSIGN statement is:
ASSIGN
B.
(a)
(expression)
TO (id
list)
Expression
Operators
The expression contains the Boolean—based logic of the ASSIGN statement. It
is a combination of operands and operators. The operands may be any bit
defined in the program. The operators that join the operands are AND, OR, XOR
(exclusive OR) and NOT.
Table 5—8 describes the four basic operators in truth table form. Included
are the input to the operator and the result. The table also lists the
shorthand notation for each operator. Note that AND, OR and XOR are binary
operators (require two operands), while NOT is a unary operator (only
processes one operand).
Table 5-8.
Inputs
A
B
o
0
1
1
0
1
0
1
ASSIGN Operators Truth Tables
AND
A*B
OR
A+B
XOR
A@C
0
0
0
1
0
1
1
1
0
1
1
0
‘d’A
NOT
s’B
1
1
0
0
1
0
1
0
The following expression performs the logical AND of A and B, which is then
assigned to C.
ASSIGN
(b)
A AND B
TO C;
Operator Precedence
There is a standard precedence level for each logical operator that specifies
the order in which operators are executed. This is needed to avoid ambiguity
in expressions. The following ASSIGNment statements are provided to show how
a given statement could be processed with different results if no order of
precedence existed:
ASSIGN A AND B OR C
ASSIGNCORBANDA
TO D;
TOD;
6400A, p. 5—21
If A and B are 0 and C is I, the first expression would be evaluated (from
The following tabulation
left to right) to 1, and the second would be 0.
lists the precedence (or hierarchy) of operators from higher to lower:
Higher
NOT and AND
Lower
OR and XOR
All ANDs and NOTs are performed first, then ORs and XORs are performed. In
most cases, this hierarchy enables expressions to be written in any desired
order, with no effect on the sequence of the operations. However, the order
is important if an expression contains both ORs and XORs.
These are processed
from left to right.
In the two previous ASSIGN statements ‘A and B’ is always
evaluated first, then the result of ‘A AND B’ is OR’ed with C.
The operator hierarchy can be overridden by using parentheses.
statement is provided as an example:
The following
TO D;
ASSIGN A OR B AND C
If the expression A OR B’ is to be AND’ed with C, parentheses must be added
so that the AND operator is not done first:
TO D;
ASSIGN (A OR B) AND C
The next two examples show the effect of using NOT, the only unary operator:
TO D;
TO D;
ASSIGN NOT A AND B
ASSIGN NOT (A AND B)
These statements produce different results. The first statement consists of
‘NOT A’ AND’ed with ‘B’. The second is the complement (NOT) of ‘A ANDed with
B’.
Complex expressions can be created within the basic syntax of the ASSIGN
statement, for example:
ASSIGN (A OR (B XOR (A OR F) AND WI) AND X TOG;
Figure 5—2 shows the order in which the above expression is evaluated:
ASSIGN (
A OR
(
B XOR
(
A
OR
F
)
AND W
) )
AND
X TO
L11
3
4
5
Figure 5—2.
ASSIGN Operators, Sample Execution
6400A, p. 5—22
G
C.
ASSIGN Statement Object
The expression in an ASSIGN statement is evaluated and then ASSIGNed to a bit
or list of bits. Such a bit(s) is referred to as the object of the ASSIGN
statement.
If the object of ~n ASSIGN statement includes two or more bits,
they are separated with commas and terminated with a semicolon. For example:
ASSIGN A AND B
TO
C,D,E;
A bit may only be assigned a value from one logic equation. The following
program segment is invalid because the bit DOUBLE is assigned a value in two
different equations:
ASSIGN RACE
ASSIGN NOT RACE
TO DOUBLE:
TO DOUBLE;
This is invalid because it can cause bit ‘racing’: whenever bit RACE changes,
then bit DOUBLE can possibly have two values.
P.
END Statement
Once all of the logic has been specified, the application logic program is
terminated by the END statement.
The syntax of the END statement is simply
the word END. Any text which appears after END is ignored.
6400A, p. 5—23
5.4
SUMMARY OF PROGRAM STRUCTURE
The Following outline reviews the basic structure of a MICROLOK or MICROLOK
PLUS vital program:
I.
The program always begins with a PROGRAM statement.
II.
The INTERFACE section is always next.
A.
It must contain at
least one of four standard sub—sections.
B.
When two or more sub—sections are used, they must be in a prescribed
order.
C.
None of the sub—sections can be duplicated elsewhere in the program.
D.
The INTERFACE sub—sections include:
1.
LOCAL
The local output (if any), followed by the local input
(if any) is defined First.
2.
MASTER
If the unit is used in a Master/Slave link with
another MICROLOK or MICROLOK PLUS unit(s), the Master
definition(s) is written next.
3.
SLAVE
If the unit is used in a Slave/Master link with
another MICROLOK or MICROLOK PLUS unit, the Slave
definition(s) is written next.
4.
CODE LINE If the unit is used in a link with a non—vital code
line device, the code line output and input is defined
ne x t.
III. If needed, VAR statement is next.
this statement.
IV.
V.
Any internal bits are defined in
If needed, bit attributes are defined next.
They are developed from
bits already defined in the INTERFACE or VAR sections, and include:
A.
TIMERS.
These are always defined first.
B.
CODED OUTPUTS.
These are always defined second.
The BEGIN statement is entered next, always after all of the above
definitions are completed.
VI.
All ASSIGN statements are specified next.
All programs must contain at
least one ASSIGNment statement.
VII. The END statement is always the last item in the source file and
terminates the program.
6400A, p. 5—24
5.5
SUMMARY OF PROGRAMMING RULES
The Following programming rules must be observed, otherwise an error message
may be generated during compilation:
1.
Make every defined output bit the object of an ASSIGN statement.
2.
Use every defined input
3.
DeFine unused bit locations (between active locations) on an I/O word
as SPARE bits.
4.
MICROLOK:
Do not define more than 15 (maximum) local I/O words in
the INTERFACE section.
MICROLOK PLUS:
in the system logic.
Do not define more than 10 (maximum) local I/O words
in the INTERFACE section.
5.
Do not define more than 16 (maximum) MASTER definitions in the
INTERFACE section.
6.
7.
Do not define more than 16 (maximum) SLAVE definitions in the
INTERFACE section.
Do not define more than 128 input bits or 128 output bits in an
individual address in the Master or Slave section.
8.
Do not define more than one CODE LINE in the INTERFACE section.
9.
Do not define more than 255 input bits (maximum) or 255 output bits
(maximum) in the CODE LINE section.
10.
Always specify
the Initial
Output Inhibit
Delay compiler
switch
(AL)
before the VAR statement.
11.
Do not use system bits for calibration bits (timers or coded
outputs). Use only output and internal bits.
12.
Do not define a bit as both a timer and a coded output.
13.
Do not define more than 1000 bits in the program.
14.
Do not make any bit the object of more than one ASSIGN or coded
output statement.
15.
Do not make more than 20 different bits the object of any one ASSIGN
statement.
16.
Do not write more than 1000 logic equations in a program.
17.
Do not write logic such that a single bit triggers more than 150
equations.
6400A, p.
5—25
5.6
PROGRAMMER GUIDELINES
5.6.1
—
PROGRAM EXECUTION
General
A MICROLOK or MICROLOK PLUS program does not execute in the same manner as a
typical computer program. The latter has a logical order of statements that
are executed in the manner defined by the programmer (usually from top to
bottom). A MICROLOK/MICROLOK PLUS program does not necessarily follow this
pattern because of the type of the logic and applications (i.e., relay based
systems). The program only executes those equations that need to be
re—evaluated.
The resulting sequence may or may not be in top—to—bottom
order; a widely varIable number and sequence of logic equations may be
executed.
Program execution will continue indefinitely as long as changes
occur. To best understand the execution of a MICROLOK/MICROLOK PLUS program,
it is important to understand two internal data structures, specifically the
Timer List and the Trigger List.
5.6.2
Timer List
The timer list is used to hold timer bits when such bits have been commanded
to change state. (When the defined interval elapses, the associated bit
changes state.) Such a bit is called an active bit. It is automatically
placed on the timer list when commanded to change state. The timer list
carries every active timer bit.
The system routinely checks the timer list
for the purpose of clocking, changing (state) and removing timer bits.
outputs are also processed in a similar manner.
5.6.3
5.6.3.1
Coded
Trigger List
General
The trigger list is used to maintain a list of equations that need to be
executed. The completed application program (as loaded into the Peripheral
PCB EPROM(s)) contains information that maps every bit to every equation in
which that bit is used. This mapping is used to ‘trigger’ equations (i.e.,
mark them for execution) whenever a bit changes.
When equations are marked
for execution, they are divided according to a breaks—before—makes rule (refer
to section 5.6.3.2).
When a program begins execution, every logic equation is
evaluated at least once.
5.6.3.2
This is done to initialize the system.
Breaks—Before—Makes Rule
To eliminate timing problems, any bit that changes and triggers an equation
for execution causes the equation to be (a) placed on the trigger list and (b)
marked if the ‘contact’ is being broken or made. This relates directly to the
definition of a bit.
For example, if the defined bit is named CONTACT,
CONTACT refers to the ‘front contact’ of that bit. NOT CONTACT refers to the
‘back contact’ of that bit. When equations are placed on the trigger list,
those involving a break of a contact will always be executed before those
involving a make.
6400A, p. 5—26
The following table shows how an equation will be placed on the trigger list,
based on the changing bit:
Current Value
of BIT
Changing To
Equation Uses
0
0
0
0
1
1
1
1
BIT
NOT BIT
BIT
NOT BIT
Placed On
BREAK
MAKE
MAKE
BREAK
list
list
list
list
The following two ASSIGN statements are provided to show how equations may be
triggered differently:
ASSIGN NOT A
ASSIGN A
TO INDC_1;
TO INDC_2;
%Equation #1
%Equation #2
When bit ‘A’ is assigned a new value, both of these equations will be
triggered for execution. However,
and is now changed to a ‘1’ (SET),
Break list and Equation #2 will be
always done before makes, Equation
if ‘A’ had an initial value of ‘0’ (CLEAR)
then Equation #1 will be triggered on the
trigger on the Make list. Since Breaks are
#1 will be executed before Equation #2.
This follows directly from the breaking of the back contact (used in Equation
#1), and then the making of the front contact (which is used in equation #2).
NOTE
In compiler versions prior to 4.00, the Break—Before—Make
rule was not always followed when processing some logic
equations. Under certain limited cc,nditions, logic
equations could be executed in an order that would not
strictly follow the Break—Before—Make ordering. Version
4.00 of the compiler is modified so that these equations
will be properly processed and executed in the Break—
Before—Make order.
If an older application logic program is recompiled with
Version 4.00 of the MICROLOK Development System, the
EPROMs generated may not be identical to the older EPROMs.
These differences would only involve the order in which
the logic
equations
are processed.
No changes are re-
quired on any installation that is currently in service
and has undergone complete testing during a cut—over.
6400A, p. 5—27
5.6.4
Sample Execution
Timer and Trigger Lists
Tne following program seqment will be used to describe the trigger and timer
—
lists during their executi3n:
-Trigger and Timer Lists Sample Program-
%SLO\
MICROLOK PROGRAM LISTS;
INFERFACE
LOCAL
01.02,03.04;
OUTPUT WORD:
INPUT WORD:
11,12,13;
VAR
FLASH;
TIMER FLASH : SET = 1 :SEC
CLEAR = 1 SEC;
BEGIN
TO FLASH;
ASSIGN NOT FLASH
TO 01;
ASSIGN Ii AND 12
ASSIGN 13 AND FLASH
TO 02.03:
TO 04;
ASSIGN 12 XOR 13
END
% #2\
% #3\
% #4\
For the first sample operation of this sample program, all inputs (Il, 12 and
13) start at ‘0’. At the beginning of the program execution each logic
equation is queued for execution. As a result:
1.
FLASH is placed on the timer list to be SET (‘1’)
2.
‘0’ (11 AND 12) assigned to 01
3.
‘0’ assigned to 02, 03
4.
‘0’ assigned to 04
in 1 second.
At this point the system has executed all equations. No other logic will be
executed (assuming no new inputs) until 1 second has elapsed. After 1 second,
FLASH will be removed from the timer list and SET (‘1’). As a result of the
set of FLASH, every equation that uses FLASH will be queued on the trigger
list. Once all the equations are queued they will be executed. In this case,
equations 1 and 3 are triggered.
1.
FLASH is removed from timer list and SET (‘1’).
equations #1 and #3 on the trigger list.
2.
Equation #1 is removed from the trigger list and evaluated. Since
FLASH is SET (‘1’), FLASH will be placed on the timer list to be
CLEARed (‘0’) in 1 second.
3.
Equation #3 is removed from the trigger list and evaluated.
assigned to 02 and 03
4.
After 1 second, FLASH is removed from the timer list and CLEARed
(‘0’). This places equations #1 and #3 on the trigger list.
6400A, p. 5—28
This places
‘0’
5.
Equation #3 is removed from the trigger list and evaluated.
assigned to 02 and 03
‘0’
~3.
Equation #3 is removed fron the trigger list and evaluated.
Since
FLASH is now CLEARed (‘0’), FLASH will be placed hack on the timer
list to be SET (‘1’) in I second.
The above loop will continue for the duration of the execution of the program,
although equation #3 will yield different results.
For the second sample operation of this program, a ‘1’ (SET) is input to 12.
This causes the following actions (ignoring FLASH and its effect on the
system):
1.
Equations #2 and #4 are placed on the trigger list.
2.
Equation #2 will be removed from the trigger list and evaluated.
‘0’ assigned to 01.
3.
Equation #4 will be removed from the trigger list and evaluated.
‘1’ assigned to 04.
Next, input 13 is changed to a ‘1’ (SET). As a result, Equation #3 is placed
on the trigger list. As FLASH is SET and CLEARed as a timer bit, outputs 02
and 03 flash at the same rate as FLASH. (Refer to the first part of this
example, but with 13 SET.)
5.6.5
Cyclic Logic
Certain types of logic can cause a perpetual operation problem when a MICROLOK
or MICROLOK PLUS program is being executed.
ASSIGN NOT FLASH
For example:
TO FLASH;
If FLASH has not been defined as a timer bit, the above statement will cause a
lock up of the the unit when execution of the program begins. This is due to
FLASH being SET and CLEARed at (in effect) an infinitely short rate because it
has no distinct pick or drop delay. As a result, the system only executes
this equation; other logic processes are inhibited from execution. This type
of logic is indirectly detected by the system because of the excessive time
required for other logic to execute (causing a system shut—down).
6400A, p.
5—29
5.7
MICROLOK DEVELOPMENT SYSTEM (M.D.S.)
-
GENERAL
The MICROLOK Development System (M.D.S.) enables the user to compose, debug
and load a MICROLOK or MIC9OLOK PLUS program into the system hardware.
Tt
consists of a personal computer, a EPROM programmer unit and the compiler
software, which is contained on a single diskette.
(Note: A text editor is
not available with development system.)
Figure 5—3 shows the general steps in the use of the M.D.S.
The source
program is written and entered into the compiler using a text editor. The
compiler checks the program for proper terminology and format and lists any
errors in a listing file. Using the information in this file, the user
returns to the text editor and corrects these errors. The compiler cannot
detect mistakes in the user’s application of logic statements. These are
located using the MICROLOK/MICROLOK PLUS Simulator. Again, the user returns
to the text editor to correct errors. When the simulator indicates
satisfactory operation of the program, it may be loaded into the Peripheral
PCB EPROMs. The compiler is used to convert the source program into EPROM
tables.
The EPROM programmer unit performs final checks of these tables and
the EPPOM itself, before actual loading into the chip.
Figure 5—3.
5.8
M.D.S.
—
MICROLOK Development System Basic Diagram
AVAILABLE FILES
The MICROLOK Development System software uses seven file extensions.
These
extensions enable the user to employ the various parts of the M.D.S:
Extension
File Contents
.MLK
Source program for the application logic.
.MLS
.MDG
Listing file with errors produced by the compiler.
Debug file produced by compiler and used by the simulator (when
~D+ is used).
EPROM code file produced by the compiler/assembler and used by
the simulator and EPROM programmer.
Equations generated by the simulator
Simulator initialization file.
Temporary File used during compilation.
.MCD
.MEQ
.MSI
.MIM
6400A, p. 5—30
5.9
M.D.S.
5.9.1
-
COMPILER
General
The M.D.S. compiler checks and converts the application program into a code
that can be processed by the Executive software (contained in three separate
Peripheral PCB EPROMs). The compiler performs two functions, including code
generation and assembling.
The code generation section checks the source program for any errors, using a
two—phase process: Syntax Analysis and Semantic Analysis. Syntax analysis
looks for improper ‘grammar’ in the program. During this anaylsis, two types
of errors may be detected, including token errors (more than 12 characters,
illegal character, etc.) and statement syntax errors (no BEGIN Reserved Word,
missing semicolon, etc.).
Semantic analysis checks for meaningful statements.
ASSIGN A AND B
For example:
TO C;
If C is defined as an input bit, or B has not been defined, a semantic error
will be detected. Refer to section 6.3 for a complete listing of compiler
error messages.
As the source program is processed, it is converted to a special—purpose code
that, in turn, is processed by the Assembler section of the compiler. The
assembler converts the output of the code generator to a format that can be
processed by the PROM Programmer.
The compiler is accessed by using the batch file: MICROLOK (name) . Typing
in this term invokes the batch file. This file can perform several functions,
depending on how it is invoked:
MICROLOK HELP
—This displays the help file.
This file is below:
MICROLOK Help File
Version 4.01
1.
MICROLOK Compiler
Compile the MICROLOK program
Errors reported in
This HELP screen:
MICROLOK <name>
<name> .MLK
<name> .MLS
MICROLOK help
2.
Program EPROMS
Program EPROMS using the file
MLKPROM
<name> MCD
3.
MICROLOK Simulator
Simulate the execution of a MICROLOK program.
MLKSIM <name>
4.
MICROLOK Scan Time Estimates
Assist in the selection of the Vital Serial
Link Parameters
MLKSCAN
6400A, p.
5—31
MICROLOK (name)
—IF (name) .MLK appears as a file in the current directory,
it is com~i1ed.
Otherwise, a ‘file does not exist’ message
is lisplayed.
The batch file performs several operations:
1.
)etermines if the requested file eKists~ displays error message and
stops if this File does not exist.
2.
Deletes the previous EPROM code (.MCD) file
3.
Calls the code ctenerator
4.
Calls the assembler if no errors were detected.
The hatch File is recommended for compilinQ a MICROLOK or MICROLOK PLUS
o rog ram.
5.9.2
Symbol Table Listing
NOTE
The information in this section is only applicable to
compiler Version 4.00 and higher.
The M.D.S. compiler symbol table indicates (‘EQUATIONS USING FRONT BACK’) the
number of times the ‘front contact’ and the ‘back contact’ of a bit (or
‘relay’) has been used in the application program. An example is shown at the
bottom of page 5—33. This permits the user to verify that all defined bits
are being referenced in the application program.
With this information, the user can determine if there are any incorrectly
used bits in the application logic. For example:
I.
Bit #4 (04) is a local output bit that is not assigned a value,
therefore is it always 0.
2.
Bit #7 (13) is a local input that is not used in any logic equations
(the blanks under ‘Equations Using Front Back’ should be interpreted
as 0 0).
This means that the input does not affect the system
because it is not used in logic (unless it is a controllinQ bit for a
coded output).
3.
Bit #20 (V2) is an internal bit that is used in three logic
equations, but is never assigned a value. Therefore, it is always 0.
4.
Bit #17 (C12) represents a special case.
This bit is a Code Line
input bit that is also assigned a value through the application logic.
6400A, p.
5—32
MICROLOK Source
Version 4 01 ]
I-JAN-1992
Revised 1991, Union Switch & Signal. Inc.
Listing
Copyright
1985.
This
a~
2
3
~IiSD
Page: 1
MICROLOK Comment
is an example of a
enable debugging
4
5
This example program is used to
describe now comments are marked
n the listing file
%
I6
8
9
10
11
MICROLOK PROGRAM EXAMPLE;
%$E.
gotoanewpage\
Version 4.01 1
1-JAN- 1992
1985. Revsied 1q91. Union Switch & Sgnal, Inc.
MICROLOI( Source Listing
Copyright
Page:
2
12
13
INTERFACE
LOCAL
14
15
16
17
18
01,02; %th’s comment is not marked
Li, L2, L3;
OUTPUT DC.STANDARD WORD:
OUTPUT DC.LAMP WORD:
I’
Errors Detected
0
Unassigned Internal/Output Bits
:
f Version 4.01 1
MICROLOK Symbol Table Listing
Bit
Number
Bit
Name
01
Bit
Type
Equations Using
Front
Back
OUTPUT
OUTPUT
2
3
02
03
4
04
5
II
‘UNASSIGNED
INPUT
I?
INPUT
6
7
13
INPUT
14
INPUT
9
MOl
OUTPUT
10
M02 ‘UNASSIGNED
11
MII
MI?
COI
C02
15
C03
INPUT
INPUT
‘UNASSIGNED
OUTPUT
16
17
Cli
CI?
INPUT
INPUT ASGN
18
C13
19
Vi
INPUT
20
21
V2
V3
INTERNAL
‘UNASSIGNED
INTERNAL
13
14
0
2
OUTPUT
8
12
0
Program “EXAMPLE
Interface Information
Type Station Position
LOCAL
I
LOCAL
1
LOCAL
LOCAL
1
1
LOCAL
LOCAL
2
0
0
1
LOCAL
2
3
S
2
6
MASTER
MASTER
MASTER
MASTER
CODELINE
CODELINE
CODELINE
2
2
2
2
3
3
3
2
3
CODELINE
3
0
1
2
CODELINE
CODELINE
3
3
2
1
1
1
2
Debug
Initial Output Delay
MIP Sum
OFF
No Response Time
116 MSEC.
0 MIN.
1.0 SEC.
•
4.0 SEC
Baud Rate
•
1200 BPS
Key On
Key Off
•
OMSEC
•
OMSEC
Time Out
Baud Rate
•
•
•
4.0 SEC
1200BPS
OMSEC
•
OMSEC
SLAVE
Key On
Key Off
6400A, p.
5—33
Clear
1S00:MSEC 2:SEC
0
0
I
0
2
TIMER BIT
SWITCH Settings
MASTER
Time Out
2
3
CODED OUTPUT
LOCAL
OUTPUT
Time Delay
Set
TIMER BIT
0
2
2
Bit
Attribute
0
7
1
3
Page: SYM-1
1500:MSEC 2:SEC
5.9.3
Comments Symbol and Page Generator Compiler Switch
MOTE
The information in this section is only amplicable to
compiler Version 4.00 and hiqher.
In the sample program at the top of page 5—33 note the exclamation Point ()
at the beginning of a listing line.
This is included to help identify
comments (any descriptions between % and
).
This only haopens if the
comment (%) is the First non—blank item on the line, or the comment spans more
than one line. The comment on line 416 is not marked with a
because it is
not the first non-blank item on the line and does not soan multiple lines.
Note that the comment on line #11 utilizes the %~E compiler switch (refer
also to section 6.1.13), causing the compiler to skip to a new page.
\
‘~‘
5.10
5.10.1
M.D.S.
—
SIMULATOR
General
The MICROLOK Simulator allows testing of a completed MICROLOK or MICROLOK PLUS
orogram, prior to actual loading into the system hardware.
Commands are
provided in the simulator to mimic operating aspects of the designed system.
This includes setting and clearing internal and external relays, executina
logic equations, and advancing system time.
Logic statements and the system
clock can be stepped Individually, or simultaneously at any desired
increment.
Commands are also available to display:
(a) inputs and outputs
according to their physical arrangement in the Cardfile, (b) names, bit
numbers and status of individual relays, (c) logic statements as they are
executed.
With the simulator, the source program is compiled in the same manner as the
program that will be loaded into the system hardware, with the exception of
the debug switch (refer to section below). The PROM code file, with extension
.MCD, is the standard input to the simulator. The debug file, with extension
.MDG, supplies relay names, equation information and system bit information.
In the simulator, logic execution follows the same algorithm as the run—time
system.
5.10.2
Access to Simulator
NOTES
The simulator uses the EPROM file produced by the comoiler
If a program is to be debugged using the simulator1 it must be
compiled with the debug switch on (%~D+\ ).
(The default is
%~D—\ .)
This switch does not affect the code file; it only
generates the debug file. The switch does not have to be
turned off to program EPROMs.
6400A, p. 5—34
Command terms in the following text are shown in all capital
letters, to help distinguish them from other words in the text.
In the actual use of the simulator, these words may be typed in
lower case letters as well as upper case. (ce) indicates the
carriage return (or enter) key.
1.
The simulator is run by entering MLKSIM and a carriage return ( (CR)), as
shown in the Help File. The simulator cover screen will then be
displayed, showing the latest version of the simulator.
2.
The prompt on the cover screen asks for the name of the source program.
When the name is entered, a tabulation will appear immediately below.
This table lists the basic totals of bits and boards in the source program:
NOTE
The name of the program will not be prompted if
MLKSIM (name) is used.
K
MICROLOK
Simulator
Version 4.01
Copyright 19B5. Revised 1991.
Union Switch & Signal Inc.
Program->
Total
Total
Total
Total
number
number
number
number
examplel
of
of
of
of
BITS defined
OUTPUT Boards
INPUT Boards
LOCAL I/O Bits
30
3
15
Press <RETURN> to initialize the logic
NJ”
IN
Trigger List: 0
•
0
5.10.3
System Time:
00:00:00:000
Program:
Command-
EXAMPLEl
Timer List: 0
•
0
Screen: Init
Standard Formats
The MLK simulator supports several different screen types.
contains two status lines, as shown below:
Trigger List: m
Command—
,
b
System Time:
Program:
RH :MM :SS :MSEC
name
6400A, p.
5—35
Each screen
Timer List: t
Screen: name
,
c
The two numbers after ‘Trigger List’ define the number of equations queued on
the MAKE list (in) and on the BREAK list (b).
The current system time is
displayed in hours, minutes, seconds and milliseconds.
After ‘Timer List’ are
two numbers that show the number of active timer bits Ct) and the number of
active coded outputs (c).
5.10.4
5.10.4.1
Simulator Operation
General
~‘Jhenthe simulator is executed and the PROM tables are entered, the simulator
performs the necessary housekeeping functions:
(a)
Initialize all bits to 0.
(h)
Reset/clear all data structures (System Time, Trigger List and Timer
List).
(c)
Execute all equations using the following procedure:
1.
Execute equation #1 and then continue executing all triggered
equat ions.
2.
5.10.4.2
Execute equation #2
(etc.)
Sample Program
The Simulator commands are described in subsequent sections, using a small,
sample program shown on page 5—37.
The associated symbol table is shown on
page 5—38. Each of the available commands (see Help screen, section 5.l0.4.X)
is exercised with this program in a typical order of execution, and not in
order shown on the Help screen.
This Is not a required order; with practice,
the user will find it desirable to call up a variety of commands at any point
in the simulation.
NOTE
Certain aspects of the Simulator’s operation, such
as scrolling lines, cannot be depicted in this text.
TO best understand the operation of the Simulator,
the user should enter the sample program in his system
and run the various commands as they are presented.
6400A, p. 5—36
PROGRAM FOR MICROLOK’ SYSTEM
Version 4.01
MICROLOK Source Listing
Copyright
2
1985,
1
3-FEB-i 989
RevIsed 1991, Union Switch & Signal, Inc.
DEBUG ON\
% THIS IS A SAMPLE PROGRAM\
3
4
5
% $L 1
1 MINUTE RESET OUTPUT INHIBIT TIME\
6
MICROLOK PROGRAM EXAMPLE;
7
8
9
10
INTERFACE
LOCAL
OUTPUT WORD:
OUTPUT DC.LAMP WORD:
LAMPOUT:
INPUT WORD:
11
12
13
01,02,03;
L1,L2,L3;
LOl ,L02,L03;
11,12,13,14,15,16;
14
15
VAR
Vi;
16
17
18
TIMER
19
Vi:
SET=100:MSEC
20
01:
03:
SET=560:MSEC
SET=0:MSEC
21
C
22
23
24
25
26
27
28
29
30
CODED OUTPUT
TOGGLE L2 AT
10:CPM IF 13,
20:CPM IF 14;
BEGIN
16
TO
TO
TO
TO
—L2 AND (13 OR 14)
TO
ASSIGN Ii
ASSIGN
ASSIGN
ASSIGN
ASS IG N
31
32
33
CLEAR= 100:MSEC;
CLEAR= 50:MSEC;
CLEAR = 50:MSEC;
Ii AND 12
13 XOR 12
01;
02;
03,V1;
L3;
Li;
END
Errors Detected
0
Unassigned Internal/Output Bits
0
NOTE
In a program for a MICROLOK PLUSTM system, the INTERFACE
section would have a maximum of 10 OUTPUT and INPUT
WORDS defined (10 I/O slots maximum in vital section of
cardfi le).
6400A, p. 5—37
Page: 1
U
I
tD
p.
U’
iii
‘3
4
a.
w
U
IS
‘A
III
Lu
U
i
i
Lu
U
U
Lu
In
II..
Lu
In
U
‘S
In
N
0
N
I-
U’
a
—
—
itt
S
ma
•a
=
~
It—
.4
S
IS
U
I
a
Lu
Li.
III
=3—
a
2
ii
I
I
C
0 r ft 0—
—
‘-
—
ft
O
ft ft ft
—
ft
~nq n
“ii
Mm en en en en
IL
liii
S
IS
ddddSd
I-
4i~iI
II
a
0000
I I.’
2
0
0
p.
ski
In
U! ttttt
t~.
000
NNNuzzzNuuz
I!
‘U
5a
ap.
C•
C
I
5
5’
a
S
U
!29SS
0
-
0-i’d
‘AWlInflInflIn
a
•
r.ftMQiflSP.5S@0-ftMWflCP.~W
—
—
—
———
—
.
—ftenw
ft ft ft ft
sac
it,. ~.
ft ft ft ft ft S
6400A, p. 5—38
I
U
~
I.jJlnlln
“V
5.10.4.3
Help Screen
HELP (ce) produces the standard Simulator Help screen shown below. This
screen shows all display and operating commands, and their purposes. ~‘Jote
that the command names include capital and lower case letters.
The capital
letters are the minimum characters required for a valid command. Usinq the
QUIT command as an example, Q (ce) would cause an error message, but QO (CR)
would be a valid command.
(OUT and QUIT are also valid.)
Capital letters are
only used on the help screen to show the shortest substring that can be
specified for that command.
In practice, these may also be entered in lower
case letters (for example, qu, qui, quit).
K
‘~~HELP SCREEN***
page 1
Display:
DIsplay 10
Display TRiggers
Display RElays
DIsplay RElays (list)
Display Timers
display values of the i/O boards
display equations on trigger list
display relays on display list
VAlue (list)
add relays to the display list
display all relays on timer queue
display value of relay(s)
REMove (list)
remove relay(s) from display list
NOdisplay
full screen display
use color characteristics for display
use monochrome characteristics for display
COlor
MOno
Simulation:
RUn [xJ
EXecute [xl
INCrement [xl
TRace (xi
run system for x milliseconds
execute x number of logic equations
increment system clock x milliseconds
display and execute x logic equations
Press any key for the next HELP page
****HELp SCREEN***
Bit Operations:
SEt (list)
page 2
set the relay(s) in (list)
CLear (list)
INPut (list)
clear the relay(s) in (list)
nput values for the board(s) in (list)
PRint (file)
print logic equations to (file)
REAd (file)
PAuse
read commands from [fuel
when read from command file.
Control:
pauses for keyboard commands
RESet
when entered from the keyboard.
continues reading commands from the command file
restart the simulator with the same program
Quit
end the simulation
CONt
The first four display commands require a combination of DI, a space, and the
minimum letters of the command. For example DI TR (cR) would display
equations currently on the trigger list.
6400A, p.
5—39
The notations after the Help screen commands are defined as follows:
Notation
U
I
(list)
Puncti on
Optional arqument.
If this is not specified, the simulator will
resort to the associated default. For example, if the Display
Relays command is entered without a list of requested relays,
all relays on the relay display list will be shown.
List of bit names/numbers. The list is used to specify a bit or
series of bits (refer to the example in section 5.l0.4.6’~.
Required argument.
file
5.10.4.4
File name.
Tf not specified, it will be prompted.
Default extensions will be added.
Display I/O Command
The Display I/O command (DI 10 (CR) ) shows the local I/O defined in the
source program.
Each horizontal entry describes the board type and the values
for any defined bits.
Output boards may also have check bits defined.
(Check
bits correspond to LAMP.OUT and SUSPEND TEST.)
Display I/O is a dynamic
display; as the program executes, the values are updated. An example is shown
at the top of the following page.
5.10.4.5
Display Triggers Command
The Display Triggers (DI TR(CR) ) command displays all equations queued on
the trigger lists. Equations are displayed by their line number, which is
produced by the compiler.
This is a static display and is not updated during
execution of equations.
An example is shown in the middle of the following
page.
The tabulation at the bottom of the next page can be used to determine
which list an equation will be added to when a bit changes.
6400A, p.
5—40
Display I/O Sreen Example -
-
Bets
Check Bits
dr set dr
dr dr set
Lamp Out
Output Board Type
1 DC Standard
2 DC Lamp
Input Board Type
3
0
dr dr
Bets
DC Standard
Trigger List:
dr
set
set
2
set
dr
dr set
Timer List: I • 1
Screen: I/O Boards
system Time: 00:00:00:000
Command-
Program:
-
EXAMPLEI
Display Triggers Example
Break List
Make List
Line N 29
Line N 25
Line N 25
Line N 26
Line N 26
Line # 27
Line N 27
Line N 28
Line # 28
Np
-
Trigger List Development Table
Equation
Bits
Value
Bit
Bit
Bit
Bit
0
0
1
1
Changing
To
0
0
0
0
Uses
bit
— bit
bit
— bit
6400A, p. 5—41
Queued On
Make
Break
Break
Make
List
List
List
List
5.10.4.6
Display Relays Command
The Display Relays (DI RE
(CR) ) command has two forms: selected relays
and all relays.
For example, 015 RE 1—3 9 14—17 (ce) adds relays 1 through 3,
9, and 14 throuqh 17 to the list. DI RE (CR) shows all relays currently on
the list.
The present state of the relay (set, cir) is shown in the value
column.
If the relay has a pick (set) or drop (clear) delay, its state will
be displayed ir~ the status column.
All times are specified in milliseconds.
If an asterisk (*) is present in the timer description, the bit is an active
coded output.
Up to 34 relays may be displayed at any given time. The relay display list
can hold up to 34 relays.
If more relay additions are attempted to a full
display list, an error message will be generated. When spare relays are
present on an initial listing, they can be removed to allow display of more
active relays on a given screen. This is done with the Remove command; refer
to section 5.10.4.7.
In the following example, DI RE 1—20 (CR) was entered:
-Display Relays-
Bit Number
-
value
Name
1
2
3
01
02
dr
set
03
dr
4
Li
dr
5 L2
61-3
7 LOI
8 L02
9 L03
10 Ii
dr
11
12
13
14
15
16
17
IS
16
Vi
set
set
dr
dr
set
dr
KILL
cIt
set
-
Name
Value
18 RESET
dr
19
20
dir
SYSERR.CLEAR
SYSERR
Status
dr
C
3000 ‘set
dr
dr
dr
set
14
Command-
560
Bit Number
set
12
13
Trigger List: 0
Status
•
2
System Time: 00:00:00:000
Program: EXAMPLEl
Timer List: 1
•
1
Screen: I/O Boards
2
Relays may also be displayed by name.
For example, DI RE LOl (Cs) would
display the same relay as DI RE 7 (CR)
(bit #7 and LOl refer to the same
relay).
6400A, p.
5-42
5.10.4.7
Remove Command
)
The Remove (REM
(CR
) command allows removal of relays From the relay
display list. Relays can be removed by bit number or name.
In the example
below, REM 7—9 (CR) was enterei to remove lamp out relays from the Display
Relays table in the previous section.
___
-Remove Command Example-
6400A, p.
5—43
5.10.4.8
Input Command
The Input (INP
(cR)
command is used to generate inputs on the board
leve].. This command processes one parameter, either a single number, list of
numbers, or a range. The number refers to the input board number with respect
to the inputs. For example, in a MICROLOI< system input 3 refers to the third
input board, not the third board in the I/O cardfile.
In a MICROLOK PLUS
system, input 2 refers to the second input board, not the second board in the
vital section of the cardfile.
___
The example below shows the INput command for board #1 (INP 1 (CR)
:
—Input Command Example—
Enter the values for input bits on Input Board #1
Bit #10
value 0 •
input value 0,
input value 0 •
input value o .
input value 0,
- II
Bit #11 -12
Bit #12 - 13
Bit #13 - IA
Bit #14 - 5
input
Bit #15
input
-
16
I or CR to exit =1
1 or CR to exit =1
1 or CR to exit =0
¶ or CR to exit =0
1 or CR to exit al
value 0, 1 or CR to exit =1
C
If a carriage return ( (CR) ) is entered, all remaining bits on that input
board will be skipped, and the next board requested will be processed and
retain their current values.
6400A, p.
5—44
5.10.4.9
A.
Relay Set and Clear Commands
General
The Set command (SEt
(CR) ) and clear command (CLear
(c~) ) are used to
set or clear a bit, a range of bits or a list of bits.
The following
tabulation provides several examples:
__
Command Entry
Result
SET 19
Requests bit * 19 to set
CLEar INP.7— INP.13
Requests bits INP.7 through INP.13 to
clear
SET 1 9 20—31 46
Requests bits 1,
31 to set.
9, 46 and 20 through
If a request is made to SET/CLEAR a bit that does not result in a change to
system, the following message will be displayed:
“SETting (CLEARing) Bit
will have no effect on the system.”
For example, if an output bit not used in any equation is manually set/cleared
by the user, the above message will be displayed.
This message indicates bits
that may not be used in the logic.
B.
Non—Timer Relays
When a request is made to SET/CLEAR a non—timer bit, the operation is
immediately performed.
The bit is set/cleared and equations that use that hit
are triggered.
C.
Timer Relays
When a request is made to SET/CLEAR a bit with a timer attribute, the
following rules apply:
(Note: This example details the setting of a clear
bit. It is analogous to clearing a set bit.)
1.
If the bit has a zero set delay, it is treated as a non—timer relay.
2.
If the bit has a non—zero set delay, the bit is placed on the timer list.
After the specified time has elapsed, the bit is removed from the list and
then set, causing equations to be triggered.
3.
If the bit is already set, but is on the timer list to be cleared, another
SET command causes the bit to be removed from the timer queue (thus
causing it to remain set).
6400A, p. 5—45
5.10.4.10
Increment Command
The Increment command (INC
executinq loqic equations.
(CR)) is used to increment system time, without
This command has two forms:
INC and INC x
The Increment command without a parameter fINC) increments system time by the
first time found on the time list (i.e., the bit with the smallest delay),
if
the timer list is empty, the INC command has no effect. The Increment command
with a parameter (INC x) advances the system time by x milliseconds, and
updates all timer bits.
5.10.4.11
Display Timers Command
The Display Timers command (DI TI (CR)) produces a static display of
timers and coded output bits on the timer list.
The screen format is
as the relays screen. This is a static display: values do not change
execution.
(An asterisk (*) represents a toggling coded output.) An
all
the same
during
example
is shown below:
-Display Timers Example-
5.10.4.12
Execute Command
The Execute command (EX
(CR) ) performs the opposite function of the
Increment Command, executing logic equations without advancing the system
time. A number may be entered with this command, specifying the number of
trigger list equations to be executed.
If a number is not specified, then all
equations on the trigger list will be executed.
__
In the example below, program example_1 has all bits cleared. Both the
trigger list and the timer lists are empty.
Bits Il and 12 are now set (SET
11 12 (CR) ), resulting in three equations being placed on the trigger list
(equations from lines 25, 26 and 27). The trigger list can be displayed to
view the equations that are queued (DI TR (CR) ) •
To execute the equations in
the trigger list, the execute command (EX e~CR) ) is used.
This results in the
following display:
Queue bit # 1
SETting bit #2
SETting bit #3
Queue bit #16
—
01 on timer queue
—
—
—
02
03
Vl on timer queue
6400A, p.
5—46
The step-by-step process is as follows:
1.
Equation on line #25 is executed, resulting in 01 being placed on the
timer list to be set in 560 milliseconds.
2.
Equation on line #26 is executed, setting bit 02.
3.
Equation on line *27 is executed, setting bit 03 and placing Vl on the
timer list to be set in 100 milliseconds.
5.10.4.13
Trace Command
The Trace command
(TR
(CR) ) performs the same function as the Execute
command, however the actual boolean logic statements are displayed in the
scroll area, as they are executed.
This command has one optional parameter,
which specifies the number of equations to be displayed and executed.
The
following example repeats the operation of the Execute command in the previous
section. With the Trace command, this is done by entering TR(CP)
-Trace Command—
Equation #1 - Line #25
assign Ii
to 01;
Press <RETURN> to execute equation
Queue bit #1
01 on timer queue
Equation #2
Line #26
assign 12 and Ii
to 02;
Press <RETURN> to execute equation
SETting Bit #2
-
--
--
02
#3 - Line #27
assign 12 xor 13
to 03. vi;
Equation
Press <RETURN> to execute equation
SETting Bit #3 - 03
Queue bit #16 - VI on timer queue
--
6400A, p.
5—47
5.10.4.14
Run Command
The Run Command (RU
KCR) ) executes logic equations and increments system
time. Like the Increment command, this command is entered with a time
reoresenting how long the system is to be run. If no time is specified
(RU(CR) ), the system will execute all equations on the Trigger List.
If the
timer relay list has any entries, the first relay will be removed from the
list and the system time will be incremented.
If the program contains no
timer relays, the default will execute all equations on the trigger list.
In the following example, all bits are clear and the trigger and timer lists
are empty.
Bit 13 is set, which causes L2 to toggle at 10 CPM.
L2 is placed
on the timer list to be set in 3000 milliseconds (coded output). The RUN
command can be used to simulate execution for a specified period. In the
example below, RUN 9000 is used.
As a result, the system continues to execute
equations and increment system time until it has been incremented by 9000
milliseconds:
—Pun Command-
SETting Bit #12
- 3
Start Coded Output bit #5
SETting Bit #3
Queue bit #16
SETting Bit #4
-
L2 toggling
- 03
V1 on timer queue
- Li
Increment System Time by 100 Milliseconds
SETting Bit #16
- Vi
-
C
Increment System Time by 2900 Milliseconds
SETting Bit #5
L2
CLEARing Bit #4
- Li
Increment System Time by 3000 Milliseconds
CLEARing Bit #5
- 12
SETt6ing Bit #4
- Li
Increment System Time by 3000 Milliseconds
SETting Bit #5
- L2
CLEARing Bit #4
Li
Trigger List: 0
Command-
0
System Time: 00:00:09:000
Program: EXAMPLE I
Timer List: 0
1
Screen: Entire
2
6400A, p. 5—48
5.10.4.15
Value Command
~c~) ) may be used to display the value of any
The Value command (VA
example,
if the current screen was 10, any other bit may
desired relays. For
the
Value
command. In the example below, VA 16 KCR)
be examined by using
of
the
internal
relay that is not displayed on the screen:
would show the state
—Value of relay 16—
Bits
Output Board Type
Check Bits
I
DC Standard
cli dr
set
2
DC Lamp
dr
dr
Input Board Type
3 DC Standard
set
Lamp Out
cli cli dr
Bits
dr
dr set dr cli cli
NT
System Time: 00:00:09:000
Program: EXAMPLEI
Trigger List: 0 • 2
Command- VAL Vi
relay #16
-Vi
Timer List: 0 • 1
Screen: I/O Boards
set
C
5.10.4.16
Read Command
The Read (REA (CR) ) command may be used to read commands from a file, rather
than the keyboard. It is designed to simplify the re—entering of commands
with long lists of items at the beginning of a simulation, or to execute a
series of commands in sequence.
When the read command is invoked, the initializing file name is requested.
The default extension for this file is .MSI. (If the command READ EXAMPLEl
(CR )is entered, the file used is examplel.MSI.
If the command is simply
READ(CR) , the file name is prompted by INIT FILE—— .
The default
extension of .MSI is always used by the simulator.
Two special commands are valid when reading an Init file, Pause and Continue.
To temporarily suspend the reading of commands from an mit file, a Pause
command may be entered into the file. When this command is read from the
file, the simulator pauses. At this point, the user may enter other commands
from the keyboard. When the continue command is entered, the Read command
continues to process commands from the mit file.
The Pause command will
remain in effect until the Continue command is entered.
6400A, p.
5—49
in the following example, the editor is used to create the file examplel.MSr
with contents:
dig
mo
rel
1
l-l~
1
()
0
1
pause
run 5000
When the command READ EXAMPLEl is entered, commands are read from that file.
The first command displays relays 1—16.
The second command enters the values
of 1, 0, 0 and I for input board #1.
The blank line is needed because more
input bits remain: this line terminates the INPut command. The third command
temporarily suspends reading commands from the mit file. At this point,
other commands may be performed. When the CONTinue command is entered, the
mit file is resumed and the RUN command is performed.
5.10.4.17
Print Command
The Print (PP (CP> ) command is used to convert a compiler PROM table (i.e., a
.MCD file) back into readable statements. Only the assign statements in the
source program are returned.
This command can be used to generate the logic
equations if a comDiler listing is not available.
To execute the Print command with the examplel sample oroeram, the user would
enter PR examplel (CR> . The default file extension for this command is
.MEQ. If another extension is desired, it must be entered in the initial
command. When conversion of the PROM tables is complete, the following
message will appear:
File EXAMPLEl.MEQ contains the logic equations
To obtain the logic equations themselves, use the Quit command (QU (CR> ) to
leave the simulator, then type EXAMLEl.MEQ(CR> . In this instance, the .MEQ
extension must be used.
The format and syntax
the statements in the
identical.
This is a
the examplel program,
25
26
27
28
29
30
ASSIGN
ASSIGN
ASSIGN
ASSIGN
ASSIGN
Then use the DOS TYPE command to examine the file.
of displayed assign statements will differ slightly from
source listing, however they are functionally
normal feature of the simulator system. For example, in
the assign statements were written as follows:
Il
12
Ii AND
13 XOR 12
TO 01;
16
NOT L2 AND (13 OP 14)
END
6400A, o.
5—50
TO 02;
TO 03,Vl;
TO L3,
TO Ll:
C
In the Print command output, these statements would appear as follows:
Logic equations for Proqram:
Equation #1
assign Il
—
EXAMPLE]
Line #25
to 01;
Equation *2
Line *26
assign II and 12
to 02;
—
Equation *3
Line *27
assign 13 xor 12
to 03, Vl;
—
Equation *4
—
assign 16
Line #28
to L3;
Equation *5
Line #29
assign (14 or 13) and (not L2)
—
5.10.4.18
to Ll;
No Display Command
The scroll area of the CRT screen is relatively small. The No Display command
(NO(CR) ) removes the current command screen (i.e. relay tabulation) and
allows the entire CRT screen for scrolling. In turn, this allows more
scrolled information to be viewed at one time.
5.10.4.19
Reset and Quit Commands
The Reset (RES (CR) ) command may be used to reset the simulator.
With this
command:
(a)
All bits are cleared
(b)
(c)
(d)
Trigger and timer lists are reset
System time returned to 00:00:00:000
The logic is initialized
This is the same procedure used when the simulator is initialized with the
program name.
The Quit (QU (CR) ) command terminates the simulation and exits the simulator.
5.10.4.20
Color/Monochrome Commands
Versions 4.00 and higher of the Simulator supports the use of color video
displays. The Simulator makes use of both monochrome and color
characteristics to produce more easily viewed displays. The default mode of
the Simulator is monochrome.
When using a color display, the command “COLOR” can be entered to select color
graphics, instead of monochrome graphics.
Also, a
available to revert back to the default mode.
of information is displayed.
6400A, p. 5—51
MONOCHROME
command is
In either mode, the same volume
.
5.10.5
Simulator Diagnostics
The Simulator checks for the following problems:
Cause of Problem
Type of_Problem
Triqger List Overflow
Either the MAKE or the BREAK trigger is full
and another equation cannot be queued.
System Bit KILL Set.
The logic has assigned a “1” to a KILL bit.
This causes a hardware shutdown.
System Bit RESET Set
The logic has assigned a “1” to a RESET
bit. This causes a hardware reset.
System Bit SYSERP.CLEAR Set
The logic has assigned a “1” to
SYSERR.CLEAR.
This causes all other
SYSERR.x bits to be cleared.
Illegal Bi—Polar Output
Pair
A “1
1” has been assigned to a Bi—Polar
PCB output.
The hardware changes this to a
“0
0” (most restrictive), but the
Simulator leaves them ‘1—1”.
-
—
5.11
M.D.S.
EPROM PROGRAMMER
-
NOTE
This section includes references to the Data I/O Corp.
Model 21A and 201 EPROM programmer, which were originally supplied with the MICROLOK Development System. These
references have been retained for current Model 212
users.
The Model 21A. was replaced in 1987 with the
Data I/O Corp. Model 201 EPROM programmer. The Model
201 was replaced with the Data I/O Corporation Model
212 in 1991. MICROLOK Development System Versions 1.01
and higher accomodate Models 21A and 201. Version 4.01
is required for the Model 212
5.11.1
General
The MICROLOK EPROM Programmer (MLKPROM) is used to make final checks of the
compiler EPROM table, and transfer that table to the Peripheral board EPROM
ICs. This program requires the Data I/O Corporation Model 212 ERPOM
Programmer. The programmer contains a zero insertion force (ZIF) IC socket
for the PROM. US&S recommends EPROM J715029—0409 for the compiler program.
6300A, p. 5—52
5.11.2
Initial Configuration File
—
M.D.S. Versions 1.01 and Higher
The MLKPROM program uses a configuration file to store information regarding
the EPROM programmer and EPPOMs. This program makes use of an “Environment
Table” to determine the location of the configuration file (refer to the
appropriate DOS manual for details on the Environment Table). To make this
determination, the environment table is searched to find the entry
“MOSEPROM”.
If found, the value of this entry determines the name and
location of the configuration file. For example:
Use the SET Command to specify the location of the configuration file:
SET MOSEPROM
=
C:\ MICROLOK\ MDSEPPOM.CFG
This instructs the MLKPROM program that the Configuration File is named
“MDSEPROM.CFG” and that it resides in the directory C: MICROLOK.
If the
entry is not found, the default is “MDSEPROM.CFG” in the current directory.
The first time the MLKPROM program is run, the configuration file is set up to
specify the type of Programmer Unit (Model 21A, 201 or 212) and type of
EPROM. Once this file is complete, it does not have to reentered.
NOTE
Refer to section 5.11.6 if running the following procedure with MICROLOK Development System Versions 1.00.
In Versions 1.02 and higher, the program will stay open
even if an incorrect file name is entered. The user
may retry the file name. Versions 1.02 and higher also
allow the user to retry the connection to the programmer without closing the program.
1.
The first screen asks for selection of Commmunication Port 1 or
Communication Port 2.
This allows use of either Port 1 or Port 2 on the
back of the computer.
Press the “1” key on the terminal for Port 1, or
the “2” key for Port 2.
2.
The second screen in the routine asks for’ selection of either the Model
21A, 201 or 212 programmer. Press the “1” key on the terminal for the
model 21A, the “2” key for the 201 or the
3” key for the 212.
3.
The next screen asks for selection of the EPROM family/pinout code:
If the Model 21A was selected in step 1, the routine will ask for
selection of either the US&S—recommended EPROM (Code 63) or the code for
the alternate EPROM.
(Refer to the Data I/O Model 21A manual for
information on the available EPROM types.)
If the Model 201 or 212 was selected in step 1, the routine will ask for
selection of two possible US&S—recommended EPROMs (7933 or 4533), or the
code for the alternate EPROM.
(Refer to the Data I/O Model 201 or 212
manual for information on the available EPROM types.)
Press the appropriate key for the type of EPROM.
6400A,
0.
5—53
4.
If an alternate EPPOM is to be used, the screen next asks for the
eppropriate code of that EPROM. Refer to the EPPOM Programmer manual for
this code.
5.
When the RETURN key is hit to enter
the EPPOM code, the system is now
ready for programming procedures. The screen shows the options (i.e. Port
1 or Port 2) selected to this point.
If the options are correct, press
“Y to continue.
If not, press “N” to re—enter this information.
5.11.3
Programmer Operation
—
M.D.S. Versions 1.01 and Higher
NOTE
Refer to section 5.11.7 if running the following procedure using MICROLOK Development System Version 1.00.
1. Model 201 or 212 Programmer: Turn on the programmer and check that “SELF
TEST OK
DATA I/O 201 N” appears on the LCD display. This indicates that
the programmer has passed its own start—up diagnostics. Do not make any
other adjustments on the programmer.
Model 21A Programmer:
Open the small access panel on the front of the
Model 21A and set the three left—hand rotary switches to 5, 0, and C,
respectively.
Do not readjust the three right hand switches. Note:
These will be the permanent positions of these switches for all future
operations of the programmer.
They do not have to be reset each time
power is turned on. Then turn on the Model 21A and check that the word
“PASS” appears on the ADDRESS portion of the digital display. This
indicates the programmer has passed its own start—up diagnostics.
2. Type MLKPROM (or mlkprom) and a carriage return ( (CR) ) to enter the
EPROM programmer routine.
3. The file name of the source program should be entered after the prompt
(“Enter the name of the PROM file?”), followed by a (CR)
NOTES
In Versions 1.01 and higher, the program will continue even if an incorrect file name is entered. The
user may retry the file name. Versions 1.01 and higher
also allow the user to retry the connection to the
programmer without terminating the program.
4. When the file name is entered, the program will indicate how many blank
EPROMS are needed to carry the entire program. Type in any key (except
“X”) as indicated by the prompt at the bottom of the screen.
6400A, p.
5—54
C
5. Model
201 or 212 Programmer: As requested on the screen, use the two
scroll keys on the Model 201 or 212 50 that “R5232 PORT” appears on the
LCD display. When this message appears, press the ENTER key on the Model
201 or 212.
Next, use the two scroll keys so that “COMPUTER CONTROL” appears on the
LCD display. When this message appears, press the ENTER key on the Model
201 or 212.
6. Model 21A Programmer:
on the programmer.
Execute the instruction
“Enter (SELECT)
c
(SET)
“
7. As instructed on the screen, place a blank EPROM in the programmer. Make
certain the pin latching lever is in the up position and insert the EPROM
with the notch away from the lever, then close the lever.
8. Press any key on the computer when the EPROM is inserted.
The screen will
then indicate which EPROM (if more than one are required) will be
programmed, the hexadecimal base address of that EPROM, the program file
name and several instructions. The base addresses are ~4000, t6000, t8000
~A000 and ~C000.
9. When any key is pressed on the computer, the screen should show the
following series of messages:
“Blank check of PROM.”
“Downloading program to the PROM programmer.”
Verifying contents of the PROM programmer.”
“Programming PROM.....Please Wait.”
The program is not loaded directly into the EPROM IC when “any key” is
pressed.
Instead:
—
—
—
—
-
The EPROM is first checked to make certain it is blank and properly
inserted in the programmer socket (“Blank check of PROM”).
Next, the program is transferred to temporary memory in the
programmer (“Downloading program....6).
Then, the programmer repeats this procedure to make certain the two
match (“Verifying contents......”).
This is designed to detect any
errors that might have been generated in the tables during the first
downloading process.
Finally, the program is loaded into the EPROM itself, a procedure
that typically takes about two minutes.
Model 201 or 212 programmer:
The message “COMPUTER COt~TROL” remains
on during program downloading, checking and transfer to the EPROM.
Also, a period (.) cycles from left to right on the LCD display.
Model 21A Programmer: Address characters cycle. These represent the
addresses in the EPROM program as they are delivered.
6400A, p.
5—55
10. Any hardware problems or errors in the transferred messages will be
indicated by any of a variety of fault messages at this time.
Messages on
the computer are described in section 5.11.4. Refer to the Programmer
manuals for their particular error messag’~s.
11.
Tf the program requires two or more EPROMs, the computer will display
“PROM $
has been programmed” and the check sum for that EPROM.
If the
installed EPROM is not the last in the set, the computer will repeat the
“Press any keys message and the program will go back to step 7.
12. If the installed EPROM is the last in the set, the computer will display
several messages indicating that the programmer should be reset and turned
off.
13. When the programmer is turned off, pressing any key on the computer will
exit the MLKPROM program.
5.11.4
Error Messages
The tabulation on the following pages lists computer error messages that may
appear in the course of the MLKPROM procedure.
In most cases, the user should
repeat the original procedure as the first means of removing the error.
6300A, p.
5—56
Cause
Message
“PROM programmer failed to
accept a command.”
Remedy
EPROM programmer not
set up properly.
Check Data I/O manual.
Hardware malfunction
Repair or replace EPROM
programmer, cable and/or
computer.
Ouptut of compiler is
not in a valid format
“The PROM file is incorrect:
Invalid format.
Recompile the MICROLOK
program and try again.”
because:
Recompile on new disk.
Bad disk
EPROI4 code file modified Recompile.
after creation by
compiler.
Same as above
“The PROM file is incorrect unexpected end of
Same as above
file”.
“Unable to set PROM type.”
The EPROM programmer did Verify that the EPROM
not recognize the EPROM programmer has been set
type because of a set- up correctly.
up problem.
‘The PROM is not properly
As indicated
Check that the EPROM is
fully inserted in the
holder, and that the
inserted in the PROM
socket.”
lever is down.
Replace EPROM.
Defective EPROM
“The PROM is not blank
During verification step
(Possibly a damaged PROM).
Error code from PROM Programmer:
in download, EPROM programmer returned an
error code. Refer to
programmer manual for
error code meanings.
“Unable to read the PROM
Error code from the PROM
Programmer:
-
EPROM could not be read
by the programmer, error
message returned.
Refer
to programmer manual for
error code meanings.
“Unable to set base
address of the PROM.”
the MICROLOK or MICRO—
Check for possible
errors and recompile the
LOK PLUS hardware.
source program.
Program too large for
6400A, p.
5—57
Cause
Mes sage
“PROM Programmer rejected
the data
Error code from
PROM Programmer:
—
Remedy
Error found by programmer during download,
such as illegal address
in code, or unknown record type. Compiler
output corrupted by bad
disk or attempted alteration in compiler code.
Refer to programmer
manual for error code
meanings.
“Transmission error during
data transfer.”
“D3ta verification error
data conflict betwee~i
computer and PROM Programmer.”
Communication error be- Check settings of rotary
switches on programmer
tween programmer and
computer, involving par- (under keypad), and
ity, framing, overrun
check installation of
or baud rate.
EIA cable.
During verification step
programmer did not receive same data again.
This may be caused by:
Communication error
Repeat procedure
Hardware error
Check EIA cable and prog rammer.
Bad data media (computer did not read same
Use new disk
data).
“The PROM did not program
Programmer detected an
it may be damaged.
error during final pro-
Error
code from PROM programmer:
gramming phase: usually
indicates bad EPROM.
Refer to programmer
manual for error code
meanings.
“Unable to successfully
Programmer terminated
connect with PROM program- operations after a set
number of attempts to
me r.”
create a communications
link.
Usually caused by
bad initialization of
programmer.
6400A, p.
5—58
Check settings of rotary
switches on programmer
(under keypad).
C
5.11.5
Communications Interrupt
If the EPROM programmer is interruoted while interactive with the computer
(i.e., turned off, reset or EIA cable disconnected), the MICROLOK or MICROLOK
PLUS EPROM programmer will cease operation.
This is indicated by lock-up of
the computer (no response to any commands).
To remedy this problem, correct
the problem and reset the entire system.
5.11.6
Initial Configuration File
—
M.D.S Version 1.00
1.
The first screen in the routine asks for selection of either the Model
21A, 201 or 212 programmer. Press the “1” key on the terminal for the
model 21A, the “2” key for the 201, or the “3” key for the 212.
2.
The next screen asks for selection of the EPROM code:
If the Model 21A was selected in step I, the routine will ask for
selection of either the US&S—recommended EPROM (Code 63) or the code for
the alternate EPROM. (Refer to the Data I/O Model 21A manual for
information on the available EPROM types.)
If the Model 201 or 212 was selected in step 1, the routine will ask for
selection of two possible US&S-recommended EPROMs (7933 or 4533), or the
code for the alternate EPROM.
Press the appropriate key for the type of EPROM.
3.
If an alternate EPROM is to be used, the screen next asks for the
appropriate code of that EPROM. Refer to the EPROM Programmer manual for
this code.
4.
When the RETURN key is hit to enter the EPROM code, the system is now
ready for programming procedures.
5.11.7
Prog rammer Operation
—
M.D.S. Versions 1.00
1.
Before entering the MLKPROM program, make certain the compiler debug
switch (for the simulator) is turned “off”. This may be done by changing
the switch to %tD—\ , or erasing the switch (switch—off default in
effect).
If this is not done, a series of error messages will appear at
the start of the MLKPROM program.
2.
Open the small access panel on the front of the Model 21A and set the
three left—hand rotary switches to 5, 0, and C, respectively. Do not
readjust the three right hand switches.
Note? These will be the
permanent positions of these switches for all future operations of the
programmer.
3.
They do not have to be reset each time power is turned on.
Turn on the Model 21A and check that the word “PASS” appears on the
ADDRESS portion of the digital display.
passed its own start—up diagnostics.
6400A, p.
This indicates the programmer has
5—59
4.
Type MLKPROM (or mlkprom) and a carriage return ( (CR) ) to enter the
EPROM programmer routine.
This will generate a cover screen that remains
throughout the program.
This screen shows the version of the EPROM
mroqramrn~r.
5.
The File name of t:he source pro~ran should be entered after the prompt
(“Enter the name of the PROM file?”), followed by a (CR)
6.
When the file name is entered, the program will indicate how many blank
EPROMs are needed to carry the entire program. Type in any key (except
as indicated by the prompt at the bottom of the screen.
7.
x)
To place a blank EPROM in the programmer, make certain the pin latching
lever is in the up position and insert the EPROM with the notch away from
the lever.
8.
Next, execute the instruction “Enter (SELECT) C (SET) on the EPROM
Programmer”, which appears at the bottom of the screen.
9.
The screen will then indicate which EPROM (if more than one are required)
to insert in the programmer, the hexadecimal base address of that EPRON,
the program file name and several instructions. The base addresses are
~4000, ~6000, ~8000 ~A000 and ~C000.
10. When “any key” is pressed, the screen should show the following series of
messages in succession:
Blank check of PROM
Downloading program to the PROM programmer
Verifying contents of the PROM programmer
Programming PROM
Please Wait
The program is not loaded directly into the EPROM IC when “any key” is
pressed.
First, the EPROM is checked to make certain it is blank and
properly inserted in the programmer socket (“Blank check of PROM”). Next,
the program is transferred to temporary memory in the programmer
(“Downloading program....”). Then, the programmer repeats this procedure
to make certain the two match (“Verifying contents.....”).
This is
designed to detect any errors that might have been generated in the tables
during the first downloading process. Finally, the program is loaded into
the EPROM itself, a procedure that typically takes about two minutes.
(Note during the initial EPROM downloading, download check and final
loading that the ADDRESS characters on the Model 21A are cycling. These
present the addresses in the EPROM program as they are delivered.)
11. Any physical problems in the hardware, or errors in the transferred
messages will be indicated by any of a variety of fault messages at this
time.
These are described in section 5.11.4.
6400A, p.
5—60
12. When EPROM programming has been successfully completed, the message “PROM
has been programmed” will appear, and the check sum for that EPROM
will be displayed. The check sum may be used to distinguish the EPROMs.
#__
13.
If more than one EPROM is needed to hold the tables, the “any key” message
will appear. When such a key is pressed, the system will go back to step
8. Otherwise, the terminal will display several messages indicating that
the programmer should be reset and turned off.
14. When the programmer has been turned off, pressing any key will exit
MLKPROM.
5.11.8
EPROM Programmer Driver
—
Color Display
The Version 4.00 MICROLOK EPROM Programmer Driver program supports color video
displays.
In previous versions, the program would only produce displays with
black and white characters.
The new version makes use of colors, and also
supports the Data I/O Corp. Model 212 EPROM programmer.
5.12
5.12.1
M.D.S.
SCAN TIME ESTIMATES PROGRAM
-
General
—
All Versions
NOTE
The Scan Time Estimates Program is only appropriate
for calculating parameters of an all—MICROLOK or MICRO—
LOK PLUS communications link.
It should not be used
for communications between ?4ICROLOK or MICHOLOK PLUS
and other systems.
The Scan Time Estimates Program suggests values for various serial link scan
time parameters.
It is provided as an aid to setting the serial data compiler
This program only provides approximate
values for these parameters. The user may elect to refine these values with
conventional computations.
switches (refer to section 6.1).
The standard Scan Time Estimates Program cover screen is shown at the top of
the next page (typical values entered).
Note that two types of data must be
entered, including those pertaining to the transmission medium (bit rates,
communication channel delay etc.), and those pertaining to I/O (number of
Slave units, total I/O etc.).
Note also that a separate group of questions is
asked for each Slave unit in the system.
6400A, p.
5—61
.
(
MICROLOK
Scan Time Estimate
version 4 01
Copyright 1985, Revised 1991,
Union
Switch & Signal Inc
1200
7 5
Baud Rate (as referenced by %SMB switch)
‘
Communication Channel Delay (in milliseconds)
Number of Slaves
Master Key On Delay
Master Key Off Delay
Slave Key On Delay
? 12
(as set by %SSN switch)
7 12
(as set by %SSF switch)
the line idle
between complete Scan Cycles (in milliseconds)
Slave Key
Off
(as set by %SMN switch)
(as set by %SMF switch)
1
Delay
‘
12
12
Amount of time to force
The following questions apply to Slave I
Number of Transmitted Data Bits
Number of Received Data Bits
Number of Bad Messages to Tolerate per Scan Cycle
(
MICROLOK
Scan Time Estimate
version 4.01
Copyright 1985. Revised 1991.
Union Switch & Signal Inc.
=
90 Milliseconds.
The corresponding switch setting is
No Response Time
%SR9O\)
The nominal MIPSUM = 750 Milliseconds.
(The corresponding switch setting is
%SIO.8\)
The Master Stale Data Time Out = 2.64 Seconds.
The corresponding switch setting is
%SMT2.7\)
The associated Slave Stale Data Time Out = 2.6.4 Seconds.
The corresponding switch setting is
%SST2.7\)
Run
the program again (Y OR N) -->
6400A, o.
5—62
--->
? 500
--->
--->
7 24
? 15
--->
‘
2
SECTION VI
SUPPLEMENTAL DATA
6.1
—
MICROLOK AND MICROLOK PLUS
APPLICATION PROGRAM COMPILER SWITCHES
NOTE
Refer to section 6.4 for baud rate recommendations with 20 mA
current loop interface.
6.1.1
Master Baud Rate
Switch
Variable (*)
1
2
=
=
3
4
5
6
150 BPS
300 BPS
600 BPS
=
1200 BPS
1800 BPS
=
2400 BPS
=
6.1.2
Slave Baud Rate
Switch
Variable (*)
1
6.1.3
Switch
2
=
3
=
4
5
=
6
=
=
150 BPS
300 BPS
600 BPS
1200 BPS
1800 BPS
2400 BPS
Definition/Comments
Default
Bits per second rate of data (transmit and
1200 BPS
receive) on the data link between the
attendant Master unit and its remote Slave
units.
Definition/Comments
Default
Bits per second rate of data (transmit and
1200 BPS
receive) on the data link between the
attendant Slave unit and its single Master
unit.
Master Key—On Delay
Definition/Comments
Default
Integer be-
Minimum period to hold the RTS line active
zero
tween 0 and
before transmitting the first bit of data
Variable
(C)
255 inclusive. to a Slave unit. The actual delay may be
as much as 10 bits longer. Default value
is an actual 0 to 10 bits delay.
The key on/off switch requires the delays
to be specified in bit times.
formula is:
Delay (msec.)
=
The standard
1000 x Bit Time
Baud Pate (Bits/Sec.)
Since the switch requires that the bit time
be specified, solve for the bit time:
Bit time
=
Delay (msec.) x Baud Rate
1000
6400A, p. 6—1
6.1.4
Switch
Slave Key—On Delay
Variable (*)
Defini t ion/Comments
Minimum period to hold the RTS line active
Integer be—
before transmittina the first bit of data
tween 0 and
The actual delay may
255 inclusive. to the Master unit.
be as much as 10 bits longer. Default
value is an actual 0 to 10 bits delay.
Default
zero
Delay is specified in number of bit times.
Refer to section 6.1.3 for definition.
6.1.5
Switch
Master Key—Off Delay
Variable (*)
Defini t ion/Comments
Default
Integer between 0 and
Number of bit lengths of time to hold the
zero
RTS line active after transmitting last data
255 inclusive. bit to a Slave unit. This is in addition to
20 bits added internally due to hardware
characteristics. Default value is an actual
20 bits delay.
6.1.6
Switch
Slave Key—off Delay
Variable (*)
Definition/Comments
Default
Number of bit lengths of time to hold the
zero
RTS line active after transmitting last data
255 inclusive. bit to a Master unit. This is in addition
to 20 bits added internally due to hardware
characteristics. Default value is an actual
20 bits delay.
Integer between 0 and
6.1.7
Switch
C
Master Waiting for Response Time—Out
Variable
(C)
Defini t ion/Comments
Default
Maximum time (msec.) for this Master unit to (See
Integer bewait for a response from a Slave unit,
below)
tween 0 and
2550 inclusive When time—out expires the Master unit will
re—poll the same Slave, only if the previous
message from that Slave unit had no errors.
Scanning of the Slave units is then resumed.
The specified value is rounded upwards to
the next multiple of 10.
Default
=
50 msec.)
Larger of (Slave Key—On Delay or
+
80 Master Bit Times.
6400A, p.
6—2
WARNING
THE FOLLOWING SECTIONS OF THIS MANUAL (6.1.8, 6.1.9 AND 6.1.10)
DESCRIBE HOW TO SELECT THE SERIAL LINK TIMING PARAMETERS
MASTER INTERVAL SUMMATION PARAMETER (MIPSUM’,, MASTER STALE
DATA TIME-OUT (MSDT-O) AND SLAVE STALE DATA TIME-OUT (SSDT-O).
IN MOST APPLICATIONS, THE DEFAULTS OF 1.0 SECOND FOR THE MIPSUM
AND FOUR TIMES MIPSUM (OR 4.0 SECONDS) FOR THE MSDT-O AND
SSDT-O ARE SUFFICIENT TO PROVIDE FAST RESPONSE TO CHANGES, AND
YET PERFORM ALL PROCESSING.
FOR LARGE APPLICATIONS OR APPLICATIONS WITH NUMEROUS SERIAL LINKS AND/OR SERIAL MESSAGES, THE
SETTINGS MAY NEED TO BE INCREASED TO ALLOW MORE TIME FOR
PROCESSING OF NON—SERIAL OPERATIONS.
HOWEVER, IT SHOULD BE
NOTED THAT EXCESSIVELY LONG SETTINGS OF THESE TIMING PARAMETERS
MAY DELAY THE COMMUNICATION (BETWEEN MASTER AND SLAVE UNITS) AND
PROCESSING OF INTERLOCKING STATE CHANGES.
SUCH A DELAY, IN
RARE INSTANCES, MAY RESULT IN AN OPERATING HAZARD.
THEREFORE, CAREFULLY ADJUST THESE PARAMETERS DURING APPLICATION
DEVELOPMENT OR FIELD TESTING. REFER TO SECTION V FOR
APPLICATION PROGRAMMING PROCEDURES AND SERVICE MANUAL 6400C
FOR MICROLOK AND MICROLOK PLUS (VITAL SECTION) FIELD TESTING.
6.1.8
Master Interval Parameter Summation (MIPSUM)
6.1.8.1
Switch Options
Switch
Variable (*)
Definition/Comments
Default
Number between Target scan cycle of all Slave units con—
0.0 and 10.0. nected to this Master unit. This value is
ignored if all Slaves could not be scanned
in such a period.
However, two consecutive
1.0 sec.
updates of serial link inputs are at least
MIPSUM sec. apart.
6.1.8.2
Application Considerations
When the Master uses the default value of 1 second, it will wait only 1 second
before beginning the next polling cycle. If possible, a longer value should
be used to relieve system loading. Serial messages require relatively large
amounts of processing time by the Executive software. Therefore, if the
serial link operations can be set at a slower pace, the Executive software
will have more time to perform other types of processing.
However, do not
select an excessively long MIPSUM value, otherwise old (invalid) data could
remain in the Master and Slave units.
In turn, this could adversely affect
system performance.
6400A, p. 6—3
The setting of the MIPSUM switch mist also be properly coordinated with the
setting of the Stale Data Time—Out, otherwise system performance could again
be adversely affected.
For example, if MIPSUM is set to 10 seconds and the
Stale Data Time—Out switch is set to 5 seconds, the data in the Slave unit is
considered stale because its stale—data timer elapses before the unit can be
updated by the next Master unit communication. The Stale Data Time—Out
default value is four times the MIPSUM value. Therefore, data is not
considered stale until four MIPSUM intervals (or typically four polling
cycles) mass without reception of a valid message.
The optimum setting of the MIPSUM switch can only be based on the application
logic. The logic must be reviewed to determine how often data needs to be
updated in order to achieve fast response and still have enough time to
perform all processin’~.
6.1.9
Master Stale Data Time—Out
6.1.9.1
Switch Options
Switch
Variable (*)
Defini t ion/Comments
(See Below)
Maximum no—update time (sec.) for a Slave.
(See
If data is not updated from a Slave within
be low)
this period, the inputs from the Slave are
forced into the most restrictive state.
Each Slave unit is monitored with its own
Stale Data Time Out. All of these time—outs
run concurrently.
Default
Loss of one Slave does
not affect data from other slaves. The timeout value is identical for all Slave stations.
At expiration, this time—out clears
the “SLAVE.ON” bit for the corresponding
slave.
Variable:
Decimal number between 0.0 and
25.0; up to one decimal digit to the right
of decimal place.
Default:
Smaller of
25.5 sec.
6.1.9.2
(4 x MIPSUM) or
Application Considerations
Make certain not to select too short Stale Data Time—Out, otherwise system
ooerating problems may occur (refer also to section 4.2.5). Also make certain
not to select too long of a Stale Data Time—Out, otherwise an operating hazard
could be created due to delays in clearing the input data base in case of link
failures.
In particular, this time—out must be properly coordinated with the
MIPSUM ~,alue. Refer to section 6.1.8.2 for application considerations.
6400A, p.
6—4
6.1.10
6.1.10.1
Switch
Slave Stale Data Time—Out
Switch Options
Default
Variable (*)
Defini t ion/Comments
(See Below)
(See
Maximum no—update time (sec.) for a Master.
be low)
Even though a Slave may have more than one
Slave address (same unit responds to more
than one Slave address), this time—out
is unique. It causes the entire input data
base from the Master to be cleared if data
from one of the Master Addresses is stale.
At expiration, this time—out clears the
MASTER.ON bit. This time must be longer than
MIPSUM + 0.25 seconds. This is a vital
time-out.
Variable:
Decimal number between 0.0 and
25.0; up to one decimal digit to the right
of decimal place.
Default:
6.1.10.2
Smaller of
(4 x MIPSUM) or 25.5 sec.
Application Considerations
Same comments as Master Stale Data Time—Out; refer to section 6.1.9.2.
6.1.11
Switch
Debug
Variable
Default
Definition/Comments
The debug switch (MD) is used to create a
% ~D
Off
debug file that will be used when simulating
the execution of a program. If a program is
to be used in the Simulator, then debug must
be turned on (.~D+). The tD+ switch does not
affect the EPROM code file;
it only gener-
ates an additional debug file.
6.1.12
Switch
Symbol Table Listing
Variable
Defini t ion/Comments
The symbol table listing switch is used to
suppress the bit listing included at the
end of the compiler listing.
The default for this switch is ON (bit
listing included).
6400A, p.
6—5
Default
On
6.1.13
Switch
Page Generator
Variable
Definition/Comments
Default
This switch is used to separate the compiler
listing into separate pages.
When the
t:he compiler encounters the %~E switch,
the next source line is placed at the top
of a new page in the compiler listing.
6.2
STATUS BYTE ALLOCATION IN NON-VITAL UNI’~
NOTE
In this section, the term “non—vital unit” refers to
the GENISYS system or the non—vital section of the
MICROLOK PLUS system.
The term “vital unit” refers
to the MICROLOK system or the vital section of the
MICROLOK PLUS system.
6.2.1
General
All messages from the vital unit to the non—vital unit consist of the routine
indication data and 15 bytes of vital unit system indication status data. The
status bytes are automatically compiled by the vital unit software and do not
require definition in the vital unit application program. However, the status
bytes will not be processed by the non—vital unit unless they are defined in
the non—vital unit application program. Also, the starting point for the
first byte of status data must be defined (DIP switch 5W5 of the Code System
PCB; refer to section 6.6, part B). Table 6—1 on the following page lists the
vital unit system status bytes.
NOTE
Table 6—1 applies to Executive Software Revisions
3 and higher.
In Revisions 0 through 2, bits 6 and
7 of status byte *2, and bytes 12 and 13 are not
used.
6400A,
p.
6—6
Table
Byte No. Bit No.
0
0—7
1
0
1
2
3*
4—7
2
0
1
2
3
4
5
6
7
6-1.
MICROLOK/MICROLOK PLUS Indication Status Bytes
Message Reported
Selection
Not Used
“A’ On—Line
“8” On—Line
This system was a standby
Off-line computer is healthy.
1
=
0
=
1
=
0
=
System was a standby
and is now on—line
No failover has taken
place
Off—line computer is
healthy
Off—line computer is
not healthy
Not used (future application)
MASTER.ON
SLAVE .ON 1ST
SLAVE.ON 2ND
SLAVE • ON 3RD
SLAVE.ON 4TH
SLAVE.ON 5TH
SLAVE.ON 6TH
SLAVE .ON 7TH
SLAVE
SLAVE
SLAVE
SLAVE
SLAVE
SLAVE
SLAVE
NO.
NO.
NO.
NO.
NO.
NO.
NO.
(Additional SLAVE.ON bits in bytes
12 and 13)
3
0
1
2
3
4
5
4
SYSERR..5
6
SYSERR. 6
7
SYSERR.7
0
1
2
SYSERR • 8
SYSERR.9
3—7
5—7
SYSERR
SYSERR. 1
SYSERR. 2
SYSERR.3
SYSERR. 4
0—7
SYSERR. 10
Not used (future application)
3—byte error code of last vital
error detected
*This bit is only defined in Executive software revision 9 and higher.
to section 4.5.5. for additional information.
6400A, p. 6—7
Refer
yte NoiBi~ No.
Messaoe Reported
Selection
8,9
0—7
Recoverable errors; one bit for
each I/O board
1 = recoverable error de—
tected on this board
10,11
0—7
Non—recoverable errors; one bit
for each I/O board
1 = non—receoverable
error detected on
this board
12
13
l4~l5[0—7
6.2.2
0
1
2
3
4
5
6
7
SLAVE.ON
SLAVE.ON
SLAVE.ON
SLAVE.ON
SLAVE.ON
SLAVE.ON
SLAVE.ON
SLAVE.ON
8TH SLAVE NO.
9TH SLAVE NO.
10TH SLAVE NO.
11TH SLAVE NO.
12TH SLAVE NO.
13TH SLAVE NO.
14TH SLAVE NO.
15TH SLAVE NO.
0
SLAVE.ON 16TH SLAVE NO.
-—
Not used (future application’,
——
-—
——
-—
--—
-—
-—
Indication and Status Bit Mapping
The vital unit status bytes are mapped in the MASTER section of the
application program of the associated non—vital unit, along with routine
indication bits from the vital unit (slave to the non—vital controller).
In
the vital unit application program, outputs to the non—vital unit are defined
in the CODE LINE section.
The following general procedure describes how to
map indication and system status bits in for proper use in the non—vital unit
program:
1.
In the CODE LINE section (OUTPUT sub-section) of the vital unit
application program, define all routine output bits.
2.
In the MASTER section (INPUT sub—section) of the non—vital
application program, define the corresponding routine input bits.
3.
If the number of bits being sent from the vital unit to the non—vital
unit is not evenly divisible by 8, insert SPARE bits for the
remaining locations so that the total number of routine indication
bits and SPARES is a factor of 8.
4.
Record the number of bytes (8—bit) needed to specify all of the
routine indication bits (active plus SPARES, if any). This value
will be used to set the status byte starting point switch on the
vital unit Code System PCB.
6400A, p.
6—8
5.
Referring to Table 6—I, place the first status indication bit
definition after the last routine indication bit (or spare) in the
vital unit INPUT sub—section.
6.
If a particular status bit is not needed, use a SPARE bit in its
place.
7.
Set the status byte start point switch on the Code System PCB, as
described in section 6.6, part 8.
The following application program segments demonstrate allocation of the vital
unit status bits:
—From the Vital Unit Application Program—
MICROLOK PROGRAM
CODE LINE
OUTPUT:
INPUT:
ADDRESS:3
out.l, out.2, out.3, out.4, out.5, out.6, out.7, out.8,
out.9, out.l0, out.ll, out.12;
(etc.)
END
—From the Non-Vital Unit Application Program—
GENISYS PROGRAM
MASTER
OUTPUT:
INPUT:
ADDRESS:3
(etc.)
in.l, in.2, in.3, in.4, in.5, in.6 in.7,
in.8, in.9, in.l0,
in.ll, in.12, spare, spare, spare, spare, spare, spare,
spare, spare
Sysbit.0, spare, spare, spare, spare, spare, spare, spare,
Sysbit.l, Sysbit.2,
END
Note in the vital unit application program that it is not necessary to define
system status indications for output to the non—vital unit. Bit ‘out.l” of
the vital unit application program is received as “in.l” at the non—vital unit
program, “out.2” as ‘in.2’ and so on. In the non—vital unit program, the
total number of routine input bits (12) is not evenly divisible by 8.
Therefore, four spare bits are added after the last routine input bit “inp.12”
to make a total of two bytes. This allows the first vital unit status byte to
be defined at the beginning of the third indication byte in the non—vital unit
program.
used.)
(An additional eight spares are added because the status byte is not
6400A, p.
6—9
rn the above example, only the first and second status indication bytes are
accessed.
“Sysbit.0’ represents bit 0 (‘Data Base Complete”) of Indication
Status Byte I. Seven spares are inserted so that bits 1—7 of byte 1 are
ignored.
“Sysbit.l” and “Sysbit.2” represent the first two bits (Master.on,
Slave.on) of byte 2. Since no other system status bytes are required in the
above program, no other active or spare bits are defined. These will still be
sent by the vital unit, but ignored by the non—vital unit.
The Status Byte Start Switch on the Code System PCB is used to specify which
byte starts the status bytes. This is simply the number of 8—bit bytes used
by the routine indications.
In the above example, the switch would be set to
2. Setting all of the bits on the switch to 1 (FF) suppresses the
transmission of the status bytes.
6.3
COMPILER ERROR MESSAGES
6.3.1
Token Errors
Error No.
1:
3:
5:
6:
7:
9:
11:
12:
13:
6.3.2
Desc ript ion
Input line exceeds
characters, line truncated
Numeric constant greater than 4 digits
ID:
contains an illegal character:
assume
Word more than
characters
Compiler Switch Error: Unknown switch
Compiler Switch Error:
‘+‘
or
expected
Compiler Switch Error:
Number expected
Compiler Switch Error:
Digit expected after
Compiler Switch Error:
Numeric constant exceeds 4 digits
_____
‘
“—‘
Syntax Errors
Error No.
1:
2:
3:
4:
5:
6:
7:
8:
9:
‘
Description
PROGRAM statement missing
Invalid PROGRAM statement
INTERFACE statement missing
INTERFACE section can not be empty
ADDRESS specification expected
“OUTPUT WORD” or “INPUT WORD” specification expected
RELAY NAME expected
Unexpected ID found after U)
Invalid I/O board TYPE
10:
Incorrect interface format
II:
COLON expected
12:
SEMICOLON or COMMA expected
13:
14:
16:
17:
19:
20:
21:
Invalid
Invalid
Invalid
Missing
Invalid
Invalid
“BEGIN’
“SET=OPTION”
timer UNITS specified
timer “SET/CLEAR’ statement
CLEAR parameter on timer declaration
timer declaration
declaration format
missing
6400A, p.
6—10
—
—
.
Syntax Errors (Cont’d)
Descr ipt ion
Error No.
Missing ASSIGN statement
ASSIGN statement or end of program expected
Invalid expression syntax
Invalid “IF” clause in CODED INPUT section
Invalid FREQUENCY RANGE specification
Invalid UNITS for frequency
Invalid “OUTPUT WORD” declaration
Invalid SET command
Invalid “INPUT WORD’ declaration
Invalid “CODED” statement
Invalid ‘TOGGLE’ statement
Invalid ‘TOGGLE FREQUENCY’ specification
All “OUTPUT’ declarations MUST precede “INPUT” declarations
22:
23:
24:
25:
26:
27:
28:
29:
30:
31:
32:
33:
34:
35:
36:
37:
38:
39:
40:
41:
42:
Invalid ‘IF” segment in CODED OUTPUT statement
Invalid CHECK WORD specified
‘IF” expected
“TOGGLE’ expected
Invalid MASTER/SLAVE/CODE—LINE statement
Invalid ‘CODE—LINE’ statement
“OUTPUT” OR “INPUT’ specification expected
No more than one “OUTPUT” specification is expected for each
station address
No more than one “INPUT” specification is expected for each
station address
LOCAL/MASTER/SLAVE/CODE LINE sections MUST be in this order and
MUST NOT be DUPLICATED
Invalid “OUTPUT” declaration
Invalid “INPUT’ declaration
SEMICOLON MISSING
Attempt to define more than
bits
Compiler Stack Overflow
43:
44:
45:
46:
55:
69:
99:
6.3.3
_____
Semantic Errors
Description
Error No
It can not be
2:
Illegal Bit Use:
is the PROGRAM name.
3:
used.
Illegal Bit Use:
not be used.
is a system defined bit.
4:
5:
6:
7:
It can
Maximum memory has been used; too many Timers and Coded Outputs
defined
More than
IDS in an ID list
ID:
already specified in this ID list
______
____________
Illegal Time Specified:
Delay exceeds
_______
MINUTES
8:
Number of LAMPOUT bits exceeds the number of DC.LAMPS bits
defined
9:
Number of SUSPEND TEST bits exceeds the number of OUTPUT bits
defined
6400A, p.
6—11
Semantic Errors
10:
(Cont’d)
Number of LOCAL boards exceeds
NOTE
If writing a program for a a MICROLOK PLUS system, do not
specify more than 10 1/0 boards. If 11 to 15 I/O boards
are specified, the compiler will not display error code 10.
11:
12:
13:
14:
Number of OUTPUT bits exceeds
Number of INPUT bits exceeds
LAMP OUT bits can only be defined with a DC.LAMP board
_______
_______
15:
16:
17:
18:
SUSPEND TEST bits can only be defined with DC.STANDARD,
DC.BIPOLAR and DC.LIMITED boards
Number of different MASTER addresses exceeds
Number of OUTPUT bits for MASTER address
exceeds
Number of INPUT bits for MASTER address
exceeds
MASTER address
has already been declared
19:
20:
Compiler Switch Error: Number specified is out of range
Number of different SLAVE addresses exceeds
21:
22:
23:
Number of OUTPUT bits for SLAVE addresses
Number of INPUT bits for SLAVE addresses
SLAVE address
has already been declared
24:
Number of EQUATION defined exceeds
25:
26:
27:
Number of different CODELINE addresses exceeds
Number of OUTPUT bits for CODELINE address
Number of INPUT bits for CODELINE address
28:
29:
30:
CODELINE address
has already been declared
Bit:
triggers more than
equations
Address for MASTER or SLAVE exceeds
SYSTEM RESPONSE bit
has been defined in an I/O or VAR
statement
31:
_______
_______
_______
_______
_____
_____
______
exceeds
exceeds
______
______
_______
______
_________
35:
Illegal Time Specified:
increments
Illegal Time Specified:
possible
Illegal Bit Use:
36:
Illegal Bit Use:
41:
Illegal Bit Use:
bit
42:
Illegal Bit Use:
47:
______
______
_______________
Address for CODELINE exceeds
45:
_____
_____
______
______
33:
43:
exceeds
exceeds
_____
32:
34:
_______
_______
_______
MSEC must be specified in 10 MSEC
_____
MSEC is the smallest delay
_________________
is multiply defined
________________
is undefined
________________
is an illegal type for a TIMER
________________
can not be a TIMER bit.
an INPUT bit
Illegal Bit Use:
del ay
Illegal Bit Use:
attribute definition
Illegal Bit Use:
It is
________________
multiply defined SET/CLEAR
________
is used in more than 1 relay
_______
________________
can not be ASSIGNed.
________________
can not be TOGGLEd.
It is an
input bit
SO:
Illegal Bit Use:
It is an
INPUT bit
52:
53:
Illegal Bit Use: SPARE can not be a CODED OUTPUT.
Illegal Bit Use: SPARE can not be a controlling bit in a TOGGLE
statement
6400A, p.
6—12
Semantic Errors (Cont’d)
54:
56:
Toggle rate:
is out of range
Illegal Bit Use:
is already used as a
controlling bit in this TOGGLE statement
Illegal Bit Use: SPARE can not be used in an ASSIGN statement
Illegal Bit Use:
is multiply assigned
Illegal Bit Use:
can not be assigned a value in
an ASSIGN statement.
It is a CODED OUTPUT bit.
MASTER data always stale MIPSUM/MASTER STALE DATA TIME OUT ratio
invalid
SLAVE data always stale MIPSUM/SLAVE STALE DATA TIME OUT ratio
invalid
MASTER address can not be zero
Attempt to ASSIGN the result to more than
bits
Illegal Bit Use: SPARE is a system bit.
It is not definable
Reset Output Inhibit Time not specified
Illegal Bit Use: SPARE can not be used as a TIMER bit
Illegal Time Specified: SET and CLEAR delay both 0
________________
60:
61:
________________
63:
64:
65:
66:
69~
70:
71:
75:
76:
6.4
______
BAUD RATE SELECTION FOR CURRENT LOOP INTERFACE
The serial communications baud rate for a system using the 20 mA current loop
option is restricted by the length and characteristics of the current loon
cable. Figure 6—1 shows a typical performance chart for *19 wire having a
capacitance of 0.09 microfarads per 1000 feet, a resistance of 30 ohms per
mile, and carrying the maximum baud rate of 9600.
For smaller wire gauges or
poorer performance characteristics (higher capacitance or resistance), the
effective distance would be reduced.
BAUD
RATE
19.200
9600
4800
2400
1200
600
300
DISTANCE
1.00
2.00
(MILES)
Figure 6—1.
Baud Rate Vs. Distance For Current Loop Interface
6400A, p. 6—13
6.5
A.
PERIPHERAL PCB SWITCH AND JUMPER ADJUSTMENTS (See Figure 6—2)
Dual Computer ‘Locking”
—
MICROLOK Only
Toggle switch SWS is used to set the overall oQerating mode of the two
compL.ters in the dual-CPU version of MICROLOK.
When SWS is placed in the LOCK
OFF (upper) position, the respective CPU remains off line at all times, even
if the alternate CPU goes off line. Conversely, when 5W5 is moved to the LOCK
ON position, the respective CPU remains on—line at all times. If this CPU
fails, a no failover will occur to the alternate CPU, even if that CPU is
ready to go on-line.
For normal operation of the MICROLOK dual—CPU system, set SWS to the AUTO
(center) position on both Perhipheral PCBs.
This will allow either CPU to
assume on—line status.
If the lock function is required, make certain not to
set both 5W5 switches to the same lock (on or off) position. On the
single-CPU version of MICROLOK, set 5W5 to the LOCK ON or AUTO position.
B.
System Normal or Error Displaying
Toggle switch 5W4 is used in conjunction with the RECOVER pushbutton on the
Processor PCB to display errors when a system malfunction has occurred (refer
to SM—6400C). For initial operation of the MICROLOK or MICROLOK PLUS system,
place SW4 in the OPERATE (upper) position.
In the dual—CPU MICROLOR system,
make certain both 5W3 switches are in the OPERATE position.
C.
System Normal or Reset
Toggle switch 5W3 is used to reset the MICROLOK or MICROLOK PLUS system or
place it in the normal operating mode.
For initial operation of the system,
place SW3 in the NORMAL (upper) position.
In the dual—CPU MICROLOK system,
make certain both 5W3 switches are in the NORMAL position.
D.
Dual Computer A or B Select
—
MICROLOK Only
Rocker *1 of DIP switch SWI is used to identify the respective group of CPU
boards as either the ‘A” or ‘B’ computer in the dual—computer version of
MICROLOK. When rocker *1 is moved to the closed position, the respective CPU
section becomes the “A” computer.
The alternate rocker position (open) makes
the CPU section the ‘B” computer. During a power—up system reset, the ‘B” CPU
reset procedure is slightly delayed so that the “A” CPU is the first to
complete its reset procedure and become the on—line computer.
This procedure
will only occur if switch 5W5 is in the AUTO position (refer to part A, this
section).
For normal operation of the MICROLOK dual-CPU system, place rocker *1 on each
Peripheral board in opposite positions.
Do not place both rockers in the same
position.
In the single—CPU version of MICROLOK, set Rocker *1 to the open
position.
6400A, r). 6—14
ON: WATCHDOG CIRCUIT
OFF
ON: SWS
HAS APPLIED RESET
NORMAL OPERATION
IN LOCK-OFF OR LOCK-ON POSITION
OFF:
6
LED
SWS IN AUTO POSITION
LED S
RTS FROM MASTER PORT ~ANDed” WITH I-ON-LINE.
LEO FLASHES EVERY TIME MASTER POLLS A SLAVE.
THIS CPU NEVER
PERIPHERAL PCB
N451441.5502
(WHITE EJECTOR)
LED 7
LOCK-OFF
ON-LINE
NORMAL POSITION: THIS CPU READY FOR
AUTOMATIC FAILOVER (NORMAL POS. FOR
ALL SYSTEMS WITH OR WITHOUT FAILOVER.
AUTO
SW-S
7——-J
LOCK-ON~
THIS CPU ALWAYS ON-LINE
NORMAL OPERATION
OPERATE
NOTE:
~
SYSTEM OPERATING: DISPLAYS LOGGED ERROR ON
LEDS ¶ - 4.
SYSTEM DOWN: WORKS WITH SWi ON PROCESSOR
PCB TO DISPLAY LOGGED ERROR ON LEDS ¶ - 4
SWITCH SW-5 AND JUMPERS
JI/J2 NOT APLLICABLE TO
MICROLOK PLUS TM - SET SW-S
TO AUTO AND OMIT JUMPERS
J1/J2 FOR MICROLOK PLUS TM
WHEN 5W4 IS IN OSPL ERROR POSITION -OPERATION
OF HIS BUTTON CLEARS ALL LOGGED ERRORS.
WHEN 5W4 IS IN OPERATE POSITION - OPERATION
OF THIS SUTTON CLEARS STATUS CODES.
NORMAL OPERATION -4------
SYSTEM-WIDE RESET
L
-4---—--
NORMAL
R~~Z~IIi~
CLOSED: THIS IS CPU “A” (ON-LINE FIRST)
OPEN: THIS IS CPU “8” (YIELDS TO “A” ON-LINE)
I:
OPENS I
NOT USED
OPEN: NORMAL OPERATION
12
SW-I
CLOSED: QUICK POLL OF SLAVES
FOR DEBUGGING. WHEN THIS
SWITCH IS iN THE ON POSITION.
THE SYSTEM LOGS ERROR AI.
Ji
EJ’
EJ’
OPEN: LOGS BUT DOES
NOT DISPLAY RECOVERABLE
ERRORS ON VITAL SERIAL
LINK.
CLOSED: LOGS AND
DISPLAYS RECOVERABLE
ERRORS ON VITAL SERIAL
LINK.
WHEN SWA IS IN
OPERATE POSITION,
THESE LEDS SHOW
STATUS CODES AND
SHORT ERROR CODES
FAILOVER ENABLE JUMPERS MUST BE
INSTALLED FOR AUTO.
MATIC FAILOVER. NOT
USED WHEN NO
FAILOVER IN USE.
LED 4
•
LED 3
•
LED 2
WHEN 5W4 IS IN
DSPL ERROR
POSITION. THESE
FLASH LONG ERRORS.
17
.~1
16
18
15
—
J,
—
110
LED I
“0”
Ja
J3
“1-
2
04
08
STATION ADDRESS
VITAL LINK SLAVE STATION ADDRESS
(ADDRESS 3 SHOWN)
Figure 6—2.
Peripheral PCB Manual Adjustments and LEDs
6400A,
D.
6—15
K
E.
Serial Link Debug
Rocker #3 of DIP switch SWl is used to enable debugging of the vital serial
lirlk.
When this rocker is set to the closed position, it overrides various
system polling, etc. nines set up in the applications program. Also, detailed
error code “Al” is shown on the four system status LEDs (of the Peripheral
board).
For normal system operation, set this rocker to the open position.
F.
Vital Serial Error Display On/Off
Rocker #4 of DIP switch SWl determines whether the system will display
recoverable errors within the vital serial link. When rocker 14 is moved to
the open position, the system status LEDs will show these errors. When the
rocker is moved to the closed position, these errors are only logged
internally. Rocker *4 may be placed in either position for normal system
operation.
G.
Master/Slave Unit Address
Jumpers J3 through JlO are used to set the Master or Slave unit hardware
address in a vital serial communications link.
They create a number that can
be read by the system software, using binary addition.
For example, to create
unit address number 3, install jumpers in sockets J6 and JS, and leave the
remaining sockets open.
(Note that J6 and JS are on the ‘1’ side of the
jumper set.)
The address set with these jumpers must also be entered in the
application program; refer to section 5.3.1.3, parts C and D.
H.
Failover Enable
-
MICROLOK Only
Jumpers Jl and J2 are factory—installed when the Peripheral PCB is used in the
dual—CPU version of MICROLOK.
These jumpers enable carry—over of failover
signals to the alternate computer.
Check that both of these jumpers are
either present or absent (per the application), prior to PCB installation.
6.6
CODE SYSTEM INTERFACE PCB SWITCH ADJUSTMENTS (See Figure 6—3)
NOTE
In this section, the term “vital unit’ refers to
the MICROLOK system or the vital section of the
MICROLOK PLUS system.
The term ‘non—vital unit”
refers to the GENISYS system or the non—vital
section of the MICROLOK PLUS system.
A.
Station Address
DIP switch SW4 is used to set the station address of the vital unit.
This is
the address that identifies the vital unit to the non—vital unit.
It can be
any value in the range of 0 to 255.
Table 6—2 lists rocker positions and
corresponding address values.
Selected bits are added together to form the
desired address.
For example, vital unit station address 3 is created by
placing rockers 1 and 2 to the ‘1” (open) position and all others to the “0’
(closed) position.
6400A, p.
6—16
2
“-I
~
•U
~
I-
—~-~-~
~
I
~
~
A
£
a
0
A
C
00000000
ti~ T~
0
-‘‘2
4
‘o
2
I
0
2
2
‘4’
w
~J
‘
U
4
-c~J
2
U
~
0
aU
4
~
2
U
I-I
U
4
a
~.1
-ix
a. w
0
0
-~
Z~
O’~
U..
~
~—
,.
U
C
0
a
9
,-‘a
z
,~
1
I
33~
0VUNUO~SN4
— — MNNflN
a~
4—
.jrj3
I...
~
—
.n.a
• •
0I
~i-’I~t
III
~2
~1L ~
-~
4;:
I
N
~i~1
4o1
.-,.we
4
U;~!Z~RRRRRRRR
~&
———
~iU ~a
~flM
=
N
fl
~5 ~j
ace
oe~=eo——oe——oe——
~@@a
—
S...
WAil
eecoe@o
—
U
N
_______________
~
I
as
~:
eeoc..——
___________
....ee.-—ee——ee—
—0
r
~1
I
~~555~
I
•
Ca.
N
C
I
I
20~
Cu.~.
Uzi
II
2
~OoP •
‘a
...
ceo 0———— 000~
—
ecoeeee
—
i
I
____________________
—
I
L
LU
‘3
4
LU
I-
0
0.
U¶
a.
Oo
-~
‘2
V
IhJ;
2
-A
0~
~
LU
U
U-
u,0
~2
-j
4
I
I’
2
4
—
2
O
LU
LU
Iz
0
4
N
I
I
U
LU
a
-J
4
LU
0
2
IS
C
a
0
a4
LU
I.
LI
‘A
‘A
LU
a
2
‘~
—
LU
I’‘A
‘A
U.
U.
4
LU
-j
0
2
-J
2
I-
4
4
LU
0
I-i
Figure 6—3.
‘a
£~
~
U
-A
‘a
4
LU
A-
01.~
—
t.
4
-J
N
—
U
~
4—
V.l
N
U~
WU
~J
0
2
4-i
.J
a
U
~“
C
2
0
U.
LI.
0
a.
‘A
2
V
2
A-
-I
0
LU
LU
-J
LU
0
‘A
‘A
LU
0
LU
IU
avi
OLU
41-
LU
-A
LU
I-
4
2
2’A
F
4
44
0
4
‘A ‘A
S
0
I‘A
a.
Code System Ir terface PCB Manual Adjustments and LEDs
6 OOA,
p~
6—17
LU
‘A
ISA
0
4
z
I
.1
Table 6-2.
SW4 Rocker
Vital Unit/Non—Vital Unit Station Address
Bit Value
SW4 Rocker
Bit Value
1
2
3
1
2
4
5
6
7
16
32
64
4
8
8
128
For normal operation of the vital unit, set the 5W4 rockers to the proper
address as specified in the non—vital controller that serves as the Master.
In the dual—CPU MICROLOK system, make certain both 5W4 switches are set at the
same address.
B.
Status Byte Starting Address
DIP switch 5W5 is used to define the starting address of the first vital unit
system status byte that is sent to the non—vital unit. Section 6.2 gives the
procedure for determining this address.
If address 255 is selected (rockers
all I, or hexadecimal FF), no system status information will be sent. The bit
values for the 5W5 rockers are the same as the 5W4 rockers; refer to Table
6—2. For normal operation of the vital unit, set the 5W5 rockers to the
desired address. In the dual—CPU MICROLOK system, make certain both SWS
switches are set to the same address.
C.
Communications Baud Rate
Rockers 1 through 4 of DIP switch 5W6 are used to set the baud rate of the
serial communications between the vital unit and non—vital unit.
This is the
same rate set in the non—vital unit application program.
Each binary
combination of these four rockers represents a different baud rate, as shown
in Table 6—3. For normal operation of the vital unit, set 5W6 rockers 1—4 for
the same baud rate set on the non—vital unit controller PCB. In the dual—CPU
MICROLOK system, make certain both 5W6 switches are set for the same baud rate.
Table 6—3.
Vital Unit/Non—Vital Unit Serial Link Baud Rates
5W6 Rockers
5W6 Rockers
1
2
3
4
Baud Rate
(BPS)
1
0
1
0
1
0
1
0
1
1
0
0
1
1
0
0
0
1
1
1
1
0
0
0
0
0
0
0
50
75
110
134
150
300
600
6400A, p.
1
2
3
4
Baud Rate
(BPS)
0
1
0
1
0
1
0
0
0
1
1
0
0
1
0
0
0
0
1
1
1
1
1
1
1
1
1
1
1200
1800I
2400
3600
4800
7200
9600
6—18
D.
Half or Duplex Communication
Rocker 17 of switch 5W6 is used
on the serial link between the v
mode (rocker in the closed posit
direction at any given time.
In
position), transmissions may occ
normal operation of the vital un
same mode as the non—vital unit
MICROLOK system, make certain bo
communications mode.
E.
o select half or full duplex communications
tal and non—vital units.
In the half duplex
on), data transmissions only occur in one
the full duplex mode (rocker in the open
r in both directions at the same time.
For
t/non—vital unit link, set this rocker to the
typically, half-duplex).
In the dual—CPU
h 5W6 switches are set for the same
Transmit Data Enable
Rocker *8 of switch 5W6 is used o enable the data transmit function on the
For normal operation, keep this rocker in
serial link to the non—vital uni
the closed position.
F.
Key-On and Key-Off Delays
DIP switch SW7 is used to select
the vital unit communicates with
Rockers 1 through 4 define the K
the Key—Off delays. Table 6-4 1
values.
When the vital unit and non—vita
be used.
Table 6—4.
the carrier Key—On and Key—Off delays when
non—vital unit through a carrier modem.
y—On delays while rockers 5 through 8 define
sts rocker positions and corresponding delay
unit communicate directly,
zero delays may
Ke~ -On and Key—Off Delays (5W6)
Switch 7 Rockers
Switch 7 Rockers
1
2
3
4
Key—On Delay
1
2
3
4
Key—Off Delay
0
1
0
1
0
0
0
0
1
1
1
1
0
0
0
0
0
0
0
0
0
0
0
1
1
1
zero delay
4
8
12
16
20
24
28
32
36
40
0
1
0
0
0
1
0
0
0
0
0
0
zero delay
1
1
0
0
0
0
1
0
1
0
1
0
1
0
0
0
1
1
0
0
1
1
0
0
1
1
0
1
0
8
12
16
20
0
1
1
0
24
1
1
1
0
28
1
1
0
1
44
0
1
0
1
0
0
1
1
1
1
1
1
1
1
1
1
48
52
56
60
0
1
0
1
0
1
0
1
0
0
1
1
0
0
1
1
0
0
0
0
1
1
1
1
1
1
1
1
1
1
1
1
o
bOA,
p.
6—19
4
32
36
40
44
48
52
56
60
.
F.
Carrier Test
Toggle switch SWl, 5W2, SW3 and SWlO are used for standard testing of carrier
signal used by modem-linked vital and non—vital units. For normal operation
of the MICROLOK system, set these switches as follows:
Switzh No
Posit ion
SW 1
5W2
5W3
SWlO
G.
NORMAL
OPERATE
NORMAL
RUN
Serial Data Byte Format
NOTE
This function is only applicable to Code System
Interface PCB Executive software Revisions 3 and
higher. In earlier revisions, the data byte format
is fixed at 1 start bit, 8 data bits, 1 stop bit and
no parity.
Rockers 1, 2 and 3 of DIP switch 5W8 are used to set the data byte format for
the serial data port on the Code System PCB. Table 6—5 lists the switch
settings for the available format options:
Table 6—5.
5W8 Rocker
Serial Port Data Byte Format
(5W8)
Position
Format Selected
3
Closed
Open
2 stop bits
1 stop bit (default)
3
Closed
Open
Parity enabled
Parity disabled (default)
3
Closed
Open
Even parity
Odd Parity
6400A, p.
6—20
IUNION SWITCH & SIGNALI~J
A member 01 Ihe ANSALDO Group
~,8OOCOrp,y~te b,i~e P.ttm.ircjh. P’~ IS2J/
SERVICE MANUAL 6400A
A ~PENDIX A
PARTS LIST
-
I EVELOPMENT SYSTEM
MI CROLOK
VITAL INTERLC ~KlNGCONTROL SYSTEM
MICR )LOK PLUS
VITAL
+
TM
NON-V ~ALCONTROL PACKAGE
(VI ~ALSECTION)
Up t and including
Executive Software Revision 9
Application Lo jic Compiler Version 4.01
October, 1991
1D0323F, 0324F
A-i 0/91-2774-1
COPYRIGHT 1991. UNION SWITCH & SIGNAL NC.
Pi(IN~L, IN USA
~DO
Lj~ortI
I
I
p
DEVELOPMENT SYSTEM (M.D.S.) EQ(JII ~¶ENT
US&S Part No.
Item
DeSCript:
n
EPROM Programmer
Data I/O :orp. Model 212
J703105—0003
Cable
EPROM Pr
N451458—7201
EPROM Eraser
Spectroni :s PE—14T
J7031 05—00 05
Diskette ~~z/Software
M.D.S., I ~rd and Floppy Disk
Versions
5—1/4”
N451 232—0105
M.D.S., lird and Floppy Disk
Versions
3—l/2
N451232—0113
Blank Diskette
5—1/4”
J703105—0004
Blank Diskette
3—112”
3703105—0008
~rammer to PC
(25—Pin)
-
Diskette w/Software
-
*Model 201 replaced Model 21A in [987.
Model 212 replaced Model 201 in [991.
E
~00A,
P.
A—l
I
I
p