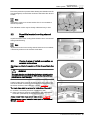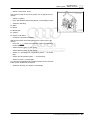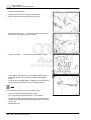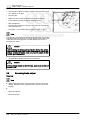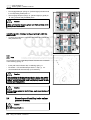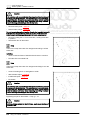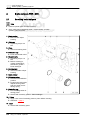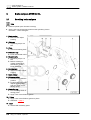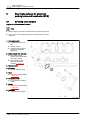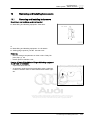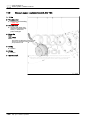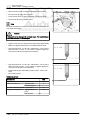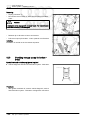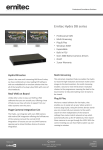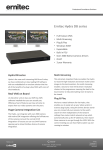
1
Service
Workshop Manual
Audi A8 2003 ➤
Brake system
Edition 03.2013
Protected by copyright. Copying for private or commercial purposes, in part or in whole, is not
permitted unless authorised by AUDI AG. AUDI AG does not guarantee or accept any liability
with respect to the correctness of information in this document. Copyright by AUDI AG.
Service Department. Technical Information
Service
List of Workshop Manual Repair GroupsList of Workshop Manual
Repair GroupsList of Workshop Manual Repair Groups
Repair Group
00 - Technical data Protected by copyright. Copying for private or commercial purposes, in part or in whole, is not
unless authorised by AUDI AG. AUDI AG does not guarantee or accept any liability
45 - Anti-lock brake permitted
system
with respect to the correctness of information in this document. Copyright by AUDI AG.
46 - Brakes - mechanism
47 - Brakes - hydraulics
Technical information should always be available to the foremen and mechanics, because their
careful and constant adherence to the instructions is essential to ensure vehicle road-worthiness and
safety. In addition, the normal basic safety precautions for working on motor vehicles must, as a
matter of course, be observed.
All rights reserved.
No reproduction without prior agreement from publisher.
Copyright © 2013 Audi AG, Ingolstadt
A0051005420
Audi A8 2003 ➤
Brake system - Edition 03.2013
Contents
00 - Technical data . . . . . . . . . . . . . . . . . . . . . . . . . . . . . . . . . . . . . . . . . . . . . . . . . . . .
1
2
2.1
2.2
2.3
2.4
2.5
2.6
3
3.1
3.2
3.3
3.4
4
4.1
4.2
4.3
4.4
5
5.1
Brakes, wear limits . . . . . . . . . . . . . . . . . . . . . . . . . . . . . . . . . . . . . . . . . . . . . . . . . . . . . . . .
Assessment of ceramic brake discs . . . . . . . . . . . . . . . . . . . . . . . . . . . . . . . . . . . . . . . . . .
Visible features of ceramic brake discs . . . . . . . . . . . . . . . . . . . . . . . . . . . . . . . . . . . . . . . .
Superficial cracks in cooling channel lands . . . . . . . . . . . . . . . . . . . . . . . . . . . . . . . . . . . .
Cracks in area of bolted connection on ceramic brake discs . . . . . . . . . . . . . . . . . . . . . . . .
Edge fractures . . . . . . . . . . . . . . . . . . . . . . . . . . . . . . . . . . . . . . . . . . . . . . . . . . . . . . . . . .
Chipping on ceramic brake discs . . . . . . . . . . . . . . . . . . . . . . . . . . . . . . . . . . . . . . . . . . . .
Cracks extending into cooling channels . . . . . . . . . . . . . . . . . . . . . . . . . . . . . . . . . . . . . . . .
Assessing degree of wear on ceramic brake discs . . . . . . . . . . . . . . . . . . . . . . . . . . . . . .
Wear assessment by checking thickness of brake disc . . . . . . . . . . . . . . . . . . . . . . . . . . . .
Wear assessment according to wear indicators . . . . . . . . . . . . . . . . . . . . . . . . . . . . . . . . . .
Wear assessment by weighing brake disc . . . . . . . . . . . . . . . . . . . . . . . . . . . . . . . . . . . . . .
Wear assessment by weighing brake disc . . . . . . . . . . . . . . . . . . . . . . . . . . . . . . . . . . . . . .
Brake test . . . . . . . . . . . . . . . . . . . . . . . . . . . . . . . . . . . . . . . . . . . . . . . . . . . . . . . . . . . . . .
General notes . . . . . . . . . . . . . . . . . . . . . . . . . . . . . . . . . . . . . . . . . . . . . . . . . . . . . . . . . . . .
Vehicles with front-wheel drive . . . . . . . . . . . . . . . . . . . . . . . . . . . . . . . . . . . . . . . . . . . . . .
Vehicles with four-wheel drive . . . . . . . . . . . . . . . . . . . . . . . . . . . . . . . . . . . . . . . . . . . . . .
EPB (Electronic Parking Brake) on brake dynamometer . . . . . . . . . . . . . . . . . . . . . . . . . .
Brake fluid . . . . . . . . . . . . . . . . . . . . . . . . . . . . . . . . . . . . . . . . . . . . . . . . . . . . . . . . . . . . . .
General notes . . . . . . . . . . . . . . . . . . . . . . . . . . . . . . . . . . . . . . . . . . . . . . . . . . . . . . . . . . . .
1
1
4
4
5
5
6
6
6
7
11
11
12
13
15
15
15
15
15
17
17
45 - Anti-lock brake system . . . . . . . . . . . . . . . . . . . . . . . . . . . . . . . . . . . . . . . . . . . . . . 18
1
General information on the anti-lock brake system . . . . . . . . . . . . . . . . . . . . . . . . . . . . . .
1.1
Notes for repair work on the ABS . . . . . . . . . . . . . . . . . . . . . . . . . . . . . . . . . . . . . . . . . . . .
2copyright.Connecting
VAS
505x and
selecting
functions
Protected by
Copying for private
or commercial
purposes,
in part or in
whole, is not . . . . . . . . . . . . . . . . . . . . . . . . . . . . . . . . . .
permitted unless authorised by AUDI AG. AUDI AG does not guarantee or accept any liability
3
Electronic stabilisation program Bosch 5.7 . . . . . . . . . . . . . . . . . . . . . . . . . . . . . . . . . . . .
with respect to the correctness of information in this document. Copyright by AUDI AG.
3.1
Overview of components - ESP Bosch 5.7 . . . . . . . . . . . . . . . . . . . . . . . . . . . . . . . . . . . .
3.2
Hydraulic unit and brake lines . . . . . . . . . . . . . . . . . . . . . . . . . . . . . . . . . . . . . . . . . . . . . .
3.3
Removing and installing hydraulic control unit . . . . . . . . . . . . . . . . . . . . . . . . . . . . . . . . . .
3.4
Renewing ABS control unit J104 . . . . . . . . . . . . . . . . . . . . . . . . . . . . . . . . . . . . . . . . . . . .
4
Removing and installing parts of ABS system on front and rear axles . . . . . . . . . . . . . . . .
4.1
Removing and installing parts of ABS system on front axle . . . . . . . . . . . . . . . . . . . . . . . .
4.2
Removing and installing parts of ABS system on rear axle . . . . . . . . . . . . . . . . . . . . . . . .
5
Removing and installing parts of ESP system . . . . . . . . . . . . . . . . . . . . . . . . . . . . . . . . . .
5.1
Removing and installing brake light switch . . . . . . . . . . . . . . . . . . . . . . . . . . . . . . . . . . . . . .
5.2
Removing and installing lateral acceleration sender G200 and yaw rate sender G202 . .
5.3
Removing and installing steering angle sender G85 . . . . . . . . . . . . . . . . . . . . . . . . . . . . . .
5.4
Removing and installing parking brake switch . . . . . . . . . . . . . . . . . . . . . . . . . . . . . . . . . .
5.5
Removing and installing brake pressure sender G201 . . . . . . . . . . . . . . . . . . . . . . . . . . . .
18
18
20
22
22
24
24
28
31
31
32
34
34
35
35
36
36
46 - Brakes - mechanism . . . . . . . . . . . . . . . . . . . . . . . . . . . . . . . . . . . . . . . . . . . . . . 38
1
1.1
1.2
1.3
2
2.1
2.2
2.3
3
Front brakes (PR 1LG) . . . . . . . . . . . . . . . . . . . . . . . . . . . . . . . . . . . . . . . . . . . . . . . . . . . .
Servicing front brakes . . . . . . . . . . . . . . . . . . . . . . . . . . . . . . . . . . . . . . . . . . . . . . . . . . . . . .
Removing and installing brake pads . . . . . . . . . . . . . . . . . . . . . . . . . . . . . . . . . . . . . . . . . .
Renewing brake caliper . . . . . . . . . . . . . . . . . . . . . . . . . . . . . . . . . . . . . . . . . . . . . . . . . . . .
Front brakes (PR 1LJ, 1LL, 1LM, 1LK) . . . . . . . . . . . . . . . . . . . . . . . . . . . . . . . . . . . . . . . .
Servicing front brakes . . . . . . . . . . . . . . . . . . . . . . . . . . . . . . . . . . . . . . . . . . . . . . . . . . . . . .
Removing and installing brake pads . . . . . . . . . . . . . . . . . . . . . . . . . . . . . . . . . . . . . . . . . .
Renewing brake caliper . . . . . . . . . . . . . . . . . . . . . . . . . . . . . . . . . . . . . . . . . . . . . . . . . . . .
Ceramic front brakes (PR 1LW) . . . . . . . . . . . . . . . . . . . . . . . . . . . . . . . . . . . . . . . . . . . . . .
Contents
38
38
41
45
46
46
48
52
54
i
Audi A8 2003 ➤
Brake system - Edition 03.2013
3.1
3.2
3.3
3.4
3.5
3.6
4
4.1
4.2
5
5.1
5.2
6
6.1
7
7.1
7.2
Servicing ceramic brakes . . . . . . . . . . . . . . . . . . . . . . . . . . . . . . . . . . . . . . . . . . . . . . . . . .
Detaching and attaching damper spring . . . . . . . . . . . . . . . . . . . . . . . . . . . . . . . . . . . . . . . .
Removing and installing brake pads (ceramic brakes) . . . . . . . . . . . . . . . . . . . . . . . . . . . .
Removing and installing brake caliper (ceramic brakes) . . . . . . . . . . . . . . . . . . . . . . . . . .
Detaching and attaching front brake disc (ceramic brakes) . . . . . . . . . . . . . . . . . . . . . . . .
Renewing front brake disc (ceramic brakes) . . . . . . . . . . . . . . . . . . . . . . . . . . . . . . . . . . . .
Rear brakes, electronic parking brake and handbrake (EPB) . . . . . . . . . . . . . . . . . . . . . .
Servicing rear brakes - all models including ceramic brakes . . . . . . . . . . . . . . . . . . . . . .
Removing and installing brake pads (rear brakes) . . . . . . . . . . . . . . . . . . . . . . . . . . . . . . . .
Brake pedal (LHD) - exploded view . . . . . . . . . . . . . . . . . . . . . . . . . . . . . . . . . . . . . . . . . .
Separating brake pedal from brake servo . . . . . . . . . . . . . . . . . . . . . . . . . . . . . . . . . . . . . .
Removing and installing brake pedal (LHD vehicles) . . . . . . . . . . . . . . . . . . . . . . . . . . . . . .
Removing and installing mounting bracket . . . . . . . . . . . . . . . . . . . . . . . . . . . . . . . . . . . . . .
Removing and installing mounting bracket . . . . . . . . . . . . . . . . . . . . . . . . . . . . . . . . . . . . . .
Overview of components: electronic parking brake and handbrake (EPB) . . . . . . . . . . . .
Removing and installing control unit for electronic parking brake and handbrake . . . . . . . .
Removing and installing actuator motor for electronic parking brake and handbrake . . . .
54
57
57
60
62
63
65
65
67
74
74
76
77
77
78
79
79
47 - Brakes - hydraulics . . . . . . . . . . . . . . . . . . . . . . . . . . . . . . . . . . . . . . . . . . . . . . . . 83
1
1.1
1.2
2
2.1
2.2
3
3.1
3.2
4
4.1
4.2
5
5.1
5.2
6
6.1
6.2
7
7.1
7.2
8
9
9.1
10
10.1
11
11.1
11.2
11.3
11.4
11.5
11.6
11.7
ii
Contents
Pressurised leak test . . . . . . . . . . . . . . . . . . . . . . . . . . . . . . . . . . . . . . . . . . . . . . . . . . . . . .
Pressurised leak test . . . . . . . . . . . . . . . . . . . . . . . . . . . . . . . . . . . . . . . . . . . . . . . . . . . . . .
High-pressure and low-pressure tests . . . . . . . . . . . . . . . . . . . . . . . . . . . . . . . . . . . . . . . .
Brake calipers FNR G60 . . . . . . . . . . . . . . . . . . . . . . . . . . . . . . . . . . . . . . . . . . . . . . . . . .
Servicing brake calipers . . . . . . . . . . . . . . . . . . . . . . . . . . . . . . . . . . . . . . . . . . . . . . . . . . . .
Removing and installing piston for front brake caliper . . . . . . . . . . . . . . . . . . . . . . . . . . . .
Brake calipers 2FNR 42 AL . . . . . . . . . . . . . . . . . . . . . . . . . . . . . . . . . . . . . . . . . . . . . . . .
Servicing brake calipers . . . . . . . . . . . . . . . . . . . . . . . . . . . . . . . . . . . . . . . . . . . . . . . . . . . .
Removing and installing pistons for front brake caliper . . . . . . . . . . . . . . . . . . . . . . . . . . . .
Brembo brake calipers (18") . . . . . . . . . . . . . . . . . . . . . . . . . . . . . . . . . . . . . . . . . . . . . . . .
Servicing brake calipers . . . . . . . . . . . . . . . . . . . . . . . . . . . . . . . . . . . . . . . . . . . . . . . . . . . .
Removing and installing pistons for front brake caliper . . . . . . . . . . . . . . . . . . . . . . . . . . . .
Brake caliper (ceramic brakes) . . . . . . . . . . . . . . . . . . . . . . . . . . . . . . . . . . . . . . . . . . . . . .
Servicing brake caliper (ceramic brakes) . . . . . . . . . . . . . . . . . . . . . . . . . . . . . . . . . . . . . .
Removing and installing pistons for front brake caliper . . . . . . . . . . . . . . . . . . . . . . . . . . . .
Rear brake calipers for electronic parking brake and handbrake (EPB) . . . . . . . . . . . . . .
Servicing brake calipers . . . . . . . . . . . . . . . . . . . . . . . . . . . . . . . . . . . . . . . . . . . . . . . . . . . .
Removing and installing piston for rear brake caliper . . . . . . . . . . . . . . . . . . . . . . . . . . . .
Bleeding brake system . . . . . . . . . . . . . . . . . . . . . . . . . . . . . . . . . . . . . . . . . . . . . . . . . . . .
Bleeding sequence for vehicles with Electronic Stabilisation Program (ESP) . . . . . . . . . .
ChangingProtected
brake by
fluid
. . Copying
. . . . .for. .private
. . . or
. .commercial
. . . . . .purposes,
. . . . . in. .part
. .or. in. .whole,
. . . is. not
..................
copyright.
permitted unless authorised by AUDI AG. AUDI AG does not guarantee or accept any liability
Brake servo/
brake
cylinder
- exploded
view Copyright
. . . . . .by. AUDI
. . . AG.
....................
with
respect master
to the correctness
of information
in this document.
Removing and installing brake master cylinder . . . . . . . . . . . . . . . . . . . . . . . . . . . . . . . . . .
Removing and installing brake master cylinder . . . . . . . . . . . . . . . . . . . . . . . . . . . . . . . . . .
Removing and installing brake servo . . . . . . . . . . . . . . . . . . . . . . . . . . . . . . . . . . . . . . . . . .
Removing and installing brake servo . . . . . . . . . . . . . . . . . . . . . . . . . . . . . . . . . . . . . . . . . .
Vacuum pumps for brake servo . . . . . . . . . . . . . . . . . . . . . . . . . . . . . . . . . . . . . . . . . . . .
Vacuum pump - exploded view (3.0 ltr TDI) . . . . . . . . . . . . . . . . . . . . . . . . . . . . . . . . . . . .
Removing and installing vacuum pump (3.0 ltr. TDI) . . . . . . . . . . . . . . . . . . . . . . . . . . . . . .
Vacuum pump - exploded view (4.0 ltr TDI) . . . . . . . . . . . . . . . . . . . . . . . . . . . . . . . . . . . .
Removing and installing vacuum pump (4.0 ltr. TDI) . . . . . . . . . . . . . . . . . . . . . . . . . . . . . .
Vacuum pump - exploded view (4.2 ltr TDI) . . . . . . . . . . . . . . . . . . . . . . . . . . . . . . . . . . . .
Removing and installing vacuum pump (4.2 ltr. TDI) . . . . . . . . . . . . . . . . . . . . . . . . . . . .
Removing and installing vacuum pump (2.8 ltr. and 3.2 ltr. petrol engine) . . . . . . . . . . . .
83
83
83
84
84
85
88
88
89
92
92
93
95
95
97
100
100
101
110
110
111
112
114
114
117
117
121
121
122
123
124
126
127
131
Audi A8 2003 ➤
Brake system - Edition 03.2013
12
12.1
12.2
12.3
12.4
12.5
13
13.1
13.2
14
14.1
14.2
Electric vacuum pump for brakes V192 . . . . . . . . . . . . . . . . . . . . . . . . . . . . . . . . . . . . . . . .
Vacuum pump for brakes V192 - exploded view . . . . . . . . . . . . . . . . . . . . . . . . . . . . . . . .
Removing and installing vacuum pump for brakes V192 . . . . . . . . . . . . . . . . . . . . . . . . . .
Checking vacuum pump for brakes V192 . . . . . . . . . . . . . . . . . . . . . . . . . . . . . . . . . . . . . .
Removing and installing brake servo pressure sensor G294 . . . . . . . . . . . . . . . . . . . . . .
Checking non-return valve . . . . . . . . . . . . . . . . . . . . . . . . . . . . . . . . . . . . . . . . . . . . . . . . . .
Brake hoses and brake lines . . . . . . . . . . . . . . . . . . . . . . . . . . . . . . . . . . . . . . . . . . . . . . . .
Routing of brake hoses/lines . . . . . . . . . . . . . . . . . . . . . . . . . . . . . . . . . . . . . . . . . . . . . . . .
Tightening torques . . . . . . . . . . . . . . . . . . . . . . . . . . . . . . . . . . . . . . . . . . . . . . . . . . . . . . . .
Repairing brake lines . . . . . . . . . . . . . . . . . . . . . . . . . . . . . . . . . . . . . . . . . . . . . . . . . . . . . .
Flanging tool - exploded view . . . . . . . . . . . . . . . . . . . . . . . . . . . . . . . . . . . . . . . . . . . . . . . .
Instructions for use . . . . . . . . . . . . . . . . . . . . . . . . . . . . . . . . . . . . . . . . . . . . . . . . . . . . . . . .
133
133
133
134
136
136
137
137
138
139
140
140
Protected by copyright. Copying for private or commercial purposes, in part or in whole, is not
permitted unless authorised by AUDI AG. AUDI AG does not guarantee or accept any liability
with respect to the correctness of information in this document. Copyright by AUDI AG.
Contents
iii
Audi A8 2003 ➤
Brake system - Edition 03.2013
Protected by copyright. Copying for private or commercial purposes, in part or in whole, is not
permitted unless authorised by AUDI AG. AUDI AG does not guarantee or accept any liability
with respect to the correctness of information in this document. Copyright by AUDI AG.
iv
Contents
Audi A8 2003 ➤
Brake system - Edition 03.2013
00 –
Technical data
1
Brakes, wear limits
(ARL003290; Edition 03.2013)
Brake system
Diagonally split dual-circuit braking system with ABS, EBPD, EDL, ASR, ESP, ECD and EPB
Front brakes
Brake caliper
Factory code (PR No.)
Ventilated brake disc
Brake disc, thickness
Brake disc, wear limit
Brake caliper, piston
Brake pad thickness
Brake pad wear limit (in‐
cluding backplate and
damper plate)
∅ mm
mm
mm
∅ mm
mm
mm
FNR
G60
(16”)
1LG
321
30
28
60
20.3
9
FNR G60
(16”)
FNR 42 AL
(17”)
FNR 42 AL
(18”)
FNR 42 AL
(18”)
1LG
323
30
28
60
20.3
9
1LL, 1LM
360
34
32
2 x 42
20.43
9
1LJ, 1LK
385
36
34
2 x 42
20.43
9
1LJ,1)
385
36
34
2 x 42
20.43
9
1) Special security vehicle
⇒ “1 Front brakes (PR 1LG) ”, page 38
⇒ “2 Front brakes (PR 1LJ, 1LL, 1LM, 1LK)”, page 46
Note
♦ When performing repair work on brakes, hairline cracks are
often found on the friction surface of the brake discs. Hairline
cracks up to a length of 10 mm do not present a technical
problem and do not justify a renewal of brake discs.
♦ Brake discs with cracks going all the way across the friction
surface must be renewed.
Ceramic front brakes
Brake caliper
Brembo M6 Al
Factory code (PR
1LW
No.)
Ventilated brake
∅ mm
380
disc
Brake disc, thick‐
mm
38
ness
Brake disc, wear
The minimum thickness of the
Protected by copyright. Copying for private or commercial purposes, in part or in whole, is not
limit
brake disc is stamped onto the
permitted unless authorised by AUDI AG. AUDI AG does not guarantee or accept any liability
brakeof disc
hubin as
wear Copyright
limit by AUDI AG.
with respect to the correctness
information
this a
document.
specification.
Brake caliper, 6
∅ mm
2 x 32/ 36/ 38
piston monoblock
1. Brakes, wear limits
1
Audi A8 2003 ➤
Brake system - Edition 03.2013
Ceramic front brakes
Minimum pad
thickness (includ‐
ing backplate and
damper plate)
mm
9.5
⇒ “3 Ceramic front brakes (PR 1LW)”, page 54
Note
Depending on the version, the minimum weight of the brake disc
is stamped on the disc. The brake disc must then be additionally
weighed in order to assess the amount of wear. The disc must be
renewed when the minimum weight is reached. Brake discs
should always be renewed on both sides of the axle.
Note
Hairline cracks on the friction surfaces of ceramic brakes can be
caused during manufacturing and therefore already appear to
varying degrees when the brakes are new. Hairline cracks on the
friction surfaces do not justify a renewal of the ceramic brake
discs.
Rear brakes
Factory code (PR No.)
Ventilated brake disc
Brake disc, thickness
Brake disc, wear limit
Brake caliper, piston
Brake pad thickness
Brake pad wear limit (in‐
cluding backplate)
∅
mm
mm
mm
∅
mm
mm
mm
1KE
(16”)
280
1KW
(17”)
310
1KY (18”)
1KY 2)
1KZ (18”)
335
356
335
22
20
43
22
20
43
22
20
43
28
26
43
22
20
43
17.45
8
17.45
8
17.45
8
17.45
8
17.45
8
2) Special security vehicle
⇒ “4 Rear brakes, electronic parking brake and handbrake
(EPB)”, page 65
Note
Protected
by copyright.
Copyinghairline
for private cracks
or commercial
♦ When performing repair
work
on brakes,
arepurposes, in part or in whole, is not
permitted unless authorised by AUDI AG. AUDI AG does not guarantee or accept any liability
often found on the friction
surface of the brake discs. Hairline
with respect to the correctness of information in this document. Copyright by AUDI AG.
cracks up to a length of 10 mm do not present a technical
problem and do not justify a renewal of brake discs.
♦ Brake discs with cracks going all the way across the friction
surface must be renewed. ⇒ page 54
Ceramic rear brakes
Brake caliper
Factory code (PR
No.)
2
Rep. gr.00 - Technical data
TRW CII45 HE - DK
1KU
Audi A8 2003 ➤
Brake system - Edition 03.2013
Ceramic rear brakes
Ventilated brake
disc
Brake disc, thick‐
ness
Brake disc, wear
limit
∅ mm
356
mm
28
Brake caliper,
1 piston
Minimum pad
thickness (includ‐
ing backplate and
damper plate)
∅ mm
The minimum thickness of the
brake disc is stamped onto the
brake disc hub as a wear limit
specification.
45
mm
9.0
⇒ “4 Rear brakes, electronic parking brake and handbrake
(EPB)”, page 65
Note
Depending on the version, the minimum weight of the brake disc
is stamped on the disc. The brake disc must then be additionally
weighed in order to assess the amount of wear. The disc must be
renewed when the minimum weight is reached. Brake discs
should always be renewed on both sides of the axle.
Note
permitted unless authorised by AUDI AG. AUDI AG does not guarantee or accept any liability
Protected by copyright. Copying for private or commercial purposes, in part or in whole, is not
with respect to the correctness of information in this document. Copyright by AUDI AG.
Hairline cracks on the friction surfaces of ceramic brakes can be
caused during manufacturing and therefore already appear to
varying degrees when the brakes are new. Hairline cracks on the
friction surfaces do not justify a renewal of the ceramic brake
discs.
1. Brakes, wear limits
3
Audi A8 2003 ➤
Brake system - Edition 03.2013
2
Assessment of ceramic brake discs
1 - Cooling channel lands
2 - Friction layer
3 - Carrier material
Protected by copyright. Copying for private or commercial purposes, in part or in whole, is not
permitted unless authorised by AUDI AG. AUDI AG does not guarantee or accept any liability
with respect to the correctness of information in this document. Copyright by AUDI AG.
2.1
Visible features of ceramic brake discs
Checking area of bolted connection on friction ring and brake disc
hub:
WARNING
The brake disc ring and the brake disc hub are bolted together
and must NOT be separated. Do NOT slacken the bolted con‐
nection on the brake disc hub.
4
Rep. gr.00 - Technical data
Audi A8 2003 ➤
Brake system - Edition 03.2013
Due to the production process there already are relaxation cracks
(varying degrees) on the friction surface of the brake disc when it
is new.
Note
Relaxation cracks on a ceramic brake disc do not constitute a
technical problem.
The relaxation cracks may be clearly visible and vary in size.
2.2
Superficial cracks in cooling channel
lands
Superficial cracks in the cooling channel lands -arrow- are caused
during manufacturing.
Note
Superficial cracks in the cooling channel lands do not constitute
a technical problem on the ceramic brake discs.
2.3
Cracks in area of bolted connection on
ceramic brake discs
Checking area of bolted connection on friction ring and brake disc
hub:
WARNING
The brake disc ring and the brake disc hub are bolted together
and must NOT be separated. Do NOT slacken the bolted con‐
nection on the brake disc hub.
Ceramic brake discs must be renewed if there are cracks in the
area of the bolted connection of the brake disc hub extending into
the friction surface of the brake disc -arrows-. ⇒ page 54
The brake discs must be renewed on both sides of the axle if:
♦ renewal is necessary because of brake disc wear
♦ there has been a technical modification to the replacement
brake disc (indicated by changed part number).
Always renew brake discs on both sides of axle. ⇒ page 63
Protected by copyright. Copying for private or commercial purposes, in part or in whole, is not
authorised
by AUDI
AUDIsides
AG doesof
not guarantee or accept any liability
When doing so, always permitted
renewunless
the brake
pads
onAG.
both
with respect to the correctness of information in this document. Copyright by AUDI AG.
the axle. ⇒ page 57
2. Assessment of ceramic brake discs
5
Audi A8 2003 ➤
Brake system - Edition 03.2013
2.4
Edge fractures
Edge fractures -arrow- are caused by mechanical damage to the
edges.
Permissible:
♦ max. width / depth = 2 mm
♦ max. length = 10 mm
♦ max. 3 edge fractures per brake disc
If any of the criteria listed above are exceeded, the brake disc
must be renewed. ⇒ page 54
Always renew brake discs on both sides of axle if:
♦ renewal is necessary because of brake disc wear
♦ there has been a technical modification to the replacement
brake disc (indicated by changed part number).
Always renew brake discs on both sides of axle. ⇒ page 63
When doing so, always renew the brake pads on both sides of
the axle. ⇒ page 57
2.5
Chipping on ceramic brake discs
Always renew ceramic brake discs if there is chipping (larger than
1 cm² -arrow-) on the friction surface.
Always renew brake discs on both sides of axle ⇒ page 54 if:
♦ renewal is necessary because of brake disc wear
♦ there has been a technical modification to the replacement
brake disc (indicated by changed part number).
Always renew brake discs on both sides of axle ⇒ page 63 .
When doing so, always renew the brake pads on both sides of
the vehicle ⇒ page 57 .
2.6
Cracks extending into cooling channels
Always renew ceramic brake discs if there is a crack extending
from the friction surface of the brake disc to the cooling channel
or through the cooling channel -arrow-. ⇒ page 54
Protected by copyright. Copying for private or commercial purposes, in part or in whole, is not
permitted unless authorised by AUDI AG. AUDI AG does not guarantee or accept any liability
with respect to the correctness of information in this document. Copyright by AUDI AG.
6
Rep. gr.00 - Technical data
Audi A8 2003 ➤
Brake system - Edition 03.2013
3
Assessing degree of wear on ceramic
brake discs
⇒ “3.1 Wear assessment by checking thickness of brake disc”,
page 11
⇒ “3.2 Wear assessment according to wear indicators”,
page 11
⇒ “3.3 Wear assessment by weighing brake disc”, page 12
When minimum weight is stamped on hub of brake disc:
⇒ “3.4 Wear assessment by weighing brake disc”, page 13
WARNING
The brake disc ring and the brake disc hub are bolted together
and must NOT be separated. Do NOT slacken the bolted con‐
nection on the brake disc hub.
Checking area of bolted connection on friction ring and brake disc
hub:
Designation of ceramic brake disc on brake disc hub
Protected by copyright. Copying for private or commercial purposes, in part or in whole, is not
permitted unless authorised by AUDI AG. AUDI AG does not guarantee or accept any liability
with respect to the correctness of information in this document. Copyright by AUDI AG.
3. Assessing degree of wear on ceramic brake discs
7
Audi A8 2003 ➤
Brake system - Edition 03.2013
1 - Direction of rotation
2 - Supplier
3 - Serial production number of
brake disc
4 - Audi part number
Note
The Audi part number of the brake
disc is an example and can vary de‐
pending on the vehicle type and
model
5 - Production date of brake
disc
6 - Permissible minimum thick‐
ness of brake disc
Note
The minimum permissible thickness
of the brake disc differs depending
on the type of vehicle.
7 - Weight of new brake disc
with brake disc hub
Checking area of bolted con‐
nection on friction ring and
brake disc hub:
WARNING
The brake disc ring and
the brake disc hub are
bolted together and must
NOT be separated. Do
NOT slacken the bolted
connection on the brake
disc hub.
Note
Depending on the version, the min‐
imum permissible weight for a used
brake disc is stamped on the brake
disc hub. The disc must be renewed
when the weight of the disc is less
than or equal to the indicated mini‐
mum weight. Always renew brake
discs on both sides of the axle.
Caution
If the minimum permissi‐
ble weight of the disc is
indicated on the hub of
the disc (“min. weight”),
the disc must be addi‐
tionally weighed to as‐
sess the amount of wear.
8
Rep. gr.00 - Technical data
Protected by copyright. Copying for private or commercial purposes, in part or in whole, is not
permitted unless authorised by AUDI AG. AUDI AG does not guarantee or accept any liability
with respect to the correctness of information in this document. Copyright by AUDI AG.
Audi A8 2003 ➤
Brake system - Edition 03.2013
Caution
Always install brake
discs of the same type on
both sides of one axle.
The brake disc must first be cleaned before assessing the degree
of wear as described below.
WARNING
Do NOT clean the brake disc with water or other fluids as this
will falsify the results.
Note
♦ The brake disc ventilation drillings must be completely free of
brake dust and dirt. Clear out carefully with a suitable tool if
necessary. Do not use force.
♦ Thoroughly blow out the brake discs with compressed air (in‐
cluding the area between the cooling channels and ventilation
drillings).
Caution
Always observe respiratory protection requirements when
cleaning brake discs or other parts of the brake system using
compressed air.
Protected by copyright. Copying for private or commercial purposes, in part or in whole, is not
permitted unless authorised by AUDI AG. AUDI AG does not guarantee or accept any liability
with respect to the correctness of information in this document. Copyright by AUDI AG.
To assess the brake disc wear, proceed as follows:
♦ 1. Wear assessment by checking thickness of brake disc
♦ 2. Wear assessment according to wear indicators
1. Wear assessment by checking thickness of brake disc
⇒ page 11
Thickness of brake discs in permissible range → brake disc OK
Brake disc thickness in critical
Value at or below limit
range min. Th + 0.2 mm
↓↓
↓↓
Further wear assessment ac‐
Renew brake disc
cording to wear indicators
↓↓
---------2. Wear assessment according to wear indicators
⇒ page 11
None of the six wear indicators fully worn out → brake disc OK
---------One of the six wear indicators
fully worn out
--------↓↓
---------Renew brake disc
3. Assessing degree of wear on ceramic brake discs
9
Audi A8 2003 ➤
Brake system - Edition 03.2013
Note
Depending on the version, the minimum permissible weight for a
used brake disc is stamped on the brake disc hub. The disc must
be renewed when the weight of the disc is less than or equal to
the indicated minimum weight. Always renew brake discs on both
sides of the axle.
Caution
If the minimum permissible weight of the disc is indicated on
the hub of the disc (“min. weight”), the disc must be additionally
weighed to assess the amount of wear. The disc must be re‐
newed when the weight of the disc is less than or equal to the
indicated minimum weight.
Brake disc with minimum weight stamped on hub:
1. Wear assessment by checking thickness of brake disc (if
minimum weight is stamped on hub) ⇒ page 11
Thickness of brake discs in permissible range → brake disc OK
Brake disc thickness in critical
Value at or below limit
range min. Th + 0.05 mm
↓↓
↓↓
Further wear assessment ac‐
Renew brake disc
cording to wear indicators
↓↓
---------2. Wear assessment according to wear indicators
⇒ page 11
None of the six wear indicators fully worn out → brake disc OK
---------One of the six wear indicators
fully worn out
--------↓↓
---------Weigh brake disc ⇒ page 13
---------Minimum weight not reached
---------↓↓
---------Brake disc OK
---------Minimum weight reached
---------↓↓
---------Renew brake disc
Always renew brake discs on both sides of axle if:
♦ the brake discs have to be renewed because of wear.
Protected by copyright. Copying for private or commercial purposes, in part or in whole, is not
permitted modification
unless authorised by
AUDI AG does not guarantee or accept any liability
♦ there has been a technical
toAUDI
theAG.
replacement
withchanged
respect to the
correctness
of information in this document. Copyright by AUDI AG.
brake disc (indicated by
part
number).
10
Rep. gr.00 - Technical data
Audi A8 2003 ➤
Brake system - Edition 03.2013
If one of the three wear limits defined below has been reached,
do NOT continue using the brake disc. The brake disc must be
renewed.
In this case, always renew the brake discs on both sides of the
axle.
When doing so, always renew the brake pads on both sides of
the axle.
3.1
Wear assessment by checking thick‐
ness of brake disc
Special tools and workshop equipment required
♦ Use a commercially available caliper gauge or micrometer
Protected by copyright. Copying for private or commercial purposes, in part or in whole, is not
gauge.
permitted unless authorised by AUDI AG. AUDI AG does not guarantee or accept any liability
with respect to the correctness of information in this document. Copyright by AUDI AG.
The minimum permissible
thickness of the brake disc is engraved
as “min.Th.” on the brake disc hub.
– Measure the brake disc thickness at three points round the
outside of the disc next to the individual wear indicators -x-.
Note
If the thickness is x = min. Th. + 0.2 mm, additionally check the
wear of the brake disc by inspecting the wear indicators
⇒ page 11 .
When minimum weight is stamped on hub of brake disc:
Note
♦ When minimum weight is stamped on hub of brake disc:
♦ If the thickness is x = min. Th. + 0.05 mm, additionally check
the wear of the brake disc by inspecting the wear indicators
⇒ page 11 .
All types of ceramic brake discs (continued):
If the thickness of the brake disc is less than or equal to the min‐
imum permissible thickness “min.Th.”, do NOT continue using the
brake disc. The brake disc must be renewed.
In this case, always renew the brake discs on both sides of the
axle.
When doing so, always renew the brake pads on both sides of
the axle.
3.2
Wear assessment according to wear in‐
dicators
Wear indicators are positioned at intervals of 120 degrees on the
friction surface of the brake disc.
3. Assessing degree of wear on ceramic brake discs
11
Audi A8 2003 ➤
Brake system - Edition 03.2013
The wear indicators -arrow- appear in a different colour.
There are three indicators on each side of the brake disc (front
and reverse side).
The wear of the indicators is visible as a dark, burnt out recess.
Do NOT continue using the brake disc if one of the six indicators
is completely burnt out. The brake disc must be renewed.
In this case, always renew the brake discs on both sides of the
axle.
When doing so, always renew the brake pads on both sides of
the axle.
Checking area of bolted connection on friction ring and brake disc
hub:
WARNING
The brake disc ring and the brake disc hub are bolted together
and must NOT be separated. Do NOT slacken the bolted con‐
nection on the brake disc hub.
3.3
Wear assessment by weighing brake
disc
Special tools and workshop equipment required
♦ Commercially available scales with a tolerance of ± 1 g
Procedure
– Remove front brake disc for weighing.
– Remove rear brake disc for weighing.
•
Protected by copyright. Copying for private or commercial purposes, in part or in whole, is not
The brake disc must be cleaned
andunless
dry before
weighed.
permitted
authoriseditbyis
AUDI
AG. AUDI AG does not guarantee or accept any liability
with respect to the correctness of information in this document. Copyright by AUDI AG.
Caution
Do NOT clean the brake disc with water or other fluids as this
will falsify the results.
Note
♦ The brake disc ventilation drillings must be completely free of
dirt. Clear out carefully with a suitable tool if necessary.
♦ Thoroughly blow out the brake discs with compressed air (in‐
cluding the area between the cooling channels and ventilation
drillings).
– Carefully place the clean brake disc on the scales.
The initial weight of the brake disc with disc brake hub is engraved
on the disc brake hub.
For this model, the following maximum values are specified for
brake disc weight loss:
♦ Front brake disc: Up to 120 g weight loss from initial weight of
new brake disc.
12
Rep. gr.00 - Technical data
Audi A8 2003 ➤
Brake system - Edition 03.2013
♦ Rear brake disc: Up to 120 g weight loss from initial weight of
new brake disc.
Note
If the weight loss is only 20 g within these limits, additionally check
the wear of the brake disc according to the wear indicators.
If the weight loss has reached or exceeded these limits, the brake
discs must be renewed. It is no longer permissible to use these
brake discs. The brake disc must be renewed.
Always renew brake discs on both sides of axle if:
♦ the brake discs have to be renewed because of wear.
♦ there has been a technical modification to the replacement
brake disc (indicated by changed part number).
In this case, always renew the brake discs on both sides of the
axle.
When doing so, always renew the brake pads on both sides of
the axle.
3.4
Wear assessment by weighing brake
disc
Brake disc with minimum weight stamped on hub:
Special tools and workshop equipment required
♦ Commercially available scales with a tolerance of ± 1 g
Procedure
– Remove front brake disc for weighing.
– Remove rear brake disc for weighing.
Note
Protected by copyright. Copying for private or commercial purposes, in part or in whole, is not
permitted unless
authorised by AUDI
AG. AUDI
Depending on the version, the minimum
permissible
weight
for AG
a does not guarantee or accept any liability
with
respect disc
to the correctness
information
in this document. Copyright by AUDI AG.
used brake disc is stamped on the
brake
hub. Theof disc
must
be renewed when the weight of the disc is less than or equal to
the indicated minimum weight. Always renew brake discs on both
sides of the axle.
•
The brake disc must be cleaned and dry before it is weighed.
Caution
Do NOT clean the brake disc with water or other fluids as this
will falsify the results.
Note
♦ The brake disc ventilation drillings must be completely free of
dirt. Clear out carefully with a suitable tool if necessary.
♦ Thoroughly blow out the brake discs with compressed air (in‐
cluding the area between the cooling channels and ventilation
drillings).
3. Assessing degree of wear on ceramic brake discs
13
Audi A8 2003 ➤
Brake system - Edition 03.2013
– Carefully place the clean brake disc on the scales.
The disc must be renewed when the weight of the disc is less than
or equal to the indicated minimum weight. Always renew brake
discs on both sides of the axle.
Always renew brake discs on both sides of axle if:
♦ the brake discs have to be renewed because of wear.
♦ there has been a technical modification to the replacement
brake disc (indicated by changed part number).
In this case, always renew the brake discs on both sides of the
axle.
When doing so, always renew the brake pads on both sides of
the axle.
Protected by copyright. Copying for private or commercial purposes, in part or in whole, is not
permitted unless authorised by AUDI AG. AUDI AG does not guarantee or accept any liability
with respect to the correctness of information in this document. Copyright by AUDI AG.
14
Rep. gr.00 - Technical data
Audi A8 2003 ➤
Brake system - Edition 03.2013
4
Brake test
4.1
General notes
The wheels are driven by the brake test rollers.
During the test the gearbox must be in neutral on manual gear‐
boxes or in position N on automatic gearboxes.
Follow the instructions provided by the manufacturer of the brake
test equipment when performing the test.
Note
Electronic brake control systems are inoperative when the ignition
is switched off.
4.2
Vehicles with front-wheel drive
Perform brake test on a single-axle brake dynamometer.
Test speed must not exceed 5 km/h. Otherwise the Protected
EDL control
by copyright. Copying for private or commercial purposes, in part or in whole, is not
permittedinunless
authorised by AUDI AG. AUDI AG does not guarantee or accept any liability
can activate the brakes if the rollers start at different points
time.
with respect to the correctness of information in this document. Copyright by AUDI AG.
All brake test equipment approved by Audi meets these require‐
ments.
4.3
Vehicles with four-wheel drive
Testing on a single-axle brake dynamometer for four-wheel drive
vehicles:
The rollers drive the wheels of one axle in opposite directions to
avoid transmitting torque to the other axle.
Test speed must not exceed 6 km/h. Otherwise the EDL control
can activate the brakes if the rollers start at different points in time.
WARNING
The Torsen differential will be seriously damaged if test speed
exceeds 6 km/h.
All brake test equipment approved by Audi meets these require‐
ments.
Testing on a single-axle brake dynamometer:
Test speed must not exceed 6 km/h. Otherwise the EDL control
can activate the brakes if the rollers start at different points in time.
All brake test equipment approved by Audi meets these require‐
ments.
4.4
EPB (Electronic Parking Brake) on
brake dynamometer
Test sequence:
– Drive rear wheels of vehicle onto test rollers; do not switch off
ignition.
– As soon as the rollers reach a speed in excess of 3 km/h the
“TÜV mode” (TÜV = German technical inspection agency) is
activated.
4. Brake test
15
Audi A8 2003 ➤
Brake system - Edition 03.2013
– The instrument cluster will then display a crossed-out, yellow
symbol of the electronic parking brake ⇒ Owner's Manual;
Instruments and warning/indicator lamps
The EPB will now function as follows:
The full brake force is not applied at once, but step by step each
time the parking brake switch is operated. The brake will be fully
applied after operating the button 3 times.
The brake is released by pressing the switch once.
Requirements for “TÜV mode”:
– Ignition on
– Front wheels, speed = 0 Protected
km/ h by copyright. Copying for private or commercial purposes, in part or in whole, is not
permitted unless authorised by AUDI AG. AUDI AG does not guarantee or accept any liability
respect to the correctness of information in this document. Copyright by AUDI AG.
– Rear wheels, min. speed =with
3 km/
h, max. speed = 9 km/h.
WARNING
When testing models with four-wheel drive you must use brake
test rollers with synchronised wheel speeds.
16
Rep. gr.00 - Technical data
Audi A8 2003 ➤
Brake system - Edition 03.2013
5
Brake fluid
5.1
General notes
Brake fluid is hygroscopic, i.e. it has the tendency to absorb water
and moisture from the atmosphere
The boiling point decreases as the water content increases, which
means a considerable rise in brake fluid temperature can lead to
formation of vapour bubbles and brake failure.
The colour of the brake fluid becomes darker over the course of
time. A dark brake fluid colour is not an indication of its condition.
The change in colour is caused by chemical reactions and may
occur within a short period (several weeks), particularly in vehi‐
cles equipped with ABS.
WARNING
Rubber parts of brake system (sleeves, seals) are not com‐
patible with mineral oil, fuel and cleaning agents.
Even minute quantities coming into contact with a seal or sleeve
will affect the component and could impair brake operation. The
consequences of a contaminated brake system only become ap‐
parent months later, and then give rise to greater expenses,
particularly in vehicles equipped with ABS.
A = Sleeve (original size)
B = Sleeve (swollen due to contact with mineral oil)
Summary of the above mentioned points:
Always keep brake fluid containers properly sealed. This is the
only way of preventing contamination by oil, dirt, cleaning agents
or moisture.
Brake fluid containers should be kept completely separate from
oils (including hydraulic fluid) and cleaning agents to prevent any
mixture of fluids or even filling of the brake system with an incor‐
rect fluid.
Protected by copyright. Copying for private or commercial purposes, in part or in whole, is not
permitted unless authorised by AUDI AG. AUDI AG does not guarantee or accept any liability
with respect to the correctness of information in this document. Copyright by AUDI AG.
5. Brake fluid
17
Audi A8 2003 ➤
Brake system - Edition 03.2013
45 –
Anti-lock brake system
1
General information on the anti-lock
brake system
1.1
Notes for repair work on the ABS
WARNING
The anti-lock brake system is basically maintenance-free.
Testing, removing, installing and repair work may only be per‐
formed by qualified personnel.
Failure to observe the information described in this Workshop
Manual may result in damage to the system and could make
the vehicle unsafe.
♦ Before carrying out repair work on the anti-lock brake system,
determine the cause of the problem using self-diagnosis.
♦ When installing
a new hydraulic control unit, always check the
Protected by copyright. Copying for private or commercial purposes, in part or in whole, is not
coding ⇒ VASpermitted
505x unless
vehicle
diagnostic,
testing
and
authorised
by AUDI AG.
AUDI AG
doesinformation
not guarantee or accept any liability
system .
with respect to the correctness of information in this document. Copyright by AUDI AG.
♦ Always switch off the ignition before carrying out installation
or repair work. On vehicles with a coded radio, find out the antitheft code and disconnect the battery earth strap.
♦ When working with brake fluid, observe the relevant safety
precautions and notes ⇒ page 17 .
♦ Always bleed the brake system (using brake filling and bleed‐
ing equipment - V.A.G 1869/- or VAS 5234 or similar) after all
work which involves opening the hydraulic system ⇒ Repair
group 47. Additionally perform high-pressure and low-pres‐
sure tests ⇒ page 83 .
♦ During the final road test, ensure that at least one ABS-con‐
trolled braking operation is performed (pulsations must be felt
at the brake pedal) ⇒ Vehicle diagnostic, testing and infor‐
mation system - VAS 505x- .
♦ Absolute cleanliness is required when working on the anti-lock
brake system; avoid any products that contain mineral oil,
such as oil, grease, etc.
♦ Thoroughly clean all connections and the adjacent areas be‐
fore loosening, but do not use aggressive cleaning agents
such as brake cleaner, petrol, thinners or similar.
♦ Place removed parts on a clean surface and cover them up.
♦ Carefully cover or seal open components if repairs are not to
be carried out immediately. (Use sealing plugs from repair kit
1 H0 698 311 A).
♦ Do not use fluffy cloths.
♦ Only remove replacement parts from packaging immediately
prior to installation.
♦ Only use genuine spare parts from original packaging.
♦ When the system is open do not work with compressed air and
do not move the vehicle.
18
Rep. gr.45 - Anti-lock brake system
Audi A8 2003 ➤
Brake system - Edition 03.2013
♦ Ensure that no brake fluid enters electrical connectors.
Protected by copyright. Copying for private or commercial purposes, in part or in whole, is not
permitted unless authorised by AUDI AG. AUDI AG does not guarantee or accept any liability
with respect to the correctness of information in this document. Copyright by AUDI AG.
1. General information on the anti-lock brake system
19
Audi A8 2003 ➤
Brake system - Edition 03.2013
2
Connecting -VAS 505x- and select‐
ing functions
Special tools and workshop equipment required
♦ Vehicle diagnostic, testing and information system - VAS
505x♦ Diagnosis lead (3m with power supply) - VAS 5051/1-
WARNING
♦ Test equipment must always be secured to the rear seat
when road-testing the vehicle.
♦ While the vehicle is moving this equipment must be oper‐
ated by a second person; NOT by the driver.
– Attach the diagnosis cable connector VAS 5051/5a to the di‐
agnosis connection.
Protected by copyright. Copying for private or commercial purposes, in part or in whole, is not
permitted unless authorised by AUDI AG. AUDI AG does not guarantee or accept any liability
with respect to the correctness of information in this document. Copyright by AUDI AG.
20
Rep. gr.45 - Anti-lock brake system
Audi A8 2003 ➤
Brake system - Edition 03.2013
– Switch on the tester -arrow-.
The tester is ready as soon as a picture of a car appears in the
display.
– Switch on ignition.
– Press the Guided Fault Finding button on the display screen.
– Select the following:
♦ Make
♦ Model
♦ Model year
♦ Version
♦ Engine code letters
– Confirm the entered information.
Wait until the tester has interrogated all the control units in the
vehicle.
– Press the Go to button and select the option “Function/com‐
ponent selection”.
– Select “Running gear” on the display.
Protected by copyright. Copying for private or commercial purposes, in part or in whole, is not
permitted
– Select “Brake system”
onunless
the authorised
display.by AUDI AG. AUDI AG does not guarantee or accept any liability
with respect to the correctness of information in this document. Copyright by AUDI AG.
– Select “01 - Self-diagnosis compatible systems ...” on the dis‐
play.
– Select “Anti-lock brake system ...” on the display.
– Select “Function” on the display.
You will now see displayed all possible functions for the anti-lock
brake system installed in the vehicle.
– Select the function you require on the display.
2. Connecting VAS 505x and selecting functions
21
Audi A8 2003 ➤
Brake system - Edition 03.2013
3
Electronic stabilisation program
Bosch 5.7
3.1
Overview of components - ESP Bosch 5.7
1 - ABS hydraulic unit - N55with ABS control unit with EDL
- J104❑ The hydraulic unit and
the control unit together
form the hydraulic con‐
trol
unit.by copyright. Copying for private or commercial purposes, in part or in whole, is not
Protected
permitted
unless authorised
by AUDI AG. AUDI AG does not guarantee or accept any liability
❑ Do not disconnect
con‐
with respect to the correctness of information in this document. Copyright by AUDI AG.
nector
(42 pin) before
successfully completing
self-diagnosis. Switch
off ignition before de‐
taching connector.
❑ Located on the hydraul‐
ic unit on left of engine
compartment.
❑ Removing and installing
⇒ page 24
2 - Brake pressure sender
(01435) -1- - G201❑ Screws onto hydraulic
unit
❑ Removing and installing
⇒ page 36
3 - TCS (ASR)/ESP button E256❑ Fitting location: in centre
console
4 - Lateral acceleration sender
(01423) - G200- and yaw rate
sender (01542) - G202❑ Combined in one hous‐
ing
❑ Fitting location: under
extension of centre con‐
sole
❑ Can be checked in “Guided Fault Finding” with vehicle diagnostic, testing and information system - VAS
505x❑ Observe installation instructions
⇒ page 35
22
Rep. gr.45 - Anti-lock brake system
Audi A8 2003 ➤
Brake system - Edition 03.2013
5 - Traction control system warning lamp (00824-3424) - K86❑ Location: In the dash panel insert
❑ See Owner's Manual for further information
6 - ABS warning lamp - K47❑ Location: In the dash panel insert
❑ See Owner's Manual for further information
7 - Brake system warning lamp - K118❑ Fitting location: in driver information system/ dash panel insert
❑ See Owner's Manual for further information
8 - Parking brake switch - F234❑ Fitting location: in centre console
❑ Removing and installing ⇒ page 36
9 - Steering angle sender (00778-3132) - G85- (vehicles with ESP)
❑ Fitting location: incorporated in return ring with slip ring on steering column ⇒ Body Repairs; Rep. gr. 69
❑ Performing zero compensation
Vehicle diagnostic, testing and information system - VAS 505x10 - Wheel bearing/hub unit
❑ The ABS sensor ring is installed in the wheel bearing
11 - Rear right/left speed sensor (G44/G46)
❑ Can be checked in “Guided Fault Finding” with vehicle diagnostic, testing and information system - VAS
505xProtected by copyright. Copying for private or commercial purposes, in part or in whole, is not
❑ permitted
Renewing
⇒ pageby32
unless authorised
AUDI AG. AUDI AG does not guarantee or accept any liability
12 - Diagnostic socket
❑ Fitting location: cover in driver's footwell
with respect to the correctness of information in this document. Copyright by AUDI AG.
13 - Brake light switch -F- and cruise control system brake pedal switch (diesel direct injection system) (00629)
- F47❑ Removing and installing ⇒ page 34
❑ Can be checked in “Guided Fault Finding” with vehicle diagnostic, testing and information system - VAS
505x14 - Wheel bearing/hub unit
❑ The ABS sensor ring is installed in the wheel bearing
15 - Front right/left speed sensor (G45/G47)
❑ Can be checked in “Guided Fault Finding” with vehicle diagnostic, testing and information system - VAS
505x❑ Renewing ⇒ page 31
16 - Brake fluid level warning contact - F3417 - Tandem brake servo
3. Electronic stabilisation program Bosch 5.7
23
Audi A8 2003 ➤
Brake system - Edition 03.2013
3.2
Hydraulic unit and brake lines
1 - Brake master cylinder and
brake servo
2 - Brake line
❑ Brake master cylinder/
primary piston circuit to
hydraulic unit
3 - Brake line
❑ Brake master cylinder/
secondary piston circuit
to hydraulic unit
4 - Brake line
❑ Hydraulic unit to front
right brake caliper
5 - Brake line
❑ Hydraulic unit to front
left brake caliper
6 - Brake line
❑ Hydraulic unit to rear left
brake caliper
7 - Brake line
❑ Hydraulic unit to rear
right brake caliper
8 - Brake pressure sender
(01435) -1- - G201❑ Screws onto hydraulic
unit
❑ Tightening torque: 20
Nm
❑ Removing and installing
⇒ page 36
9 - ABS hydraulic unit - N55with ABS control unit with EDL
- J104❑ Removing and installing ⇒ page 24
10 - Nut with washer
❑ Tightening torque 9 Nm
Protected by copyright. Copying for private or commercial purposes, in part or in whole, is not
permitted unless authorised by AUDI AG. AUDI AG does not guarantee or accept any liability
with respect to the correctness of information in this document. Copyright by AUDI AG.
11 - Bracket for ESP
12 - Retaining clip
3.3
Removing and installing hydraulic con‐
trol unit
Special tools and workshop equipment required
24
Rep. gr.45 - Anti-lock brake system
Audi A8 2003 ➤
Brake system - Edition 03.2013
♦ Torque wrench - V.A.G 1331/-
♦
Protected by copyright. Copying for private or commercial purposes, in part or in whole, is not
permitted unless authorised by AUDI AG. AUDI AG does not guarantee or accept any liability
respect
to the correctness
of information
in this document. Copyright by AUDI AG.
Brakewith
pedal
actuator
- V.A.G
1869/2-
♦ Sealing plugs repair kit, part No. 1H0 698 311A
Fitting location:
The hydraulic control unit is fitted on the left-hand side of the en‐
gine compartment.
Removing
WARNING
Do not bend the brake lines.
– Switch off ignition.
– Remove hexagon bolts - 1 - securing coolant expansion tank.
3. Electronic stabilisation program Bosch 5.7
25
Audi A8 2003 ➤
Brake system - Edition 03.2013
– Remove hexagon bolts -1-.
– Unplug connector from coolant expansion tank.
– Move coolant expansion tank clear to one side.
– Remove hexagon bolt - 1 - securing fluid reservoir and pull
fluid reservoir to the side and out of buffer.
– Unplug connector - 1 - from brake pressure sender -G 201.
Protected by copyright. Copying for private or commercial purposes, in part or in whole, is not
permitted unless authorised by AUDI AG. AUDI AG does not guarantee or accept any liability
with respect to the correctness of information in this document. Copyright by AUDI AG.
– Insert brake pedal actuator -V.A.G 1869/2- between brake
pedal and driver's seat. Depress the brake pedal at least
60 mm.
– Connect hose of bleeder bottle to bleeder screws of front left
and rear left brake calipers and open bleeder screws.
Note
This will release the pressure in the hydraulic unit.
– Close front left and rear left bleeder screws.
– Do not remove brake pedal actuator -V.A.G 1869/2- .
– As protection against escaping brake fluid, place a sufficient
number of lint-free cloths in area beneath control unit and hy‐
draulic unit.
– Mark brake lines.
26
Rep. gr.45 - Anti-lock brake system
Audi A8 2003 ➤
Brake system - Edition 03.2013
– Disconnect brake lines from hydraulic unit to brake master
cylinder -3- and tie up.
– Disconnect remaining brake lines -2- on hydraulic unit.
WARNING
Do not bend the brake lines in the vicinity of the hydraulic unit.
– Seal brake lines and tapped holes with sealing plugs from re‐
pair kit.
– Release control unit connector -arrow- and unplug.
Note
♦ Make sure brake fluid does not get into connector housing of
control unit. This can result in corrosion of the contacts and
failure of the system.
♦ Use compressed air to carefully clean connector housing if
necessary.
– Release retaining clip on both sides from below -1-.
Protected by copyright. Copying for private or commercial purposes, in part or in whole, is not
permitted unless authorised by AUDI AG. AUDI AG does not guarantee or accept any liability
with respect to the correctness of information in this document. Copyright by AUDI AG.
– Remove retaining clips in direction indicated (arrow).
– Remove hydraulic control unit.
Installing
Installation is performed in reverse sequence; note the following:
Note
♦ Do not remove sealing plugs from new hydraulic unit until cor‐
responding brake line is ready to be fitted.
♦ If sealing plugs are removed from hydraulic unit sooner, brake
fluid may escape and it may no longer be possible to fill and
bleed the unit properly.
– When assembling control unit and hydraulic unit, make sure
contact pins of hydraulic unit do not catch on control unit sol‐
enoids.
3. Electronic stabilisation program Bosch 5.7
27
Audi A8 2003 ➤
Brake system - Edition 03.2013
– Connect pipes as previously marked:
1 - Primary piston circuit
2 - To front left brake caliper
3 - To front right brake caliper
4 - Secondary piston circuit
5 - To rear left brake caliper
6 - To rear right brake caliper
– Fit connector on hydraulic pump.
– Clip ABS unit onto bracket.
Note
Do not tighten bolts completely. This will make it easier to attach
the individual brake lines to the hydraulic unit.
– After tightening brake lines, tighten hydraulic unit.
– Remove brake pedal actuator - V.A.G 1869/2- .
– Bleed brake system ⇒ page 110 .
– Code ABS control unit - J104- (with EDL) ⇒ Coding control
unit with VAS 505x via "Guided Fault Finding" function .
– When renewing the control unit, select the function “Replace”
for the relevant control unit in the “Guided Fault Finding”.
To do so, use the vehicle diagnostic, testing and information sys‐
tem - VAS 505x- .
Protected by copyright. Copying for private or commercial purposes, in part or in whole, is not
– Perform final control diagnosis after attaching brake lineswith
to respect to the correctness of information in this document. Copyright by AUDI AG.
hydraulic unit ⇒ "Guided Fault Finding" function of vehicle di‐
agnostic, testing and information system VAS 505x .
permitted unless authorised by AUDI AG. AUDI AG does not guarantee or accept any liability
Note
Final control diagnosis can be used to establish whether line con‐
nections have been interchanged.
Tightening torques
Component
Nm
Brake lines to hydraulic unit M10 (brake line di‐
ameter 5 mm)
Brake lines to hydraulic unit M12 (brake line di‐
ameter 5 mm)
Brake lines to hydraulic unit M12 (brake line di‐
ameter 8 mm)
12
3.4
12
20
Renewing ABS control unit J104
Removing
Caution
The two components must be removed from the vehicle before
separating the control unit from the hydraulic unit.
28
Rep. gr.45 - Anti-lock brake system
Audi A8 2003 ➤
Brake system - Edition 03.2013
Note
♦ Clean the hydraulic unit carefully before removal.
♦ Before removing the control unit, interrogate the fault memory
and print out any fault codes that are displayed.
♦ Place the hydraulic unit together with the control unit on a
clean flat surface.
♦ Renewal may only be performed by qualified personnel with
adequate technical expertise.
Removing and installing hydraulic unit ⇒ page 24
– Slacken bolts -1- and pull control unit -2- off hydraulic unit,
taking care to keep it straight.
– Clean sealing surface -2- using a plastic scraper -1-. Check
valves -3- for damage.
WARNING
Sealing surface of hydraulic unit must be clean and flat.
The hydraulic unit must be renewed if the sealing surface or
the contact pins are damaged.
The seal on the control unit cannot be replaced.
The seal on the control unit must not be lifted or pulled out.
Protected by copyright. Copying for private or commercial purposes, in part or in whole, is not
permitted unless authorised by AUDI AG. AUDI AG does not guarantee or accept any liability
with respect to the correctness of information in this document. Copyright by AUDI AG.
Note
♦ Use the cleaning agent provided (do not use any aggressive
cleaning products).
♦ Check sealing surface for damage (visual inspection).
Assembling
Caution
Make sure that no moisture or dirt gets inside the control unit.
Do not blow out control unit or hydraulic unit with compressed
air.
Severe shocks or jolts can damage the control unit. The control
unit must not be re-installed if it has been damaged in any way.
3. Electronic stabilisation program Bosch 5.7
29
Audi A8 2003 ➤
Brake system - Edition 03.2013
– With solenoids pointing downwards, carefully press on control
unit -1-, guiding it over valves on hydraulic unit -2-. Make sure
that valves remain straight.
– The edge of the control unit housing must slide over the shoul‐
der on the hydraulic unit.
Note
♦ Use new bolts.
♦ To avoid any risk of leakage at the flexible seals, a new control
unit must not be fitted more than twice onto an "old" hydraulic
unit that is being re-installed.
♦ A control unit which has been in operation while the vehicle is
being driven must not be fitted a second time.
– Push control unit onto ABS hydraulic unit (N55) and screw in
new bolts -1- and -2- evenly (without tightening) until control
unit makes even contact with hydraulic unit.
– Screw in bolts -1- to -6- all the way, but do not tighten.
Protected by copyright. Copying for private or commercial purposes, in part or in whole, is not
– Tighten bolts -1- to -6in the
sequence
shown.
permitted
unless
authorised by
AUDI AG. AUDI AG does not guarantee or accept any liability
with respect to the correctness of information in this document. Copyright by AUDI AG.
Tightening torque 2.9 Nm
– After tightening, check that all bolt heads are seated flush.
– Install assembled unit ⇒ page 27 .
30
Rep. gr.45 - Anti-lock brake system
Audi A8 2003 ➤
Brake system - Edition 03.2013
4
Removing and installing parts of ABS
system on front and rear axles
4.1
Removing and installing parts of ABS system on front axle
1 - ABS speed sensor
❑ Before inserting sensor,
clean inner surface of fit‐
ting hole and coat with
grease G 000 650
❑ Renewing ⇒ page 31
2 - Hexagon socket head bolt
❑ Tightening torque: 18
Nm
3 - Drive shaft
4 - Wheel hub with wheel bear‐
ing
5 - Hexagon socket head bolt
❑ Always renew if re‐
moved ⇒ Rep. gr. 40 ;
Servicing drive shaft.
Protected by copyright. Copying for private or commercial purposes, in part or in whole, is not
permitted unless authorised by AUDI AG. AUDI AG does not guarantee or accept any liability
with respect to the correctness of information in this document. Copyright by AUDI AG.
4.1.1
Removing and installing front wheel
speed sensor
Removing
– Raise the vehicle.
4. Removing and installing parts of ABS system on front and rear axles
31
Audi A8 2003 ➤
Brake system - Edition 03.2013
– Unplug connector -1-.
– Remove bolt -2- from wheel bearing housing.
– Pull ABS speed sensor out of wheel bearing housing.
Installing
– Before inserting speed sensor, clean inner surface of hole and
coat speed sensor thoroughly with lubricating paste
G 000 650.
– Insert speed sensor into drilling in wheel bearing housing and
tighten bolt.
– Connect speed sensor to speed sensor wiring.
4.2
Removing and installing parts of ABS system on rear axle
1 - Drive shaft
2 - Bracket
❑ For speed sensor wire
3 - Hexagon socket head bolt,
18 Nm
❑ Tightening torque: 18
Nm
4 - ABS speed sensor
❑ Before inserting sensor,
clean inner surface of fit‐
ting hole and coat with
grease G 000 650
❑ Renewing ⇒ page 32
5 - Wheel bearing/hub unit
❑ The ABS sensor ring is
installed in the wheel
bearing
6 - Hexagon socket head bolt
❑ Always renew if re‐
moved ⇒ Rep. gr. 42 ;
Servicing rear drive
shaft.
4.2.1
Protected by copyright. Copying for private or commercial purposes, in part or in whole, is not
permitted unless authorised by AUDI AG. AUDI AG does not guarantee or accept any liability
with respect to the correctness of information in this document. Copyright by AUDI AG.
Removing and installing rear wheel
speed sensor
Removing
– Raise the vehicle.
32
Rep. gr.45 - Anti-lock brake system
Audi A8 2003 ➤
Brake system - Edition 03.2013
– Detach speed sensor wiring connector -1- from speed sensor.
– Remove bolt -2- from wheel bearing housing.
– Pull ABS speed sensor out of wheel bearing housing.
Installing
– Before inserting speed sensor, clean inner surface of fitting
hole and coat speed sensor thoroughly with grease - G 000
650- .
– Insert speed sensor into hole in wheel bearing housing and
tighten bolt together with bracket for speed sensor wire to 10
Nm.
– Connect speed sensor to speed sensor wiring.
Protected by copyright. Copying for private or commercial purposes, in part or in whole, is not
permitted unless authorised by AUDI AG. AUDI AG does not guarantee or accept any liability
with respect to the correctness of information in this document. Copyright by AUDI AG.
4. Removing and installing parts of ABS system on front and rear axles
33
Audi A8 2003 ➤
Brake system - Edition 03.2013
5
Removing and installing parts of ESP
system
5.1
Removing and installing brake light
switch
Note
♦ The brake light switch must be removed in order to adjust
it.
Protected by copyright. Copying for private or commercial purposes, in part or in whole, is not
♦ To ensure a secure fit, the switch may only be fitted once.
with respect to the correctness of information in this document. Copyright by AUDI AG.
permitted unless authorised by AUDI AG. AUDI AG does not guarantee or accept any liability
Removing
– Unplug electrical connector.
– Turn brake light switch anti-clockwise 45° to remove.
Installing
Installation is performed in reverse sequence; note the following:
– Pull out plunger of brake light switch as far as it will go
-arrow-.
– Fit retainer tabs -1- and -2- on switch into recesses in mounting
hole.
Note
♦ When installing, brake pedal must not be pressed.
♦ The plunger adjusts itself automatically when the brake light
switch is inserted.
– Guide switch through mounting hole, press against pedal and
secure by turning 45° clockwise.
– Install driver's storage compartment ⇒ Body Repairs; Rep. gr.
68 ; Storage compartments/trim panels and covers; Removing
and installing driver's storage compartment .
After adjusting the brake light switch check whether the brake
pedal is on the end stop (rest position).
34
Rep. gr.45 - Anti-lock brake system
Audi A8 2003 ➤
Brake system - Edition 03.2013
5.2
Removing and installing lateral acceler‐
ation sender -G200- and yaw rate send‐
er -G202-
The lateral acceleration sender -G200- and the yaw rate sender
-G202- are integrated in one housing. The housing is located on
the front tunnel below the air conditioner.
Removing
– Remove extension of centre console ⇒ Rep. gr. 68 ; General
body repairs, interior .
– Pull connector off lateral acceleration/yaw rate sender.
– Remove the two securing bolts -arrows-.
– Take out lateral acceleration/yaw rate sender.
Installing
WARNING
Severe shocks or jolts can damage the lateral acceleration/
yaw rate sender.
– Installation is carried out in the reverse sequence.
When installing, ensure lateral acceleration/ yaw rate sender is
correctly seated in its bracket and is free of stress.
Do not use the securing bolts to forcibly position the lateral ac‐
celeration/yaw rate sender.
– Tighten securing bolts to 10 Nm.
– When renewing the control unit, select the function “Replace”
for the relevant control unit in the “Guided Fault Finding”.
To do so, use the testing and information system.
5.3
Removing and installing steering angle
sender -G85-
The steering angle sender is located between the steering wheel
and steering column switch.
5.3.1
Removing and installing
⇒ Rep. gr. 48 ⇒ permitted
Vehicleunless
diagnostic,
testing
sys‐ or accept any liability
authorised by
AUDI AG.and
AUDIinformation
AG does not guarantee
tem VAS 505x; "Guided
Fault
Finding"
with respect
to the
correctnessfunction
of information in this document. Copyright by AUDI AG.
Protected by copyright. Copying for private or commercial purposes, in part or in whole, is not
– Zero position compensation of steering angle sender must
then be performed.
– Connect vehicle diagnostic, testing and information system VAS 505x- and select “Function/component selection” with the
"Go to" key.
– Then, under “Function” select Replace steering angle sender
(00778-3132) - G85- ⇒ page 20 .
5. Removing and installing parts of ESP system
35
Audi A8 2003 ➤
Brake system - Edition 03.2013
5.4
Removing and installing parking brake
switch
Removing
– Remove extension of centre console ⇒ Rep. gr. 68 ; General
body repairs, interior .
– Remove switch -item 2- from navigation unit.
– -Item 1- bolt (2x), tightening torque 8 Nm.
– Unplug connector -item 3-.
Installing
– Installation is carried out in the reverse sequence.
5.5
Removing and installing brake pressure
sender -G201-
Removing
Note
Cover the engine compartment to ensure that no brake fluid flows
into it.
Protected by copyright. Copying for private or commercial purposes, in part or in whole, is not
permitted unless authorised by AUDI AG. AUDI AG does not guarantee or accept any liability
with respect to the correctness of information in this document. Copyright by AUDI AG.
– Remove hexagon bolt - 1 - securing fluid reservoir and pull
fluid reservoir to the side and out of buffer.
– Tightening torque: 6 Nm
– Unplug connector -1-.
36
Rep. gr.45 - Anti-lock brake system
Audi A8 2003 ➤
Brake system - Edition 03.2013
– Unscrew brake pressure sender -4-.
Installing
Remaining installation steps are carried out in reverse sequence.
– Bleed brake system ⇒ page 110 .
– Perform ESP road test ⇒ vehicle diagnostic, testing and in‐
formation system VAS 505x in the function "Guided Fault
Finding" .
Protected by copyright. Copying for private or commercial purposes, in part or in whole, is not
permitted unless authorised by AUDI AG. AUDI AG does not guarantee or accept any liability
with respect to the correctness of information in this document. Copyright by AUDI AG.
5. Removing and installing parts of ESP system
37
Audi A8 2003 ➤
Brake system - Edition 03.2013
46 –
Brakes - mechanism
1
Front brakes (PR 1LG)
⇒ “1.1 Servicing front brakes”, page 38
1.1
Servicing front brakes
⇒ “1.2 Removing and installing brake pads”, page 41
⇒ “1.3 Renewing brake caliper”, page 45
Note
♦ Always install all parts supplied in repair kit.
♦ After renewing brake pads, depress brake pedal firmly several
times with vehicle stationary so that the pads are properly
seated in their normal operating position.
♦ To draw off brake fluid from brake fluid reservoir use a bleeder
bottle which is used only for brake fluid. Brake fluid is poison‐
ous and must NOT be drawn off by sucking through a hose.
♦ Check that the brake caliper moves freely by moving it from
side to side.
Protected by copyright. Copying for private or commercial purposes, in part or in whole, is not
permitted unless authorised by AUDI AG. AUDI AG does not guarantee or accept any liability
with respect to the correctness of information in this document. Copyright by AUDI AG.
38
Rep. gr.46 - Brakes - mechanism
Audi A8 2003 ➤
Brake system - Edition 03.2013
1 - Brake pads
Note
A wire for the wear indicator is fitted
to the inner pad (with spring).
❑ There is an adhesive foil
on the backplates of the
outer brake pads. Re‐
move the protective foil
before fitting pads.
❑ Before fitting pads,
clean guide surfaces
and apply a thin coating
of polycarbamide
grease ⇒ Parts cata‐
logue
❑ Different versions avail‐
able ⇒ Parts catalogue
❑ Always renew on both
sides of axle
❑ ⇒ “1.2 Removing and in‐
stalling brake pads”,
page 41
❑ Checking pad thickness
⇒ Maintenance ; Book‐
let 4E
Note
Clean the brake calipers thoroughly
(grease-free) before inserting new
brake pads. When doing this, make
sure that all adhesive foil residue on
the contact surfaces for the outer
brake pad is removed.
Protected by copyright. Copying for private or commercial purposes, in part or in whole, is not
permitted unless authorised by AUDI AG. AUDI AG does not guarantee or accept any liability
with respect to the correctness of information in this document. Copyright by AUDI AG.
1. Front brakes (PR 1LG)
39
Audi A8 2003 ➤
Brake system - Edition 03.2013
2 - Brake carrier
❑ Bolt to wheel bearing housing
3 - Ribbed bolt
❑ Tightening torque: 190 Nm
❑ Clean ribs if using again
❑ M14 ×1.5 x 38
4 - Bearing bush
❑ Insert into brake caliper housing
5 - Guide pin
❑ Tightening torque: 30 Nm
6 - Protective cap
❑ Take off
❑ Insert wear indicator wire in protective cap
7 - Brake disc
❑ Wear limit ⇒ page 1
❑ Always renew on both sides of axle
❑ Detach brake caliper prior to removing
❑ Lightly lubricate contact surfaces between brake disc and wheel hub with polycarbamide grease ⇒ Parts
catalogue
❑ Allocation of brake discs ⇒ page 1
8 - Wheel bolts
❑ Fitting wheels ⇒ ELSA/ Wheel/Tyre Guide
9 - Brake line connection at brake pipe
❑ Tightening torque: 12 Nm
Note
Protected by copyright. Copying for private or commercial purposes, in part or in whole, is not
permitted unless authorised by AUDI AG. AUDI AG does not guarantee or accept any liability
with respect to the correctness of information in this document. Copyright by AUDI AG.
♦ Brake line at brake pipe: 12 Nm
♦ Brake pipe in brake caliper:
19 Nm
10 - Brake line
❑ Screw into brake caliper housing
❑ Screw into brake hose, counter hold on brake hose hexagon.
❑ Do not twist hose when fitting
❑ Ensure that lugs are properly seated in grooves in bracket.
11 - Brake pipe in brake caliper
❑ Tightening torque: 19 Nm
Note
♦ Brake line at brake hose: 12 Nm
♦ Brake pipe in brake caliper:
19 Nm
40
Rep. gr.46 - Brakes - mechanism
Audi A8 2003 ➤
Brake system - Edition 03.2013
12 - Bracket
❑ Bolt to brake caliper housing
❑ Attach brake line
13 - Bolt for bracket
❑ 25 Nm
14 - Brake caliper
❑ If assembly work is required, do not leave caliper hanging from brake hose but secure it to body with
wire
❑ With the exception of “Removing and installing brake pads” ⇒ page 41 and “Servicing front brake
caliper” ⇒ page 84 , no repairs may be performed on the brake caliper
❑ Do not twist hose when fitting
❑ Allocation ⇒ page 1 , Brakes
❑ ⇒ “1.3 Renewing brake caliper”, page 45
15 - Retaining spring
❑ Note correct installation position.
❑ Engage onto both brake caliper housing studs and onto outer pad retaining spring.
Note
The retaining spring must be push‐
ed under the brake carrier after en‐
gaging onto both studs. If incorrectly
installed, the wear of the outer pad
cannot be adjusted, and the pedal
travel will be increased as a result.
1.2
Protected by copyright. Copying for private or commercial purposes, in part or in whole, is not
permitted unless authorised by AUDI AG. AUDI AG does not guarantee or accept any liability
with respect to the correctness of information in this document. Copyright by AUDI AG.
Removing and installing brake pads
Check the thickness of the brake disc when renewing the brake
pads. Refer to wear limit for brake disc. Wear limit
⇒ “1 Brakes, wear limits”, page 1
Removing
Note
♦ Mark brake pads when removing them if they are to be rein‐
stalled. Reinstall in their original position to prevent uneven
braking.
♦ When installing brake discs, note direction of travel -indicated
by arrow on brake disc- and fitting location -left or right-.
– Raise the vehicle.
– Remove wheels.
1. Front brakes (PR 1LG)
41
Audi A8 2003 ➤
Brake system - Edition 03.2013
– Secure brake disc with one wheel bolt see -arrow-.
Protected by copyright. Copying for private or commercial purposes, in part or in whole, is not
– Lever brake pad retaining spring out of brake
housing
permittedcaliper
unless authorised
by AUDI AG. AUDI AG does not guarantee or accept any liability
with respect to the correctness of information in this document. Copyright by AUDI AG.
with a screwdriver and remove.
– Unplug connector for brake pad wear indicator.
– Turn connector 90° while using a screwdriver to release con‐
nector from bracket.
– Pull connector upwards out of bracket and detach wire.
– Detach brake line from bracket.
42
Rep. gr.46 - Brakes - mechanism
Audi A8 2003 ➤
Brake system - Edition 03.2013
– Remove caps -1-.
– Unscrew and remove both guide pins from brake caliper.
– Take off brake caliper housing and lay to one side so that the
weight of the brake caliper does not stress or damage the
brake hose.
– Take brake pads out of brake caliper housing or from brake
carrier.
Use only methylated spirits to clean the brake caliper housing.
Installing
Check the thickness of the brake disc when renewing the brake
pads. Refer to wear limit for brake disc.
– Check brake disc for wear ⇒ “1 Brakes, wear limits”, page 1 .
– Press piston back.
Note
Before inserting new brake pads, press piston back into cylinder
with resetting appliance. Before pressing the piston back, draw
off brake fluid from the reservoir with a bleeder bottle. Otherwise,
fluid can overflow and cause damage, particularly if the reservoir
has been subsequently topped up.
WARNING
Brake fluid is poisonous and must NOT be drawn off by sucking
through a hose.
– Insert brake pad with retaining spring and wear indicator into
brake caliper housing (piston).
Protected by copyright. Copying for private or commercial purposes, in part or in whole, is not
permitted unless authorised by AUDI AG. AUDI AG does not guarantee or accept any liability
with respect to the correctness of information in this document. Copyright by AUDI AG.
1. Front brakes (PR 1LG)
43
Audi A8 2003 ➤
Brake system - Edition 03.2013
– Fit outer brake pad -2- in brake caliper.
Note
♦ Fit brake pads into brake caliper and install assembly on brake
carrier / brake disc.
♦
– Secure brake caliper housing to brake carrier with both guide
pins (tighten to 30 Nm).
– Make sure not to twist the brake hose when installing.
– Fit both caps.
– Insert retaining spring into brake caliper housing.
– Attach brake line
– Connect wear indicator connector and insert wire in dust cap
and protective cap.
– Fit wheels ⇒ ELSA/ Wheel/Tyre Guide ⇒ Rep. gr. 44 .
Note
The retaining spring must be pushed under the brake carrier after
engaging onto both studs. If incorrectly installed, the wear of the
outer pad cannot be adjusted, and the pedal travel will be in‐
creased as a result.
Caution
After installing the brake pads and before driving the vehicle,
depress brake pedal firmly several times with the vehicle sta‐
tionary, so that the brake pads are properly seated in their
normal operating position.
Protected by copyright. Copying for private or commercial purposes, in part or in whole, is not
unless
authorised
by AUDI AG. AUDI AG does not guarantee or accept any liability
– Check brake fluid permitted
level
and
top
up if necessary.
with respect to the correctness of information in this document. Copyright by AUDI AG.
Caution
Before driving vehicle for the first time, make sure function of
brakes is OK.
44
Rep. gr.46 - Brakes - mechanism
Audi A8 2003 ➤
Brake system - Edition 03.2013
1.3
Renewing brake caliper
Removing
Note
♦ Mark brake pads when removing them if they are to be rein‐
stalled. Reinstall in their original position to prevent uneven
braking.
♦ When installing brake discs, note direction of travel -indicated
by arrow on brake disc- and fitting location -left or right-.
– Raise the vehicle.
– Remove wheels.
– Secure brake disc with one wheel bolt see -arrow-.
– Remove brake pads ⇒ page 41 .
Protected by copyright. Copying for private or commercial purposes, in part or in whole, is not
Installingpermitted unless authorised by AUDI AG. AUDI AG does not guarantee or accept any liability
with respect to the correctness of information in this document. Copyright by AUDI AG.
Installation is carried out in reverse sequence.
– Install brake pads ⇒ page 41 .
– Bleed brake system ⇒ page 110 .
– Fit wheels ⇒ ELSA/ Wheel/Tyre Guide ⇒ Rep. gr. 44 .
Caution
After installing the brake pads and before driving the vehicle,
depress brake pedal firmly several times with the vehicle sta‐
tionary, so that the brake pads are properly seated in their
normal operating position.
– Check brake fluid level and top up if necessary.
Caution
Before driving vehicle for the first time, make sure function of
brakes is OK.
1. Front brakes (PR 1LG)
45
Audi A8 2003 ➤
Brake system - Edition 03.2013
2
Front brakes (PR 1LJ, 1LL, 1LM,
1LK)
⇒ “2.1 Servicing front brakes”, page 46
2.1
Servicing front brakes
⇒ “2.2 Removing and installing brake pads”, page 48
⇒ “2.3 Renewing brake caliper”, page 52
Note
♦ Always install all parts supplied in repair kit.
♦ After renewing brake pads, depress brake pedal firmly several
times with vehicle stationary so that the pads are properly
seated in their normal operating position.
♦ To draw off brake fluid from brake fluid reservoir use a bleeder
bottle which is used only for brake fluid. Brake fluid is poison‐
ous and must NOT be drawn off by sucking through a hose.
♦ Check that the brake caliper moves freely by moving it from
side to side.
1 - Brake pads
Note
A wire for the wear indicator is fitted
to the inner pad (with spring).
❑ There is an adhesive foil
on the backplates of the
outer brake pads. Re‐
move the protective foil
before fitting pads.
❑ Before fitting pads,
clean guide surfaces
and apply a thin coating
of polycarbamide
grease ⇒ Parts cata‐
logue
❑ Different versions avail‐
able ⇒ Parts catalogue
❑ Always renew on both
sides of axle
❑ ⇒ “2.2 Removing and in‐
stalling brake pads”,
page 48
❑ Checking pad thickness
⇒ Maintenance ; Book‐
Protected by copyright. Copying for private or commercial purposes, in part or in whole, is not
let 4E
permitted unless authorised by AUDI AG. AUDI AG does not guarantee or accept any liability
Note
with respect to the correctness of information in this document. Copyright by AUDI AG.
Clean the brake calipers thoroughly
(grease-free) before inserting new
brake pads. When doing this, make
sure that all adhesive foil residue on
the contact surfaces for the outer
brake pad is removed.
46
Rep. gr.46 - Brakes - mechanism
Audi A8 2003 ➤
Brake system - Edition 03.2013
2 - Brake carrier
❑ Bolt to wheel bearing housing
3 - Ribbed bolt
❑ 190 Nm
❑ Clean ribs if using again
❑ M14 × 1.5 x 38
4 - Bearing bush
❑ Insert into brake caliper housing
5 - Guide pin
❑
Tightening torque: 30 Nm
6 - Protective cap
❑ Take off
❑ Insert wear indicator wire in protective cap
- copyright.
Brake disc
Protected7by
Copying for private or commercial purposes, in part or in whole, is not
permitted unless authorised by AUDI AG. AUDI AG does not guarantee or accept any liability
❑
Wear
limit ⇒ page 1
with respect to the correctness of information in this document. Copyright by AUDI AG.
❑ Always renew on both sides of axle
❑ Detach brake caliper prior to removing
❑ Lightly grease contact surfaces between brake disc and wheel hub with polycarbamide grease
G 052 142 A2.
8 - Wheel bolts
❑ Fitting wheels ⇒ Wheel/Tyre Guide
9 - Brake line connection at brake pipe
❑ Tightening torque: 12 Nm
Note
♦ Brake line connection at brake
pipe: 12 Nm
♦ Brake pipe in brake caliper:
19 Nm
10 - Brake line
❑ Screw into brake caliper housing
❑ Screw into brake hose, counter hold on brake hose hexagon.
❑ Do not twist hose when fitting
❑ Ensure that lugs are properly seated in grooves in bracket.
11 - Brake pipe in brake caliper
❑ Tightening torque: 19 Nm
Note
♦ Brake pipe in brake caliper:
19 Nm
♦ Brake line connection at brake
pipe: 12 Nm
2. Front brakes (PR 1LJ, 1LL, 1LM, 1LK)
47
Audi A8 2003 ➤
Brake system - Edition 03.2013
12 - Bracket
❑ Bolt to brake caliper housing
❑ Attach brake line
13 - Bolt for bracket
❑ Tightening torque: 25 Nm
14 - Brake caliper
❑ If assembly work is required, do not leave caliper hanging from brake hose but secure it to body with
wire
❑ With the exception of “Renewing brake pads” ⇒ page 48 and “Servicing front brake caliper”
⇒ page 88 , no repairs may be performed on the brake caliper.
❑ Do not twist hose when installing
❑ Allocation ⇒ page 1 , Brakes
❑ ⇒ “2.3 Renewing brake caliper”, page 52
15 - Retaining spring
❑ Note correct installation position.
Note
The retaining spring must be push‐
ed under the brake carrier after en‐
gaging onto both studs. If incorrectly
installed, the wear of the outer pad
cannot be adjusted, and the pedal
travel will be increased as a result.
2.2
Removing and installing brake pads
Protected by copyright. Copying for private or commercial purposes, in part or in whole, is not
permitteddisc
unlesswhen
authorised
by AUDI AG.
AUDI
AG does not guarantee or accept any liability
Check the thickness of the brake
renewing
the
brake
with respect
to the
correctness
pads. Refer to wear limit for brake
disc.
Wear
limit of information in this document. Copyright by AUDI AG.
⇒ “1 Brakes, wear limits”, page 1
Removing
Note
♦
♦ Mark brake pads when removing them if they are to be rein‐
stalled. Reinstall in their original position to prevent uneven
braking.
♦ When installing brake discs, note direction of travel -indicated
by arrow on brake disc- and fitting location -left or right-.
– Raise the vehicle.
– Remove wheels.
48
Rep. gr.46 - Brakes - mechanism
Audi A8 2003 ➤
Brake system - Edition 03.2013
– Secure brake disc with one wheel bolt see -arrow-.
– Lever brake pad retaining spring out of brake caliper housing
with a screwdriver and remove.
Note
Spring is under tension, so protect yourself by holding a glove or
cloth in front of spring.
– Unplug connector for brake pad wear indicator as shown in
illustration.
Protected by copyright. Copying for private or commercial purposes, in part or in whole, is not
permitted unless authorised by AUDI AG. AUDI AG does not guarantee or accept any liability
with respect to the correctness of information in this document. Copyright by AUDI AG.
– Turn connector 90° while using a screwdriver to release con‐
nector from bracket.
– Pull connector upwards out of bracket and detach wire.
2. Front brakes (PR 1LJ, 1LL, 1LM, 1LK)
49
Audi A8 2003 ➤
Brake system - Edition 03.2013
– Detach brake line from bracket.
Protected by copyright. Copying for private or commercial purposes, in part or in whole, is not
permitted unless authorised by AUDI AG. AUDI AG does not guarantee or accept any liability
with respect to the correctness of information in this document. Copyright by AUDI AG.
– Remove caps -1-.
– Unscrew and remove both guide pins from brake caliper.
– Take off brake caliper housing and lay to one side so that the
weight of the brake caliper does not stress or damage the
brake hose.
– Take brake pads out of brake caliper housing or from brake
carrier.
Note
♦ The brake pad with wear indicator is located on the inside.
♦ Remove brake carrier when renewing brake discs.
Use only methylated spirits to clean the brake caliper housing.
Installing
Check the thickness of the brake disc when renewing the brake
pads. Refer to wear limit for brake disc.
– Check brake disc for wear ⇒ “1 Brakes, wear limits”, page 1 .
50
Rep. gr.46 - Brakes - mechanism
Audi A8 2003 ➤
Brake system - Edition 03.2013
– Press back both pistons.
Note
Before inserting new brake pads, press pistons back into cylin‐
ders with resetting appliance. Before pressing the pistons back,
draw off brake fluid from the reservoir with a bleeder bottle. Oth‐
erwise, fluid can overflow and cause damage, particularly if the
reservoir has been topped up.
WARNING
Brake fluid is poisonous and must NOT be drawn off by sucking
through a hose.
– Insert brake pad with retaining spring and wear indicator into
brake caliper housing (piston).
– Fit outer brake pad -2- in brake caliper.
Note
Fit brake pads into brake caliper and install assembly on brake
carrier / brake disc.
Protected by copyright. Copying for private or commercial purposes, in part or in whole, is not
permitted unless authorised by AUDI AG. AUDI AG does not guarantee or accept any liability
with respect to the correctness of information in this document. Copyright by AUDI AG.
2. Front brakes (PR 1LJ, 1LL, 1LM, 1LK)
51
Audi A8 2003 ➤
Brake system - Edition 03.2013
– Secure brake caliper housing to brake carrier with both guide
pins (tighten to 30 Nm).
– Fit both caps.
– Make sure not to twist the brake hose when installing.
– Insert retaining spring into brake caliper housing.
– Attach brake line.
– Connect wear indicator connector and insert wire in dust cap
and protective cap.
– Fit wheels ⇒ ELSA/ Wheel/Tyre Guide ⇒ Rep. gr. 44 .
Note
Protected by copyright. Copying for private or commercial purposes, in part or in whole, is not
permitted unless authorised by AUDI AG. AUDI AG does not guarantee or accept any liability
with respect to the correctness of information in this document. Copyright by AUDI AG.
The retaining spring must be pushed under the brake carrier after
engaging onto both studs. If incorrectly installed, the wear of the
outer pad cannot be adjusted, and the pedal travel will be in‐
creased as a result.
Caution
After installing the brake pads and before driving the vehicle,
depress brake pedal firmly several times with the vehicle sta‐
tionary, so that the brake pads are properly seated in their
normal operating position.
– Check brake fluid level and top up if necessary.
Caution
Before driving vehicle for the first time, make sure function of
brakes is OK.
2.3
Renewing brake caliper
Removing
Note
♦ Mark brake pads when removing them if they are to be rein‐
stalled. Reinstall in their original position to prevent uneven
braking.
♦
– Raise the vehicle.
– Remove wheels.
52
Rep. gr.46 - Brakes - mechanism
Audi A8 2003 ➤
Brake system - Edition 03.2013
– Secure brake disc with one wheel bolt see -arrow-.
– Remove brake pads ⇒ page 48 .
Installing
– Install brake pads ⇒ page 48 .
– Bleed brake system ⇒ page 110 .
– Fit wheels ⇒ ELSA/ Wheel/Tyre Guide ⇒ Rep. gr. 44 .
Caution
Protected by copyright. Copying for private or commercial purposes, in part or in whole, is not
permitted unless authorised by AUDI AG. AUDI AG does not guarantee or accept any liability
with respect to the correctness of information in this document. Copyright by AUDI AG.
After installing the brake pads and before driving the vehicle,
depress brake pedal firmly several times with the vehicle sta‐
tionary, so that the brake pads are properly seated in their
normal operating position.
– Check brake fluid level and top up if necessary.
Caution
Before driving vehicle for the first time, make sure function of
brakes is OK.
2. Front brakes (PR 1LJ, 1LL, 1LM, 1LK)
53
Audi A8 2003 ➤
Brake system - Edition 03.2013
3
Ceramic front brakes (PR 1LW)
⇒ “3.1 Servicing ceramic brakes”, page 54
3.1
Servicing ceramic brakes
The ceramic brake discs must always be checked for damage and
wear when renewing the brake pads.
♦ ⇒ “2 Assessment of ceramic brake discs”, page 4
♦ ⇒ “3 Assessing degree of wear on ceramic brake discs”, page
7
Note
♦ Always install all parts supplied in repair kit.
♦ After renewing brake pads, depress brake pedal firmly several
times with vehicle stationary so that the pads are properly
seated in their normal operating position.
♦ To draw off brake fluid from brake fluid reservoir use a bleeder
bottle which is used only for brake fluid. Brake fluid is poison‐
ous and must NOT be drawn off by sucking through a hose.
1 - Bolts
Caution
Do NOT loosen these
bolts.
Note
These bolts do not have to be loos‐
ened in order to remove the brake
caliper. Loosen bolts -10- to remove
the brake caliper.
2 - Retaining spring for brake
pads
3 - Guide pin
4 - Brake caliper
❑ If assembly work is re‐
quired, do not leave cal‐
iper hanging from brake
hose but secure it to
body with wire
❑ With the exception of
“Renewing brake pads”
⇒ page 48 and “Servic‐
ing front brake caliper”
⇒ page 88 , no repairs
may be performed on
the brake caliper.
❑ Always renew on both
sides of axle
❑ Allocation ⇒ page 1 ,
Brakes
❑ Removing and installing
54
Rep. gr.46 - Brakes - mechanism
Protected by copyright. Copying for private or commercial purposes, in part or in whole, is not
permitted unless authorised by AUDI AG. AUDI AG does not guarantee or accept any liability
with respect to the correctness of information in this document. Copyright by AUDI AG.
Audi A8 2003 ➤
Brake system - Edition 03.2013
⇒ page 57
5 - Brake pads
Note
A wire for the wear indicator is fitted
to the inner pad.
❑ There is an adhesive foil on the backplates of the outer brake pads. Remove the protective foil before
fitting pads.
❑ Before fitting pads, clean guide surfaces and apply a thin coating of polycarbamide grease ⇒ Parts
catalogue
❑ Different versions available ⇒ Parts catalogue
❑ Always renew on both sides of axle
❑ Removing and installing ⇒ page 57
❑ Checking pad thickness ⇒ Maintenance ; Booklet 4E
6 - Locating bolt
❑ Tightening torque 5 Nm
7 - Brake disc
❑ Wear limit ⇒ page 1
❑ Always renew on both sides of axle
❑ Detach brake caliper prior to removing
❑ Lightly grease contact surfaces between brake disc and wheel hub with polycarbamide grease
G 052 142 A2.
❑ Allocation of brake discs ⇒ page 1
❑ Removing and installing ⇒ page 62
❑ Renewing ⇒ page 63
8 - Splash plate
9 - Bolts for splash plate
❑ Tightening torque 9 Nm
10 - Bolts
Note
Loosen these bolts to remove brake
caliper.
Note
Always renew if removed
❑ 190 Nm
11 - Brake carrier
Protected by copyright. Copying for private or commercial purposes, in part or in whole, is not
permitted unless
authorised
by AUDI AG.
AUDI AGhousing
does not guarantee or accept any liability
❑ Bolt
to wheel
bearing
with respect to the correctness of information in this document. Copyright by AUDI AG.
❑ Bolted onto brake caliper
❑ 190 Nm
3. Ceramic front brakes (PR 1LW)
55
Audi A8 2003 ➤
Brake system - Edition 03.2013
12 - Brake pistons
WARNING
The brake pistons have
different
diameters.
When
re-installing,
please make sure that
each of the brake pistons
is inserted in the correct
aperture in the brake cal‐
iper. The ceramic inserts
on the brake piston act
as heat insulators and
must not be separated
from the brake piston. If
the ceramic insert is
damaged, the brake pis‐
tons must be renewed
for safety reasons.
13 - Bolt for bracket
❑ Tightening torque: 25 Nm
14 - Brake line connection at brake pipe
❑ Tightening torque: 12 Nm
❑ Brake hose must not be twisted.
Note
♦ Brake line connection at brake
pipe: 12 Nm
♦ Brake pipe in brake caliper:
19 Nm
15 - Brake line
❑ Screw into brake caliper housing
❑ Screw into brake hose, counter hold on brake hose hexagon.
Protected by copyright. Copying for private or commercial purposes, in part or in whole, is not
permitted unless authorised by AUDI AG. AUDI AG does not guarantee or accept any liability
❑ Do not twist hose when fitting
with respect to the correctness of information in this document. Copyright by AUDI AG.
❑ Ensure that lugs are properly seated in grooves in bracket.
16 - Bracket for brake line
❑ Bolt to brake caliper housing
❑ Attach brake line
17 - Brake pipe in brake caliper
❑ Tightening torque: 19 Nm
Note
♦ Brake pipe in brake caliper:
19 Nm
♦ Brake line connection at brake
pipe: 12 Nm
18 - Bolt for guide pin
❑ 30 Nm
19 - Damper spring
❑ 2 fitted on each brake caliper
❑ Detaching and attaching ⇒ page 57
56
Rep. gr.46 - Brakes - mechanism
Audi A8 2003 ➤
Brake system - Edition 03.2013
3.2
Detaching and attaching damper spring
Detaching
– First disengage damper springs -A- (left and right) from guide
pin -B- using commercially available pliers.
– Then pull damper springs -A- out of brake pads -C-.
Attaching
– First engage damper springs -A- (left and right) in bottom hole
in corresponding brake pads -C-.
– Then engage damper springs -A- (left and right) in guide pin
-B- using commercially available pliers.
Caution
Make sure that the damper springs are fitted correctly at the
guide pin and brake pads.
Installation position of damper springs at guide pin and brake
pads -arrows-
3.3
Removing and installing brake pads (ce‐
ramic brakes)
Removing
Note
♦ The brake caliper does not have to be detached in order to
Protected by copyright. Copying for private or commercial purposes, in part or in whole, is not
remove
the brake pads.
permitted unless authorised by AUDI AG. AUDI AG does not guarantee or accept any liability
♦ Mark brake pads when removing them if they are to be rein‐
with respect to the correctness of information in this document. Copyright by AUDI AG.
stalled. Reinstall in their original position to prevent uneven
braking.
The ceramic brake discs must always be checked for damage and
wear when renewing the brake pads.
♦ ⇒ “2 Assessment of ceramic brake discs”, page 4
3. Ceramic front brakes (PR 1LW)
57
Audi A8 2003 ➤
Brake system - Edition 03.2013
♦ ⇒ “3 Assessing degree of wear on ceramic brake discs”, page
7
– Raise the vehicle.
– Remove wheels.
Caution
On vehicles with ceramic brakes the wheel must not be allowed
to drop onto the brake disc. This would cause irreparable dam‐
age to the disc. Screw two assembly pins (from vehicle tool kit)
into the wheel bolt holes when removing and fitting a wheel.
Insert the long assembly pin into the top hole.
– Secure brake disc with one wheel bolt.
– Unplug connector for brake pad wear indicator as shown in
illustration.
Protected by copyright. Copying for private or commercial purposes, in part or in whole, is not
permitted unless authorised by AUDI AG. AUDI AG does not guarantee or accept any liability
– Turn connector 90° while using a screwdriver to release con‐
with respect to the correctness of information in this document. Copyright by AUDI AG.
nector from bracket.
– Pull connector upwards out of bracket and detach wire.
Note
The brake caliper does not have to be detached in order to re‐
move the brake pads.
– First disengage damper springs -A- (left and right) from guide
pin -B- using commercially available pliers.
– Then pull damper springs -A- out of brake pads -C-.
– Remove bolt for guide pin -B-.
– Pull guide pin out of brake pads and brake caliper.
WARNING
Retaining spring is under tension and could cause injury when
pulling out the guide pin if suitable precautions are not taken.
58
Rep. gr.46 - Brakes - mechanism
Audi A8 2003 ➤
Brake system - Edition 03.2013
– Disengage pad wear indicator wire from retaining spring -2-.
Note
Before removing old brake pads, press pistons back into cylinders
with resetting appliance. Before pressing the pistons back, draw
off brake fluid from the reservoir with a bleeder bottle. Otherwise,
fluid can overflow and cause damage, particularly if the reservoir
has been topped up.
WARNING
Brake fluid is poisonous and must NOT be drawn off by sucking
through a hose.
– Remove retaining spring -2-.
– Remove brake pads from brake caliper housing.
Use only methylated spirits to clean the brake caliper housing.
Installing
The ceramic brake discs must always be checked for damage and
wear when renewing the brake pads.
♦ ⇒ “2 Assessment of ceramic brake discs”, page 4
♦ ⇒ “3 Assessing degree of wear on ceramic brake discs”, page
7
– Insert brake pads into brake caliper.
Note
The brake pad with the wear indicator wire is located on the inside.
– Insert retaining spring in brake caliper housing -2-.
– Press guide pin -3- through brake caliper and brake pads.
WARNING
After introducing the guide pin, the retaining spring must be
pressed underneath the guide pin so that it is under tension. If
the retaining spring is fitted incorrectly, the brake pads will be
out of position and the function of the brakes will be impaired.
Protected by copyright. Copying for private or commercial purposes, in part or in whole, is not
permitted unless authorised by AUDI AG. AUDI AG does not guarantee or accept any liability
with respect to the correctness of information in this document. Copyright by AUDI AG.
– Tighten bolt of guide pin -18- to specified torque
⇒ Item 18 (page 56) .
3. Ceramic front brakes (PR 1LW)
59
Audi A8 2003 ➤
Brake system - Edition 03.2013
– First engage damper springs -A- (left and right) in bottom hole
in corresponding brake pads -C-.
– Then engage damper springs -A- (left and right) in guide pin
-B- using commercially available pliers.
Caution
Make sure that the damper springs are fitted correctly at the
guide pin and brake pads.
Installation position of damper springs at guide pin and brake
pads -arrows– Connect wear indicator connector and insert wire in dust cap
and protective cap.
Note
Protected by copyright. Copying for private or commercial purposes, in part or in whole, is not
permitted unless authorised by AUDI AG. AUDI AG does not guarantee or accept any liability
with respect to the correctness of information in this document. Copyright by AUDI AG.
It is important to ensure that the pad wear indicator wire is inserted
in the retaining spring -2-.
– Insert pad wear indicator wire in retaining spring -2-.
– Fit wheels ⇒ ELSA/ Wheel/Tyre Guide ⇒ Rep. gr. 44 .
– Check brake fluid level and top up if necessary.
Caution
After installing the brake pads and before driving the vehicle,
depress brake pedal firmly several times with the vehicle sta‐
tionary, so that the brake pads are properly seated in their
normal operating position.
Caution
Before driving vehicle for the first time, make sure function of
brakes is OK.
3.4
Removing and installing brake caliper
(ceramic brakes)
Caution
Do NOT loosen bolts -1-.
60
Rep. gr.46 - Brakes - mechanism
Audi A8 2003 ➤
Brake system - Edition 03.2013
4 - Brake caliper
❑ If assembly work is re‐
quired, do not suspend
caliper from brake hose
but tie it to body with a
piece of wire.
10 - Bolts
Note
Always renew if removed
❑ 190 Nm
11 - Brake carrier
❑ Bolt to wheel bearing
housing
❑ Bolted onto brake cali‐
per
❑ 190 Nm
13 - Bolt for bracket
❑ 25 Nm
16 - Bracket for brake line
by copyright. Copying for private or commercial purposes, in part or in whole, is not
❑ Attach brake line Protected
permitted unless authorised by AUDI AG. AUDI AG does not guarantee or accept any liability
with respect to the correctness of information in this document. Copyright by AUDI AG.
3. Ceramic front brakes (PR 1LW)
61
Audi A8 2003 ➤
Brake system - Edition 03.2013
Note
Do NOT loosen bolts -1-.
Removing
– Remove bracket for brake line.
– Loosen and remove the two bolts -10- on the brake carrier.
– Remove brake caliper. Leave brake carrier -11- in position on
brake caliper.
Installing
– Installation is carried out in reverse sequence.
Note
Take care not to twist brake hose.
Caution
Protected by copyright. Copying for private or commercial purposes, in part or in whole, is not
permitted unless authorised by AUDI AG. AUDI AG does not guarantee or accept any liability
with respect to the correctness of information in this document. Copyright by AUDI AG.
Before driving vehicle for the first time, make sure function of
brakes is OK.
3.5
Detaching and attaching front brake disc
(ceramic brakes)
WARNING
The brake disc ring and the brake disc hub are bolted together
and must NOT be separated. Do NOT slacken the bolted con‐
nection on the brake disc hub.
– Raise vehicle.
– Remove wheels.
Caution
On vehicles with ceramic brakes the wheel must not be allowed
to drop onto the brake disc. This would cause irreparable dam‐
age to the disc. Screw two assembly pins (from vehicle tool kit)
into the wheel bolt holes when removing and fitting a wheel.
Insert the long assembly pin into the top hole.
– Detach brake caliper via bolt -10- ⇒ page 60 .
Do not leave brake caliper and brake carrier hanging from brake
hose but secure them to bodywork using a suitable cable tie or
wire. Take care that brake hose is not damaged by weight of brake
components.
Note
Do NOT loosen bolts -1-.
62
Rep. gr.46 - Brakes - mechanism
Audi A8 2003 ➤
Brake system - Edition 03.2013
– Remove locating bolt -6- from brake disc, holding brake disc
in position.
– Take brake disc off wheel hub.
Note
Take care to keep the brake disc straight when taking it off the
wheel hub.
Installing
– Clean contact surfaces of wheel hub and brake disc and re‐
move corrosion.
– Fit brake disc onto wheel hub.
Note
Take care to keep the brake disc straight when fitting it onto the
wheel hub.
– Screw in locating bolt -6- and tighten to 5 Nm.
– Attach brake caliper ⇒ page 60 .
– Fit wheels.
Tightening torque for wheel bolts ⇒ Rep. gr. 44
Caution
Before driving vehicle for the first time, make sure function of
brakes is OK.
3.6
Renewing front brake disc (ceramic
brakes)
WARNING
Protected by copyright. Copying for private or commercial purposes, in part or in whole, is not
permitted unless authorised by AUDI AG. AUDI AG does not guarantee or accept any liability
with respect to the correctness of information in this document. Copyright by AUDI AG.
The brake disc ring and the brake disc hub are bolted together
and must NOT be separated. Do NOT slacken the bolted con‐
nection on the brake disc hub.
Note
Always renew on both sides of axle.
Removing
– Raise vehicle.
– Remove wheels.
3. Ceramic front brakes (PR 1LW)
63
Audi A8 2003 ➤
Brake system - Edition 03.2013
Caution
On vehicles with ceramic brakes the wheel must not be allowed
to drop onto the brake disc. This would cause irreparable dam‐
age to the disc. Screw two assembly pins (from vehicle tool kit)
into the wheel bolt holes when removing and fitting a wheel.
Insert the long assembly pin into the top hole.
– Remove brake pads ⇒ page 57 .
– Detach brake caliper ⇒ page 60 .
Protected by copyright. Copying for private or commercial purposes, in part or in whole, is not
Do not leave brake caliper hanging from brake hosepermitted
but secure
it
unless authorised
by AUDI AG. AUDI AG does not guarantee or accept any liability
with respect
to bodywork using a suitable cable tie or wire. Take care
that to the correctness of information in this document. Copyright by AUDI AG.
brake hose is not damaged by weight of brake components.
– Remove locating bolt -6- from brake disc, holding brake disc
in position.
– Take brake disc off wheel hub.
Note
Take care to keep the brake disc straight when taking it off the
wheel hub.
Installing
– Clean contact surfaces of wheel hub and remove corrosion.
– Fit brake disc onto wheel hub.
Note
Take care to keep the brake disc straight when fitting it onto the
wheel hub.
– Screw in locating bolt -6- and tighten to 5 Nm.
– Attach brake caliper ⇒ page 60 .
– Install brake pads ⇒ page 57 .
– Fit wheels.
Caution
On vehicles with ceramic brakes the wheel must not be allowed
to drop onto the brake disc. This would cause irreparable dam‐
age to the disc. Screw two assembly pins (from vehicle tool kit)
into the wheel bolt holes when removing and fitting a wheel.
Insert the long assembly pin into the top hole.
Tightening torque for wheel bolts ⇒ Rep. gr. 44
Caution
Before driving vehicle for the first time, make sure function of
brakes is OK.
64
Rep. gr.46 - Brakes - mechanism
Audi A8 2003 ➤
Brake system - Edition 03.2013
4
Rear brakes, electronic parking
brake and handbrake (EPB)
⇒ “4.1 Servicing rear brakes - all models including ceramic brakes
”, page 65
4.1
Servicing rear brakes - all models in‐
cluding ceramic brakes
Steel version brakes:
Check the thickness of the brake disc when renewing the brake
pads. Refer to wear limit for brake disc
⇒ “1 Brakes, wear limits”, page 1 .
Ceramic brakes:
The ceramic brake discs must always be checked for damage and
wear when renewing the brake pads.
♦ ⇒ “2 Assessment of ceramic brake discs”, page 4
♦ ⇒ “3 Assessing degree of wear on ceramic brake discs”, page
7
Note
Protected by copyright. Copying for private or commercial purposes, in part or in whole, is not
permitted unless authorised by AUDI AG. AUDI AG does not guarantee or accept any liability
with respect to the correctness of information in this document. Copyright by AUDI AG.
Install all parts supplied in repair kit.
4. Rear brakes, electronic parking brake and handbrake (EPB)
65
Audi A8 2003 ➤
Brake system - Edition 03.2013
1 - Self-locking bolt
❑ Tightening torque: 12
Nm
2 - Actuator motor for electron‐
ic parking brake and hand‐
brake
❑ Removing and installing
control unit for electro‐
mechanical parking
brake ⇒ page 79
❑ Removing and installing
actuator motor
⇒ page 79
3 - Self-locking bolt
❑ Tightening torque: 35
Nm
❑ Always renew
❑ Counter-hold guide pin
when loosening and
tightening
4 - Brake caliper
❑ Do not disconnect brake
hose when changing
brake pads
❑ Servicing brake caliper
⇒ page 101
5 - Brake pads
by copyright.
for private or commercial purposes, in part or in whole, is not
❑ Protected
Always
renew Copying
on both
permitted
authorised by AUDI AG. AUDI AG does not guarantee or accept any liability
sides unless
of axle
with respect to the correctness of information in this document. Copyright by AUDI AG.
❑ Removing and installing
⇒ page 67
❑ Checking pad thickness
⇒ Maintenance ; Book‐
66
Rep. gr.46 - Brakes - mechanism
Audi A8 2003 ➤
Brake system - Edition 03.2013
let 8E
6 - Pad retainer
❑ Always renew when changing pads
7 - Brake disc
❑ Always renew on both sides of axle
❑ Detach brake caliper prior to removing
❑ Only dress evenly, on both sides, starting from thickness when new ⇒ page 1
❑ Allocation of brake discs ⇒ page 1
8 - Ribbed bolt
Protected by copyright. Copying for private or commercial purposes, in part or in whole, is not
❑ Tightening torque: 140 Nm
permitted unless authorised by AUDI AG. AUDI AG does not guarantee or accept any liability
with respect to the correctness of information in this document. Copyright by AUDI AG.
❑ M12×1.5 x 75
❑ Always renew
❑ Set torque wrench -V.A.G 1332- to 125 Nm to tighten the bottom bolt. This tightening torque only applies
when using insert tool -T40036- .
9 - Brake carrier with guide pins and protective caps
❑ Replacement carriers are supplied assembled and with sufficient grease on guide pins
❑ If protective caps or guide pins are damaged, renew using repair kit. Use grease sachet supplied to
lubricate guide pins.
10 - Brake line
❑ Tightening torque: 14 Nm
❑ Do not disconnect brake line when changing brake pads
11 - Retaining spring
❑ Make sure that the locking lug is fitted properly in the bracket.
4.2
Removing and installing brake pads
(rear brakes)
Steel version brakes:
Check the thickness of the brake disc when renewing the brake
pads. Refer to wear limit for brake disc
⇒ “1 Brakes, wear limits”, page 1 .
Ceramic brakes:
The ceramic brake discs must always be checked for damage and
wear when renewing the brake pads.
♦ ⇒ “2 Assessment of ceramic brake discs”, page 4
♦ ⇒ “3 Assessing degree of wear on ceramic brake discs”, page
7
4. Rear brakes, electronic parking brake and handbrake (EPB)
67
Audi A8 2003 ➤
Brake system - Edition 03.2013
Special tools and workshop equipment required
♦
♦ Torque wrench - V.A.G 1331/♦ Torque wrench - V.A.G 1332/♦ Piston resetting appliance -T10145♦ Vehicle diagnostic, testing and information system - VAS
505x♦ Insert tool -T40036Removing
Note
Protected by copyright. Copying for private or commercial purposes, in part or in whole, is not
permitted unless authorised by AUDI AG. AUDI AG does not guarantee or accept any liability
with respect to the correctness of information in this document. Copyright by AUDI AG.
♦ Mark brake pads when removing them if they are to be rein‐
stalled. Fit in same position when installing otherwise uneven
braking will be caused.
♦ It is recommended to apply the electronic parking brake after
driving long distances.
♦ Pad wear is automatically adjusted approx. every 1,000 km.
68
Rep. gr.46 - Brakes - mechanism
Audi A8 2003 ➤
Brake system - Edition 03.2013
– Select jacking mode. ⇒ Rep. gr. 43 Operation of air suspen‐
sion
– Raise the vehicle.
– Remove wheels.
Caution
On vehicles with ceramic brakes the wheel must not be allowed
to drop onto the brake disc. This would cause irreparable dam‐
age to the disc. Screw two assembly pins into the wheel bolt
holes when removing and fitting a wheel. Insert the long as‐
sembly pin into the top hole.
– Connect vehicle diagnostic, testing and information system VAS 505x- and diagnosis lead, 3m with voltage supply - VAS
5051/1- to 16-pin diagnostic connector of vehicle and select
parking brake with “address word” 53. When doing this, the
ignition must be off.
Note
♦ Ignition on
♦ Release parking brake.
♦ Coding checked and rectified if necessary
♦ Event memory interrogated, indicated faults eliminated and
memory erased.
Display on VAS 505x:
– Select function “53 - Parking brake”.
– Select function “04 - Basic setting”.
Display on VAS 505x:
♦ The prompt to enter a display group appears in display zone
-1-.
♦ Display zone -2- shows a keypad.
When installing new brake pads:
Protected by copyright. Copying for private or commercial purposes, in part or in whole, is not
permitted–unless
authorised
AG. AUDI
AG does notgroup
guarantee
or accept any
Enter
“05”byorAUDI
“005”
as “Display
number”
inliability
display
with respect to the correctness of information in this document. Copyright by AUDI AG.
zone
-2- via the keypad and confirm entry with “Q key” (resetting
piston).
When re-installing old brake pads:
– Enter “07” or “007” as “Display group number” via the key pad
-2- and confirm entry with the "Q key". (Brake opens all the
way, the pad thickness does not have to be entered later on.)
All vehicles
4. Rear brakes, electronic parking brake and handbrake (EPB)
69
Audi A8 2003 ➤
Brake system - Edition 03.2013
– Remove securing bolts from brake caliper housing, when do‐
ing this counter-hold on guide pins.
Note
Do not unplug connection of actuator motor and/or brake system.
– Push connector out of retainer.
– Move brake caliper clear to one side.
– Remove brake pads.
– Remove guide clips.
Note
It is possible to change the brake disc without removing the brake
carrier.
– Push back piston with piston resetting appliance -T10145- .
Installing
Steel version brakes:
Check the thickness of the brake disc when renewing the brake
pads. Refer to wear limit for brake disc.
– Check brake disc for wear ⇒ “1 Brakes, wear limits”, page 1 .
Ceramic brakes:
The ceramic brake discs must always be checked for damage and
wear when renewing the brake pads.
♦ ⇒ “2 Assessment of ceramic brake discs”, page 4
♦ ⇒ “3 Assessing degree of wear on ceramic brake discs”, page
7
All types of brakes (continued):
Use only methylated spirits to clean the brake caliper housing.
– Insert pad retaining springs.
Protected by copyright. Copying for private or commercial purposes, in part or in whole, is not
permitted unless authorised by AUDI AG. AUDI AG does not guarantee or accept any liability
with respect to the correctness of information in this document. Copyright by AUDI AG.
70
Rep. gr.46 - Brakes - mechanism
Audi A8 2003 ➤
Brake system - Edition 03.2013
– Fit brake pads.
– Ensure that the brake pads are located correctly in the pad
retainers -arrows-.
– Secure brake caliper housing with new self-locking bolts.
Note
The repair kit includes four self-locking hexagon bolts which must
always be installed.
– Fit connector for electronic parking brake in retainer.
Protected by copyright. Copying for private or commercial purposes, in part or in whole, is not
permitted unless authorised by AUDI AG. AUDI AG does not guarantee or accept any liability
with respect to the correctness of information in this document. Copyright by AUDI AG.
4. Rear brakes, electronic parking brake and handbrake (EPB)
71
Audi A8 2003 ➤
Brake system - Edition 03.2013
Display on VAS 505x:
♦ Request to enter a display group in display zone -1-.
♦ Display zone -2- shows a keypad.
– Enter “06” or “006” as display group number via the keypad
-2- and confirm entry with “Q key” (moves piston to original
position).
– Press left arrow button to exit from basic setting mode.
When installing new brake pads:
Display on VAS 505x:
♦ The prompt to enter a display group appears in
-1-.
Protected by copyright. Copying for private or commercial purposes, in part or in whole, is not
permitted unless authorised by AUDI AG. AUDI AG does not guarantee or accept any liability
respect to the correctness of information in this document. Copyright by AUDI AG.
display with
zone
♦ Display zone -2- shows a keypad.
– Press left arrow button twice.
Display on VAS 505x:
– Select function “10 - Adaption”.
– Measure the thickness of the thinner of the two brake pads
(without backplate) and enter the value via the keypad or scroll
bar.
– Select keypad or enter via scroll bar.
– Enter value between 10 - 23 mm via keypad -2-.
– Confirm by pressing Q key (moves piston to original position).
– Select Save and then Accept.
When re-installing old brake pads (different procedure):
72
Rep. gr.46 - Brakes - mechanism
Audi A8 2003 ➤
Brake system - Edition 03.2013
Display on VAS 505x:
♦ The prompt to enter a display group appears in display zone
-1-.
♦ Display zone -2- shows a keypad.
– Enter “06” or “006” as display group number via the keypad
-2- and confirm entry with “Q key”.
– Fit wheels ⇒ Wheels and tyres; Repair group 44 .
Caution
On vehicles with ceramic brakes the wheel must not be allowed
to drop onto the brake disc. This would cause irreparable dam‐
age to the disc. Screw two assembly pins into the wheel bolt
holes when removing and fitting a wheel. Insert the long as‐
sembly pin into the top hole.
– Check brake fluid level and top up if necessary.
Note
The electronic parking brake must now be recalibrated.
Requirements
♦ Electronic parking brake must be released.
♦ Selector lever must be in position “P”.
– Switch off ignition, take out ignition key and lock steering.
Recalibration will now be performed.
♦ The electronic parking brake retracts and closes again audi‐
bly.
♦ It then sets the required clearance automatically.
– Wait for this process to be completed.
Recalibration is now completed.
Then erase fault memory.
Protected by copyright. Copying for private or commercial purposes, in part or in whole, is not
Caution
permitted unless authorised by AUDI AG. AUDI AG does not guarantee or accept any liability
with respect to the correctness of information in this document. Copyright by AUDI AG.
After installing the brake pads and before driving the vehicle,
depress brake pedal firmly several times with the vehicle sta‐
tionary, so that the brake pads are properly seated in their
normal operating position.
Caution
Before driving vehicle for the first time, make sure function of
brakes is OK.
4. Rear brakes, electronic parking brake and handbrake (EPB)
73
Audi A8 2003 ➤
Brake system - Edition 03.2013
5
Brake pedal (LHD) - exploded view
WARNING
The brake pedal travel must not be restricted by additional floor
coverings.
♦ Lubricate all bearings and contact surfaces with grease, Part
No. G 000 450 02.
1 - Hexagon bolt
2 - Brake pedal mounting
bracket
3 - Hexagon nut
❑ Tightening torque: 25
Nm
4 - Torx socket head bolt -T45❑ Tightening torque: 25
Nm
Protected by copyright. Copying for private or commercial purposes, in part or in whole, is not
permitted unless authorised by AUDI AG. AUDI AG does not guarantee or accept any liability
with respect to the correctness of information in this document. Copyright by AUDI AG.
5 - Tube
6 - Brake pedal
❑ Insert tube
⇒ Item 5 (page 74)
❑ Removing and installing
⇒ page 76
7 - Hexagon socket head bolt
❑ Tightening torque: 9 Nm
❑ The 3 hexagon head
bolts locate the acceler‐
ator pedal module from
the other side.
8 - Accelerator pedal
9 - Torx socket head bolt -T45❑ Tightening torque: 40
Nm
10 - Spacer sleeve
❑ With bonded gasket
11 - Mounting bracket for pedal
cluster
❑ Illustration for automatic
gearbox
12 - Mounting
❑ For ball head of brake servo push rod
13 - Bearing shell
14 - Insulation cover
5.1
Separating brake pedal from brake ser‐
vo
Special tools and workshop equipment required
74
Rep. gr.46 - Brakes - mechanism
Audi A8 2003 ➤
Brake system - Edition 03.2013
♦ -T10159- Release tool
– Remove driver's footwell cover ⇒ Rep. gr. 68 ; General body
repairs, interior .
– Remove brake light switch ⇒ page 34 .
– First press brake pedal in direction of brake servo and hold.
1 - Brake pedal
2 - Push rod
3 - Retaining lugs
– Insert special tool -T10159- and pull in direction of driver seat.
When doing this, counter-hold on brake pedal. (At this moment
the pedal must not be allowed to move backwards). This will
press the retaining lugs -3- of the mounting off the ball head
of the push rod -2-.
For illustration purposes, the method of separating the brake ped‐
al from the brake servo is shown with the pedal cluster removed.
Attaching brake
pedal to brake servo
Protected by copyright. Copying for private or commercial purposes, in part or in whole, is not
permitted unless authorised by AUDI AG. AUDI AG does not guarantee or accept any liability
with respect to the correctness of information in this document. Copyright by AUDI AG.
– Hold ball head of push rod in front of mounting and push brake
pedal in direction of brake servo, so that the ball head audibly
locks into place.
Remaining installation steps are carried out in reverse sequence.
– Adjust brake light switch ⇒ page 34 .
Caution
Before driving vehicle for the first time, make sure function of
brakes is OK.
5. Brake pedal (LHD) - exploded view
75
Audi A8 2003 ➤
Brake system - Edition 03.2013
5.2
Removing and installing brake pedal
(LHD vehicles)
Removing
– Remove driver's footwell cover ⇒ Rep. gr. 68 ; General body
repairs, interior .
– Remove brake light switch ⇒ page 34 .
– Separate brake pedal from brake servo ⇒ page 74 .
– Unscrew hexagon bolt.
– Remove brake pedal.
Installing
Installation is carried out in the reverse sequence, when doing this
note the following:
Attaching brake pedal to brake servo
– Hold ball head of push rod in front of mounting and push brake
pedal towards brake servo so that ball head audibly locks into
place.
– Adjust brake light switch/brake pedal switch ⇒ page 34 .
Caution
Before driving vehicle for the first time, make sure function of
brakes is OK.
Protected by copyright. Copying for private or commercial purposes, in part or in whole, is not
permitted unless authorised by AUDI AG. AUDI AG does not guarantee or accept any liability
with respect to the correctness of information in this document. Copyright by AUDI AG.
76
Rep. gr.46 - Brakes - mechanism
Audi A8 2003 ➤
Brake system - Edition 03.2013
6
Removing and installing mounting
bracket
6.1
Removing and installing mounting
bracket
Removing
⇒ Rep. gr. 92 ; Servicing windscreen wiper system; Removing
and installing wiper system
Protected
by copyright. Copying
for private
or commercial
– Remove driver's storage
compartment.
⇒ Body
Repairs;
Rep. purposes, in part or in whole, is not
permitted unless authorised by AUDI AG. AUDI AG does not guarantee or accept any liability
gr. 68
with respect to the correctness of information in this document. Copyright by AUDI AG.
– Removing and installing brake servo ⇒ page 117 .
– Remove brake light switch ⇒ page 34 .
– Separate brake pedal from brake servo ⇒ page 74 .
– Remove bolt connections -1-.
– Item -2- Mounting bracket
– Item -3- Bulkhead
Remove accelerator pedal
– Unscrew hexagon socket head bolts ⇒ Item 7 (page 74) .
Removing brake pedal mounting bracket
– Remove Torx socket head bolt -T45- ⇒ Item 5 (page 74) - item
4.
Installing
Installation is carried out in the reverse sequence, when doing this
note the following:
Attaching brake pedal to brake servo
– Hold ball head of push rod in front of mounting and push brake
pedal in direction of brake servo so that the ball head audibly
locks into place ⇒ page 75 .
– Adjust brake light switch/brake pedal switch ⇒ page 34 .
– Bleed brake system ⇒ page 110 .
Caution
Before driving vehicle for the first time, make sure function of
brakes is OK.
6. Removing and installing mounting bracket
77
Audi A8 2003 ➤
Brake system - Edition 03.2013
7
Overview of components: electronic parking brake and handbrake
(EPB)
1 - Parking brake switch
❑ Pull switch to apply
brake
❑ Push switch ⇒ to re‐
lease brake
❑ Fitting location: in centre
console
❑ Removing and installing
⇒ page 36
2 - LED indicator for applied
parking brake (light-emitting
diode)
3 - EPB system fault warning
lamp (yellow)
4 - Indication of achieved
clamping force and dynamic
deceleration
5 - Electronic parking brake
with rear left actuator motor
❑ Removing and installing
⇒ page 100
❑ Removing and installing
control unit for electron‐
ic parking brake and
handbrake ⇒ page 79
❑ Removing and installing
actuator motor for elec‐
tronic parking brake and
handbrake ⇒ page 79
6 - EPB control unit
❑ Control unit for electro‐
mechanical parking
brake (EPB) J540
❑ Fitting location: below
battery in rear right side panel
❑ Removing and installing ⇒ page 79
Protected by copyright. Copying for private or commercial purposes, in part or in whole, is not
permitted unless authorised by AUDI AG. AUDI AG does not guarantee or accept any liability
with respect to the correctness of information in this document. Copyright by AUDI AG.
7 - Electronic parking brake with rear left actuator motor
❑ Removing and installing ⇒ page 101
8 - Acoustic signal
❑ Warning signal if parking brake is operated while vehicle is in motion
❑ Warning signal if a fault is detected in the system
78
Rep. gr.46 - Brakes - mechanism
Audi A8 2003 ➤
Brake system - Edition 03.2013
7.1
Removing and installing control unit for
electronic parking brake and handbrake
Removing
– Remove battery.
– Pull locking slide in direction of arrow and unplug connector
-1-.
– Item -2- EPB control unit
– Remove nuts -1-.
– Remove item -2- EPB control unit
Installing
Installation is carried out in the reverse sequence, when doing this
note the following:
– Screw on nuts -1-, tightening torque 10 Nm.
– When renewing the control unit, select the function “Replace”
for the relevant control unit in the “Guided Fault Finding”.
Vehicle diagnostic, testing and information system - VAS 505xCaution
Before driving vehicle for the first time, make sure function of
brakes is OK.
7.2
Removing and installing actuator motor
for electronic parking brake and hand‐
brake
Special tools and workshop equipment required
♦ Torque wrench - V.A.G 1331/-
Protected by copyright. Copying for private or commercial purposes, in part or in whole, is not
permitted unless authorised by AUDI AG. AUDI AG does not guarantee or accept any liability
with respect to the correctness of information in this document. Copyright by AUDI AG.
7. Overview of components: electronic parking brake and handbrake (EPB)
79
Audi A8 2003 ➤
Brake system - Edition 03.2013
♦ Vehicle diagnostic, testing and information system - VAS
505x-
Removing
Note
Protected by copyright. Copying for private or commercial purposes, in part or in whole, is not
permitted unless authorised by AUDI AG. AUDI AG does not guarantee or accept any liability
with respect to the correctness of information in this document. Copyright by AUDI AG.
♦ Ignition on
♦ Release parking brake.
♦ Coding checked and rectified if necessary
♦ Event memory interrogated, indicated faults eliminated and
memory erased.
♦ Ignition off.
– Select jacking mode. ⇒ Rep. gr. 43
– Raise the vehicle.
– Remove wheels.
Note
♦ Ignition must be switched off at least 30 sec. before unplugging
connector.
♦ Clean whole area around connector and actuator motor/ brake
caliper.
– Press down securing lug on upper part of connector (vehicle
side of connection) as shown in illustration detail and unplug
actuator motor connection.
– Pull connector (on actuator side of connection) out of the
bracket.
80
Rep. gr.46 - Brakes - mechanism
Audi A8 2003 ➤
Brake system - Edition 03.2013
– Remove both securing bolts (Torx TX25) from actuator motor.
– Remove actuator motor.
– Remove seal with suitable tool.
Protected by copyright. Copying for private or commercial purposes, in part or in whole, is not
Make sure you do not damage annular groove for
sealunless
andauthorised
con‐ by AUDI AG. AUDI AG does not guarantee or accept any liability
permitted
tact surface on actuator motor.
with respect to the correctness of information in this document. Copyright by AUDI AG.
Note
Do not use tools with sharp edges.
– If necessary clean annular groove and contact surfaces. Only
use brake cleaner.
Installing
– Fit new seal.
– Back off adjuster screw on caliper slightly to facilitate installa‐
tion of actuator motor.
Note
This makes it easier to install the actuator motor.
7. Overview of components: electronic parking brake and handbrake (EPB)
81
Audi A8 2003 ➤
Brake system - Edition 03.2013
– Fit actuator motor as shown in illustration (item -1-).
Note
Ensure that seal is fitted correctly.
– Then turn actuator motor in such a way (item -2-) that bolt hole
-a- and thread in brake caliper housing -b- are aligned.
Make sure that actuator motor is flush with brake housing.
– Fit both securing bolts on actuator motor. Tightening torque
12 Nm
Important: Bolts must be fitted and screwed in several turns by
hand. If the thread is damaged the complete brake caliper has to
be renewed.
– Push actuator motor connector into bracket.
Protected by copyright. Copying for private or commercial purposes, in part or in whole, is not
permitted unless authorised by AUDI AG. AUDI AG does not guarantee or accept any liability
with respect to the correctness of information in this document. Copyright by AUDI AG.
Note
To avoid any damage to connector only fit it by hand.
– Insert connector (on vehicle side of connection).
– Fit wheels ⇒ ELSA/ Wheel/Tyre Guide .
After renewing actuator motor you must use vehicle diagnostic
tester to perform basic setting 10 in EPB function.
To do so, use the vehicle diagnostic, testing and information sys‐
tem -VAS 505x- .
– Either select basic setting 10 ⇒ page 20 under “Function” or
– under Running gear (repair group 01: 34-65)
– Brake system (repair group 01: 45-46)
– 01 - Self-diagnosis compatible systems
– 53- Parking brake
– J540- Control unit for electromechanical parking brake
– J540- Basic setting (3 Function test: electronic parking brake
and handbrake)
Caution
Before driving vehicle for the first time, make sure function of
brakes is OK.
82
Rep. gr.46 - Brakes - mechanism
Audi A8 2003 ➤
Brake system - Edition 03.2013
47 –
Brakes - hydraulics
1
Pressurised leak test
1.1
Pressurised leak test
Special tools and workshop equipment required
♦ Tester for brake pressure regulator - V.A.G 1310/A-
Protected by copyright. Copying for private or commercial purposes, in part or in whole, is not
permitted unless authorised by AUDI AG. AUDI AG does not guarantee or accept any liability
with respect to the correctness of information in this document. Copyright by AUDI AG.
♦ -V.A.G 1310–-
1.2
High-pressure and low-pressure tests
Before starting:
Make sure that the brake system (master cylinder, brake hoses,
brake lines and brake calipers) works properly and is free of leaks.
High-pressure test:
– Remove bleeder screw at one of the front brake calipers. Con‐
nect pressure gauge -V.A.G 1310-- or tester for brake pres‐
sure regulator - V.A.G 1310/A- and bleed.
– Insert brake pedal depressor between brake pedal and driver's
seat. Apply pressure to brake pedal until the gauge indicates
a pressure of 50 bar. The pressure must not drop by more than
4 bar during the test period of 45 seconds. Renew hydraulic
unit if drop in pressure exceeds the above figure.
Low-pressure test:
– Move the brake pedal depressor back until the pressure gauge
indicates a pressure of 6 bar.
– The pressure should not drop by more than 1 bar within the
test period of 3 minutes.
Renew hydraulic unit if drop in pressure exceeds the above figure.
1. Pressurised leak test
83
Audi A8 2003 ➤
Brake system - Edition 03.2013
2
Brake calipers FNR -G60-
2.1
Servicing brake calipers
Note
♦ Install complete repair kit when servicing.
by copyright.
Copying for
private or
commercial
purposes,
or in whole, is not
♦ Apply aProtected
thin coat
of assembly
paste
-G
052 150
A2- intopart
brake
unless authorised by AUDI AG. AUDI AG does not guarantee or accept any liability
cylinder,permitted
piston
and seal.
with respect to the correctness of information in this document. Copyright by AUDI AG.
1 - Brake carrier
❑ Bolt to brake caliper
housing
2 - Guide pin
❑ Tightening torque: 30
Nm
3 - Caps
❑ Insert into bearing bush
4 - Protective cap
❑ Push onto bleeder valve
5 - Bleeder valve
❑ Tightening torque: 15
Nm
❑ Before screwing in,
grease thread lightly
with lithium grease ⇒
Parts catalogue .
6 - Bearing bush
❑ Insert into brake caliper
housing
7 - Brake caliper
8 - Retaining spring
❑ Note correct installation
position.
❑ Engage onto both brake
caliper housing studs
and onto outer pad re‐
taining spring.
9 - Protective cap
❑ Do not damage when in‐
serting piston
❑ Grease with assembly paste ⇒ Parts catalogue
10 - Piston
❑ Apply a thin coat of assembly paste to piston before inserting
❑ Allocation ⇒ page 1
11 - Seal
❑ Grease with assembly paste
84
Rep. gr.47 - Brakes - hydraulics
Audi A8 2003 ➤
Brake system - Edition 03.2013
2.2
Removing and installing piston for front
brake caliper
Special tools and workshop equipment required
♦ Removal wedge - VAS 3409-
♦ Assembly paste ⇒ Parts catalogue
♦ Assembly tool for protective caps -T10146/5-
♦ Piston resetting appliance -T10145Removing
Protected by copyright. Copying for private or commercial purposes, in part or in whole, is not
permitted unless authorised by AUDI AG. AUDI AG does not guarantee or accept any liability
with respect to the correctness of information in this document. Copyright by AUDI AG.
– Force piston out of brake caliper housing using compressed
air.
Note
Place a piece of wood in the recess to prevent damaging the pis‐
ton.
2. Brake calipers FNR G60
85
Audi A8 2003 ➤
Brake system - Edition 03.2013
– Take out seal.
– To do this use removal wedge 3409.
Note
When removing ensure that the bore of the cylinder is not dam‐
aged.
Installing
– The surface of the piston and seal should be cleaned using
only methylated spirits and then dried.
– Apply a small amount of assembly paste to piston and seal
before inserting.
– Insert inner seal in groove in brake caliper housing with re‐
moval wedge 3409.
– Press in protective cap with special tool -1- and -2-.
– Item -1-: Assembly tool for protective caps -T10146/1– Item -2-: Piston resetting appliance -T10145Use jaw protectors
– Push protective cap onto brake caliper housing and press it in
so that it is seated flush -arrow-.
– At this stage it should not be possible to remove the protective
cap from the brake caliper housing by hand.
– Apply a small amount of assembly paste to piston and seal
before inserting.
Protected by copyright. Copying for private or commercial purposes, in part or in whole, is not
permitted unless authorised by AUDI AG. AUDI AG does not guarantee or accept any liability
with respect to the correctness of information in this document. Copyright by AUDI AG.
86
Rep. gr.47 - Brakes - hydraulics
Audi A8 2003 ➤
Brake system - Edition 03.2013
– Lift up piston with standard extension and ratchet attachment
as shown in illustration and press lightly onto protective cap.
Keep the piston straight to avoid damaging the protective cap.
– Inflate protective cap with compressed air (maximum 3 bar).
The protective cap will then locate around the brake piston.
Use jaw protectors
– Press piston into brake caliper housing by hand.
Note
The inner sealing lip on the protective cap will then locate in the
piston groove.
Caution
Before driving vehicle for the first time, make sure function of
brakes is OK.
Protected by copyright. Copying for private or commercial purposes, in part or in whole, is not
permitted unless authorised by AUDI AG. AUDI AG does not guarantee or accept any liability
with respect to the correctness of information in this document. Copyright by AUDI AG.
2. Brake calipers FNR G60
87
Audi A8 2003 ➤
Brake system - Edition 03.2013
3
Brake calipers 2FNR 42 AL
3.1
Servicing brake calipers
Note
♦ Install complete repair kit when servicing.
♦ Apply a thin coat of assembly paste to brake cylinders, pistons
and seals ⇒ Parts catalogue .
1 - Brake carrier
❑ Bolt to brake caliper
housing
2 - Guide pin
❑ Tightening torque: 30
Nm
3 - Caps
❑ Insert into bearing bush
4 - Protective cap
❑ Push onto bleeder valve
5 - Bleeder valve
❑ Tightening torque: 10
Nm
❑ Before screwing in,
grease thread lightly
with lithium grease ⇒
Parts catalogue .
6 - Bearing bush
❑ Insert into brake caliper
housing
7 - Brake caliper
8 - Retaining spring
❑ Note correct installation
position.
❑ Engage onto both brake
caliper housing studs
and onto outer pad re‐
taining
spring.Copying for private or commercial purposes, in part or in whole, is not
Protected
by copyright.
permitted unless authorised by AUDI AG. AUDI AG does not guarantee or accept any liability
9 - Protective
with respectcap
to the correctness of information in this document. Copyright by AUDI AG.
❑ Do not damage when in‐
serting piston
❑ Apply a thin coat of lithium grease
10 - Piston
❑ Apply a thin coat of lithium grease to piston
❑ Allocation ⇒ page 1
11 - Seal
❑ Grease with assembly paste
88
Rep. gr.47 - Brakes - hydraulics
Audi A8 2003 ➤
Brake system - Edition 03.2013
3.2
Removing and installing pistons for front
brake caliper
Special tools and workshop equipment required
♦ Removal wedge - VAS 3409-
♦ Assembly paste ⇒ Parts catalogue
♦ Assembly tool for protective caps -T10146/5Protected by copyright. Copying for private or commercial purposes, in part or in whole, is not
permitted unless authorised by AUDI AG. AUDI AG does not guarantee or accept any liability
with respect to the correctness of information in this document. Copyright by AUDI AG.
♦ Piston resetting appliance -T10145Removing
– Force piston out of brake caliper housing using compressed
air.
– Item -1-: Piston resetting appliance -T10145Note
Place a piece of wood in the recess to prevent damaging the pis‐
ton.
3. Brake calipers 2FNR 42 AL
89
Audi A8 2003 ➤
Brake system - Edition 03.2013
– Lever off protective cap from brake caliper (e.g. with removal
wedge 3409)
– Take out seal.
– To do this use wedge 3409 -2-.
– Item -1-: Piston resetting appliance -T10145Note
When removing ensure that the surface of the cylinder is not
damaged.
Installing
– The surface of the piston and seal should be cleaned using
only methylated spirits and then dried.
– Apply a small amount of assembly paste to piston and seal
before inserting.
– Insert inner seal in groove in brake caliper housing with re‐
moval wedge 3409.
– Press in protective
with Copying
special
and -2-.purposes, in part or in whole, is not
Protected cap
by copyright.
for tool
private-1or commercial
permitted unless authorised by AUDI AG. AUDI AG does not guarantee or accept any liability
– Item -1-: Assembly
tooltofor
caps -T10146/5with respect
the protective
correctness of information
in this document. Copyright by AUDI AG.
– Item -2-: Piston resetting appliance -T10145Use jaw protectors
– Push protective cap onto brake caliper housing and press it in
so that it is seated flush -arrow-.
Use jaw protectors
90
Rep. gr.47 - Brakes - hydraulics
Audi A8 2003 ➤
Brake system - Edition 03.2013
– At this stage it should not be possible to remove the protective
cap from the brake caliper housing by hand.
– Apply a small amount of assembly paste to piston and seal
before inserting.
– Lift up piston with standard extension and ratchet attachment
as shown in illustration and press lightly onto protective cap.
Keep the piston straight to avoid damaging the seal.
– Inflate protective cap with compressed air (maximum 3 bar).
The protective cap will then locate around the brake piston.
Use jaw protectors
– Press piston into brake caliper housing by hand.
Note
The inner sealing lip on the protective cap will then locate in the
piston groove.
Protected by copyright. Copying for private or commercial purposes, in part or in whole, is not
permitted unless authorised by AUDI AG. AUDI AG does not guarantee or accept any liability
with respect to the correctness of information in this document. Copyright by AUDI AG.
Caution
Before driving vehicle for the first time, make sure function of
brakes is OK.
3. Brake calipers 2FNR 42 AL
91
Audi A8 2003 ➤
Brake system - Edition 03.2013
4
Brembo brake calipers (18")
4.1
Servicing brake calipers
Note
♦ Brake line connection at brake pipe: 12 Nm
♦ Brake pipe in brake caliper: 19 Nm
Note
♦ Use only methylated spirits to clean the brake caliper
♦ Install complete repair kit when servicing.
♦ New brake calipers are filled with brake fluid and are pre-bled.
♦ Apply a thin coat of lithium grease - G 052 150 A2- to brake cylinder, piston and seal.
1 - Dust cap
❑ Fit onto bleeder valve
2 - Bleeder valve, 12 Nm
❑ Before screwing in,
grease thread with thin
coat of lithium grease G 052 150 A23 - Brake caliper
4 - Seal for 32 mm piston
❑ Removing and installing
⇒ page 93
5 - Seal for 28 mm piston
❑ Removing and installing
⇒ page 93
6 - Piston, 32 mm
❑ Removing and installing
⇒ page 93
❑ Apply a thin coat of lithi‐
um grease G 052 150 A2- to piston
7 - Piston, 28 mm
❑ Removing and installing
⇒ page 93
❑ Apply a thin coat of lithi‐
um grease G 052 150 A2- to piston
8 - Protective cap for 32 mm
piston
❑ Do not damage when in‐
serting piston
9 - Protective cap for 28 mm
piston
❑ Do not damage when inserting piston
92
Rep. gr.47 - Brakes - hydraulics
Protected by copyright. Copying for private or commercial purposes, in part or in whole, is not
permitted unless authorised by AUDI AG. AUDI AG does not guarantee or accept any liability
with respect to the correctness of information in this document. Copyright by AUDI AG.
Audi A8 2003 ➤
Brake system - Edition 03.2013
10 - Support plate
11 - Hexagon socket head bolt, 6 Nm
12 - Connecting pipe, 17 Nm
4.2
Removing and installing pistons for front
brake caliper
Special tools and workshop equipment required
♦ byRemoval
wedge
- 3409Protected
copyright. Copying
for private
or commercial purposes, in part or in whole, is not
permitted unless authorised by AUDI AG. AUDI AG does not guarantee or accept any liability
with respect to the correctness of information in this document. Copyright by AUDI AG.
♦ Piston resetting appliance - T10145-
♦ Lithium grease - G 052 150 A2Removing
– Force pistons out of brake caliper housing one at a time using
compressed air.
The pistons can only be removed one at a time. Hold the opposite
piston in the caliper housing with piston resetting appliance -a-.
Use blocks of wood or similar -b- to keep the other pistons in
place. Also place a piece of wood -c- against the resetting tool to
prevent the piston from being damaged when it is forced out.
4. Brembo brake calipers (18")
93
Audi A8 2003 ➤
Brake system - Edition 03.2013
– Remove seal using removal wedge - 3409- .
When removing ensure that the bore of the cylinder is not dam‐
aged.
Installing
– The surface of the piston and seal should be cleaned using
only methylated spirits and then dried.
– Apply a thin coat of lithium grease - G 052 150 A2- to piston
and seal before inserting.
– Insert the seal into the brake caliper housing.
Protected by copyright. Copying for private or commercial purposes, in part or in whole, is not
permitted unless authorised by AUDI AG. AUDI AG does not guarantee or accept any liability
with respect to the correctness of information in this document. Copyright by AUDI AG.
– Fit protective cap onto piston.
– Push piston into caliper housing, exerting even pressure.
The protective cap must fit securely in the groove; if necessary,
apply additional pressure with piston resetting appliance.
Note
♦ Brake line connection at brake pipe: 12 Nm
♦ Brake pipe in brake caliper: 19 Nm
Caution
Before driving vehicle for the first time, make sure function of
brakes is OK.
94
Rep. gr.47 - Brakes - hydraulics
Audi A8 2003 ➤
Brake system - Edition 03.2013
5
Brake caliper (ceramic brakes)
Note
♦ Brake line connection at brake pipe: 12 Nm
♦ Brake pipe in brake caliper: 19 Nm
5.1
Servicing brake caliper (ceramic brakes)
1 - Bolts for brake caliper
Note
These bolts do not have to be slack‐
ened in order to remove the brake Protected by copyright. Copying for private or commercial purposes, in part or in whole, is not
caliper or change the brake pads. permitted unless authorised by AUDI AG. AUDI AG does not guarantee or accept any liability
with respect to the correctness of information in this document. Copyright by AUDI AG.
❑ Tightening torque 190
Nm
2 - Retaining spring for brake
pads
3 - Guide pin
4 - Brake caliper
❑ If assembly work is re‐
quired, do not leave cal‐
iper hanging from brake
hose but secure it to
body with wire
❑ With the exception of
“Removing and instal‐
ling brake pads”, “Re‐
moving and installing
brake caliper” and “Re‐
moving and installing
brake pistons”, no re‐
pairs may be performed
on the brake caliper
❑ Do not twist hose when
installing
❑ Allocation ⇒ page 1 ,
5. Brake caliper (ceramic brakes)
95
Audi A8 2003 ➤
Brake system - Edition 03.2013
Brakes
5 - Brake pads
❑ Wear limit ⇒ page 1
Note
A wire for the wear indicator is fitted
to the inner pad.
❑ There is an adhesive foil on the backplates of the outer brake pads. Remove the protective foil before
fitting pads.
❑ Before fitting pads, clean guide surfaces and apply a thin coating of polycarbamide grease ⇒ Parts
catalogue
❑ Different versions available ⇒ Parts catalogue
❑ Always renew on both sides of axle
❑ Removing and installing
❑ Checking pad thickness ⇒ Maintenance ; Booklet 4E
10 - Ribbed bolt
❑ Tightening torque: 190 Nm
❑ Clean ribs if using again
11 - Brake carrier
❑ Bolt to wheel bearing housing
12 - Brake pistons
WARNING
The brake pistons have
different
diameters.
When
re-installing,
please make sure that
each of the brake pistons
is inserted in the correct
aperture in the brake cal‐
iper. The ceramic inserts
on the brake piston act
as heat insulators and
must not be separated
from the brake piston. If
the ceramic insert is
damaged, the brake pis‐
tons must be renewed
for safety reasons.
13 - Bolt for bracket
❑ Tightening
torque:
25 Nm
Protected by copyright.
Copying
for private or commercial purposes, in part or in whole, is not
permitted unless authorised by AUDI AG. AUDI AG does not guarantee or accept any liability
14 - Brakewith
line
connection
at brake
pipein this document. Copyright by AUDI AG.
respect
to the correctness
of information
❑ Tightening torque: 12 Nm
❑ Brake hose must not be twisted.
Note
♦ Brake line connection at brake
pipe: 12 Nm
♦ Brake pipe in brake caliper:
19 Nm
96
Rep. gr.47 - Brakes - hydraulics
Audi A8 2003 ➤
Brake system - Edition 03.2013
15 - Brake line
❑ Screw into brake caliper housing
❑ Screw into brake hose, counter hold on brake hose hexagon.
❑ Do not twist hose when fitting
❑ Ensure that lugs are properly seated in grooves in bracket.
16 - Bracket for brake line
❑ Bolt to brake caliper housing
❑ Attach brake line
17 - Brake pipe in brake caliper
❑ Tightening torque: 19 Nm
Note
♦ Brake pipe in brake caliper:
19 Nm
Protected
copyright. Copying
private or commercial purposes, in part or in whole, is not
♦ Brake
linebyconnection
atforbrake
permitted
unless authorised by AUDI AG. AUDI AG does not guarantee or accept any liability
pipe:
12 Nm
with respect to the correctness of information in this document. Copyright by AUDI AG.
18 - Bolt for guide pin
❑ Tightening torque: 30 Nm
19 - Damper spring
❑ 2 fitted on each brake caliper
❑ Detaching and attaching ⇒ page 57
5.2
Removing and installing pistons for front
brake caliper
Special tools and workshop equipment required
♦ Removal wedge - 3409-
♦ Piston resetting appliance - T10145-
5. Brake caliper (ceramic brakes)
97
Audi A8 2003 ➤
Brake system - Edition 03.2013
♦ Lithium grease - G 052 150 A2Removing
– Force pistons out of brake caliper housing one at a time using
compressed air.
The pistons can only be removed one at a time. Hold the opposite
piston in the caliper housing with piston resetting appliance -a-.
Use blocks of wood or similar -b- to keep the other pistons in
place. Also place a piece of wood -c- against the resetting tool to
prevent the piston from being damaged when it is forced out.
– Remove seal using removal wedge - 3409- .
When removing ensure that the bore of the cylinder is not dam‐
aged.
Installing
WARNING
The brake pistons have different diameters. When re-installing,
please make sure that each of the brake pistons is inserted in
the correct aperture in the brake caliper. The ceramic inserts
on the brake piston act as heat insulators and must not be
separated from the brake piston. If the ceramic insert is dam‐
aged, the brake pistons must be renewed for safety reasons.
– The surface of the piston and seal should be cleaned using
only methylated spirits and then dried.
– Apply a thin coat of lithium grease - G 052 150 A2- to piston
and seal before inserting.
Protected by copyright. Copying for private or commercial purposes, in part or in whole, is not
– Insert the seal into the brake caliper housing.
permitted unless authorised by AUDI AG. AUDI AG does not guarantee or accept any liability
with respect to the correctness of information in this document. Copyright by AUDI AG.
98
Rep. gr.47 - Brakes - hydraulics
Audi A8 2003 ➤
Brake system - Edition 03.2013
– Fit protective cap onto piston.
– Push piston into caliper housing, exerting even pressure.
The protective cap must fit securely in the groove; if necessary,
apply additional pressure with piston resetting appliance.
Note
♦ Brake pipe in brake caliper: 19 Nm
♦ Brake line connection at brake pipe: 12 Nm
Caution
Before driving vehicle for the first time, make sure function of
brakes is OK.
Protected by copyright. Copying for private or commercial purposes, in part or in whole, is not
permitted unless authorised by AUDI AG. AUDI AG does not guarantee or accept any liability
with respect to the correctness of information in this document. Copyright by AUDI AG.
5. Brake caliper (ceramic brakes)
99
Audi A8 2003 ➤
Brake system - Edition 03.2013
6
Rear brake calipers for electronic
parking brake and handbrake (EPB)
6.1
Servicing brake calipers
Applies to steel and ceramic brakes.
Note
♦ When carrying out repairs install all parts supplied in repair kit.
♦ Apply a thin coat of assembly paste to brake cylinder, piston
and seal.
1 - Self-locking bolt
❑ Tightening torque: 35
Nm
❑ Always renew
❑ Counter-hold guide pin
when loosening and
tightening
2 - Brake caliper with actuator
❑ The brake caliper
should not be separated
from the actuator
❑ After repairing, prebleed brake caliper
housing ⇒ page 110
3 - Bleeder valve
4 - Dust cap
❑ Fit onto bleeder valve
5 - Seal
❑ Removing and installing
⇒ page 101
6 - Compressor nut
❑ To operate the parking
brake
7 - Piston
❑ Removing and installing
⇒ page 101
8 - Guide pin
❑ Lubricate before instal‐
100
Rep. gr.47 - Brakes - hydraulics
Protected by copyright. Copying for private or commercial purposes, in part or in whole, is not
permitted unless authorised by AUDI AG. AUDI AG does not guarantee or accept any liability
with respect to the correctness of information in this document. Copyright by AUDI AG.
Audi A8 2003 ➤
Brake system - Edition 03.2013
ling protective cap
9 - Protective cap
❑ Insert onto brake carrier
and guide pin
10 - Brake carrier with guide pins and protective caps
❑ Replacement carriers are supplied assembled and with sufficient grease on guide pins
❑ If protective caps or guide pins are damaged, renew using repair kit. Use grease sachet supplied to
lubricate the guide pins.
11 - Protective cap
❑ Removing and installing ⇒ page 101
❑ Push outer sealing lip onto piston
6.2
Protected by copyright. Copying for private or commercial purposes, in part or in whole, is not
permitted unless authorised by AUDI AG. AUDI AG does not guarantee or accept any liability
with respect to the correctness of information in this document. Copyright by AUDI AG.
Removing and installing piston for rear
brake caliper
Applies to steel and ceramic brakes.
Special tools and workshop equipment required
6. Rear brake calipers for electronic parking brake and handbrake (EPB)
101
Audi A8 2003 ➤
Brake system - Edition 03.2013
♦ -V.A.G 1331- Torque wrench
♦ -V.A.G 1332- Torque wrench
♦ -T10145- Piston resetting appliance
♦ -VAS 505x- Vehicle diagnosis, testing and information system
♦ 3409 Removal wedge
Removing
– Raise the vehicle.
– Remove wheels.
– Connect vehicle diagnostic, testing and information system VAS 505x- with diagnosis lead -VAS 5051/1- to the 16-pin
diagnosis connector of the vehicle and select the parking
brake via self-diagnosis with “Address word” 53. When doing
Protected by copyright. Copying for private or commercial purposes, in part or in whole, is not
this the ignition must be off.
permitted unless authorised by AUDI AG. AUDI AG does not guarantee or accept any liability
with respect to the correctness of information in this document. Copyright by AUDI AG.
Note
♦ Ignition on
♦ Release parking brake.
♦ Coding checked and rectified if necessary
♦ Event memory interrogated, indicated faults eliminated and
memory erased.
Display on VAS 505x:
– Select function “04 - Basic setting”.
Display on VAS 505x:
♦ The prompt to enter a display group appears in display zone
-1-.
♦ Display zone -2- shows a keypad.
– Enter “7” to select “Display group 007” via the keypad in dis‐
play zone -2- and confirm entry with Q key (brake opens all
the way).
102
Rep. gr.47 - Brakes - hydraulics
Audi A8 2003 ➤
Brake system - Edition 03.2013
– Remove securing bolts from brake caliper housing, when do‐
ing this counter-hold on guide pins.
Note
Do not unplug connection of actuator motor or brake system.
– Push connector out of retainer.
– Move brake caliper clear to one side.
– Remove brake pads.
– Remove guide clips ⇒ Self-diagnosis; Address word 53, Park‐
ing brake .
Display on VAS 505x:
– Select function “04 - Basic setting”.
Display on VAS 505x:
♦ The prompt to enter a display group appears in display zone
-1-.
Protected by copyright. Copying for private or commercial purposes, in part or in whole, is not
♦ Display zone -2- shows a keypad.
permitted unless authorised by AUDI AG. AUDI AG does not guarantee or accept any liability
respect
the correctness
– Enter “6” to select “Display groupwith
006”
viato the
keypadofininformation
dis‐ in this document. Copyright by AUDI AG.
play zone -2- and confirm entry with Q key (extending piston).
The piston extends for 20 seconds and drops out of the brake
caliper.
Note
If the brake piston has not dropped out after 20 seconds, switch
ignition off and on again after 10 seconds. Then operate the
switch for the electronic parking brake. The brake piston will ex‐
tend for another 20 seconds.
– Switch off ignition.
– Take brake piston and compressor nut out of brake caliper.
– Detach the old protective cap from the brake piston.
6. Rear brake calipers for electronic parking brake and handbrake (EPB)
103
Audi A8 2003 ➤
Brake system - Edition 03.2013
– Remove the old seal from the brake caliper using removal
wedge 3409.
Installing
– Fit the new seal in the brake caliper.
– Fit the new protective cap onto the brake piston as shown in
the illustration.
– Screw compressor nut -1- into brake caliper onto stop, then
turn nut a quarter turn in the opposite direction.
– Insert protective cap into groove in brake caliper. To do this
use removal wedge 3409.
– Carefully slide brake piston into brake caliper. Turn brake pis‐
ton as required. The brake piston must be guided over the
compressor nut, which is only possible in four positions.
Protected by copyright. Copying for private or commercial purposes, in part or in whole, is not
permitted unless authorised by AUDI AG. AUDI AG does not guarantee or accept any liability
with respect to the correctness of information in this document. Copyright by AUDI AG.
104
Rep. gr.47 - Brakes - hydraulics
Audi A8 2003 ➤
Brake system - Edition 03.2013
– Press brake piston onto stop in brake caliper after passing the
compressor nut.
Note
Make sure not to damage the compressor nut.
– Piston resetting appliance -T10145- can also be used to press
in the brake piston.
– Make sure that the protective cap is located in the groove of
the brake piston when the piston is pressed in all the way.
– Insert pad retaining springs.
– Measure the pad thicknesses of both brake pads without back‐
plates and make a note of the lower value.
Note
Round off the measured value to a whole number. The value
should be between 3 and 14. Use new brake pads if the measured
value is less than 3.
– Fit brake pads.
Protected by copyright. Copying for private or commercial purposes, in part or in whole, is not
permitted unless authorised by AUDI AG. AUDI AG does not guarantee or accept any liability
with respect to the correctness of information in this document. Copyright by AUDI AG.
6. Rear brake calipers for electronic parking brake and handbrake (EPB)
105
Audi A8 2003 ➤
Brake system - Edition 03.2013
– Ensure that the brake pads are located correctly in the pad
retainers -arrows-.
– Secure brake caliper housing with new self-locking bolts.
Note
Protected by copyright. Copying for private or commercial purposes, in part or in whole, is not
permitted unless authorised by AUDI AG. AUDI AG does not guarantee or accept any liability
with respect to the correctness of information in this document. Copyright by AUDI AG.
The repair kit includes four self-locking hexagon bolts which must
always be installed.
– Fit electronic parking brake connector into bracket.
– Switch on ignition.
– Apply and release electronic parking brake three times. Wait
in each case until the actuator motors of the electronic parking
brake have reached their end position.
– Switch ignition off and on again after 10 seconds. ⇒ Self-di‐
agnosis; Address word 53, Parking brake
Display on VAS 505x:
– Select function “04 - Basic setting”.
106
Rep. gr.47 - Brakes - hydraulics
Audi A8 2003 ➤
Brake system - Edition 03.2013
Display on VAS 505x:
♦ The prompt to enter a display group appears in display zone
-1-.
♦ Display zone -2- shows a keypad.
– Enter “10” to select “Display group 10” via the keypad in dis‐
play zone -2- and confirm entry with Q key (system test). The
operation of the brake is tested. The electronic parking brake
opens all the way and closes three times. ⇒ Self-diagnosis;
Address word 53, Parking brake
Display on VAS 505x:
– Select function “10 - Adaption”.
Display on VAS 505x:
♦ Prompt for entering channel number appears in display zone
-1-.
♦ Display zone -2- shows a keypad.
– Enter “6” to select “Channel number 06” via the keypad in dis‐
play zone -2- and confirm entry with Q key (entering brake pad
thickness).
Display on VAS 505x:
♦ “Read and test channel 6” appears in display zone -1-.
♦ Zone -2- displays the specified limits for brake pad thickness.
♦ Zone -3- displays a sliding bar diagram with a number repre‐
senting the currently stored pad thickness.
– The pad thickness can be changed within the specified limits
(3...14) via the sliding bar.
Note
♦ If you enter a pad thickness that is outside the specified limits
by copyright.
for private
commercial
purposes, in part or in whole, is not
via the sliding bar, Protected
the
value
will beCopying
indicated
butornot
accepted.
permitted unless authorised by AUDI AG. AUDI AG does not guarantee or accept any liability
with respect to the correctness of information in this document. Copyright by AUDI AG.
♦ The display resets automatically
if the pad thickness entered
via the sliding bar is too large or too small.
The values can be entered via the keypad as well.
6. Rear brake calipers for electronic parking brake and handbrake (EPB)
107
Audi A8 2003 ➤
Brake system - Edition 03.2013
– Press key -4- (to enter values via keypad).
Display on VAS 505x:
♦ Request in display zone -1- “Enter adaption value: 0...65535”.
♦ Display zone -2- shows a keypad.
– Enter the measured pad thickness in display zone -2- via the
keypad and confirm entry with Q key.
Display on VAS 505x:
Protected by copyright. Copying for private or commercial purposes, in part or in whole, is not
permitted unless authorised by AUDI AG. AUDI AG does not guarantee or accept any liability
♦ Zone -3- displays the
padof thickness
value
indi‐Copyright by AUDI AG.
with newly
respect toentered
the correctness
information in this
document.
cated by the sliding bar.
– Store the new pad thickness by pressing key -5-.
108
Rep. gr.47 - Brakes - hydraulics
Audi A8 2003 ➤
Brake system - Edition 03.2013
Display on VAS 505x:
♦ “Store channel 6” appears in display zone -1-.
♦ Zone -2- displays the specified limits for brake pad thickness.
♦ Zone -3- displays the original and the newly entered pad thick‐
ness value.
– Confirm and store the new pad thickness by pressing key
-4-.
♦ Display zone -1- indicates “Store channel 6 Value 0...23 stor‐
ed”.
– End self-diagnosis and switch ignition off.
– Fit wheels ⇒ ELSA/ Wheel/Tyre Guide ⇒ Rep. gr. 44 .
– Check brake fluid level and top up if necessary.
Caution
Before driving vehicle for the first time, make sure function of
brakes is OK.
Protected by copyright. Copying for private or commercial purposes, in part or in whole, is not
permitted unless authorised by AUDI AG. AUDI AG does not guarantee or accept any liability
with respect to the correctness of information in this document. Copyright by AUDI AG.
6. Rear brake calipers for electronic parking brake and handbrake (EPB)
109
Audi A8 2003 ➤
Brake system - Edition 03.2013
7
Bleeding brake system
WARNING
♦ Do not under any circumstances allow brake fluid to come
into contact with fluids that contain mineral oils (e.g. oil,
petrol, cleaning agents). Mineral oils damage the plugs
and seals in the brake system.
♦ Brake fluid is poisonous and must NOT be drawn off by
sucking through a hose. Because of its caustic properties
it must also not come into contact with paintwork.
♦ Brake fluid is hygroscopic, i.e. it absorbs moisture from the
surrounding air, and should therefore always be stored in
airtight containers.
♦ Brake fluid flushed out during the bleeding process must
not be re-used and must be disposed of in the proper
manner.
♦ Always observe the relevant environmental regulations for
disposal ⇒ page 17 .
Note
♦ Only use new brake fluid conforming to US standard FMVSS
116 DOT 4.
♦ Genuine VW/Audi brake fluid conforms to this specification.
♦ Do not use liquids containing silicone.
♦ Avoid contamination of brake fluid with any dirt particles or bits
of fluff (e.g. from cleaning cloths etc.).
♦ Rinse off spillages using plenty of water.
♦ When the system is open do not work with compressed air and
do not move the vehicle.
♦ During the final road test, ensure that at least one ABS-con‐
trolled braking operation is performed (pulsations must be felt
at the brake pedal).
7.1
Bleeding sequence for vehicles with
Electronic Stabilisation Program (ESP)
Applies to steel and ceramic brakes.
Unlike ESP 5.3, ESP 5.7 does not incorporate hydraulic pump V156- . It is therefore not necessary to bleed the pre-charging
pump with the diagnostic tester.
Note
copyright. Copying
for private or
commercial
♦ A pressure of at least 2Protected
bar isbyrequired
for bleeding
the
hy‐ purposes, in part or in whole, is not
permitted
unless
authorised to
by AUDI
AG. AUDI
AG does
draulic unit. For this reason
it is
important
always
check
thenot guarantee or accept any liability
with respect to the correctness of information in this document. Copyright by AUDI AG.
pressure setting on the bleeder
unit.
♦ Only use the brake pedal actuator when installing brake sys‐
tem components, and bleed the system afterwards.
Special tools and workshop equipment required
110
Rep. gr.47 - Brakes - hydraulics
Audi A8 2003 ➤
Brake system - Edition 03.2013
♦ -VAS 5234- Brake filling and bleeding equipment
or
♦ Brake filling and bleeding equipment - V.A.G 1869/- with up‐
grade kit and extraction unit -V.A.G 1869/4or
♦ -V.A.G 1869- Brake filling and bleeding equipment without upgrade kit and extraction unit -V.A.G 1869/4Bleeding brake system using brake filling and bleeding equipment
-V.A.G 1869- or VAS 5234
Observe instruction manual for -VAS 5234- or for -V.A.G 1869- !
– Connect -V.A.G 1869- or VAS 5234.
– Open bleeder screws in the specified order and bleed brake
calipers (assist as required with pedal pressure).
Bleed sequence for LHD and RHD vehicles
1 - Front left-side brake caliper
2 - Front right-side brake caliper
3 - Rear left-side brake caliper
4 - Rear right-side brake caliper
– Keep bleeding the calipers until clear, foam-free brake fluid
emerges.
– Close bleeder screw.
Caution
Before driving vehicle for the first time, make sure function of
brakes is OK.
7.2
Changing brake fluid
Changing brake fluid
⇒ Maintenance ; Booklet 4E ; Work descriptions; Changing brake
fluid (every 2 years)
Protected by copyright. Copying for private or commercial purposes, in part or in whole, is not
permitted unless authorised by AUDI AG. AUDI AG does not guarantee or accept any liability
with respect to the correctness of information in this document. Copyright by AUDI AG.
7. Bleeding brake system
111
Audi A8 2003 ➤
Brake system - Edition 03.2013
8
Brake servo/ brake master cylinder exploded view
Note
Use only new brake fluid. Observe information on brake fluid res‐
ervoir!
1 - Torx bolt -T45❑ Tightening torque: 23
Nm
2 - Self-locking hexagon nut
❑ Tightening torque: 49
Nm
3 - Tandem brake master cyl‐
inder
❑ Cannot be repaired. If
faulty, renew complete.
❑ Removing and installing
⇒ page 114
4 - Sealing plug
❑ Moisten with brake fluid
and press into brake flu‐
id reservoir
5 - Filler cap
6 - Brake fluid reservoir
7 - Vacuum hose
❑ Insert into brake servo
unit
8 - Sealing plug
❑ Connection for vacuum
hose
9 - Tandem brake servo
❑ Adjusting ball head
⇒ page 113
❑ On petrol engines the
vacuumProtected
required
is tak‐
by copyright. Copying for private or commercial purposes, in part or in whole, is not
en from the
intake
mani‐
permitted
unless
authorised by AUDI AG. AUDI AG does not guarantee or accept any liability
with respect to the correctness of information in this document. Copyright by AUDI AG.
112
Rep. gr.47 - Brakes - hydraulics
Audi A8 2003 ➤
Brake system - Edition 03.2013
❑
❑
❑
❑
❑
❑
❑
fold.
Vehicles with a V6 petrol
engine and automatic gearbox are equipped with a brake vacuum pump.
Checking function
With the engine switched off, firmly depress the brake pedal several times (this reduces the vacuum
present in the servo unit).
Then hold brake pedal in applied position employing moderate force and start engine. If the servo unit
is working properly, the pedal will give slightly under foot (servo assistance becomes activated).
Renew complete unit if defective
With bonded gasket
Removing and installing ⇒ page 117
10 - Seal
❑ Renew
11 - Brake line
❑ Tightening torque: 24 Nm
❑ Brake master cylinder/primary piston circuit to hydraulic unit
12 - Trunnion bolt
❑ Tightening torque: 10 Nm
13 - Brake line
❑ Tightening torque: 24 Nm
❑ Brake master cylinder/secondary piston circuit to hydraulic unit
14 - Mounting bracket for pedal cluster
❑ Removing and installing ⇒ page 77
Protected by copyright. Copying for private or commercial purposes, in part or in whole, is not
15 - Hexagon nut
permitted unless authorised by AUDI AG. AUDI AG does not guarantee or accept any liability
with respect
to the correctness
of information
in this document. Copyright by AUDI AG.
❑ Tightening
torque:
25 Nm
16 - Torx socket head bolt -T45❑ Tightening torque: 25 Nm
Adjusting ball head
LHD vehicles:
a = 184.4 mm ± 0.5 mm
Note
♦ Surface -1- for measuring
♦ When measuring the ball head, it must be set at right angles
to the surface of the brake servo.
♦ Measure to end of ball head without gasket fitted.
Tightening torque:
Ball head to brake servo
30 Nm
Caution
Before driving vehicle for the first time, make sure function of
brakes is OK.
8. Brake servo/ brake master cylinder - exploded view
113
Audi A8 2003 ➤
Brake system - Edition 03.2013
9
Removing and installing brake mas‐
ter cylinder
9.1
Removing and installing brake master
cylinder
Special tools and workshop equipment required
♦ Brake filling and bleeding equipment -VAS 5234-
or
♦ Brake filling and bleeding equipment -V.A.G 1869 A♦ Sealing plugs repair kit, part No. 1H0 698 311A
Removing
Protected by copyright. Copying for private or commercial purposes, in part or in whole, is not
permitted unless authorised by AUDI AG. AUDI AG does not guarantee or accept any liability
with respect to the correctness of information in this document. Copyright by AUDI AG.
– Detach plenum chamber cover.
Drawing off brake fluid with brake filling and bleeding equipment
-V.A.G 1869- or VAS 5234.
– Open brake fluid reservoir.
– As protection against escaping brake fluid, place a sufficient
number of lint-free cloths in area beneath brake master cylin‐
der.
114
Rep. gr.47 - Brakes - hydraulics
Audi A8 2003 ➤
Brake system - Edition 03.2013
– Draw off as much brake fluid as possible from brake fluid res‐
ervoir using brake filling and bleeding equipment -VAS 5234or extraction unit -V.A.G 1869/4- .
– Unplug connector from sender for float warning indicator -1-.
Removing body brace
– Remove bolts with washers -1- (tightening torque 45 Nm).
– Remove bolts with washers -2- (tightening torque 3 Nm).
– -Item 3- Front section of plenum chamber
– -Item 4- Suspension turret
Arrow in illustration points in direction of travel.
– Remove bolts with washers -1- (tightening torque 9 Nm).
– -Item 2- Cross piece for suspension turret
– -Item 3- Windscreen cross member
– -Item 4- Support/ connection piece at windscreen cross mem‐
ber
Protected by copyright. Copying for private or commercial purposes, in part or in whole, is not
permitted unless authorised by AUDI AG. AUDI AG does not guarantee or accept any liability
with respect to the correctness of information in this document. Copyright by AUDI AG.
9. Removing and installing brake master cylinder
115
Audi A8 2003 ➤
Brake system - Edition 03.2013
– Unscrew securing bolt -1- for brake fluid reservoir.
– Pull off brake fluid reservoir and lay it to one side.
Note
♦ Protect the plenum chamber against any brake fluid which es‐
capes.
♦ The underside of the brake fluid reservoir clips into the brake
master cylinder.
Protected by copyright. Copying for private or commercial purposes, in part or in whole, is not
permitted unless authorised by AUDI AG. AUDI AG does not guarantee or accept any liability
– To remove reservoir, press down locking lug
at tothe
same of information in this document. Copyright by AUDI AG.
withand
respect
the correctness
time pull brake fluid reservoir out of sealing plugs.
– Disconnect brake lines -2- and seal with sealing plugs from
repair kit, Part No. 1H0 698 311 A.
– Unscrew securing bolts for brake master cylinder -3-.
– Carefully remove brake master cylinder from brake servo.
Installing
When installing, note the following points in particular:
♦ Before installing brake master cylinder, clean any residual
brake fluid off plenum chamber.
♦ When assembling brake master cylinder with brake servo unit,
make sure push rod is properly positioned in brake master
cylinder.
– Adjust brake light switch ⇒ page 34 .
– Bleed brake system ⇒ page 110 .
Caution
Before driving vehicle for the first time, make sure function of
brakes is OK.
116
Rep. gr.47 - Brakes - hydraulics
Audi A8 2003 ➤
Brake system - Edition 03.2013
10
Removing and installing brake servo
10.1
Removing and installing brake servo
Special tools and workshop equipment required
♦ Brake filling and bleeding equipment -VAS 5234-
or
♦ Brake filling and bleeding equipment -V.A.G 1869 A♦ Sealing plugs repair kit, part No. 1H0 698 311A
Removing
– Remove storage compartment on driver's side ⇒ Body Re‐
pairs; Rep. gr. 68
– Detach plenum chamber cover.
Drawing off brake fluid with brake filling and bleeding equipment
-V.A.G 1869- or VAS 5234.
– Open brake fluid reservoir.
– As protection against escaping brake fluid, place a sufficient
number of lint-free cloths in area beneath brake master cylin‐
der.
Protected by copyright. Copying for private or commercial purposes, in part or in whole, is not
permitted unless authorised by AUDI AG. AUDI AG does not guarantee or accept any liability
with respect to the correctness of information in this document. Copyright by AUDI AG.
10. Removing and installing brake servo
117
Audi A8 2003 ➤
Brake system - Edition 03.2013
– Draw off as much brake fluid as possible from brake fluid res‐
ervoir using brake filling and bleeding equipment -VAS 5234or extraction unit -V.A.G 1869/4- .
Removing body brace
– Remove bolts with washers -1- (tightening torque 45 Nm).
– Remove bolts with washers -2- (tightening torque 3 Nm).
– -Item 3- Front section of plenum chamber
– -Item 4- Suspension turret
Arrow in illustration points in direction of travel.
– Remove bolts with washers -1- (tightening torque 9 Nm).
– -Item 2- Cross piece for suspension turret
– -Item 3- Windscreen cross member
– -Item 4- Support/ connection piece at windscreen cross mem‐
ber
– Unplug connector from sender for float warning
– Pull off vacuum hose -2-.
118
Rep. gr.47 - Brakes - hydraulics
Protected by copyright. Copying for private or commercial purposes, in part or in whole, is not
permitted unless authorised by AUDI AG. AUDI AG does not guarantee or accept any liability
indicator with
-1-.respect to the correctness of information in this document. Copyright by AUDI AG.
Audi A8 2003 ➤
Brake system - Edition 03.2013
– Unscrew securing bolt -1- for brake fluid reservoir.
Note
♦ Protect the plenum chamber against any brake fluid which es‐
capes.
♦ The underside of the brake fluid reservoir clips into the brake
master cylinder.
by copyright. Copying for private or commercial purposes, in part or in whole, is not
–Protected
To remove
reservoir, press down locking lug and at the same
permitted unless authorised by AUDI AG. AUDI AG does not guarantee or accept any liability
time
pulltobrake
fluid reservoir
sealing
plugs.
with respect
the correctness
of informationout
in thisof
document.
Copyright
by AUDI AG.
– Pull off brake fluid reservoir and lay it to one side.
– Disconnect brake lines -2- and seal with sealing plugs from
repair kit, Part No. 1H0 698 311 A.
– Removing and installing brake light switch ⇒ page 34 .
– Separate brake pedal from brake servo ⇒ page 74 .
– Unscrew securing bolts for brake servo -1-.
– Remove brake servo with brake master cylinder.
10. Removing and installing brake servo
119
Audi A8 2003 ➤
Brake system - Edition 03.2013
– Unscrew securing nuts for brake master cylinder -1-.
– Carefully remove brake master cylinder from brake servo.
Installing
When installing, note the following points in particular:
♦ Before installing brake master cylinder, clean any residual
brake fluid off plenum chamber.
♦ When assembling brake master cylinder with brake servo unit,
make sure push rod is properly positioned in brake master
cylinder.
– Adjust brake light switch ⇒ page 34 .
– Bleed brake system ⇒ page 110 .
Caution
Before driving vehicle for the first time, make sure function of
brakes is OK.
Protected by copyright. Copying for private or commercial purposes, in part or in whole, is not
permitted unless authorised by AUDI AG. AUDI AG does not guarantee or accept any liability
with respect to the correctness of information in this document. Copyright by AUDI AG.
120
Rep. gr.47 - Brakes - hydraulics
Audi A8 2003 ➤
Brake system - Edition 03.2013
11
Vacuum pumps for brake servo
Removing and installing vacuum pump (3.0 ltr. diesel engine)
⇒ page 122
Removing and installing vacuum pump (4.0 ltr. diesel engine)
⇒ page 124
Removing and installing vacuum pump (4.2 ltr. diesel engine)
⇒ page 127
Removing and installing vacuum pump (2.8 ltr. and 3.2 ltr. petrol
engine) ⇒ page 131
Electric vacuum pump for brake servo -V192- (petrol engines)
⇒ page 133
11.1
Vacuum pump - exploded view (3.0 ltr TDI)
19 Nm
2 - Vacuum pump
Protected by copyright. Copying for private or commercial purposes, in part or in whole, is not
❑ Removing
and installing
permitted unless authorised by AUDI AG. AUDI AG does not guarantee or accept any liability
⇒ page with
122respect to the correctness of information in this document. Copyright by AUDI AG.
3 - Vacuum hose
❑ Secure with hose clips
(same as original equip‐
ment) ⇒ Electronic
parts catalogue
45 Nm
5 - O-ring
❑ Renew
6 - Inlet camshaft
7 - O-ring
❑ Renew
8 - O-ring
❑ Renew
11. Vacuum pumps for brake servo
121
Audi A8 2003 ➤
Brake system - Edition 03.2013
11.2
Removing and installing vacuum pump
(3.0 ltr. TDI)
Removing
– Carefully pull engine cover panel off 4 mounting studs (one at
a time) -arrows-.
– Remove bolt -1- and detach vacuum hose with hose connec‐
tion from vacuum pump.
Caution
Take care not to damage the vacuum hose. The vacuum hose
must be renewed if it is damaged.
– Remove bolts -arrows- and take off vacuum pump.
Installing
Installation is performed in reverse sequence; note the following:
Note
Renew O-rings
– Set drive lugs of vacuum pump so they engage in slots in
camshaft when vacuum pump is installed -arrows-.
– Attach vacuum pump to flange -arrows- and tighten bolts to
9 Nm.
Protected by copyright. Copying for private or commercial purposes, in part or in whole, is not
permitted unless authorised by AUDI AG. AUDI AG does not guarantee or accept any liability
with respect to the correctness of information in this document. Copyright by AUDI AG.
122
Rep. gr.47 - Brakes - hydraulics
Audi A8 2003 ➤
Brake system - Edition 03.2013
– Secure vacuum hose to vacuum pump with bolt -1- (5 Nm).
Caution
Take care not to damage the vacuum hose. The vacuum hose
must be renewed if it is damaged.
Tightening torques
Component
Nm
Vacuum pump to timing chain cover
Hose connection for vacuum hose to vacuum
pump
11.3
9
5
Vacuum pump - exploded view (4.0 ltr TDI)
1 - 10 Nm
2 - Vacuum pump
❑ Removing and installing
⇒ page 124
3 - Vacuum hose
❑ Secure with hose clips
(same as original equip‐
ment) ⇒ Electronic
parts catalogue
4 - Hose clip
Note
On some models the vacuum hose
has to be secured at the vacuum
pump with a bolt.
5 - O-ring
❑ Renew
6 - O-ring
❑ Renew
7 - Inlet camshaft
Protected by copyright. Copying for private or commercial purposes, in part or in whole, is not
permitted unless authorised by AUDI AG. AUDI AG does not guarantee or accept any liability
with respect to the correctness of information in this document. Copyright by AUDI AG.
11. Vacuum pumps for brake servo
123
Audi A8 2003 ➤
Brake system - Edition 03.2013
11.4
Removing and installing vacuum pump
(4.0 ltr. TDI)
Removing
– Carefully pull engine cover panel off four mounting studs (one
at a time) -arrows-.
– Remove cover for suspension turret (right-side); to do so, de‐
tach fasteners-1- and unscrew retainer -2-.
– Pull cover out of retainer clamps -arrows-.
Caution
Observe rules for cleanliness when working on the injection
system.
Protected by copyright. Copying for private or commercial purposes, in part or in whole, is not
permitted unless authorised by AUDI AG. AUDI AG does not guarantee or accept any liability
with respect to the correctness of information in this document. Copyright by AUDI AG.
– Disconnect fuel return line -1- and fuel supply line -2- at fuel
filter.
– Unplug electrical connector -arrow- at fuel temperature sender
- G81- and move fuel lines to one side.
124
Rep. gr.47 - Brakes - hydraulics
Audi A8 2003 ➤
Brake system - Edition 03.2013
– Disconnect vacuum hose -1- from vacuum pump.
Caution
Take care not to damage the vacuum hose. The vacuum hose
must be renewed if it is damaged.
– Remove bolts -2- and -3-.
– Take off vacuum pump.
Installing
Installation is performed in reverse sequence; note the following:
Note
Protected by copyright. Copying for private or commercial purposes, in part or in whole, is not
permitted unless authorised by AUDI AG. AUDI AG does not guarantee or accept any liability
♦ respect to the correctness of information in this document. Copyright by AUDI AG.
with
Renew O-rings
♦ Secure all hose connections with the correct type of hose clips
(same as original equipment) ⇒ Electronic parts catalogue .
– Set drive lugs of vacuum pump so they engage in slots in
camshaft when vacuum pump is installed.
– Attach vacuum pump to flange and tighten bolts to 9 Nm.
– Fit new hose clip onto vacuum hose.
– Push vacuum hose -1- onto connection on vacuum pump.
– Fasten hose clip using suitable pliers.
Note
On some models the vacuum hose has to be secured at the vac‐
uum pump with a bolt.
Caution
Take care not to damage the vacuum hose. The vacuum hose
must be renewed if it is damaged.
Tightening torque
Component
Nm
Vacuum pump to timing chain cover
10
11. Vacuum pumps for brake servo
125
Audi A8 2003 ➤
Brake system - Edition 03.2013
11.5
Vacuum pump - exploded view (4.2 ltr TDI)
1 - 10 Nm
2 - Vacuum pump
❑ Removing and installing
⇒ page 127
3 - Vacuum hose
❑ Secure with hose clips
(same as original equip‐
ment) ⇒ Electronic
parts catalogue
4 - Hose clip
Note
On some models the vacuum hose
has to be secured at the vacuum
pump with a bolt.
5 - O-ring
❑ Renew
6 - O-ring
❑ Renew
7 - Inlet camshaft
126
Rep. gr.47 - Brakes - hydraulics
Protected by copyright. Copying for private or commercial purposes, in part or in whole, is not
permitted unless authorised by AUDI AG. AUDI AG does not guarantee or accept any liability
with respect to the correctness of information in this document. Copyright by AUDI AG.
Audi A8 2003 ➤
Brake system - Edition 03.2013
11.6
Removing and installing vacuum pump (4.2 ltr. TDI)
Special tools and workshop
equipment required
♦ Torque wrench - V.A.G
1331♦ Ratchet - V.A.G 1331/1♦ Tool insert (19 mm) - V.A.G
1331/5♦ Tool insert (17 mm) - V.A.G
1331/6-
Removing
– Drain off coolant.
– Carefully pull engine cover panel off four mounting studs (one
at a time) -arrows-.
Caution
Observe rules for cleanliness when working on the injection
system.
Protected by copyright. Copying for private or commercial purposes, in part or in whole, is not
permitted unless authorised by AUDI AG. AUDI AG does not guarantee or accept any liability
with respect to the correctness of information in this document. Copyright by AUDI AG.
11. Vacuum pumps for brake servo
127
Audi A8 2003 ➤
Brake system - Edition 03.2013
– Disconnect fuel return line -1- and fuel supply line -2- at fuel
filter.
– Unplug electrical connector -arrow- at fuel temperature sender
- G81- and move fuel lines to one side.
– Slacken off union nuts -1- and -3-.
– Remove bolt -2- and take off high-pressure pipe.
permitted unless authorised by AUDI AG. AUDI AG does not guarantee or accept any liability
Protected by copyright. Copying for private or commercial purposes, in part or in whole, is not
with respect to the correctness of information in this document. Copyright by AUDI AG.
– Detach electrical connector -1-.
– Remove bolts -arrows- and detach exhaust gas recirculation
control motor - V339- (left-side).
128
Rep. gr.47 - Brakes - hydraulics
Audi A8 2003 ➤
Brake system - Edition 03.2013
– Remove bolt -4- and detach coolant connection.
– Detach hoses -2- and -6-.
– Remove bolts -1-, -3- and -5- and detach connection for ex‐
haust gas recirculation.
– Detach coolant hose -arrow- in front of bulkhead.
Protected by copyright. Copying for private or commercial purposes, in part or in whole, is not
permitted unless authorised by AUDI AG. AUDI AG does not guarantee or accept any liability
with respect to the correctness of information in this document. Copyright by AUDI AG.
– Disconnect vacuum hose -1- from vacuum pump.
Caution
Take care not to damage the vacuum hose. The vacuum hose
must be renewed if it is damaged.
– Remove bolts -2- and -3- and take off vacuum pump.
Installing
Installation is performed in reverse sequence; note the following:
Note
♦ Renew seals and O-rings.
♦ Secure all hose connections with the correct type of hose clips
(same as original equipment) ⇒ Electronic parts catalogue .
– Set drive lugs of vacuum pump so they engage in slots in
camshaft when vacuum pump is installed -arrows-.
11. Vacuum pumps for brake servo
129
Audi A8 2003 ➤
Brake system - Edition 03.2013
– Attach vacuum pump to flange and tighten bolts to 9 Nm.
– Fit new hose clip onto vacuum hose.
– Push vacuum hose -1- onto connection on vacuum pump.
– Close hose clip using suitable pliers.
Note
On some models the vacuum hose has to be secured at the vac‐
uum pump with aProtected
bolt. by copyright. Copying for private or commercial purposes, in part or in whole, is not
permitted unless authorised by AUDI AG. AUDI AG does not guarantee or accept any liability
with respect to the correctness of information in this document. Copyright by AUDI AG.
Caution
Take care not to damage the vacuum hose. The vacuum hose
must be renewed if it is damaged.
– Tighten union nuts on high-pressure pipes hand-tight initially.
– Make sure high-pressure pipes are seated without strain.
– Use torque wrench - V.A.G 1331- with ratchet - V.A.G 1331/1and tool insert (17 mm) - V.A.G 1331/6- to tighten high-pres‐
sure pipe connection at high-pressure pump.
– Use torque wrench - V.A.G 1331- with ratchet - V.A.G 1331/1and tool insert (19 mm) - V.A.G 1331/5- to tighten high-pres‐
sure pipe connections at rail elements.
– Install exhaust gas recirculation control motor - V339- (leftside).
– Fill cooling system.
Tightening torque
Component
Vacuum pump to timing chain cover
EGR connection to:
Cylinder head
Connecting pipe
Coolant connection to EGR connection
High-pressure pipe to:
High-pressure
pump
Rail element
130
Rep. gr.47 - Brakes - hydraulics
Nm
9
9
9
9
25
25
Audi A8 2003 ➤
Brake system - Edition 03.2013
11.7
Removing and installing vacuum pump
(2.8 ltr. and 3.2 ltr. petrol engine)
Removing
– Pull off front engine cover panel -arrows-.
Caution
Take care not to damage the vacuum hose. The vacuum hose
must be renewed if it is damaged.
– Unclip vacuum line leading to air cleaner at vacuum pump
housing.
– Disconnect vacuum hose -1from vacuum pump.
Protected by copyright. Copying for private or commercial purposes, in part or in whole, is not
unless authorised by AUDI AG. AUDI AG does not guarantee or accept any liability
– Remove bolts -arrows- andpermitted
take
off
vacuum pump.
with respect to the correctness of information in this document. Copyright by AUDI AG.
Installing
Installation is performed in reverse sequence; note the following:
Note
♦ Renew O-rings
♦ Secure all hose connections with the correct type of hose clips
(same as original equipment) ⇒ Electronic parts catalogue .
– Set drive lug of vacuum pump -1- so it engages in symmetrical
slot in camshaft when vacuum pump is installed -arrows-.
11. Vacuum pumps for brake servo
131
Audi A8 2003 ➤
Brake system - Edition 03.2013
– Attach vacuum pump to flange -arrows- and tighten bolts to
9 Nm.
– Slide new hose clip onto vacuum hose.
– Push vacuum hose -1- onto connection on vacuum pump.
Caution
Take care not to damage the vacuum hose. The vacuum hose
must be renewed if it is damaged.
– Use suitable pliers to fasten clip on vacuum hose.
Note
On some models the vacuum hose has to be secured at the vac‐
uum pump with a bolt.
Tightening torque
Component
Vacuum pump to cylinder head
Nm
9
Protected by copyright. Copying for private or commercial purposes, in part or in whole, is not
permitted unless authorised by AUDI AG. AUDI AG does not guarantee or accept any liability
with respect to the correctness of information in this document. Copyright by AUDI AG.
132
Rep. gr.47 - Brakes - hydraulics
Audi A8 2003 ➤
Brake system - Edition 03.2013
12
Electric vacuum pump for brakes V192-
12.1
Vacuum pump for brakes - V192- - exploded view
1 - Brake servo pressure sen‐
sor - G294❑ Removing and installing
⇒ page 136
2 - Vacuum hose
❑ To brake servo
3 - Brake servo relay - J569❑ Removing and installing
⇒ Current flow dia‐
grams
4 - Non-return valve
Checking function
⇒ page 136
5 - Hose clip
❑ Renew
6 - Clip
Protected by copyright. Copying for private or commercial purposes, in part or in whole, is not
permitted unless authorised by AUDI AG. AUDI AG does not guarantee or accept any liability
with respect to the correctness of information in this document. Copyright by AUDI AG.
7 - Stop buffer
8 - Vacuum pump for brakes V192❑ Removing and installing
⇒ page 133
❑ Checking ⇒ page 134
9 - Stop buffer
10 - Bracket
❑ For correct version refer
to ⇒ Electronic parts
catalogue (ETKA)
11 - Nut
12 - Hexagon bolt
12.2
Removing and installing vacuum pump
for brakes - V192-
No provision is made for repairs to vacuum pump for brakes V192- . If a fault occurs, the vacuum pump for brakes - V192- must
be renewed.
12. Electric vacuum pump for brakes V192
133
Audi A8 2003 ➤
Brake system - Edition 03.2013
Removing
– Unplug connector -1-.
– Disconnect vacuum hose -2- from vacuum pump for brakes V192- .
Caution
Take care not to damage the vacuum hose. The vacuum hose
must be renewed if it is damaged.
Protected by copyright. Copying for private or commercial purposes, in part or in whole, is not
permitted unless authorised by AUDI AG. AUDI AG does not guarantee or accept any liability
with respect to the correctness of information in this document. Copyright by AUDI AG.
– Release clip in direction of arrow and remove.
– Pull vacuum pump for brakes - V192- upwards out of bracket.
Installing
Installation is carried out in the reverse sequence.
12.3
Checking vacuum pump for brakes V192-
Special tools and workshop equipment required
♦ Vehicle diagnosis and service information system - VAS 505x-
Procedure
– With ignition switched off, connect vehicle diagnosis, service
and information system - VAS 505x- to diagnostic connection.
134
Rep. gr.47 - Brakes - hydraulics
Audi A8 2003 ➤
Brake system - Edition 03.2013
– Switch on tester -arrow-.
The tester may need up to 3 minutes before it is ready for oper‐
ation.
– Switch on ignition.
– Select mode: Press the button on the display for “Vehicle selfdiagnosis”.
– Select vehicle system: Press the button for “Engine electron‐
ics”.
The control unit identification and coding will appear at the top
right of the display.
– Select diagnosis function (all diagnosis functions are available
at this stage).
– Select “006 - Basic setting” on the display.
– Press buttons 0 , 1 and 1 for Measured value block.
– Confirm entry with Q key.
The following information will appear at the bottom of the display:
Basic setting
Not operated
Pump off
xxx mbar
Test off
– Firmly depress the brake pedal several times in succession
until the test is activated.
The following information will appear at the bottom of the display:
Basic setting
Not operated
Pump on
xxx mbar
Test on
Do not press the brake pedal again once the test has been acti‐
vated.
The vacuum pump for brakes - V192- supplies vacuum to the
brake servo. The diagnosis of the brake servo system runs in the
control unit at the same time.
The system passes the test if the pressure in the brake servo
reaches the shut-off threshold within the time limit set by the di‐
agnostic function.
Protectedof
by the
copyright.
Copying for private or commercial purposes, in part or in whole, is not
The following information will appear at the bottom
display:
Basic setting
permitted unless authorised by AUDI AG. AUDI AG does not guarantee or accept any liability
with respect to the correctness of information in this document. Copyright by AUDI AG.
Not operated
Pump off
xxx mbar
Syst. OK
– You can cancel or exit from this mode by pressing the Go
to button.
12. Electric vacuum pump for brakes V192
135
Audi A8 2003 ➤
Brake system - Edition 03.2013
The system fails the test if the pressure in the brake servo does
not reach the shut-off threshold within the time limit set by the
diagnostic function.
The following information will appear at the bottom of the display:
Basic setting
Not operated
Pump off
xxx mbar
Syst.n.OK
– Perform “Guided Fault Finding” using vehicle diagnosis, and
service information system - VAS 505x- .
12.4
Removing and installing brake servo
pressure sensor - G294-
Removing
– Unplug connector -1-.
– Carefully pry out and remove brake servo pressure sensor G294- .
Installing
Installation is carried out in the reverse sequence.
12.5
Checking non-return valve
The valve should allow air to pass in the direction indicated by the
arrow.
Valve must remain closed in opposite direction.
Observe correct installation position.
Arrow must point towards vacuum pump.
Protected by copyright. Copying for private or commercial purposes, in part or in whole, is not
permitted unless authorised by AUDI AG. AUDI AG does not guarantee or accept any liability
with respect to the correctness of information in this document. Copyright by AUDI AG.
136
Rep. gr.47 - Brakes - hydraulics
Audi A8 2003 ➤
Brake system - Edition 03.2013
13
Brake hoses and brake lines
13.1
Routing of brake hoses/lines
Replacement brake hoses and brake lines are supplied as spare
parts ready to be installed.
Secure brake hoses and brake pipes to the original mounting
points when installing.
Brake lines to hydraulic unit
– Item -1- Hexagon bolt ( -M10- and M12 ∅ 5 mm brake lines),
12 Nm tightening torque
– Item -2- Hexagon bolt ( -M14- ∅ 8 mm brake lines), 12 Nm
tightening torque
Brake line routing at front wheels
Protected by copyright. Copying for private or commercial purposes, in part or in whole, is not
permitted unless authorised by AUDI AG. AUDI AG does not guarantee or accept any liability
with respect to the correctness of information in this document. Copyright by AUDI AG.
– Item -1-: Hexagon bolt, tightening torque 25 Nm
– Item -2- Brake hose bracket
– Item -3- Retaining spring
– Item -4- Brake line, 14 Nm tightening torque
– Item -5- Brake hose; make sure that locating lugs engage
properly in bracket.
Routing of brake lines at rear wheels
13. Brake hoses and brake lines
137
Audi A8 2003 ➤
Brake system - Edition 03.2013
– Item -1- Brake line, 14 Nm tightening torque
– Item -2-: Hexagon bolt, tightening torque 10 Nm
– Item -3- Retaining spring
– Item -4- Brake hose bracket
–
Protected by copyright. Copying for private or commercial purposes, in part or in whole, is not
permitted unless authorised by AUDI AG. AUDI AG does not guarantee or accept any liability
with respect
the correctness
information in this
document. Copyright by AUDI AG.
Item -1Braketo line,
14 Nmof tightening
torque
– Item -2- Brake hose
– Item -3- Retaining spring
– Item -4- Brake hose bracket
13.2
Tightening torques
Splash plates to wheel bearing housing
Hydraulic unit with bracket to longitudinal mem‐
ber (Bosch 5.7)
Bleed valve to brake caliper
Brake pipe to brake hoses
Rear brake caliper (EPB); brake hose to brake
caliper (banjo union with banjo bolt)
Brake caliper to brake carrier
Brake carrier to wheel bearing housing (always
renew bolts). See note
⇒ Item 8 (page 67)
138
Rep. gr.47 - Brakes - hydraulics
10 Nm
10 Nm
10 Nm
15 Nm
38 Nm
35 Nm
140 Nm
Audi A8 2003 ➤
Brake system - Edition 03.2013
14
Repairing brake lines
With the aid of the flanging tool for brake lines - VAS 6056- it is
possible to make connections on the ends of the brake lines with‐
out damaging the coating. In certain cases this makes it possible
to replace sections of brake lines and thus save repair costs.
The flanging tool set V.A.G 1356 must not be used for the black
brake lines because of the coating and the diameter of these
brake lines.
Note
♦ Do not bend brake lines more than 90°; this would cause kinks
or other deformations which would excessively restrict the
brake lines.
♦ Brake lines should preferably be cut at some point on the un‐
derside of the vehicle.
♦ Select the position of the connecting pieces so that they can‐
not chafe against any moving parts.
♦ Do not grease the spindle; clean with methylated spirits only.
Special tools and workshop equipment required
♦ Flanging tool for brake lines - VAS 6056-
Protected by copyright. Copying for private or commercial purposes, in part or in whole, is not
permitted unless authorised by AUDI AG. AUDI AG does not guarantee or accept any liability
with respect to the correctness of information in this document. Copyright by AUDI AG.
List of tools in set
Item
1
2
3
4
5
6
7
Tool
Tool number
Flanging tool (including jaws
VAS 6056/6)
Pipe cutter
Brake line scraper tool 3)
Mole grips with plastic jaws
Pipe bending tool
Allen key (6 mm)
Jaws for flanging tool
VAS 6056/1
VAS 6056/2
VAS 6056/3
VAS 6056/4
VAS 6056/5
VAS 6056/7
3) The grub screws (in the stem and on the sides of the tool) are pre-set and
must not be turned.
14. Repairing brake lines
139
Audi A8 2003 ➤
Brake system - Edition 03.2013
14.1
Flanging tool - exploded view
1 - Top section of flanging tool
❑ Unscrew this part to
change jaws of flanging
tool
2 - Mounting for handle
❑ Must be removed for ac‐
cess to retaining screw
for top section of tool
3 - Retaining screw
❑ For top section of flang‐
ing tool
4 - Grub screws for jaws
❑ These screws centralise
and secure jaws of
flanging tool
❑ 2 mm socket head
Protected by copyright. Copying for private or commercial purposes, in part or in whole, is not
permitted unless authorised by AUDI AG. AUDI AG does not guarantee or accept any liability
with respect to the correctness of information in this document. Copyright by AUDI AG.
5 - Jaws for flanging tool
❑ Different versions avail‐
able
❑ Assembly instructions
⇒ page 140
Assembly instructions for jaws of flanging tool:
♦ VAS 6056/6 (dark) for black brake lines
♦ VAS 6056/7 (light) for green brake lines
Note
The arrow on the rounded end of the jaws must face the end of
the housing and the straight end of the jaws must face the spindle,
otherwise the flanged connection on the brake line will not be
formed correctly.
14.2
Instructions for use
Applies to steel and ceramic brakes.
– Unscrew defective brake line at brake caliper or wheel brake
cylinder. Catch escaping brake fluid and dispose of fluid in the
correct manner.
140
Rep. gr.47 - Brakes - hydraulics
Audi A8 2003 ➤
Brake system - Edition 03.2013
– Cut through brake line at a suitable point (straight, easily ac‐
cessible section of pipe) using pipe cutter -2-.
– Remove section of pipe to be replaced.
– De-grease outside surface of brake lines.
– Clamp brake line in mole grips -4- so that approx. 50 mm of
pipe protrudes from plastic jaws.
–Protected
Clamp
brake line scraper tool -3- in electric drill and apply tool
by copyright. Copying for private or commercial purposes, in part or in whole, is not
to
brake
permitted unlessline.
authorised by AUDI AG. AUDI AG does not guarantee or accept any liability
with respect to the correctness of information in this document. Copyright by AUDI AG.
– With electric drill running at slow speed, exert light pressure
and strip off coating from brake line.
The length of the coating that is stripped off is determined by the
limit stop incorporated in the brake line scraper tool.
– Pull scraper tool off brake line and clean off residue of coating.
– Remove mole grips and slide union screw -D- onto brake line.
– Push brake line -B- against limit stop -A- in flanging tool.
Note
The brake line must be in contact with the limit stop when the
socket head bolts are tightened, otherwise the flanged connection
on the brake line will not be formed correctly.
– Clamp brake line in flanging tool tightly enough to prevent it
from moving. Then fold up limit stop -A- and fully tighten socket
head bolts in diagonal sequence using Allen key -C-.
14. Repairing brake lines
141
Audi A8 2003 ➤
Brake system - Edition 03.2013
Protected by copyright. Copying for private or commercial purposes, in part or in whole, is not
permitted unless authorised by AUDI AG. AUDI AG does not guarantee or accept any liability
with respect to the correctness of information in this document. Copyright by AUDI AG.
– Screw spindle into flanging tool onto limit stop.
– Unscrew spindle.
– Slacken off socket head bolts in diagonal sequence.
– Take brake line out of flanging tool. Clean and inspect brake
line with flanged connection.
Briefly flush out section of pipe remaining in vehicle:
– Connect brake filling and bleeding equipment - VAS 5234- , fit
hose of bleeder bottle onto flared connection on brake line and
operate brake filling and bleeding equipment - VAS 5234briefly until a small quantity of brake fluid has run through.
– Blow out new section of brake line with compressed air before
installing.
– Join together sections of brake line with connecting piece
-E-.
– Install brake line.
– Then bleed brake system ⇒ page 110 .
Caution
Before driving vehicle for the first time, make sure function of
brakes is OK.
142
Rep. gr.47 - Brakes - hydraulics