1
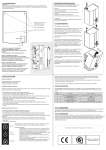
Installation details: Comet 2 (2.8kW) - A moulded 13A plug is factory fitted. A suitable 13A outlet is all that is required. Installation procedure: Fit a stop Valve on a cold water line and attach a 3/4" BSP male fitting, (e.g. 3/4" x 1/2" 311 or washing machine type stop valve). Connect straight tailpiece of the hose to the stop valve fitting. Make sure that the preattached sealing washer is fitted. Turn on the water to flush any impurities, dust etc from the inlet hose and water pipe. Allow several gallons through. Connect right-angled tailpiece of the hose to the inlet valve of the boiler (again 3/4" BSP). Make sure the sealing washer is fitted here also. Turn on water and check for leaks. Operating boiler for the first time: Check that all installation procedures have been carried out. Ensure water valve is on. Plug boiler into 13A socket and turn power on at switch in the front of the machine. The orange “power on” light will glow and the machine will fill to a safe level, above the elements, before heating. The red “Ready/Status” light will cycle two flashes while the machine is filling to the safe level. After this amount of water has heated to about 96ºC the boiler will draw more water in until the temperature drops by 1 or 2 degrees. The boiler will then heat again. This heat fill cycle continues until the boiler is full (approx. 25 - 30 mins). The green “Ready/Status” light illuminates when the machine is both full and up to normal operating temperature. The boiler is now ready for use. NOTE: Because the boiler is electronically controlled no priming is necessary. The element cannot switch on until a safe level of water is reached. 1900065 REV.2 Page 3 of 5