1
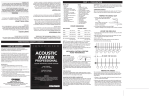
INSTALLATION INSTRUCTIONS FOR SOLID PRODUCTS
Sub Floor Preparations:
The concrete sub floor must be dry.
1) Per the NWFA’s recommendations, the maximum “generally” allowable amount of moisture emissions as expressed by
the calcium chloride test is 3.0 to 5.0 pounds per 1,000 sq. ft. of concrete surface per 24 hours at the time of installation.
Please follow ASTM standard 1869-4 which is the specific preparation/application instructions for calcium chloride
testing.
2) Another method to determine the presence of moisture in the concrete slab is by means of R-H testing or relative
humidity testing following ASTM standard F-2170-2, as well as F-710. Johnson Premium Hardwood recommends the
Wagner Rapid RH moisture testing process and procedures. Note: Johnson Premium Hardwood still requires the use of
vapor retarding system when installing floor over concrete or raised foundation sub-floor.
3) The concrete slab will usually take from 90 to 150 days to thoroughly dry depending on the size and thickness of the
slab and weather conditions. Please note, before moisture testing begins, the concrete slab must be a minimum of 30
days old. If moisture testing begins before the minimum 30 day drying period the test results will more than likely be
inaccurate and unreliable.
4) Do not install wood flooring if moisture levels exceed recommended levels. But, contact the Johnson technical
department for recommendations.
5) The sub floor MUST be free from any type of paint, oil, greases, dust, sealers, release agents, and all other types of
residues.
6) The sub floor should be level in general; however, it MUST be flat to with-in 3/16” over a 10 foot radius, in any direction for
glue down applications, and ¼” flat over a 10 foot radius, in any direction for nail down applications.
7) If plywood is used as a sub floor, the moisture content difference should be NO MORE than 4% between the engineered
wood floor and the plywood, and there should be NO MORE than a 2% difference between the solid plank wood floor
and the plywood sub floor. All plywood MUST BE EXTERIOR GRADE CDX and plywood size for sub floor is suggested to be
standard ¾” 4’ x 8’ panels, with an expansion gap of ¼” between panels, and staggered, full sheets by ½. Also, cross kerf
the back of the plywood every 1’ x 3/8” deep. Please note, plywood sub floor should run at 45 degree angle (preferred)
or perpendicular to the direction of the finished wood floor. “ATTENTION ENGINEERED WOOD FLOORING CANNOT BE
DIRECTLY INSTALLED OVER A 1’ X 6’ SUB FLOOR. THE NATIONAL WOOD FLOORING ASSOCIATION REQUIRES AN ADDITONAL
LAYER OF 1/2” CDX EXTERIOR GRADE PLYWOOD BE PLACED/SECURED TO THE SURFACE OF THE 1’ X 6’ SUB FLOOR FOR
ADDITIONAL SUPPORT”.
8) Please note: Johnson Premium Hardwood recognizes the following vapor retarding systems to be used with our products.
MVP by Bostik Finley, or tar, 15lb tar saturated felt paper, tar, followed by 15lb tar saturated felt paper and tar. Or a
skim coat of tar and 6-mil polyethylene sheeting for the application over the surface of lightweight/concrete slabs.
Note, apply a single layer of 15lb or 30lb tar saturated felt paper or single layer asphalt laminated paper over raised
foundation installations.
•
For more information, please refer to the NWFA Technical Service Manual. “INSTALLING HARDWOOD FLOORING” or visit
www.nwfa.org or call 1-800-422-4556
SOLID PRODUCTS: Nail-Down Installation
1) Pre-inspect your flooring to verify the proper product and color is being installed per manufacture’s standards. Always
plan for 5% defect and or waste.
2) Verify that the delivered wood flooring is between 6-9% moisture content and free of defects.
3) Do not deliver wood flooring to the jobsite or install wood flooring until appropriate temperature and humidity conditions
have been achieved. For more information regarding acclimation, please refer to our acclimation section.
4) Concrete slab should be tested per the instructions in “Sub Floor Preparation Instructions”. And document all test
results.
5) Please note: Johnson Premium Hardwood requires the use of a moisture vapor retarding system for both our Engineered
Wood Flooring and our Solid Wood Flooring regardless of sub floor type, or grade level.
6) Crawl space should have a minimum clearance of 18” from top of soil to bottom of joist and the soil should be covered
with 6 mil black polyethylene sheeting according to NWFA guidelines. Also, the ventilation should equal 1.5% of open
venting per 1,000 sq. ft. of floor area strategically located to foster proper cross ventilation.
7)
Snap a working line parallel to the starting wall, in multiples of our solid plank width, PLUS an expansion space of ¾”, to
set up the baseline of installation. (Be careful to assure you do NOT end up with a width of less than 2 inches at the final
opposing wall. If so, adjust by ripping down the width of the first row).
PREFINISHED, 3/4” SOLID, PLANK
Please carefully review and understand this information completely prior to starting, since improper installation will void the
warranties.
OWNER/INSTALLER RESPONSIBILTY
Hardwood flooring is a beautiful product of nature, which is characterized by distinctive variations in grain and color. These
variations in color and grain should not be seen as flaws, but embraced as nature showcases its beauty and uniqueness.
Johnson Premium Hardwood Floorings are manufactured according to accepted industry standards, which permit a defect
tolerance of 5%.
•
•
•
The installer/contractor assumes all responsibility for final inspection of product quality. The flooring should be inspected
before installation. Carefully examine the flooring for color, grade, finish quality or any damage caused during transit
before installing it. The installer should use reasonable selectivity to cull out or cut off unacceptable pieces. If the product
is considered unacceptable, “STOP DO NOT INSTALL THE FLOORING” but contact the Johnson Premium Hardwood dealer
immediately.
Prior to installation, the installer must determine that the environment of the job site and the conditions are suitable to the
material that’s being installed. The installer is responsible for determining the moisture emission rate of the concrete slab
and or the moisture content of the CDX plywood sub floor as per the NWFA installation guidelines, SECTION V – Appendix
AA Moisture Testing Procedures for Concrete Slabs, (specifically the Calcium Chloride test) and Appendix AB Moisture
Testing for Wood. All test results must be carefully documented and made available to the home owner. Johnson Premium
Hardwood declines any responsibility for job failure from or associated with inappropriately or improperly prepared subfloors or job site environment deficiencies.
Homeowner should be aware of color variations, graining ranges, the effect of moisture on wood flooring, the proper
way in which to maintain wood floors and the effect of UV light on wood flooring, “especially exotic woods”. All products
from Johnson Premium Hardwood will change color over time. The degree of change depends on the species and the
amount of UV exposure. Although wood usually darkens, some planks might turn lighter in color.
JOB SITE INSPECTION AND PRE-INSTALLATION REQUIREMENTS
•
•
•
•
•
Job site must be dry with no visible moisture. To ensure the job site is ready for hardwood flooring, installer must conduct
necessary moisture tests with approved calibrated Moisture Meters. All testing results must be carefully recorded and
made available to the homeowner before any work begins.
Contractor/installer should perform a pre-installation job site evaluation. The contractor/installer should look for the
following conditions. Does the lot sit on alluvial plain? If so is water run off directed away from the side of the building?
Does the roof gutter system direct water to a main drainage system that carries water away from the side of the
building? Is there adequate drainage around all landscape and hardscape to carry water away from the side of the
building? Check the surrounding concrete walkways and driveways for signs of efflorescence and/or alga growth.
Check surrounding planters for over watering as well as make sure sprinklers are directing water spray away from the
side of the building.
Per NWFA recommendations, the maximum allowable amount of moisture emissions as expressed by the Calcium
Chloride test is 3.0 to 5.0 pounds per 1,000 sq. ft. per 24 hours at the time of installation. Please note, It is generally
recognized that when installing engineered wood flooring directly to the surface of a concrete slab, without the use
of an industry/manufacture approved vapor retarding system the maximum allowable moisture emission rate cannot
exceed 3 pounds per 1,000 sq. ft. per 24 hours. And when installing an industry/manufacturer approved sub floor (CDX)
over the surface of a concrete slab that would result in perforating the moisture vapor retarding system, the maximum
allowable moisture emission rate cannot exceed 5 pounds per 1,000 sq. ft. per 24 hours.
As recommended by the NWFA, the installation site should have a consistent room temperature of 60 to 80 degrees
Fahrenheit and a constant relative humidity level of 35 to 50 percent. The structure should be fully enclosed with interior
climate control operating for at least 5 days prior to installation.
Concrete slab will require a 90 to 150 day drying period depending on the size and depth of the slab and weather
conditions. In newly constructed buildings, hardwood flooring should be one of the last items installed. All work involving
water or moisture should be completed prior to the delivering of wood flooring to the job site. Also, all doors and windows
must be installed.
SUB FLOOR REQUIREMENTS
•
•
•
•
The sub floor should be free from any type of paint, oil, greases, dust, sealers, release agents and all other types of
residues. The flatness tolerance 1/4” over 10 foot radius must be maintained throughout the installation.
The moisture content between the plywood and the flooring (solid flooring) must not exceed 2% in difference between
properly acclimated wood flooring and sub flooring. The recommended plywood must be EXTERIOR grade CDX in 4’
x 8’ x ¾” panels and suggest cross kerfing the backs 3/8” deep every 1 foot when installing over a concrete slab and
allowing ¼” space between panel edges as well as laying the panels in a brick pattern perpendicular to the direction
of the finished floor.
Ground level of the raised foundation sub floor must be completely covered with an industry approved moisture vapor
retarding system such as 1 layer of 15 lb or 30 lb tar saturated felt paper, or an asphalt laminated paper meeting UU-B790a, Grade B, Type I, Style 1a.
CDX plywood when properly installed over the surface of a concrete/lightweight slab, following manufacturer/industry
standards must be covered with an additional layer of 15 lb or 30 lb tar saturated felt paper, or an asphalt laminated
paper meeting UU-B-790a, Grade B, I, Style 1a. Prior to nailing/cleating/stapling, Johnson Premium Wood Flooring to the
surface of the sub straight.
IMPORTANT
•
•
•
•
•
•
All Solid Johnson Premium Hardwood Flooring can be installed on and above grade only. Note: If any part of the soil
surrounding the structure is 3” above the floor of any level, consider that level below-grade.
¾” solid flooring cannot be installed over radiant heated sub floor systems.
¾” solid Johnson Premium Hardwood Flooring is designed for nail/cleat, or staple-down applications. Note: With some
exotic species, stables may split the tongue.
When installing Johnson Premium Hardwood Flooring it is recommended to work out of 3 to 5 boxes at a time in order to
achieve a more uniform color tone and grain appearance.
Verify that the delivered wood flooring has 6 to 9% moisture content and is free of defects.
To determine the suitable moisture content for installation, please use the equilibrium moisture chart provided below.
Grayed area represents the ideal moisture content for the wood to perform normally. Moisture tests should be completed
before and after the flooring has been installed. Please refer to the National Wood Flooring Association’s Installation
Guidelines for additional information and instructions on the required moisture content for your specific region. This
information can be found in the National Wood Flooring Association’s Technical Publication No. A100 Water and Wood.
“How Moisture Affects Wood”. You can reach the National Wood Flooring Association at 1-800-422-4556.
Equilibrium Moisture Content Chart
Temp. (F)
Relative Humidity Percent
........................................................................................................................................................................................................................
5 10
15
20
25
30
35
40
45
50
55
60
65
70
75
80
85
90
95
98
30° 1.4 2.6 3.7 4.6 5.5 6.3 7.1 7.9 8.7 9.5 10.4 11.3 12.4 13.5 14.9 16.5 18.5 21.0 24.3 26.9
40° 1.4 2.6 3.7 4.6 5.5 6.3 7.1 7.9 8.7 9.5 10.4 11.3 12.4 13.5 14.9 16.5 18.5 21.0 24.3 26.9
50° 1.4 2.6 3.7 4.6 5.5 6.3 7.1 7.9 8.7 9.5 10.4 11.3 12.4 13.5 14.9 16.5 18.5 21.0 24.3 26.9
60° 1.3 2.5 3.6 4.6 5.4 6.2 7.0 7.8 8.6 9.4 10.2 11.1 12.1 13.3 14.6 16.2 18.2 20.7 24.1 26.8
70° 1.3 2.5 3.5 4.5 5.4 6.2 6.9 7.7 8.5 9.2 10.1 11.0 12.0 13.1 14.4 16.0 17.9 20.5 23.9 26.6
80° 1.3 2.4 3.5 4.4 5.3 6.1 6.8 7.6 8.3 9.1 9.9 10.8 11.7 12.9 14.2 15.7 17 7 20.2 23.6 26.3
90° 1.2 2.3 3.4 4.3 5.1 5.9 6.7 7.4 8.1 8.9 9.7 10.5 11.5 12.6 13.9 15.4 17.3 19.8 23.3 26.0
100° 1.2 2.3 3.3 4.2 5.0 5.8 6.5 7.2 7.9 8.7 9.5 10.3 11.2 12.3 13.6 25.1 17.0 19.5 22.9 25.6
........................................................................................................................................................................................................................
Chart taken from Wood Handbook: Wood as an Engineering Material, (Agriculture Handbook 72), Forest Product Laboratory,
U.S. Department of Agriculture.
Required Tools and Accessories for Nail and Glue down Installations:
Please refer to the National Wood Flooring Association’s Technical Publication N0. A300
Tools Of The Trade. “What Contractors Need For Hardwood Flooring Installation”. Please refer to the partial list of tools commonly
used for wood flooring installations.
Eye Protection
Knee Pads
Respirator
Ear Plugs
Moisture Meter
Nailing Machines
Nails, Cleats and Staples
Air Compressor and Hoses
Jig Saw
Pliers
Tape Measure
Band Saw
Reciprocating Saw
Table Saw
Jamb Saw
Skill Saw
Miter Saw
Chalk Line
Stapler
Squares
Nail Pulle
Extension Cord
Level/Straight Edge
Calculator
Scrapers
Pry Bar
Drill and Bits
Router and Bits
Hammers
Chisels
Nail Sets
Screwdriver
Vacuum/Broom
Vapor Retarding System
Trowel
Adhesive
Yellow Glue
Adhesive Removers
Rags
Utility Knife
Trammel Points
Slip tongue Spline
3-M Blue Tape
Trash Bags
IMPORTANT: Prior to installing Johnson SOLID Premium Hardwood Flooring, materials must be tested for recommended moisture
content. Jobsite moisture content level should also be carefully metered and recorded daily during the installation process.
The homeowner must maintain the temperature and relative humidity level in the recommended ranges to ensure maximum
performance.
ACCLIMATION
Acclimation depends on geographic location, interior climate control and time of the year. The point of acclimating
wood flooring before installation is to allow the moisture content of the wood to adjust to the installation site’s “normal
living conditions”—that is, the temperature and humidity conditions that will typically be experienced once the structure is
occupied.
For site-finished wood flooring, it may also be more important to allow the flooring to acclimate to the controlled environment
and to stabilize for a period of time (one to three weeks) after installation and before sanding and finishing.
The worst-case scenario is one in which wood flooring is stored at the jobsite in an uncontrolled environment – especially one
that is subject to excessive moisture and humidity conditions. It does no good at all –in fact it is likely harmful – to store wood
flooring at the jobsite under conditions that don’t reflect those normal environmental conditions. Garage and exterior patios,
for example, are not acceptable areas to store wood flooring.
Wood flooring is a hygroscopic material subject to dimensional change as a result of variations in moisture, temperature and
humidity in the surrounding environment. That has led to increasing awareness of the need to acclimate wood flooring before
installation. Wood flooring simply needs to reach a moisture content level in equilibrium with the surrounding environment in
which it will be installed, at or near normal living conditions. Always account for the time of year and geographic location.
COEFFICIENTS OF CHANGE: HOW MOISTURE AFFECTS WOOD FLOORING
Reference back to the EMC chart, at 70 degrees Fahrenheit, a relative humidity of 25 percent gives and EMC of 5 percent,
and a relative humidity of 75 percent gives and EMC of 14 percent. A 50 percent variance in relative humidity produces an
EMC change of 10 percent. How that affects wood flooring depends on which species is being used. However, let’s say the
width variation is just 1/16 inch for a 2 ¼-inch board. That’s a full inch over 16 boards in a floor. Over the width of a 10-foot
wide floor, that amounts to more than three inches of total expansion or contraction. Protective coatings cannot prevent
wood from gaining or losing moisture; they merely slow the process. Installers need to take those expected dimensional
variations into account when installing the wood flooring.
WOOD’S COMFORT ZONE
As a general rule, wood flooring will perform best when the interior environment is controlled to stay within a relative humidity
range of 35 to 50 percent and a temperature range of 60 to 80 degrees Fahrenheit. The chart below indicates the moisture
content wood will likely have at any given combination of temperature and humidity. Note that equilibrium moisture contents
in the recommended temperature/humidity range (shaded area) coincide with the 6-9 percent range within which most
hardwood flooring is manufactured. Although some movement can be expected even between 6 and 9 percent, wood
can expand and shrink more dramatically outside that range. The moisture content of wood below the fiber saturation
point is a function of both relative humidity and temperature in the surrounding air. When wood is neither gaining nor losing
moisture, equilibrium moisture content (EMC) has been reached.
PROPER INSTALLATIOIN BY CALCULATING COEFFICIENTS OF CHANGE
Proper installation depends not only on the moisture content of the wood and the environmental conditions at the time of
installation, but also on expected seasonal changes in temperature and humidity at the location – changes that may cause
the wood flooring to gain or lose moisture content over time. Such changes are likely to occur even if the building occupants
maintain interior environmental conditions through use of an HVAC system.
For example, if a wood flooring installation takes place at a time of year when relative humidity is high, it’s likely that the wood
flooring will lose moisture content and therefore shrink during low-humidity seasons. In that case, the knowledgeable installer
will install the flooring as tightly as possible, thereby minimizing the expected (and normal) separations that will occur between
boards as the boards shrink during heating or other dry seasons.
Conversely, if a wood flooring installation takes place during a time of year when humidity conditions are low, it’s likely that
the wood flooring will gain moisture and therefore expand during more-humid seasons. In those cases, a knowledgeable
installer will incorporate additional expansion space throughout the floor, through use of spacers.
How much expansion space to leave will depend on the expected changes in moisture content of the wood flooring, and
that will depend on the dimensional change coefficient of the species being installed and the width of the flooring, as well as
on the expected variations in temperature and humidity at the location.
Predicting temperature and humidity changes: Installers may have a climate history for the areas in which they typically
install wood flooring, or climate data is also available from a variety of sources, including the National Weather Service (www.
weather.gove) and Weather Underground (www.wunderground.com).
Calculating dimensional changes: Different species of wood flooring exhibit different coefficients of change and, therefore,
have different rates of dimensional stability. That is, some woods are more prone to expansion and shrinkage than other. The
National Wood Flooring Association’s Technical Publication No. A200: Wood Species Used in Wood Flooring lists dimensional
change coefficients for several common wood species used in wood flooring.
To calculate the expected dimensional change in wood flooring, you will need to determine the current moisture content of
the wood flooring, using a moisture meter. Then calculate the expected change in moisture content, using the equilibrium
moisture content chart above and the climate data for the location in which the flooring is to be installed. Finally, you will
need to know the dimensional change coefficient of the species to be installed.
With that information in hand, you will be able to perform a simple calculation that will tell how much the wood flooring is
likely to expand or shrink. That calculation multiples the change in moisture content by the change of coefficient, multiplied
by the width of the flooring boards.
Change coefficient x moisture content change x board width = dimensional change
For example, let’s say that the climate data for the location indicates that the maximum moisture content for the wood
flooring will be 9.1 percent (relative humidity of 50 percent and temperature of 80 degrees). Let’s also say that the wood
flooring currently has a moisture content reading of 6.1 percent. That means the wood is likely to experience a change in
moisture content of 3 percent (9.7% - 6.1%) from dry season to humid season. In the example, let’s say that the wood flooring
to be installed is 5-inch plank read Oak. Red Oak has a change coefficient of .00369. We now have the date we need:
Change coefficient = .00369
Moisture content change = 3%
Board width = 5 inches
The following calculation would apply:
.00369 x 3 x 5 = .055 inches
In other words, for every 3-percentage-point increase in moisture content, a 5 inch board will grow by more than 1/20th of
an inch. Over 10 boards that will equal over ½ inch of expansion – something the installer will need to take into account,
although in actual practice the installation and fastening process will tend to restrain board movement somewhat.
THE PROCESS OF ACCLIMATION
If the manufacturer recommends that the wood flooring be acclimated before installation, proceed as follows:
•
•
•
•
•
•
First, ensure that the building is enclosed.
Second, ensure that the building is maintained at normal living conditions for temperature and humidity. It does no
good to acclimate flooring to interior conditions that are too moist or too dry, or in any way significantly outside the
range of conditions likely to be found in the building after the flooring is installed. In fact, it is counterproductive.
Where building codes allow, permanent HVAC systems should be operating at least five days preceding installation to
promote proper acclimation. Where building codes do not allow for operation of the permanent system, acclimation
of the flooring must be completed with the temperature and humidity maintained at or near normal living conditions,
which generally fall between 60 to 80 degrees Fahrenheit and at the average yearly relative humidity for the area.
If it is not possible for the permanent HVAC system to be operating before, during and after installation, a temporary
heating and humidification/dehumidification system using electric heating units, humidification/dehumidifiers and
industrial fans can enable the installation to proceed until the permanent HVAC system is operating.
Upon delivery, check wood flooring moisture content with a moisture meter to establish a baseline for required
acclimation. Acclimate to manufacturer’s recommendations or as necessary according to geographical locations.
Acclimation can be facilitated by breaking the floor units into small lots and/or opening the packaging. A common
practice is to stack and sticker the flooring, with ¾-inch to 1-inch sticks between each layer of flooring to allow air
circulation on all side of all boards. However, this common practice is not recommended for exotic species due to
the perceive color changes and possible striping perpendicular to the direction of the grain once the stickers are
removed.
Note: Some manufacturers do not require acclimation for certain products prior to installation.
•
For solid strip flooring (3 inches wide or less), when an industry approved moisture vapor retarder with a proper perm
rating is installed between the flooring and the sub floor, there should be no more than 4 percent moisture content
difference between properly acclimated wood flooring and sub flooring materials, taking into consideration normal
living conditions and equilibrium moisture content (EMC). For wide-width (3 ¼” or wider) solid flooring, when an industry
approved moisture vapor retarder with proper perm rating is installed between the flooring and the sub floor, many
industry professionals suggest a moisture content difference of no more than 2 percent between properly acclimated
wood flooring and sub flooring materials, with a 2 percent difference being the maximum. For wide-width flooring, many
industry professionals also suggest using an adhesive as an assist to mechanical fastening. However, the adhesive may
not provide sufficient moisture protection to substitute for an industry approved moisture vapor retarder. Also, when
an adhesive is applied over a moisture vapor retarder, care should be taken to ensure that the adhesive and moisture
vapor retarder are compatible with one another.
INSTALLING THE FLOOR
Meter the moisture content level of the flooring again and make sure it has stabilized with the surrounding controlled
environment based on 35 to 50 percent relative humidity and 60 to 80 degrees Fahrenheit. Please note, an uncontrolled
environment can lead to the following conditions; Shrinkage/gapping, cupping, buckling, checking or splitting. Johnson
Premium Hardwood will not warrant any damages caused by moisture related issues.
•
•
•
•
•
•
•
Before beginning the actual installation, provide proper layout of flooring by working out of multiple boxes of material
(3 to 5) is recommended in order to achieve a more uniform color tone, grain appearance and end joint distribution
through out the installation.
Snap a working line approximately 1 foot away from the starting wall in multiples of the wood flooring width, with an
expansion space of ¾” minimum, to set up the baseline of installation.
Do not end up with a width of less than 2 inches at the final opposing wall. If so, adjust by ripping down the width of the
first row.
For nail down installations the tongue should be facing the field and the grove facing the wall. Next, secure the first row
by top nailing the board to the sub floor using small finish nails at their appropriate lengths. This will depend upon if the
flooring installation is on raised foundation or is on a wood sub floor secured to the surface of a concrete slab.
When installing Johnson Premium Solid Wood Flooring, use adjustable pneumatic power nailer with 1-1/2” power cleats
in 16 gauge or ½” x 1-1/2” crown staples when installing over a ¾” minimum thickness CDX plywood sub floor over a
concrete slab and 2” fasteners over raised foundations.
Nailing schedule should be no less than 1 to 3” from the end and ever 8 – 10” apart. Each row must be nailed. Note,
failure to follow the required nailing schedule can result in squeaky board/floor syndrome.
When installing Johnson Premium Hardwood Flooring off set end joints a minimum of 6” or grater apart to prevent
repetition in pattern. Also, when installing adjacent rows of flooring be careful to avoid H-Patterns from developing.
6”
Important: Allow at least ¾” of expansion space at all wall and vertical obstructions. Expansion space will be concealed using
baseboard and quarter round trim. Hardwood flooring will change in size according changes in temperature and relative
humidity. Insufficient expansion space can result in cupping, buckling, cracking and checking in the flooring. Johnson
Premium Hardwood will not warrant any damages caused by improper installation.