1
360
Auxiliary EPC
Theory of operation
The auxiliary EPC channels are controlled by a pressure setpoint. To work
properly, there must be adequate flow resistance downstream of the pressure
sensor. The auxiliary channel pneumatics manifold provides a frit-type
restrictor for each channel. Four frits are available:
Frit Marking
Flow Resistance
Part no.
Blue Dot
High
19234-60660
Red Dot
Medium
19231-60770
Brown Dot
Low
19231-60610
None (brass tube)
Zero
G1570-20540
The Red Dot frit is in all three channels when the instrument is shipped.
The figures on the next two pages show approximate pressure/flow
relationships for the three Dot frits, assuming there is no significant
additional resistance downstream of the frits.
If the Zero resistance frit is installed, the user must provide flow resistance
downstream and generate the pressure/flow relationships.
WARNING
When hydrogen is used, dangerously high flows are possible if insufficient
flow resistance is provided downstream of the supply tube. Always use either
the High (Blue Dot) or Medium (Red Dot) frit with hydrogen.
External flow restrictor (Type 2 manifold)
Use an external flow restrictor (part no. G1530-80380) on each auxiliary EPC
channel to be used for a flammable gas (i.e., hydrogen). The restrictor prevents
excessive gas flow in the event of a leak in the manifold or its input fitting.
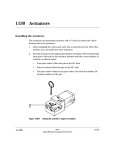
External flow restrictor
Jun 2001
Detectors
Agilent 6890 Gas Chromatograph Service Manual
1 of 16
360
Auxiliary EPC
Theory of operation
Pressure requirements for AUX EPC flow restrictors
with air, nitrogen, or helium
(ambient conditions: 25°C, 14.7 psia)
80
70
19234-60660
(blue dot)
60
50
19231-60770
(red dot)
Minimum
source
pressure
40
(psig)
30
19231-60610
(brown dot)
20
10
0
0.1
1.0
10.0
100.0
1000.0
Gas flow in mL/min
2 of 16
Detectors
Agilent 6890 Gas Chromatograph Service Manual
Jun 2001
Auxiliary EPC
Theory of operation
360
Pressure requirements for AUX EPC flow restrictors
with hydrogen
(ambient conditions: 25°C, 14.7 psia)
80
70
19234-60660
(blue dot)
60
Minimum
50
19231-60770
(red dot)
source
pressure
(psig)
40
30
20
19231-60610
(brown dot)
10
0
0.1
Jun 2001
1.0
10.0
Gas flow in mL/min
Detectors
Agilent 6890 Gas Chromatograph Service Manual
100.0
1000.0
3 of 16
360
Auxiliary EPC
Replacement procedures
Replacement procedures
For general replacement procedures for a Type 1 manifold, see
Pneumatics Control Module.
Removing the auxiliary manifold (type 1 or type 2)
WARNING
Hydrogen gas is flammable and potentially explosive. Before replacing the
manifold, turn off the hydrogen gas at the source.
WARNING
Before proceeding, turn off the oven and any heated zones and let them cool
down. Turn off all detector gases at their supply, then turn off the main power
switch and unplug the power cord.
1.
Remove the pneumatics cover, the RFI shield, the detector cover, the
electronics cover, the right side cover, and the top rear panel.
2.
Remove the gas supply tubing from the present manifold. See
Figure 360-1.
Disconnect gas lines
OR
Disconnect gas lines
Type 1 manifold, installed before January 1999
Figure 360-1
3.
4 of 16
Type 2 manifold, installed after January 1999
99
Remove the gas connections
Remove the Torx T-20 mounting screw from the front of the manifold.
See Figure 360-2.
Detectors
Agilent 6890 Gas Chromatograph Service Manual
Jun 2001
Auxiliary EPC
Replacement procedures
360
Slot for tubing
Torx T-20
mounting screw
Figure 360-2
4.
Caution
Caution
Jun 2001
Removing the auxiliary flow manifold
Disengage the tubing from the slots in the chassis so that the gang fitting
on the manifold can be removed easily. See Figure 360-2.
Always hold the Type 2 manifold by its support bracket to avoid damaging
board components.
5.
Unlock the manifold’s ribbon cable from the pneumatics control board
and detach the connector. The adjacent ribbon cable may have to be
removed as well.
6.
Remove the one Torx T-20 screw holding the gang fitting on the manifold.
See Figure 360-3.
Do not lose the O-rings when you remove the gang fitting.
Detectors
Agilent 6890 Gas Chromatograph Service Manual
5 of 16
360
Auxiliary EPC
Replacement procedures
Remove screw
and gang fitting
Manifold, installed before January 1999
Figure 360-3
Manifold, installed after January 1999
Removing the gang fitting
Installing a type 2 manifold
If you are replacing a Type 1 manifold with a Type 2 manifold, order the
accessory kit, G1570-60720. This kit contains a new pneumatics control board
bracket that is required for the Type 2 manifold. See also Replacing the PCB
bracket.
WARNING
Hydrogen gas is flammable and potentially explosive. Before replacing the
manifold, turn off the hydrogen gas at the source.
WARNING
Before proceeding, turn off the oven and any heated zones and let them cool
down. Turn off all detector gases at their supply, then turn off the main power
switch and unplug the power cord.
Caution
Always hold the manifold as shown below to avoid damaging board
components.
6 of 16
Detectors
Agilent 6890 Gas Chromatograph Service Manual
Jun 2001
Auxiliary EPC
Replacement procedures
1.
360
While holding the manifold by the black plastic frame as shown below,
slip the label through the slot in the mounting bracket, and align the
bracket holes over the gas fittings.
Hold manifold by
the black plastic frame.
Slip label tag through
the slot in the bracket.
(FPD shown)
2.
Jun 2001
Finger-tighten three 7/16-inch hex nuts over the fittings to hold the
bracket in place. It is very important that you do not tighten the nuts
yet. See Figure 360-4.
Detectors
Agilent 6890 Gas Chromatograph Service Manual
7 of 16
360
Auxiliary EPC
Replacement procedures
Finger-tighten nuts.
Do not use a wrench.
(FPD shown above)
Mounting bracket
Gang fitting
installs here
Apply blank label
7/16-inch hex nuts
Ribbon cable
Label ID tag
through slot
in bracket
Figure 360-4
8 of 16
Bracket mounted onto the manifold
3.
Peel the blank label from its backing and paste it on the mounting bracket
over the screw heads. See Figure 360-4.
4.
If you need to change one or more auxiliary channel frits, do so now. See
the Agilent 6890 GC Operating Manual/CD-ROM.
Detectors
Agilent 6890 Gas Chromatograph Service Manual
Jun 2001
Auxiliary EPC
Replacement procedures
360
5.
If the tubing from the gang fitting bends to the left, reshape it so that it
bends up and back from the block as shown in Figure 360-6.
6.
Insert the gang fitting through the cutout in the manifold bracket and
install it onto the new manifold assembly so that the tubing runs back
and away from the fitting.
•
Be sure that the three O-rings are in place.
•
Be sure the left tube clears the inner edge of the bracket. See
Figure 360-6.
Tighten the screw on the gang fitting until the gang fitting touches the
manifold.
7.
Route the ribbon cable to the right side of the manifold assembly as shown
in Figure 360-5. Then, slide the manifold and bracket assembly into the
Aux slot until the bracket seats flush against the end of the rails. See
Figure 360-6.
Ribbon cable
Figure 360-5
Jun 2001
Routing the ribbon cable
Detectors
Agilent 6890 Gas Chromatograph Service Manual
9 of 16
360
Auxiliary EPC
Replacement procedures
Route tubing along
this path
Bracket is flush with
carrier rails
Check for interference
Attach gang fitting
Figure 360-6
Manifold, after installation
8.
Route the gas tubing behind the manifold, over the top of the chassis, and
through the slots as shown in Figure 360-2 and Figure 360-6.
9.
Connect the ribbon cable to the mating connector on the pneumatics
board. This is behind the connector for the back detector and faces up.
See Figure 360-7.
10. Secure the manifold in place using the Torx T-20 mounting screw. See
Figure 360-2.
Connector for auxiliary manifold
Connector for back detector manifold
Figure 360-7
Auxiliary and back detector connectors
11. If the detector cable is in the way, remove it temporarily while you connect
the Aux cable. Arrange the cable to keep it away from the valves and keep
it from being pinched against the manifold.
10 of 16
Detectors
Agilent 6890 Gas Chromatograph Service Manual
Jun 2001
Auxiliary EPC
Replacement procedures
Caution
360
Overtightening may cause hazardous leaks. Tighten the hex nuts exactly as
described below.
12. Use a wrench to tighten the 7/16-inch hex nuts 3/4 turn only.
13. Using a pair of needle-nosed pliers, remove the top rear panel cutout for
Auxiliary. Also remove any cutouts needed to access other manifolds or
accessories installed in the GC. See Figure 360-8.
Insert tip of
pliers here
Back inlet
Front inlet
Front detector
Auxiliary
Left most screw slot
Back detector
Figure 360-8
Top rear panel cutouts
14. Place the new top rear panel on its left-most mounting screw. Use the
screw as a hinge and angle the panel while sliding each manifold ID tag
through its cutout in the panel, working from left to right. When all the
tags are through the panel, finish installing the panel on the GC.
Jun 2001
Detectors
Agilent 6890 Gas Chromatograph Service Manual
11 of 16
360
Auxiliary EPC
Replacement procedures
15. Attach the Aux EPC label to the top of the pneumatics chassis as shown
in Figure 360-9 below.
Attach label here
Gas outlet block
Figure 360-9
Attaching the Aux EPC label
16. Install the RFI shield, the pneumatics cover, and the detector top cover.
17. If using hydrogen or other flammable gases, install an external flow
restrictor, part no. G1530-80380, on each fitting that will be used for a
flammable gas.
External flow restrictor
installed and ready for
connection to gas line.
18. Check for leaks.
Restore the GC to operating condition
1.
12 of 16
Plug in the GC and turn it on.
Detectors
Agilent 6890 Gas Chromatograph Service Manual
Jun 2001
Auxiliary EPC
Replacement procedures
2.
360
Press [Aux #][3], [Aux #][4], or [Aux #][5] to access the desired channel.
If your manifold is correctly installed, you will see the following display:
PNEUMATIC AUX 3
Pressure
0.x† Off
0.00
Init time
Rate 1 (off)
†
An actual flow value is displayed when the gases are off or not
connected. This is not an error. After the gases are connected and the
detector is operational, the actual flow values will be equal to the setpoint
values.
Jun 2001
3.
If the display reads Aux not installed, recheck your cable
connections.
4.
Zero the pressure sensors:
a. Make certain that no gases are connected to your manifold.
b.
Press [Options] and scroll to Calibration → Aux pressure.
c.
Scroll to Aux 3 zero and press [On].
d.
Scroll to Aux 4 zero and press [On].
e.
Scroll to Aux 5 zero and press [On].
Detectors
Agilent 6890 Gas Chromatograph Service Manual
13 of 16
360
Auxiliary EPC
Replacement procedures
5.
Connect the source gas lines to the manifold. See Figure 360-10.
Figure 360-10
6.
Gas line connections
Restore gas pressures and leak check all fittings.
Changing an auxiliary channel frit
1. Locate the block that connects the three gas outlet tubes for the auxiliary
channels to the pneumatics module.
2. Remove the screw that holds the block to the pneumatics module. Pull the
block free of the module and rotate it so that the frits are on top.
Aux 4 frit
Aux 5 frit
Aux 3 frit
Flow block
Aux 3 outlet
Aux 4 outlet
Aux 5 outlet
14 of 16
Detectors
Agilent 6890 Gas Chromatograph Service Manual
Jun 2001
Auxiliary EPC
Replacement procedures
360
3. Pull the frit to be changed out of the block. Also remove the O-ring that
seals it.
4. Place an O-ring on the new frit. Place the O-ring/frit combination in the
block.
5. Reconnect the block to the pneumatics module. Tighten the screw firmly.
Jun 2001
Detectors
Agilent 6890 Gas Chromatograph Service Manual
15 of 16
360
16 of 16
Auxiliary EPC
Replacement procedures
Detectors
Agilent 6890 Gas Chromatograph Service Manual
Jun 2001