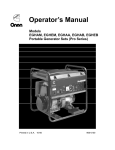
1
Operator Manual
Commercial Mobile Generator Set
HDKBB (Spec A-H)
HDKBC (Spec D-H)
English
Original Instructions
2-2015
981-0183 (Issue 11)
Table of Contents
1. IMPORTANT SAFETY INSTRUCTIONS .......................................................................................
1.1 Overview .................................................................................................................................
1.2 Warning, Caution, and Note Styles Used in This Manual ......................................................
1.3 General Safety Precautions....................................................................................................
1.4 Automatic Generator Start Control Hazards ...........................................................................
1.5 Electrical Shock and Arc Flash Can Cause Severe Personal Injury or Death .......................
1.6 Generator Voltage Is Deadly ..................................................................................................
1.7 Engine Exhaust/Carbon Monoxide Is Deadly .........................................................................
1.8 Diesel Fuel Is Combustible .....................................................................................................
1.9 Battery Gas Is Explosive.........................................................................................................
1.10 Moving Parts Can Cause Severe Personal Injury or Death .................................................
1.11 CARB ....................................................................................................................................
1.12 Generator Set Warning Labels .............................................................................................
1
1
1
1
3
3
3
4
5
5
5
6
6
2. INTRODUCTION............................................................................................................................
2.1 About this Manual ...................................................................................................................
2.2 Related Literature ...................................................................................................................
2.3 Model Identification ...............................................................................................................
2.3.1 Nameplate Location ...................................................................................................
2.4 How to Obtain Service ..........................................................................................................
2.4.1 In North America ........................................................................................................
2.4.2 Outside North America...............................................................................................
2.4.3 Information To Have Available...................................................................................
9
9
9
10
11
11
11
11
11
3. OVERVIEW ..................................................................................................................................
3.1 Electromagnetic Compatibility Compliance...........................................................................
3.2 Information for Generator Set Users.....................................................................................
3.3 Build Standards.....................................................................................................................
3.4 Specifications........................................................................................................................
3.4.1 Diesel Model Specifications .......................................................................................
3.5 List of Acronyms ...................................................................................................................
13
13
13
13
15
15
16
4. OPERATION ................................................................................................................................
4.1 Key Component Locations....................................................................................................
4.2 Control Panel ........................................................................................................................
4.2.1 Generator Set Control Panel......................................................................................
4.2.2 Remote Control Panel................................................................................................
4.3 Starting and Stopping the Generator Set .............................................................................
4.3.1 Pre-start Checks ........................................................................................................
4.3.2 Priming the Fuel System ...........................................................................................
4.3.3 Starting the Generator Set .........................................................................................
4.3.4 Stopping the Generator Set .......................................................................................
4.4 Loading the Generator Set ...................................................................................................
19
19
21
21
22
23
23
23
24
24
24
981-0183 (Issue 11)
i
Table of Contents
2-2015
4.4.1 Power Versus Altitude................................................................................................
4.5 Exercising the Generator Set................................................................................................
4.6 Resetting Line Circuit Breakers ............................................................................................
4.7 Connecting Shore Power......................................................................................................
4.8 Operating in Weather Extremes ...........................................................................................
4.9 Operating in Dusty Environments .........................................................................................
4.10 Care of New or Rebuilt Engine ...........................................................................................
26
27
27
28
28
28
29
5. MAINTENANCE ...........................................................................................................................
5.1 Periodic Maintenance ...........................................................................................................
5.1.1 Periodic Maintenance Schedule ................................................................................
5.2 Consumable Parts ................................................................................................................
5.3 General Inspection................................................................................................................
5.4 Maintaining the Battery .........................................................................................................
5.5 Maintaining the Lubrication System......................................................................................
5.5.1 Oil Level .....................................................................................................................
5.5.2 Engine Oil Recommendations ...................................................................................
5.5.3 Changing Engine Oil and Oil Filter ............................................................................
5.6 Maintaining the Fuel System ................................................................................................
5.6.1 Fuel System ...............................................................................................................
5.6.2 Fuel Recommendations .............................................................................................
5.6.3 Replacing the Fuel Filter ............................................................................................
5.7 Maintaining the Cooling System ...........................................................................................
5.7.1 Cooling System ..........................................................................................................
5.7.2 Coolant Level .............................................................................................................
5.7.3 Coolant Recommendations........................................................................................
5.7.4 Draining and Cleaning Cooling System .....................................................................
5.7.5 Refilling Cooling System ............................................................................................
5.8 Exhaust System ....................................................................................................................
5.9 Mechanical System...............................................................................................................
5.10 Replacing the Air Filter Element .........................................................................................
5.11 Cleaning the Spark Arrester ...............................................................................................
5.12 Storing the Generator Set...................................................................................................
5.13 Returning the Generator Set to Service .............................................................................
31
31
31
32
32
33
33
33
34
35
37
37
38
39
41
41
42
42
42
44
44
44
45
46
47
47
6. TROUBLESHOOTING .................................................................................................................
6.1 Overview ...............................................................................................................................
6.2 Fault Codes...........................................................................................................................
6.2.1 Code 1 - Engine Over Temperature ..........................................................................
6.2.2 Code 2 - Low Oil Pressure.........................................................................................
6.2.3 Code 3 - Service Check.............................................................................................
6.2.4 Code 4 - Over Crank..................................................................................................
6.2.5 Code 12 - Over Voltage .............................................................................................
6.2.6 Code 13 - Under Voltage ...........................................................................................
6.2.7 Code 14 - Over Frequency ........................................................................................
6.2.8 Code 15 - Under Frequency ......................................................................................
6.2.9 Code 19 - Governor Actuator.....................................................................................
49
49
49
50
50
51
51
51
51
52
52
52
ii
981-0183 (Issue 11)
2-2015
Table of Contents
6.2.10 Code 22 - Governor Actuator Overload ...................................................................
6.2.11 Code 24 - Faulty Temperature Sender ....................................................................
6.2.12 Code 27 - Voltage Sense.........................................................................................
6.2.13 Code 29 - High Battery Voltage ...............................................................................
6.2.14 Code 32 - Low Cranking Speed...............................................................................
6.2.15 Code 35 - Control Card Failure................................................................................
6.2.16 Code 36 - Engine Stopped ......................................................................................
6.2.17 Code 38 - Over Current (Field Overload) ................................................................
6.2.18 Code 41 - Generator Rotor ......................................................................................
6.2.19 Code 42 - Processor ................................................................................................
6.2.20 Code 43 - Processor ................................................................................................
6.2.21 Code 45 - Speed Sense ..........................................................................................
6.2.22 Code 48 - Generator Field Sense............................................................................
6.2.23 Code 57 - Over Prime..............................................................................................
6.3 Symptom Based....................................................................................................................
6.3.1 Status Indicator Not Working .....................................................................................
6.3.2 Starting Batteries Run Down......................................................................................
6.3.3 Starter Engages-Disengages .....................................................................................
6.3.4 No Power—Generator Set Running, Status Light On................................................
52
52
52
53
53
53
53
54
54
54
54
54
54
55
55
55
55
55
56
7. MAINTENANCE RECORD...........................................................................................................
57
981-0183 (Issue 11)
iii
Table of Contents
2-2015
This page is intentionally blank.
iv
981-0183 (Issue 11)
1
Important Safety Instructions
1.1
Overview
Thoroughly read the Operator Manual before operating the generator set. It contains important
instructions that should be followed during operation and maintenance. Safe operation and top
performance can only be achieved when equipment is properly operated and maintained. The
owners and operators of the generator set are solely responsible for its safe operation.
Generator set operation, maintenance, and installation must comply with all applicable local,
state, and federal codes and regulations. Electricity, fuel, exhaust, moving parts, and batteries
present hazards which can result in severe personal injury or death. Only trained and
experienced personnel with knowledge of fuels, electricity, and machinery hazards should
perform generator set installation or adjustment procedures; or remove, dismantle, or dispose of
the generator set.
1.2
Warning, Caution, and Note Styles Used in This
Manual
The following safety styles and symbols found throughout this manual indicate potentially
hazardous conditions to the operator, service personnel, or equipment.
DANGER
Indicates a hazardous situation that, if not avoided, will result in death or serious injury.
WARNING
Indicates a hazardous situation that, if not avoided, could result in death or serious
injury.
CAUTION
Indicates a hazardous situation that, if not avoided, could result in minor or moderate injury.
NOTICE
Indicates information considered important, but not hazard-related (e.g., messages relating to
property damage).
1.3
General Safety Precautions
WARNING
Operation of equipment is unsafe when mentally or physically fatigued. Do not operate
equipment in this condition, or after consuming any alcohol or drug.
981-0183 (Issue 11)
1
1. Important Safety Instructions
2-2015
WARNING
Maintaining or installing a generator set can cause severe personal injury. Wear personal
protective equipment such as safety glasses, protective gloves, hard hats, steel-toed boots, and
protective clothing when working on equipment.
WARNING
Running the generator set without the cover or service door can cause severe personal injury or
equipment damage. Do not operate the generator set with the cover or service doors removed.
WARNING
Coolants under pressure can cause severe scalding. Do not open a radiator or heat exchanger
pressure cap while the engine is running. Let the engine cool down before removing the coolant
pressure cap. Turn the cap slowly and do not open it fully until the pressure has been relieved.
WARNING
Hot metal parts can cause severe burns, Avoid contact with the radiator, turbo charger, and
exhaust system.
WARNING
Starting fluids, such as ether, can cause explosion and generator set engine damage. Do not use.
WARNING
Ethylene glycol, used as engine coolant, is toxic to humans and animals. Clean up coolant spills
and dispose of used antifreeze in accordance with local environmental regulations.
WARNING
Used engine oils have been identified by some state and federal agencies to cause cancer or
reproductive toxicity. Do not ingest, breathe the fumes, or contact used oil when checking or
changing engine oil.
CAUTION
To prevent accidental or remote starting while working on the generator set, disconnect the
negative (-) battery cable at the battery using an insulated wrench.
CAUTION
Unsecured or loose fasteners can cause equipment damage. Make sure all fasteners are secure
and properly torqued.
CAUTION
Oily rags and other material can cause fire and restrict cooling. Keep the generator set, drip pan,
and compartment clean.
CAUTION
Accumulated grease and oil can cause overheating and engine damage presenting a potential
fire hazard. Keep the generator set clean and repair any oil leaks promptly.
2
981-0183 (Issue 11)
2-2015
1. Important Safety Instructions
NOTICE
Keep multi-class ABC fire extinguishers handy. Class A fires involve ordinary combustible
materials such as wood and cloth. Class B fires involve combustible and flammable liquid fuels
and gaseous fuels. Class C fires involve live electrical equipment. (Refer to NFPA No. 10 in
applicable region.)
1.4
Automatic Generator Start Control Hazards
WARNING
Accidental starting can cause severe personal injury or death. Turn off the AGS
whenever performing maintenance or service, when the vehicle is stored between uses,
is awaiting service, or is parked in a garage or other confined area.
Unexpected starting may occur if the generator set is equipped with an inverter-charger or other
Automatic Generator Start (AGS) control. This may cause exposure to:
• Unexpected generator starting
• Moving parts hazards
• Electric shock
• Exhaust carbon monoxide (CO)
1.5
Electrical Shock and Arc Flash Can Cause Severe
Personal Injury or Death
WARNING
Electrical shocks and arc flashes can cause severe personal injury or death. Adhere to
the following guidelines:
• Only qualified service personnel certified and authorized to work on power circuits should
work on exposed energized power circuits.
• All relevant service material must be available for any electrical work performed by certified
service personnel.
• Exposure to energized power circuits with potentials of 50 VAC or 75 VDC or higher poses a
significant risk of electrical shock and electrical arc flash.
• Refer to standard NFPA 70E, or equivalent safety standards in corresponding regions, for
details of the dangers involved and for safety requirements.
1.6
Generator Voltage Is Deadly
WARNING
Improperly connected generator electrical output connections can cause equipment
damage, severe personal injury, or death. Electrical connections must be made by a
trained and experienced electrician in accordance with applicable codes.
981-0183 (Issue 11)
3
1. Important Safety Instructions
2-2015
WARNING
Improper installations can cause equipment damage, severe personal injury, or death.
All installations must be conducted by trained and experienced personnel in
accordance with the installation instructions and all applicable codes.
WARNING
Back feed to shore power can cause electrocution and damage to equipment. The
generator set must not be connected to shore power or to any other source of electrical
power. An approved switching device must be used to prevent interconnections.
WARNING
Live electrical equipment can cause electrocution. Use caution when working on live
electrical equipment. Remove jewelry, make sure clothing and shoes are dry, stand on a
dry wooden platform or rubber insulating mat, and use tools with insulated handles.
1.7
Engine Exhaust/Carbon Monoxide Is Deadly
WARNING
Substances in exhaust gases have been identified by some state and federal agencies
to cause cancer or reproductive toxicity. Do not breathe in or come into contact with
exhaust gases.
WARNING
Carbon monoxide is a poisonous gas. Inhalation of this gas can cause severe personal
injury or death. Adhere to the following bullet points to make sure carbon monoxide is
not being inhaled by occupants of the vehicle as well as others working on or around
the generator set.
• Inspect for exhaust leaks, and test and confirm that all carbon monoxide detectors are
working in accordance with the manufacturer's instructions or owner's manual, prior to
every startup, and after every 8 hours of running.
• Never occupy the vehicle while the generator set is running unless the vehicle is equipped
with a working carbon monoxide detector.
• Never operate the generator set when the vehicle is in a confined space, such as a garage,
basement, or building of any kind.
• Make sure the exhaust system is installed in accordance with the generator set installation
manual.
• Never use engine cooling air for heating a working or living space compartment.
Carbon Monoxide (CO) is odorless, colorless, tasteless, and non-irritating. It cannot be seen or
smelled. Exposure, even to low levels of CO for a prolonged period can lead to asphyxiation
(lack of oxygen).
Mild effects of CO poisoning include:
• headache
• dizziness
• drowsiness
• fatigue
4
981-0183 (Issue 11)
2-2015
1. Important Safety Instructions
• chest pain
• confusion
More extreme symptoms include:
• vomiting
• seizure
• loss of consciousness
1.8
Diesel Fuel Is Combustible
WARNING
Diesel fuel is highly combustible. Adhere to the following bullets to avoid igniting fuel
and fuel vapors.
• Do not smoke or turn electrical switches on or off where fuel fumes are present or in areas
sharing ventilation with fuel tanks or equipment.
• Keep flame, sparks, pilot lights, arc-producing equipment and all other sources of ignition
well away from fuel lines and sources.
• Fuel lines must be secured, free of leaks, and separated or shielded from electrical wiring.
WARNING
Flammable vapor can cause a diesel engine to over speed and become difficult to stop,
resulting in possible fire or explosion, and severe personnel injury or death. Do not
operate a diesel-powered generator set where a flammable vapor environment can be
created by fuel spill, leak, etc.
1.9
Battery Gas Is Explosive
WARNING
Battery gas is highly explosive and may cause personal injury or death if ignited. Take
the proper precautions to avoid personal injury.
• For personal safety, wear appropriate PPE when working on or around the generator set.
• To make sure battery gas is not ignited, do not smoke around the generator set.
• To reduce arcing when disconnecting or reconnecting battery cables, always disconnect
the negative (–) battery cable first and reconnect it last.
1.10
Moving Parts Can Cause Severe Personal Injury or
Death
WARNING
Moving parts can cause severe personal injury or death, and hot exhaust parts can
cause severe burns. Make sure all protective guards are properly in place before
starting the generator set.
981-0183 (Issue 11)
5
1. Important Safety Instructions
2-2015
WARNING
Hot moving, and electrically live parts can cause severe personal injury or death. Keep
children away from the generator set.
WARNING
Hot, moving, and electrically live parts can cause severe personal injury or death. Only
trained and experienced personnel should make adjustments while the generator set is
running.
WARNING
Moving parts can catch on loose items such as clothing or jewelry. Do not wear loose
clothing or jewelry near moving parts such as PTO (power take-off) shafts, fans, belts,
and pulleys.
WARNING
Moving parts can entangle appendages such as fingers. Keep the protective guards in
place over fans, belts, pulleys, and other moving parts and keep hands away from all
moving parts.
1.11
CARB
CAUTION
Unauthorized modifications or replacement of fuel, exhaust, air intake, or speed control
system components that affect engine emissions are prohibited by law in the state of
California.
The California Air Resources Board (CARB) has requirements regarding modification & repair of
fuel system & exhaust components.
1.12
Generator Set Warning Labels
Warning signs are provided on the generator set at or near the point of risk. To avoid injury,
always take the necessary precautions as indicated on the sample signs shown below.
Caution or Warning.
Indicates a risk of personal injury.
Caution or Warning of Temperature Hazard.
Indicates a risk of personal injury from high temperature.
Caution or Warning of High Voltage Hazard.
Indicates a risk of personal injury from electric
shock or electrocution.
6
981-0183 (Issue 11)
2-2015
1. Important Safety Instructions
Caution or Warning of Engine Coolant Pressure Hazard.
Indicates a risk of personal injury from hot pressurized engine coolant.
Caution or Warning.
Indicates to read Operator Manual for additional information.
Caution or Warning of No Step.
Indicates a risk of personal injury or equipment damage from stepping on
equipment.
Caution or Warning of Combustion or Explosion Hazard.
Indicates a risk of personal injury from explosion.
Caution or Warning of Belt and Rotating Part Hazard.
Indicates a risk of personal injury from entanglement in moving parts.
Caution or Warning of Chemical (ingestion or burn) Hazard.
Indicates a risk of personal injury or asphyxiation from poisonous fumes
or toxic gases.
Caution or Warning of High Voltage or Current Source Hazard.
Indicates a risk of personal injury from electrical shock or electrocution.
Caution or Warning of Fan and Rotating Part Hazard.
Indicates a risk of personal injury from entanglement in moving parts.
981-0183 (Issue 11)
7
1. Important Safety Instructions
2-2015
This page is intentionally blank.
8
981-0183 (Issue 11)
2
Introduction
2.1
About this Manual
This is the Operator Manual for the generator set or sets listed on the front cover. Each operator
should study this manual carefully and observe all of its instructions and safety precautions.
Keep this manual readily available for reference.
The information contained within the manual is based on information available at the time of
printing. In line with Cummins Power Generation policy of continuous development and
improvement, information may change at any time without notice. The users should therefore
make sure that before commencing any work, they have the latest information available. The
latest
version
of
this
manual
is
available
on
QuickServe
Online
(https://qsol.cummins.com/info/index.html).
The Operation, Maintenance, and Troubleshooting Chapters of this manual provide instructions
necessary for operating the generator set and maintaining it at top performance. The owner is
responsible for performing maintenance in accordance with the information provided in Chapter
5 on page 31.
This manual also includes generator set specifications and information on how to obtain service,
emissions regulation compliance, and model identification.
See the Parts Manual for part identification numbers and required quantities. Genuine Cummins
Onan replacement parts are recommended for best results.
2.2
Related Literature
Before any attempt is made to operate the generator set, the operator should take time to read
all of the manuals supplied with the generator set, and to familiarize themselves with the
warnings and operating procedures.
CAUTION
A generator set must be operated and maintained properly if you are to expect safe and reliable
operation. The Operator manual includes a maintenance schedule and a troubleshooting guide.
The Health and Safety manual must be read in conjunction with this manual for the safe
operation of the generator set:
• Health and Safety Manual (0908-0110)
The relevant manuals appropriate to your generator set are also available, the documents below
are in English:
• Operator Manual for Commercial Mobile Generator Set HDKBB (Spec A-G) and HDKBC
(Spec D-G) (0981-0183)
• Installation Manual for Commercial Mobile Generator Set HDKBC (Spec A-G) and HDBKC
(Spec D-G) (0981-0650)
• Generator Set Service Manual for Commercial Mobile Generator Set HDKBB (Spec A-G)
and HDKBC (Spec D-G) (0981-0535)
981-0183 (Issue 11)
9
2. Introduction
2-2015
• Recommended Spares List (RSL) for Commercial Mobile Generator Set HDKBB (Spec A)
(RSL_517), HDKBB (Spec B-G) (A043T385), and HDKBC (Spec D-G) (A043T640)
• Parts Manual for Commercial Mobile Generator Set HDKBB (Spec A-G) and HDKBC
(Spec D-G) (0981-0273)
• Standard Repair Times - BJ Family (0900-0621)
• Service Tool Manual (A043D529)
• Failure Code Manual (F1115C)
• Warranty Manual (A040W374)
• Global Commercial Warranty Statement (A028U870)
2.3
Model Identification
Each generator set is provided with a nameplate that contains the model and serial numbers.
This information is needed when contacting Cummins Onan for parts, service, and product
information.
Every character of the model number is significant. The last character of the model number is
the specification letter which is important for obtaining the correct parts.
Record the generator set model and serial numbers in the figure below to have them available if
needed.
10
981-0183 (Issue 11)
2-2015
2.3.1
2. Introduction
Nameplate Location
FIGURE 1.
2.4
NAMEPLATE LOCATION
How to Obtain Service
For generator set parts, service, and literature, contact the nearest authorized Cummins Onan
distributor. You may go to the Internet site www.power.cummins.com for information on
contacting our distributors worldwide.
2.4.1
In North America
Call +1 800 8886626 for the nearest Cummins Onan distributor in the United States or Canada.
Press 1 (option 1) to be automatically connected.
If you are unable to contact a distributor using the automated service, consult the Yellow Pages.
Typically, our distributors are listed under: generators - electric.
2.4.2
Outside North America
If you are outside North America, refer to www.cumminspower.com and select Distributor
Locator, or send an email to [email protected].
2.4.3
Information To Have Available
• model number
981-0183 (Issue 11)
11
2. Introduction
2-2015
• serial number
• date of purchase
• nature of the problem (see Chapter 6 on page 49)
12
981-0183 (Issue 11)
3
Overview
3.1
Electromagnetic Compatibility Compliance
Generator sets emit and receive electromagnetic (radio frequency) energy. If the generator set
affects operation of nearby devices, or nearby devices affect generator set operation, increase
the distance between them.
When used in countries where compliance to the EMC directive is required: This generator set
has been evaluated for use in the residential, commercial, and light industrial environments.
3.2
Information for Generator Set Users
This generator set meets the requirements of California Air Resources Board (CARB) as stated
on the nameplate.
As a user of this generator set, please be aware that unauthorized modifications or replacement
of fuel, exhaust, air intake, or speed control system components that affect engine emissions
are prohibited. Unauthorized modification, removal, or replacement of the generator set label is
prohibited.
Carefully review Operator (Owner), Installation, and other manuals and information you receive
with the generator set. If unsure that the installation, use, maintenance, or service of the
generator set is authorized, seek assistance from an approved Cummins Onan dealer.
Generator set users may use the following table as an aid in locating information related to the
CARB requirements for emissions control.
TABLE 1.
EMISSIONS CONTROL INFORMATION
Generator Set Warranty Information
The emissions control warranty statement is located in the same
packet of information as this manual when the generator set is shipped
from the factory.
Engine Valve Lash
See Section 3.4 on page 15.
Engine Fuel Requirements
The engine is certified to operate on diesel fuel.
See Section 5.6 on page 37 for fuel recommendations.
Engine Lubricating Oil Requirements
See Section 5.5 on page 33 for engine oil recommendations.
Engine Adjustments
High idle speed. This is a service procedure requiring trained
personnel and proper tools. See the Service Manual.
Engine Emission Control System
The engine emissions control system consists of engine design and
precision manufacture (IFI).
3.3
Build Standards
The generator set and its control system have been designed, constructed and tested generally
in accordance with the following Standards where applicable.
981-0183 (Issue 11)
13
3. Overview
2-2015
Standard
Title
BS EN 1037:1995+a1:2008
Safety of machinery - Prevention of unexpected start up.
BS EN ISO 14121-1:2007
Safety of machinery. Risk assessment principles.
BS EN ISO 13857:2008
Safety of machinery. Safety distances to prevent hazard zones being
reached by upper and lower limbs.
BS EN 349:1993+A1:2008
Safety of machinery - Minimum gaps to avoid crushing parts on the human
body.
BS EN 547-1:1996+A1:2008
Safety of machinery - Human body dimensions - Part 1: Principles for
determining the dimensions required for openings for whole body access
into machinery.
BS EN 547-2:1996+A1:2008
Safety of machinery - Human body dimensions - Part 2: Principles for
determining the dimensions required for access openings.
BS EN 547-3:1996+A1:2008
Safety of machinery - Human body dimensions - Part 3: Anthropomorphic
data.
BS EN 60204-1:2006+A1:2009
Safety of machinery. Electrical equipment of machines. General
requirements.
BS EN 614-1:2006+A1:2009
Safety of machinery. Ergonomic design principles. Terminology and
general principles.
BS EN 953:1997+A1:2009
Safety of machinery - Guards - General requirements for the design and
construction of fixed and movable guards.
BS EN ISO 12100-1:2003+A1:2009
Safety of machinery. Basic concepts, general principles for design. Basic
terminology, methodology
BS EN ISO 12100-2:2003+A1:2009
Safety of machinery. Basic concepts, general principles for design.
Technical principles
BS EN ISO 13732-1:2008
Ergonomics of the thermal environment. Methods for the assessment of
human responses to contact with surfaces. Hot surfaces
BS EN ISO 13849-1:2008
Safety of machinery - Safety-related parts of control systems
BS EN ISO 13850:2006
Safety of machinery - Emergency stop. Principles for design.
BS EN 61310-1:2008
Safety of machinery - Indication, marking and actuation - Part
1:Requirements for visual, auditory and tactile signals.
BS EN 61310-2:2008
Safety of machinery - Indication, marking and actuation - Part 2:
Requirements for marking.
BS EN 61000-6-1:2007
Electromagnetic compatibility (EMC). Generic standards. Immunity
standard for residential, commercial and light-industrial environments.
BS EN 61000-6-3:2007
Electromagnetic compatibility (EMC). Generic standards. Emission
standard for residential, commercial and light-industrial environments.
BS EN 1299:1997+A1:2008
Mechanical vibration and shock - Vibration isolation of machines Information for the application of source isolation
BS EN 1679-1:1998
Reciprocating internal combustion engines - Safety - Part 1: Compression
ignition engines
BS EN 12601:2001
Reciprocating internal combustion engine driven generating sets - Safety
14
981-0183 (Issue 11)
2-2015
3. Overview
3.4
Specifications
3.4.1
Diesel Model Specifications
TABLE 2.
DIESEL MODEL SPECIFICATIONS
HDKBB
HDKBC
GENERATOR SET CONTROL: Integrated Microprocessor Based Engine and Generator Controller
GENERATOR: 2-Bearing, 2-Pole Rotating Field, "Poly-Vee" Belt Drive
Power (@1.0 power factor)
4800 Watts
5000 Watts
Speed
3000 RPM
3600 RPM
50 Hz
60 Hz
Voltage
230 V 1-Phase
120 V 1-Phase, 120/240 V 1Phase, or 120/240 V 3-Phase
Current
21 Amps per leg
41.7/20.8 Amps (1-Ph) or 12
Amps (3-Phase)
2-pole, 25 Amp (1 pole used)
2-pole, 25 Amp (1-Phase) or 3pole, 15 Amp (3-Phase)
No Load
0.74 l/h (0.20 gph)
0.95 l/h (0.25 gph)
Half Load
1.23 l/h (0.32 gph)
1.47 l/h (0.39 gph)
Full Load
2.04 l/h (0.54 gph)
2.27 l/h (0.60 gph)
Frequency
Line Circuit Breaker
FUEL CONSUMPTION:
ENGINE: 2-Cylinder In-Line, Water-Cooled, Indirect-Injection (IDI), 4-Stroke Cycle Diesel
Bore
67 mm (2.64 in)
Stroke
68 mm (2.68 in)
479 cm3 (29.23 in3)
Displacement
Compression Ratio
23 : 1
Fuel Injection Timing (BTDC)
18.25° to 19.75°
Firing Order
1-2
Fuel Nozzle Injection Pressure
Valve Lash: Intake and Exhaust (cold)
13.73 MPa (1991 psi)
0.145 to 0.185 mm (0.0057 to 0.0073 in)
Oil Capacity
1.9 liters (2 qt)
Cooling System Capacity
2.8 liters (3 qt)
DC SYSTEM:
Nominal Battery Voltage
Minimum Battery Capacity CCA (Cold
Cranking Amps)
Battery Recharging
Maximum Regulated Charging Current
12 Volts
12 Volts
475 Amps down to –17 °C (0 °F)
650 Amps down to –29 °C (–20
°F)
475 Amps down to –17 °C (0 °F)
650 Amps down to –29 °C (–20
°F)
Installer must provide
Installer must provide
20 Amps
20 Amps
INSTALLATION:
Weight
981-0183 (Issue 11)
181 kg (400 lbs)
15
3. Overview
2-2015
HDKBB
Size (L x W x H)
876 mm x 581.2 mm x 514.4 mm (34.5 in x 22.9 in x 20.3 in)
Sound
3.5
68 dB(A) @ 3 m (10 ft)—before installation at half load
List of Acronyms
TABLE 3.
ACRONYM DEFINITIONS
Acronym
Definition
AC
Alternating Current
AGS
Automatic Generator Start
ANSI
American National Standards Institute
API
American Petroleum Institute
ASTM
American Society for Testing and Materials (now known as ASTM International)
BS
Build Standard
BTDC
Before Top Dead Center
CARB
California Air Resources Board
CCA
Cold Cranking Amp
CO
Carbon Monoxide
CPG
Cummins Power Generation
CSA
Canadian Standards Association
DC
Direct Current
EEPROM
Electronically Erasable Programmable Read Only Memory
EMC
Electromagnetic Compatibility
EPA
Environmental Protection Agency
GFCI
Grounded Fault Circuit Interrupters
hp
High Pressure
I.D.
Inside Diameter
ISO
International Organization for Standardization
LED
Light-emitting Diode
NFPA
National Fire Protection Agency
NPT
National Pipe Thread
OEM
Original Equipment Manufacturer
PPE
Personal Protective Equipment
PTO
Power Take-Off
RAM
Random Access Memory
ROM
Read Only Memory
RV
Recreational Vehicle
RVIA
RV Industry Association
16
HDKBC
981-0183 (Issue 11)
2-2015
3. Overview
Acronym
Definition
SAE
Society of Automotive Engineers
UNC
Unified National Coarse
US, U.S.
United States
WC
Water Column
TABLE 4.
ACRONYMS FOR UNITS OF MEASUREMENT
Acronym
Definition
Amp
Ampere
C
Celsius
cm
centimeter
dB(A)
Decibel A-Weighted
F
Fahrenheit
ft
Feet, foot
ft-lbs
Foot-pounds
gph
Gallons per hour
H
Height
Hz
Hertz
in
Inch
kg
kilogram
kg/h
kilograms per hour
kW
kilowatt
l/h
Liters per hour
L
Length
lb
Pound
lbs/h
Pounds per hour
m
Meter
mm
millimeter
MPa
megapascal
Nm
Newton meter
Ph
Phase
psi
Pounds per square inch
qt
Quart
RPM
Revolutions per Minute
V
Volt
VAC
Volts Alternating Current
VDC
Volts Direct Current
W
Watts, Width
981-0183 (Issue 11)
17
3. Overview
2-2015
This page is intentionally blank.
18
981-0183 (Issue 11)
4
Operation
4.1
Key Component Locations
The control panel and the components requiring attention during periodic maintenance (see
Section 5.1 on page 31) are located behind a removable access cover. The figure below
illustrates the components of a typical generator set. There may be some variation depending
on the generator set model.
• To remove the access cover:
1. Slide the cover latches up and pull the cover outward from the bottom.
2. Lower the cover to remove it from the housing.
• To replace the access cover:
1. Position the tabs on the top of the cover into the openings on the housing.
2. Slide the latches up and push the bottom of the cover in place.
3. Hold the cover in place firmly and release the latches.
WARNING
Operating the generator set with the access cover off can result in severe personal
injury or equipment damage. Hot components are exposed when the access cover is
removed and generator set cooling air does not circulate properly. Do not operate the
generator set with the access cover removed.
981-0183 (Issue 11)
19
4. Operation
No.
2-2015
Description
No.
Description
1
AC Output and Remote Control Connections
8
Air in for cooling, combustion, and ventilation
2
Lifting Eye Cover
9
Access for oil and air filters
3
Hot Air Out (end and bottom)
10 Coolant Level Check
4
Exhaust Tailpipe Exit (end, back, and bottom)
11 Control Switch
5
Fuel Connections
12 Oil Fill
6
Battery Connections
13 Access to Coolant Pressure Cap
7
Access below for oil and fuel filters and oil and
coolant drain valves
FIGURE 2.
20
KEY COMPONENT LOCATIONS
981-0183 (Issue 11)
2-2015
4. Operation
4.2
Control Panel
4.2.1
Generator Set Control Panel
No.
Name
Description
1
Access to Coolant Pressure
Cap
Provides access to the coolant pressure cap. Fill coolant here when refilling
the system.
2
Oil Fill Cap and Dipstick Access Provides access to the oil fill cap and dipstick. Check and fill engine oil here.
3
Access to Coolant Recovery
Tank
Provides access to the coolant recovery tank which allows space for coolant
expansion. Replenish the normal loss of coolant here.
4
Coolant Level Sight Hole
Use to view coolant level.
5
Control Switch and Status Light
The control switch is used to start and stop the generator set, prime the engin
fuel system, and restore the fault code. The status light is the LED in the
control switch that blinks rapidly during preheat and cranking. It stays on
continuously after generator set is running. If the generator set shuts down
abnormally, the indicator flashes a numerical code to indicate the cause of the
shutdown (see Chapter 6 on page 49).
6
Line Circuit Breakers
Protect the AC power leads connected to the generator set from overloads
and equipment short circuits.
FIGURE 3.
981-0183 (Issue 11)
GENERATOR SET CONTROL PANEL
21
4. Operation
4.2.2
2-2015
Remote Control Panel
A remote control panel may be installed inside the vehicle. Cummins Onan offers 3 remote
control panel kits.
• Control switch with status indicator.
• Control switch with status indicator and an hour meter.
• Control switch with status indicator and a DC voltmeter.
No.
Name
Description
1
Control Switch
Used to start and stop the generator set, and to prime the engine fuel system.
Hold the switch in its Start position to crank and start the generator set. Press
the switch to the Stop position to stop the generator set. Hold the switch in its
Stop position to prime the fuel system.
2
Status Indicator
LED in the control switch that blinks rapidly during preheat and cranking.
Stays on continuously after generator set is running. If the generator set shuts
down abnormally, the indicator flashes a numerical code to indicate the cause
of the shutdown (see Chapter 6 on page 49).
3
Hour Meter
Records the total running time of the generator set. Cannot be reset.
4
DC Voltmeter
Displays voltage of the generator set. If the voltage across the 12 VDC control
system consistently stays above or below 12 VDC, see Section 5.4 on page
33.
FIGURE 4.
22
REMOTE CONTROL PANELS
981-0183 (Issue 11)
2-2015
4. Operation
4.3
Starting and Stopping the Generator Set
4.3.1
Pre-start Checks
WARNING
EXHAUST GAS IS DEADLY!
Exhaust gases contain carbon monoxide, an odorless, colorless gas. Carbon monoxide is
poisonous and can cause unconsciousness and death. Symptoms of carbon monoxide
poisoning include:
• Dizziness
• Muscular twitching
• Weakness and sleepiness
• Throbbing in temples
• Headache
• Inability to think clearly
• Nausea
• Vomiting
IF YOU OR ANYONE ELSE EXPERIENCES ANY OF THESE SYMPTOMS, GET OUT INTO THE
FRESH AIR IMMEDIATELY. If symptoms persist, seek medical attention. Shut down the generator
set and do not operate it until it has been inspected and repaired.
Never occupy the vehicle with the generator set running unless the vehicle is equipped with a
working carbon monoxide detector. However, primary protection against inhaling carbon
monoxide is proper installation of the exhaust system, and daily (every 8 hours) inspection for
visible and audible exhaust system leaks.
Perform pre-start checks before the first start of the day and after every 8 hours of operation.
See Chapter 5 if the vehicle has been in storage.
1. Make sure all vehicle CO detectors are working properly.
2. Remove access cover.
3. Inspect the generator set as instructed in Chapter 5.
4. Perform any maintenance due (Section 5.1 on page 31).
5. Keep a maintenance log (Chapter 7 on page 57).
6. Check for signs of fuel and exhaust leaks and for damage to the exhaust system.
7. Replace access cover.
8. Turn off the air conditioner and other large appliances.
4.3.2
Priming the Fuel System
The fuel system should be primed after the fuel filter is replaced or after the generator set runs
out of fuel.
Position the control switch to STOP/PRIME for 30 seconds. The status indicator stays on while
the pump is on.
981-0183 (Issue 11)
23
4. Operation
4.3.3
2-2015
Starting the Generator Set
1. Visually inspect for fuel and exhaust leaks. Do not start the generator set until any fuel or
exhaust leak is repaired.
2. Position and hold the control switch to START until the generator set starts. The status
indicator on the switch flashes while cranking. It will stay on continuously when the
generator set is running.
3. If the generator set fails to start, cranking will stop in approximately 30 seconds. The status
indicator will blink, indicating an over crank fault. Wait 5 seconds for the control to reset
before trying again. After 5 tries, let the starter motor cool down for 30 seconds before
trying again. See Chapter 6 on page 49 if the generator set does not start after several
tries.
CAUTION
The starter motor can be damaged by overheating. Allow it to cool down for 30
seconds after every fifth crank.
4. For top performance and engine life, especially in colder weather, let the engine warm up
for 2 minutes before connecting appliances.
5. See Chapter 6 on page 49 if the generator set shuts down and the status indicator blinks,
indicating a fault.
4.3.4
Stopping the Generator Set
1. Turn off the air conditioner and other large appliances.
2. Run generator set for 2 minutes to allow for cool down.
3. Press the control switch in its STOP position.
4.4
Loading the Generator Set
The power rating (kW) on the generator set nameplate determines how much electrical load
(motors, fans, heaters, air conditioners, and other appliances) the generator set can power. If
the sum of the loads exceeds the generator set power rating, the generator set will shut down or
its line circuit breakers will trip.
NOTICE
It may be necessary to run fewer appliances at the same time—the sum of the loads
must not be greater than the generator set power rating.
To avoid shutdowns due to generator set overload, use the electrical ratings on the nameplates
of equipment (if available) to compare the sum of the electrical loads that are likely to be used at
the same time to the generator set power rating. Refer to the table below for typical appliance
ratings.
24
981-0183 (Issue 11)
2-2015
4. Operation
Appliance load and generator set power are measured in terms of Watts (W) or kilowatts (kW),
where 1 kilowatt (kW) = 1000 Watts (W).
• If the equipment is marked in Amps and Volts only, multiply the Amps times the Volts to
obtain the load in Watts.
• Divide Watts by 1000 to obtain load in terms of kilowatts.
It is possible that the generator set circuit breaker may trip even though the sum of the steady
state loads is less than the generator set power rating. When a large motor or air conditioner is
started last or cycles off and on, the startup load is larger than its normal running load, causing
the load to temporarily exceed the generator set power rating.
Typical "invisible" charging loads:
• During startup, air conditioners need "reserve" power and can draw 3–4 times the typical
1400–2400 Watts needed to run. Too much baseload can prevent air conditioners from
starting.
• Battery chargers are activated automatically and can draw a large load (up to 3000 Watts).
Manage electrical loads by adjusting battery charge rates to best suit your needs. Consult
your inverter/charger manual or manufacturer.
TABLE 5.
Appliance
TYPICAL APPLIANCE LOADS
Average Required Wattage
Amps
Air Compressor (1hp)
900-1800
7.5-15
Air Conditioner
1200-2400
10-20
Up to 3000
6-28
Blender
450-700
3.3-5.8
Broiler
1400-1700
11.6-14
Broom/Vacuum
1000-1440
8.3-12
85
0.7
Coffeepot
900-1200
7.5-10
Computer
60-270
0.5-2.25
Laptop
20-50
0.16-0.41
500-1000
4-8
Curling Iron
20-50
0.16-0.41
Dishwasher
1200-2400
10-20
Drill
250-1000
2-8
Electric Blanket
60-100
0.5-0.8
Fan
10-175
0.08-1.45
Flat Iron
40-80
0.3-0.6
Frying Pan/Wok
1000-1350
8-11.25
Game Console
19-200
0.16-1.6
Hair Dryer
1200-1875
10-15.6
Iron
1000-1800
8-15
13-100
0.1-0.8
Battery Charger
1
CD/mp3 Player & Speakers
Converter
Light Bulbs
981-0183 (Issue 11)
25
4. Operation
2-2015
Appliance
Average Required Wattage
Amps
750-1100
6.25-9.2
50-200
0.4-1.6
400-1000
3.3-8
15-20
0.12-0.16
Space Heater
750-1500
6.25-12.5
Stove
900-2500
7.5-20.8
43-600
0.35-5
800-1400
6.6-11.6
6-30
0.05-0.25
Washer/Dryer
350-500/1800-5000
3-4/15-42
Water Heater
1000-1500
8-12.5
Water Pump
250-1100
2-9.16
Microwave/Convection Oven
Radio
Refrigerator
Shaver
Television
Toaster
VCR/DVD/Blu-ray Player
1
Battery chargers can be a source of significant load and will be on whether they are connected to shore power or
the generator set.
4.4.1
Power Versus Altitude
The generator set is rated at standard barometric pressure, humidity, and air temperature
(reference ISO 3046). Low barometric pressure (high altitude) or high ambient temperature
decreases engine power.
• As ambient temperature increases, rated generator set engine power decreases
approximately 1% for every 5.5 °C (10 °F) above 25 °C (77 °F).
• Power decreases approximately 3.5% of rated power each 305 m (1000 ft) of increase in
elevation. Refer to the table below for typical elevation/generator set power calculations.
NOTICE
It may be necessary to run fewer appliances at higher altitudes and ambient
temperatures.
TABLE 6.
POWER VERSUS ALTITUDE
Elevation Above Mean Sea Level
Maximum Generator Set Power1
Up to 152 m (500 ft)
5000 Watts (rated)
762 m (2500 ft)
4700 Watts
1676 m (5500 ft)
4250 Watts
Above 1676 m (5500 ft)
4250 Watts minus 150 Watts each 305 m (1000 ft)
1. - Does not take into account the effect circuit breakers may have in limiting maximum power.
26
981-0183 (Issue 11)
2-2015
4.5
4. Operation
Exercising the Generator Set
Exercise the generator set at least 2 hours each month if use is infrequent. Run the generator
set at approximately 1/2 rated power. A single 2-hour exercise period is better than several
shorter periods.
Exercising a generator set drives off moisture, relubricates the engine, replaces stale fuel in fuel
lines, and removes oxides from electrical contacts and generator slip rings. The result is better
starting, longer engine life, and greater reliability.
4.6
Resetting Line Circuit Breakers
If a generator set line circuit breaker or a circuit breaker in the power distribution panel trips,
either a short circuit has occurred or too many loads were connected.
NOTICE
The generator set continues to run if its circuit breaker trips.
If a circuit breaker trips:
1. Disconnect or turn off as many electrical loads as possible.
2. Reset the circuit breaker.
3. If the circuit breaker trips right away, either the appliance (or electrical load) has a short or
the circuit breaker is faulty. Call a qualified electrician.
NOTICE
It may be necessary to push the circuit breaker OFF to reset it and ON to reconnect
the circuit.
4. If the circuit breaker does not trip right away, reconnect loads one-by-one making sure not
to overload the generator set or cause a circuit breaker to trip. If a circuit breaker trips right
away when an appliance is connected, that appliance or circuit probably has a short.
FIGURE 5.
981-0183 (Issue 11)
CIRCUIT BREAKER CONNECTIONS
27
4. Operation
2-2015
WARNING
Short circuits in electrical equipment can cause fire and electrical shock leading to severe
personal injury or death. Electrical equipment and its grounding must be maintained properly to
protect against short circuits.
Electrical equipment must be used and maintained properly, and be properly grounded, to
cause the line circuit breakers to trip when short circuits occur.
Electrical appliances and tools must be used and maintained in accordance with their
manufacturer's instructions and safety precautions. Proper grounding is needed to reduce the
risk of electric shock and fire.
4.7
Connecting Shore Power
WARNING
Interconnecting the generator set and shore power can lead to electrocution of utility line
workers, equipment damage, and fire. Use an approved switching device to prevent
interconnections.
A vehicle with provisions for connecting utility power must have an approved device to keep the
generator set and utility from being interconnected. See the generator set Installation Manual for
more information.
4.8
Operating in Weather Extremes
Pay particular attention to the following items when operating the generator set in cold or hot
weather.
1. Make sure nothing blocks airflow to and from the generator set.
2. Make sure engine oil viscosity is appropriate for the ambient temperature. See Section 5.5
on page 33 for engine oil recommendations.
3. Keep the generator set clean.
4. Perform maintenance due. See Section 5.1 on page 31.
4.9
Operating in Dusty Environments
Pay particular attention to the following items when operating the generator set in dusty
environments.
1. Do not let dirt and debris accumulate inside the generator set compartment. Keep the
generator set clean.
2. Perform air filter element maintenance more often.
3. Change engine oil more often.
28
981-0183 (Issue 11)
2-2015
4.10
4. Operation
Care of New or Rebuilt Engine
Proper engine break-in on a new generator set or on one with a rebuilt engine is essential for
top engine performance and acceptable oil consumption. Run the generator set at
approximately 1/2 rated power for the first 2 hours and at 3/4 rated power for 2 more hours.
Proper engine oil and oil level are especially critical during break-in because of the higher
engine temperatures that can be expected. Change the oil if the oil is not appropriate for the
ambient temperatures during break-in. See Section 5.5 on page 33 for engine oil
recommendations.
Check oil level twice a day or every 4 hours during the first 24 hours of operation and change
the oil after the first 50 hours of operation.
981-0183 (Issue 11)
29
4. Operation
2-2015
This page is intentionally blank.
30
981-0183 (Issue 11)
5
Maintenance
WARNING
Only authorized and competent personnel who are familiar with the equipment and its operation
should carry out maintenance.
5.1
Periodic Maintenance
WARNING
Accidental starting can cause severe personal injury or death. Turn off the AGS
whenever performing maintenance or service, when the vehicle is stored between uses,
is awaiting service, or is parked in a garage or other confined area.
Periodic maintenance is essential for top performance and long generator set life. Use the
Periodic Maintenance Schedule below for normal periodic maintenance. In hot and dusty
environments some maintenance procedures should be performed more frequently, as indicated
by the footnotes in the schedule. Keeping a log of maintenance performed and hours run will
help keep generator set maintenance regular and provide a basis for supporting warranty claims
(see Chapter 7 on page 57).
Maintenance, replacement, or repair of emission control devices and systems may be
performed by any engine repair establishment or individual. However, warranty work must be
completed by an authorized Cummins Onan Service Representative.
5.1.1
Periodic Maintenance Schedule
TABLE 7.
PERIODIC MAINTENANCE SCHEDULE
MAINTENANCE FREQUENCY
MAINTENANCE PROCEDURE
Every Day
or Every 8
Hours
General Inspection
X
Check Engine Oil Level
X
Clean Engine Coolant Level
X
After First
50 Hours
Every 150
Hours
Every 500
Hours
X3, 7
Clean Spark Arrester
X
X1, 2, 3, 4
Replace Engine Air Filter
X1, 3
Replace Fuel Filter
X3, 8
Check Coolant Anti-Freeze
Protection
Every 1000
Hours
X2
Clean and Check Battery
Change Engine Oil and Oil Filter
Every
Month
X3
Flush Coolant System
X5
Replace Coolant Pressure Cap
X5
981-0183 (Issue 11)
31
5. Maintenance
2-2015
MAINTENANCE FREQUENCY
MAINTENANCE PROCEDURE
Every Day
or Every 8
Hours
After First
50 Hours
Every
Month
Every 150
Hours
Every 500
Hours
Every 1000
Hours
Replace Engine V-Belt (Coolant
Pump)
X6, 7
Replace Coolant Hoses and
Thermostat
X6, 7
Adjust Engine Valve Lash
X6, 7
Service Fuel Injectors
X6, 7
Check Generator Bearings, Drive
Belt, Belt Tensioner and Drive
Coupling
X6, 7
1 - Perform more often when operating in dusty conditions
2 - Perform more often when operating in hot weather.
3 - Perform at least once a year.
4 - Perform every 75 hours when using high sulfur fuel.
5 - Perform at least once every two years.
6 - Perform at least once every five years.
7 - Must be performed by a qualified mechanic (authorized Cummins Onan Service Representative).
8 - Perform every 250 hours when using B20 Bio-diesel fuel.
5.2
Consumable Parts
The following is a list of consumables associated with the generator models covered in this
manual:
TABLE 8.
Part Number
Description
Quantity
FL777
Filter, Oil (Skid Mounted)
2
FL3325
Filter, Oil (On Engine)
5
AF2614
Element Air Cleaner, Primary
4
AF2615
Element Air Cleaner, Secondary
4
Filter, Fuel (Skid Mount)
3
Filter, Fuel (Raycore)
2
Filter, Fuel Water Separator
2
Filter, Water
2
A041D315 (FF5782)
FS1006
A041W159 (WF2076)
5.3
CONSUMABLE PARTS
General Inspection
1. Check battery connections (Section 5.4 on page 33).
2. Check engine oil level (Section 5.5 on page 33).
3. Check engine coolant level (Section 5.7 on page 41).
4. Check fuel system (Section 5.6 on page 37).
32
981-0183 (Issue 11)
2-2015
5. Maintenance
5. Check exhaust system (Section 5.8 on page 44).
6. Check mechanical system (Section 5.9 on page 44).
5.4
Maintaining the Battery
The generator set requires a 12 Volt battery to power its control and starting circuits. Reliable
generator set starting and starter service life depend upon adequate battery system capacity
and maintenance.
WARNING
Flames, sparks, or arcing at battery terminals, light switches, or other equipment can
ignite battery gas, causing severe personal injury. Ventilate the battery area before
working on or near a battery, wear safety glasses, and do not smoke. Turn work light on
or off away from the battery. When performing maintenance procedures or when
servicing a battery, stop the generator set and disconnect the charger before
disconnecting battery cables. Using an insulated wrench, disconnect the negative (–)
cable first and reconnect it last.
Refer to Section 5.1 on page 31 for the battery maintenance schedule and follow the battery
manufacturer's instructions. Have the battery charging system serviced if DC system voltage is
consistently low or high.
Check the battery terminals for clean, tight connections. Loose or corroded connections have
high electrical resistance which makes starting harder.
1. Keep the battery case and terminals clean and dry.
2. Keep the battery terminals tight.
3. Remove battery cables with a battery terminal puller.
4. Make sure which terminal is positive (+) and which is negative (–) before making battery
connections, always removing the negative (–) cable first and reconnecting it last to reduce
arcing.
5.5
Maintaining the Lubrication System
Keep dirt, water, and other contaminants from entering the lubrication system and corroding or
clogging lubrication components.
5.5.1
Oil Level
Park the vehicle on level ground and stop the generator set before checking engine oil level.
WARNING
Engine components (drains, filters, hoses, etc.) can be hot and cause severe burns,
lacerations of the skin, and liquid splash. Use personal protective equipment when
working with or around hazardous materials. Examples of personal protective
equipment include (but are not limited to) safety glasses, protective gloves, hard hats,
steel toed boots, and protective clothing.
981-0183 (Issue 11)
33
5. Maintenance
2-2015
WARNING
Crankcase pressure can blow hot engine oil out the fill opening causing, severe burns.
Always stop the generator set before removing the oil fill cap.
WARNING
State and federal agencies have determined that contact with used engine oil can cause
cancer or reproductive toxicity. Avoid skin contact and breathing of vapors. Use rubber
gloves and wash exposed skin.
CAUTION
Too little oil can cause severe engine damage. Too much oil can cause high oil
consumption. Keep the oil level between the high and low beads (or markings) on the
dipstick.
1. Unscrew the oil fill cap/dipstick.
2. Wipe off the dipstick and thread back into the fill neck.
3. Remove the dipstick to check oil level.
4. Add or drain oil as necessary. Keep the oil level between the full and add marks.
5. Insert the dipstick and screw the oil fill cap back on securely.
FIGURE 6.
5.5.2
OIL FILL CAP AND DIPSTICK
Engine Oil Recommendations
Use API (American Petroleum Institute) classified engine oils according to the following
guidelines.
• In emissions regulated areas, it is mandatory to use CF, CF-4, CG-4, CH-4, or CI-4 class
oil with:
• Low sulfur fuel - sulfur content less that 500 ppm (0.05% weight).
• Ultra low sulfur fuel - sulfur content less that 15 ppm ( 0.0015% weight).
• In non-emissions regulated areas, use high sulfur fuel.
• If sulfur content is between 500 ppm (0.05% weight) and 5000 ppm (0.5% weight), CF
class oil is recommended.
• If sulfur content is between 5000 ppm (0.5% weight) and 10,000 ppm (1.0% weight),
use CF, CF-4, CG-4, CH-4, or CI-4 class oil.
34
981-0183 (Issue 11)
2-2015
5. Maintenance
NOTICE
If high sulfur fuel is used, the oil and oil filter must be changed twice as often.
Look for the SAE (Society of Automotive Engineers) viscosity grade. Choose the viscosity grade
appropriate for the ambient temperatures expected until the next scheduled oil change.
Multigrade oils such as SAE 15W-40 are recommended for year round use.
TABLE 9.
5.5.3
OIL VISCOSITY VS. TEMPERATURE
EXPECTED AMBIENT TEMPERATURES
SAE VISCOSITY GRADE
0 °C (32 °F) and higher
30
–12 to 38 °C (10 to 100 °F)
15W-40 (OnaMax)
–18 to 27 °C (0 to 80 °F)
10W-30 10W-40
–28 to 10 °C (–20 to 50 °F)
5W-30
Changing Engine Oil and Oil Filter
WARNING
Accidental or remote starting can cause severe personal injury or death. Before
removing a panel or access door, or before working on the generator set, use an
insulated wrench to disconnect the negative (-) cable from the battery to prevent
accidental starting.
WARNING
Engine components (drains, filters, hoses, etc.) can be hot and cause severe burns,
lacerations of the skin, and liquid splash. Use personal protective equipment when
working with or around hazardous materials. Examples of personal protective
equipment include (but are not limited to) safety glasses, protective gloves, hard hats,
steel toed boots, and protective clothing.
WARNING
State and federal agencies have determined that contact with used engine oil can cause
cancer or reproductive toxicity. Avoid skin contact and breathing of vapors. Use rubber
gloves and wash exposed skin.
Refer to Section 5.1 on page 31 for the engine oil change schedule. Change oil more often in
hot or dusty environments.
1. Run the generator set under load until it is up to operating temperature, stop it, and
disconnect the negative (–) battery cable at the battery.
WARNING
Crankcase pressure can blow hot engine oil out the fill opening causing, severe
burns. Always stop the generator set before removing the oil fill cap.
2. Remove the oil fill cap.
3. Place a pan underneath the oil drain hole and open the drain valve. Let all oil drain from
the engine.
981-0183 (Issue 11)
35
5. Maintenance
2-2015
4. Close the drain valve.
5. Spin off the oil filter and thoroughly wipe off the filter mounting surface. Remove the gasket
if it does not come off with the filter.
6. Apply a film of oil to the new filter gasket and spin the new filter on by hand until the gasket
just touches the mounting pad. Tighten 1/2 to 3/4 of a turn.
CAUTION
Too little oil can cause severe engine damage. Too much oil can cause high oil
consumption. Keep the oil level between the high and low beads (or markings) on
the dipstick.
7. Refill with 1.9 liters (2 qts) of oil. Check the oil level and add or drain oil as necessary.
8. Screw the oil fill cap on securely.
9. Reconnect the negative battery cable.
10. Run the generator for a few minutes, shut it down, and recheck for proper oil level and
leaks.
11. Dispose of the used oil and oil filter in accordance with local environmental regulations.
FIGURE 7.
36
OIL FILTER (FRONT ACCESS)
981-0183 (Issue 11)
2-2015
5. Maintenance
No.
Description
1
Oil Drain Valve
2
Oil Drain Hose
FIGURE 8.
5.6
No.
3
Description
Oil Filter
OIL DRAIN VALVE, DRAIN HOSE, AND FILTER (BOTTOM ACCESS)
Maintaining the Fuel System
Keep dirt, water, and other contaminants from entering the fuel system and corroding or
clogging fuel system components.
5.6.1
Fuel System
WARNING
Diesel fuel leaks can lead to fire. Do not operate the generator set if operation causes
fuel to leak.
1. Check for leaks at the hose, tube, and pipe fittings in the fuel supply system while the
generator set is running and while it is stopped.
2. Check flexible fuel hoses sections for cuts, cracks, abrasions, and loose hose clamps.
3. Make sure the fuel line does not rub against other parts of the vehicle or generator set.
4. Replace worn or damaged fuel line parts before leaks occur.
981-0183 (Issue 11)
37
5. Maintenance
5.6.2
2-2015
Fuel Recommendations
WARNING
Diesel fuel is combustible and can cause severe personal injury or death. Do not smoke
near fuel tanks or fuel-burning equipment, or in areas sharing ventilation with such
equipment. Keep flames, sparks, pilot flames, electrical arcs and switches, and all other
sources of ignition well away. Keep a multi-class ABC fire extinguisher handy.
High quality diesel fuel is necessary for good performance and long engine life.
• The specifications for the type and sulfur content (ppm and weight percentage) of the
diesel fuel used must comply with all emissions regulations applicable in the areas where
the generator set is to be operated.
• Diesel fuels meeting ASTM D975 or EN 590 specifications are recommended. Use Grade
1-D diesel fuel.
• When the ambient temperature is below –10 oC (14 oF), a minimum Cetane number of
45 is recommended.
• When the ambient temperature is below –20 oC (–4 oF) or elevation is above 1500 m
(5000 ft), a minimum Cetane number of 50 is recommended.
• Current US EPA regulations for non-road engines limit diesel fuel sulfur content to a
maximum of 500 ppm (0.05% weight).
• Use Grade 2-D S500 or 2-D S15 diesel fuel.
• When the ambient temperature is below –10 oC (14 oF), use Grade 1-D S500 or 1-D
S15 diesel fuel.
NOTICE
Beginning in the year 2010, US EPA regulations limit diesel fuel sulfur content to a
maximum of 15 ppm (0.0015% weight).
• Do not use diesel fuel with a sulfur content greater than 10,000 ppm (1.0% weight).
• Diesel fuel must meet the ASTM D975 standard for lubricity and pass a minimum load
level of 3100 grams as measured by ASTM D6078, or maximum scar diameter of 0.45 mm
as measured by ASTM D6079 or ISO 12156-1.
5.6.2.1 Bio-diesel Fuels B5 – B20
B5 bio-diesel fuel that meets industry specifications and quality is suitable for use with this
generator set.
Before using bio-diesel fuel blends above B5 and up to B20, the following conditions must be
verified:
• The vehicle propulsion engine is capable of using B20 when sharing the same fuel tank.
• The OEM has installed a B20 compatible fuel line from the fuel tank to the generator set.
• The OEM has installed a water separator in the fuel line just before the generator set.
38
981-0183 (Issue 11)
2-2015
5. Maintenance
For bio-diesel blends above B5 and up to B20, Cummins Onan recommends that the fuel meet
the specifications outlined in ASTM D7467. The bio-diesel component of this fuel blend must
meet ASTM D6751 or EN14214, and the petroleum diesel component must meet ASTM D975.
Blended bio-diesel fuels should be pre-blended and not made by customers.
CAUTION
Market applications contain properties that can affect engine operating characteristics.
It is hightly recommended that use of these bio-diesel fuel blends be avoided or
exercised with extra care. Use standard fuels in applications that experience seasonal
usage, storage for periods exceeding 90 days, and extreme temperatures or humidity.
The following bio-diesel fuel properties can affect engine performance:
• Poor oxidation stability can accelerate fuel oxidation. Fuel oxidation reduces generator
performance. This effect is accelerated at increased ambient temperatures.
• Properties change at temperatures below –5 oC (23 oF). Necessary precautions must be
taken when operating the generator with bio-diesel blends in low ambient temperatures.
• Fuel heater
• Hose insulation
• Additional anti-gel fuel additives.
• Bio-diesel fuel blends are an excellent medium for microbial growth. Microbes cause fuel
system corrosioin and premature filter plugging. The effectiveness of all commerically
available conventional anti-microbial additives, when used in bio-diesel fuel, is not known.
Consult your fuel and additive supplier for assistance.
If bio-diesel fuel is used for seasonal applications (stored more than 90 days), the generator
must be purged before storage by running the engine on pure diesel fuel meeting ASTM D975
for a minimum of 30 minutes.
NOTICE
The Cummins Onan Warranty covers failures that are a direct result of defects in
material or factory workmanship. Generator damage, service issues, and/or
performance issues determined by Cummins Onan to be caused by bio-diesel fuel
blends not meeting the specifications outlined in the applicable Installation, Operator,
and Service Manauls are not considered to be defects in material or workmanship and
may affect your generator's warranty.
5.6.3
Replacing the Fuel Filter
WARNING
Accidental or remote starting can cause severe personal injury or death. Before
removing a panel or access door, or before working on the generator set, use an
insulated wrench to disconnect the negative (-) cable from the battery to prevent
accidental starting.
981-0183 (Issue 11)
39
5. Maintenance
2-2015
WARNING
Engine components (drains, filters, hoses, etc.) can be hot and cause severe burns,
lacerations of the skin, and liquid splash. Use personal protective equipment when
working with or around hazardous materials. Examples of personal protective
equipment include (but are not limited to) safety glasses, protective gloves, hard hats,
steel toed boots, and protective clothing.
WARNING
Diesel fuel is combustible and can cause severe personal injury or death. Do not smoke
near fuel tanks or fuel-burning equipment or in areas sharing ventilation with such
equipment. Keep flames, sparks, pilot flames, electrical arcs and switches, and all other
sources of ignition well away. Keep a multiclass fire extinguisher handy.
Refer to Section 5.1 on page 31 for scheduled fuel filter replacement. Replace the fuel filter if
the engine lacks power.
1. Let engine cool down to prevent igniting any fuel that may be spilled when disconnecting
the fuel filter.
2. Remove the fuel line from the fuel filter. Plug the fuel line to prevent fuel leakage and vapor
accumulation.
3. Disconnect the negative (–) cable at the battery to prevent the engine from starting.
4. Disconnect the two fittings at the fuel filter using two flarenut wrenches so as not to round
the corners or stress the fittings.
5. Remove the filter mounting nut and two (2) bracket mounting screws.
6. Remove old fuel filter.
7. Loosely secure the bracket to the new fuel filter.
8. Loosely secure the new fuel filter and bracket to the base with the two mounting screws.
9. Reconnect the fuel fittings, making sure to thread them in by hand to prevent cross
threading. Tighten one flat past seating.
10. Tighten the bracket and bracket mounting screws.
11. Prime the engine for at least 1 minute to fill the new fuel filter. Check for leaks as the
generator set runs for several minutes.
12. Tighten the connections, if necessary.
13. Connect the negative (–) cable at the battery.
14. Dispose of the old filter in accordance with local environmental regulations.
40
981-0183 (Issue 11)
2-2015
5. Maintenance
No.
Description
No.
Description
1
Fuel Filter
4
Disconnect fuel line from pump
2
Disconnect fuel line to engine
5
Filter Bracket Mounting Screws
3
Filter Mounting Nut
6
Filter Bracket
FIGURE 9.
5.7
FUEL FILTER
Maintaining the Cooling System
The engine cooling system is filled with a 50/50 mixture of ethylene glycol antifreeze and water
when the generator set leaves the factory. The mixture is suitable for temperatures down to –37
o
C (–34 oF).
5.7.1
Cooling System
CAUTION
Operating the generator set when coolant level is low can cause serious engine
damage.
Check the engine coolant level and look for coolant leaks around the bottom of the generator
set and on the ground below. Minor leaks that can be replenished by daily additions of coolant
to the recovery tank should be repaired by a qualified service technician as soon as possible.
Larger leaks are cause fo shutting down the generator set until it can be repaired.
981-0183 (Issue 11)
41
5. Maintenance
No.
2-2015
Description
No.
Description
1
Pressure Cap and System Fill Opening
4
Fill Hose
2
Overflow Hose
5
Coolant Recovery Tank Fill Cap
3
Vent Hose
6
Recovery Tank Fluid Level
FIGURE 10. COOLING SYSTEM
5.7.2
Coolant Level
Check coolant level in the recovery tank before the first startup of each day and fill to the
"COLD" mark if necessary.
5.7.3
Coolant Recommendations
Use the best quality ethylene glycol antifreeze available.
• Antifreeze should be fully formulated with rust inhibitors and coolant stabilizers.
• Mixed with fresh (distilled) water that is low in minerals and corrosive chemicals.
A 50/50 mixture is recommended for all climates and is suitable for temperatures down to –37
o
C (–34 oF).
5.7.4
Draining and Cleaning Cooling System
WARNING
Hot coolant spray can cause severe burns. Let the engine cool before releasing the
pressure cap or removing the drain plug.
42
981-0183 (Issue 11)
2-2015
5. Maintenance
Let the engine cool before removing the pressure cap.
1. Relieve any remaining pressure by turning the cap slowly, without pushing down.
2. When the pressure has been relieved, push down on the cap and turn it the rest of the way
to withdraw it.
WARNING
Ethylene glycol antifreeze is considered toxic. Dispose of it according to local
regulations for hazardous substances.
3. Remove the bottom access cover.
4. Open the radiator drain cock and drain the coolant into a suitable container.
Flush and clean the cooling system before refilling. Radiator cleaning chemicals are available at
local auto parts stores. Follow cleaning and flushing instructions on the product.
No.
1
Description
Bottom Access Cover
No.
2
Description
Radiator Drain Cock
FIGURE 11. LOWER RADIATOR HOSE
981-0183 (Issue 11)
43
5. Maintenance
5.7.5
2-2015
Refilling Cooling System
1. Install the coolant drain plug using pipe thread sealant.
2. Tighten it just enough to prevent leaks when the generator set is running and has warmed
up.
3. Pull the hose connected to the pressure cap assembly out as far and high as it will go, and
fill the system with coolant.
4. When the coolant level reaches the fill opening, start and operate the generator set for a
few minutes and shut it down.
5. Add more coolant if necessary.
6. Secure the pressure cap.
5.8
Exhaust System
WARNING
EXHAUST GAS IS DEADLY! Do not operate the generator set if there is an exhaust leak
or any danger of exhaust gasses entering or being drawn into the vehicle.
WARNING
Grass or brush in contact with the exhaust system can cause fire. Do not park the
vehicle in high grass or brush.
1. Look and listen for exhaust system leaks while the generator set is running. Shut down the
generator set if a leak is found and have it repaired before operating.
2. Look for openings or holes between the generator set compartment and vehicle cab or
living space if the generator set engine sounds louder than usual. Have all such openings
or holes closed off and sealed to prevent exhaust gases from entering the vehicle.
3. Replace dented, bent, or severely rusted sections of the tailpipe and make sure the tailpipe
extends at least 25.4 mm (1 in) beyond the perimeter of the vehicle.
4. Park the vehicle so that generator set exhaust gases disperse away from the vehicle.
Barriers such as walls, snow banks, high grass, brush, and other vehicles can cause
exhaust gases to accumulate in and around the vehicle.
5. Do not operate power ventilators or exhaust fans while the vehicle is standing with the
generator set running. The ventilator or fan can draw exhaust gases into the vehicle.
6. Check all CO monitors to assure proper operation.
5.9
Mechanical System
WARNING
Compressed air, pressure washers, and steam cleaners can cause severe eye injury.
Always wear safety glasses when using.
1. Look for mechanical damage and listen for unusual noises and vibrations.
44
981-0183 (Issue 11)
2-2015
5. Maintenance
2. Check the generator set mounting bolts.
3. Check to see that the generator set air inlet and outlet openings are not clogged with debris
or blocked.
4. Clean accumulated dust and dirt from the generator set. Do not clean the generator set
while it is running or still hot. Protect the generator, air cleaner, control panel, and electrical
connections from water, soap, and cleaning solvents.
5.10
Replacing the Air Filter Element
WARNING
Accidental or remote starting can cause severe personal injury or death. Before
removing a panel or access door, or before working on the generator set, use an
insulated wrench to disconnect the negative (-) cable from the battery to prevent
accidental starting.
WARNING
Engine components (drains, filters, hoses, etc.) can be hot and cause severe burns,
lacerations of the skin, and liquid splash. Use personal protective equipment when
working with or around hazardous materials. Examples of personal protective
equipment include (but are not limited to) safety glasses, protective gloves, hard hats,
steel toed boots, and protective clothing.
Refer to Section 5.1 on page 31 for scheduled air filter element replacement. Under dusty
operating conditions, inspect and replace more often.
1. Remove the front access cover.
2. Unscrew the 2 wingnuts on the filter housing and pull away the air filter housing and air
filter element.
3. Wipe the air filter element sealing surfaces clean and install new air filter element into the
housing and slide back into position.
4. When installing the new air filter element, turn the wingnuts hand tight.
5. Replace the front access cover.
981-0183 (Issue 11)
45
5. Maintenance
No.
2-2015
Description
1
Air Filter Element
2
Air Filter Housing
FIGURE 12. AIR FILTER ELEMENT
5.11
Cleaning the Spark Arrester
WARNING
A hot muffler can cause severe burns. Let the muffler cool down before removing or
installing spark arrester cleanout plugs or screens.
WARNING
Grass or brush in contact with the exhaust system can cause fire. Do not park the
vehicle in high grass or brush.
Refer to Section 5.1 on page 31 for scheduled spark arrester muffler cleaning (meets U.S.
Forest Service requirements). Cleaning is required for maximum generator set performance.
1. Remove the cleanout plug from the muffler.
2. Start and load the generator set to near full power. Let the generator set run for about 5
minutes to expel the soot in the muffler.
3. Stop the generator set, allow the muffler to cool, and reinstall the plug.
46
981-0183 (Issue 11)
2-2015
5. Maintenance
FIGURE 13. SPARK ARRESTER CLEANOUT PLUG
5.12
Storing the Generator Set
Proper storage is essential for preserving top generator set performance and reliability. If the
generator set is not going to be exercised on a regular basis and not be used for more than 120
days, the generator set should be prepared for storage.
WARNING
Carbon monoxide is deadly and can accumulate to dangerous levels in garages and
other confined spaces. Disable the automatic generator starting feature before storing
the vehicle.
1. Disable the automatic generator set starting feature.
2. Change the engine oil and attach a tag indicating the oil grade viscosity.
3. Disconnect the battery cables, negative (–) cable first, from the starting battery and store
the battery according to the battery manufacturer's recommendations.
4. Position the line circuit breaker to OFF.
5.13
Returning the Generator Set to Service
1. Check the oil tag on the generator set and change the oil if the viscosity indicated is not
appropriate for the temperatures expected.
2. Reconnect the starting battery (negative [–] cable last).
3. Replace the air filter element. Use new air filter element if it is dirty.
4. Inspect the generator set.
5. Prime the generator set fuel system by positioning the control switch to STOP/PRIME for
30 seconds. The status indicator stays on while the pump is on.
6. Start the generator set.
7. Position the line circuit breaker to ON when the generator set is ready to power loads.
981-0183 (Issue 11)
47
5. Maintenance
2-2015
This page is intentionally blank.
48
981-0183 (Issue 11)
6
Troubleshooting
6.1
Overview
WARNING
Hot engine parts can cause severe burns. Always allow the engine to cool down before
performing any maintenance or service.
The following paragraphs provide fault code faults and symptom-based faults. If a problem is
not resolved after taking the corrective actions suggested, contact a local dealer or distributor.
See Section 2.4 on page 11.
NOTICE
Maintaining engine oil level, keeping battery connections clean and tight, watching the
fuel gauge, not overloading the generator set, etc. will prevent most shutdowns.
NOTICE
When the generator set and vehicle engine share a common fuel tank, the fuel dip tubes
are usually arranged so that the generator set will run out of fuel first. Marking the
generator set empty point on the fuel gauge will make it easier to tell when to stop the
generator set before running it out of fuel.
6.2
Fault Codes
The generator set control contains extensive diagnostics to detect shutdown faults. Following a
fault shutdown, the control indicates the fault code by flashing the numeric code on the status
indicator in the control switch.
Determine the fault code as follows:
• 1 flash indicates a high engine coolant temperature.
• 2 flashes indicates a low oil pressure fault (Code 2 fault).
• 3 flashes indicates a service fault (Code 3 fault).
1. Press STOP/PRIME on the control switch once to have the 2-digit service fault code
flash.
The 2-digit code consists of two sets of flashes. The first set is of flashes represents
the 10s digit of the code. After a brief pause, the second digit of the code flashes
representing the unit digit of the code. This is followed by a long pause before
repeating the flashing of the fault code.
For example, Fault Code 36 appears as: blink-blink-blink—pause—blink-blink-blinkblink-blink-blink—long pause—repeat
2. Press STOP/PRIME to stop flashing the fault code.
981-0183 (Issue 11)
49
6. Troubleshooting
2-2015
• 4 flashes indicates that cranking exceeded 30 seconds without the engine starting (Code 4
fault).
NOTICE
Fault codes 33 and 34 are not assigned as fault codes. Be careful of interpreting
Fault Codes 3 and 4 as second-level faults.
The fault code stops flashing after 5 minutes. Pressing STOP/PRIME 3 times within 5 seconds
causes the fault code to resume flashing.
NOTICE
The last fault logged continues to flash even though the condition that caused the
shutdown has been corrected.
6.2.1
Code 1 - Engine Over Temperature
Indicates that, during normal operation, the engine coolant temperature exceeded 115 oC (239
F) for 10 seconds.
o
A. Check Engine Coolant Level
If coolant level is low, add coolant as necessary and repair any leaks.
B. Check for Blockages
1. If an air inlet or outlet opening on the bottom of the generator set is blocked, remove
objects.
2. If dirt is fouling the radiation fins, clean dirt out.
NOTICE
Compressed air or washing with water can be helpful in removing debris from
heat exchangers. Do not allow copious amounts of water to enter generator
set components. A pressure washer is NOT advised for cleaning heat
exchangers.
C. Reduce Load
Reduce the number of connected appliances, especially air conditioners and battery
chargers. (Review load management in Loading the Generator Set.)
6.2.2
Code 2 - Low Oil Pressure
Indicates that the low oil pressure cutoff switch did not open.
A. Check Engine Oil Level
1. If the dipstick indicates oil is low, add oil.
2. If oil is above the full mark on dipstick, drain excess oil.
50
981-0183 (Issue 11)
2-2015
6.2.3
6. Troubleshooting
Code 3 - Service Check
See second-level fault code.
6.2.4
Code 4 - Over Crank
Indicates that cranking exceeded 30 seconds without engine starting.
A. Check Fuel Level
1. If fuel level is low, fill the fuel tank.
NOTICE
The generator set fuel pickup tube could be higher up in the fuel tank than the
vehicle engine pickup.
2. Prime the engine fuel system by positioning the control switch to STOP/PRIME for 30
seconds.
B. Check Air Filter Element
Replace the air filter if dirty.
C. Replace Engine Oil
Replace engine oil with oil of proper viscosity for the ambient temperature.
NOTICE
High oil viscosity can slow down cranking speed.
D. Check Fuel Fittings
1. Tighten any fuel fitting if there is a fuel or air leak.
2. Reprime the engine fuel system by positioning the control switch to STOP/PRIME for
30 seconds.
E. Replace Fuel Filter
6.2.5
Code 12 - Over Voltage
Indicates the control is unable to maintain rated voltage.
A. Contact Local Dealer or Distributor
6.2.6
Code 13 - Under Voltage
Indicates the control is unable to maintain rated voltage.
981-0183 (Issue 11)
51
6. Troubleshooting
2-2015
A. Reduce Load
Reduce the number of connected appliances, especially air conditioners and battery
chargers. (Review load management in Loading the Generator Set.)
6.2.7
Code 14 - Over Frequency
Indicates the engine governor is unable to maintain rated frequency.
A. Contact Local Dealer or Distributor
6.2.8
Code 15 - Under Frequency
Indicates the engine governor is unable to maintain rated frequency.
A. Reduce Load
Reduce the number of connected appliances, especially air conditioners and battery
chargers. (Review load management in Loading the Generator Set.)
6.2.9
Code 19 - Governor Actuator
Indicates the control sensed an open or shorted circuit.
A. Contact Local Dealer or Distributor
6.2.10 Code 22 - Governor Actuator Overload
Indicates the duration of operation is near full-duty cycle beyond design limit.
A. Reduce Load
Reduce the number of connected appliances, especially air conditioners and battery
chargers. (Review load management in Loading the Generator Set.)
B. Check Air Filter Element
Replace the air filter if dirty.
C. Check Exhaust System
If exhaust system is blocked, remove blockage.
6.2.11 Code 24 - Faulty Temperature Sender
Indicates the control sensed open sender.
A. Contact Local Dealer or Distributor
6.2.12 Code 27 - Voltage Sense
Indicates the control is unable to sense output voltage.
52
981-0183 (Issue 11)
2-2015
6. Troubleshooting
A. Contact Local Dealer or Distributor
6.2.13 Code 29 - High Battery Voltage
Indicates that voltage across the battery system is greater than 19 Volts.
A. Check Battery
1. Check battery bank connections and reconnect if necessary so that the 12 Volt
batteries serving the generator set are connected in parallel (12 Volt) rather than in
series (24 Volt).
2. Select a lower battery boost charge rate.
6.2.14 Code 32 - Low Cranking Speed
Indicates that cranking speed is less than 180 RPM for more than 2 seconds.
A. Check Battery
1. Clean and tighten the positive (+) and negative (–) battery cable connections at the
battery and at the generator set.
2. Recharge or replace
recommendations.
the
battery.
Refer
to
the
battery
manufacturer's
B. Replace Engine Oil
Replace engine oil with oil of proper viscosity for the ambient temperature.
NOTICE
High oil viscosity can slow down cranking speed.
6.2.15 Code 35 - Control Card Failure
Indicates that a microprocessor EEPROM error occurred during self test.
A. Contact Local Dealer or Distributor
6.2.16 Code 36 - Engine Stopped
Indicates that the engine stopped without receiving a command from the control.
A. Check Fuel Level
1. If fuel level is low, fill the fuel tank.
NOTICE
The generator set fuel pickup tube could be higher up in the fuel tank than the
vehicle engine pickup.
981-0183 (Issue 11)
53
6. Troubleshooting
2-2015
2. Prime the engine fuel system by positioning the control switch to STOP/PRIME for 30
seconds.
B. Check Air Filter Element
Replace the air filter if dirty.
C. Check for Mechanical Damage
6.2.17 Code 38 - Over Current (Field Overload)
Indicates low power factor loads.
A. Reduce Load
Reduce the number of connected appliances, especially air conditioners and battery
chargers. (Review load management in Loading the Generator Set.)
B. Check Appliances for Proper Operation
Have air conditioners and other appliances checked for proper operation.
6.2.18 Code 41 - Generator Rotor
Indicates control is unable to sense field or output voltage.
A. Contact Local Dealer or Distributor
6.2.19 Code 42 - Processor
Indicates that a microprocessor ROM error occurred during self test.
A. Contact Local Dealer or Distributor
6.2.20 Code 43 - Processor
Indicates that a microprocessor RAM error occurred during self test.
A. Contact Local Dealer or Distributor
6.2.21 Code 45 - Speed Sense
Indicates the control is unable to sense quadrature frequency.
A. Contact Local Dealer or Distributor
6.2.22 Code 48 - Generator Field Sense
Indicates the control is unable to sense field voltage.
54
981-0183 (Issue 11)
2-2015
6. Troubleshooting
A. Contact Local Dealer or Distributor
6.2.23 Code 57 - Over Prime
Indicates that priming exceeded 3 minutes.
A. Check Control Switch
Check for and remove any object that may be holding either control switch (remote or
generator set) in the STOP/PRIME position.
6.3
Symptom Based
Diagnosis of some problems involves observing system operation.
6.3.1
Status Indicator Not Working
Indicates that there could be faulty connections or no battery voltage.
A. Check Other Control Switch
Try the generator set control switch if the remote control switch start doesn't work, and vice
versa.
B. Check Battery
1. Clean and tighten the positive (+) and negative (–) battery cable connections at the
battery and at the generator set.
2. Recharge or replace
recommendations.
6.3.2
the
battery.
Refer
to
the
battery
manufacturer's
Starting Batteries Run Down
Indicates problem with batteries, connections, charging system, or parasitic loads.
A. Check Battery
1. Clean and tighten the positive (+) and negative (–) battery cable connections at the
battery and at the generator set.
2. Recharge or replace
recommendations.
the
battery.
Refer
to
the
battery
manufacturer's
B. Battery Charging System
Install or service a battery charging system in the vehicle.
6.3.3
Starter Engages-Disengages
Indicates cranking voltage dips below 6 Volts.
981-0183 (Issue 11)
55
6. Troubleshooting
2-2015
A. Use Vehicle to Start Generator Set
Run the vehicle propulsion engine while trying to start the generator set—the battery
charging alternator may be able to maintain starting voltage high enough to start the
generator set.
B. Check Battery
1. Clean and tighten the positive (+) and negative (–) battery cable connections at the
battery and at the generator set.
2. Recharge or replace
recommendations.
the
battery.
Refer
to
the
battery
manufacturer's
C. Change Battery Cables
Increase battery cable size or run parallel cables.
6.3.4
No Power—Generator Set Running, Status Light On
Indicates line circuit breaker is OFF, or tripped due to short circuit or overload.
A. Check Line Circuit Breakers
1. Turn on or reset the line circuit breaker on the generator set.
2. Turn on or reset the line circuit breaker on the main distribution panel in the vehicle.
56
981-0183 (Issue 11)
7
Maintenance Record
TABLE 10. MAINTENANCE RECORD
Record all periodic and unscheduled maintenance/service. See Periodic Maintenance section.
DATE
HOUR
METER
READING
MAINTENANCE OR SERVICE PERFORMED
Record the name, address, and phone number of your authorized Cummins Onan service center.
981-0183 (Issue 11)
57
7. Maintenance Record
2-2015
This page is intentionally blank.
58
981-0183 (Issue 11)
Cummins Power Generation
1400 73rd Ave. NE
Minneapolis, MN 55432 USA
Phone 1 763 574 5000
Toll-free 1 800 888 6626
Fax 1 763 574 5298
Copyright © 2015 Cummins Power Generation, Inc. All rights reserved.
Cummins, Onan, the "C" logo, and "Performance you rely on." are
trademarks of Cummins Inc.