1
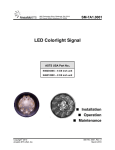
Union Switch & Signal Inc., an Ansaldo Signal
company
1000 Technology Drive, Pittsburgh, PA 15219 ● 645 Russell Street, Batesburg, SC 29006
SM 6800N
MicroLok® II
LED Signal System
with the US&S
LED12 PCB
US&S Part No.
N4620440X
Installation
Operation
Maintenance
Copyright © 2007
Union Switch & Signal Inc.
Original
June 2007
Proprietary Notice
This document and its contents are the property of Union Switch & Signal Inc.
hereinafter US&S). This document has been furnished to you on the following
conditions: no right or license under any patents or any other proprietary right in respect
of this document or its content is given or waived in supplying this document. This
document or its content are not to be used or treated in any manner inconsistent with the
rights of US&S, or to its detriment, and are not to be copied, reproduced, disclosed to
others, or disposed of except with the prior written consent of US&S.
Important Notice
US&S constantly strives to improve our products and keep our customers apprised of changes
in technology. Following the recommendations contained in the attached service manual will
provide our customers with optimum operational reliability. The data contained herein
purports solely to describe the product, and does not create any warranties.
Within the scope of the attached manual, it is impossible to take into account every eventuality
that may arise with technical equipment in service. Please consult your local US&S sales
representative in the event of any irregularities with our product.
We expressly disclaim liability resulting from any improper handling or use of our equipment,
even if these instructions contain no specific indication in this respect. We strongly
recommend that only approved US&S spare parts be used as replacements.
SM 6800N, Original, June 2007
i
Revision History
Revision History
ii
Rev.
Date
Nature of Revision
Original
June 2007
Initial Issue
SM 6800N, Original, June 2007
Table of Contents
1
Introduction............................................................................................................................... 1-1
2
2.1
2.2
2.3
2.4
2.5
System Description .................................................................................................................. 2-1
LED Signals........................................................................................................................... 2-1
The LED12 PCB .................................................................................................................... 2-2
Driver Protection PCB ........................................................................................................... 2-3
Constant Current Regulator................................................................................................... 2-4
Detailed System Description ................................................................................................. 2-5
3
LED System Installation ........................................................................................................... 3-1
3.1 Mechanical Installation .......................................................................................................... 3-1
3.2 System Wiring ....................................................................................................................... 3-1
3.2.1 LED12 PCB Upper Connector and Address Selection .................................................. 3-1
3.2.2 Signal and Protection Board Wiring ............................................................................... 3-1
3.3 Example Wiring Diagrams ..................................................................................................... 3-4
3.3.1 Standard Configuration with Regulator Sharing............................................................. 3-4
3.3.2 Common Return Configuration With Failover-to-Red .................................................... 3-6
3.3.3 Standard Configuration .................................................................................................. 3-8
3.3.4 Multiple MicroLoks at a Single Location......................................................................... 3-8
4
Application Logic Programming................................................................................................ 4-1
4.1 Board Declaration.................................................................................................................. 4-1
4.2 Example Declaration ............................................................................................................. 4-1
4.3 PCB System Bits ................................................................................................................... 4-1
4.3.1 NV.PB ............................................................................................................................ 4-1
4.3.2 Retest.LEDs ................................................................................................................... 4-2
4.3.3 Example Usage of Board System Bits ........................................................................... 4-2
4.4 Sample Application Program .................................................................................................4-2
4.5 Application Programming Notes ............................................................................................ 4-6
4.5.1 Flashing.......................................................................................................................... 4-6
5
LED Signal System Troubleshooting........................................................................................ 5-1
5.1 Typical System Measurements ............................................................................................. 5-1
5.1.1 Constant Current Regulator ........................................................................................... 5-1
5.1.2 LED12 Board.................................................................................................................. 5-2
5.1.3 Driver Protection Board..................................................................................................5-2
5.1.4 LED Signal ..................................................................................................................... 5-2
5.1.5 Replacing LED Protection Board ................................................................................... 5-2
5.2 LED Fault Detection (Light-Out) ............................................................................................5-3
5.3 Troubleshooting Notes .......................................................................................................... 5-4
5.3.1 Field Testing Open Signal Detection.............................................................................. 5-4
5.3.2 Operation without the Constant Current Regulator Connected...................................... 5-5
5.3.3 Failure to Provide Field Side Power to LED12 Board .................................................... 5-5
5.3.4 Hints on Troubleshooting LED Signals .......................................................................... 5-5
6
Parts List .................................................................................................................................. 6-1
7
RAIL Team and Technical Support .......................................................................................... 7-1
SM 6800N, Original, June 2007
iii
Table of Contents
List of Figures
Figure 1–1 - The Components of the US&S LED Signal System ..................................................... 1-1
Figure 2–1 - LED System ................................................................................................................. 2-1
Figure 2–2 - The LED Signal ............................................................................................................ 2-1
Figure 2–3 - The LED12 Card .......................................................................................................... 2-2
Figure 2–4 - Driver Protection PCB (N4620520X)............................................................................ 2-3
Figure 2–5 - Constant Current Regulator (N34801301) ................................................................... 2-4
Figure 2–6 - Typical Existing Signaling System Block Diagram ....................................................... 2-5
Figure 2–7 - US&S LED Signal System Block Diagram ................................................................... 2-5
Figure 3–1 - LED Signal Driver Pinout Drawing ............................................................................... 3-2
Figure 3–2 - Standard Configuration – Regulator Sharing ............................................................... 3-5
Figure 3–3 - Common Return Configuration with Failover-to-Red ................................................... 3-7
Figure 3–4 - Standard Configuration – Regulator Sharing (Double Break) ...................................... 3-9
Figure 5–1 - Pins on the Constant Current Regulator ...................................................................... 5-1
Figure 5–2 - LED Protection Board Orientation LED Signal ............................................................. 5-3
List of Tables
Table 3-1 - Maximum Signal Distance from the Signal House ......................................................... 3-1
Table 5-1 - Valid Constant Current Regulator Readings .................................................................. 5-1
Table 5-2 - Valid LED12 Vital Output Readings ............................................................................... 5-2
Table 5-3 - Fault Clearing Logic ....................................................................................................... 5-4
Table 6-1 - Part Numbers for the US&S LED Signal System Components...................................... 6-1
iv
SM 6800N, Original, June 2007
Introduction
1 Introduction
The Union Switch and Signal (US&S) LED Signal System consists of the LED signals (in four distinct
colors) (PN N4620440X) complete with the LED Protection Board (PN N46205001), a Constant
Current Regulator (PN N34801301), an LED12 Signal Driver Printed Circuit Board (PCB) (PN
N17066101), and a Driver Protection PCB (PN N4620520X). The LED12 Signal Driver PCB controls
the US&S LED signals.
CAUTION
The LED12 Signal Driver PCB is designed to vitally drive the US&S
LED signals and only those signals. It must not be used to drive
incandescent signals or other non-US&S LED signals.
Each LED signal contains several high-intensity LEDs which operate on a constant current provided
by the constant current regulator. The LED12 PCB provides vital control of the signals, turning them
on and off as needed, and monitors their condition. The Driver Protection PCB is in series with the
signal and provides surge protection for the signal.
The components of the system are ordered separately and installed as a system based on the specific
application of the signals. All of the components of the system are shown in Figure 1–1.
LED Signal Complete
with LED Protection PCB
The LED 12 Signal
Driver Board
The Driver
Protection Board
Constant Current
Regulator
Figure 1–1 - The Components of the US&S LED Signal System
SM 6800N, Original, June 2007
1-1
Introduction
1-2
SM 6800N, Original, June 2007
System Description
2 System Description
This section contains a brief description of the LED System components and their function in relation
to the overall system. A block diagram of the LED System is shown in Figure 2–1.
G96 BUS to CPU
VCOR
Contact
Constant Current
Regulator
(N34801301)
Output
Battery
LED Driver
PCB
(N17066101)
WAYSIDE
FIELD
WIRING
LED Driver
PCB
Protection Board
(N4620520x)
SIGNAL HEAD
LED Signal
Protection Board
(N46205001)
LED Signal
(N4620440x)
Figure 2–1 - LED System
2.1
LED Signals
The LED signals (Figure 2–2) are available in red, amber (yellow), cyan (green), and lunar (white) in
6-3/8” diameter (PN N4620480X). These signals include high intensity LEDs, in series, which are
powered by a constant current source. Because the signals are designed to operate with an external
constant current source; no DC/DC converters or other active electronics are included. The signal
system only includes LEDs and other passive components for diagnostics and surge protection. When
combined with the vital output LED12 Signal Driver PCB, the system can provide true light-out
detection.
LED
PROTECTION
BOARD
FRONT
GROUND
STUD
BACK
Figure 2–2 - The LED Signal
SM 6800N, Original, June 2007
2-1
LED System Description
2.2
The LED12 PCB
The LED12 Signal Driver PCB (N17066101) (Figure 2–3) provides 12 vital outputs to control the
LED signals. These outputs are controlled by “high side” software-controlled switches, which connect
and disconnect the output of the constant current regulators for the LED signals. The LED12 PCB
performs diagnostic and light-out detection functions without the use of external “check pulses.” In
addition it provides a continuous continuity check of the LEDs. The LED12 PCB has a non-vital
pushbutton on the front panel to set the state of the board’s system bit (refer to Section 4.3.1).
The LED12 PCB is designed to be installed in the standard MicroLok II cardfile. The LED12 PCB
can light all of the LED signals at once if necessary provided there is a current regulator for each of the
LED signals (Section 2.4).
CAUTION
The LED12 Signal Driver PCB is designed to vitally drive the US&S
LED signals and only those signals. It must not be used to drive
incandescent signals or other non-US&S LED signals.
Figure 2–3 - The LED12 Card
2-2
SM 6800N, Original, June 2007
System Description
2.3
Driver Protection PCB
The Driver Protection PCB (N4620520X) (Figure 2–4) is an entrance panel mounted board. It is used
in combination with US&S lightning arrestors to provide a high level of surge protection for the Signal
Driver board.
The Driver Protection PCB (N46205201), which is mounted in the house, is designed to terminate
house wiring on the left hand side of the board and field wiring on the right hand side of the board. An
optional version of the Driver Protection PCB (N46205202) allows terminating the house wiring on the
right hand side of the board and field wiring on the left hand side of the board. Both versions of the
board use the same components and allow the components to be viewed for inspection when mounted
in the house.
DRIVER BOARD PROTECTION PCB
(N46205201)
HOUSE WIRING ON LEFT SIDE OF BOARD
DRIVER BOARD PROTECTION PCB
(N4620502)
HOUSE WIRING ON RIGHT SIDE OF BOARD
Figure 2–4 - Driver Protection PCB (N4620520X)
SM 6800N, Original, June 2007
2-3
LED System Description
2.4
Constant Current Regulator
CAUTION
The constant current regulator is designed to be installed on a
standard DIN rail. When installed with other regulators there should
be at least a 1/2” separation between the regulators.
The Constant Current Regulator (PN N34801301) (Figure 2–5) provides a constant 350mA regulated
current output for driving the LED signals. The output of the regulator includes both open and short
circuit protection.
Note
Only US&S Constant Current Regulators are to be used with the US&S LEDs.
A regulator is required for each “ON” LED signal in a system; however, a
regulator can be shared between signals that will never be on at the same time.
The power consumption of the constant current regulator is:
With the Regulator Powered and the LED signal ON - 16.5W
With the Regulator Powered and the LED signal OFF - 1.6W
Figure 2–5 - Constant Current Regulator (N34801301)
2-4
SM 6800N, Original, June 2007
System Description
2.5
Detailed System Description
The US&S LED Signal System is a unique concept in railroad LED signaling. Some LED equipment
has been designed to perform like incandescent bulbs; so they can be powered by existing incandescent
lamp drivers. The US&S LED Signal operates from an external constant current source. This design
allows for accurate monitoring of the operational state of the LED devices in the signal.
Figure 2–6 illustrates a typical existing signaling system, where a software-controlled switch is used to
apply and remove a voltage source (battery) from the signal load.
Figure 2–7 illustrates the US&S LED Signal System. This system differs from the typical existing
system in that the signal load is powered by an external regulated current source (rather than a voltage
source) which is applied and removed from the signal load via a software-controlled switch.
INCANDESCENT OR
LED SIGNAL WITH
INTERNAL DC TO DC
CONVERTER, POWER
SUPPLY, AND REGULATOR
+
_
SOFTWARE CONTROLLED
SWITCH
BATTERY
(9.8 - 16.2V)
Figure 2–6 - Typical Existing Signaling System Block Diagram
US&S
CONSTANT
CURRENT
REGULATOR
350mA
SOFTWARE CONTROLLED
SWITCH
US&S LED SIGNAL
+
_
BATTERY
(9.8 - 16.2V)
Figure 2–7 - US&S LED Signal System Block Diagram
SM 6800N, Original, June 2007
2-5
LED System Description
2-6
SM 6800N, Original, June 2007
LED System Installation
3 LED System Installation
3.1
Mechanical Installation
®
The LED12 board is installed as part of the MicroLok II system, the Constant Current Regulator is
DIN-rail mounted in the house, and the Driver Board Protection PCB is mounted on the AAR
terminals at the entrance rack.
3.2
System Wiring
3.2.1 LED12 PCB Upper Connector and Address Selection
The pinouts and addresses for the LED board are presented in Figure 3–1.
Note
Even though the LED12 PCB will light up to 12 LED signals at once, the figures
in this manual show, in most cases, only three LED signals for illustration
purposes only and are not meant to imply that the LED12 PCB should be limited
to lighting only three LED signals at once. Nor should it be inferred that the
LED signals be all located in the same signal head.
3.2.2 Signal and Protection Board Wiring
Table 3-1 summarizes the maximum distance a signal can be located from the signal house based on
the wire gauge selected for the application. As noted in the table, the distances already include the
series resistance of all the lightning/surge protection circuitry. However, the series resistance of
additional components such as house wiring, relay contacts, and terminal connections will reduce the
maximum distance for a signal (they will need to be included in the 3-ohm limit for each leg).
Table 3-1 - Maximum Signal Distance from the Signal House
Wire Gauge
(AWG)
Note 1
Ohms per 1000 ft
Maximum signal distance
(wire length for each leg)
6
0.3951
7500 ft
8
0.6282
4700 ft
9
0.7921
3700 ft
10
0.9989
3000 ft
12
1.588
1800 ft
14
2.525
1100 ft
Distances are based on maximum line resistance of 3 ohms per leg (6 ohms total).
Note 2
Distances include series resistance of all lightning/surge protection circuits.
Note 3
Additional series resistance of house wiring, relay contacts, terminal connections, etc. will
reduce the maximum distances allowed.
SM 6800N, Original, June 2007
3-1
LED System Installation
Top Connector
Address Select Jumpers
PCB 48-pin Top Connector
Pin-Outs
SEL+
SW1
E32 White
E30 Brown
C30 Red
A30 Orange
E28 Yellow
C28 Green
A28 Blue
E26 Black
SW2
SW3
SW4
SW5
SW6
GND
B12
Constant Current
Regulator
N34800101
VCOR
Relay
3 BATT+
1 BATT -
3 BATT+
1 BATT -
N12
B12
VCOR
Relay
OUT
OUT
* Either Out 2
or 4 can be
used for input
to PCB
To Board
Addressing
Circuits
FIELD
WIRING
SIGNAL
HOUSE
Software
Controlled
Switches
4*
LED Signal
E12 IN #1
LED #1
E2
C16 IN #2
LED #2
C2
E14 IN #3
LED #3
E4
C22 IN #4
LED #4
C4
LED Protection
PCB
LED Driver
Protection PCB
LED PCB
LED
2*
4
SIGNAL
HEAD
RED
USGA
RED
EARTH
LED Protection
PCB
LED PCB
2
E16 IN #5
LED#5
E6
C24 IN #6
LED #6
C6
C26 IN #7
LED #7 C10
LED
AMBER
(YELLOW)
USGA
RED
EARTH
LED Protection
PCB
LED PCB
LED
CYAN
(GREEN)
USGA
RED
EARTH
N12
E24 IN #8
LED #8 E10
A22 IN #9
LED #9 A16
A24 IN #10
LED #10 A18
A12 IN #11
LED #11 A20
EARTH
LED Signal
LED Protection
PCB
LED Driver
Protection PCB
LED PCB
LED
USGA
RED
RED
USGA
RED
A14 IN #12
US&S LED Signal
LED #12 E22
EARTH
LED Protection
PCB
EARTH
USGA
BLUE
LED PCB
LED
E18
AMBER
(YELLOW)
USGA
RED
E20
US&S LED Signal
EARTH
LED Protection
PCB
C18
LED PCB
LED
CYAN
(GREEN)
N12
USGA
RED
EARTH
C20
E8
C8
C12
A2
A4
A6
A8
A10
C12
C14
USGA
RED
N12
EARTH
EARTH
LED12 Driver
Vital Output PCB
Figure 3–1 - LED Signal Driver Pinout Drawing
3-2
SM 6800N, Original, June 2007
LED System Installation
The following is a list of wiring specific requirements/notes for the US&S LED Signal System:
•
For all applications, the use of the lightning/surge protection components of the LED signal
system is required.
•
US&S recommends the use of twisted pair wiring (two to three turns per foot) to minimize
possible noise. This should be done wherever possible on all I/O wiring.
•
US&S recommends the physical separation of clean and noise generating wiring. Ideally, all
outputs are gathered in one bundle, inputs are gathered in another bundle, and power wiring is
gathered in a third bundle. Each of these bundles is physically separated from each other (6”
preferred) and all bundles are physically separated from other house wiring. It is particularly
important to maintain this physical separation from high-current, noise generating wiring.
•
All field wiring should be configured to minimize cross talk between wires. Cables and wires
should be kept as short as possible to minimize induced line noise. Case/house wiring layouts
should also be arranged to minimize noise. Battery leads should be as short as possible and
must be isolated as much as possible from noisy wiring.
•
The US&S Common Mode Filter (N4515521001) is recommended for use on the battery lines
to the MicroLok II and all battery-powered LED signal system components (including battery
broken-by-relay contacts). This filter needs to be located as close as possible to the equipment
to maximize its effectiveness. Note that on MicroLok II systems that include LAMP16 PCBs
in addition to LED12 PCBs, power to the LAMP16 PCB and incandescent signals must NOT
be filtered. Using the filter in this instance can cause check-pulse problems.
•
Additional loads, such as local indicators, cannot be connected across the signal leads of the
LED signal.
•
Multiple signals cannot be wired in series or parallel (i.e., color position lights must be
separately wired to individual constant current sources).
•
The outputs of multiple constant current sources should not be connected in parallel or series.
•
Fuses are not needed/recommended on the signal outputs; the US&S constant current regulator
output includes short-circuit protection, and no damage will occur to the system if an output is
inadvertently shorted to ground. Fuses can be installed on the system battery connections to the
system as required. These fuses can be installed in the circuit between VCOR-1 and terminal
B12.
•
Slide-wire resistors are not required for use with the LED signals and should never be installed.
Also, the LED signals cannot be dimmed by switching in a series resistance, as can typically be
done with an incandescent signal.
•
The LED signal has five terminals which are clearly marked (three require a field connection;
two have no external connection). Ensure that the connections are made to the proper
terminals.
•
The LED signal field terminals have a polarity that must be observed, where incandescent
signals typically do not. A signal hooked up with reversed polarity will not operate and could
eventually damage the signal.
SM 6800N, Original, June 2007
3-3
LED System Installation
3.3
Example Wiring Diagrams
3.3.1 Standard Configuration with Regulator Sharing
Figure 3–2 illustrates the standard configuration for the LED signal system components with regulator
sharing (three signals shown). The constant current regulator can only power one LED signal at a
time. If multiple LED signals will never be on at the same time, these LED signals can share the same
constant current regulator. Because the constant current regulator is only in use when a signal is the
ON state, a single constant current regulator can be shared between multiple signals provided that only
one signal is ON at any given time.
VCOR contacts are used on the B12 power supplied to the LED12 PCB and the constant current
regulator(s), so that under a system reset condition all signals will be dark.
The maximum allowable length for the field wiring can be found in Table 3-1.
3-4
SM 6800N, Original, June 2007
B12
SM 6800N, Original, June 2007
N12
VCOR-1
N12
B12
1
3
1
3
1
3
OUT
OUT
EARTH
USGA
RED
USGA
BLUE
BATT-
BATT+
EARTH
USGA
RED
OUT
Constant Current Regulator
BATT-
BATT+
Constant Current Regulator
BATT-
BATT+
Constant Current Regulator
2
4
2
4
2
4
VCOR-1
LED12 PCB
BATT +
C4
C22
A16
A22
E8
C8
C12
C14
A2
A4
A6
A8
A10
BATT-
E22
A14
E18
E20
C18
C20
A20
A12
A18
E10
E24
A24
C10
C6
C26
C24
E6
E4
E14
E16
C2
E2
C16
E12
(ADDRSEL I /O not shown )
N12
USGA
RED
Driver Protection PCB
USGA
RED
Driver Protection PCB
USGA
RED
Driver Protection PCB
EARTH
EARTH
EARTH
SIGNAL
HOUSE
FIELD
WIRING
LED
LED PCB
LED SIGNAL
LED Protection PCB
LED
LED PCB
LED SIGNAL
LED Protection PCB
LED
LED PCB
LED SIGNAL
LED Protection PCB
EARTH
SIGNAL
HEAD
LED System Installation
Figure 3–2 - Standard Configuration – Regulator Sharing
3-5
LED System Installation
3.3.2 Common Return Configuration With Failover-to-Red
Figure 3–3 illustrates the common return configuration for the LED signaling system components
(three signals shown) when using a shared regulator and failover-to-red.
This configuration is supported with the following limitations:
•
Only one signal can be on at a given time since the regulator is being shared.
•
The resistance of the common return leg must be kept as low as possible within the 3-ohm limit
as described in Table 3-1. The heaviest gauge wire possible should be used for this return.
Three VCOR contacts are used to implement failover-to-red for a signal head:
•
VCOR-1 – The back contact connects the constant current regulator output directly to the RED
signal when the system is in reset, causing it to light. During normal operation, the front
contact will connect the constant current regulator output to the driver board, so that all signals
can be powered under application control.
•
VCOR-2 – The back contact connects the RED signal directly to the constant current regulators
output when the system is in reset, causing it to light. During normal operation, the front
contact will connect the RED aspect to the driver board, and the state of the RED aspect will be
under application control.
•
VCOR-3 – This contact removes B12 from the LED12 board. Note how the power to the
regulators is not broken by a relay contact (the contacts are on the output of the regulator).
The maximum allowable length for the field wiring can be found in Table 3-1.
3-6
SM 6800N, Original, June 2007
B12
SM 6800N, Original, June 2007
N12
VCOR-1
N12
B12
1
3
EARTH
USGA
RED
USGA
BLUE
BATT-
BATT+
EARTH
USGA
RED
OUT
Constant Current Regulator
2
4
VCOR-1
LED12 PCB
BATT +
E8
C8
C12
C14
A2
A4
A6
A8
A10
BATT-
E22
A14
N12
A20
A12
E18
E20
C18
C20
A18
C10
C26
A24
C6
C24
A16
E6
E16
A22
C4
C22
E10
E4
E14
E24
C2
E2
C16
E12
(ADDRSEL I /O not shown)
VCOR -2
USGA
RED
Driver Protection PCB
USGA
RED
Driver Protection PCB
USGA
RED
Driver Protection PCB
EARTH
EARTH
EARTH
SIGNAL
HOUSE
FIELD
WIRING
EARTH
SIGNAL
HEAD
LED Protection PCB
LED Protection PCB
CYAN
(GREEN)
LED
LED PCB
LED
AMBER
(YELLOW)
LED PCB
RED
LED
LED PCB
LED SIGNAL
LED Protection PCB
LED System Installation
Figure 3–3 - Common Return Configuration with Failover-to-Red
3-7
LED System Installation
3.3.3 Standard Configuration – Regulator Sharing (Double Break)
As a variation on the standard configuration shown in Figure 3–2, a relay contact can also be added to
the return of the signals, as shown in Figure 3–4 (VCOR-2) to provide a double-break (both power and
ground) to the signals under a reset condition.
The maximum allowable length for the field wiring can be found in Table 3-1.
3.3.4 Multiple MicroLoks at a Single Location
In locations where there are two or more MicroLok II cardfiles that are each driving US&S LED
signals, there are specific application requirements to ensure that when one or more MicroLok II are
under reset conditions the aspects return to a known safe state:
3-8
•
All relay contacts corresponding to a single MicroLok II cardfile LED signal system shall be
energized by the CPS in that system. Do not use the CPS from another cardfile to energize
relays, or share a single CPS between all of the cardfiles. This is necessary as all the cardfiles
in the location will likely not reset at the same time.
•
Do not share the constant current regulators between signals driven by separate cardfiles.
•
Make use of the “double break” scheme as shown in Figure 3–4. This will prevent signals from
lighting due to output shorts between the I/O of the separate cardfiles.
SM 6800N, Original, June 2007
B12
SM 6800N, Original, June 2007
N12
VCOR-1
N12
B12
1
3
EARTH
USGA
RED
USGA
BLUE
BATT-
BATT+
EARTH
USGA
RED
OUT
Constant Current Regulator
2
4
VCOR-1
LED12 PCB
BATT+
E10
A16
A18
A20
E22
E24
A22
A24
A12
A14
E8
C8
C12
C14
A2
A4
A6
A8
A10
BATT -
C10
C26
E18
E20
C18
C20
C6
C24
C4
C22
E6
E4
E14
E16
C2
E2
C16
E12
(ADDRSEL I /O not shown )
N12
USGA
RED
Driver Protection PCB
USGA
RED
Driver Protection PCB
USGA
RED
Driver Protection PCB
EARTH
EARTH
EARTH
SIGNAL
HOUSE
FIELD
WIRING
EARTH
LED Protection PCB
LED Protection PCB
LED
CYAN
(GREEN)
LED PCB
AMBER
(YELLOW)
LED
LED PCB
RED
LED
LED PCB
LED SIGNAL
LED Protection PCB
SIGNAL
HEAD
LED System Installation
Figure 3–4 - Standard Configuration – Regulator Sharing (Double Break)
3-9
LED System Installation
3-10
SM 6800N, Original, June 2007
Application Logic Programming
4 Application Logic Programming
4.1
Board Declaration
This section contains the information on how to declare a board in a MicroLok II Application Program.
4.2
Example Declaration
BOARD: Board.Name
ADJUSTABLE ENABLE: 1
TYPE: LED12
OUTPUT:
SIGNAL.OUTPUT.1, SIGNAL.OUTPUT.2, SIGNAL.OUTPUT.3,
SIGNAL.OUTPUT.4, SIGNAL.OUTPUT.5, SIGNAL.OUTPUT.6,
SIGNAL.OUTPUT.7, SIGNAL.OUTPUT.8, SIGNAL.OUTPUT.9, SIGNAL.OUTPUT.10,
SIGNAL.OUTPUT.11, SIGNAL.OUTPUT.12;
SIGNAL.GOOD:
SIGNAL.GOOD.1, SIGNAL.GOOD.2, SIGNAL.GOOD.3, SIGNAL.GOOD.4,
SIGNAL.GOOD.5, SIGNAL.GOOD.6,
SIGNAL.GOOD.7, SIGNAL.GOOD.8, SIGNAL.GOOD.9, SIGNAL.GOOD.10,
SIGNAL.GOOD.11, SIGNAL.GOOD.12;
As for other vital I/O boards, unused outputs must be declared as SPARE if a higher numbered output
is used. Unused outputs above the highest number used output do not have to be declared.
4.3
PCB System Bits
This section describes two bits unique to the LED12 PCB – the NV.PB bit and the Retest.LEDs bit.
4.3.1 NV.PB
The LED12 PCB has a non-vital pushbutton on the front panel. Pressing this button sets the state of
the board’s system bit, NV.PB. The MicroLok II must detect the button to have been released before it
will respond to a second set. This non-vital input can be used in the application to trigger logic. An
example is presented in Section 4.4.
WARNING
Application logic should be written to always examine the
SIGNAL.GOOD system bit and to turn OFF a signal that has been
detected by the MicroLok II diagnostics to be faulty. Failure to do so
may result in a signal that could appear as partially illuminated or
intermittent which could cause problems.
This is similar to the way the LAMP.OUT system bit must be used for lamps driven by the LAMP16
board. Refer to US&S Service Manual SM-6800D, Appendix B. Note that the polarity of the
SIGNAL.GOOD system bit is SET when the MicroLok II diagnostics determine the signal to be
working properly, and CLEAR when they determine the signal to be faulty. This is the opposite of the
polarity for the LAMP.OUT system bit used for LAMP16 signals.
SM 6800N, Original, June 2007
4-1
Application Logic Programming
4.3.2 Retest.LEDs
Setting this application bit (1) will clear the fault status and set the .SIGNAL.GOOD bits for all signals
connected to the LED12 board. Retesting of the signals will commence immediately and in one
second the fault status of all signals, and their .SIGNAL.GOOD bits, will be updated. The
Retest.LEDs system bit has a slow pick of three seconds, is edge triggered, and has a slow drop of 10
seconds. The application bit must be set (1) for three seconds before the application will process the
system bit. The Retest.LEDs must be cleared (0) before the application will recognize another set (1).
After the Retest.LEDs system bit is set (1), no transitions of the bit will be processed for 10 seconds.
This prevents logic from repeatedly clearing the fault status.
4.3.3 Example Usage of Board System Bits
ASSIGN BoardName.LED12.NV.PB to BoardName.LED12.Retest.LEDs;
4.4
Sample Application Program
/* Example program is an intermediate with a DC track and Vital Peer link on one side and a Microtrax
Coded Track Circuit on the other side, using an LED 12 and a Lamp 16 lamp driver in a Microlok II Card
File. Both the Lamp 16 and LED 12 are shown to illustrate the differences in using this boards.
*/
INTERFACE
LOCAL
/* Track board, maybe disabled for trouble shooting purposes.
to perform any useful function. */
This board is required for the program
BOARD: MTRX
ADJUSTABLE ENABLE: 1
TYPE: TRX.TRACK
TRACKA: EN_ADJ_R
TRACK.NAME: EAST_TRACK
OUTPUT:
E_D_OUT, E_E_OUT, E_F_OUT, SPARE, E_H_OUT, E_I_OUT, E_J_OUT,
E_K_OUT, SPARE, SPARE, SPARE, SPARE, SPARE, SPARE, E_R_OUT,
E_S_OUT, E_T_OUT, E_U_OUT, E_V_OUT, E_W_OUT;
INPUT:
E_D_IN, E_E_IN, E_F_IN, E_G_IN, E_H_IN, E_I_IN, E_J_IN, E_K_IN,
E_L_IN, E_M_IN, E_N_IN, E_O_IN, E_P_IN, E_Q_IN, E_R_IN, E_S_IN,
E_T_IN, E_U_IN, E_V_IN, E_W_IN;
ADJUSTABLE LENGTH: 9;
ADJUSTABLE ENABLE: 1;
TRACKB: EN_ADJ_L
TRACK.NAME: WEST_TRACK
OUTPUT:
SPARE;
INPUT:
SPARE;
ADJUSTABLE LENGTH: 9;
FIXED ENABLE: 0;
4-2
SM 6800N, Original, June 2007
Application Logic Programming
BOARD: WEST_SIG
ADJUSTABLE ENABLE: 1
TYPE: LED12
/* In this example the LED 12 is used for the West Bound signal aspects. Not all aspects need to be
defined, only those that are used. If you wish to skip an output location, label it SPARE. In this
example outputs 1-3 and 5-7 are used. Output 4 is not used and labeled as a SPARE. All 12 outputs can
be listed, but are not required if they are not used.
*/
OUTPUT:
WAGE, WAYE, WARE, SPARE,
WBGE, WBYE, WBRE;
/* The LED 12 uses the Signal.Good executive bit. This bit is set when the lamp is believed to be in a
useable condition based on the tests performed by the Microlok II executive.
The Signal.Good bits are listed in the same order as the aspect bits. WAGLOR is the Signal.Good bit
for WAGE, because these bits appear in the first position in the board definition.
*/
SIGNAL.GOOD:
WAGLOR, WAYLOR, WARLOR, SPARE,
WBGLOR, WBYLOR, WBRLOR;
BOARD: EAST_SIG
ADJUSTABLE ENABLE: 1
TYPE: LAMP16
ADJUSTABLE 18 WATT MODE 1
OUTPUT:
EAGE, EAYE, EARE, SPARE,
EBGE, EBYE, EBRE;
/* Refer to SM 6800D for detailed information on the Lamp 16 definition. Notice that this lamp board
uses Lamp.Out instead of Signal.Good. The Lamp.Out bit is set when the lamp is believed to be bad
based on the tests performed by the Microlok II executive. So it status is inverted as compared to
Signal.Good.
*/
LAMP.OUT:
EAG_LO, EAY_LO, EAR_LO, SPARE,
EBG_LO, EBY_LO, EBR_LO;
BOARD: VIO
ADJUSTABLE ENABLE: 1
TYPE: IN8.OUT8
OUTPUT:
ELR_OUT, WLR_OUT;
INPUT:
WTR_IN;
COMM
LINK: PEERLINK
ADJUSTABLE ENABLE: 1
PROTOCOL: MII.PEER
ADJUSTABLE PORT: 4;
ADJUSTABLE POINT.POINT: 1;
ADJUSTABLE BAUD: 19200;
ADJUSTABLE STOPBITS: 1;
ADJUSTABLE PARITY: NONE;
SM 6800N, Original, June 2007
4-3
Application Logic Programming
ADJUSTABLE KEY.ON.DELAY: 0;
ADJUSTABLE KEY.OFF.DELAY: 0;
ADJUSTABLE GRANT.DELAY: 250:MSEC;
ADJUSTABLE MII.ADDRESS: 10
ADJUSTABLE ENABLE: 1
STATION.NAME: MLK.CNTRL.POINT;
ADJUSTABLE PEER.ADDRESS: 20;
ADJUSTABLE TIME.STAMP: 1;
ADJUSTABLE ACK.TIMEOUT: 2400:MSEC;
ADJUSTABLE HEARTBEAT.INTERVAL: 2400:MSEC;
ADJUSTABLE INDICATION.UPDATE.CYCLE: 2;
ADJUSTABLE STALE.DATA.TIMEOUT: 6000:MSEC;
ADJUSTABLE CLOCK.MASTER: 0;
INPUT: WHR_IN, WDR_IN, WFYR_IN, WTR_SIN,
WBKR_IN;
OUTPUT: WHR_OUT, WDR_OUT, WFYR_OUT, WYLR_OUT, WYYR_OUT, WTR_OUT,
WBKR_OUT, WMK_OUT;
ADJUSTABLE MII.NV.ADDRESS: 11
ADJUSTABLE ENABLE: 1
STATION.NAME: CRS_LIGHT;
ADJUSTABLE PEER.ADDRESS: 12;
ADJUSTABLE TIME.STAMP: 1;
ADJUSTABLE ACK.TIMEOUT: 400:MSEC;
ADJUSTABLE HEARTBEAT.INTERVAL: 400:MSEC;
ADJUSTABLE INDICATION.UPDATE.CYCLE: 2;
ADJUSTABLE STALE.DATA.TIMEOUT: 1:SEC;
ADJUSTABLE CLOCK.MASTER: 0;
NV.OUTPUT:
WAE_OUT,
EAE_OUT;
/* Master West Approach Energy */
/* Master East Approach Engery */
NV.INPUT:
WAE_IN,
EAE_IN;
/* Master West Approach Energy IN */
/* Master East Approach Enerpy IN */
BOOLEAN BITS
>----------------------------------------------------------------------------------------------------------------------------------------------->
CONFIGURATION
SYSTEM
ADJUSTABLE DEBUG_PORT_ADDRESS:1;
ADJUSTABLE DEBUG_PORT_BAUDRATE:9600;
ADJUSTABLE LOGIC_TIMEOUT:2000:MSEC;
ADJUSTABLE DELAY_RESET:0:MSEC;
APPLICATION.VERSION:1;
LOGIC BEGIN
/* This statement prevents this application from running in a card file it has not been
configured for. */
ASSIGN CONFIGURE.ERROR TO KILL_SP;
/* The Microlok II CPU can sound two audible tones. Below is an example of how this can
be used to make the application software more user friendly. */
NV.ASSIGN CONFIGURE.ERROR TO ALARM.1;
4-4
SM 6800N, Original, June 2007
Application Logic Programming
NV.ASSIGN MTRX.WEST_TRACK.SLEEPIN + MTRX.WEST_TRACK.TDIN TO TD_W_BEEP.TER;
NV.ASSIGN MTRX.EAST_TRACK.SLEEPIN + MTRX.EAST_TRACK.TDIN TO TD_E_BEEP.TER;
NV.ASSIGN ~TD_W_BEEP.TER * (MTRX.WEST_TRACK.SLEEPIN + MTRX.WEST_TRACK.TDIN)
+~TD_E_BEEP.TER * (MTRX.EAST_TRACK.SLEEPIN + MTRX.EAST_TRACK.TDIN)
TO ALARM.2;
/* Delay kill for 3 seconds to prevent surge on power supply */
ASSIGN KILL_SP TO KILL;
/* If unit is running in limited mode, ‘Auto Reset’ after 10 minutes */
ASSIGN ERROR.RESTRICTED TO CPS_SP;
ASSIGN CPS_SP TO CPS.RESET;
/* CPS.ENABLE must be set for the VCOR to pick.
user to change the track length. */
EN_ADJ_L and EN_ADJ_R must be set for the
ASSIGN ONE TO CPS.ENABLE, EN_ADJ_L, EN_ADJ_R;
>----------------------------------------------------------------------------------------------------------------------------------------------------------------------------------->
/* Because the Lamp 16 defines a Lamp.Out bit instead of a Signal.Good, Light On Relays are
built in application logic. As shown the EARLOR functions the same as the WARLOR defined
in the LED 12 definition. */
ASSIGN ~EAR_LO * EAST_SIG.ENABLED * CPS.STATUS TO EARLOR;
ASSIGN ~EAY_LO * EAST_SIG.ENABLED * CPS.STATUS TO EAYLOR;
ASSIGN ~EAG_LO * EAST_SIG.ENABLED * CPS.STATUS TO EAGLOR;
ASSIGN ~EBR_LO * EAST_SIG.ENABLED * CPS.STATUS TO EBRLOR;
ASSIGN ~EBY_LO * EAST_SIG.ENABLED * CPS.STATUS TO EBYLOR;
ASSIGN ~EBG_LO * EAST_SIG.ENABLED * CPS.STATUS TO EBGLOR;
>--------------------------------------------------------------------------------------------------------------------------------------------------------------------------------------------------->
/* Green lamp good, unit can display green */
ASSIGN EDR * EAGLOR TO EDRP;
/* Signal can display FY */
ASSIGN (EFYR + EDR * ~EAGLOR) * EAYLOR TO EFYRP;
>--------------------------------------------------------------------------------------------------------------------------------------------------------------------------------------------------->
/* Signal can display green */
ASSIGN WDR * WAGLOR TO WDRP;
/* Signal can display FY */
ASSIGN (WFYR + WDR * ~WAGLOR) *
WAYLOR TO WFYRP;
>--------------------------------------------------------------------------------------------------------------------------------------------------------------------------------------------------->
/* WEST_SIG.NV.PB is an executive bit that is true when the user presses the Lamp Reset
button on the front of the LED 12. The executive will ensure that this bit is not set if the
button is stuck, the executive also filters the button so that the bit will not set if the
button is momentarily pressed. WEST_SIG.Reset.LEDs is the executive bit that, when set, will
clear all of the LO latches for the board. Retest.LEDs could be assigned in different ways,
for example an office control could be used.
SM 6800N, Original, June 2007
4-5
Application Logic Programming
*/
ASSIGN WEST_SIG.NV.PB TO WEST_SIG.Retest.LEDs;
NV.ASSIGN WEST_SIG.Retest.LEDs TO LED.8;
END LOGIC
END PROGRAM
4.5
Application Programming Notes
4.5.1 Flashing
To overcome the long turn-on time of an incandescent lamp, application programs frequently flashed
the signal with a 60/40 duty cycle (60% of the time on, 40% off) resulting in the signal appearing to be
50% on and 50% off. Because the LED signals turn on and off almost instantaneously, a 50/50 duty
cycle will provide the 50/50 visible flashing.
4-6
SM 6800N, Original, June 2007
LED Signal System Troubleshooting
5 LED Signal System Troubleshooting
5.1
Typical System Measurements
This section provides a list of voltage and/or current measurement for a good system and for a faulty
system. Measurements are taken with a meter using the MicroLok II Development System.
5.1.1 Constant Current Regulator
Table 5-1 summarizes the expected measurements that can be observed from a functional constant
current regulator operating off of a 9.8 to 16.2-volt source. Any readings outside the stated ranges
indicate a possible faulty regulator.
Table 5-1 - Valid Constant Current Regulator Readings
Condition
Expected Reading
Voltage at output with no load connected
(pin 4 referenced to pin1)*
V = ~52V
V = 0.35 * R +/-10%, where
Voltage at output with resistive load
connected (pin 4 referenced to pin1)*
R <= 140ohms
Voltage at output with a known good LED
Signal connected - signal ON condition (pin 4
referenced to pin1)*
29V <= V <= 50V
Current output with valid load - signal ON
condition (pin 4)*
I = 350mA ±10%
*
See Figure 5–1.
N12
1
2
3
4
B12
LED OUTPUT
CONSTANT
CURRENT
REGULATOR
MODULE
Figure 5–1 - Pins on the Constant Current Regulator
SM 6800N, Original, June 2007
5-1
LED Signal System Troubleshooting
5.1.2 LED12 Board
Table 5-2 summarizes the expected measurements that can be observed on the LED12 Vital Output
Board output that is functioning properly with a good LED signal load. These measurements are taken
with a meter at the signal output on the MicroLok II CPU front panel, or with the MicroLok II
Maintenance Tool. Any readings outside of the stated ranges indicate a possible faulty system module.
Table 5-2 - Valid LED12 Vital Output Readings
Condition
Expected Reading
Output ON
29V <= V <= 48V
I = 350mA ±10%
Output OFF
V < 0V (V should be negative)
-150mA <= I < 0A
5.1.3 Driver Protection Board
The expected voltage readings taken across the driver protection board field terminals will be the same
or slightly less (due to resistance in the wiring) than the readings taken at the LED12 Vital Output
Board outputs, shown in Table 5-2. Any readings outside of the stated ranges indicate a possible faulty
driver protection board.
5.1.4 LED Signal
The expected voltage readings taken across the LED Signal field wiring terminals will be the same or
slightly less (due to resistance in the wiring) than the readings taken at the LED12 Vital Output Board
outputs, shown in Table 5-2. Any readings outside of the stated ranges indicate a possible faulty LED
signal.
5.1.5 Replacing LED Protection Board
Inspect the components for signs of stress or damage. If present, replace the board with a spare and
return the faulty board to US&S for repair. Figure 5–2 illustrates the proper orientation of the
protection board on the back of the LED signal.
5-2
SM 6800N, Original, June 2007
LED Signal System Troubleshooting
Figure 5–2 - LED Protection Board Orientation LED Signal
5.2
LED Fault Detection (Light-Out)
The LED signal system follows the AREMA Guidelines for LED signals. The system repeatedly
monitors the status signals connected to the LED12 board. On-state signals are monitored for open
and short circuits between each signal’s leads. Off-state signals are monitored for continuity of the
leads to the signal and short circuits between each signal’s leads. Faulty on- or off-state signals are
detected in one second. Flashing signals can take up to two seconds to detect since the system is
separately monitoring the on- and off-states.
Once a signal has been determined to be faulty the MicroLok II system will log a warning and clear the
faulty signal’s .SIGNAL.GOOD application bit (0). The LED12 front panel LED corresponding to the
faulty signal will begin flashing. This flashing pattern is several quick on pulses followed by a longer
off period. This distinguishes a faulty signal from a normally flashing signal. When any of the 12
LED12 outputs detects a faulty signal the red LED at the bottom of the front panel will also turn on.
This LED quickly draws the maintainer’s attention to boards with faulty signals.
Note
Note that the SIGNAL.GOOD bit is set (1 state) when its attached signal is
detected as good. A LAMP16 board’s LIGHT.OUT bit is set (1 state) when its
attached signal is detected to be faulty.
Replacing a faulty signal will be automatically detected and the faulty condition cleared in one second
except in the condition of a faulty On signal.
The fault clearing logic used on the LED12 board is shown on Table 5-3.
SM 6800N, Original, June 2007
5-3
LED Signal System Troubleshooting
Table 5-3 - Fault Clearing Logic
*
Output state when
signal fault was
detected.
Current output state.
After repairing the
signal, the fault will be
cleared by:
ON
ON
Waiting five seconds or setting
and clearing the .Retest.LED
board application bit
ON
OFF
Setting and clearing the
.Retest.LED board application
bit*
OFF
ON
Waiting five seconds or setting
and clearing the .Retest.LED
board application bit
OFF
OFF
Waiting five seconds or setting
and clearing the .Retest.LED
board application bit
By requiring the logic bit to be set, we are preventing a signal that has; failed in the ON state and tests
good in the OFF state, from being upgraded by the application logic. This may done by assigning .NV.PB
(the LED12 board’s application bit associated with the NON-VITAL front panel pushbutton) to the
.RetestLED board.
Following AREMA guidelines a signal that is detected as faulty in the On-state will continue to be
considered faulty in the Off-state. This prevents an application from inadvertently flashing a signal
when it downgrades a faulty on signal. To clear the fault condition for a signal detected as faulty while
in the on-state, the repaired signal either has to be turned on or the application logic must set and then
clear the .Retest.LEDs board application bit. This is typically done by mapping the non-vital
pushbutton on the front of the LED12 board to the retest bit. Adding the following line to the LOGIC
section of an application program will do this mapping.
ASSIGN LED12boardname.NV.PB to LED12boardname.Retest.LEDs;
With this line in the application the maintainer must press the non-vital front panel pushbutton for
three seconds. Once recognized as being actuated, the MicroLok II will set the status of all signals
connected to that LED12 to be “good” and begin retesting. One second later, all signals will be
updated to their current status, good or faulty. When the non-vital front panel pushbutton is pressed,
an event will be logged. The MicroLok II must detect the button to have been released before it will
respond to a second pushing. This would prevent a stuck non-vital pushbutton from continuously
clearing the signals’ status.
After a faulty signal has been replaced and recognized by the MicroLok II, an event will be logged and
the .SIGNAL.GOOD bit for the signal will be set (1). If all of the signals connected to a LED12 board
are good the front panel red LED will be off.
5.3
Troubleshooting Notes
5.3.1 Field Testing Open Signal Detection
When field testing a system for detecting open signals special attention should be made to how the
open wiring condition is created. If the maintainer attempts to open a circuit by removing a ring
5-4
SM 6800N, Original, June 2007
LED Signal System Troubleshooting
terminal from a tall ARR stud, many makes and breaks will usually occur. This can cause the
MicroLok II system to log “Shift Test” events and possibly a “Shift Test” Critical Error. This occurs
because the signal’s output is unstable during the LED12 board circuit diagnostics. The maintainer can
choose to ignore the logged events or break the circuit in a quicker manner.
5.3.2 Operation without the Constant Current Regulator Connected
During the initial system installation it was necessary that all required constant current regulators be
powered and connected to the LED12 board. If there is an attempt to turn on a signal that is not
connected to a constant current regulator a Critical Error will be detected and the MicroLok II System
will reset. The MicroLok II event log will record an “UNDEFINED state” error in the ON state.
5.3.3 Failure to Provide Field Side Power to LED12 Board
The LED12 Board is designed to allow the signals to be powered from an isolated power source.
While this is rarely needed, it does require that connections from the battery (through the VCO relay)
be made to each LED12 board. If this connection is not made the MicroLok II will detect a Critical
Error and the MicroLok II system will reset. The MicroLok II event log will record an ADC signature
failure. This is caused by the system attempting to read signals from un-powered circuitry.
5.3.4 Hints on Troubleshooting LED Signals
•
Because of the constant current regulator, the electrical readings taken at the LED signal load
will be different from typical signals. Where the load voltage of an ON-state incandescent
signal is typically at battery level (i.e., 12V or lower due to line drop), the load voltage of a
ON-state US&S LED signal is typically around 35V.
•
The LED signal cannot be checked for operation (energized) by applying battery voltage
directly to its terminals. A constant current regulator or equivalent current source is required to
light the signal. Also, an ohmmeter across the terminals of the signal will not provide an
indication of the signal’s integrity.
•
The LED signal has five terminals which are clearly marked (three require a field connection;
two have no external connection). Ensure that the connections are made to the proper
terminals.
•
The LED signal field terminals have a polarity that must be observed, where incandescent
signals typically do not. A signal hooked up with reversed polarity will not operate and could
eventually damage the signal.
•
When used in combination with the Vital Output LED12 PCB, an OFF-state US&S LED signal
will have a load voltage of approximately -2.5V. This voltage level is normal and is present
because OFF-state diagnostics are being performed by the control system.
•
The diagnostic and light-out detection functions of the Vital Output LED12 PCB do not use
external “check pulses.” For both ON- and OFF-state LED signals, a “check pulse” will never
be seen at the load.
•
Slide-wire resistors are not required for use with the LED signals and should never be installed.
Also, the LED signal cannot be dimmed by switching in a series resistance, as can typically be
done with an incandescent signal.
SM 6800N, Original, June 2007
5-5
LED Signal System Troubleshooting
•
5-6
The LED12 PCB will detect shorts between signals that cause an incorrect signal state. If the
return leads (-) of any two or more signals are shorted together the system will not indicate an
error, because this is a legal wiring option. If the controlled lead (+) of two or more signals are
shorted together the system will not indicate an error if all of the signals are in the same state,
all on or all off. If a wiring short causes an off-state signal to turn on then a critical error will
occur and the MicroLok II system will reset.
SM 6800N, Original, June 2007
Parts List
6 Parts List
This section provides the part numbers for all system components.
Table 6-1 - Part Numbers for the US&S LED Signal System Components
Part Number
Description
N17066101
MicroLok II LED12 I/O Board
N34801301
Constant Current Regulator Module
N46205201
Driver Protection Board (House wiring on left)
N46205202
Driver Protection Board (House wiring on right)
N46205001
LED Protection Board (mounted on LED Signal)
N46204401
LED Signal, Red, 6 3/8”
(includes LED Protection Board – N46205001)
N46204402
LED Signal, Cyan (Green), 6 3/8”
(includes LED Protection Board – N46205001)
N46204403
LED Signal, Amber (Yellow), 6 3/8”
(includes LED Protection Board – N46205001)
N46204404
LED Signal, Lunar (White), 6 3/8”
(includes LED Protection Board – N46205001)
N451552-1001
CMF Common Mode Filter
N4515520101
USGA Lightning Arrester, High Voltage – “Blue”
N4515520201
USGA Lightning Arrester, Low Voltage – “Red”
N800101-0850
MicroLok II Executive Software, Version 8.50 or later.
N800102-0850
MicroLok II Maintenance Tool, Version 8.50 or later.
SM 6800N, Original, June 2007
6-1
Parts List
6-2
SM 6800N, Original, June 2007
Technical Support
7 RAIL Team and Technical Support
The Rapid Action Information Link Team (RAIL Team) is a group of experienced product and
application engineers ready to assist you to resolve any technical issues concerning this product.
Contact the RAIL Team in the United States at 1-800-652-7276 or by e-mail at [email protected].
SM 6800N, Original, June 2007
7-1
Technical Support
7-2
SM 6800N, Original, June 2007