Transcript
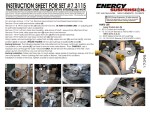
INSTRUCTION SHEET FOR SET #4-4107
Read this instruction sheet thoroughly before initiating any work!
R
1131 VIA CALLEJON, SAN CLEMENTE, CA 92673
It is recommended that if you are unfamiliar with this type of work that you refer to a qualified service center
specializing in this type of work. It is also recommended that if you choose to do this work yourself that a factory
service manual be obtained for the proper procedures pertaining to removal, replacement and proper torque
specifications for your vehicle. This instruction set is intended as a guideline for the safe installation of Energy
Suspension’s polyurethane bushings, once you have removed the factory components from your vehicle.
4063
4061
4060
4060
17027
2” WASHER
SUPPLIED
POSITION #2
1
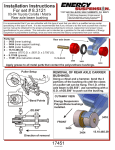
NOTE: Be sure on disassembly to note
4062
OEM
Washer/sleeve
POSITION #3
4065
Frame
4062
4064
2
4065
4061
Frame
4064
3
OEM
Washer/sleeve
OEM
Washer/sleeve
4063
Mount
Position
Diagram
POSITION #1
the quantity and positions of any shims
that may have been inserted for body
alignment. These shims will have to be
reused to insure proper body alignment.
REMOVAL
16/JAN/07 BRH
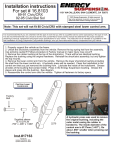
Tube
Washers
OEM bolt
*Spray generously all nuts to be removed with your favorite rust
buster.
1. Remove bolts of mounts from inside of cab. Remove bolts
from one side at a time, leave other side loose.
2. The body mounts are pressed together by a flair fit from the
factory. A simple “puller” assembly can be made with a tube
and some washers. (See pic). Placing the OEM bolt thru the
“puller ” assembly and tightening it will free the body mounts
from the frame.
3. Remove OEM bushings.
4. Reinstall with new bushings supplied.
5. Tighten all bolts to factory specifications.
Energy Suspension. All rights reserved.
C 2007
Updated 8/JAN/03 BRH Updated 23/JAN/04 BRH
May not
be reproduced,
in any
form,10/JAN/06
or by anyBRH
means,
Updated
14/JAN/05 BRH
Updated
without
the written
consent
Updated
2/JAN/07
BRH of Energy Suspension.