Transcript
Installation instructions
For set # 16.8103
89-91 Civic/CRX
92-95 Civic/Del Sol
R
1131 VIA CALLEJON, SAN CLEMENTE, CA 92673
C 2003 Energy Suspension. All rights reserved.
May not be reproduced, in any form, or by any means,
Updated 8/JAN/03 BRH
without the written
consent of Energy Suspension.
Note: This set will not fit 88 Civic/CRX with stamped steel lower control arm.
It is recommended that if you are unfamiliar with this type of work that you refer to a qualified service center specializing in this type of work.
It is also recommended that if you choose to do this work yourself that a factory service manual be obtained for the proper procedures
pertaining to removal, replacement and proper torque specifications for your vehicle. This instruction set is intended as a guideline for the
safe installation of Energy Suspension’s polyurethane bushings, once you have removed the factory components from your vehicle.
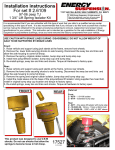
1. Properly support the vehicle on the frame.
2. Unbolt the shock/strut assembly from the vehicle. Remove the top spring hat from the assembly.
Use extreme caution!!! Follow procedure in Factory manual or major injury may occur!!!
3. Remove the rubber bushing at the top of the shock/strut. There will be two identical bushing.
Replace the bushing using the original hardware. Reinstall the shock/strut assembly, but only tighten
the top mounts.
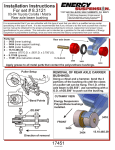
4. Remove the lower control arm from the vehicle. Remove the lower shock/strut bushing including
the shell from the lower control arm. A hydraulic press will be needed. Clean the hole/barrel in the
control arm that you just removed the bushing from. Lubricate the inside of the hole/barrel. Grease
all sides of the bushing that contact metal. Press in the Energy Suspension bushing. Grease the
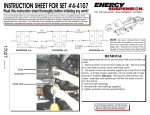
sleeve and press into the bushing. See diagram.
5. Reassemble the control arm onto the vehicle. Tighten all fasteners to factory specs.
Cast Iron Lower
Control Arm
Factory
Bolt
2270
Supplied sleeve
15.10.279.39
.750” x .406” x 1.960”
Inst.#17163
7/25/96 KN
Updated 15/FEB/02 BRH
Updated 29/MAY/03 BRH
2270
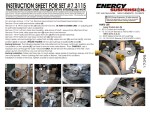
A hydraulic press was used to remove
the original bushing, including the
outer metal casing the rubber is
bonded to. The inside diameter of the
control arm is Ø 37mm (1.457”). Go
about .050” smaller when pressing out
the bushing.