1
www.collegehillshonda.com
INSTALLATION
INSTRUCTIONS
Accessory
Application
AMBIENT LIGHTS
P/N 08E10-T7S-100
2016 HR-V
Publications No.
VERSION 1
Issue Date
APR 2015
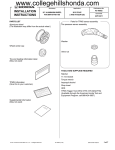
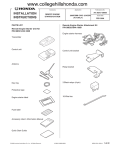
PARTS LIST
TOOLS AND SUPPLIES REQUIRED
2
Phillips screwdriver
10 mm Open end wrench
Ratchet
10 mm Socket
Diagonal cutters
Isopropyl alcohol
Shop towel
Tape
The following tools are available through the Honda Tool
and Equipment Program. On the iN, click on: Service >
Service Bay > Tool and Equipment Program, then enter
the number under “Search.” Or, call 888-424-6857.
• Trim Tool Set (T/N SOJATP2014)
• Plastic Trim Tool (T/N SILTRIMTL10)
Ambient lights
Bracket
Ambient light harness
Illustration of the Ambient Lights in the Vehicle
2A FUSE
8
Wire ties
Fuse label
AMBIENT
LIGHT
3
AMBIENT LIGHT
HARNESS
QD41601AJ
AMBIENT
LIGHT
Self-tapping screws
© 2015 American Honda Motor Co., Inc. – All Rights Reserved.
AII01797-1 (1504)
08E10-T7S-1000-90
1 of 9
www.collegehillshonda.com
INSTALLATION
Customer Information: The information in this
installation instruction is intended for use only by skilled
technicians who have the proper tools, equipment, and
training to correctly and safely add equipment to your
vehicle. These procedures should not be attempted by
“do-it-yourselfers.”
1.
2.
• If the vehicle is equipped with a front passenger’s
airbag ON/OFF switch, continue with step 3. If not,
go to step 4.
With front passenger’s airbag ON/OFF switch
3.
Pull away the door opening seal, and remove the
passenger’s dashboard side lid and unplug the
vehicle connector.
Go to step 5.
Disconnect the negative cable from the battery, then
wait at least three minutes before starting work.
Remove the passenger’s under cover.
VEHICLE
CONNECTOR
DOOR OPENING SEAL
(Pull away.)
PASSENGER’S
DASHBOARD
SIDE LID
3 CLIPS
CLIP
4 RETAINING
TABS
PASSENGER’S
UNDER COVER
QD40852AH
PLASTIC TRIM
TOOL
2 of 9
AII01797-1 (1504)
© 2015 American Honda Motor Co., Inc. – All Rights Reserved.
www.collegehillshonda.com
Without front passenger’s airbag ON/OFF switch
4.
6.
Pull away the door opening seal, and remove the
passenger’s dashboard side lid.
Pull away the door opening seal, open the glove box,
and remove the glove box.
DOOR OPENING SEAL
(Pull away.)
5 CLIPS
DOOR OPENING SEAL
(Pull away.)
PASSENGER’S
DASHBOARD
SIDE LID
2 BOLTS
5 RETAINING
TABS
PLASTIC TRIM
TOOL
5.
7.
QD40855AH
Pull away the door opening seal and remove the
driver’s dashboard side lid.
DOOR
OPENING
SEAL
(Pull away.)
QD40853AH
Remove the two bolts from the glove box.
GLOVE BOX
6 RETAINING
TABS
DRIVER’S
DASHBOARD
SIDE LID
PLASTIC
TRIM TOOL
QD40315AJ
2 BOLTS
QD40854AH
© 2015 American Honda Motor Co., Inc. – All Rights Reserved.
AII01797-1 (1504)
3 of 9
www.collegehillshonda.com
8.
Attach tape to the lower column cover.
• If the vehicle is equipped with automatic climate
control, continue with step 10. If not, go to step 13.
With automatic climate control
10. Apply tape to the climate control unit, center console
panel, center console pad, and shift lever as shown.
Shift the shift lever to D.
SHIFT LEVER
(D POSITION)
LOWER COLUMN
COVER
9.
TAPE
CLIMATE
CONTROL UNIT
TAPE
QD40316AJ
Pull away the door opening seal, and remove the
driver’s dashboard lower cover and unplug the
vehicle connectors.
DOOR OPENING SEAL
(Pull away.)
VEHICLE
CONNECTORS
CLIP
CENTER
CONSOLE PANEL
QD41602AJ
CENTER
CONSOLE PAD
11. Remove the center console switch trim and unplug
the vehicle connector.
2 CLIPS
CENTER CONSOLE
SWITCH TRIM
11 CLIPS
DRIVER’S DASHBOARD
LOWER COVER
QD40317AJ
2 RETAINING
TABS
4 of 9
AII01797-1 (1504)
VEHICLE
CONNECTOR
QD41603AJ
© 2015 American Honda Motor Co., Inc. – All Rights Reserved.
www.collegehillshonda.com
12. Remove the climate control unit and unplug the
vehicle connectors.
Go to step 18.
14. Remove the center console switch trim and unplug
the vehicle connector.
2 CLIPS
CLIMATE
CONTROL UNIT
CLIP
CENTER CONSOLE
SWITCH TRIM
5 CLIPS
VEHICLE
CONNECTORS
QD40856AH
2 RETAINING
TABS
QD41605AJ
15. Set the mode control dial and the temperature
control dial as shown.
With manual climate control
13. Apply tape to the heater control panel, center
console panel, center console pad, and shift lever as
shown. Shift the shift lever to D.
SHIFT LEVER
(D POSITION)
VEHICLE
CONNECTOR
TEMPERATURE
CONTROL DIAL
(MAX COOL)
MODE
CONTROL DIAL
(VENT)
HEATER
CONTROL PANEL
HEATER
CONTROL PANEL
TAPE
QD40857AH
CENTER
CONSOLE PANEL
QD41604AJ
CENTER
CONSOLE PAD
© 2015 American Honda Motor Co., Inc. – All Rights Reserved.
AII01797-1 (1504)
5 of 9
www.collegehillshonda.com
16. Remove the mode control cable and air mix control
cable:
• Remove the control cable from the clamp and
the groove.
• Remove the inner cable from the control linkage.
17. Remove the heater control panel and unplug the
vehicle connectors.
HEATER
CONTROL PANEL
5 CLIPS
CONTROL
LINKAGE
GROOVE
CLAMP
INNER
CABLE
CONTROL
CABLE
MODE CONTROL CABLE
2 CLIPS
GROOVE
VEHICLE
CONNECTORS
CONTROL
LINKAGE
CLAMP
18. Using isopropyl alcohol on a shop towel, clean the
fuse case where the fuse label will attach.
INNER
CABLE
AIR MIX CONTROL CABLE
QD40859AH
QD40858AH
CONTROL
CABLE
FUSE CASE
(Clean with
isopropyl
alcohol.)
FUSE LABEL
(2A AMBIENT LIGHT)
AMBIENT LIGHT
HARNESS
QD41606AJ
19. Attach the fuse label to the ambient light harness
fuse case.
6 of 9
AII01797-1 (1504)
© 2015 American Honda Motor Co., Inc. – All Rights Reserved.
www.collegehillshonda.com
20. Unplug the vehicle 4-pin connector from the hazard
warning switch, and plug it into the ambient light
harness 4-pin connector. Plug the remaining
ambient light harness 4-pin connector into the
hazard warning switch.
AMBIENT LIGHT
HARNESS
4-PIN CONNECTORS
22. Route the ambient light harness as shown. Align the
green tape on the ambient light harness with the
vehicle clip, and secure the ambient light harness to
the vehicle harness with three wire ties.
VEHICLE
HARNESS
VEHICLE 4-PIN
CONNECTOR
AMBIENT LIGHT
HARNESS
VEHICLE
CLIP
HAZARD WARNING
SWITCH
3 WIRE TIES
GREEN
TAPE
QD41609AJ
23. Route the ambient light harness as shown. Secure
the ambient light harness to the vehicle harness with
two wire ties.
QD41607AJ
AMBIENT LIGHT
HARNESS
21. Secure the 4-pin connectors and ambient light
harness to the vehicle harness with one wire tie.
VEHICLE HARNESS
VEHICLE
HARNESS
WIRE TIE
4-PIN CONNECTORS
© 2015 American Honda Motor Co., Inc. – All Rights Reserved.
2 WIRE TIES
QD41610AJ
QD41608AJ
AII01797-1 (1504)
7 of 9
www.collegehillshonda.com
24. Secure the ambient light harness to the vehicle
harness with two wire ties.
27. Install the ambient light on the bracket with one selftapping screw.
SELF-TAPPING
SCREW
DRIVER’S
DASHBOARD
LOWER COVER
BRACKET
AMBIENT
LIGHT
AMBIENT LIGHT
HARNESS
VEHICLE
HARNESS
2 WIRE TIES
QD41613AJ
QD41611AJ
25. Reinstall the climate control unit or heater control
panel and glove box.
28. Plug the ambient light harness 4-pin connector into
the ambient light, and reinstall the driver’s
dashboard lower cover.
26. Install the bracket on the driver’s dashboard lower
cover with one self-tapping screw.
DRIVER’S
DASHBOARD
LOWER COVER
DRIVER’S
DASHBOARD
LOWER COVER
BRACKET
SELF-TAPPING
SCREW
QD41612AJ
8 of 9
AII01797-1 (1504)
AMBIENT AMBIENT LIGHT
HARNESS 4-PIN
LIGHT
CONNECTOR
QD41614AJ
© 2015 American Honda Motor Co., Inc. – All Rights Reserved.
www.collegehillshonda.com
29. Install the ambient light on the passenger’s under
cover with one self-tapping screw.
PASSENGER’S
UNDER COVER
31. Check that all wire harnesses are routed properly
and all connectors are plugged in.
32. Reinstall all removed parts.
33. Connect the negative cable to the battery.
34. Turn the engine switch to ON; the SRS indicator
should come on for about 6 seconds and then go off.
35. Press and hold the radio power button for two
seconds to restore the audio and navi (if equipped)
system functions.
36. Reset the clock.
37. Restore the systems back to normal operation as
described in the Service Manual if necessary.
Check the Operation of the Ambient Light
SELF-TAPPING
SCREW
• With the light switch set to the “
” or “
” position,
the ambient lights are on.
• When the headlight switch is in the “AUTO” position,
the ambient lights are on with the parking lights or
headlights.
• If the ambient lights do not come on, check the fuse and
all the connectors.
AMBIENT
LIGHT
LIGHT
SWITCH
QD41615AJ
30. Plug the ambient light harness 4-pin connector into
the ambient light, and reinstall the passenger’s
under cover.
AMBIENT LIGHT
HARNESS 4-PIN
CONNECTOR
QD41617AJ
AMBIENT
LIGHT
PASSENGER’S
UNDER COVER
QD41616AJ
© 2015 American Honda Motor Co., Inc. – All Rights Reserved.
AII01797-1 (1504)
9 of 9