1
INSTALLATION
INSTRUCTIONS
Accessory
Application
FRONT GRILLE
P/N 08F21-T7S-100
2016 HR-V
Publications No.
VERSION 1
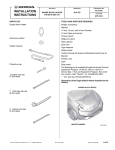
PARTS LIST
Issue Date
APR 2015
INSTALLATION
Front grille
Customer Information: The information in this
installation instruction is intended for use only by skilled
technicians who have the proper tools, equipment, and
training to correctly and safely add equipment to your
vehicle. These procedures should not be attempted by
“do-it-yourselfers.”
License frame
1.
Disconnect the negative cable from the battery.
2.
Remove the front bumper:
• Wrap a shop towel around the lever.
• Attach tape to the areas shown on each side.
SHOP TOWEL
TOOL AND SUPPLIES REQUIRED
LEVER
Phillips screwdriver
Ratchet
10 mm Socket
Tape
Blanket
Shop towel
The following tool is available through the Honda Tool and
Equipment Program. On the iN, click on: Service >
Service Bay > Tool and Equipment Program, then enter
the number under “Search”. Or, call 888-424-6857.
• Trim Tool Set (T/N SOJATP2014)
HEAD
LIGHT
FRONT
FENDER
TAPE
FRONT BUMPER
© 2015 American Honda Motor Co., Inc. – All Rights Reserved.
AII01797-4 (1504)
08F21-T7S-1000-90
1 of 5
•
Remove the grille cover.
9 CLIPS
•
Remove four clips and two self-tapping screws
on each side.
GRILLE COVER
LEFT FRONT WHEEL
ARCH PROTECTOR
2 SELF-TAPPING
SCREWS
4 CLIPS
•
Remove the 12 clips.
QC72104AH
•
Remove the front wheel arch protector on each
side.
5 CLIPS
2 CLIPS
12 CLIPS
Remove the
clips from the
front in order.
RETAINING
TAB
(Remove
first.)
2 of 5
AII01797-4 (1504)
FRONT BUMPER
LEFT FRONT
WHEEL
ARCH
PROTECTOR
LEFT SIDE
SILL TRIM
QC72105CH
© 2015 American Honda Motor Co., Inc. – All Rights Reserved.
•
Remove the self-tapping screw on each side.
•
Release four retaining tabs on each side.
SELF-TAPPING
SCREW
1
3 RETAINING
TABS
FRONT BUMPER
2
RETAINING
TAB
FRONT
BUMPER
FRONT
BUMPER
QD41504AH
© 2015 American Honda Motor Co., Inc. – All Rights Reserved.
AII01797-4 (1504)
3 of 5
•
With the help of an assistant, remove the front
bumper and unplug the vehicle connectors, if
equipped. Place the front bumper on the blanket
to prevent damage.
4.
Remove the license plate.
FRONT GRILLE
(Discard.)
2 RETAINING TABS
LICENSE PLATE
4 SELF-TAPPING
SCREWS
5.
VEHICLE
CONNECTORS
(if equipped)
QD41508AH
Install the license plate to the license frame.
LICENSE PLATE
FRONT BUMPER
3.
Remove the front grille from the front bumper.
10 RETAINING TABS
FRONT GRILLE
LICENSE FRAME
QD41509AH
FRONT BUMPER
3 SELF-TAPPING
SCREWS
4 of 5
AII01797-4 (1504)
© 2015 American Honda Motor Co., Inc. – All Rights Reserved.
6.
Attach the license frame to the front grille.
9. Reinstall all removed parts.
10. Reconnect the negative cable to the battery.
11. Press and hold the audio power button for two
seconds to restore the audio and navi (if equipped)
system functions.
12. Reset the clock.
13. Restore the systems back to normal operation as
described in the Service Manual if necessary.
FRONT GRILLE
LICENSE
FRAME
LICENSE
FRAME FRONT
GRILLE
LICENSE PLATE
DIMPLE
4 SELF-TAPPING
SCREWS
(reused)
7.
SELFTAPPING
SCREW
SECTION VIEW
QD41510AH
Install the front grille on the front bumper.
FRONT GRILLE
FRONT BUMPER
3 SELF-TAPPING
SCREWS
(reused)
8.
Check that all wire harnesses are routed properly
and all connectors are plugged in.
© 2015 American Honda Motor Co., Inc. – All Rights Reserved.
AII01797-4 (1504)
5 of 5