1
engraved on the back of the shell. The wire colors
should match up with the mating connector on the
OE harness. Insert the supplied white plastic seal
into the empty position at pin 6. Reinstall the
secondary lock.
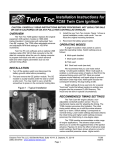
Figure 1 - OE Module and Deutsch Connector
the mating plug on the supplied extension harness.
Route the extension harness as required - up to
the coil for single fire hookup or to some other
convenient location. Make sure that the harness is
clear of hot exhaust areas and cannot chafe
against sharp edges. Secure the harness with
nylon cable ties. For dual fire hookup, the blue wire
is not used and should be taped up.
10. Install the supplied Weather Pack connector set on
the brown tachometer wire as shown. If a
tachometer is not used, seal the end of the mating
plug with silicone RTV and use it as a protective
cover. Use a proper Weather Pack crimping tool or
solder the terminals. Pioneer-Standard
(www.packard.pios.com) sells Packard crimping
tool P/N 12014254. Snap-on sells a low cost tool,
P/N PWC30.
11. Single Fire Tach Hookup. If your motorcycle had
a tach before installation of the Twin Tec module,
the tach was connected to the pink coil wire. When
you connect the tach direct to the Twin Tec module
as shown in Figure 4 for a single fire application,
you must make sure that it is not still connected to
the pink coil wire. Trace the wire going all the way
back to the tach to avoid an inadvertent coil
connection.
Figure 2 - Finished Installation
CAUTION: Single fire only. Failure to
isolate the tach wire from the coil will
cause damage to the Twin Tec module
that is not covered under warranty.
12. Reconnect the battery ground cable. Complete the
setup and timing procedures given on pages 3-7.
13. Reinstall the cover plate using two supplied 10-24
x 1/4" socket head screws and lock washers in
place of the original rivets. You will have to tap the
rivet holes on the inner plate (do this with the plate
removed from the bike to avoid damaging the
ignition). You can use the supplied 10-24 x 3/8"
self threading screw as a tap.
8. Insert the remaining two terminals (blue and brown
wires) into the supplied connector shell and install
the supplied secondary lock.
NOTE: The unit is grounded by means
of the gear case housing. The mounting
surface must not be anodized or
painted.
9. Plug the 6 pin connector back into the mating plug
on the OE harness. Plug the 2 pin connector into
Daytona Twin Tec LLC, 933 Beville Road, Suite 101-H, S. Daytona, FL 32119
(386) 304-0700 www.daytona-twintec.com
Page 2
Model 1005S EX
5/2015