1
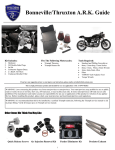
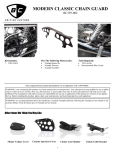
Clutch Lifter Arm Finisher BC210-001 Kit Includes: 1. 2. Fits The Following Motorcycles: Clutch Arm Cover Rubber Boot Triumph Bonneville Triumph Thruxton Triumph Scrambler Triumph America Triumph Speedmaster Tools Required: 3/32 Allen Wrench Crescent Wrench or 18mm Open End Razor Blade Recommended: Blue Loc-Tite This is a high performance product and intended for race use applications! USE AT OWN RISK! WARNING: Laws concerning this product vary from state/province to state/province. Your state/province may prohibit its use on public roads or restrict its use to novelty, show use, off-road areas, or race facility areas only. In some states/provinces off-road uses are also prohibited. The manufacturer and retailer assume no responsibility for any use or application of this product in violation of any applicable law. Before installing this product, please check your state/province and local/municipal laws and regulations. WARNING: It is recommended that this kit be installed by a certified Triumph technician, following the Triumph service manual to aid in proper fitting. Verify all torque specs in Triumph service manual. Other Items We Think You May Like Oil Pressure Gauge Air Injection Removal Kit Performance Head Work 1 Turn Signal Harness Clutch Lifter Arm Finisher BC210-001 Step 1: Use your left hand to hold the clutch cable, use a crescent wrench in your right hand; apply enough force in a counterclockwise motion to remove the tension on the clutch cable arm Step 2: Remove the clutch cable from the retainer Step 3: Locate the rubber boot and carefully use a razor blade to remove the desired length from the boot. Note: it is recommended that you remove 3 humps from the end of the boot that has the larger hole. Step 4: Slide the boot over the cable 2 Clutch Lifter Arm Finisher BC210-001 Step 5: Use your left hand and hold the boot back to expose the end of the cable Step 6: While holding the boot and exposed clutch cable in your left hand, take the crescent or 18mm wrench in your right hand, use it to relieve the pressure of the clutch arm and re-install the end of the cable into the retainer Step 7: Take your new cover and loosen the Allen screws on both sides of the cover with a 3/32 Allen Wrench. Note: It is recommended to remove these screws and apply blue loctite to them prior to installation. Step 8: Place the cover over the arm, make sure it seats all the way on top of the arm. Tighten the Allen screws on both sides of the cover. 3 Clutch Lifter Arm Finisher BC210-001 Step 9: Briefly re-check all hardware and newly installed components to ensure all are properly secure End: Congratulations! You have completed the installation of your new British Customs Product! 4