1
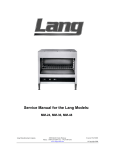
Service Manual for the Lang Models:
0-2-10-3, 0-2-10-4, 0-2-10-5
Lang Manufacturing Company
6500 Merrill Creek Parkway
Phone: 1-800-224-5264 Fax: 1-425-349-2733
www.langworld.com
Everett, WA 98203
©Copyright 2000
TABLE OF CONTENTS
CHAPTER
PAGE
1.
TABLE OF CONTENTS....................................................................... 1
2.
READ FIRST ....................................................................................... 2
3.
EQUIPMENT DESCRIPTION .............................................................. 4
4.
INSTALLATION ................................................................................... 5
5.
START-UP........................................................................................... 7
6.
GENERAL OPERATION ..................................................................... 8
7.
SEQUENCE OF OPERATION............................................................. 10
8.
TROUBLESHOOTING......................................................................... 11
9.
TECHNICAL DATA.............................................................................. 13
10. WIRING DIAGRAM.............................................................................. 14
11. PARTS LIST ........................................................................................ 15
1
IMPORTANT
READ FIRST
CAUTION:
EACH IS HEAVY. FOR SAFE HANDLING, INSTALLER
SHOULD OBTAIN HELP AS NEEDED, OR EMPLOY
APPROPREATE MATERIALS HANDLING EQUIPMENT
(SUCH AS A FORKLIFT, DOLLY, OR PALLET JACK) TO
REMOVE THE UNIT FROM THE SKID AND MOVE IT TO
THE PLACE OF INSTALLATION.
CAUTION:
ANY STAND, COUNTER OR OTHER DEVICE ON WHICH
OVEN WILL BE LOCATED MUST BE DESIGNED TO
SUPPORT THE WEIGHT OF THE OVEN.
CAUTION:
SHIPPING STRAPS ARE UNDER TENSION AND CAN
SNAP BACK WHEN CUT.
DANGER:
THIS APPLIANCE MUST BE GROUNDED AT THE
TERMINAL PROVIDED. FAILURE TO GROUND THE
APPLIANCE COULD RELUT IN ELECTOCUTION AND
DEATH.
WARNING:
INSTALLATION OF THE UNIT MUST BE DONE BY
PERSONNEL QUALIFIED TO WORK WITH ELECTRICITY
AND PLUMBING. IMPROPER INSTALLATION CAN
CAUSE INJURY TO PERSONNEL AND/OR DAMAGE TO
EQUIPMENT. UNIT MUST BE INSTALLED IN
ACCORDANCE WITH ALL APPLICABLE CODES
WARNING:
BEFORE LIGHTING, USE A SOAP AND WATER
SOUTION TO TEST ALL JOINTS FOR GAS LEAKS.
WARNING:
DURING INITIAL USE, OR AFTER SERVICE, IF PILOT
DOES NOT IGNITE ON FIRST TRY THE MAIN GAS
VALVE MUST BE TURNED OFF FOR AT LEAST FIVE
MINUTES.
NOTICE:
The data plate is located left side of unit behind control
door. The melter voltage, gas specs, serial number,
pipe size, and clearance specifications are on the data
plate. This information should be carefully read and
understood before proceeding with the installation.
NOTICE:
The installation of any components such as a vent
hood, grease extractors, fire extinguisher systems,
must conform to their applicable National, State and
locally recognized installation standards.
NOTICE:
During the first few hours of operation you may notice
a small amount of smoke coming off the oven, and a
faint odor from the smoke. This is normal for a new
oven and will disappear after the first few hours of use.
2
IMPORTANT
IMPORTANT
READ FIRST
WARNING:
KEEP WATER AND SOLUTIONS OUT OF CONTROLS.
NEVER SPRAY OR HOSE CONTROL CONSOLE,
ELECTRICAL CONNECTIONS, ETC.
CAUTION:
ALWAYS KEEP THE AREA NEAR THE APPLIANCE
FREE FROM COMBUSTIBLE MATERIALS.
KEEP FLOOR IN FRONT OF EQUIPMENT CLEAN AND
DRY. IF SPILLS OCCUR, CLEAN IMMEDIATELY, TO
AVOID THE DANGER OF SLIPS OR FALLS.
MOST CLEANERS ARE HARMFUL TO THE SKIN, EYES,
MUCOUS MEMBRANES AND CLOTHING.
PRECAUTIONS SHOULD BE TAKEN TO WEAR RUBBER
GLOVES, GOGGLES OR FACE SHIELD AND
PROTECTIVE CLOTHING. CAREFULLY READ THE
WARNING AND FOLLOW THE DIRECTIONS ON THE
LABEL OF THE CLEANER TO BE USED.
Service on this, or any other, LANG appliance must be
performed by qualified personnel only. Consult your
authorized service station directory or call the factory at
1-800-224-LANG (5264), or WWW.LANGWORLD.COM for
the service station nearest you.
BOTH HIGH AND LOW VOLTAGES ARE PRESENT
INSIDE THIS APPLIANCE WHEN THE UNIT IS
PLUGGED/WIRED INTO A LIVE RECEPTACLE. BEFORE
REPLACING ANY PARTS, DISCONNECT THE UNIT
FROM THE ELECTRIC POWER SUPPLY.
USE OF ANY REPLACEMENT PARTS OTHER THAN
THOSE SUPPLIED BY LANG OR THEIR AUTHORIZED
DISTRIBUTORS CAN CAUSE BODILY INJURY TO THE
OPERATOR AND DAMAGE TO THE EQUIPMENT AND
WILL VOID ALL WARRANTIES.
CAUTION:
CAUTION:
NOTICE:
WARNING:
CAUTION:
3
IMPORTANT
EQUIPMENT DESCRIPTION
GAS MELTER
EXTERIOR
!
The melter dimensions are 28” (71cm) High, 21” (53cm) Deep, 36”, 48”, 60” (91cm, 122cm, 152cm)
wide dependent on the actual model number.
!
The Sides, Bottom, and Rear wall are constructed stainless steel.
!
The melter cavity is insulated with high temperature insulation for efficiency and reduced heat loss.
INTERIOR
!
The interior of the melter has one rack that can be placed in 4 different positions.
!
The interior of the melter has a rack sensitive micro-switch for quick and easy activation.
CONTROLS
♦
AUTOMATIC
! Main burner will only come on when the rack sensitive micro-switch is activated. If there
is nothing on the rack the melter is in a standby mode with only the pilot light on.
♦
CONTINUOUS
! Main burner is on all the time.
4
INSTALLATION
RECEIVING THE MELTER
Upon receipt, check for freight damage, both visible and concealed. Visible damage should be noted on the
freight bill at the time of delivery and signed by the carrier's agent. Concealed loss or damage means loss
or damage, which does not become apparent until the merchandise has been unpacked.
If concealed loss or damage is discovered upon unpacking, make a written request for inspection by the
carrier's agent within 15 days of delivery. All packing material should be kept for inspection.
Do not return damaged merchandise to Lang Manufacturing Company. File your claim with the carrier.
Prior to un-crating, move the melter as near its intended location as practical. The crating will help protect
the unit from the physical damage normally associated with moving it through hallways and doorways.
ELECTRICAL CONNECTION
The electrical connection must be made in accordance with local codes or in the absence of local codes
with NFPA No. 70 latest edition (in Canada use: CAS STD. C22.1).
Each appliance requires a 115 volt grounded supply at 1 amp.
Supply wire size must be large enough to carry the amperage load for the number of appliances being
installed. Wire size information can be found on the data plate.
GAS CONNECTION
This appliance must be installed under a ventilation hood. The installation of any components such as vent
hoods, grease extractors, fire and smoke detection devices, or fire extinguisher systems, must conform to
N.F.P.A Standard #96, latest edition.
To prevent the function of this appliance from being affected by a reduced atmospheric pressure, adequate
make-up air in the kitchen should be provided to replace the air taken out by the ventilating system.
This appliance is manufactured for use with the type of gas indicated on the data plate. Contact the factory
if the gas type does not match that which is on the data plate.
All gas connections must be in accordance with local codes and comply with the National Fuel Gas Code
ANSI Z223.1 latest edition.
Gas must be delivered to the appliance regulator at less than 1/2 pound of pressure and less than 1/2 inch
water column pressure drop.
The regulator on this appliance is set to 6 inches water column for natural gas and 10 inches water column
for propane. A 1/8 inch NPT tap is provided on the main manifold for checking regulator pressure.
When replacing the 1/8 inch plug in the main manifold a joint sealant that is resistant to the action of liquid
petroleum gas must be used.
The supply piping must be of sufficient size to provide 10,000 BTU/hr per foot of Cheese Melter. A 1/2
inch NPT connection is provided at the lower right rear corner.
A gas shut off valve must be installed to the appliance and located in an accessible area.
This appliance and its individual shutoff valve must be disconnected from the gas supply piping system
during any pressure testing of that system at test pressures in excess of 1/2 PSGI (3.45 kPA) and the
appliance must be isolated from the gas supply piping system by closing its individual manual shutoff valve
during any pressure testing of the gas supply system at test pressures equal to or less than 1/2 PSIG (3.45
kPA).
Test for gas leaks. Use a commercial leak detector or a soap and water solution.
5
INSTALLATION CONT’D
COUNTER TOP INSTALLATION
Legs must be installed on this appliance if it is to be configured as a counter top model.
Attach the legs to the body by screwing the threaded stud of the leg into the nut insert provided under each
bottom corner of the machine. Tighten each leg with a wrench.
Adjust the legs so that burners are level. Leg adjustment is made by turning the adjustable foot at the
bottom of each leg. Ensure that the leg does not turn while adjusting the foot.
WALL HUNG INSTALLATIONS
The illustration, below, shows the connection points for the gas and electrical and how the wall bracket is
to connect to the Cheese Melter.
The heat shield is shipped in the 4-inch space at the rear of the machine.
Instructions for installing the heat shield are provided with the shield. Follow the instructions carefully. It
is important to remember to remove the knockouts from the front edge of the machine after the heat shield
is installed.
Minimum clearance from the cooking surface below to the bottom of this appliance is 17 inches.
A wall hanging bracket is provided. It is shipped in the 4 inch space at the rear of the machine. Attach the
bracket to the wall studs then hang the machine on the bracket.
6
START-UPS
GAS MELTER
1) Verify connections at plug and terminal block.
2) Incoming Volt -
Single Phase L1______
3) Gas pressure is set for 6” WC (Natural Gas), 10” WC
(Propane). Ensure that the regulator is installed in the
correct direction.
4) Ensure Melter burners are level.
5) Confirm that on wall mount units installed over high
heat sources that heat shield (provided with all wall
mount units) is installed and minimum distance is 22”.
6) Ensure that burner flame is stable and not lifting off of
burner. (Flame should be tight against burner and have
orange tips.)
7) Ensure that spark electrode does not continue to spark
after ignition. The tip of the spark electrode and sensor
electrodes must have flame on them and glowing red.
Model #_______
Date_______ Serial #________
Store #___________
Tech Name___________________
Contact_______________ Company _________________________
Store Phone #___________ Service Company Phone #______________
Address_____________________
______________________
______________________
7
GENERAL
GENERAL
The Lang Gas Cheesemelter can be used to poach, sauté and brown. In addition to melting cheese on
sandwiches, French onion soup, hot apple pie and casseroles, it may be used for finishing Italian, Mexican
and au gratin dishes utilizing less energy than conventional broilers.
The product is heated with 1650° of infrared heat, which penetrates the product preventing burning and
scorching. The rack is counterbalanced so that maximum heat is supplied only when the product is placed
in the rack.
Although the heating elements are not directly controlled to regulate heat, the exposure of the product to
heat is adjustable. Heat adjustment may be obtained by raising and lowering the rack position. The shelf
positions provide a choice of cooking positions for a variety of applications. The top position is very hot,
and can be used for quick browning and toasting, with the heat decreasing at each lower position.
In order to change positions, simply slide the rack in and out of the slots provided. Make sure that the end
of the rack engages the sliding mechanism located on the right front corner.
CONTROLS
There are very few controls that operate the gas Cheese Melter. Below is a list of the various components
with a description of their purpose.
8
GENERAL CONT’D
Power Switch
Turns the unit On and Off.
Constant - Auto Switch
When set to Constant, the burner(s) will light and stay on.
When set to Auto, the burner(s) will light whenever a
product is placed onto the Tilting Product Rack.
Manual Gas Valve
This valve turns off the flow of gas to the burner(s). Once
the machine is installed, this valve need not be turned off as
the Power Switch should be utilized to shut the machine
down. The manual gas valve cannot be used to regulate the
heat output from the burner(s), it must be full On or full Off.
Tilting Product Rack
The Tilting Product Rack is used to adjust the amount of heat
a product is exposed to and to start the burner(s) when the
machine is placed into the Auto mode. Raising the Tilting
Product Rack increases the heat on the product while lower
the rack decreases the heat.
OPERATING DO's and DON'Ts
DO:
Insure all dishes placed in the cheesemelter are oven safe.
Pre-heat pans in the cheesemelter or on a stove.
Turn products halfway through cooking, as needed.
Use the unit in Automatic as much as possible, use Constant during peak periods.
DON'T:
Do not use the cheesemelter as a cooking or baking device, it is best suited for finishing dishes
immediately prior to serving.
Do not use the unit to heat or thaw chilled or frozen product.
Do not place aluminum foil on the rack or bottom shelf. This will reflect heat and expose
components to unnecessary high temperatures.
Do not move rack from one position to another without hand protection.
9
SEQUENCE OF OPERATION
Power switch turned to on:
!
120 VAC to Solenoid valve.
!
Pilot lit manually.
!
Pilot confirmed through flame switch.
!
120 VAC to Constant / Auto switch.
Auto / Constant switch to “Auto” position.
!
120 VAC to Rack sensitive to shelf switch.
Rack switch activated.
!
Main burner ignition.
Auto / Constant switch to “Constant” position.
!
Main burner ignition.
10
TROUBLESHOOTING
NO POWER
PROBABLE CAUSE
CORRECTIVE ACTION
Defective outlet
!
Confirm that outlet is putting out 120 VAC single phase.
Tripped Circuit Breaker
!
Confirm that breaker is set in proper position.
Defective Power Cord
!
Confirm that power cord has continuity through it.
Defective Power Switch
!
Confirm that power switch is operating correctly.
NO PILOT
PROBABLE CAUSE
CORRECTIVE ACTION
Plugged orifice
!
Clean plugged orifice.
!
Replace if necessary.
!
Clean air vent located on the top of the regulator behind W/C
adjustment.
!
Replace if necessary.
!
Set regulator for correct W/C. (6” for NG, 10” for LP)
Faulty regulator
Incorrect Water Column
11
NO BURNER
PROBABLE CAUSE
CORRECTIVE ACTION
Auto / Constant switch in
incorrect position.
!
!
!
!
Confirm that in “Constant” position that main burner activates.
Confirm that in “Auto” position that main burner activates only when
product is placed on the rack.
Replace as necessary.
!
Clean air vent located on the top of the regulator behind W/C
adjustment.
Replace if necessary.
Plugged Main orifice
!
!
Clean plugged orifice.
Replace if necessary.
Incorrect Water Column
!
Set regulator for correct W / C (6” for NG, 10” for LP)
Faulty Solenoid valve
!
!
Check for 120 VAC, 1100 Ω on valve.
Replace if necessary.
Low pilot
!
!
!
Adjust pilot screw on the manifold right next to regulator.
Clean orifice.
Replace if necessary.
Faulty flame switch
!
!
Confirm that pilot is strong and that flame sensor is red.
Replace if necessary.
Plugged or cracked tile
assembly.
!
Replace tile assembly.
Faulty regulator
12
TECHNICAL DATA
MELTER LINE AMPERAGE, AND WATTAGE
Total BTU
Model
Number
NG
LP
Number of
Connections
0-2-10-3
0-2-10-4
0-2-10-5
30,000
40,000
50,000
30,000
40,000
50,000
One 1/2 NPT
One 1/2 NPT
One 1/2 NPT
Electrical Conn.
VAC
AMPS
115V
115V
115V
1.0
1.0
1.0
13
Gas Pressure
NG
LP
W/C
W/C
6”
10”
6”
10”
6”
10”
Clearances
Sides
Back
Bottom
6”
6”
6”
0”
0”
0”
12”
12”
12”
Weight
230 lbs
300 lbs
340 lbs
WIRING DIAGRAM GAS MELTER
80502-01
80506-04
30303-06
30303-06
31601-01
51100-12
14
0-2-10-3, 0-2-10-4, 0-2-10-5
GAS CHEESE MELTER
DESCRIPTION
PART NO.
Switch Toggle On-Off
Pilot Light 208/240V 6” Lead Black Body
Spring Regulator LP
Spring Regulator NG
Micro Switch Assembly
Pilot Burner Assembly Mod. Kit (Before D-52897)
Valve Manual Main Burner, 4ft & 5ft Units
Valve Manual Gas Pilot Burner
Valve Manual Main Burner, 3ft Units
Catch Magnetic Door
Knob Gas On-Off Chrome
Infrared Gas Burner 15 5/16” Long, 4ft & 5ft Units
Infrared Gas Burner 26 7/8” Long, 3ft & 5ft Units
Manifold Gas Melter, 3ft, 4ft & 5ft Units
Manifold Gas Melter, 4ft & 5ft Units
Pilot Burner Assembly (After D-52897)
Orifice Pilot Burner .010 DRL LP
Orifice Pilot Burner .021 DRL NG
Orifice Gas Spud #42 DRL NG 30k for 26 7/8” Burner
Orifice Gas Spud #48 DRL NG 20k for 15 5/6” Burner
Orifice Gas Spud #52 DRL LP 30k for 26 7/8” Burner
Orifice Gas Spud #55 DRL LP 20k for 15 5/6” Burner
Orifice Gas Spud #45 DRL NG for 15 5/16” Burner (Chili’s Units
Only)
Orifice Gas Spud #38 DRL NG for 26 7/8” Burner (Chili’s Units
Only)
Orifice Gas Spud #54 DRL LP for 15 5/16” Burner (Chili’s Units
Only)
Orifice Gas Spud #50 DRL LP for 26 7/8” Burner (Chili’s Units
Only)
Regulator Gas Set 6” NG
Regulator Gas Set 10” LP
Valve Solenoid Gas 120 VAC
Flame Switch 36” Long Capillary
15
30303-06
31601-01
51001-10
51001-11
51100-12
60101-18
70402-05
70402-06
70402-07
70602-06
70701-43
80005-01
80005-02
80100-10
80100-11
80201-20
80401-09
80401-11
80404-03
80404-09
80404-13
80404-16
80404-23
80404-24
80404-27
80404-28
80501-01
80501-03
80502-01
80506-04