1
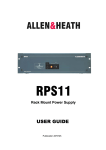
RPS9
RACK MOUNT
POWER SUPPLY
USER
GUIDE
PUBLICATION AP0334
Warranty
LIMITED ONE YEAR WARRANTY
This product has been manufactured in the UK by ALLEN & HEATH and is warranted to be free from defects in materials or
workmanship for a period of one year from the date of purchase by the original owner.
To ensure the high level of performance and reliability for which this equipment has been designed and manufactured please read
the User Guide before use.
In the event of a failure notify and return the defective unit to ALLEN & HEATH or its authorised agent as soon as possible for
repair under warranty subject to the following conditions:
CONDITIONS OF WARRANTY:
1. The product has been installed and operated in accordance with the instructions in the installation instructions in the User
Guide.
2. The product has not been subject to misuse either intended or accidental, neglect, or alteration other than as described in the
installation instructions in the User Guide or approved by ALLEN & HEATH.
3. Any necessary adjustment, alteration, or repair has been made by ALLEN & HEATH or it's authorised agent.
4. The defective unit is to be returned carriage prepaid to ALLEN & HEATH or it's authorised agent with proof of purchase.
5. Units to be returned should be packed to avoid transit damage.
These terms of warranty apply to UK sales. In other territories the terms may vary according to legal requirements.
Allen & Heath Agent:
ALLEN & HEATH.
Kernick Industrial Estate,
Penryn,
Cornwall.
England.
TR10 9LU
www.allen-heath.com
Tel: 01326 372070
Fax: 01326 377097
A division of Harman International Industries Ltd.
copyright © 1999 ALLEN & HEATH.
All rights reserved.
Publication AP0334 Issue 3
IMcB 9-8-99
Information in this manual is subject to change without notice and does not represent a commitment on the part of the vendor.
ALLEN & HEATH shall not be liable for any loss or damage whatsoever arising from the use of information or any error contained
in this manual.
No part of this manual may be reproduced, stored in a retrieval system, or transmitted, in any form or by means, electronic,
electrical, mechanical, optical, chemical, including photocopying and recording, for any purpose without the express written
permission of ALLEN & HEATH.
It is recommended that all maintenance and service on the product should be carried out by ALLEN & HEATH or its authorised
agents. ALLEN & HEATH cannot accept any liability whatsoever for any loss or damage caused by service, maintenance or repair
by unauthorised personnel.
2
RPS9 Power Supply
INTRODUCING THE RPS9
The RPS9 is a linear power supply which, like other linear supplies, produces DC voltages by rectifying, smoothing and regulating
AC voltages from the secondary windings of a mains transformer.
Allen & Heath mixing consoles employ a number of DC voltage supply levels in their operation and these are provided at the
output of the power supply unit.
ON
OFF
POWER
IMPORTANT:
Please read this manual carefully before connecting your
RPS9 power supply to mains electricity.
This product complies with the European Electromagnetic Compatibility directives 89/336/EEC & 92/31/EEC
and the European Low Voltage directive 73/23/EEC & 93/68/EEC.
Warning to the User/Installer/Service Engineer
Allen & Heath warns that any unauthorised changes or modifications to the RPS9 unit may invalidate the
legal compliance of the unit and could void the user’s authority to operate the equipment.
Precautions and Safety instructions
General Precautions
Avoid storing or using the RPS9 in conditions of excessive heat or cold, or in positions where it is likely to be subjected to
vibration, dust or moisture. Do not use any liquids to clean the exterior of the unit. A soft, dry cloth or brush is ideal.
SOLVENTS MAY CAUSE DAMAGE TO PAINT OR PLASTIC PARTS
Handling and Transport
The RPS9 is supplied in a specially designed cardboard box. If it is necessary to move the unit any distance after installation, it is
recommended that this carton is used to protect it. Be sure to disconnect all cabling before moving. If the RPS9 is to be moved
regularly (e.g. touring) it is recommended that it is installed in a foam lined case. At all times avoid applying excessive force to any
switches or connectors.
3
Installation of the RPS9
Free Standing
The RPS9 can be operated as a free standing unit without requiring any special cooling arrangement, but should not be
accidentally or deliberately covered in any way. Always stand the unit on a firm flat surface well away from any soft furnishings
such as carpets or curtains.
Rack Mounting
The RPS9 is designed as a 19 inch rack mount unit and will occupy 2U (3.5 inches) of rack space.
An important consideration when rack-mounting the unit is the need for natural convection of air flow over the whole unit.
Good ventilation below the unit, in the floor or back of the rack, will ensure a path for continuous air flow.
Other equipment in the rack which is known not to produce a significant amount of heat should be mounted below the unit.
Equipment which also relies on good air flow within the rack (i.e. most power amplifiers and other power supplies) should be given
due consideration and some space should be provided between such units and between the RPS9 unit. Forced convection, by
means of a fan-tray, may be desirable in this situation.
Location
As with any power supply that contains a mains voltage transformer, it is recommended that the RPS9 is physically separated from
other equipment, particularly that which carries low level audio signals, to avoid any possible hum pick-up. For this reason the unit
is provided with a long (3m) output cable to enable it to be positioned away from the mixing console. For the same reason, when
rack-mounting it is preferable to avoid locating the unit adjacent to signal processing equipment.
Earthing
Finally; some consideration should be given to the earthing arrangement of the system at the centre of which is the console and
the RPS9. The console chassis is earthed, to mains earth via the power supply. When rack-mounting the RPS9 care should be
taken to avoid any possible “ground loops” in the system which would introduce audible hum to otherwise clean audio signals.
Ground loops may occur where signal processing equipment, patched to the console, has its signal earth connected to the
equipment chassis. A ground loop is formed if the chassis of the signal processing equipment and the RPS9 chassis are in electrical
contact through the fixing rails they share in the rack. The RPS9 includes a “ground lift” switch on the rear panel. This isolates the
audio 0V from the chassis earth. Operation of this switch may alleviate hum caused by a ground loop. Note that this will not
disconnect the console chassis from mains earth, which must remain connected at all times.
Using the RPS9
ALWAYS MAKE SURE THAT THE POWER SUPPLY HAS BEEN SET TO THE SAME AC
MAINS VOLTAGE AS PROVIDED FROM THE MAINS SOCKET OUTLET
Always switch the power supply off before connecting or disconnecting the console power cable, removing or installing modules
and servicing. In the event of an electrical storm, or large mains voltage fluctuations, immediately switch off the power supply and
disconnect from the mains supply.
During normal operation some heat is generated. This is dissipated by the rear heatsink and chassis ventilation.
DO NOT COVER THE UNIT DURING OPERATION
4
THIS UNIT CONTAINS NO USER SERVICEABLE PARTS, REFER ALL SERVICING TO A
QUALIFIED ENGINEER, THROUGH THE APPROPRIATE DEALER NETWORK
Mains Voltage Setting
SPECIAL ATTENTION SHOULD BE GIVEN TO THE FOLLOWING INFORMATION
The RPS9 is capable of operating over a wide range of AC mains input voltages by means of a mains voltage selector. It is
important to check that the RPS9 has the correct voltage setting as marked on the rear panel of the power supply. Confirm that the
voltage setting matches the local AC mains supply in your area.
DO NOT CHANGE THE AC MAINS VOLTAGE SETTING WITHOUT FIRST DISCONNECTING THE
MAINS LEAD FROM THE AC MAINS SOCKET
To alter the setting of the AC mains
input voltage, lever out the fuseholder
with a suitable tool. Pull the fuse carrier
assembly clear of the unit and rotate it
until the required voltage aligns with the
arrow. Push the fuse carrier back into
place.
Check the correct fuse is fitted for the
selected mains input voltage.
Check the arrow indicates
the correct AC mains
voltage setting for your
local AC mains supply.
Set the voltage selector to:
100 V for ac mains input voltages between 100-115 V ac
120 V for ac mains input voltages between 115-125 V ac
220 V for ac mains input voltages between 210-230 V ac
230 V for ac mains input voltages between 230-264 V ac
DO NOT ATTEMPT TO USE THE POWER SUPPLY IF IT IS SET TO A DIFFERENT AC MAINS
INPUT VOLTAGE TO THE LOCAL AC MAINS SUPPLY IN YOUR AREA
DO NOT USE DC MAINS INPUT VOLTAGES
The power supply is provided with an IEC type mains connector and a moulded mains plug. Check that this is suitable for
connection to the wall socket outlet.
5
Replacing Mains Fuse
The AC mains fuse is located on the rear of the RPS9 unit next to the AC mains connector. In the event of a mains surge or underrated fuse value, the mains input fuse will rupture. Switch off the power supply and remove the mains lead plug from the “AC
MAINS IN” socket on the rear of the unit.
Check the fuse and replace if necessary. Check also the AC mains input voltage setting is correct for the mains supply in your area
before switching the unit on again.
TO AVOID THE RISK OF FIRE REPLACE FUSE WITH THE CORRECT TYPE ONLY, AS
INDICATED ON THE UNIT
In the event of repeated failure of the mains fuse, consult the local dealer from where the unit was purchased.
AC MAINS VOLTAGE SETTING
FUSE RATING
220/230 VAC
100/120 VAC
T 1A / 250V
T 3.15A / 250V
Technical Specification
Mains Input Voltage Settings
230/220/120/100 VAC @ 47-63 Hz
Power consumption (max.)
150W
Mains Fuse Rating
100-120 V~
220-240 V~
Use T 3.15A/250V
Use T 1A/250V 20mm
20mm
Outputs
DC Voltage Rail
+16 VOLTS
-16 VOLTS
+48 VOLTS
Output Current
2.5A Max.
2.5A Max.
100mA Max.
DC Output Socket Pin Connections
Pin 1
Pin 2
Pin 3
Pin 4
Pin 5
=
=
=
=
=
-16 Volts
AUDIO 0V
CHASSIS 0V
+16 Volts
+48 Volts
Overall Dimensions
Front Panel
19 inch 2U (482mm x 88mm)
Weight: 5Kg
Chassis
Height:
Width:
Depth:
(11 pounds)
6
(Maximum External)
78mm including feet (3.07 inches)
400mm (15.75 inches)
130mm (5.12 inches)
Servicing
THIS UNIT CONTAINS NO USER SERVICEABLE PARTS. REFER ALL SERVICING TO A
QUALIFIED SERVICE ENGINEER, THROUGH THE APPROPRIATE ALLEN & HEATH DEALER
Initial operational tests on the power supply can be carried out by switching the unit ON and checking the front panel LED
indicator is illuminated. If the LED indicator is not illuminated, check the fuses are intact in the mains plug (where fitted) and the
unit fuseholder on the rear panel.
THIS OPERATION SHOULD ONLY BE CARRIED OUT BY A TECHNICALLY COMPETENT
PERSONNEL
If the front panel LED indicator is illuminated but the console appears not to have any power then it may be necessary to check the
voltages present on the output connector. Refer to the Technical Specification section in this manual for the DC output voltage
levels.
Any fault condition, with the exception of simple fuse failures, will require access to the internal assemblies of the power supply.
Servicing Components
ALL SERVICE AND REPAIR WORK MUST ONLY BE CARRIED BY TECHNICALLY COMPETENT
PERSONNEL
REPLACEMENT OF ANY COMPONENTS SHOULD BE UNDERTAKEN ONLY AFTER
DISCONNECTING THE MAINS SUPPLY LEAD FROM THE POWER SUPPLY UNIT
The RPS9 power supply unit requires no internal maintenance or regular servicing. If the RPS9 requires servicing or repair then refer
to the service manual for the power supply or contact your Allen & Heath dealer.
7