1
Before starting please download the latest Qu-Pac firmware
and documentation from www.allen-heath.com.
For Firmware Version V1.7
Publication AP9815
Limited One Year Manufacturer’s Warranty
Allen & Heath warrants the Allen &Heath -branded hardware product and accessories contained in the
original packaging ("Allen & Heath Product”) against defects in materials and workmanship when used
in accordance with Allen & Heath's user manuals, technical specifications and other Allen & Heath
product published guidelines for a period of ONE (1) YEAR from the date of original purchase by the
end-user purchaser ("Warranty Period").
This warranty does not apply to any non-Allen & Heath branded hardware products or any software,
even if packaged or sold with Allen & Heath hardware.
Please refer to the licensing agreement accompanying the software for details of your rights with
respect to the use of software/firmware (“EULA”).
Details of the EULA, warranty policy and other useful information can be found on the Allen & Heath
website: www.allen-heath.com/legal.
Repair or replacement under the terms of the warranty does not provide right to extension or renewal
of the warranty period. Repair or direct replacement of the product under the terms of this warranty
may be fulfilled with functionally equivalent service exchange units.
This warranty is not transferable. This warranty will be the purchaser’s sole and exclusive remedy and
neither Allen & Heath nor its approved service centres shall be liable for any incidental or
consequential damages or breach of any express or implied warranty of this product.
Conditions Of Warranty
The equipment has not been subject to misuse either intended or accidental, neglect, or alteration
other than as described in the User Guide or Service Manual, or approved by Allen & Heath.
Any necessary adjustment, alteration or repair has been carried out by an authorised Allen & Heath
distributor or agent.
The defective unit is to be returned carriage prepaid to the place of purchase, an authorised Allen &
Heath distributor or agent with proof of purchase. Please discuss this with the distributor or the agent
before shipping. If the unit is to be repaired in a different country to that of its purchase the repair may
take longer than normal, whilst the warranty is confirmed and parts are sourced. Units returned should
be packed in the original carton to avoid transit damage.
DISCLAIMER: Allen & Heath shall not be liable for the loss of any saved/stored data in products that
are either repaired or replaced.
Check with your Allen & Heath distributor or agent for any additional warranty information which may
apply. If further assistance is required please contact Allen & Heath Ltd.
Qu Series products comply with the European Electromagnetic
Compatibility directive 2004/108/EC and the European Low Voltage
directive 2006/95/EC.
Any changes or modifications to the product not approved by Allen & Heath
could void the compliance of the product and therefore the users authority to
operate it.
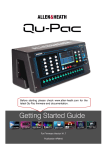
Qu-Pac Getting Started Guide AP9815 Issue 1
Copyright © 2014 Allen & Heath. All rights reserved
ALLEN&HEATH
Allen & Heath Limited, Kernick Industrial Estate, Penryn, Cornwall, TR10 9LU, UK
http://www.allen-heath.com
Qu-Pac Getting Started Guide
2
AP9815 iss1
IMPORTANT - Read these instructions before starting:
Safety instructions
Before starting, read the Important Safety Instructions printed on the sheet supplied with the
equipment. For your own safety and that of the operator, technical crew and performers, follow
all instructions and heed all warnings printed on the sheet and on the equipment panels.
System operating firmware
The function of the Qu mixer is determined by the firmware (operating software) that runs it.
Firmware is updated regularly as new features are added and improvements made. The
firmware version current when this guide was released is noted in the Contents section.
The latest firmware can be downloaded from the Allen & Heath website, transferred to USB key
and then loaded into the Qu mixer using the Firmware Update utility. Read the Release Notes
that come with the firmware.
Check the Allen & Heath website for the latest version of Qu-Pac firmware.
Software licence agreement
By using this Allen & Heath product and the software within it you agree to be bound by the
terms of the relevant End User Licence Agreement (EULA), a copy of which can be found on
the Allen & Heath website ( www.allen-heath.com/legal ). You agree to be bound by the terms of
the EULA by installing, copying, or using the software.
Further information
Please refer to the Allen & Heath website for further information, knowledgebase and technical
support. You can join our Allen & Heath Digital Community to share knowledge and information
with other Qu users.
Check for the latest version of this Getting Started Guide.
Download the Qu Series Reference Guide AP9372.
General precautions
To prevent damage to the controls and cosmetics, avoid placing heavy objects on the
control surface, scratching the surface or touch screen with sharp objects, or rough
handling and vibration.
Protect the equipment from damage through liquid or dust contamination. Cover the
mixer when it is not being used for a long period.
Computer and touch screen technology can be affected by extreme cold. If the
equipment has been stored in sub-zero temperatures allow time for it to reach normal
operating temperature before use at the venue. Recommended operating temperature
for Qu is 5 to 35 degrees Celsius.
Avoid using the equipment in extreme heat and direct sunlight. Make sure the mixer
ventilation slots are not obstructed and that there is adequate air movement around the
equipment.
Clean the surface with a soft brush and dry lint-free cloth. Do not use chemicals,
abrasives or solvents.
It is recommended that servicing is carried out only by an authorised Allen & Heath
agent. Contact details for your local distributor can be found on the Allen & Heath
website. Allen & Heath do not accept liability for damage caused by maintenance, repair
or modification by unauthorised personnel.
Qu-Pac Getting Started Guide
3
AP9815 iss1
1. Packed contents
Qu-Pac Mixer
Getting
AP9815
Started
Guide
Safety Sheet
AP9240/CL-1
•
Read this before starting
19” Rack Ears and screws
Mains lead
AA9848-L and AA9848-R
4x AB0344 M6x16 screws
4x AB0345 M6 cups
4x AB0332 M4x8 screws
•
Check this is correct for
your territory
Options and Accessories available
Remote Audio Racks
Provides remote audio over dSNAKE Cat5 cable digital snake.
AR2412 24 Mic/Line in, 12 Line out
AR84 8 Mic/Line in, 4 Line out
Part: GLD-AR2412
Part: GLD-AR0804
AB168 16 Mic/Line in,
8 Line out Remote
AudioRack.
Part: AB1608
LEDlamp
Right angled 4-pin
XLR LED lamp with
built-in dimmer
Cat5 cables
For use with dSNAKE remote
audio
AH8822 2m (6.6’) short patch
AH9651 20m (66’) coil
AH9650 100m (330’) drum
Part: LEDlampX
Qu-Pad app for iPad
Qu-You app for iOS devices
Available from the Apple Store
Polyester carry bag
Part AP9931
Full mix control
Qu-Pac Getting Started Guide
4
Personal monitoring
AP9815 iss1
2. Contents
1. Packed contents ................................................................................................................................. 4 2. Contents .............................................................................................................................................. 5 3. Introduction ......................................................................................................................................... 6 4. Installing Qu-Pac ................................................................................................................................. 7 5. Rear Panel ........................................................................................................................................... 8 6. Front Panel ........................................................................................................................................ 10 7. Audio Signal Processing .................................................................................................................. 12 8. Operating Qu-Pac ............................................................................................................................. 13 8.1 Mixing using the Front Panel Controls .................................................................................... 13 8.2 Mixing using Wireless Control ................................................................................................. 15 8.3 Qu-Control................................................................................................................................ 17 9. Resetting the Mixer ........................................................................................................................... 18 9.1 Reset Mix Settings – A starting point for mixing ...................................................................... 18 9.2 System Hard Reset .................................................................................................................. 19 About this guide
This is the Getting Started Guide for the Allen & Heath Qu-Pac rack
mount digital mixer.
For more information about Qu-Pac setup and mixing functions please
refer to the Qu Mixer Reference Guide available for download from
the Allen & Heath website:
www.allen-heath.com
Please Note
This guide refers to Qu firmware V1.7. Please refer to the Allen &
Heath website for the latest version of firmware and this guide.
For information on the AR2412, AR84 and AB168 remote AudioRacks
please refer to their user guides.
Qu-Pac Getting Started Guide
5
AP9815 iss1
3. Introduction
Qu-Pac is part of the Allen & Heath Qu Series of digital mixers. It is a faderless version with the same local
connections as the Qu-16, but features the Qu-32 mix engine and can therefore be expanded to 32
channels using an optional AudioRack linked via the dSNAKE Cat5 digital snake. Qu-Pac is intended for
wireless live mixing, for example using an iPad. It can also be fully controlled using its front panel touch
screen. Qu-Pac has many applications where a compact solution is required:
Compact live mixer for wireless remote mixing
Free standing or 19” 4U rack mount (rack ears supplied)
Band mixer for side-of-stage live mixing, personal monitoring, live and DAW multitrack recording
Installed mixer with user logins for live event technician and non-technical staff zone control
Corporate event mixing
16 Mic/Line inputs expandable to 32 via dSNAKE (digital snake and optional AudioRacks)
3 stereo Line inputs, 12 mixes (4 mono, 3 stereo, LR), 4 stereo groups, 2 stereo matrix
4 internal FX engines with dedicated return channels
4 Mute groups, 4 DCA groups
Input processing – Preamp, HPF, Gate, PEQ, Compressor, Delay, Ducking
Output processing – PEQ, Graphic EQ, Compressor, Delay
100 Scene memories with recall filters, safes and USB data transfer
Qu-Drive for stereo and 18-track recording/playback to USB hard drive
32 in, 32 out USB streaming, MIDI DAW control
Qu-Pad engineer’s mixing wireless remote app for iPad
Qu-You personal monitoring app for iPhone, iPad, iPod Touch
Compatible with the Allen & Heath ME personal mixing system
Customisable 15 SoftKeys, 16 Sel keys, Qu-Control screen
User permissions and login to enable operator access required
Qu-Pac Getting Started Guide
6
AP9815 iss1
4. Installing Qu-Pac
Free Standing
- For operating while on a
desk, shelf or other flat surface.
Make sure the 4 rubber feet are fitted.
Allow space at the sides and rear for ventilation.
The mixer can be transported in a purpose
designed padded bag or flight case.
Optional polyester Qu-Pac padded carry bag
AP9931 is available from Allen & Heath.
Rubber feet
Rack Cased - For operating while fitted into
a 4U space in a standard 19” equipment rack or
flight case.
Choosing a ‘shallow’ case with internal depth of
200mm (8”) or more would allow easy access to
the rear connectors.
The mixer front panel is angled upwards to allow
easier access to the controls while in the rack.
Qu-Pac is shipped with a rack ear kit to convert
from free standing to rack operation. To fit the
rack ears:
Secure Qu-Pac into the
rack using 2x M6x16
screws (AB0344) and
plastic cups (AB0345)
per side.
Fit the ears to the
case using 2x
M4x8 screws per
side.
If necessary, remove the 4x rubber feet by
prizing the central plastic grommet out
using a small flat bladed screwdriver.
Note Allow adequate air flow around the ventilation slots at the rear and through the inside section of the
case. Do not block the sides.
Dimensions
Shown in millimetres (inches)
122 (4.8")
Angle
17 degrees
181 (7.13")
177 (6.97") 4U Rack Space
440 (17.32") Free Standing
174 (6.85")
274 (10.8") to allow for connections
Qu-Pac Getting Started Guide
7
AP9815 iss1
5. Rear Panel
2
1
12
3
17
10
15
11
9
8
7
6
5
4
13
14
16
1
Local Mic/Line inputs 1-16 - Plug into either the XLR Microphone
or TRS jack Line socket, not both. The Line input adds a 10dB pad to attenuate very
hot signals.
Mic/Line inputs 17-32 can be accessed using an optional AudioRack connected via
dSNAKE. You can choose the source to Qu-Pac channels from these local inputs,
remote dSNAKE inputs, Qu-Drive USB playback or USB streaming from a computer.
Note - To avoid loud thumps, mute the channel before plugging in mic cables or
equipment while 48V phantom power is turned on.
2
Local Stereo inputs ST1, ST2 - The L input normals (switches)
through the R input jack so that you can work with a mono source by plugging into
just the L/M input. To work with RCA phono connections use jack to RCA converter
plugs.
3
Talkback input - Dedicated input for plugging in a microphone for
the engineer to talk to stage monitors or house. Use the Setup / Audio / Talkback
screen to set its gain, HPF, 48V and route to the various mixes.
4
Local Mix outputs - These are dedicated XLR outputs for mono Mix
1-4 and stereo Mix 5-6, 7-8 and 9-10. These mixes can also be patched to other
sockets and dSNAKE.
Dedicated Group and Matrix outputs are not available locally. However, these can be
patched locally to the Alt Out and AES outputs, and via dSNAKE to remote
AudioRack sockets.
5
Local LR outputs - Left and Right XLR output of the main stereo mix.
LR can also be patched to other sockets and dSNAKE.
6
Alt output - Stereo ‘alternative’ jack output with dedicated front panel
level control. Use the Setup / Output Patch / Surface screen to patch an output
pair. For example, you could patch a stereo Group, Matrix or local PAFL monitor
speakers.
Qu-Pac Getting Started Guide
8
AP9815 iss1
7
2TRK output - Dedicated stereo recording jack output that follows the
main LR mix. It is post-fader and therefore affected by the LR master fader.
8
AES output - 2-Channel AES (Audio Engineering Society) digital audio
standard output for connection using an XLR cable to equipment fitted with an AES
input. Use the Setup / Output Patch / Surface screen to patch outputs to the AES
socket.
9
USB B port - USB type B socket for 32 channel, bi-directional audio
streaming and MIDI control between the mixer and a computer running DAW (digital
audio workstation) software. Use the Setup / Output Patch / USB Audio screen to
patch mixer signals. Qu-Drive and USB B streaming share the same patch.
It is typical to set the channel source to Insert Sends (pre-processing) for live
recording, or Direct Outs (set post) for DAW recording.
Refer to the Allen & Heath web site for information on Windows® and Apple® Mac
drivers available for Qu.
10
dSNAKE port - Proprietary Allen & Heath ‘digital snake’ single Cat5
cable connection for remote audio using optional AR2412, AR84 or AB168
AudioRacks, and for personal monitoring using ME-1 personal monitor mixers.
Note Qu-Pac has the same connectors as the Qu-16 mixer but the processing
engine of the Qu-32. Use dSNAKE to access the additional 17-32 inputs and
dedicated Group and Matrix outputs.
Use the Setup / Output Patch / dSNAKE screen to patch mixer outputs to the
AudioRack sockets. Use the Setup / Output Patch / Monitor screen to patch
channels to the ME monitor system. It is typical to set the global Direct Out option to
pre-fade, post-mute, post-processing for these monitor sends.
11
Network port - For connection to a wireless router (access point) for
live mix control using iOS devices running Allen & Heath Qu apps. You can use one
iPad running Qu-Pad (engineer’s mix control), and up to 7 iPhones, iPad or iPod
Touch devices running Qu-You (musicians personal monitor control).
12
Lamp - 4-Pin socket to plug a standard 12V, 5W or lower power
gooseneck lamp to illuminate the connector panel or working space around the
mixer. We recommend the Allen & Heath LEDLamp with built-in thumbwheel
dimmer.
13
Power On/Off switch
- Press to switch the mixer on. Press again to
switch it off.
14
AC Mains input - IEC socket to plug in a mains lead with moulded
plug suitable for your territory. A suitable mains lead is shipped with the mixer.
Note – Do not replace the mains plug or modify the lead in any way. Do not remove
or defeat the ground connection.
15
Cable clamp - A plastic P-clip cable clamp is provided to secure the
mains cable. Slot the cable in or lock it in place using a star head Torx T20
screwdriver to refit the clamp around the cable.
16
Fuse - Mains input fuse to protect the mixer circuits in the unlikely event
of a failure or excessive power surge. Always replace with the same type and rating
as printed on the rear panel.
17
Kensington lock
- A slot for fitting a standard Kensington anti-theft
security device.
Qu-Pac Getting Started Guide
9
AP9815 iss1
6. Front Panel
8
1
4
5
9
10
11
12
7
3
6
2
1
Touch Screen - All live mixing, setup and memory management
functions can be controlled from the Qu-Pac front panel. The colour touch screen
provides quick access to these functions. The top presents tabs for the available
pages. The bottom presents a toolbar showing status information.
2
Screen Rotary - Adjusts the value of parameters on screen. Touch a
parameter. It highlights orange to show it is selected. Turn the Rotary to adjust its
value.
3
Fn key - Press to open an option pop-up page for the currently selected
screen. Its function, if available, is shown in the screen toolbar above the key. For
example, the Fn key provides quick access to the Libraries while in Processing
screens.
4
Live mixing screens - These screens provide quick access to live
mixing functions such as level control and signal processing:
Qu-Control - User assignable custom screen for simple
level, mute and on/off control. A user permission can be set
so that this is the only control available to the ‘Basic User’, for
example bar staff control of zone music source and level at a
venue.
Processing – Follows the active Sel key or button to open
the signal processing screens. This includes the Preamp,
Gate, Ducker, PEQ, GEQ, Compressor, Delay, FX
parameters and more.
Routing – Follows the active Sel key or button to open the
routing assignment screens.
Channel – Follows the active Sel key or button to open a
virtual ‘fader strip’ on screen. This replaces the physical
faders of the other Qu mixer models. It provides a way to
work with the faders when not mixing using an iPad.
The Channel screen presents tabs and Sel buttons to access
any Qu input or output channel, and the DCA and Mute
Group masters.
Qu-Pac Getting Started Guide
10
AP9815 iss1
5
System screens - These screens provide access to the mixer setup,
Qu-Drive recording and memories:
Home – Pages of housekeeping functions including safe
Shut Down, Lock Surface, change and set up User Profile,
view Meters and RTA, and work with Qu-Drive stereo and
multitrack recording and playback.
FX – View, load and set up the 4 internal effects units. The
Back Panel view lets you patch each unit as inserted or
send/return. These can provide reverbs, delay and
modulation effects types.
Scenes – Name, store and recall to/from 100 Scene
memories. You can block selected parameters from scene
recall by setting a global as well as per-scene Filters. You
can protect selected channels from recall by making them
Safe.
Setup – Access menus to configure Qu-Pac. Includes PAFL
options, Talkback, Signal Generator, Custom Sel keys,
SoftKeys, Network, MIDI, Output Patching and more. You
can transfer Scene, Library and Show data to a USB storage
device, calibrate the faders and screen, format a USB drive
for recording, and update the mixer firmware.
Press and hold the Setup key and turn the screen Rotary for
the dimmer function to adjust screen and indicator
brightness.
6
Copy/Paste/Reset keys - These let you copy or reset processing
or mix parameters. To copy – Hold down the Copy key and press the key associated
with the parameters you wish to copy. Then hold down the Paste key and press Sel
key (for processing) or Mix key (for send levels, pan and assign) of the channel or
mix to copy to. To Reset – Hold down the Reset key and press an associated key:
+ Input strip Sel key = HPF, Gate, PEQ, Comp, Delay
+ Mix strip Sel key = PEQ, GEQ, Comp, Delay
+ Master Mix key
= Send levels, Pans, Assign
+ touch Scene item in list = Scene name and contents
Note Copy/Reset of Mix does not affect the Pre/Post fader
settings.
7
Custom Select keys - 16 Sel keys can be user assigned for quick
access to any combination of channels, masters and DCAs. For example, assign
only those that you are using for your show. Space is provided for a label strip.
Assign these keys using the Setup / Control / Custom Sel screen.
8
SoftKeys - 15 SoftKeys can be user assigned for quick access to
various functions such as mutes, tap tempo, scene recall and navigation, Qu-Drive
transport control, PAFL clear or Talk. Default is keys 1-4 assigned as Mute Groups 14, and key 15 assigned as Talk for talkback to stage. Assign these keys using the
Setup / Control / SoftKeys screen.
9
ST3 Input - Convenient front panel stereo mini jack input for plugging in
a local playback source such as an iPod, phone or laptop.
10
Qu-Drive USB socket - For Scene, Library and Show data transfer,
and also for stereo or 18-track multitrack recording direct to a USB storage device.
Note – Qu-Drive audio recording and multitrack playback require the USB storage
device to support high sustained transfer rates. Not all USB devices will guarantee
flawless performance. To find out more please refer to the ‘Understanding Qu-Drive
and USB’ document in the Qu Knowledgebase on the Allen & Heath web site.
Qu-Pac Getting Started Guide
11
AP9815 iss1
11
Phones - Level trim and standard ¼” jack socket for plugging in
headphones to listen to the mixer PAFL (monitor) signal.
12
Alt Out - Level control for the stereo ‘alternative’ local output available on
the rear panel. The source to this output is patched using the Setup / Output Patch
/ Surface screen. For example you could access a stereo Matrix output here.
Note – For more information on setting up and operating Qu-Pac download the Qu
Mixer Reference Manual from the Allen & Heath web site.
7. Audio Signal Processing
The following diagram shows the available Qu-Pac signal flow and processing. A more detailed diagram
and further information is available within the Qu Mixer Reference Guide which can be downloaded from
the Allen & Heath website.
All input and output channels have the processing shown here at all times. For
example, every mix has a 1/3rd octave Graphic EQ, a 4-band Parametric EQ,
Compressor and Delay. No need to patch from a limited resource.
The internal FX provides 4 slots for loading from several effects types available.
These can used for Send/Return effects (reverb, delay) or inserted into any channel
or mix.
A Ducker function is available. You can choose to insert either an FX or the Ducker
at the input channel or Group insert points. Each channel can have its own settings
(single mode) or multiple channels can share the same settings (ganged mode).
Qu-Pac
SIGNAL FLOW
Mic/Line Inputs
1 ------ 16
Mic
Line
PREAMP
GAIN
48V
ST1
L/M
Cat5 Digital Snake to AudioRack
Line Inputs
ST2
L/M
ST3
Stream
32 ch
R
Local Inputs
Channel SOURCE
USB B
FX
or
Ducker
TRIM POL Insert HPF
0
Record
Stereo, 18 trk
GATE PEQ COMP DELAY
Mix 1-----------10
Main LR
USB dSNAKE
MUTE
Virtual
FADER
ASSIGN
PAN
PRE/POST
L
R
SENDS
Trigger
Route to:
GRP
LR
MIX Sends
FX Sends
DIR OUT
L
L
R
R
Local Outputs
Mix
PAFL
AES Out
2Trk Alt Out
Stream
32 ch
dSNAKE USB
Inputs
Input CH1-32, ST1-3
CH17-32, Group and MTX Outputs
Line Outputs
Qu-Drive
Playback
Stereo, 18 trk
L/R
R
Remote access to any Input/Output including:
dSNAKE
Masters
Group 1-2, 3-4, 5-6, 7-8
FX or Ducker
Insert
PEQ
GEQ
COMP DELAY
MUTE
Virtual
FADER
L
Trigger
PAN
R
LR post
Output PATCH
PAFL
Output BAL
L
R
Route to:
ASSIGN
PRE/POST
SENDS
Outputs
LR
MIX Sends
FX Sends
MTX Sends
FX
FX Send 1-4
FX Return 1-4
Insert
Virtual
FADER ASSIGN
MUTE
PRE/POST
SENDS
FX 1-4
PEQ
MUTE
Virtual
FADER
GAIN
Mic
DELAY
PAFL MONITOR
PFL TRIM
PHONES
PAFL
ASSIGN
R PRE/POST
SENDS
TALKBACK
Talkback
RTA
L
PAN
PAFL
HPF
TALK ASSIGN
SIG GEN
Sine
LEV
Pink
MUTE
ASSIGN
White
Bandpass
Mono 1-4, Stereo 5-6, 7-8, 9-10 Mix
Route to:
GRP
LR
MIX Sends
FX Sends
Route to:
GRP
LR
MIX
MTX
PEQ
GEQ
COMP DELAY
MUTE
Main LR
Insert
FX
PEQ
GEQ
Route to:
GRP
LR
MIX
MTX
COMP DELAY
MUTE
Virtual
FADER
Matrix 1-2, 3-4
PAFL
Qu-Pac Getting Started Guide
Insert
FX
Virtual
FADER
12
Insert
FX
PEQ
GEQ
COMP DELAY
MUTE
Virtual
FADER
PAFL
Output BAL
L
R
ASSIGN
PRE/POST
SENDS
PAFL
Output BAL
L
R
ASSIGN
PRE/POST
SENDS
PAFL
Output BAL
L
R
Route to:
Outputs
MTX Sends
Route to:
Outputs
MTX Sends
Route to:
Outputs
ASSIGN
PRE/POST
SENDS
AP9815 iss1
8. Operating Qu-Pac
8.1 Mixing using the Front Panel Controls
7
1
3
4
2
6
5
1
Select a channel - Press a Custom Sel key or touch a select button
in the Channel screen to select a channel for editing.
2
Channel screen - Select any channel for editing, and adjust its fader
and send levels using the ‘virtual fader strip’ and screen rotary control.
Any Qu channel, FX or master can be accessed using the tabs in
this screen. Each select button also displays the current level,
mute status and metering providing a useful overview of the mix.
The ‘virtual fader strip’ presents a screen version of the
physical controls found on the other Qu mixer models. This
includes the Fader, Pan control, Mute button, Mute/DCA
group status, PAFL button and channel meter.
Touch the fader to highlight it and use the rotary to adjust its
level. The current dB value is displayed.
Touch the Pan control to highlight it and use the rotary to
adjust its position.
Touch PAFL to listen to the channel signal in the
headphones monitor and view it on the RTA (real time
analyser) screen. Use the Setup / Audio / PAFL screen to
set the PAFL (pre-fade and after-fade listen) options. You can
set a SoftKey to Clear PAFL selections.
Touch the Mix Select button to choose the
current mix. A popup presents a screen layout of
the physical Mix keys found on the other Qu
models. Touch a mix button to change mix.
If a mix other than LR is selected then the faders
turn blue to show that you are adjusting the
channel sends to that mix. The mix master select
button follows the current mix.
Qu-Pac Getting Started Guide
13
AP9815 iss1
3
Processing screen - Access the processing for the currently
selected channel. Touch the top part of the screen to open the page for each
processing type. Touch a parameter box to highlight it and use the rotary to adjust
its value.
Input
Preamp/Linking/Insert/Delay, Gate, PEQ, Compressor
Output
Delay/Insert, PEQ, GEQ, Compressor
Note – To turn phantom power on or off, touch and hold the 48V button for 1
second or longer. This is to prevent accidental operation.
4
Routing screen - Access the routing parameters for the currently
selected channel. Use the tabs to open the available routing pages.
Input channel routing pages let you toggle Pre/Post fade and assignment On/Off
settings. You can access send levels and pan, or alternatively use the Channel
screen for quick access to these while mixing.
Global Direct Output options are also available from the input routing page. Set
these according to your application, for example FX send, USB recording source,
ME personal monitor source, Ducker trigger source.
Mix master routing pages also provide access to global Pre/Post, On/Off, mix
source select, and stereo output Balance control.
Press the Fn key to access the Mute and DCA Group naming and assignments while
in any routing page apart from Matrix.
Press the Fn key while a Matrix is selected to access the sends to that matrix.
5
Screen Rotary - Use this to adjust the value of the parameter
highlighted in orange on the touch screen. The rotary also lets you scroll through
selections in menus, scene lists and setup spin boxes.
6
Fn key - Press this key to open a page of additional options if available
for the currently selected screen. The page function is labelled in the screen above
the key. Exit the page by pressing the key again.
7
SoftKeys - Use these for quick access to functions such as commonly
used mutes, recalling specific scenes, navigating scenes, tap tempo, talking to the
stage, clearing active PAFL and more. SoftKeys are assigned using the Setup /
Control / SoftKeys screen.
Qu-Pac Getting Started Guide
14
AP9815 iss1
8.2 Mixing using Wireless Control
Qu-Pad (engineer’s live mix control) and Qu-You (musician’s personal monitor control) apps are
available free from the Apple Store for iOS devices including iPad, iPhone and iPod Touch.
Setting up the Qu wireless network
The app sends and receives control data over a wireless (Wi-Fi) network. This requires a wireless router
(wireless access point) connected to the Qu mixer Network port.
Qu mixer
Wireless router
iOS device
Qu Network port
Cat5 cable
Choosing a wireless router - For best performance use a dual band (2.4 and
5GHz) wireless router (wireless access point) with auto channel selection.
Setting up the Qu mixer Network - The default setting is DHCP enabled. This is
recommended as it means that the mixer gets it network IP address automatically
from a DHCP enabled router. Go to the mixer Setup / Network screen to check that
DHCP is enabled.
Setting up the wireless router – The default settings of many routers are
immediately compatible with the Qu mixer so you should be able to connect quickly.
However, if you wish to change settings then you will need to access the router
setup utility by connecting it to a PC or Mac using a wired LAN (network)
connection. Follow the instructions provided by the wireless router manufacturer.
Wireless router DHCP settings – Check that the router is set for DHCP so that it
automatically allocates a compatible IP address to your iOS device. This is the
default setting for most routers.
Wireless security -To prevent other people accessing your Wi-Fi we recommend you
enable WPA/WPA2 encryption and set a wireless key (password).
SSID - This is the name broadcast by the wireless router to help identify it in the
network list you will see in the device Settings Wi-Fi page.
Positioning your wireless router – It is important that your iOS device operates
within the specified range and in line of sight of the wireless router. Place it high up
to avoid obstacles such as people and equipment. Avoid locating it behind pillars or
walls, near metal beams or on top of loudspeakers.
Connecting to the wireless router - Make sure the iOS device Wi-Fi is turned ON in
its Settings screen. Choose your wireless router from those shown in the Network
list. Enter the password to connect to the router. After a few moments a tick should
appear to show it has successfully connected to the wireless network. Check that
the icon in the top toolbar shows good Wi-Fi signal strength.
Note – To prevent unauthorised control of your Qu mixer we strongly recommend
that you set a router password to protect your wireless network.
Note - The iOS device remembers the network settings. To prevent it connecting
again in future without the password, for example if you have given a guest engineer
access your Qu with their own device, select your network in their device Settings
Wi-Fi menu and use the 'Forget this network' function.
If you experience connection problems or drop outs – You may suffer
interference from other wireless networks or equipment in the area. Try rebooting the
router to pick up a different channel, or change its band (2.4 or 5GH).
Qu-Pac Getting Started Guide
15
AP9815 iss1
Qu Mixer Requirements - The Qu mixer firmware and app feature release version
numbers must be the same, for example V1.6 firmware will not run with the V1.7
app. However, the maintenance version numbers do not need to be identical, for
example Qu-Pad V1.70 would run with Qu mixer V1.71. Refer to the Allen & Heath
web site for more information and to download the latest Qu mixer firmware.
Wireless devices – Qu-Pac supports Apple iOS devices including iPhone4 or later,
iPad, iPad Mini or iPod Touch running iOS7 or later.
Note – Current firmware supports only one iPad running Qu-Pad. However, you can
connect up to 7 additional iPhones, iPads or iPod Touch devices running the QuYou monitor app.
Qu-Pad is an engineer's mixing tool giving you the freedom to
walk the room or stage and control the sound where it is needed.
For example, for discrete mixing at corporate events, for live show
mixing in music bars where space and layout do not allow a
permanent FOH mix position, or for a band to sound check out
front and then mix from side of stage.
LR mix selected, CH preamp shown
CH PEQ shown
Custom Layer setup
Qu-You provides personal monitor mix control for musicians
and performers on stage. The engineer can still keep an eye on
and control each mix at the Qu mixer at any time.
Touch to select a mix. Once selected it can be locked to this mix
to prevent accidental selection of a different monitor mix.
Master fader and mute for the selected mix.
Channels can be assigned to up to 4 local groups, each with its
own thumbwheel level control.
Double tap a wheel to access its channel levels, pan and meters.
Connect to the wireless network – Connect and power up the wireless router. Wait
a few minutes for it to establish its broadcast. Connect the iOS device to this
network.
Start the app and log in to the Qu mixer – The app opens in its Login page. You
should see your Qu mixer in the list if it is recognised on the wireless network. Select
this and touch Connect.
More information – Read the app Help Manual by touching the ? button on its
Login page for further instructions on how to set up and operate it. Refer to the
Knowledgebase and Digital Community on the Allen & Heath web site.
Qu-Pac Getting Started Guide
16
AP9815 iss1
8.3 Qu-Control
Qu-Control is a custom assignable screen to present just the few controls needed for basic operation. For
example, to control background music source and level within a music bar. It can be associated with the
Qu ‘Basic User’ with permissions set by the ‘Admin’ user so that only this screen is available for nontechnical bar staff to adjust the background music. Access to the live mixing and setup functions can be
locked out for the Basic User.
1
2
1
Qu-Control key - Press to open the Qu-Control screen. Buttons and
level controls configured by the Admin user are presented.
Tabs allow access to up to 5 custom screens. If a screen has no controls assigned
then it is not available to the user.
Touch a button to toggle its state. Touch a level control to highlight it and adjust it
using the screen rotary.
2
Setup page - Press the Fn key to open the Qu-Control setup page for
the currently active tab. This is only available to the Admin User.
Functions can be assigned to up to 15
positions arranged as a grid of 3 rows with 5
columns. If a position is unassigned then it
will appear blank in the user screen.
Touch to open the Function list. You can
choose mutes, level or assignments
(On/Off) associated with channels or mixes.
Touch and spin the rotary to scroll through
the channels or mixes.
Once you have finished assigning the
screen press Apply to save and exit or
Cancel to exit without saving.
Note – Qu-Control settings are stored to USB device as part of the Show file. They
are not stored in Scene memories.
User Permissions
- Three user profiles are available. The ‘Admin’ User can
set access for the ‘Standard’ and ‘Basic Users. Various parameters can be blocked
and passwords can be set. Go to the Home / User screen to set user permissions or
log in as a different user.
Example:
Admin User
Standard User
Basic User
Qu-Pac Getting Started Guide
Engineer in charge of the installation
Mixes live shows, blocked from setup functions
Controls background music only
17
AP9815 iss1
9. Resetting the Mixer
There are two ways to reset the Qu settings to give you a known starting point:
9.1 Reset Mix Settings – A starting point for mixing
This button in the Scenes screen resets the mixer to a
known starting point for mixing. It provides a quick way
to reset the processing, mixes and patching before a
show or after another user has finished with it.
All Scene parameters are reset to a factory default.
Parameters that are not stored in scenes are not
affected. This reset does not affect existing scenes and
libraries stored in the mixer.
If you want to keep your current settings then save
these as a Scene before resetting the mixer.
Note - This reset is not affected by the Global filter and
Safes settings but it does clear these.
Touch and hold the Reset Mix Settings button for 1
second until the confirmation screen appears. This
‘resets the board’ ready for mixing:
Refer to the Qu Mixer Reference
Guide for further information on the
reset functions.
All preamps are patched and have nominal mic
gain set and phantom power switched off, a good
start for vocal microphones,
All EQ is switched in and set flat ready to start
adjusting tone,
Gates and compressors are switched out but have
their parameters set ready for being switched in
for applications such as drum gating and vocal
compression,
Channels are assigned to the mixes and FX with
their faders and send levels turned down ready to
start dialling into the mix,
The mixes are set pre-fade and sourced post-EQ,
pre-compressor ready to be used as monitor
sends.
The FX master and return faders are turned up
and default reverbs and delay patched ready for
you to hear the effects as soon as you raise a
channel send.
The Mix master faders are turned up ready to hear
sound when you raise a channel send. The main
LR master is turned down to avoid unexpected
loud level in the PA.
The Groups are unassigned and their master
faders turned down.
The Matrix sends are assigned and their master
faders turned down.
Creating your own start settings
– You
can start by resetting the mixer and then editing the
patching, levels and parameters to suit your starting
preferences. Name and store this as a Scene, for
example Scene 1 “Reset Board”.
Qu-Pac Getting Started Guide
18
AP9815 iss1
9.2 System Hard Reset
A power up reset is available if you need to fully reset
the Qu mixer settings and memories. This could be
done to clear the system out before sending the mixer
to a client, or if you suspect a system problem.
To reset mix parameters before starting a show or
sound check, use a Scene or the Reset Mix Settings
function.
Note – A hard reset clears all current settings, all
Scenes, User Libraries and User Permissions.
Hold for 5 seconds
while powering up
the mixer
First turn off the system including amplifiers and
powered speakers.
To hard reset the Qu mixer - Press and hold the
touch screen Reset and Setup keys together and then
power up the mixer. Keep the keys pressed for at least
5 seconds while the mixer boots. Release the keys.
The hard reset:
Qu-Pac Getting Started Guide
Resets the current settings the same as using the
Scenes screen ‘Reset Mix Settings’ button.
Resets
non-scene
parameters
preferences to a factory default.
Clears scene recall Safes and all Filters.
Clears all memories including Scenes, User
Libraries and User Permissions.
Resets the Network IP address and the touch
screen calibration.
19
and
user
AP9815 iss1
Qu-Pac Getting Started Guide
20
AP9815 iss1