1
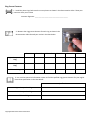
Piston & Ring Measurement Lab Name: _____________________ ID#: _______________________ Engine#: ___________________ Vehicle Make: __________________ Model: ______________________ Engine Size: _______________ NATEF TASKS: I.C.3‐ Inspect and measure cylinder walls/sleeves for damage, wear, and ridges; determine necessary action. I.C.9‐ Inspect and measure piston skirts and ringlands; determine necessary action. I.C. 12‐ Inspect, measure, and install piston rings. Piston Measurements 1. Measure the diameter of each piston directly across the piston skirt. Measure the piston skirt where you see the most amount of wear. (You only have to put measurements for the number of cylinders you have in your engine) Record your measurements in the chart. 2. Inspect the piston skirt for wear or damage‐ record your findings in the chart Piston #1 Piston #2 Piston #3 Piston #4 Piston #5 Piston #6 Diameter
Condition
(Good,
Scuffed,
Severe
Wear)
3. Use a service manual or information system to locate the specified piston diameter: _________________________________________________________________________ 4. Are your pistons within specification? ___________________________________________________ 5. What would you recommend to the customer: ____________________________________________ Copyright 2011 Santini Video Productions Ring Measurements 1. Place each piston ring in its correct cylinder bore as shown in the demonstration video and measure its ring end gap using a feeler gauge. Record your results in the chart below. Cylinder #1 Upper Compression Ring Lower Compression Ring Oil Control Ring Rail #1 Oil Control Ring Rail #2 Cylinder #2 Cylinder #3 Cylinder #4 Cylinder #5 Cylinder #6 2. Use a service manual or information system to locate the specified ring end gap. Record the specifications in the chart below. Upper Compression Ring Lower Compression Ring Oil Control Ring Rails Specification 3. Are you ring end gaps within specification? ____________________________________________ 4. If not why do you think they are not within specification? _______________________________________________________________________________ 5. What would you recommend to the customer? __________________________________________________ Show your instructor so they can check your work so far. Instructor Signature: __________________________________________ Copyright 2011 Santini Video Productions Ring Groove Clearance 1. Install the piston rings back onto the correct pistons as shown in the demonstration video. Show your instructor when you are done Instructor Signature: _________________________________________ 2. Measure the ring groove clearance for each ring as shown in the demonstration video. Record your results in the chart below. Piston #1 Piston #2 Piston #3 Piston #4 Piston #5 Piston #6 Upper Compression Ring Lower Compression Ring Oil Control Ring 3. Use a service manual or information system to find the specified ring groove clearance for your engine. Record the specification in the chart below. Specification Upper Compression Ring Lower Compression Ring Oil Control Ring Copyright 2011 Santini Video Productions