1
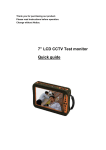
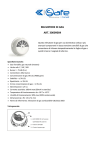
3.5” LCD CCTV Test Monitor
ART. 43600
Via Don Arrigoni, 5 24020 Rovetta S. Lorenzo (Bergamo)
http://www.comelit.eu e-mail: [email protected]
SAFETY PRECAUTIONS
Please read before using
The lightning flash with arrowhead symbol, within
an equilateral triangle, is intended to alert the user
to the presence of insulated dangerous Voltage
within the product’s enclosure that may be
sufficient magnitude to constitute risk of electrical
shock to persons.
The exclamation point within an equilateral
triangle is intended to alert the user to the
presence of important operation and maintenance
(servicing)
instructions
in the literature
accompanying the appliance.
1.
2.
3.
4.
5.
6.
7.
8.
Ground loop maybe causes electrode short-circuit problem. User should follow
principle as bellow in order to avoid shock accident.
a. Don’t connect others I/O in AC/DC mode
b.
Don’t measure AC/DC voltage in any types of I/O function.
c.
Don’t operate AC/DC measure function in charge mode.
Please read the service manual in details before using.
Don't try to disassemble the chassis or the part easily, in case that touch the
power by mistake, is shocked by electricity the danger or caused inside
parts to be damaged ,
Do not attempt to service this unit yourself unless you are authorized to do so.
Opening cover may exposure you to dangerous voltage or other hazards. Refer
all servicing to qualified personnel only.
When being regular, please lock the parts firmly first to prevent the
machine damage.
Please connect correctly in accordance with the regulation , prevent the
machine from using , or striking improperly.
Please don't use any organic solution or the corrosively sanitizer to insert and wipe
away the chassis outside . While inserting and wiping away, please turn off
the power , and use the clean cloth is stained with letting a small amount of
branch water, insert and wipe away appearance.
Please don't use the device under the following abominable environments:
Temperature is lower than -10 degrees Centigrade, or is higher than +50 degrees
Centigrade.
Accessories:
:
Legend:
:
1 Bag
6 Probe
○
○
2 Safeguard ○
7 Video cable
○
3 Terminals ○
8 Neck lace
○
4 Battery
○
9 Belt
○
5 AC adaptor ○
10 Hand link
○
Exploring your Test Monitor
System indicator
Green Light:Power on
Red Light:Charging
Direction key
MENU key
MODE key
POWER key
ISP interface
Power switch
DC Jack
Cable test
10 PTZ protocol test
○
11 RS 232 port
○
12
○ Video extension cord
13 Positive probe
○
14 Negative probe
○
Up/Down/L/R direction for select options
Entry Menu to adjust detail parameters
Switch function mode
Turn on / off Test Monitor
Upgrade firmware interface
Turn on / off your Test Monitor
Adapter in 9V
Cable Open/Short circuit test X 2 sets
PTZ protocol test for RS485 +/- port terminal
Debug for engineer only
Connect to video in、out and audio in cable
+ Probe for DC / AC voltage measurement
- Probe for DC / AC voltage measurement
Function & Operation
Type A. measurement
1. Video Level:
a. Power on and push “MODE key” to get “VIDEO” page.
b. Connect “Video Out” of device with “Video In” of video extension cord
to measure video level.
c. System is auto detects NTSC/ PAL system and measure value will be
showed as below.
2. AC/DC Voltage:
a. Switch “MODE key” to get “AC-2 level mode” or “DC” page.
b. Connect two end of termination with probe to measure voltage.
Caution:
:Distinguish form +/- level is important and necessary in
DC measure mode.
c. The measure value will be showed as below.
Type B. tester
3.PTZ control test:
a. Switch “MODE key” to get “RS485” page as below.
b. Push “MENU key” to entry detail Protocol Setup.
c. Make sure your remote device protocol is setup correctly at first then
configure this as the same.
For example, Protocol:PELCO P / ID:1 / Baud rate:9600
d. Control direction of PTZ camera by ”direction key” and press “Up +
Right” key for Zoom in and press “Down + Left” key for Zoom out is
available that vision was shown on monitor presents communication is
correct.
4.Cable test:
Open or Short circuit test for 2 sets.
a. Switch “MODE key” to get “CABLE TEST” page.
b. Connect two end of termination with “Cable test terminal” to test circuit
status is OK(Short) or NG(Open) as below.
c. 2 testing channels are independently that make sure connect port is
pair at first.
5.Audio test:
a. Switch “MODE key” to get “VIDEO” page.
b. Click “Up key” or “Down key” to open or close speaker for testing
audio output function, default is ON as diagram below.
Type C. video pattern generator
6. Standard pattern output for monitor testing:
a. Switch “MODE key” to get “PATTERN OUT” page.
b. Connect “Video In” of monitor with “Video Out” of video extension cord
to display 8-colorbar standard pattern as below.
c. Switch NTSC / PAL format by “Down key”.
Dimension
Fundamental illustration
1. Language:“Menu key”
”Down key”
Language; There have English, Français,
Deutsch, Italiano, ,Español, 日本語, Chinese language to select.
“Sleep Time” means sleep mode timer setting when
user no use test monitor that system will turn off power
automatically.
2. LCD panel color adjust: Click “Menu key” to entry adjust OSD menu as below.
2. Battery status:Display on the right-up of screen to show battery residual capacity. The
full level estimates 6 hours usage, the least level could provide 5 minutes to
record important data and ready to turn off.
3. Charge method:System indicator will show charge status. Charge independently is
better for battery life and fast short battery charger time.
4. Calibrate method:Adjust the Brightness value to 30 in Menu page then press the
“Right key + MODE key” to entry the calibrate mode. The default value is 128 and user
could adjust 0~250 to decrease or increase ratio from 0~2 times of measurement
value. The adjust measurement parameters include Video level, AC and DC voltage
and this coordinate setup will retention forever until your next setting modification.
Notice:
:When you first time to start using the test monitor, please charge
battery above 5 hours to make sure this battery is fully charge to extend its usage
life as your cell phone. After that the battery just charge 2~3 hours could be charged
fully and enough usage for 5~6 hours. Battery charge life time about 250
times and depend on use environment and operation to decide its decadent
speed. Please follow correct charge method to extend battery life.
Caution:
:Although test monitor could work and charge at the same
time, but must do not measure AC voltage when battery in charger
mode, it will cause explosive accident!
Specification
Model Name
43600
Display Size
3.5”
Panel backlight
LED type
Display Resolution
320 x 240
Charge voltage
4.2 V ±10%
Battery
2200 mA, Lithium Polymer battery
Charge time
2~3 hours
Standby time
Video level measurement
5~6 hours
0~2 Vpp (Voltage peak to peak value)
NTSC/ PAL auto detection
Pattern out
8 Color-bar with 1V standard Vpp
PTZ protocol
PELCO P / D
Protocol Baud rate
2400 / 4800 / 9600 bps
AC voltage range
20~250 V
DC voltage range
0~45 V
Audio test
Build-in speaker for testing (8Ω/1W)
Cable test
Open or Short circuit test X 2 sets
Weight
NW /GW:0.29kg / 1.07kg
Dimension
156 x 90 X 38 mm with safeguard cover
Operating Temp
0 to 45 °C (32 to 113 °F )
Storage Temp
-20 to 45 °C (-4 to 113 °F )
V1.4
The specifications are subject to variations without warning
Via Don Arrigoni, 5 24020 Rovetta S. Lorenzo (Bergamo)
http://www.comelit.eu e-mail: [email protected]