Transcript
No.756-IS
Rev N/C
3/12
A Division of Thiessen Products, Inc.
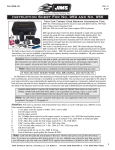
Instruction Sheet For No.756 Tool
Softail Oxygen Sensor Socket
This oxygen sensor socket is specifically made to remove or install the rear exhaust oxygen sensor on Softail models 2012 to present.
ADDTIONAL TOOLS NEEDED TO USE THIS TOOL:
1. 3/8” extension drive
2. 3/8” ratchet wrench
3. 3/8” drive ft-lbs torque wrench
4. JIMS No.4507 copper anti seize lubricant
5. JIMS No.774 Seat Mounting Screw tool for use on H-D No. 3075.
6. H-D or equivalent service manual
REMOVING REAR EXHAUST PIPE O2 SENSOR
1.
2.
3.
4.
5.
6.
Read the complete instructions and refer to service manual before using this tool.
Let motorcycle cool down before performing any service work in the exhaust pipe area.
Remove seat using JIMS tool No. 774 to remove seat for No. 3075 screw.
Remove battery per service manual.
Disconnect rear O2 sensor connector per service manual.
Use JIMS TOOL No. 756 to remove the rear sensor per service manual.
INSTALLING REAR EXHAUST PIPE O2 SENSOR
1. If reusing the sensor always replace the sensor seal with a new one. Make sure larger side of new gasket faces
exhaust and apply a light coat of JIMS No.4507 copper anti seize lubricant or equivalent to the threads. Never
use any other lubes or Loctite or any other chemicals on threads or element area. Also note that the sensors
cannot be dropped or impacted by other components or damage to the sensing element will occur.
2. Install sensor into the threaded insert on the rear pipe and torque to 14 ft-lbs. using your JIMS socket tool No.
756 socket.
3. Connect your rear oxygen sensor connector and insert harness in battery caddy clip. Refer to service manual.
4. Install battery and seat per service manual.
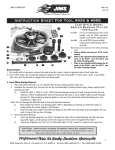
Oxygen Sensors (Inboard
Side of Exhaust Pipes)
555 Dawson Drive, Camarillo, CA 93012 Phone 805-482-6913 • Fax 805-482-7422
1