1
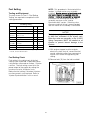
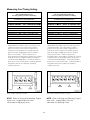
Presetting the Indicator Group
(Former Style)
Program 1U-8869 Digital Position Indicator
(19) to a preset value of 62.00 mm
(the dimension of 9U-7269 Timing Gauge
Block), as follows:
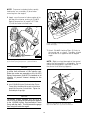
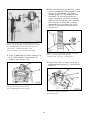
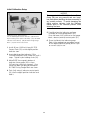
Indicator Group (Current Style).
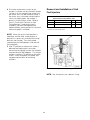
(19) 1U-8869 Digital Position Indicator. (20) 9U-6272
Nylon Holding Screw (Part Of 9U-7282). (29) 123-4940
Indicator Fixture Group. (30) 9U-7269 Timing Gauge
Block. (31) 9U-7274 Contact Point.
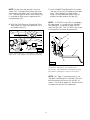
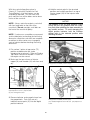
NOTE: Check the travel of the dial indicator.
As the contact point is pressed in towards the
dial, the reading on the indicator should
decrease.
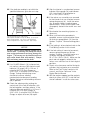
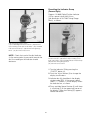
Indicator Group (Former Style). (19) 1U-8869 Digital
Position Indicator. (20) 9U-6272 Nylon Holding Screw
(Part of 9U-7282). (29) 123-4940 Indicator Fixture Group.
(30) 9U-7269 Timing Gauge Block.
(31) 9U-7274 Contact Point.
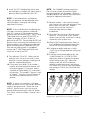
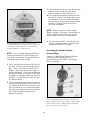
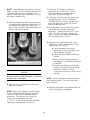
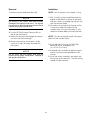
1. Turn the indicator ON by pressing the
“ON/OFF” button (4).
2. Press the "in/mm" button (2) to change the
display to millimeters.
3. Indicator bar (6) should be in the display
window under REV. If the space is blank,
select "+ / -" button (1) so the display shows
the indicator bar, as shown.
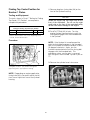
4. Press and hold "preset" button (3) until there
is a flashing (P) in the upper right corner of
the display. When the flashing (P) appears,
release the button.
21