1
8.
Remove and discard two bolts and washers from left and
right side of front isolator mount.
14. Position washer between front isolator mount and isolator. Install bolt, washer, D washer and new locknut.
9.
Remove front isolator mount from left side of motorcycle.
15. Making sure flat on D washer stays oriented to front of
bike, tighten bolt to 100 ft-lbs (135.6 Nm).
b0041b
*Locknut
D Washer
Isolator
16. Apply LOCTITE THREADLOCKER 243 (blue) to threads
of airbox screws. Install airbox screws to airbox and front
isolator mount. Install locknuts to screws.
17. Install air cleaner filter box and cover.
18. Connect negative battery cable.
19. Install fuel tank and seat.
On motorcycles with original fuel tank mounting hardware
tighten fuel tank hardware to specification listed below:
●
9-11 ft-lbs (12.2-14.9 Nm)
On motorcycles that have had the fuel tank retention recall
service performed, make sure plates are oriented properly
and tighten fuel tank hardware to specification listed below:
●
18-23 ft-lbs (24.4-31.2 Nm), then wait 3-5 minutes
and tighten again to 18-23 ft-lbs (24.4-31.2 Nm).
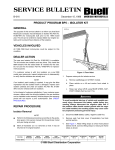
Washer
*Front
Isolator
Mount
Washer
*Isolator Washer (2)
Bolt
*Front Isolator Bolt (2)
* Included in Kit
Figure 1. Front Isolator Mount
1WARNING
After installing seat, pull upward on front of seat to be
sure it is locked in position. If seat is loose, it could shift
during vehicle operation and startle the rider, causing
loss of control. These events could result in death or
serious injury.
NOTE
A new cable tie and new hose clamp have been provided in
the kit to install the fuel tank vent hose and supply hose.
S1/M2 Models
1.
1WARNING
Always wear proper eye protection and gloves when
working with compressed air. Debris or solvent may be
blown out with enough force to penetrate skin or cause
eye injury. Failure to comply could result in death or serious injury.
10. Clean residual loctite from threads in engine with a suitable nonflammable solvent and dry with compressed air.
11. Apply LOCTITE THREADLOCKER 271 (red) to threads
of new front isolator mount bolts.
12. Apply a thin film of clean HD 20W50 engine oil to both
sides of new thick washers and to bottom of bolt heads.
Exercise caution to avoid mixing oil on washers with loctite on bolts.
13. Position new front isolator mount and secure with two
new front bolts with new thick washers. Tighten bolts to
60 ft-lbs (81 Nm) initially and then loosen each bolt one
full turn. Tighten bolts again to 60 ft-lbs (81 Nm).
NOTE
Make sure flat on D washer remains oriented to front of
motorcycle while tightening bolt.
2 of 3
Position motorcycle on a suitable lift and position REAR
WHEEL SUPPORT STAND (Part No. B41174) under the
swing arm. Secure motorcycle to lift.
1WARNING
Always disconnect the negative battery cable when
working on motorcycle to prevent accidental startup. If
the positive cable should contact ground with the negative cable installed, the resulting sparks may cause a
battery explosion, which could result in death or serious
injury.
2.
Disconnect negative battery cable.
3.
Position floor jack under engine under front shock mount
to support engine.
4.
From left side of motorcycle, remove and discard isolator
locknut and remove bolt, two washers and D washer.
5.
Remove air cleaner cover and filter box.
6.
Remove two nuts and 2 socket head screws from air
cleaner backplate and front isolator mount.
7.
Remove and discard two bolts and washers from left and
right side of front isolator mount.
8.
Remove front isolator mount from left side of motorcycle.
B-018