1
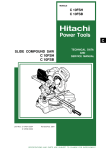
MODEL
C 10FCB
POWER TOOLS
C
COMPOUND SAW
C 10FCB
LIST No. E931
TECHNICAL DATA
AND
SERVICE MANUAL
Apr. 2001
SPECIFICATIONS AND PARTS ARE SUBJECT TO CHANGE FOR IMPROVEMENT
CONTENTS
Page
1. PRODUCT NAME ......................................................................................................................... 1
2. MARKETING OBJECTIVE ........................................................................................................... 1
3. APPLICATIONS ........................................................................................................................... 1
4. SELLING POINTS ........................................................................................................................ 1
4-1. Selling Point Descriptions ............................................................................................................ 2
5. SPECIFICATIONS ........................................................................................................................ 4
6. COMPARISONS WITH SIMILAR PRODUCTS ........................................................................... 5
7. PRECAUTIONS IN SALES PROMOTION ................................................................................... 6
7-1. Instruction Manual ....................................................................................................................... 6
8. ADJUSTMENT AND OPERATIONAL PRECAUTIONS .............................................................. 7
8-1. Cutting A Groove on The Table Insert .......................................................................................... 7
8-2. Confirmation of Saw Blade Lower Limit Position ......................................................................... 7
8-3. How to Use The Vise Assembly ................................................................................................... 8
8-4. Confirmation for Use of Sub Fence ............................................................................................. 8
8-5. Cutting Operation ......................................................................................................................... 9
9. ADJUSTMENT OF COMPONENTS ........................................................................................... 11
9-1. Bevel Angle Adjustment ................................................................................................................ 11
10. PACKING .................................................................................................................................... 11
11. PRECAUTIONS IN DISASSEMBLY AND REASSEMBLY .........................................................12
11-1. Disassembly ............................................................................................................................... 12
11-2. Reassembly ............................................................................................................................... 17
11-3. Wiring Diagram .......................................................................................................................... 18
11-4. Lead Wire Precautions ............................................................................................................... 19
11-5. No-load Current .......................................................................................................................... 20
11-6. Reassembly Requiring Adjustment ............................................................................................ 20
11-7. Lubrication.................................................................................................................................. 21
11-8. Product Precision ....................................................................................................................... 21
11-9. Tightening Torque ....................................................................................................................... 22
12. REPAIR GUIDE ......................................................................................................................... 23
13. STANDARD REPAIR TIME (UNIT) SCHEDULES .....................................................................27
Assembly Diagram for C 10FCB
1. PRODUCT NAME
Hitachi Compound Saw, Model C 10FCB
2. MARKETING OBJECTIVE
The Model C 10FCB has been newly developed as a successor of the current Models C 10FC, C 10FC2 and
C 10FCA (REXON's OEM products) intended to be manufactured in the factory of Hitachi Koki Group (HKF) to
keep high quality and to adopt Hitachi Koki's original design. Vigorous sales promotion and market share
increases are anticipated with the introduction of the new Model C 10FCB. Although the Model C 10FCB is of the
same construction as the current models basically, the Model C 10FCB employs additional functions including the
following:
Capable of cutting both 2 x 6 and 4 x 4 materials at the right angle at a time without the use of a plate
Capable of narrowing the clearance between the fences thanks to the adoption of the rotary sub fence
3. APPLICATIONS
Cutting various types of wood workpieces
Cutting workpieces of plywood, decoration panels, soft fiberboard and hard board
Cutting aluminum sashes
4. SELLING POINTS
Capable of cutting both 2 x 6 and 4 x 4
materials at the right angle at a time
without the use of a plate
Compound miter and
left bevel cutting
Safety (lock-off) switch
(only for USA, Canada)
Lightweight design: 14 kg
Press cutting
Left bevel cutting
Equipped with debris guard to
restrict dispersion of chips for
enhanced safety in operation
Newly adopted rotary sub fence
(capable of narrowing the
clearance between the fences)
Right
Left
Miter cutting
Convenient miter with
angle setting mechanism
--- 1 ---
4-1. Selling Point Descriptions
(1) Press cutting
Table 1
Width (W)
Workpiece
Maker
Model
HITACHI
C 10FCB
Max. cutting
dimension
Height x Width
(H x W)
(Unit: mm)
Height (H)
59 x 144 (2-5/16" x 5-21/32")
89 x 101 (3-1/2" x 3-31/32")
Fig. 1
Press cutting with the head swiveling enables cutting square workpieces as large as shown in Table 1 in a single
sawing operation. (See Fig. 1.)
(2) Miter cutting facility
Table 2
Maker
Model
(Unit: mm)
HITACHI
C 10FCB
Max. cutting
dimension
Width (W)
Right 60˚
Height x Width
(H x W)
59 x 72
(2-5/16" x 2-13/16")
Right and left 45˚
Height x Width
(H x W)
59 x 102
(2-5/16" x 4")
Height (H)
Workpiece
45˚ right and
left (60˚ right)
Fig. 2
By turning the table to the right or left as desired, the Model C 10FCB is capable of miter cutting of up to 45˚ to the
left, or 60˚ to the right. The miter angle setting mechanism enables easy cutting-angle setting.
(3) Left bevel cutting facility
Table 3
Maker
Model
Max. cutting
dimension
Left bevel 45˚
Height x Width
(H x W)
(Unit: mm)
(Left) Width (W)
45˚
HITACHI
C 10FCB
Height (H)
41 x 144 (1-5/8" x 5-21/32")
By inclining the saw blade section (head) on its swivel mounting,
bevel cutting of up to a maximum of 45˚ to the left can be obtained.
(When the machine is shipped from the factory, the swivel stoppers
Bevel cutting
of the head are precisely adjusted for 0˚ and 45˚ [for further details,
Fig. 3
please refer to Paragraph 9-1, Bevel Angle Adjustment].)
--- 2 ---
(4) Compound cutting through use of miter and bevel cutting functions
Table 4
Maker
Model
Max. cutting
dimension
Left bevel 45˚
Right/Left miter 45˚
Height x Width
(H x W)
(Unit: mm)
ft)
(Le
˚
45
HITACHI
C 10FCB
Width (W)
Height (H)
41 x 102 (1-5/8" x 4")
By turning the table to the right or left and inclining the saw
blade section (head) to the left, the Model C 10FCB is
5˚
(Righ4
t or le
ft)
* When the saw blade section (head) is inclined 45˚ to the
left, the maximum possible angle setting of the table is
restricted to 45˚ to either the left or right.
Fig. 4
capable of compound cutting (bevel and miter, see Fig. 4) of
workpieces with the maximum dimension shown in Table 4.
(5) Equipped with debris guard to restrict dispersion of chips for enhanced safety in operation
A debris guard has been adopted to prevent wood chips from adhering to the saw blade at the end of the
cutting operation. The debris guard tilts together with the saw blade during bevel cutting, thereby enhancing
safe operation.
(6) Lightweight design
14 kg in weight, for easy transport in a workshop
--- 3 ---
5. SPECIFICATIONS
Maximum
cutting
dimentions
Height x
Width
(H x W)
0˚ (Right angle)
59 mm (2-5/16") x 144 mm (5-21/32")
89 mm (3-1/2") x 101 mm (3-31/32")
Miter right/left 45˚
59 mm (2-5/16") x 102 mm (4") [Right 60˚: 59 mm (2-5/16") x 72 mm (2-13/16")]
Bevel left 45˚
41 mm (1-5/8") x 144 mm (5-21/32")
Miter right/left 45˚
+
Bevel left 45˚
41 mm (1-5/8") x 102 mm (4")
Miter cutting ranges
Right 0˚ --- 60˚, Left 0˚ --- 45˚
Bevel cutting ranges
Left 0˚ --- 45˚
Compound (miter + bevel)
cutting ranges
Miter: right and left 0˚ --- 45˚, Bevel: left 0˚ --- 45˚
Angle stopper positions
Right and left 0˚, 15˚, 22.5˚, 31.6˚, 35.3˚, 45˚, Right 60˚ (for USA, CAN)
Right and left 0˚, 15˚, 22.5˚, 30˚, 45˚, Right 60˚
Applicable saw blade
255 mm (10") external dia.
Australia
New Zealand
USA/CAN
Asia/China
Europe
15.9 mm (5/8")
25.4 mm (1")
30 mm (1-11/64")
Saw blade bore
Safety (lock-off) switch
Saw cover lock
25.4 mm (1") and
30 mm (1-11/64")
USA/CAN
Europe/China
Asia/Australia, etc.
Provided
Not provided
Not provided
Not provided
Provided
Not provided
Power source type and voltage
AC single phase 50/60 Hz, 110V, 115 V, 220V --- 240V
Type of motor
AC single phase commutator series motor
Full-load current
110 V --- 115 V: 15 A 220 V: 7.8 A 230 V: 7.5 A 240 V: 7.2 A
No-load rotation speed
4,900/min.
Max. output
2,300 W
Main body dimensions
(Width x Depth x Height)
547 mm x 592 mm x 581 mm (21-17/32" x 23-5/16" x 22-7/8")
Weight
14 kg (31 Ibs.), gross weight 21 kg (46.5 Ibs.)
Coating
Metallic silver green
Packaging
Corrugated cardboard box
Cord
Type: 2-conductor cabtire cable
Length: 2.2 m (7.2 ft)
255 mm (10") TCT saw blade (24 teeth, Code No. 318963)
for wood cutting (except for CHN)
255 mm (10") TCT saw blade (100 teeth, Code No. 318964)
for aluminum cutting (for CHN)
255 mm (10") TCT saw blade (30 teeth, Code No. 319107)
for wood cutting (for AUT, GBR, FRA, HOL,
BEL,ESP, SUI, ITA, NOR,
SWE, DEN, FIN)
Dust bag
Vise ass'y
Box wrench 10 mm
Holder
Stopper
255 mm (10") TCT saw blade (60 teeth, Code No. 976472)
for normal cutting
255 mm (10") TCT saw blade (100 teeth, Code No. 319658)
for aluminum cutting (except for CHN)
• • • • • • • • • • • • • • •
• • • • • • • • • • • • • • •
Standard accessories
• • • • • • • • • • • • • • •
Optional accessories
• • • • • • • • • • • • • • •
• • • • • • • • • • • • • • •
--- 4 ---
6. COMPARISONS WITH SIMILAR PRODUCTS
Maker/Model
Item
Max.
cutting
dimensions
Height
x Width
(H x W)
HITACHI
C 10FCB
HITACHI
C 10FC2/C 10FC
0˚ (Right angle)
59 mm x 144 mm
(2-5/16" x 5-21/32")
89 mm x 101 mm
(3-1/2" x 3-31/32")
Miter right/left 45˚
59 mm x 102 mm
(2-5/16" x 4")
Right 60˚
59 mm x 72 mm
(2-5/16" x 2-13/16")
67 mm x 146 mm
(2-5/8" x 5-3/4")
89 mm x 92 mm
(3-1/2" x 3-5/8")
[with aux. board width
17 mm (11/16")]
70 mm x 89 mm
(2-3/4" x 3-1/2")
Right 60˚
70 mm x 73 mm
(2-3/4" x 2-7/8")
Bevel left 45˚
41 mm x 144 mm
(1-5/8" x 5-21/32")
Miter right/left 45˚
+
Bevel left 45˚
Z
C
70 mm x 146 mm
(2-3/4" x 5-3/4")
69 mm x 130 mm
(2-3/4" x 5-1/8")
70 mm x 105 mm
(2-3/4" x 4-1/8")
69 mm x 92 mm
(2-3/4" x 3-5/8")
44 mm x 130 mm
(1-3/4" x 5-1/8")
44 mm x 146 mm
(1-3/4" x 5-3/4")
35 mm x 130 mm
(1-3/8" x 5-1/8")
41 mm x 102 mm
(1-5/8" x 4")
44 mm x 89 mm
(1-3/4" x 3-1/2")
44 mm x 105 mm
(1-3/4" x 4-1/8")
35 mm x 92 mm
(1-3/8" x 3-5/8")
Miter cutting ranges
Right 0˚--- 60˚
Left 0˚--- 45˚
Right 0˚--- 60˚
Left 0˚--- 45˚
Right and left 0˚--- 45˚
Right 0˚--- 52˚
Left 0˚--- 45˚
Bevel cutting ranges
Left 0˚--- 45˚
Left 0˚--- 45˚
Left 0˚--- 45˚
Compound (miter + left bevel)
cutting ranges
Miter: Right and left
Miter: Right and left
Miter: Right and left
0˚ --- 45˚
Bevel: Left 0˚ --- 45˚
Right and left 0˚, 15˚,
22.5˚, 31.6˚, 45˚
Right 60˚
255 (10")
1,640
0˚ --- 45˚
Bevel: Left 0˚ --- 45˚
Right and left 0˚, 15˚,
22.5˚, 30˚, 45˚
255 (10")
------
0˚ --- 45˚
Bevel: Left 0˚ --- 45˚
Right and left 0˚, 15˚,
22.5˚, 30˚, 45˚
Right 52˚
255 (10")
------
4,900
4,900
2,300
Double insulation
525 x 137
(20-21/32" x 5-13/32")
Provided (fixed)
250 x 160
(9-27/32" x 6-5/16")
547 x 592 x 581
2,200
Double insulation
525 x 150
(20-11/16" x 5-29/32")
Provided (fixed)
300 x 190
(11-13/16" x 7-15/32")
535 x 600 x 489
4,900
-----Double insulation
455 x 125
(17-15/16" x 4-15/16")
None
300 x 190
(12-19/32" x 7-15/32")
455 x 595 x 535
4,600
-----Double insulation
460 x 135
(18-3/32" x 5-5/16")
None
300 x 150
(11-13/16" x 5-15/16")
476 x 530 x 532
Motor
0˚ --- 45˚
Bevel: Left 0˚ --- 45˚
Right and left 0˚, 15˚,
Angle stopper position
22.5˚, 31.6˚, 45˚
Right 60˚
255 (10")
Saw blade outer diameter (mm)
1,640
Power input (W)
No-load revolution (/min.)
Max. output (W)
Insulation structure
Base size
Width x Depth (mm)
Debris guard
Dust bag size (mm)
Main unit dimensions
Width x Depth x Height (mm)
Product weight (kg)
Standard accessories
Left 0˚--- 45˚
Miter: Right and left
(21-17/32" x 23-5/16" x 22-7/8") (21-1/16" x 23-1/2" x 19-1/4") (17-29/32" x 23-13/32" x 21")
14 (31 lbs.)
14.5 (32 lbs.)
22 (49 lbs.)
(18-3/4" x 20-7/8" x 20-15/16")
11 (24.2 lbs.)
• 255 mm (10") TCT
saw blade
• Vise ass'y
• 255 mm (10") TCT saw • 255 mm (10")
blade (24 teeth) for
combination saw
wood and aluminum
blade (104 teeth)
cutting
• Dust bag
• Dust bag
• Vise ass'y (horizontal type)
• Box wrench 10 mm
• Vise ass'y
• Holder ass'y
• Wrench
• Holder
• Wrench
• Wrench
• Triangular rule
• 255 mm (10") TCT saw
blade (24 teeth) for
wood cutting
• Dust bag
• Dust bag
• Auxiliary plate
• 13 mm socket wrench
• Stopper
Optional accessories
• 255 mm (10") TCT saw
blade (60 teeth) for
normal cutting
• 255 mm (10") TCT saw
blade (100 teeth) for
aluminum cutting
• Holder ass'y
• 255 mm (10") TCT saw
blade (70 teeth) for
normal cutting
--- 5 ---
• Safety goggles
7. PRECAUTIONS IN SALES PROMOTION
In the interest of promoting the safest and most efficient use of the Model C 10FCB Compound Saw by all of our
customers, it is very important that at the time of sale the salesperson carefully ensures that the buyer seriously
recognizes the importance of the contents of the Instruction Manual, and fully understands the meaning of the
precautions listed on the various Caution Plates attached to each machine.
7-1. Instruction Manual
Although every effort is made in each step of design, manufacture and inspection to provide protection against
safety hazards, the dangers inherent in the use of any power saw cannot be completely eliminated. Accordingly,
general precautions and suggestions for the use of electric power tools, and specific precautions and suggestions
for the use of the compound saw are listed in the Instruction Manual to enhance the safe, efficient use of the tool
by the customer. Salespersons must be thoroughly familiar with the contents of the Instruction Manual to be able
to offer appropriate guidance to the customer during sales promotion.
(1) Precautions on the name plate
Each Model C 10FCB is furnished with a Name Plate that lists the following precautions.
For the U.S.A. and Canada only
Except the U.S.A. and Canada
Instruct the customer to thoroughly read the Instruction Manual prior to attempting to operate the machine.
(2) Caution plate (A)
(3) Caution plate (B)
--- 6 ---
(4) Caution plate (C)
For the U.S.A. and Canada only
The caution plate (C) specified by the UL is affixed on the upper right-hand portion of the gear case. Please
instruct users to strictly observe the contents 1 to 9 in the caution plate (C) shown above.
8. ADJUSTMENT AND OPERATIONAL PRECAUTIONS
8-1. Cutting A Groove on The Table Insert
A groove has to be cut in the table insert, before starting operation.
Table
insert
Secure a piece of wood about 5-1/2" (140 mm) wide to the table with
the vise assembly, to prevent the breakage of the table insert. After the
switch has been turned on and the saw blade has reached maximum
speed, slowly lower the handle to cut a groove on the table insert.
Turn table
CAUTION: Do not cut the groove too quickly; otherwise the
Fig. 5
table insert might become damaged.
8-2. Confirmation of Saw Blade Lower Limit Position
WARNING: To prevent an accident or personal injury, always turn off the trigger switch and
disconnect the power plug from the receptacle before adjustment.
Check that the saw blade can be lowered 1-5/8" to 1-21/32" (41 mm
to 42 mm) below the table insert. If necessary, adjust as follows:
8 mm lock nut
(1) Loosen the 8 mm lock nut on the 8 mm depth adjustment screw.
(2) Turn the 8 mm depth adjustment screw as necessary to set the
lower limit position. The saw blade goes up when the 8 mm
depth adjustment screw is turned counterclockwise and down
when it is turned clockwise.
8 mm depth
adjustment
screw
(3) Once the adjustment is complete, fully tighten the 8 mm lock nut.
Fig. 6
NOTE: Before tightening the 8 mm lock nut, confirm that the saw blade is adjusted so that it will not cut into the
table.
--- 7 ---
8-3. How to Use The Vise Assembly
(1) The vise assembly can be mounted on either the left fence
Screw holder
6 mm wing
bolt (B)
(fence (B)) or the right fence (fence (A)) by loosening
Knob
6 mm wing bolt (A).
(2) The screw holder can be raised or lowered according to the
height of the workpiece by loosening 6 mm wing bolt (B).
Fence
After the adjustment, firmly tighten 6 mm wing bolt (B) and
Vise shaft
Vise plate
fix the screw holder.
(3) Turn the upper knob and securely fix the workpiece in
position (Fig. 16).
6 mm wing
bolt (A)
Workpiece
Fig. 7
WARNING: Always firmly clamp or vise to secure the workpiece to the fence; otherwise the
workpiece might be thrust from the table and cause bodily harm.
CAUTION: Always confirm that the motor head (see Fig. 1) does not contact the vise assembly when
it is lowered for cutting. If there is any danger that it may do so, loosen the 6 mm wing
bolt (B) and move the vise assembly to a position where it will not contact the saw blade.
8-4. Confirmation for Use of Sub Fence
WARNING: In the case of left bevel cutting, turn the sub fence counterclockwise. Unless it is turned
counterclockwise, the main body or saw blade may contact the sub fence, resulting in an
injury.
Sub fence
Turn.
This power tool is equipped with a sub fence. (See Fig. 1.)
Fence (B)
In the case of direct angle cutting and angle cutting, use the
sub fence. Then, you can realize stable cutting of the
material with a wide back face. In the case of left bevel
cutting, raise the sub fence up as illustrated in Fig. 9 and
then turn it counterclockwise.
Fig. 8
--- 8 ---
8-5. Cutting Operation
(1) Cutting efficiency will be reduced if a dull saw blade is used, if an excessively long extension cord is used, or if
the wire gauge of the extension cord is too small. (For details on extension cords, please refer to the
Instruction Manual.) This is particularly important when cutting materials with dimensions which are at or near
the maximum capacity for the machine.
(2) The customer should be advised to thoroughly inspect the workpiece to ensure that there are no metallic
objects (nails in particular), sand, or other foreign matter in or on the workpiece. Saw blade contact with such
foreign matter will not only shorten the service life of the saw blade, but could cause serious accident. Should
the saw blade tips be broken off, the tips may fly toward the operator.
(3) Press cutting
Like the Model C 10FC2, the Model C 10FCB can be used for press cutting of workpieces up to 59 mm x
144 mm (2-5/16" x 5-21/32") in a single operation by simply pushing the saw blade section (head) downward.
The customer should be cautioned that excessive pressure on the handle will not increase the cutting speed.
On the contrary, excessive pressure may result in reduced cutting efficiency (irregular or rough cutting of the
workpiece), and could also cause overload and subsequent burnout of the motor.
On completion of the cutting operation, turn the switch OFF and wait for the saw blade to come to a complete
stop before raising the saw blade section (head) to its original position. Raising the saw blade section (head)
while the saw blade is rotating may cause unwanted cutting marks on the workpiece.
Techniques to avoid unwanted cutting marks
Uneven and unwanted cutting marks can be avoided throughout the cutting operation by gently and smoothly
pressing down on the handle, so that the entire cutting operation is accomplished in a single uninterrupted
motion.
(4) Miter cutting
Miter cutting is accomplished by turning the table. (For details, please refer to the Instruction Manual.)
(5) Bevel cutting
Bevel cutting of 0 --- 45˚ to the left is accomplished by inclining the saw blade section (head). (For details,
please refer to the Instruction Manual.)
[Caution] When the workpiece is secured on the left side, the
cut-off portion comes to rest on the side of the saw
Fixed-side workpiece
Cut-off-side
workpiece
blade as illustrated in Fig. 8. If the handle is raised
before the saw blade rotation comes to a complete
stop, there is a chance that the cut-off portion of the
workpiece could become jammed against the saw
blade, causing a hazardous condition. Instruct the
Saw blade
customer to ensure without fail that the saw blade
comes to a complete stop before attempting to raise
the handle.
--- 9 ---
Fig. 9
(6) Compound (miter + bevel) cutting
Compound cutting can be accomplished by combining the miter cutting and bevel cutting operations described
in paragraphs (4) and (5) above. (For details, please refer to the Instruction Manual.) When the saw blade
section (head) is inclined 45˚ to the left, the table can be turned up to 45˚ to the right and left.
(7) Cut surface quality during miter/bevel cutting
The quality of the cut surface depends on the type
[Miter cutting]
of cutting operation (miter or bevel), the type and
sharpness of the saw blade, whether the
workpiece is cut to the right or left, and various
other factors. In miter and bevel cutting in
particular, cutting is performed across the wood
grain, so the condition of the cut surface depends
on whether the wood is cut with or against the
Better
Better
grain. This is the same as when using electric
[Left bevel cutting]
portable planers. Customers should be advised
of these phenomena so that they understand that
in cases when the cut surface may not be smooth
as expected or hoped for, it is not caused by the
performance of the saw blade or the Model
C 10FCB.
Better
In the cutting examples illustrated in Fig. 9, the cut
surfaces on the sides marked
those on the sides marked
B
A
Fig. 10
are better than
.
--- 10 ---
9. ADJUSTMENT OF COMPONENTS
9-1. Bevel Angle Adjustment
Before the power tool is shipped from the factory, it is adjusted for 0˚ and left 45˚ bevel cutting angles.
The positioning and bevel cutting angle can be adjusted by changing the height of the 8 mm bolt (maximum bevel
cutting angle is 45˚).
8 mm bolt
8 mm bolt
Fig. 12
Fig. 11
10. PACKING
(1) Preparation before packing
Remove the side handle, holder and dust bag from the main body. Then turn the turn table 60˚ clockwise.
(2) Mounting packings (B) and (C)
Place packing (C) under the gear case and swing the motor section. Pressing on packing (C), hook the
stopper pin on the gear case. Put the housing through the hole of packing (B).
(3) Mounting packing (A) and upper packing
Put the main body mounted with packings (B) and (C) in the carton box aligning with the base packing.
Put packing (A) at the left of the base. Place the upper packing on the main body. Close the lid of the carton
box and secure it.
Upper packing
Packing (A)
Stopper pin
Packing (B)
Packing (C)
Base packing
Fig. 13
Fig. 14
--- 11 ---
Carton box
11. PRECAUTIONS IN DISASSEMBLY AND REASSEMBLY
Please follow the precautions below for disassembly and reassembly procedures. The circled numbers in the
following figures and the [Bold] numbers in the descriptions below correspond to the item numbers in the Parts
List and exploded assembly diagrams.
CAUTION: Prior to attempting disassembly or replacement of the saw blade, ensure that the power cord
plug is disconnected from the power source.
11-1. Disassembly
A. Turn table and base
Tools required:
• Phillips screwdriver
• Flat-blade screwdriver
• Box wrench 13 mm
• Box wrench 10 mm
• Plastic hammer
Fig. 15
--- 12 ---
1. Remove the four Bolts (W/Washers) M8 x 35 (Black) and remove Fence (A) [46] and Fence (B) [31].
2. Loosen the Clamp Lever [2] and remove the Machine Screw (W/Washers) M6 x 12 (Black) [1]. Turn the Bolt
(Left Hand) M10 x 40 [3] and remove it from the Hinge [7].
3. Remove the Hex. Socket Set Screw M6 x 10 [10]. Tap the end surface of Shaft (C) [8] from the front of the
Turn Table [38] using a flat-blade screwdriver and a hammer to remove it.
4. Remove the Nylon Nut M8 [32] and remove the Turn Table [38] from the Base [49].
5. Remove the Spacer [42] and the Table Insert [39] from the Turn Table [38] by removing each mounting screw.
--- 13 ---
B. Safety cover and link
Spindle and spring
Tools required:
• Phillips screwdriver
• Hex. bar wrench 4 mm
• Hex. bar wrench 3 mm
• Box wrench 10 mm (standard accessory)
Fig. 16
--- 14 ---
1. Remove the Bolt (Left Hand) M7 x 17.5 [122] with the box wrench 10 mm (standard accessory).
Then Washers (B) and (C) [120], TCT Saw Blade 255 mm [118] and Washers (A) and (D) can be removed in
this order.
2. Remove the two Flat Hd. Screws M4 x 10 [115] to remove the Cover [114] and the Safety Cover [113].
3. Remove the Machine Screw M5 x 16 [98] to remove the Spacer [97] and the Link [96].
4. Remove the Machine Screw M5 x 20 [110] and gently tap the Gear Case [85] with a plastic hammer to remove
the Spindle Ass'y [107].
5. Remove the Hex. Socket Hd. Bolt M5 x 10 [84]. Note that the Hex. Socket Hd. Bolt M5 x 10 [84] acts as the
upper limit stopper of the Gear Case [85] and the Gear Case [85] will move upward when the Hex. Socket Hd.
Bolt M5 x 10 [84] is removed.
6. Remove the Hex. Socket Set Screw M6 x 10 [90]. Supporting the Gear Case [85], gently tap Shaft (C) [14] to
remove it. After the removal of Shaft (C) [14], the Spring [5] can be removed.
--- 15 ---
C. Armature ass'y
Cord, stator ass'y and housing ass'y
Tools required:
• Phillips screwdriver
• Flat-blade screwdriver
• Plastic hammer
Fig. 17
1. Remove the Brush Cap [64] and the Carbon Brush [63].
2. Remove the four Machine Screws (W/Washers) M5 x 45 (Black). Then the Housing Ass'y can be removed
together with the Handle Cover [70] from the Gear Case [85]. Then the Armature Ass'y [71] and the Lock
Lever [76] can be removed.
3. Remove the screws from the Gear Case [85].
4. Remove the four Tapping Screws (W/Flange) D4 x 20 (Black) [83] to remove the Handle Cover [70].
5. Remove the internal wires from the Switch [80]. Remove two Tapping Screws (W/Flange) D4 x 20 (Black) to
remove the Cord [54], Cord Armor D10.7 [55] and Cord Clip [65].
6. Remove two Tapping Screws (W/SP. Washer) D5 x 65 to remove the Brush Terminal [68] from the Brush
Holder [62]. Gently tap the surface of the Housing Ass'y [60] where the Gear Case [85] was mounted with a
plastic hammer to remove the Stator Ass'y [67].
--- 16 ---
D. Vise ass'y
Tool required:
• Phillips screwdriver
1. Remove the Wing Bolt M6 x 15 [19] to remove the Vise Shaft [24].
2. Remove the Machine Screw M4 x 10 [23] to remove the Vise Plate [22].
3. Remove the Knob Bolt M10 x 66 [18] from the Screw Holder [20].
Fig. 18
11-2. Reassembly
Reassembly can be accomplished by following the disassembly procedures in reverse. However, special
attention should be given to the following items.
(1) Prior to reassembly, measure the insulation resistance of the armature, stator, switch and other electrical
components and confirm that the insulation resistance of each part is more than 5 MΩ.
(2) When replacing the Spring [5], apply 5 grams of Hitachi Motor Grease No. 29 (Code No. 930035) to the inner
circumference of the new Spring [5] prior to reassembly.
(3) When replacing the Liner [44], apply 8 grams of Hitachi Motor Grease No. 29 (Code No. 930035) to the sliding
surface of the Base [49] prior to reassembly.
--- 17 ---
11-3. Wiring Diagram
Carefully ensure that wiring is accomplished as illustrated below. As incorrect wiring will result in lack of rotation,
reverse rotation or other malfunctions, close attention is absolutely necessary.
Wiring diagram (for the U.S.A. and Canada only)
OFF
1
2
Blue
3
Switch
Black
White
Armature
ass'y
Brake coil
Yellow
Red
Stator coil
Stator ass'y
Connector
Fig. 19
Actual wiring diagram (for the U.S.A. and Canada only)
Connector
White
Black
Blue
Red
Yellow
Fig. 20
--- 18 ---
Wiring diagram (except the U.S.A. and Canada)
Black or red
SW
Red or
black
Armature ass'y
Periphery of
stator core
3
OFF
1
4
2
Red or
black
Stator coil
Black or red
Stator ass'y
Fig. 21
Actual wiring diagram (except the U.S.A. and Canada)
Noise suppressor
(It may not be provided depending on the destinations.)
Black or red
Red or black
Fig. 22
11-4. Lead Wire Precautions
When connecting lead wires be very careful not to remove the insulation covering of each lead wire more than
needed. Exposed cores of lead wires from connectors, for example, are extremely dangerous. Also, ensure that
the lead wires are not pinched between the mating surfaces of the Housing Ass'y [60] and the Handle Cover [70].
--- 19 ---
11-5. No-load Current
After no-load operation for 30 minutes, the no-load current values should be as follows.
Voltage, frequency
No-load current
110 V, 115 V
8 A max.
220 V, 230 V, 240 V
4 A max.
11-6. Reassembly Requiring Adjustment
(1) Adjustment of squareness between the saw blade (dummy disc) and the fences
After disassembly or replacement of the Base [49], Turn
Table [38], Fence (A) [46], Fence (B) [31] or Hinge [7], it is
Fence (B)
Fence (A)
necessary to perform necessary adjustment to ensure that
the fences are positioned at precise right angles with
relation to the saw blade (or dummy disc). Align fence (B)
with the saw blade (or dummy disc), and adjust them as
Square
Saw blade or
dummy disc
necessary to ensure squareness (tolerance: 0.15/100 mm).
As shown in Fig. 23, use a square to adjust fence (B) so
that it is square with the saw blade. Next, use a straight
Fig. 23
edge to adjust fence (A) so that it is exactly aligned with
fence (B). Finally, use the square to confirm squareness of
fence (A) with the saw blade (tolerance: 0.15/100 mm).
(2) Adjustment of the lower limit position of the saw blade
The saw blade lower limit position must be adjusted so that the cutting edge of the saw blade (or dummy disc)
is 41 mm to 42 mm below the upper surface of the Base [49]. To perform the adjustment, loosen the Lock Nut
M8 [105] and turn the Bolt M8 x 25 [106]. By turning the Bolt M8 x 25 [106] counterclockwise, the saw blade
lower limit is raised. By turning the Bolt M8 x 25 [106] clockwise, the saw blade lower limit is lowered.
On completion of the adjustment, ensure that the Lock Nut M8 [105] is properly tightened.
[CAUTION] Before tightening the Lock Nut M8 [105], check that the saw blade does not contact the Turn
Table [38].
Nylon Nut M8 [32]
(3) Reassembly of the Turn Table [38]
Turn Table [38]
When reassembling the Turn Table [38] and the
Base [49], tighten the Nylon Nut M8 [32] so that
A
the Turn Table [38] turns smoothly without
excessive play or vibration. During reassembly,
liberally apply grease (Hitachi Motor Grease
No. 29, Code No. 930035 is recommended) at the
point marked "A" in Fig. 24.
Base [49]
Shaft (B) [53]
Fig. 24
--- 20 ---
11-7. Lubrication
Advise the customer to lubricate the machine as indicated below at least once a month. Also, prior to applying
lubrication, any sawdust, dirt or other foreign matter should be thoroughly wiped away with a soft cloth.
(1) Swiveling section of the Gear Case [85] and the Hinge [7]
Coat the swiveling and sliding portion of the Gear Case [85] and the Hinge [7] with machine oil.
(2) Vise ass'y section
Coat the screw thread portion of the Knob Bolt M10 x 66 [18] of the Vise Ass'y [17] with machine oil.
(3) Swiveling section of the Turn Table [38] and the Hinge [7]
Coat the swiveling and sliding portion of the Turn Table [38] and the Hinge [7] with machine oil.
(4) Swiveling section of the Sub Fence [27] and Fence (B) [31]
Coat the swiveling and sliding portion of the Sub Fence [27] and Fence (B) [31] with machine oil.
11-8. Product Precision
On completion of reassembly, confirm precision tolerances.
(Unit: mm)
Item
Tolerance
Run-out of dummy disc
0.2/245 (0.008"/9-4/64")
Squareness between base and fences (A) and (B)
Flatness between fence (A) and fence (B)
0.1/height of fence (0.004"/height of fence)
0.1 (0.004")
Squareness between dummy disc and fences (A) and (B)
0.15/100 (0.006"/4")
Squareness between dummy disc and turn table
0.15/100 (0.006"/4")
Surface alignment of base and turn table
(Use the upper surface of the base as a reference.)
+ 0.1 ( + 0.004")
-- 0.2 ( -- 0.008")
Turn table
Base
Turn table
Base
--- 21 ---
11-9. Tightening Torque
• Machine Screw (W/Washers) M6 x 12 (Black) [1] ................................... 34.7 in-lbs. (3.9 N•m, 40 kgf•m)
• Hex. Socket Set Screw M6 x 10 [10] [90] ............................................... 34.7 in-lbs. (3.9 N•m, 40 kgf•m)
• Machine Screw (W/Washers) M4 x 8 (Black) [12] [36] [43] .................... 10.4 in-lbs. (1.2 N•m, 12 kgf•m)
• Machine Screw M5 x 16 [16] [87] [98] .................................................... 26 in-lbs. (2.9 N•m, 30 kgf•m)
• Machine Screw M4 x 10 [23] ................................................................... 10.4 in-lbs. (1.2 N•m, 12 kgf•m)
• Bolt (W/Washers) M8 x 35 (Black) [30] ................................................... 130 in-lbs. (14.7 N•m, 150 kgf•m)
• Machine Screw M5 x 16 [40] ................................................................... 13 in-lbs. (1.5 N•m, 15 kgf•m)
• Machine Screw (W/Washers) M5 x 45 (Black) [59] ................................. 30.4 in-lbs. (3.4 N•m, 35 kgf•m)
• Hex. Socket Set Screw M5 x 6 [61] ......................................................... 8.7 in-lbs. (1 N•m, 10 kgf•m)
• Tapping Screw (W/Flange) D4 x 20 (Black) [66] [83] .............................. 14.7 in-lbs. (2 N•m, 20 kgf•m)
• Tapping Screw (W/SP. Washer) D5 x 65 [69] .......................................... 22.6 in-lbs. (2.5 N•m, 26 kgf•m)
• Tapping Screw D4 x 10 [81] ..................................................................... 13 in-lbs. (1.5 N•m, 15 kgf•m)
• Hex. Socket Hd. Bolt M5 x 10 [84] .......................................................... 30.4 in-lbs. (3.4 N•m, 35 kgf•m)
• Machine Screw M5 x 10 [95] ................................................................... 26 in-lbs. (2.9 N•m, 30 kgf•m)
• Machine Screw M5 x 20 [110] ................................................................. 26 in-lbs. (2.9 N•m, 30 kgf•m)
--- 22 ---
12. REPAIR GUIDE
Item
1
Unit: mm
Phenomenon
Inaccurate cutting
Inaccurate
squareness of the
cut surface
Cut surfaces do not
fit together properly.
• • •
•••
Saw blade
Fence
Squareness
0.15/100
Cause
Factory
standard
0.15/100
(Dummy disc)
(Fig. 25)
b Excessive deflection
of the saw blade
(Excessive vibration)
0.2/245
(Dummy disc)
• Replace the TCT Saw Blade
255 mm [118].
• Check for surface defects on
Washer (A) [117] and
Washer (B) [120], and repair
with a file as necessary.
• Replace Washer (A) [117]
and Washer (B) [120].
0.15/100
(Fig. 26)
• Loosen the Bolt (W/Washers)
M8 x 35 (Black) [30] and
adjust the squareness.
• Replace Fence (A) [46] or
Fence (B) [31].
d Inaccurate surface
flatness of the fence
causes workpiece to
move irregularly,
causing poor
squareness of cut
surface.
0.1 or less
(Fig. 27)
• Loosen the Bolt (W/Washers)
M8 x 35 (Black) [30] and
adjust the squareness.
• Replace Fence (A) [46] or
Fence (B) [31].
e Inaccurate surface
flatness of the turn
table
0.1 or less
• Replace the Turn Table [38].
c Inaccurate
squareness between
the fence and the saw
blade
Fence (B)
Fence (A)
Squareness
0.15/100
Squareness
0.15/100
Saw blade
Fig. 26
• Adjust squareness with the
Nylock Bolt M8 x 25 [35].
a Inaccurate
squareness between
the turn table and the
saw blade causes the
saw blade to cut into
the workpiece at an
angle.
• Replace the Hinge [7], Gear
Case [85] or the Turn Table
[38] (if deformed).
Turn table
Fig. 25
Inspection, repair or
adjustment
0.1 or less
Fence (B)
Fence (A)
0.1 or less
Fig. 27
--- 23 ---
Item
1
Phenomenon
(Continued)
Fence
Squareness
0.1/height
of fence
Fig. 28
Factory
standard
Cause
Inspection, repair or
adjustment
f Inaccurate squareness
between the fence
and the turn table and/
or the base causes
the workpiece to tilt at
an angle and prevent
accurate cutting.
0.1/height of
fence
(Fig. 28)
g Loose fitting of
swiveling portion of
the hinge and the gear
case or sluggish
movement. As a
result, components
may be deformed
because of unstable
gear case or because
the operator applies
excessive pressure
during operation.
------
• Check the fitting surfaces of the
Hinge [7], Gear Case [85] and
Shaft (C) [14] for any foreign
substances (such as cutting
dust), and remove it as
necessary.
h Excessively fast
cutting speed causes
deflection of the saw
blade and inaccurate
cutting.
------
• Reduce the cutting speed
(appropriately 10 seconds for a
60 mm square wood
workpiece).
i Excessive cutting
force (pressure) is
required because of
dull saw blade.
------
• Sharpen the saw blade again.
j The workpiece moves
during cutting because
it is bent or deformed.
------
• Correct bend, flex or other
deformation by planing and try
cutting.
--- 24 ---
• Replace Fence (A) [46] or
Fence (B) [31].
Factory
standard
Item
Phenomenon
Cause
2
Rough cut surface
Parallelism (A) =
0.02/51
Parallelism (B) =
0.02/51
a Large deflection of the
saw blade (It causes
rough cut surface.)
Washer (A)
Washer (B)
Fig. 29
0.2/245
(Dummy disc)
b Each surface
parallelism of washer
(A) and washer (B) is
inaccurate due to
surface defects such
as impact marks and
scratches.
Washer (A) 0.02/51
Washer (B) 0.02/51
(Fig. 29)
c Inaccurate
squareness between
the turn table and the
saw blade causes the
saw blade to cut at an
improper angle and
make cutting marks.
0.15/100
(Fig. 25)
Inspection, repair or
adjustment
• Same as the Item 1- b .
• Repair impact marks or
scratches on Washer (A) [117]
and Washer (B) [120] or
replace them as necessary.
• Same as the Item 1- a .
d Excessively fast
cutting speed
-----
• Reduce cutting speed.
e Improper clamping of
workpiece
-----
• Properly clamp workpieces with
the vise ass'y.
f The turn table is not
fixed with the side
handle.
g Loose fitting of
swiveling portion of
the hinge and the gear
case or sluggish
movement.
h Cutting operation
becomes sluggish
because workpiece is
warped or bent.
i Excessive vibration
--- 25 ---
-----
• During cutting, fix the Turn
Table [38] in position with the
Side Handle [41].
• Same as the Item 1- g .
-----
-----
-----
• Correct warp or bend with
planer.
• Recheck the items a , c , d
and h .
Item
3
4
5
Phenomenon
Saw blade is locked.
Saw blade does not
rotate when switch is
triggered.
Saw blade runs too
slow (not within
4,400 --- 5,400/min.).
Factory
standard
Cause
Inspection, repair or
adjustment
a Excessively fast
cutting speed
------
• Reduce cutting speed.
b Core diameter of
extension cord is too
small.
------
• Use a thicker and shorter
extension cord.
c Excessve cutting force
is applied due to dull
saw blade.
------
• Resharpen the saw blade.
d Incorrect saw blade is
used.
------
• Use a suitable Hitachi-supplied
saw blade.
• If the saw blade has a large
number of teeth, the cutting
resistance will be increased.
When using a saw blade with a
large number of teeth, reduce
the cutting speed.
e The saw blade binds in
workpiece during
cutting because
workpiece is warped
or bent.
------
• Correct workpiece deformation
with a planer.
a The power cord is not
connected to power
supply.
------
• Check power supply voltage.
• Connect the power cord to
power supply.
b The carbon brush
wear exceeds
allowable limit (5 mm).
------
• Check the carbon brushes for
wear.
• Replace the carbon brushes.
c Contact failure of the
switch
------
• Check the Switch [80] for
conductivity.
• Replace the Switch [80].
a Power supply voltage
is lower than rated
voltage.
------
• Check power supply voltage.
• Check if extension cord is
appropriate.
--- 26 ---
13. STANDARD REPAIR TIME (UNIT) SCHEDULES
MODEL
Variable
Fixed
10
20
30
40
Lock Spring
Lock Lever
Handle Cover
Cord
Cord Armor
Spindle Ass'y
Switch
Stator Ass'y
Housing Ass'y
Fence
Shaft (C)
Shaft (B)
Base
Liner
Spring (C)
Steel Ball
50
60
70 min.
Work Flow
C 10FCB
General Assembly
Carbon Brush
Fixed Cost
Link
Safety Cover
Table Insert
Guard
Cord
Switch
Others
Link
0 min. Safety Cover
10 min. Guard
Clamp Lever
20 min. Vise Ass'y
Armature Ass'y
--- 27 ---
Gear Case
Turn
Table
Hinge
LIST NO. E931
ELECTRIC TOOL PARTS LIST
COMPOUND SAW
Model C 10FCB
2001• 4• 20
(E2)
C 10FCB
--- 2 ---
4 -- 01
PARTS
ITEM
NO.
C 10FCB
CODE NO.
NO.
USED
DESCRIPTION
1
307-232
MACHINE SCREW (W/WASHERS) M6X12 (BLACK)
1
2
312-488
CLAMP LEVER
1
3
318-933
BOLT (LEFT HAND) M10X40
1
4
318-934
SPECIAL WASHER
1
5
318-939
SPRING
1
6
318-938
SLEEVE
1
7
318-951
HINGE
1
8
318-935
SHAFT (C)
1
9
984-528
O-RING (P-6)
1
10
968-247
HEX. SOCKET SET SCREW M6X10
1
11
302-518
STOPPER PIN ASS’Y
1
12
317-200
MACHINE SCREW (W/WASHERS) M4X8 (BLACK)
1
13
318-932
INDICATOR (B)
1
14
318-940
SHAFT (C)
1
15
318-936
GUARD
1
16
990-541
MACHINE SCREW (W/WASHERS) M5X16
2
17
318-965
VISE ASS’Y
1
18
302-522
KNOB BOLT M10X66
1
19
301-806
WING BOLT M6X15
1
SCREW HOLDER
1
20
21
949-425
WASHER M6 (10 PCS.)
1
22
302-532
VISE PLATE
1
23
949-216
MACHINE SCREW M4X10 (10 PCS.)
1
24
318-967
VISE SHAFT
1
25
949-556
NUT M6 (10 PCS.)
1
26
949-432
BOLT WASHER M6 (10 PCS.)
1
27
318-950
28
SUB FENCE
1
CAUTION PLATE (A)
1
29
301-806
WING BOLT M6X15
1
30
307-221
BOLT (W/WASHERS) M8X35 (BLACK)
4
31
318-949
FENCE (B)
1
32
975-348
NYLON NUT M8
1
33
318-929
WASHER (F)
1
34
318-931
SCALE (B)
1
35
303-409
NYLOCK BOLT M8X25
2
36
317-200
MACHINE SCREW (W/WASHERS) M4X8 (BLACK)
1
37
318-927
INDICATOR (A)
1
38
318-947
TURN TABLE
1
39
318-930
TABLE INSERT
1
40
949-239
MACHINE SCREW M5X16 (10 PCS.)
4
41
318-946
SIDE HANDLE
1
42
998-814
SPACER
1
43
317-200
MACHINE SCREW (W/WASHERS) M4X8 (BLACK)
1
44
318-926
LINER
1
45
318-945
SCALE (A)
1
46
318-948
FENCE (A)
1
47
967-150
SPRING (C)
1
48
959-153
STEEL BALL D12.7 (10 PCS.)
1
*
49
318-944
BASE
1
*
49
318-969
BASE
1
50
949-342
FLAT HD. SCREW M6X25 (10 PCS.)
1
4 -- 01
REMARKS
INCLUD.9
INCLUD.18-24
FOR USA,CAN
* ALTERNATIVE PARTS
--- 3 ---
PARTS
*
ITEM
NO.
CODE NO.
51
301-806
52
C 10FCB
NO.
USED
DESCRIPTION
WING BOLT M6X15
2
CAUTION PLATE (B)
1
REMARKS
53
318-928
SHAFT (B)
1
*
54
500-214Z
CORD
1
*
54
315-897
CORD
1
(CORD ARMOR D10.7) FOR CHN
*
54
952-802Z
CORD
1
(CORD ARMOR D10.7) FOR SIN,MLA
*
54
500-453Z
CORD
1
(CORD ARMOR D10.7) FOR USA,CAN
*
54
952-804Z
CORD
1
(CORD ARMOR D10.7) FOR GBR (110V),SAF
*
54
500-243Z
CORD
1
(CORD ARMOR D10.7)
(CORD ARMOR D10.7) FOR AUS,NZL
(CORD ARMOR D10.7) FOR FRG,AUT,BEL,
ESP,GBR (230V),ITA,NOR,SWE,DEN,FIN
*
54
952-806Z
CORD
1
(CORD ARMOR D10.7) FOR FRA,HOL
*
54
303-154
CORD
1
(CORD ARMOR D10.7) FOR SUI
55
940-778
CORD ARMOR D10.7
1
*
56
959-141
CONNECTOR 50092 (10 PCS.)
1
*
57
988-894
TUBE (D)
2
*
57
988-894
TUBE (D)
1
58
FOR USA,CAN
FOR USA,CAN
NAME PLATE
1
59
302-434
MACHINE SCREW (W/WASHERS) M5X45 (BLACK)
4
60
318-955
HOUSING ASS’Y
1
61
966-426
HEX. SOCKET SET SCREW M5X6
2
62
980-487
BRUSH HOLDER
2
63
999-044
CARBON BRUSH (1 PAIR)
2
64
940-540
BRUSH CAP
2
65
937-631
CORD CLIP
1
66
302-086
TAPPING SCREW (W/FLANGE) D4X20 (BLACK)
2
*
67
340-473C
STATOR ASS’Y (B) 110V
1
INCLUD.68
*
67
340-472C
STATOR ASS’Y (A) 115V
1
INCLUD.68
*
67
340-473E
STATOR ASS’Y (B) 220V-230V
1
INCLUD.68
*
67
340-473F
STATOR ASS’Y (B) 240V
1
INCLUD.68
68
998-744
BRUSH TERMINAL
2
INCLUD.61,62
69
303-376
TAPPING SCREW (W/SP. WASHER) D5X65
2
*
70
318-960
HANDLE COVER
1
*
70
318-959
HANDLE COVER
1
FOR USA,CAN
*
71
360-531U
ARMATURE ASS’Y 110V-115V
1
INCLUD.72,74,75
*
71
360-531E
ARMATURE ASS’Y 220V-230V
1
INCLUD.72,74,75
*
71
360-531F
ARMATURE ASS’Y 240V
1
INCLUD.72,74,75
72
620-0VV
BALL BEARING 6200VVCMPS2L
1
73
946-362
BEARING LOCK
2
74
939-544
RETAINING RING FOR D15 SHAFT (10 PCS.)
1
75
600-2VV
BALL BEARING 6002VVCMPS2L
1
76
318-941
LOCK LEVER
1
77
318-942
LOCK SPRING
1
*
78
938-108
TERMINAL
1
FOR CHN,AUS,NZL,FRG,AUT,GBR,FRA,HOL,
*
79
994-273
NOISE SUPPRESSOR
1
FOR CHN,AUS,NZL,FRG,AUT,GBR,FRA,HOL,
*
80
976-450
SWITCH (A) (2P PILLAR TYPE) W/O LOCK
1
*
80
988-925
SWITCH (B) (1P PILLAR TYPE) W/LOCK
1
81
958-715
TAPPING SCREW D4X10
1
*
82
951-895
LOCK-OFF BUTTON
1
BEL,ESP,SUI,ITA,NOR,SWE,DEN,FIN,SAF
BEL,ESP,SUI,ITA,NOR,SWE,DEN,FIN,SAF
--- 4 ---
FOR USA,CAN
FOR USA,CAN
* ALTERNATIVE PARTS
4 -- 01
PARTS
C 10FCB
ITEM
NO.
CODE NO.
DESCRIPTION
83
302-086
TAPPING SCREW (W/FLANGE) D4X20 (BLACK)
4
84
949-819
HEX. SOCKET HD. BOLT M5X10 (10 PCS.)
1
NO.
USED
REMARKS
85
318-953
GEAR CASE
1
*
86
318-954
LEVER
1
*
87
949-239
MACHINE SCREW M5X16 (10 PCS.)
2
*
88
320-106
SLEEVE (B)
2
FOR CHN,FRG,AUT,GBR,FRA,HOL,BEL,ESP,
*
89
880-494
STOPPER SPRING
1
FOR CHN,FRG,AUT,GBR,FRA,HOL,BEL,ESP,
FOR CHN,FRG,AUT,GBR,FRA,HOL,BEL,ESP,
SUI,ITA,NOR,SWE,DEN,FIN
FOR CHN,FRG,AUT,GBR,FRA,HOL,BEL,ESP,
SUI,ITA,NOR,SWE,DEN,FIN
SUI,ITA,NOR,SWE,DEN,FIN
SUI,ITA,NOR,SWE,DEN,FIN
90
*
91
*
92
968-247
949-555
HEX. SOCKET SET SCREW M6X10
1
CAUTION PLATE (C)
1
NUT M5 (10 PCS.)
1
FOR USA,CAN,AUS,FRG,AUT,GBR,FRA,HOL,
BEL,ESP,SUI,ITA,NOR,SWE,DEN,FIN
*
93
318-958
SPINDLE COVER
1
FOR USA,CAN,AUS,FRG,AUT,GBR,FRA,HOL,
BEL,ESP,SUI,ITA,NOR,SWE,DEN,FIN
*
94
998-980
SPACER
1
FOR USA,CAN,AUS,FRG,AUT,GBR,FRA,HOL,
BEL,ESP,SUI,ITA,NOR,SWE,DEN,FIN
*
95
949-236
MACHINE SCREW M5X10 (10 PCS.)
1
96
318-937
LINK
1
97
998-980
SPACER
1
98
949-239
MACHINE SCREW M5X16 (10 PCS.)
1
FOR USA,CAN,AUS,FRG,AUT,GBR,FRA,HOL,
BEL,ESP,SUI,ITA,NOR,SWE,DEN,FIN
*
99
949-432
BOLT WASHER M6 (10 PCS.)
1
100
606-ZZM
BALL BEARING 606ZZC2PS2L
1
101
949-455
SPRING WASHER M6 (10 PCS.)
1
102
949-258
MACHINE SCREW M6X20 (10 PCS.)
1
103
949-432
BOLT WASHER M6 (10 PCS.)
1
FOR USA,CAN,AUS,FRG,AUT,GBR,FRA,HOL,
BEL,ESP,SUI,ITA,NOR,SWE,DEN,FIN
*
104
301-806
WING BOLT M6X15
1
105
949-568
LOCK NUT M8 (10 PCS.)
1
FOR USA,CAN,AUS,FRG,AUT,GBR,FRA,HOL,
BEL,ESP,SUI,ITA,NOR,SWE,DEN,FIN
106
949-626
BOLT M8X25 (10 PCS.)
1
107
318-956
SPINDLE ASS’Y
1
108
608-VVM
BALL BEARING 608VVC2PS2L
1
109
318-957
BEARING HOLDER
1
110
949-241
MACHINE SCREW M5X20 (10 PCS.)
2
111
600-3VV
BALL BEARING 6003VVCMPS2L
1
112
320-107
RETURN SPRING (B)
1
113
318-943
SAFETY COVER
1
114
307-731
COVER
1
115
949-322
116
FLAT HD. SCREW M4X10 (10 PCS.)
2
HITACHI LABEL
1
*
117
308-789
WASHER (D)
1
*
117
318-961
WASHER (A)
1
*
118
318-963
TCT SAW BLADE 255MM-D15.88 HOLE-NT24
1
*
118
318-964
TCT SAW BLADE 255MM-D25.4 HOLE-NT100
1
*
118
319-106
TCT SAW BLADE 255MM-D25.4 HOLE-NT24
1
*
118
319-107
TCT SAW BLADE 255MM-D30 HOLE-NT30
1
INCLUD.108,109,111
FOR CHN,FRG,AUT,GBR,FRA,HOL,BEL,ESP,
SUI,ITA,NOR,SWE,DEN,FIN
4 -- 01
* ALTERNATIVE PARTS
--- 5 ---
C 10FCB
PARTS
ITEM
NO.
CODE NO.
NO.
USED
DESCRIPTION
*
119
976-819
COLLAR (B) FOR D25.4 HOLE
1
*
119
974-663Z
COLLAR (A) FOR D30 HOLE
1
*
120
998-838
WASHER (C)
1
*
120
318-962
WASHER (B)
1
REMARKS
FOR AUS,NZL,AUT,GBR,FRA,HOL,BEL,ESP,
SUI,ITA,NOR,SWE,DEN,FIN
FOR CHN,FRG,AUT,GBR,FRA,HOL,BEL,ESP,
SUI,ITA,NOR,SWE,DEN,FIN
*
121
940-845
WASHER
1
122
996-258
BOLT (LEFT HAND) M7X17.5
1
123
949-567
LOCK NUT M6 (10 PCS.)
1
124
949-454
SPRING WASHER M5 (10 PCS.)
2
FOR CHN,FRG,AUT,GBR,FRA,HOL,BEL,ESP,
SUI,ITA,NOR,SWE,DEN,FIN
STANDARD ACCESSORIES
ITEM
NO.
CODE NO.
NO.
USED
DESCRIPTION
701
976-478
DUST BAG
1
702
940-543
BOX WRENCH 10MM
1
703
998-834
HOLDER
2
704
318-968
STOPPER
1
705
301-806
WING BOLT M6X15
1
REMARKS
OPTIONAL ACCESSORIES
ITEM
NO.
CODE NO.
NO.
USED
DESCRIPTION
*
901
976-472
TCT SAW BLADE CROSS-CUT 255MM-D15.9 HOLE
1
*
902
976-473
TCT SAW BLADE 255MM-D15.9 HOLE-NT70
1
*
903
959-000
TCT SAW BLADE CROSS-CUT 255MM-D25.4 HOLE
1
*
904
974-642
TCT SAW BLADE CROSS-CUT 255MM-D25.4 HOLE
1
*
905
976-832
TCT SAW BLADE CROSS-CUT 255MM-D30 HOLE
1
*
906
976-833
TCT SAW BLADE CROSS-CUT 255MM-D30 HOLE
1
*
907
319-658
TCT SAW BLADE 255MM-D15.88 HOLE-NT100
1
--- 6 ---
* ALTERNATIVE PARTS
REMARKS
Printed in Japan 4 -- 01
(010420N)