1
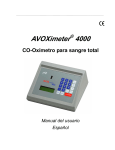
POCT Program Massachusetts General Hospital - Pathology Service 55 Fruit Street, Boston, MA 02114 Title: AVOXimeter 1000E Procedure Cross References: AVOXimeter Competency Documentation-6 month and annual AVOXimeter Initial Training and Assessment Record AVOXimeter Corrective Action Log AVOXimeter Instrument Replacement Log AVOXimeter Liquid QC Level 1 Log AVOXimeter Liquid QC Level 3 Log AVOXimeter Patient Result Log AVOXimeter QC Filter Log Sheet POCT Proficiency Testing Procedure POCT Proficiency Testing Evaluation Worksheet MGH POCT QC Storage Ordering and Documentation Guide Avox vs. GEM OPL Correlation Worksheet Contents Purpose ................................................................................................................................................................................... 2 Scope ...................................................................................................................................................................................... 2 Policy and Procedure Statement............................................................................................................................................. 2 Test Principle........................................................................................................................................................................... 2 Proficiency Testing .................................................................................................................................................................. 2 Regulatory Requirements........................................................................................................................................................ 3 Competency Assessment ....................................................................................................................................................... 4 Critical Elements ..................................................................................................................................................................... 4 Limitations and Interferences .................................................................................................................................................. 4 Test Kit/Supplies/Equipment ................................................................................................................................................... 4 Calibration ............................................................................................................................................................................... 4 Calibration Verification/Correlations ........................................................................................................................................ 5 Quality Control Monitoring ....................................................................................................................................................... 5 Specimen Collection................................................................................................................................................................ 7 Patient Test Procedure............................................................................................................................................................ 7 Instrument Replacement / Major Maintenance ....................................................................................................................... 8 Reference Ranges .................................................................................................................................................................. 9 Technical Support ................................................................................................................................................................... 9 References .............................................................................................................................................................................. 9 Cross-References ................................................................................................................................................................... 9 Written by: Gino Pagnani Nancy Toscano Date: 04/12/2010 Date: 06/30/2011 Title (with LTR): AVOXimeter 1000E Procedure (LTR17925) Last Approved: Gregory, Kimberly (Electronic Signature Timestamp: 5/1/2014 3:21:22 PM) 1 Purpose This document outlines policies and procedures that deal with %O2Hgb testing by Avoximeter 1000E. In an effort to be concise some information may be excluded from the manufacturer’s recommended procedure. It is recommended that operators familiarize themselves with the manufacturer’s product information that accompanies each package and their manual if one exists. Scope Level of Personnel: Cath lab technicians, RN’s Testing Site: Knight Cardiac Catheterization Laboratory Policy and Procedure Statement The AVOXimeter 1000(E) is a moderately complex instrument that performs whole blood analysis of total hemoglobin concentration, oxyhemoglobin fraction and the oxygen content. These analytes are measured using specific and multiple wavelengths to obtain results. The protocol to utilize oxygen saturation measurements for definitive purposes is approved by the site director. Reasons for result use may include, but are not limited to: Pediatric or congenital heart study Valve studies (AS/AI,MS/MR, valvuloplasties or percutaneous valve replacement) Cardiac output calculation (FICK) ASD, VSD, PFO studies Verification of arterial/venous access Respiratory compromise The total hemoglobin measurement from the Avoximeter is not used for clinical care at MGH. Only hemoglobin results from the core lab are used for treatment decisions. Test Principle The total hemoglobin concentration measured by the AVOXimeter 1000E includes oxy-, deoxy-, met-, and carboxyhemoglobin: [THb] = [HbO2] + [Hb] + [MetHb] + [HbCO]. Similarly, the percentage of oxyhemoglobin reported by the AVOXimeter is the so-called fractional saturation: [HbO2] • 100 %O2Hb = [HbO2] + [Hb] + [MetHb] + [HbCO] The oxygen content of the sample is [O2] = 1.39•THb•%HbO2 / 100, if dissolved oxygen is ignored, THb is expressed in g/dl, and [O2] is expressed in ml/dl. No sample preparation is required. Analysis is quickly accomplished by injecting the sample into a disposable cuvette and inserting the cuvette into the instrument. The AVOXimeter then illuminates the sample with multiple wavelengths, records the optical density of the sample at each of the wavelengths, and computes the results. In less than 10 seconds, the oxyhemoglobin fraction, the total hemoglobin concentration, and the oxygen content of the sample are shown in appropriate units on the liquid-crystal display on the front panel. Proficiency Testing The College of American Pathologists (CAP) sends unknown samples to the laboratory for analysis several times per year. Results are submitted to the CAP within 10 days of survey receipt. If a site fails 2 out of 3 events or two consecutive events, according to federal law, it may be required to discontinue testing. All Survey results are to be handled and reported in the same manner as clinical results following the directions on the CAP Survey package insert. The samples are not to be analyzed in duplicate unless clinical specimens are analyzed in duplicate. Actions or decisions must be documented. Participation must be random and not assigned to specific individuals. Successful participation may be used as demonstrating successful competency for that year. Title (with LTR): AVOXimeter 1000E Procedure (LTR17925) Last Approved: Gregory, Kimberly (Electronic Signature Timestamp: 5/1/2014 3:21:22 PM) 2 Upon receiving the survey: The POCT program will contact the participating departments regarding the survey and the timeline of the survey to be performed. The departments must be available within the period identified by POCT. The Key operators must make sure of the following: o Instruments are in good working order. o Randomly select staff to participate. o Maintain original CAP survey form with the results documented. o Maintain the signed Attestation form. o In addition, retain copies of above in the files of testing personnel. Once results are obtained, they should be reported to CAP via mail, fax or electronic entry on the CAP website. Site Director and CLIA certificate Director or designees shall review survey results to assess performance and ensure compliance with the standard and comment. Scores of 100 % minimally requires documentation of review by the Director or designee. Scores between 100% and 80% requires a comprehensive investigation and remedial action documented of unsuccessful challenges. Scores less than 80% requires a comprehensive investigation and documentation of remedial action of unsuccessful challenges. Scores of less than 80 percent may jeopardize a sites ability to continue to perform testing. Should a site fail proficiency, they will be required to immediately perform a comprehensive investigation and document remedial action. Operator re-training may be required. In order to avoid cessation of testing a site failing a challenge will be expected to develop and implement a more aggressive plan for performance improvement. Each site is responsible for completing survey challenges when they arrive. Anticipated Survey Periods: SO (Oximetry) Product Receipt Evaluation Receipt April May July August October November Regulatory Requirements I. Each testing site must have a documented quality control program, which is developed in collaboration with or has been approved by the MGH Pathology Service. II. All test results must be maintained in patient records with all required information for four years Required information: 1. Patient’s name 2. Medical Record Number 3. Patient’s gender 4. Patient’s age or date of birth 5. Date & time test collected, performed and reported 6. Ordering Physician 7. Responsible physician (if not 6) 8. Reference or Target Range 9. Test Performed 10. Test units 11. Lab name III. Additional information that must be retained for four years: 1. Testing personnel records 2. Quality control results 3. Product information (i.e. serial number, lot numbers, expiration dates, etc.), information on quality control and any remedial action 4. QC charts, maintenance sheets, reference and critical ranges Title (with LTR): AVOXimeter 1000E Procedure (LTR17925) Last Approved: Gregory, Kimberly (Electronic Signature Timestamp: 5/1/2014 3:21:22 PM) 3 IV. Other: 1. Universal precautions must be observed when handling any patient specimen. 2. A physician’s order or standing order is required is required prior to performing test. 3. The Hospital Hand Hygiene policy must be adhered to at all times. V. Linearity/ Calibration Verification The testing site will perform and document linearity/calibration verification checks every six months. Competency Assessment All operators must read the procedure manual and complete the “Operator Training Checklist” after initial training. For %O2Hb, the competency assessment process is done following initial training, at 6 months during the first year, then annually thereafter. Competency is assessed using six methods, examples of which are below: 1. Successful performance of routine patient testing, verified by direct observation 2. Supervisor monitoring of the recording and reporting of test results 3. Supervisor review of intermediate test results, QC, proficiency tests, and preventative maintenance performance 4. Successful performance of instrument maintenance function checks and calibration, verified by direct observation 5. Testing previously analyzed samples, proficiency testing samples, or internal blind testing samples. 6. Assessment of problem-solving skills Expired Operators: Operators that fail to meet competency requirements within 365 days will be locked out of the system. They will be required to undergo retraining and competency assessment according to above. Critical Elements 1. 2. 3. 4. 5. 6. Never re-use a test cuvette once it has been inserted into the analyzer. Do not remove the syringe from the cuvette until testing is complete. Discard cuvette with trapped air bubbles and check for blood clots from patient specimen prior to injection. A delay in analysis of greater than 30 seconds may yield erroneous results. Air bubbles will yield erroneous results. If any air bubbles are present in the light pathway, discard cuvette. Overfilling of the testing cuvette is a common source of error. This action will cause blood to cover the optics window inside the instrument and affect results. Contact the POCT Program via email at MGH POCT Coordinators or pager 35058. Limitations and Interferences The AVOXimeter is validated for the range of %O2Hb from 1.9 to 94.2%. Samples with results outside of the range should be confirmed with a repeat sample. Test Kit/Supplies/Equipment Product Cuvettes Vendor ITC Manufacturer # C100B People Soft# 145866 Storage RT tightly sealed Optical QC filters Yellow and Orange ITC *Instrument serial number specific RT Level-1 CO-Oximeter control RNA Medical RNA CC 527-1 Contact POCT program 118479 Level-3 CO-Oximeter control RNA Medical RNA CC 527-3 118507 CO-Oximeter calibration verification controls Syringes 1 ml RNA Medical RNA CVC 223 131546 RT (12 months) 2 - 8ºC (36 months) RT (12 months) 2 - 8ºC (36 months) 2 - 8ºC (18 months) BD 309602 08653 RT Calibration Title (with LTR): AVOXimeter 1000E Procedure (LTR17925) Last Approved: Gregory, Kimberly (Electronic Signature Timestamp: 5/1/2014 3:21:22 PM) 4 As the AVOXimeter employs highly stable state-of-the-art light sources, it does not need to be re-calibrated frequently. The AVOXimeter easily maintains its calibration for five or more years. A. Cuvette Pathlength: Each time a new bag of cuvettes is put into use, the pathlength value of the cuvettes must be entered into the AVOXimeter. The procedure is as follows: 1. 2. 3. 4. Press the Main Menu key, and select Option 1 to reach the calibration menu. Select Choice 3 on the calibration menu. When prompted to do so, enter the pathlength value on the bag of cuvettes currently in use into the AVOXimeter. After confirmation that the value entered is correct, the instrument will store a new calibration constant in nonvolatile memory and use it in subsequent analyses. Calibration Verification/Correlations Calibration verification must be performed: 1. 2. 3. 4. Every six months by using RNA CVC 223 kit If there is any major maintenance or replacement of any critical parts that may influence test performance. Instrument replacement Control results indicate that there may be a problem with the test system. Results will be entered into the online program available from RNA Medical to provide a report on the linearity and calibration verification of the Avoximeter 1000E along with peer comparison. Results for the calibration verification will be reviewed and approved by the POCT Site Coordinator and the Medical Director. Failure of any parameter will require an investigation and possibly re-calibration of the instrument. Patient sample correlations may be performed if required. Correlations between the Gem OPL and the Avoximeter are performed every six months. They are performed using the following steps: Avox 1000E to 1000E vs. GEM OPL devices • • • • • • • • • • • • • Take 15 old blood gas specimens and transfer to lithium heparin tubes. Place on rocker in GEM testing area for a minimum of 15 minutes. Additionally mix each tube end to end in hand prior to sampling. Use 1 syringe to add sample to both cuvettes Sample with syringe through the stopper. Expel any air in the syringe. Expel a few drops (from the hub) and attach to 1000e cuvette, leaving the syringe attached to the cuvette, place the cuvette in the first Avox instrument for analysis. After analysis, move the syringe with the cuvette still attached to the second Avox instrument. After analysis is complete on second Avox, remove syringe with cuvette still attached from Avox. Immediately remove the Avox cuvette, then attach a GEM OPL cuvette and fill. Insert the syringe and GEM cuvette into the first OPL to be tested. After analysis, move the syringe with the cuvette still attached to the second GEM OPL for immediate testing. Discard all used supplies into the biohazard trash. Document all results onto the correlation worksheet then follow correlation policy to report. Note: The testing methodology ensures the sample remains in an anaerobic state and after the 10 seconds analysis period, the specimen can be introduced into another instrument. Reversing this procedure may introduce pre-analytical error which will distort your correlation study. Quality Control Monitoring Daily: Two QC filters are provided for verification of the calibration of the instrument. Automatic QC lockout requires that both filters be run every 8 hours of patient testing and documented on the QC filter log sheet. Filters are serial number specific and may only be used with assigned instrument. The QC results should fall within the following ranges: Title (with LTR): AVOXimeter 1000E Procedure (LTR17925) Last Approved: Gregory, Kimberly (Electronic Signature Timestamp: 5/1/2014 3:21:22 PM) 5 Yellow QC filter Orange QC filter %HbO2 93.5 to 96.5% 37.2 to 40.8% Running a QC filter: 1. Insert one of the QC filters into the AVOXimeter 1000(E). 2. Enter your Operator ID into the instrument as requested. 3. Document results on QC log sheet. Patient testing should not be performed if any one of the QC values is out of range. Any values out of range may indicate dirty optics. The optics should be cleaned according to the manufacturer’s directions (see Troubleshooting Section in Operator’s and Service manual). The QC filters must be repeated after cleaning the dirty optics. If the problem persists either email MGH POCT Coordinators or page 35058. Weekly: Two levels of liquid QC are performed weekly to verify calibration of the system. 1. Follow hand hygiene protocol and use gloves. 2. Enter your Operator ID number using the numeric keypad and press ENTER. 3. Shake the control sample Level 1 according to the manufacturer's recommendations, approximately ten seconds. 4. Restore liquid to the bottom of the ampoule with gentle tapping. If foam or small bubbles are present, allow ampoule to stand until these have come to the surface. 5. With fingers protected, carefully snap open the ampoule. 6. Contents should be sampled as soon as the ampoule is opened. It is necessary to transfer liquid from the ampoule to a syringe. Use an 18 - 20 gauge blunt needle on a 1-3 ml non heparinized syringe. Insert the needle to the bottom of the ampoule and slowly draw liquid into the syringe. 7. Remove the needle and insert the syringe tip into the cuvette syringe port on the cuvette and inject the QC sample holding cuvette down at a 45° angle. Inject QC material into the cuvette until the sample reaches the vent patch. Leave syringe attached to cuvette. Note: Over injection of QC material will cause the vent patch to bulge outward. If this happens, pull back slightly on the syringe plunger just until the patch flattens. 8. Check that no air bubbles are present in the sample light path. Note: Air bubbles will yield erroneous results. If air bubbles are present in the light pathway, discard cuvette. 9. Holding the cuvette by the black cap, gently insert it into the slot of the instrument's front panel. 10. Insert the cuvette within 30 seconds of filling it. Note: A delay of analysis greater than 30 seconds may yield erroneous results. 11. Quality Control data will be displayed. Transcribe the data onto the “Liquid QC Level 1 Log Sheet” for Level 1. Note: If a result is outside of the range limits, this represents an unsuccessful quality control test. a. Verify that the Cuvette pathlength is correct for the cuvettes in use, b. Check the desiccant's indicator in the cuvette package, c. Perform the optical QC using the yellow and orange filters, d. Repeat the control with a new ampoule. If the results are within range, proceed with patient testing, e. If results are still outside of acceptable range limits, contact POCT program staff via email at MGH POCT Coordinators or pager 35058. f. Do not use instrument. 12. Discard the cuvette in an appropriate biohazard container 13. Repeat steps 1-10 for Level 3 control. 14. Record the results onto the “Liquid QC Level 3 Log Sheet”. Title (with LTR): AVOXimeter 1000E Procedure (LTR17925) Last Approved: Gregory, Kimberly (Electronic Signature Timestamp: 5/1/2014 3:21:22 PM) 6 Specimen Collection Heparinized whole blood is used. The sample should be obtained from an arterial line, an arterial puncture, or venipuncture. Sample must be labeled with two patient identifiers according to hospital policy. 1. Use appropriate precautions for handling possibly infectious blood. 2. Withdraw 10cc of blood into a syringe and discard. For a PA line, approximately 2cc of waste is necessary. Withdraw 0.5cc of blood for testing. 3. The required sample size for the AVOXimeter 1000(E) is 50 μl. Prior to analysis the sample should be free of any air bubbles and mixed by rolling the syringe between the outstretched palms of both hands for 10 seconds. Invert the syringe and repeat mixing. Expel a small amount of blood sample into an absorbent surface. Care should be taken to prevent the introduction of air into the sample when it is drawn. Expel all air bubbles from the syringe and cap or seal the end of the syringe. Patient Test Procedure 1. Patient testing can only be done if all quality control results are within acceptable limits. 2. The instrument indicated that it is ready to analyze samples by displaying the following message: 3. Follow hand hygiene protocol and use gloves 4. Collect the blood sample in a heparinized syringe ensuring proper waste to avoid contamination and label. 5. Roll the syringe containing the blood sample between hands periodically inverting the syringe to mix the sample thoroughly. The sample must be mixed for a full ten-second interval just prior to injection into the cuvette. Note: Poorly mixed samples or those containing clots may cause inaccurate results. 6. Expel a small amount of sample from the syringe. 7. NEVER INJECT BLOOD INTO THE INSTRUMENT ITSELF. 8. Attach a disposable cuvette to the luer tip of the syringe, and inject the blood into the cuvette following the directions for Correct Cuvette Technique. Correct Cuvette Technique: a. Connect blood-filled, plastic syringe to a new disposable cuvette. b. Hold cuvette downward at a 45° angle and express blood into cuvette until sample fills cuvette up to the vent patch at the opposite end. CAUTION: Never force blood into cuvette. If cuvette does not fill easily, discard it and use another one. Title (with LTR): AVOXimeter 1000E Procedure (LTR17925) Last Approved: Gregory, Kimberly (Electronic Signature Timestamp: 5/1/2014 3:21:22 PM) 7 c. Observing the cuvette closely, make sure that the light path at the widest portion of the sample chamber is completely filled with blood and that blood reaches the air vent at the opposite end of the cuvette. Note: Over injection of blood will cause the vent patch to bulge outward. If this happens, pull back slightly on the syringe plunger to flatten patch. d. Check that no air bubbles are present in the sample light path. Note: Air bubbles will yield erroneous results. If air bubbles are present in the light pathway, discard cuvette. e. If any blood is on the exterior surface of the cuvette, wipe it off with gauze. 9. Leaving the syringe attached to the cuvette, and holding the cuvette firmly by its black cap, insert the cuvette into the slot in the front panel of the instrument within 30 seconds of filling. Note: A delay in analysis of greater than 30 seconds may yield erroneous results. 10. Enter patient medical record number and press ‘Yes’. 11. Enter your 9 digit operator ID number (only valid operators are allowed to perform testing) and press ‘Yes’. 12. Observe the LCD display. Do not disturb the AVOXimeter while it is busy. Within 10 seconds, the results will be displayed. 13. Withdraw the cuvette as soon as the sample has been analyzed. Data will stay on the display until the cuvette is removed. A printout of the results is available on the attached printer and data will remain in non-volatile memory until deleted. 14. To analyze the next sample, discard the previously used cuvette into an appropriate biohazard container, obtain a fresh cuvette from the box and repeat the process from step 1. 15. Record the %O2Hb result in the Apollo database and on the “Patient Log sheet”. Total hemoglobin results must not be used. Only total hemoglobin results from the Core Lab are acceptable. 16. In the event of a test result that appears inconsistent with the patient’s clinical status, send a sample to the core laboratory blood gas lab. Instrument Replacement / Major Maintenance A. The replacement instrument policy must be followed when: The instrument is removed for service Replaced by another instrument Returned to service B. Documentation: All the information should be documented concurrently on the “Instrument Corrective Action Log”. C. Before putting the analyzer into service: 1. Enter the cuvette pathlength of the currently used cuvette into the instrument, 2. Perform QC by using the yellow and orange optical filters, 3. Run both levels of liquid QC, 4. Perform the Calibration Verification, 5. Document the Cal Verification results on the RNA Medical sheet and enter into the web site, 6. Document all steps performed on the “Instrument Replacement Log” 7. Send a copy of the calibration verification to the POCT program for review and approval by the POCT Director or designee. Title (with LTR): AVOXimeter 1000E Procedure (LTR17925) Last Approved: Gregory, Kimberly (Electronic Signature Timestamp: 5/1/2014 3:21:22 PM) 8 Reference Ranges %O2hgb: Arterial: Mixed venous: 94-98 (newborns 40-90) 60-80% Technical Support Call Tech Support for questions or troubleshooting assistance at 800-631-5945. References AVOXimeter 1000E Compliance guide, ITC Systems, Inc., Edison NJ 9/06 AVOXimeter 1000E Operator's guide, ITC Systems, Inc., Edison NJ 9/06 CVC 223 Co-Oximeter Calibration Verification Controls package insert, RNA Medical, Devens, MA 1/06 CC 527 Co-Oximeter controls package insert, RNA Medical, Devens, MA 1/06 Cross-References AVOXimeter QC Filter Log Sheet AVOXimeter Liquid QC Level 1 Log AVOXimeter Liquid QC Level 3 Log AVOXimeter Competency Assessment-6 month and annual AVOXimeter Patient Result Log AVOXimeter Initial Training and Assessment Record AVOXimeter Instrument Replacement Log AVOXimeter Corrective Action Log Avox vs. GEM OPL Correlation Worksheet Title (with LTR): AVOXimeter 1000E Procedure (LTR17925) Last Approved: Gregory, Kimberly (Electronic Signature Timestamp: 5/1/2014 3:21:22 PM) 9