Download Related Documents
Transcript
Active
Author: S.Phillips
Siemens 1200 series Critical Care Analysers SOP
Doc Manager: K.Ashton
Authorised by: Kath Ashton
Signature : ………………………….
Version: 1.00
Ver Date: 28/09/12
THIS DOCUMENT IS THE PROPERTY OF THE DEPARTMENT OF
CLINICAL BIOCHEMISTRY AND METABOLIC MEDICINE.
THIS DOCUMENT, OR ANY PART THERE OF, MUST NOT BE REPRODUCED WITHOUT THE
PERMISSION OF THE MANAGER OF THE DEPARTMENT OF CLINICAL BIOCHEMISTRY AND
METABOLIC MEDICINE.
Related Documents
COSHH
Risk Assessments
Others
Siemens conditioner solution_56820, Siemens deproteiniser_57094, Siemens AQC
cartridge_56782, Siemens reference electrode fill solution_57178, Siemens electrode
fill solution_57100, Siemens pH electrode fill solution_57159, Siemens reagent
cartridge_57183, Siemens wash cartridge_57197
Siemens Rapidlab 1200 series analysers
Siemens RapidComm SOP
Significant changes from previous version
Removal of siemens 400 series information
Purpose
To describe the use of the Siemens Rapidlab 1200 series critical care analysers for patient blood gas, cooximetry and electrolyte testing by healthcare professionals.
All POCT must comply with the Trust Point of Care Policy, which can be found under policies and
procedures on the Trust Staff Intranet site.
User Training and Competency
All users of Siemens critical care analysers must be trained by the Blood Sciences Department. Training
includes care and use of the analysers. Additional training is provided for staff who undertake the routine
maintenance of the analysers. On completion of training users are issued with an individual password/PIN
barcode, which is required to access the analysers. Sharing of passwords is strictly prohibited.
Training can be arranged via the POCT team, Blood Sciences (see contacts).
Clinical indications / purpose of examination
The Siemens critical care analyser provides quantitative measurements of pH, pCO2, PO2, Na+, K+, Cl-, Ca++,
glucose, lactate, haematocrit and co-oximetry (Hb, O2Hb, COHb, MetHb, HHb) parameters. These parameters,
along with derived parameters, aid in the diagnosis of a patients acid-base status, electrolyte and metabolite
balance and oxygen delivery capacity.
Do not photocopy this document
Page 1 of 14
Last printed: Last printed 24/10/2012 09:24:00
DMS Ref: 4828.doc
Active
Siemens 1200 series Critical Care Analysers SOP
Author: S.Phillips
Doc Manager: K.Ashton
Authorised by: Kath Ashton
Signature : ………………………….
Version: 1.00
Ver Date: 28/09/12
Principles of examination
Potentiometric – pH, pCO2, Na+, K+, Cl-, Ca++
Amperometric – pO2, glucose, lactate
Spectrophotometry – co-oximeter parameters
Calculated values: Standard bicarbonate, Base excess.
For further information refer to the Siemens Rapidlab 1200 operators guide.
Specimen requirements
Whole blood - freshly drawn into a heparinised syringe. Ensure all air is expelled, cap and mix by rotation.
Analyse immediately.
Minimum volume is 0.5mL
ONLY use the syringes supplied for taking samples. Other sampling devices may give erroneous results and/or
damage the analyser.
Other body fluids (e.g. pleural fluids for pH) MUST be sent to the laboratory for analysis. Samples must be
centrifuged in the laboratory prior to analysis to remove all particulate matter and potential clots.
To send a sample to the laboratory for analysis:
•
Ensure the sample is labelled and is accompanied by a completed laboratory request form (refer to the
‘Laboratory Investigations- Minimum Data Standard Policy’).
•
Pack the sample with crushed ice & water.
•
Transport to the laboratory must not be via the pneumatic tube system.
•
Samples must be received within 30 minutes of collection.
•
DO NOT send with the needle still attached
Failure to comply with any of the above will result in rejection of the sample.
Instrumentation
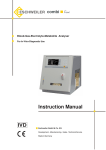
Siemens Rapidlab 1200 series critical care analyser.
The analyser is a modular system that may be configured in a number of ways, to include blood oxygen, carbon
dioxide, pH, calcium, sodium, potassium, chloride, lactate, glucose and co-oximeter parameters. Parameters
available on each instrument vary according to location, and are indicated on the analyser screen after logging
on.
The analysers are managed by the Siemens Rapidcomm software which links into the hospital PAS system and
the laboratory LIMS.
Equipment
• Syringes – stores are held in each location. Orders are made by Blood Sciences on behalf of all other
Directorates. Syringes are obtained from: Siemens Medical Solutions Diagnostics Limited (see below).
• Disposal gloves
Reagents
All reagents and QC are obtained from:
Siemens Medical Solutions Diagnostics Limited
Sir William Siemens Square
Frimley, Camberley
Surrey, GU16 8QD
Do not photocopy this document
Page 2 of 14
Last printed: Last printed 24/10/2012 09:24:00
DMS Ref: 4828.doc
Active
Siemens 1200 series Critical Care Analysers SOP
Author: S.Phillips
Doc Manager: K.Ashton
Authorised by: Kath Ashton
Signature : ………………………….
Version: 1.00
Ver Date: 28/09/12
Tel: 0845 600 1955 (24hr. service)
0845 600 1966 (orders)
Stocks of all analyser consumables are ordered by Blood Science on behalf of all other Directorates and are held
centrally in the laboratory at RLH. Reagent stocks for the BGH theatres analyser are stored in theatres. At least
one replacement reagent, QC and wash cartridge and waste container is kept in the BGH lab.
A small stock of some consumables (i.e. printer paper and waste bottles) are kept by each analyser.
Reagent stocks held in the laboratory are stored according to the manufacturers’ instructions: either at 2-80C in
fridge room 4063, or at room temperature in room 4010 and are used until the expiry date.
Calibration
Calibration of all the parameters is carried out automatically at pre-programmed intervals.
A one-point calibration is performed every 60 minutes and takes ~2 minutes
A two-point calibration is performed every 2 hours and takes ~4 minutes
A full calibration is performed every 8 hours and takes ~8 minutes.
DO NOT cancel calibrations. Calibration is essential for the generation of correct patient results and
cancellation will result in the parameter being disabled.
If the calibration of a parameter fails the system will automatically repeat the calibration up to 2 times. If the
problem remains the parameter is automatically disabled and will not be available for patient testing.
Cumulative calibration data for all analysers is archived by and may be viewed from Rapidcomm by laboratory
staff
Quality Control
INTERNAL QUALITY CONTROL
Three levels of IQC solution are stored on board the analyser in the AQC cartridge. IQC analysis is carried out
automatically, one level every 4 hours according to a pre programmed timetable. Any sensor failing IQC at one
or more levels is disabled by the analyser until the errors are resolved. Disabled parameters can only be
reactivated following successful re-calibration and repeat IQC.
All three levels of IQC are performed following the replacement of the measurement cartridge.
DO NOT cancel IQC analysis. Quality control is essential for the generation of correct patient results and
cancellation will result in the parameter being disabled.
Cumulative IQC performance for all analysers is archived by and may be viewed from Rapidcomm by
laboratory staff
EXTERNAL QUALITY CONTROL
All analysers are registered for monthly EQA under WEQAS
Using the analyser
•
All communication with the analyser is by the touch sensitive screen or bar code reader. The touch
sensitive screen must be operated with fingers only, use of pens or sharp objects will cause serious damage
to the analyser.
Do not photocopy this document
Page 3 of 14
Last printed: Last printed 24/10/2012 09:24:00
DMS Ref: 4828.doc
Active
Siemens 1200 series Critical Care Analysers SOP
Author: S.Phillips
Doc Manager: K.Ashton
Authorised by: Kath Ashton
Signature : ………………………….
Version: 1.00
Ver Date: 28/09/12
•
Access to any of the blood gas analysers is by password/PIN barcode. The Blood Science Department will
issue individual passwords/PIN barcodes following training.
•
To log-on to the analyser enter your password/PIN or Laboratory access code and press the green arrow
in the bottom right corner of screen. This will take you to the Analysis screen.
•
Access to the analysers will be disabled under the following circumstances: 1)
2)
3)
4)
5)
6)
•
If the manager of the unit owning the analyser requests that an individual is to be removed.
When a member of staff leaves the employment of the trust.
When an individual’s access code has become compromised or is suspected to be
compromised.
In event of serious misuse of an analyser.
Repeated failure to follow the ‘Standard Operating Procedure’ for the use of an analyser.
Failure to attend periodic training updates.
The screen consists of a banner area and a display area.
The banner is at the top of all screens.
• The left hand side contains information about system status.
• The right-hand side has buttons for accessing the four main system screens: 1) the Analysis
screen, 2) the Recall screen for archived patient/calibration/QC data, 3) the Status screen for
analyser status and maintenance and 4) the Help files.
The display area (main screen area) contains the options and information for the task you are
performing.
Available parameters
The list of available parameters for the analyser is displayed on the Analysis screen. Their availability status is
displayed follows:
•
Available: parameter in white box with a tick.
•
Unavailable: cross through parameter
•
Unavailable due to Failed calibration: single diagonal line through parameter.
•
Unavailable due to Failed QC: parameter in yellow box with single diagonal line.
•
Unavailable as Scheduled QC not performed: parameter in purple box with single diagonal line.
To perform a patient test
(laboratory staff also see additional info below)
1.
To perform a test on the wards the operator must have been present when the sample was drawn.
2.
Check that the status message in the top left hand corner of the banner area indicates “Ready”.
Otherwise DO NOT proceed. DO NOT cancel QC/calibrations.
3.
From the Analysis screen check on the parameter list that the assays you require are available.
4.
Select the sample type on the left-hand list (default is syringe of arterial blood).
5.
Insert the syringe into the sample port.
6.
Press the green ‘analyse’ button.
7.
Remove the sample when prompted and press the green arrow.
8.
Enter the patient demographics as follows: All fields shown below are mandatory and MUST be
completed.
Do not photocopy this document
Page 4 of 14
Last printed: Last printed 24/10/2012 09:24:00
DMS Ref: 4828.doc
Active
Siemens 1200 series Critical Care Analysers SOP
Author: S.Phillips
Doc Manager: K.Ashton
Authorised by: Kath Ashton
Signature : ………………………….
Version: 1.00
Ver Date: 28/09/12
PATIENT ID: FULL UNIT NUMBER – Enter all alphanumeric characters. Manual
input should only be used if scanning is not possible.
Acceptable unit numbers are RQ6-------, 5NL-------, W------- (LWH) or NHS number.
If the patient has no unique identifier number (no hospital number or NHS
number) or is of unknown identity see procedure ‘for unknown patients’ below.
LAST NAME: Patient’s family name. (NB. If the RQ6 number is used as patient ID the
analyser should automatically populate this field)
LOCATION: Requesting unit or ward
FiO2: Enter the patients inspired oxygen as a percentage (e.g. On air = 21%). This will
then be printed on the report to aid interpretation of results.
USER ID: This is populated from your logon and does not require separate entry
For unknown patients: enter the following into the patient ID and last name fields:
PATIENT ID: Enter Date and Time in the format DDMMYYHHMM (e.g. analysis
performed at 18:26 on 23rd February 2012 would be entered as 2302121826)
LAST NAME: For a male patient enter UNKNOWN M for a female enter
UNKNOWN F.
9.
10.
11.
12.
Check all information is correct before proceeding.
Press the green arrow.
When analysis is complete the results will be printed.
Press the green ‘continue’ button when done.
NOTE: If the analyser detects a short sample it will offer the option of ‘micro sample’. DO NOT accept. Low
volume samples have poor sample integrity and give unreliable results. Follow the on screen instructions to exit
to the initial log-on screen.
To perform a patient test on a laboratory analyser
Number and book the sample into Telepath prior to analysis.
Follow the procedure above accept enter the sample number in the accession number field on the patient
demographics screen.
Ensure the results have transferred to telepath after analysis.
To perform an off-line test on a laboratory analyser
This includes any direct ‘ISE’ checks, blood gas samples awaiting identification, and any assays that have
not been entered into Telepath for whatever reason.
Follow the procedure above accept enter the following in the patient demographic fields:
PATIENT ID:
Offline
LAST NAME:
Test
ACCESSION NO:
Sample number
Do not photocopy this document
Page 5 of 14
Last printed: Last printed 24/10/2012 09:24:00
DMS Ref: 4828.doc
Active
Siemens 1200 series Critical Care Analysers SOP
Author: S.Phillips
Doc Manager: K.Ashton
Authorised by: Kath Ashton
Signature : ………………………….
Version: 1.00
Ver Date: 28/09/12
Common Error Messages
1. A yellow triangle with legend ‘ANALYSER REQUIRES OPERATOR ATTENTION’.
This is for laboratory information ONLY and may not indicate an immediate problem with the analyser.
The analyser can be used as normal although some parameters may be unavailable.
2. Waste symbol displayed on the banner area.
This is displayed when the waste is 70% full. The waste bottle should be replaced at a time when the
system is not busy. See maintenance procedures.
3. A yellow triangle with legend ‘replace the sample port’. An obstruction (possible clot) has been detected
and you need to change the sample port. Follow the instructions on the screen to change the port.
Recording, calculation and reporting of results
All calculations are performed by the analyser. All results falling outside the reference range are flagged by
up (high) or down (low) arrows.
A print out of the results is available immediately after analysis. Additionally up to 2000 patient results are
held on the analyser for review.
When appropriate patient ID has been used to perform the test all the results are automatically transmitted
from the analyser to the laboratory Telepath system and subsequently reported in the patients record and
available for review on the hospital ICE system.
Responsibilities of personnel in authorising reporting and monitoring reports:
(i)
Users are responsible for ensuring results outside the expected range are communicated
immediately to the relevant member of staff (Doctor or Senior nurse), as highlighted in training and
in accordance with the Trust POCT Policy.
(ii)
Although most results are available on the ICE system, users are also responsible for ensuring
results are recorded in the patient notes, in accordance with the Trust POCT Policy.
(iii)
Any therapeutic decision based on the POCT result is the responsibility of the Clinical Director,
as highlighted in the Trust POCT Policy.
(iv)
For samples analysed in the laboratory it is the responsibility of the emergency laboratory staff to
ensure results are telephoned to the requesting location and are reported on Telepath.
(v)
Laboratory staff also periodically check the Siemens Rapidcomm system to ensure I.T
communications between all the analysers and the hospital and laboratory systems are working and
that all appropriate results have been transmitted to Telepath and subsequently ICE (see Rapidcomm
SOP).
Reference Ranges
Arterial:
pH
H+ ion
pCO2
7.38 - 7.44
36 – 42 nmol/L
4.7 – 6.0 kPa
pO2
Std bicarb
11.3 – 14.0 kPa
Base excess
Hb
O2Hb
22 – 26 mmol/L
-2.3 - +2.3 mmol/L
12.0 – 18.0 g/dL
94.0 – 97.0%
Do not photocopy this document
Page 6 of 14
Last printed: Last printed 24/10/2012 09:24:00
DMS Ref: 4828.doc
Active
Siemens 1200 series Critical Care Analysers SOP
Author: S.Phillips
Doc Manager: K.Ashton
Authorised by: Kath Ashton
Signature : ………………………….
HHb
MetHb
COHb
Sodium
Potassium
Chloride
Ionized Ca
Glucose
0.0 – 5.0%
0.0 – 1.5%
0.1- 0.4% (non smokers)
135 – 145 mmol/L (plasma – lower in whole blood)
3.5 – 5.3 mmol/L (plasma – lower in whole blood)
99 – 109 mmol/L (plasma – lower in whole blood)
1.15 – 1.30 mmol/L
3.5 – 6.0 mmol/L
Lactate
0.5 – 2.2 mmol/L
Version: 1.00
Ver Date: 28/09/12
Interferences
• CO-oximetry interferences:
Affected by the presence of turbidity, bilirubin, cyanmethaemoglobin and dyes in the sample.
Air pollution and smoking cause significantly higher levels of carboxyhaemoglobin.
•
Sodium interferences:
Substance
Concentration tested
Dobutamine
5mg/dl
Benzalkonium Heparin
Heparine Leo
800 – 850 U/ml
Level of interference
+6.0 mmol/l
> 50 mM
-12.6 mM
•
Potassium interferences:
Benzalkonium Heparin has been shown to interfere with potassium sensor, increasing apparent
levels by >0.15 mmol.
•
Chloride interferences:
Substance
Salicylic acid
Salicylic acid
Concentration tested
50mg/dl
20mg/dl
Level of interference
+9.5 mmol/l
+1.8 mmol/l
Calcium interferences:
Substance
Salicylic acid
Salicylic acid
Concentration tested
50mg/dl
30mg/dl
Level of interference
-6%
-3%
Concentration tested
1000mg/dl
2mg/dl
1000mg/dl
(each)
16ug/l
Level of interference
+1.4 mmol/l
+0.4 mmol/l
+1.4mmol/l
•
•
Glucose interferences:
Substance
Sodium Fluoride
Acetoaminophen
Sodium Fluoride/
potassium oxalate
Pralidoxime
Iodide
Do not photocopy this document
Page 7 of 14
Last printed: Last printed 24/10/2012 09:24:00
DMS Ref: 4828.doc
Active
Siemens 1200 series Critical Care Analysers SOP
Author: S.Phillips
•
Doc Manager: K.Ashton
Authorised by: Kath Ashton
Signature : ………………………….
Version: 1.00
Ver Date: 28/09/12
Lactate interferences:
Substance
Concentration tested
Level of interference
Sodium Fluoride
1000mg/dl
+1.0 mmol/l
Acetoaminophen
2mg/dl
+0.35 mmol/l
Sodium Fluoride/
1000mg/dl
+1.0 mmol/l
potassium oxalate (each)
Pralidoxime
64/ug/l
Iodide
Ethylene Glycol and its metabolites (Glycolic Acid, Formic Acid, Oxalic Acid and
Glyoxylic Acid) have a positive interference with the lactate assay.
Limitations
Room Air
Especially samples having very low or high pO2
content. Similarly, pCO2 may be affected and
subsequently pH and Ca++ results as well.
Metabolic Changes
Errors can occur due to metabolic changes if there is a
delay in the measurement of the samples.
Elevated White Blood Cells or Reticulocyte
Counts
Samples will deteriorate more rapidly, even when kept
in ice water.
Improper Mixing
Errors will be introduced for measurement of
haematocrit and Co-ox parameters if the sample is not
properly mixed prior to measurement.
Under-Heparinised Sample
Blood clot can form in the sensor chamber causing
various sensor failures if sample is not properly
heparinised.
Haemolysed sample
Potassium results will be falsely elevated.
Assay characteristics
pH.
pCO2
pO2
Na+
K+
Ca++
ClGlu
Lactate
Hb
O2Hb
COHb
MetHb
HHb
Whole blood within batch precision
%CV = 0.03 – 0.09 (range 7.037 – 7.626)
%CV = 1.4 – 6.0 (range 7.4 – 220 mmHg)
%CV = 0.6 – 1.4 (range 27.6 – 657.9 mmHg)
%CV = 0.2 – 0.4 (range 113.5 – 173.7 mmol/L)
%CV = 0.3 – 1.3 (range 1.18 – 11.87 mmol/L)
%CV = 0.7 – 2.0 (range 0.55 – 4.24 mmol/l)
%CV = 0.4 – 0.7 (range 70 – 106 mmol/L)
%CV = 0.7 – 3.3 (range 42 – 477 mg/dL)
%CV = 1.5 – 3.5 (range 1.2 – 13.4 mmol/L
%CV = 0.6 – 0.8 (range 6.14 – 20.23 g/dL)
%CV = 0.3 (range 84 – 86 %)
%CV = 2.7 – 4.6 (range 5.19 – 5.34%)
%CV = 1.0 – 2.4 (range 5.84 – 6.27%)
%CV = 5.5 – 5.7 (range 3.77 – 4.35%)
Linearity
6.00 – 8.00
0.67 – 33.33 kPa
0 – 106.67 kPa
70– 200 mmol/L
0.5 – 20.0 mmol/L
0.25 – 5.00 mmol/L
40 – 160 mmol/L
0.6 – 55.4 mmol/L
0.0 – 30.0 mmol/L
2.0 – 25.0 g/dL
0 – 100 %
0 – 100 %
0 – 100 %
0 – 100 %
Do not photocopy this document
Page 8 of 14
Last printed: Last printed 24/10/2012 09:24:00
DMS Ref: 4828.doc
Active
Siemens 1200 series Critical Care Analysers SOP
Author: S.Phillips
Doc Manager: K.Ashton
Authorised by: Kath Ashton
Signature : ………………………….
Version: 1.00
Ver Date: 28/09/12
Turnaround time
Samples are analysed immediately upon receipt.
Maintenance procedures
The Blood Science Department will provide a daily service visit to each analyser between 0900h and 1700h
Monday to Friday. This visit includes routine maintenance and replenishment of consumables.
Additional visits outside these hours or in case of breakdown will only be made according to availability of
Laboratory staff, contact phone numbers are:- 4230 or 4235(out of hours).
In case of analyser malfunction/breakdown samples can be sent to the laboratory for analysis 24/7.
All users are able to carry out basic maintenance procedures including changing the waste bottle, changing the
sample port and replacing the printer paper.
To empty the waste container
1.
Wear protective gloves
2.
Select the Status screen from the banner area.
3.
Select Waste > Replace.
4.
Follow the instructions in the video.
To change the printer paper
1. A red line appears across the paper when it is running out.
2. Open the paper compartment and remove the old roll. DO NOT discard the spindle.
3. Insert the spindle in the new roll and place in the groves of the holder with the paper unwinding
from the bottom.
4. Turn the paper advance knob clockwise to move ~5cm of paper through the top of the printer.
5. Close the paper compartment.
Advanced Maintenance Procedures
This following section is for users with access level 3 and above who have been trained to perform daily,
weekly and intermittent maintenance duties.
Wear disposable gloves when carrying out all maintenance procedures.
Each instrument requires daily and weekly maintenance procedures.
N.B. It is essential that one of the ITU analysers is always available. Therefore routine maintenance must always
be completed on one analyser before commencing work on the second, this also applies to the A/E and AMAU
instruments.
A routine maintenance schedule is available on each analyser. When a routine maintenance task is due a
“maintenance!” message appears on the analyser screen (in banner area) along with the number of tasks that
are due. This is for information only and will not prevent operation of the instrument.
All maintenance procedures MUST be recorded on the electronic log. Some routine maintenance
procedures are acknowledged and recorded automatically on the analyser while others require manual
acknowledgement and data recording (see below for procedure).
Do not photocopy this document
Page 9 of 14
Last printed: Last printed 24/10/2012 09:24:00
DMS Ref: 4828.doc
Active
Siemens 1200 series Critical Care Analysers SOP
Author: S.Phillips
Doc Manager: K.Ashton
Authorised by: Kath Ashton
Signature : ………………………….
Version: 1.00
Ver Date: 28/09/12
Daily maintenance
1. Check Rapidcomm for cartridge status, sensor calibration stability and IQC performance. Poor
calibration stability or IQC performance may indicate sensor maintenance is required.
2. Change analyser cartridges if required. Instructions are provided on the video activated on the
analyser. N.B. once a cartridge has been removed from the analyser, it cannot be refitted for
continuing use.
Cartridges will need to be changed due to:
o Expiry of on board life (Reagent cartridge - 30 days, AQC cartridge - 28 days and wash
cartridge - 18 days).
o Low volume (<10% volume). Normally only applies to wash cartridges.
The analyser will display a visual warning when any cartridge is within 24 hrs of expiry or when
<10% remains.
Dispose of use cartridges at the site of use in ‘yellow clinical waste bags’
3. Clean the analyser surface. Small blood spots can be removed with 0.5% hypochlorite.
4. Report any misuse of analyser to ward manager and to senior BMS (e.g. blood spills used syringes or
needles left on analyser).
5. Check and replace printer paper roll (instruction video available through user manual icon).
6. Service or replace any failed sensors. N.B if any sensors are replaced or disturbed then the analyser
must be fully calibrated and all levels of IQC measured before samples can be analysed.
Weekly Maintenance
Check the electrode fill solutions for visible bubbles and level in each of the sensors, if low replace the
electrode fill solution. (See below)
Perform High G/L analysis on analysers which have glucose and/or lactate sensors fitted.
This should be performed on the last normal working day of the week.
i. The solution may be introduced directly from the vial using an adaptor or following transfer
of the solution to a syringe (preferred method). A single vial may be used on several
instruments
ii. Log-on to the instrument, select the High G/L icon.
iii. Follow on screen instructions to analyse sample.
iv. If analysis results fall below: glucose - 44.4 mmol/L, lactate - 20 mmol/l. Replace
appropriate sensors (see below).
To maintain or install an electrolyte sensor (Na, K, Cl, Ca, pH)
Select Status screen followed by Maintenance > Performing Sensor Maintenance.
To remove an air bubble
i. Shake the sensor once to dislodge then refit the electrode. Repeat if required.
•
To replace the electrode fill solution
A single type of electrode fill solution is used for Na, K, Cl, Ca sensors. The pH fill solution is
specific to the pH sensor.
i.Remove the sensor from the instrument.
ii. Remove the centre electrode pin by unscrewing from the body of the sensor and set to one
side, taking care not to touch the central pin.
iii. Gently tap the electrode body (while inverted), onto a tissue, until all old fill solution has
been removed.
iv. Fit the filling needle to a vial of the appropriate electrode fill solution and fill the sensor
body from the bottom to - no more than 80% of capacity for K, Cl and Ca sensors and 90%
of capacity for Na and pH sensors.
Do not photocopy this document
Page 10 of 14
Last printed: Last printed 24/10/2012 09:24:00
DMS Ref: 4828.doc
Active
Siemens 1200 series Critical Care Analysers SOP
Author: S.Phillips
Doc Manager: K.Ashton
Authorised by: Kath Ashton
Signature : ………………………….
Version: 1.00
Ver Date: 28/09/12
v. Refit the central electrode and tap gently to dislodge any bubbles that may be trapped on the
membrane.
vi. Wipe the outside of the sensor with a clean tissue
vii. Refit sensor to the instrument, perform any other maintenance procedures required then
recalibrate.
•
To perform de-proteinise and conditioning of electrodes.
i. Reconstitute a vial of deproteiniser (D1b, pepsin powder) with a vial of D1a electrolyte
mixture. Fill a 5ml syringe with the deproteiniser solution.
ii. Press STATUS >MAINTENANCE >DEPROTEINIZING THE SAMPLE PATH
N.B. if glucose or lactate sensors are fitted you will be prompted to remove the glucose and
lactate sensors and install TB4 dummy electrodes before proceeding, when exchange has been
completed select OK to confirm and proceed.
Failure to do this will cause irreparable damage to the glucose/lactacte sensors
iii.
iv.
v.
vi.
Insert syringe of deproteiniser to sample port and press ANALYSE
Remove syringe when prompted. (This procedure takes approximately 5 minutes.)
Instrument will then prompt to ask for CONDITION??
Transfer the contents of one conditioner vial to a 5ml syringe and present to the analyser
sample port and press ANALYSE.
vii. Remove syringe when prompted. (This procedure takes approximately 5 minutes.)
viii. You will then be prompted to remove the dummy electrodes and re-install glucose and lactate
sensors and press OK to confirm BEFORE PROCEEDING WITH CALIBRATION.
ix. Instrument will then prompt “CALIBRATE??” press YES to calibrate.
x. The instrument may require 2 or 3 calibrations after a clean/condition before all electrodes restabilise.
Note that if any of the sensors have been replaced or disturbed then the analyser must be fully
calibrated and all levels of IQC measured before anyone is permitted access to analyse samples.
To install a new electrolyte sensor
i. The box containing the replacement sensor also contains a filling needle and sensor filling
solution.
ii. Remove the centre electrode pin, from the new sensor, by unscrewing from the body of the
sensor and set to one side, taking care not to touch the central pin.
iii. Gently tap the electrode body (while inverted), onto a tissue, until all old fill solution has
been removed.
iv. Fit the filling needle to a vial of the electrode fill solution, of the correct type, and fill the
sensor body from the bottom to - no more than 80% of capacity for K, Cl and Ca sensors
and 90% of capacity for Na and pH sensors.
v. Refit the central electrode and tap gently to dislodge any bubbles that may be trapped on
the membrane.
vi. Wipe the outside of the sensor with a clean tissue.
vii. Remove the old sensor and install new.
viii. Refit sensor to the instrument and recalibrate
To install glucose or lactate sensors
Select Status screen followed by Maintenance > Performing Sensor Maintenance.
Do not photocopy this document
Page 11 of 14
Last printed: Last printed 24/10/2012 09:24:00
DMS Ref: 4828.doc
Active
Siemens 1200 series Critical Care Analysers SOP
Author: S.Phillips
Doc Manager: K.Ashton
Authorised by: Kath Ashton
Signature : ………………………….
Version: 1.00
Ver Date: 28/09/12
1. Obtain a sensor from stock and leave to stand in the sealed packet at room temperature for at least 30
minutes to equilibrate (this prevents condensation on the electrode which would render it unsuitable
for use).
2. Open the electrode compartment. Release the clamp on the right, which holds all sensors in place.
3. Remove the old sensor and install new, ensure that the sensor is making good contact at all four
points.
4. Close compartment
5. Calibrate the sensor.
N.B. The enzyme systems within the bio-sensors are shipped dry and require hydration before they are
suitable for use, full hydration and stabilisation normally occur within 3 “Full calibration” cycles, i.e.
within 30 minutes. If calibration is not achieved within this time scale re-check that the sensor is seated
correctly and that all electrical contacts are correctly aligned. If successful calibration is still not achieved
it may be necessary to again replace the sensor following the same procedures listed above.
To install a PO2 or PCO2 sensor
Select Status screen followed by Maintenance > Performing Sensor Maintenance.
1. Obtain a sensor from stock.
2. Open the electrode compartment. Release the clamp on the right, which holds all sensors in place.
3. Remove the old sensor and install new, ensure that the sensor is correctly seated and all electrical
contacts are correctly aligned.
4. Close compartment.
5. Calibrate
N.B. Stable calibration should be achieved within 3 “Full calibration” cycles, i.e. within 30 minutes. If
calibration is not achieved within this time scale re-check that the sensor is seated correctly and that all
electrical contacts are correctly aligned. If successful calibration is still not achieved it may be necessary
to again replace the sensor following the same procedures listed above.
To remove an obstruction (clot)
Large clots will be prevented from entering the analyser by the orange sample port.
Clots that lodge further in the analyser may be removed by flushing with water from a syringe as
follows: 1. Eject both reagent and wash cartridges – From ‘Diagnostics’ menu select cartridges, followed by
eject both cartridges.
2. Remove manifold from behind cartridges by unclipping and disconnecting the analyser tubing, flush
all connectors with water from a syringe.
3. Holding the reagent cartridge upright (as fitted on analyser) locate the five connector nipples at rear
of cartridge and flush the TOP THREE only with water from a syringe.
4. Examine the line of sensors and the Co-Ox chamber for obstructions and carefully remove using
GENTLE flushing if necessary, this is facilitated by replacing the PO2 sensor with Siemens ‘CLOT
REMOVER’ tool (part no. 10378229) and gently injecting water from a syringe into the sample
path. Ensure that a piece of gauze it held at the connector with the manifold to catch the clot.
5. Replace manifold and cartridges, close analyser doors and recalibrate the system.
To record maintenance procedures on the electronic maintenance log
Some routine maintenance procedures are acknowledged and recorded automatically on the
instrument while others require manual acknowledgement and data recording.
Procedures acknowledged with automatic recording of data.
a)
Any pack changes are recorded automatically (both lot numbers and time.)
b)
De-proteinising of the sensors.
c)
Conditioning of sensors.
Do not photocopy this document
Page 12 of 14
Last printed: Last printed 24/10/2012 09:24:00
DMS Ref: 4828.doc
Active
Siemens 1200 series Critical Care Analysers SOP
Author: S.Phillips
Doc Manager: K.Ashton
d)
Authorised by: Kath Ashton
Signature : ………………………….
Version: 1.00
Ver Date: 28/09/12
The analysis of the High G/L control.
Procedures requiring manual acknowledgement and if applicable recording of data.
a)
All daily maintenance tasks.
b)
Weekly maintenance: inspection of the electrode fill solution levels.
c)
Bi-monthly maintenance: Co-Oximeter chamber changes, Air filter inspection
(cleaning and changing as required).
d)
Periodic non-routine maintenance e.g. sensor changes.
e)
Any of these procedures which involve a serial number/lot number change require
that information to be input by the user.
Procedure for manual acknowledgment and data recording
a)
Log on to the instrument.
b)
Select the Status > maintenance
c)
At the password prompt again input your log-on details (you must be level 3 access or above
to proceed).
d)
Select “Schedule.”
The first page of the maintenance schedule appears. Overdue tasks are red and due tasks are
yellow. Tasks not requiring immediate attention are green.
Selecting any task box followed by “Details” will display information on that task e.g.
frequency, when last performed etc.
Access to other pages of the schedule is achieved by use of the cursor keys: up and down
arrows for other tasks listed, and right and left arrows to move the date window displayed.
e)
f)
g)
Select maintenance task you have performed.
Select “Completed”. The task is now acknowledged – tasks may be acknowledged up to three
days retrospectively.
Record any Lot/serial numbers on Rapidcom (see below).
Procedure for logging maintenance and data on Rapidcom
a) Log-on to RapidCom
b) Select Devices > Maintenance Recording
c) In the left-hand side pane (expand the tree if necessary) select the instrument required.
d) The right hand pane now displays “Record maintenance tasks instrument selected”
e.g. Record maintenance tasks 1265 8HDU16193”.
e) Ensure “All” is selected in the “Status” Box located in the right-hand pane.
f) Scroll down the screen and select the task which is to be recorded.
g) If the task has been recorded on the instrument there will be a green tick in the box. Select
“comments” at the bottom right of the screen and type all relevant information into the free-text
box including the lot number / serial number of any item(s) which have been installed. Click
“OK”
h) If the task was not previously recorded on the instrument - right click on mouse and select
“Record Task”. Type the information into the free text box.
i) Select Apply
Health and Safety
The components of the Siemens Rapidlab 1200 series critical analysers and related consumables must be
treated as potentially bio hazardous waste. Users must be aware that any object being exposed to human
blood is a potential source of infection.
Do not photocopy this document
Page 13 of 14
Last printed: Last printed 24/10/2012 09:24:00
DMS Ref: 4828.doc
Active
Author: S.Phillips
Siemens 1200 series Critical Care Analysers SOP
Doc Manager: K.Ashton
Authorised by: Kath Ashton
Signature : ………………………….
Version: 1.00
Ver Date: 28/09/12
To reduce the risk of infection users must:
Use gloves.
Ensure that the area around the analysers is kept tidy and any spillage of sample is cleaned up
IMMEDIATELY.
Used syringes MUST be disposed of as sharps waste.
To clean the analyser use a mild detergent e.g. HOSPEC and wipe dry. Ensure water does not enter any part of
the analyser.
To decontaminate the analyser, first clean any spills/splashes, as above, then wipe with a Sanicloth (contains
70% isopropanol).
Alcohol wipes must not be used as they damage the analyser
All COSHH and risk assessment documents for the Siemens 1200 series rapidlab critical
care reagents are available from POCT if required (see contacts).
Adverse Incident Reporting
Report any adverse incident to Departmental/Ward Manager, Clinician or POCT Team Tel ext 5587.
Do not use the analyser if the integrity of results is in doubt.
Contacts
Trust POCT Manager:
POCT laboratory
Department of Biochemistry:
Kath Ashton
Office
Office
Tel: 0151 706 5587
Tel: 0151 706 4249
Tel: 0151 706 4230
Do not photocopy this document
Page 14 of 14
Last printed: Last printed 24/10/2012 09:24:00
DMS Ref: 4828.doc


