1
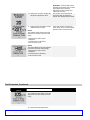
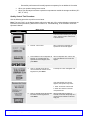
POCT Program Massachusetts General Hospital - Pathology Service 55 Fruit Street, Boston, MA 02114 Title: Precision Xceed Glucose Procedure Cross References: Precision Xceed Glucose Training and Competency Record MGH POCT QC Storage Ordering and Documentation Guide Glucose job aid Contents Purpose .............................................................................................................................................................................2 Scope ................................................................................................................................................................................2 Policy and Principle Statement..........................................................................................................................................2 Test Principle.....................................................................................................................................................................2 Regulatory Requirements..................................................................................................................................................2 Limitations/Interferences ...................................................................................................................................................3 Action Ranges ...................................................................................................................................................................3 Reference Range ..............................................................................................................................................................3 Comment Codes (Use optional)........................................................................................................................................4 Test Kits/Supplies/Equipment ...........................................................................................................................................4 Maintenance......................................................................................................................................................................4 Specimen Collection..........................................................................................................................................................5 Test Procedure..................................................................................................................................................................8 Documentation ................................................................................................................................................................11 Quality Control.................................................................................................................................................................11 Data Review ....................................................................................................................................................................14 Data Upload ....................................................................................................................................................................14 Troubleshooting...............................................................................................................................................................15 Meter Replacement Procedure .......................................................................................................................................19 Competency Assessment ...............................................................................................................................................19 Product Information/Reference Material .........................................................................................................................20 Cross - References .........................................................................................................................................................20 Written By: Gene Pagnani, 5/03 Revised By: Nancy Toscano, MT(ASCP) Date: 9/10/2010 Last Approved by: Kim Gregory, MT(ASCP), NCA, CLS Date: 9/12/11 Title (with LTR): Precision Xceed Glucose Procedure (LTR19678) Last Approved: Gregory, Kimberly (Electronic Signature Timestamp: 8/11/2014 3:20:23 PM) 1 Purpose This document outlines policies and procedures that deal with the test being described. In an effort to be concise some information may be excluded from the manufacturer’s manual. It is recommended that operators familiarize themselves with the manufacturer’s product information that accompanies each package and their manual. Scope Level of Personnel: All MD’s, RNs, NPs, PCAs, and MAs, who have successfully completed initial training and maintained annual competency. Testing Site: All sites approved and on file with the Pathology Service POCT Division. Policy and Principle Statement To obtain a quantitative measure of blood glucose measurement that is used definitively for the purpose of care. Test Principle The Precision Xceed Pro System allows rapid measurement of blood glucose (D-glucose) by using an electrochemical detection technique. This biosensor system employs a disposable dry reagent strip technology, based on the glucose dehydrogenase method for glucose determination. Each test strip features an electrode containing the enzyme glucose dehydrogenase (GDH-NAD). When a blood drop is applied to the target area of the test strip, the glucose dehydrogenase catalyzes the oxidation of glucose in the drop to produce gluconic acid. During the reaction, electrons are transferred by a co-enzyme and an electrochemical mediator to the electrode surface. This will generate a current that is measured by the system. The size of the current generated is proportional to the amount of glucose present in the blood drop, thus giving an accurate reading of the blood glucose concentration. Regulatory Requirements 1. Each testing site must have a documented quality control program, which is developed in collaboration with or has been approved by the MGH Pathology Service. 2. All test results must be maintained in patient records with all required information for four years Required information: 1. Patient’s name 2. MRN number 3. Patient’s gender 4. Patient’s age or date of birth 5. Date & time test collected, performed and reported 6. Ordering Physician 7. Responsible physician (if not 6) 8. Reference or Target Range 9. Test Performed 10. Test units 11. Lab name Title (with LTR): Precision Xceed Glucose Procedure (LTR19678) Last Approved: Gregory, Kimberly (Electronic Signature Timestamp: 8/11/2014 3:20:23 PM) 2 3. Additional information that must be retained for four years: 1. Testing personnel records 2. Quality control results 3. Product information (i.e. serial number, lot numbers, expiration dates, etc.), information on quality control and any remedial action 4. QC charts, maintenance sheets, reference and critical ranges 4. Other 1. Universal precautions must be observed when handling any patient specimen. 2. A physician’s order or standing order is required prior to performing test. 3. The Hospital Hand Hygiene policy must be adhered to at all times. Limitations/Interferences 1. The Precision XceedPro Test Strips are designed for use with fresh whole blood samples. DO NOT use serum or plasma samples. 2. The Hematocrit range is 20 – 70%. 3. Reportable range: 20 – 500 mg/dL, sample size 0.6 ul, test time 20 seconds 4. Test results may be affected by various levels of severe hydration, severely hypotensive, in shock, or in a hyperglycemic-hyperosmolar state (with or without ketosis). Similar observations have been reported in the literature for other blood glucose monitoring systems. Precautions If the test fails to start, sufficient blood sample may not have been applied to the test strip. Discard the current test strip and repeat with new strip. Do not use during intravenous infusion of high-dose ascorbic acid or during xylose absorption testing. Do not use test strips after their expiration date. Do not use test strips that are wet, bent, scratched, or damaged in any way. Do not re-use test strips. Action Ranges Patient Specimens Based on the performance characteristics of the instruments, it is recommended that values less than 50 mg/dL or greater than 400 mg/dL be verified by sending specimen to the laboratory and notifying the physician. Additionally, in the neonatal population, refer to preprinted order sheets for ranges and protocols, and for diabetic patients, refer to individualized sliding scale insulin orders. Reference Range The normal range reported for plasma glucose collected in a gray top tube in a fasting patient is reported to be 70-100 mg/dl. Plasma glucose values are compared to the reference range in the context of criteria of the American Diabetes Association for the diagnosis of diabetes mellitus. However, we do not report a non-fasting glucose level, as this varies widely depending on a variety of factors. Additionally, the sample collected for blood capillary glucose is a capillary specimen, which differs from the corresponding values of a plasma sample. Therefore, the BCG test does not correlate exactly with the plasma glucose level collected in a gray top tube. Furthermore, the CBCG test is designed for monitoring known diabetic patients in the hospital setting and is not indicated for the diagnosis of diabetes mellitus or related conditions. The BCG value should be evaluated in the context of the individual patient, their prior BCG glucose values, underlying medical conditions, pharmacological interventions, and a variety of other patient-specific criteria. As a general guideline, the reference range values are: Adult fasting, 70 - 140 mg / dL Non-fasting, 70 - 200 mg / dL Please refer to pediatric and neonatal protocols for reference ranges. Title (with LTR): Precision Xceed Glucose Procedure (LTR19678) Last Approved: Gregory, Kimberly (Electronic Signature Timestamp: 8/11/2014 3:20:23 PM) 3 Comment Codes (Use optional) 0 1 2 3 4 5 6 7 8 9 11 15 COMMENT CODES No Action Required Repeat Test New Test Strip Box New Control Bottle Procedure Error New Test Strip Lot New Control Lot Changed Monitor Changed Batteries Repeat Test, Notify Clinician, and Send Sample to Lab See Patient Record Training Test Kits/Supplies/Equipment Product Manufacturer # Distributed by Storage Owens/Minor MGH PeopleSoft # 330220 Glucose Precision Xceed Pro strips – 100/box Abbott #70932-01 Precision Glucose Control Solution – High/Low, one bottle of each/box MediSense #98411-01 Owens/Minor 39961 39 - 86°C Glucose and Ketone Calibration verification Controls (5 levels) Abbott N/A Special request 36 - 86°C #70906-01 39 - 86°C POCT program use only Maintenance The Precision Xceed Pro™ Monitor requires little routine maintenance. During testing, the sample remains outside the monitor, which significantly reduces the possibility of contamination. Disinfecting the Exterior Surface Disinfecting the exterior surface of the Precision Xceed Pro Monitor is required after each use. The monitor needs only to be wiped down after use with hospital-approved disinfectant. It is suggested that the monitor be turned off while it is being cleaned. DO NOT immerse, flood with any liquid, or autoclave the monitor. Disinfecting after use need not be documented since this is part of the operating procedure. Replacing the Batteries (used for replacing alkaline batteries) Use the following procedure to install new batteries in the Precision Xceed Pro monitor. The Monitor requires two (2) AA alkaline batteries 1. 2. 3. 4. 5. Turn the Xceed Pro Monitor off by pressing the On/Off button on the keypad. Turn the monitor over to view the battery compartment. Press the tab on the battery compartment cover and lift the cover up. Remove and discard the used batteries. Insert the new batteries, using the + and – symbols in the battery compartment to position the new batteries with the correct polarity. Title (with LTR): Precision Xceed Glucose Procedure (LTR19678) Last Approved: Gregory, Kimberly (Electronic Signature Timestamp: 8/11/2014 3:20:23 PM) 4 Permanent Port Protector The blue port protector is designed to minimize the possibility of liquid entering the monitor through the strip port. Should blood or control solution come in contact with the port protector, call the POCT Coordinators (x61462, x35392, or x48763) to replace the monitor. Specimen Collection Critical Elements Please follow the recommended guidelines so the most accurate results will be obtained. Use the test strips before their expiration date. Do not use test strips that are wet, bent, scratched or damaged. Use the test strip immediately after opening its foil packet. Do not scan a packet’s barcode and use a test strip from another packet. This may cause incorrect assay results to be generated. Continue applying blood to the white target area of the test strip until the test begins. Important: If the test fails to start, sufficient blood sample may not have been applied to the test strip. Discard the current test strip and repeat with new strip. After the blood is applied to the test strip and the test starts, do not touch the test strip. Use each test strip only once. Specimen collection from an arterial line or use of liquid anticoagulants may result in false low readings because of dilution by line fluid or anticoagulants if care is not taken. Follow hand hygiene protocol and wear gloves for all testing. Adhere to hospital policy for proper patient identification utilizing two identifiers. Scan the wristband linear barcode to capture the 9-10 digit CSN Collecting Capillary Blood Samples With meter ready, obtain a sample: Item 1. Follow hand hygiene protocol and put on gloves. Comment(s) 2. Ask the patient to wash hands with warm soap and water, rinse and dry well. If the patient is unable, cleanse the puncture site with an alcohol swab and allow to dry thoroughly. 3. Hold the patient’s arm downward for at least 15 seconds to allow blood to flow to the fingertip. 4. Prick the side of the fingertip with an automatic device or lancet. Pricking the side of the fingertip is generally less painful than the center of the fingertip. 5. Squeeze the finger gently to get a single, large, hanging drop of blood. Avoid squeezing the puncture excessively. Title (with LTR): Precision Xceed Glucose Procedure (LTR19678) Last Approved: Gregory, Kimberly (Electronic Signature Timestamp: 8/11/2014 3:20:23 PM) 5 6. Touch the blood drop to white target area at tip of test strip while the “Apply Sample” prompt appears in the display window. Hold finger in place until test begins. Never add additional sample. Discard and use a new one if needed. 7. strip If necessary, the blood can be collected in a heparin-coated capillary tube and then applied to the test strip within 30 minutes of collection. Collecting Arterial Blood Samples With meter ready, obtain a sample: Item Clear the arterial line before drawing a blood sample. Withdraw blood sample into a syringe that contains sodium or lithium heparin. Caution: You could obtain a false low glucose result if: 1. sufficient flush is not withdrawn from the arterial line (actual volume required to be removed is dependent upon length of line), or 2. if liquid heparin is used to anticoagulate the sample and the ratio of blood to heparin is not controlled or not taken into consideration. Use the sample within 30 minutes of collection. Mix the syringe several times immediately before applying the sample to the target area on the test strip. Allow a drop of blood to form at the tip of the syringe Comment(s) Title (with LTR): Precision Xceed Glucose Procedure (LTR19678) Last Approved: Gregory, Kimberly (Electronic Signature Timestamp: 8/11/2014 3:20:23 PM) 6 Touch the blood drop to white target area at tip of test strip while the “Apply Sample” prompt appears in the display window. Hold syringe in place until test begins. The syringe can briefly touch the test strip without affecting the test result. Never add additional sample. Discard strip and use a new one if needed. Do not force blood into the strip from the syringe. This may cause blood to enter the port protector and damage the meter. Collecting Venous Blood Samples With meter ready, obtain a sample: Item Collect the venous blood sample in a collection tube containing sodium or lithium heparin, ensuring that the test tube is completely filled. Do not use collection tubes that contain fluoride or oxalate. If the blood is collected from an intravenous line, clear the line before drawing the sample into a syringe that contains sodium or lithium heparin. Allow the sample to reach room temperature before performing a test on the sample; use the sample within 30 minutes of collecting it. Invert the tube with the sample several times immediately before taking a sample. Use a disposable transfer pipette to obtain a sample from the center of the collection tube. Touch the blood drop to white target area at tip of test strip while the “Apply Sample” prompt appears in the display window. Comment(s) Hold pipette in place until test begins. The pipette can briefly touch the test strip without affecting the test result. Never add additional sample. Discard strip and use a new one if needed. Title (with LTR): Precision Xceed Glucose Procedure (LTR19678) Last Approved: Gregory, Kimberly (Electronic Signature Timestamp: 8/11/2014 3:20:23 PM) 7 Test Procedure Use the following procedure to perform patient tests. Note: The word “Strip” on the display always refers to the test strip. If the monitor displays a message not indicated in these procedures, please refer to section 10, Troubleshooting, of the Abbott Precision Xceed Pro manual. What You See on the Display What You Do Comments 1. Press on/off to turn on monitor The Abbott logo screen will appear for a few seconds followed by the product name, software version screen and then the Test Mode menu 2. Press 1 to select Patient Test After the operator selects the type of test, the display will prompt for an Operator ID to be entered 3. Press Scan to scan the Operator ID barcode, or manually enter the Operator ID via the keypad, then press Enter The display will next prompt for a Patient ID to be entered 4. Press Scan to scan the Patient 9-10 digit CSN barcode, or manually enter the Patient 9-10 digit CSN via the keypad, then press Enter After entering the Patient ID, the test strip lot screen appears next. Title (with LTR): Precision Xceed Glucose Procedure (LTR19678) Last Approved: Gregory, Kimberly (Electronic Signature Timestamp: 8/11/2014 3:20:23 PM) 8 5. Press Scan to scan the test strip barcode, or manually enter the test strip lot number via the keypad, then press Enter After the test strip lot number has been entered, the Sample Type screen will appear. 6. Press 1 for Capillary or Arterial specimens. Selection will ensure that the specimen result will take into consideration specimen PO2. Press 2 for Venous specimens. 7. Open the foil test strip packet at the notch and tear up or down to remove the test strip Test Procedure, Continued What You See on the Display 8. What You Do Comments With the contact bars facing up, insert the test strip into the test strip port until it stops The Apply Sample screen will appear next 9. Touch the blood drop to white target area at tip of test strip while the “Apply Sample” prompt appears in the display window. Apply the blood directly from the patient’s finger, or a syringe to the test strip, filling the entire white target area. The test starts automatically, as the sample is accepted Title (with LTR): Precision Xceed Glucose Procedure (LTR19678) Last Approved: Gregory, Kimberly (Electronic Signature Timestamp: 8/11/2014 3:20:23 PM) 9 10. Wait for the monitor to analyze the sample and display the result 11. Note the result and whether it falls outside the action range Important: If the test fails to start, sufficient blood sample may not have been applied to the test strip. Discard the current test strip and repeat with new strip. The monitor counts down the 20 seconds it takes to analyze the sample, then displays the test result If the result is above or below the action range, an up or down triangle appears in front of the test result. NOTE: The Outside Action Range screen will appear if the result is out of the action range - Repeat test to confirm result - Notify M.D. - Send specimen to laboratory - Enter comment code NOTE: The Critical Range screen will appear if the result is out of the critical range - Repeat test to confirm result - Notify M.D. - Send specimen to laboratory - Enter comment code Test Procedure, Continued What You See on the Display What You Do Comments NOTE: The In-Range Action Range screen will appear if the result is within this action range 12. Remove the test strip from the Title (with LTR): Precision Xceed Glucose Procedure (LTR19678) Last Approved: Gregory, Kimberly (Electronic Signature Timestamp: 8/11/2014 3:20:23 PM) 10 monitor and discard when finished with testing. 13. The operator can select one of the following options: Press 1 - Next Patient Press 2 - Repeat Test Press 3 - Patient History If 1 is selected, the scan Patient ID screen will appear. Return to step 4 to continue with testing on the next patient. If 2 is selected, the scan or enter the test strip lot screen will appear. Return to step 5 to repeat the test. If 3 is selected, the monitor will display the last test result for this patient as well as allow the operator to view previous results. Refer to the action entitled Data Review for Patient History for further information. 14. After each use, disinfect the meter with a disinfectant wipe. Documentation The patient’s results must be recorded in one of the following manners: 1. in the patient’s record, or 2. on a patient log, or 3. on another approved permanent record. All records must be retained and retrievable for 4 years. Quality Control Critical Elements Please follow the recommended guidelines so the most accurate results will be obtained. Use only MediSense Precision Control Solutions Store the control solutions at room temperatures, between 39° and 86°F (4° and 30°C) Keep bottle caps fully tightened Each bottle of control solution is stable for 90 days after opening When a new bottle is first opened, write the current date on the bottle label. Discard all unused solutions 90 days after initial opening. Invert the control solution bottle several times to ensure thorough mixing before use Invert and tap the capped control solution bottle to remove air bubbles from the nozzle of the bottle Do not scan one test strip packet’s barcode and use a test strip from another packet, since incorrect assay results may be generated After each use, replace the correct cap on each bottle and immediately tighten the cap Do not use control solutions after the expiration date printed on the bottles and the box. The Precision Xceed Pro Monitor does not accept control solutions that have passed their expiration date. Frequency Two levels (low and high) every 24 hours when meter is in use for patient testing. Meter is locked out from patient testing if QC fails or is not performed. Validates instrument performance and proper operator technique Title (with LTR): Precision Xceed Glucose Procedure (LTR19678) Last Approved: Gregory, Kimberly (Electronic Signature Timestamp: 8/11/2014 3:20:23 PM) 11 Successful performance will recertify operator competency for an additional 12 months When you question blood glucose results When your test strips have been exposed to temperatures outside the storage conditions (39°86°F, 4°-30°C) Quality Control Test Procedure Use the following procedure to perform control tests. Note: The word “Strip” on the display always refers to the test strip. If the monitor displays a message not indicated in these procedures, please refer to section 10, Troubleshooting, in the Precision Xceed Pro Operator’s Manual. What You See on the Display What You Do Comments 1. Press On/Off to turn on the monitor The Abbott logo screen will appear for a few seconds followed by the product name, software version and then the Test Mode menu 2. Press 2 - Control Test After control test is selected, the Operator ID screen will appear 3. Press Scan to scan the Operator ID barcode, or manually enter the Operator ID via the keypad, then press Enter After the Operator ID is entered, the Low Level Solution Lot screen will appear 4. Scan or manually enter the low control solution lot number via the keypad, then press Enter. The Strip Lot screen will appear next. If the Unexpected Level screen appears, the operator may either: 1. Enter 1 to test the correct level 2. Enter 2 to continue to test the unexpected level 5. Scan or manually enter the test strip lot number via the keypad, then press Enter. After the test strip lot number is entered, the monitor will prompt for a test strip to be inserted into the test strip port. Title (with LTR): Precision Xceed Glucose Procedure (LTR19678) Last Approved: Gregory, Kimberly (Electronic Signature Timestamp: 8/11/2014 3:20:23 PM) 12 6. Open the foil test strip packet at the notch and tear up or down to remove the test strip 7. With the contact bars facing up, insert the test strip into the test strip port until it stops. The monitor will prompt the operator to apply the desired control solution to the test strip. 8. Verify that the QC solutions have not been opened for more than 90 days. Gently invert the required control solution bottle 3-4 times then apply a drop to the target area on the test strip. The monitor will beep when the sample is accepted. The sample accepted screen will be displayed. Recap the contract solution bottle tightly. The test starts automatically, as the sample is accepted. 9. Wait for the monitor to analyze the control solution and display the test results. The monitor counts down the seconds it takes to analyze the sample (20 seconds), then displays the test result. 10. Control results appear as either PASS or FAIL. 11. If the control result appears as FAIL, scan or manually enter a comment code via the keypad, then press Enter. 12. Remove the test strip and discard. Title (with LTR): Precision Xceed Glucose Procedure (LTR19678) Last Approved: Gregory, Kimberly (Electronic Signature Timestamp: 8/11/2014 3:20:23 PM) 13 13a. After low control has been successfully performed, press 1 – Next Level and repeat steps 4-12 using high control. 13b. If high control fails, enter comment code, press Enter and repeat test 14a. When both levels PASS, the analyzer is ready for patient testing 14b. If one or both levels continue(s) to fail, take remedial action (see appropriate section) Documentation Data is automatically retained by the meter and transferred to the QC Manager Computer during meter docking. Contact POCT Program for detail. Data Review Patient History The Precision Xceed Pro™ Monitor stores up to 4,000 patient tests that can be retrieved by the following categories: All Tests: This option displays all patient test results, starting with the most recent test results (reverse chronological order). Patient ID: This will display the test results for a particular patient, starting with the most recent test. Operator ID: This will show test results performed by a particular operator, starting with the most recent test. Action Range: This will display the test results that fall outside of the action range. Comment Code: This shows the test results for all tests tagged with a specific comment code. Date: This will display all the test results for a specific date, starting with the most recent test done on that date. Data Upload Frequency: Periodic (as prompted by meter) To begin data upload, place the monitor in the docking station. Once the connection is established, communication between the monitor and the POCT Department PC will begin, automatically. The monitor can send and receive data. When this occurs, the monitor will display the following message: “Please wait for Data Upload”. Testing is preempted while the monitor is sending or receiving data. The monitor must not be removed before data transmission is completed, otherwise data transfer will be incomplete and operator access may be affected. Title (with LTR): Precision Xceed Glucose Procedure (LTR19678) Last Approved: Gregory, Kimberly (Electronic Signature Timestamp: 8/11/2014 3:20:23 PM) 14 Docking Station The Precision Xceed Pro™ System docking station provides a means for hands-free, automatic data transfer (upload/download) between the Precision Monitor and a server in the Partners server farm running the QC Manager Application software. The lantronix box must be connected to a power source via the AC adapter supplied with the docking station. Once the monitor is placed into the docking station and a connection is established, data will be automatically transferred. The circulating arrow, displayed on the meter’s LCD screen, indicates data transfer (upload/download) is in process. Do not remove meter until the arrow disappears and the menu is displayed. Troubleshooting A. Troubleshooting Out-of-Range Patient Test Results This section describes conditions that can cause out-of-range patient test results. Refer to the Precision Xceed Pro Test Strip package insert for test strip specification information. NOTE: Do not use during intravenous infusion of high-dose ascorbic acid or during xylose absorption testing Reasons Glucose Results May Be Higher than Expected: Hematocrit is lower than 20% Serum or plasma samples instead of whole blood Venous blood tested in arterial/capillary mode Additional sample added to test strip during testing. Reasons Glucose Results May Be Lower than Expected: Hematocrit is higher than 70% Arterial or capillary blood tested in venous mode Patient has hyperglycemic-hyperosmolar (with or without ketosis) Patient has severe dehydration, hypotension, or shock Water or alcohol remaining on the puncture site Venous or arterial blood sample not tested within 30 minutes after collection B. Troubleshooting Out-of-Range Control Solution Results Repeat the test for that control solution to make sure that the operator meets the conditions in this checklist: No air bubbles are in the control bottle’s nozzle. Calibration performed using the bar-code for the test strip used. Correct 5-digit lot number for the control solutions. Solutions and test strips stored between 39°F and 86°F (4°C and 30°C). Temperature and humidity conditions in the room where the tests are being performed are within the acceptable operating range. Refer to the Precision Xceed Pro Test Strip Package insert. Bottles have not been open for more than 90 days. Only Precision Xceed Pro Test Strips used. If test results are out of range despite meeting the above criteria, please repeat the test using a new box of control solutions and/or test strips. If the results are still out of range, call: Abbott Technical Support Nursing POCT Program Manager. Pathology POCT Program Coordinators: 1-877-529-7185 617-724-8763 (for PCS sites) 617-726-1462; 617-643-5392 (for PCS and other sites) Title (with LTR): Precision Xceed Glucose Procedure (LTR19678) Last Approved: Gregory, Kimberly (Electronic Signature Timestamp: 8/11/2014 3:20:23 PM) 15 Email: MGH POCT Coordinators C. Discrepancies between Xceed Pro and Laboratory Discrepancies noted between the Xceed Pro monitor and the Laboratory should be investigated. It is important to note that the samples must be drawn at the same time or within a few minutes of each other to have a valid comparison as blood glucose values can change quickly depending on the clinical condition of the patient. Accuracy of the glucose results from a meter is considered acceptable if the glucose is within 15 mg/dL for results less than 75 mg/dL or +20% for glucose results greater than 75 mg/dL. Nursing POCT Program Manager: Pathology POCT Program Coordinators: Email: MGH POCT Coordinators 617-724-8763 (for PCS sites) 617-726-1462; 617-643-5392 (for PCS and other sites) D. Symptom/Error Messages In this section, you will find information relating to error messages that appear on the display when errors are detected by the Precision Xceed Pro™ Monitor. For each corresponding message, an explanation is given and appropriate responses are described. In many situations, it may be possible to proceed with some of the functions, at least temporarily, before attending to the problem. (For example, when the batteries are too low to permit testing, it may be possible to review data for a short time). If any problem persists, record the error message displayed, including the three digit error code (if any), and call: Abbott Technical Support Nursing POCT Program Manager. Pathology POCT Program Coordinators: Email: MGH POCT Coordinators 1-877-529-7185 617-724-8763 (for PCS sites) 617-726-1462; 617-643-5392 (for PCS and other sites) Troubleshooting When You Turn on the Meter, or During Use Symptom/ Error Message How to Respond Explanation The monitor has little or no power Place the monitor into the docking station to recharge the battery or change battery. Battery power is getting low. Testing will be available for a limited time. Replace with 2 AA batteries. The monitor may have a problem that prevents if from operating properly. One of several four-digit codes may be displayed. These codes provide Abbott additional information about the problem. 1. Turn off the monitor. Turn it on and repeat the function. 2. If the problem persists, record the three-digit error code and contact the POCT program manager for new meter. An error has occurred during last data transfer. This screen will appear when you turn on the monitor. Place the monitor into the docking station to complete the upload. Once the monitor has successfully been docked, the warning will disappear. Or, Press 1 to Continue testing. The display is blank Title (with LTR): Precision Xceed Glucose Procedure (LTR19678) Last Approved: Gregory, Kimberly (Electronic Signature Timestamp: 8/11/2014 3:20:23 PM) 16 The monitor is shipped from the factory without configuration. This screen will appear the first time you turn on the meter after receiving it. Contact the POCT Coordinators or Nursing manager for replacement meter. QC Interval for Controls Exceeded. Controls must be performed before testing. Press 1 to exit. Perform the control tests indicated in the message. The Upload Interval Exceeded. Press 1 to exit, or if it appears, press 2 to continue testing. Place the monitor in the docking station. The room temperature is outside the limits for testing. Ensure that the room temperature is within the specified limits. Press 1 to exit. The test strip was inserted at the wrong time. The monitor will beep if functions are attempted before the strip is removed or if the test strip is left in when the test calls for the test strip to be removed. Remove the test strip from the test strip port. The scanned Patient 9-10 digit CSN is similar in format to the test strip barcode. 1. Re-enter the patient 9-10 digit CSN using the barcode scanner or the keyboard. 2. Contact the POCT Coordinators if the problem persists. The barcode just scanned was not read correctly. Possible reasons are: The red scanner beam did not pass across all the bars of the code The barcode was damaged or poorly printed The barcode was not of the lot or type specified for this ID or lot number. 1. 2. Rescan the barcode. If problem persists, contact the POCT Coordinators. The lot number just scanned or entered is not on the list of acceptable lot numbers defined for this monitor. 1. Verify and re-enter the lot number using the barcode scanner. Manually enter the ID or lot number. If the problem persists, notify the POCT Coordinators. 2. 3. Title (with LTR): Precision Xceed Glucose Procedure (LTR19678) Last Approved: Gregory, Kimberly (Electronic Signature Timestamp: 8/11/2014 3:20:23 PM) 17 The Operator ID just entered is not on the list of acceptable Operator ID’s defined for this monitor. 1. Testing cannot continue because the Operator ID is not certified. 2. Contact nursing director for certification guidance. The Operator ID entered has expired. (The menu item 2-Continue appear only if this option is set to Warn.) 1. Contact nursing director for recertification directions. The operator ID entered expires in the shown number of days. 1. Press 1 to continue with testing. 2. Run two levels of QC correctly before the number of days passes to maintain competency and access to the meter. The test result is below the measuring limit of the system. The test result is above the measuring limit of the system. Press 2 – Repeat Test – 1. verify result by sending sample to lab. 2. notify M.D. Press 2 – Repeat Test – 3. verify result by sending sample to lab. 4. notify M.D. The test strip or the test port is wet, defective, contaminated, or the wrong test strip was inserted. Press 1 to continue testing with a new test strip. Repeat test. If error continues to appear, let meter sit for 24 hours and try again. There may be a problem with the test strip. One of several 4-digit error codes may be displayed. These codes provide Abbott personnel additional information about the problem. Errors include: 1. 2. 3. 4327 – The strip was removed during testing. 4. Repeat test with a new test strip. If the error appears again, confirm the result by sending a sample to the laboratory. Contact Abbott technical support and give them the 4digit error code. Contact POCT Coordinators. 4330 – Blood glucose may be too high to be read by the system or there may be a problem with the test strip. Troubleshooting When a Control Test is Selected Symptom/ Error Message Explanation How to Respond Title (with LTR): Precision Xceed Glucose Procedure (LTR19678) Last Approved: Gregory, Kimberly (Electronic Signature Timestamp: 8/11/2014 3:20:23 PM) 18 Different level of control from the one that the monitor expected Press 1 to repeat the test. Press 2 to run the level of test that matches the lot number already entered. This screen shows the level of control test the monitor is expected to run: Low or High, and the level of the lot entered. Troubleshooting When a Data Review is Selected Symptom/ Error Message How to Respond Explanation No stored test results for the type of data requested. Press 1 to return to the Data Review Menu. No stored test results match the selected criteria. Press 1 to return to the previous screen. Troubleshooting During Data Transfer Symptom/ Error Message How to Respond Explanation Error has occurred during data transfer. This screen will only appear for three seconds. 1. 2. Remove the monitor from the docking station. Place the monitor back into the docking station. If the error appears again, contact the POCT Coordinators. Meter Replacement Procedure In the event of a problem with the meter, the operator should: 1) 2) 3) 4) Review the troubleshooting section of this procedure. Contact the POCT Coordinators for assistance 6-1462, 3-5392 or 4-8763. Email MGH POCT Coordinators. Contact the nursing supervisor for further assistance or additional issues on off-shift or weekends. Competency Assessment All operators must read the procedure manual and complete the “Training and Competency Record for the Precision Xceed Pro Meter” during initial training. Competency is assessed at orientation and annually using at least two of the following methods: 1. 2. 3. 4. Successfully perform a low and high QC on the glucose meter. Supervisor observes performance of routine work. Each user’s quality control performance is monitored. Written testing specific to the method. Title (with LTR): Precision Xceed Glucose Procedure (LTR19678) Last Approved: Gregory, Kimberly (Electronic Signature Timestamp: 8/11/2014 3:20:23 PM) 19 Documentation via Healthstream or other electronic program of all training, competencies and attestations is acceptable in lieu of a paper record. Expired Operators: Operators that fail to meet competency requirements within 365 days will be locked out of the system. They will be required to undergo retraining and competency assessment according to above. Product Information/Reference Material Abbott Precision Xceed Pro Manual Precision Xceed Pro blood glucose test strip package insert, 07/08 Medisense glucose controls package insert, 07/08 Glucose and b-Ketone Calibration verification controls package insert, 10/08 Website: http://www.massgeneral.org/pathology/assets/poct/MGH-Precision-Xceed-Procedureapproved.pdf Cross - References Precision Xceed Glucose Training and Competency Record Title (with LTR): Precision Xceed Glucose Procedure (LTR19678) Last Approved: Gregory, Kimberly (Electronic Signature Timestamp: 8/11/2014 3:20:23 PM) 20