1
Service-Manual
SM 01/98
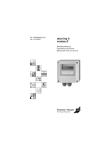
Data-logger
Mini-Log B
Home
Contents
Print
Exit
Service-Manual Mini-Log
Contents
Introduction
2
Mini-Log B data-logger order code
3
Operating matrix
4
Connection diagram
4
Battery and battery change
5
Display
5
Calibration
5
Mini-Log B repair concept
5
Fault finding
6
End test after repairs
6
Software update
7
Mini-Log B spares diagram
7
Mini-Log B spare parts list
8
Fault messages
8
1
Service-Manual Mini-Log
Introduction
The Mini-Log B data-logger is a measured value collection system with 2 input channels (one
analogue and one digital input) for recording and storage of analogue and digital signals. Because the
Mini-Log B is powered by a non-rechargeable 3.6V lithium battery (operating time of approx. 2 years
at a storage cycle of 1 hour) it can be used in applications where independent power supplies are not
available. When the Mini-Log B is in storage it can be switched off using an integrated ON/OFF switch
(see page 5). The battery is then saved from excess use. Before changing the battery please read out
and save the recorded data, then switch the unit off using the ON/OFF switch. The date and time
must be reset after switching the Mini-Log B on again.
The Mini-Log B can accept any of the following analogue signals: 0/4..20mA, 0..1V or Pt100
(-100°C..400°C). The Mini-Log B can be ordered with an integrated Pt100 sensor as an option. This
means that measurements in areas having an ambient temperature range of (-25°C..+55°C) can be
done. This sensor can also be retro-fitted into the PG cable gland of the Mini-Log B. The unit can also
monitor 2 set points. Infringement of either of these set points is indicated in the display. A potentialfree impulse signal with a maximum frequency of 25 Hz. can be connected to the digital input.
The Mini-Log B is constructed in a varnished aluminium casing (ingress protection IP65). The
dimensions are W=100mm/H=100mm/D=60mm. The unit can be mounted either to a stand pipe or
wall. Fixing kits for either are available as options. Always mount the unit vertically.
The LC display is a 7-segment display which also has a low battery display integrated. Signal cable
connection is done via 2 x PG9 compression cable glands and 2.5mm2 terminals. Setting up,
transmission and data visualisation is done using the standard integrated RS232 serial interface. The
software tool required is ReadWin (please note the optional special interface cable in the order code
RDL10A-VK). The Mini-Log B can operate with preset storage cycles of 1 minute to 24 hours. The
standard unit has a storage capacity of 4000 measured values (option 16000 measurements). All data
is stored with date and time either as instantaneous values or min/max/averages.
Accuracy:
Base accuracy
Base accuracy Pt100
Temperature drift
Temperatures: Ambient temperature
Storage temperature
+/- 0.25%
+/- 0.5%
+/- 0.25%
of F.S.D.
of F.S.D.
per 10K
- 25°C...+ 55°C
- 25°C...+ 60°C
Your contacts at E+H Wetzer are:
Frau Hoppe
08361/308-443 (Service)
Herr Geil
08361/308-413 (Product manager)
Herr Nelson
08361/308-420 (Export)
2
Service-Manual Mini-Log
Mini-Log B data-logger order code
Certificates
R Version for non-Ex areas
Y Other
Measurement signal
1 0/4...20 mA, 0...1
2 Other
Internal memory
A Internal memory 8K for max. 4000 measured values
B Internal memory 32K for max. 16000 measured values
Y Other
Temperature sensors
1 Unit without temperature sensors
2 Unit with Pt100 integrated in the PG cable gland
(measurement range -25°C...+55°C)
9 Other
Model
A Unit without lead seal option
B Unit with lead seal option
Y Other
Accessories
1 Not required
2 Wall mounting kit
3 Stand pipe mounting kit
4 Interface cable with ReadWin read out software
5 Wall mounting kit and
Interface cable with ReadWin read out software
6 Stand pipe mounting kit and
Interface cable with ReadWin read out software
9 Other
RDL10-
3
Service-Manual Mini-Log
Operation matrix
Basic settings
110
Unit
identifier
122
NT/ST
changeover
131
Memory
cycle
Analogue input
210
Identifier
211
Input
signal
212
Operating
mode
213
Engineering units
214
Decimal
point
412
Engineering units
413
Decimal
point
414
Impulse
factor
215
Scale
216
Power
supply
damping
Set point monitor
310
Upper
set point
311
Lower set
point
Digital input
410
Identifier
411
Operating
mode
Connection diagram
J2 J1
• Analogue input
0...20 mA, 4...20 mA
Jumper J1 top
0...1 V DC
Jumper J1 bottom
PT 100 ( -100 °C...+400 °C)
2-wire connection jumper J2 top
3- wire connection jumper J2 bottom
• Digital input
Potential free contact
4
Service-Manual Mini-Log
Battery and battery change
If the battery capacity comes below the minimum requirement the low-bat display is
activated. Once this has happened the unit still has enough power for approx. 30
days data recording.
In order to save the battery excess use when storing the unit it can be switched off.
The unit is switched off when delivered.
Minus terminal (blue)
ON/OFF switch
Plus terminal (orange)
Display
Low-bat display
Set point markings
Calibration
Mini-Log B calibration will only be possible using the ReadWin PC programme. For calibration a
suitable calibration source is required (accuracy 3 times that of the Mini-Log B).
Mini-Log B repair concept
We request that all units that fail from now to 1.11.1998 should be sent to E+H Wetzer for repair and
monitoring. After this date you can purchase all modules that are listed in the spare parts list and
replace these if required.
5
Service-Manual Mini-Log
Fault finding
Fault
No communication between PC
(ReadWin) and Mini-Log B
Display „dark“
Cause
Configuration in the ReadWin
Software is faulty
Interface cable not plugged in
correctly
CPU defective
The unit is switched off
Display update is slow
Battery is empty
CPU defective
Temperature is <-15°C
Measured value is above scaled
range (120%)
Incorrect time
Display: - - - Storage: 0%
Pt100 (3 wire):
Display: - - - Pt100 (2 wire)
Pt100 measured value
inaccurate
Cure
Please check configuration
Battery defective/empty
Jumper is not in the correct
current position
Scaling is faulty
Incorrect input signal
NT/ST changeover is not
switched on
Signal is <4 mA
Please check that the interface
cable is correctly connected
Please renew the CPU
Switch the unit on using the
ON/OFF switch
Please renew battery
Please renew CPU
This has no further influence on
the unit function
Please renew battery
Please correct the jumper
position
Please correct scale
Please check input signal
Please switch on NT/ST
changeover
Please check wiring and signal
Jumper J2 is in the upper
position (2 wire connection)
Jumper J2 is in the lower
position (3 wire connection)
Please plug jumper 2 in the
lower position
Please plug jumper 2 in the
upper position
End test after repairs
1. Check the
Shunt resistance:
Measure the shunt resistor value between terminals 1 and 2 (jumper
in upper position). The value should be between 50 Ω ± 0.1 Ω.
2. Test analogue
input:
Check the accuracy of the analogue inputs (U,I,Pt100) using a
calibration source.
If there are inaccuracies the measured value can be digitally calibrated
using a suitable calibration source (accuracy 3 x higher than the
Mini-Log B) and the ReadWin software. See chapter calibration.
3. Digital input:
Please set up the digital input as a counter input using ReadWin. In order to
test the count input short circuit terminals 5 and 6. Then check the display to
see if the counter is counting upwards.
4. Interface test:
RS232: Connect the interface cable to both unit and PC and see if
connection can be made using the ReadWin PC software package.
5. Safety test:
Safety test to VDE 0701 or national regulations
6
Service-Manual Mini-Log
Software update
A software update is only possible by changing the soldered Flash EPROMs.
Mini-Log B spares diagram
Pos. 2
Pos. 8
Pos. 1
Pos. 4
Pos. 3
Pos. 6
Pos. 5
Pos. 7
Pos. 9
7
Service-Manual Mini-Log
Mini-Log B spare parts list
Pos.
1
2
9
3
4
4
5
6
7
8
9
Component
Order No.
50086106
50086108
RDL10X-TA
RDL10X-KA
RDL-10X-CA
RDL-10X-CB
RDL10A-VK
50086642
RDL10X-MA
50085928
RDL10X-PA
Lower casing
Casing cover
Temperature sensor with operating manual
Terminal PCB with battery
CPU (4000 measured values)
CPU (16000 measured values)
Interface cable with ReadWin
Wall mounting plate
Stand pipe mounting kit
Spare battery
Lead sealing kit
Fault messages
If faults are recognised by the CPU fault messages are indicated in the display:
Display
Exxx1
Exx1x
Ex1xx
E1xxx
Cause
There are no valid values in
the memory (RAM)
This condition can be
caused through a battery
change
No valid operating
parameters in the EEPROM
No valid calibration values in
the EEPROM
2
I C-Bus fault, this means
fault in the electronics
Effect
Cure
Loss of stored measured
values, counters as well as
date and time
Please run a RESET
Loss of operating settings
Please set up the unit again
Unit is not ready for
operation
CPU defective
Please re-calibrate the unit
8
Please renew the CPU