1
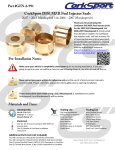
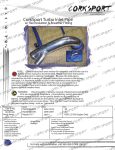
Part #Rx8-6-109
CorkSport RX-8 Single Exit Exhaust
2004-2008 RX-8
Thank you for purchasing the CorkSport RX-8 Single
Exit Exhaust. This exhaust has been designed to
provide RX-8’s a single side port exhaust with full 2.4”
piping for maximum flow and sound. Placed on the left
side for better sound for the diver, the RX-8 Single Exit
Exhaust offers 54-56 db inside the vehicle and 75db
cruising at 55MPH. We hope you enjoy your new
exhaust and look forward to your feedback! Please let
us know what you think by submitting a review at
http://www.corksport.com/corksport-power-seriessingle-exhaust-for-rx8.html
Pre-Installation Notes:
Make sure your vehicle is completely cooled down prior to starting installation. If you are
going to work on your car within an hour or two of having driven it, use a fan to cool off the car.
These instructions were written for reference only and the use of a factory service manual is
recommended. Please read these instructions thoroughly prior to starting installation
How our instructions work: To best cover all of our customers experience levels, we have
included an overview checklist for the more technically advanced users along with step-by-step
instructions for customers that require additional detail.
These installation instructions were written using a 2005 RX-8. Other year 2004-2008 RX-8
models will be similar.
Materials and Time:
General Info.
Part #: Rx8-6-109
Time Est: 2 hours
Wrench Rating: 3/5
Tooling List
17mm wrench
17mm Standard & Deep Socket
3/8 Drive Ratchet
Jack stands
Floor Jack
Dremel Cutting Tool or Equivalent
WD-40 or Equivalent
Large Flat Head Screw Driver or Pry Bar
Need Help With Your Installation?
Call (360) 260-CORK
Parts List
One (1) Front Exhaust section
One (1) Muffler Exhaust section
Two (2) M10 x 1.25 thread 35mm Long Bolts
Four (4) M10 x 20mm O.D. Flat Washers
Two (2) M10 x 1.25 thread Nuts
Two (2) M10 x 1.25 thread 70mm Long Bolts
Two (2) M10 Washers 31mm OD
One (1) Exhaust Flange Gasket
Part #Rx8-6-109
Checklist
This is an overview of each step in the build. You can use this as a reference and a checklist as you button up the work on your car
1. Remove the Factory Catback Exhaust
a. Jack up the front and rear of the car and place on jack stands. Follow the factory manual for jacking and
jack points.
b. Remove two (2) 17mm head nuts and springs from the exhaust to cat pipe connection (shown in Figure
1a). Save the springs for later use in the installation.
c.
Remove the exhaust from the 5 rubber exhaust hangers (Some models have an additional ground on the
exhaust. Remove the 10mm bolt from the frame).
Some models have an additional ground on the Muffler section. Disconnect the 10mm bolt from the frame and leave
the wire connected to the muffler section.
Before installing the new exhaust you may want to remove the exhaust shroud , shown in Figure 1e. The shroud will
require trimming to make the muffler fit correctly through the opening. There are two tabs circled that have retaining
clips in them. Slide the center down to release them. All other tabs simply pop into the bumper.
2. Install the CorkSport Catback Exhaust
a. Install the front section of the CorkSport catback exhaust. Slip the exhaust hanger into the mount
located at the rear diff (shown in Figure 2a).
b. Reusing the factory exhaust donut gasket, star the forward most flange. Reuse the springs from step 1b
and supplied M10x1.25 70mm long bolts (shown in Figure 2b).
c. The exhaust section (shown in Figure 2d) should move freely but be held to the rest of the factory
exhaust. This is important since space going through the factory exhaust shroud is tight and the exhaust
needs to be properly aligned in a later step.
d. Place the rear muffler section into position and start the supplied M10x1.25 35mm long bolts, nuts and
washers with the supplied gasket in between. The exhaust will hang on the hanger (shown in Figure 2e)
and will bolt up as shown in Figure 2f.
e. Trim the shroud as need to fit. The exhaust should now look like Figure 2g. It is likely that the muffler will
be hitting the exhaust shroud. If the exhaust rests on the shroud and cannot be trimmed back to fit you
will have to twist the exhaust slightly at the flanges and tighten the exhaust completely, described in the
next step.
If you have removed the shroud in a previous step you will want to reinstall it at this point. Trim off the back side of
the shroud as described in the next step.
f. Rotate the exhaust, starting with the muffler section. The goal is to make the exhaust fit as shown in
Figure 2h. Once you are happy with the placement at the rear tighten the rear most flange and then the
flange at the cat section. This might require a friend to help you. A little movement at the flange changes
the placement at the shroud so this is critical.
The exhaust gets very hot on rotary motors, so make sure that the exhaust is not touching the shroud or it will eventually melt.
It is recommended that you have at least ½” clearance between the muffler and the shroud. Periodically inspect
your rear shroud and trim it as necessary to avoid melting the shroud onto the muffler.
Need Help With Your Installation?
Call (360) 260-CORK
Part #Rx8-6-109
Checklist
This is an overview of each step in the build. You can use this as a reference and a checklist as you button up the work on your car
2. Install the CorkSport Catback Exhaust (continued)…
g. Double check that everything is tight and that no part of the exhaust is touching the body or body
components. Figure 2i shows the trimming that was done on the rear shroud.
It could take several attempts to get everything aligned properly. Loosen flanges, rotate components, and trim the
shroud until the exhaust is aligned to taste.
This completes the installation of your Exhaust. Bring the car down off the jack stands
and start the car. Use a flashlight to check under the car to ensure that no visible exhaust
is leaking and listen for leaks (usually a whispering tick sound at the flange). Look at the
connection that you made under the vehicle. If there are leaks, 99% of the time a flange
has been over tightened or is misaligned. There may be a burning off smell as the
exhaust is heated for the first time. This smell will go away after some driving
Need Help With Your Installation?
Call (360) 260-CORK
Part #Rx8-6-109
Detailed Instructions
1. Remove the Factory Catback Exhaust
a. Jack up the front and rear of the car and place on jack
stands. Follow the factory manual for jacking and jack points.
b. Remove two (2) 17mm head nuts and springs from the
exhaust to cat pipe connection (shown in Figure 1a). Save the
springs for later use in the installation.
c. Remove the exhaust from the 5 rubber exhaust hangers and
remove from RX-8. Removal may require an extra person as
the factory exhaust system is fairly heavy and awkward to
handle. The use of WD-40 or equivalent is recommended on
the exhaust hangers for ease of removal. Figure 1b shows one
of the exhaust hangers just in front of the rear axle. The other
four are at each corner of the muffler (shown in Figure 1c and
Figure 1d).
Figure 1a
Some models have an additional ground on the Muffler section. Disconnect the
10mm bolt from the frame and leave the wire connected to the muffler section.
Figure 1b
Figure 1c
Figure 1d
Before installing the new exhaust you may want to remove the exhaust shroud ,
shown in Figure 1e. The shroud will require trimming to make the muffler fit
correctly through the opening. There are two tabs circled that have retaining
clips in them. Slide the center down to release them. All other tabs simply pop
into the bumper.
Figure 1e
Need Help With Your Installation?
Call (360) 260-CORK
1 of 5
Part #Rx8-6-109
2. Install the CorkSport Catback Exhaust
a. Install the front section of the CorkSport catback exhaust.
First, slip the exhaust hanger into the mount located at the
rear diff (shown in Figure 2a).
b. Reusing the factory exhaust donut gasket, start the forward
most flange but do not tighten. Reuse the springs from step
1b and supplied M10x1.25 70mm long bolts and 31mm
washers (shown in Figure 2b).
Figure 2a
Figure 2b
c. The exhaust section (shown in Figure 2c) should move
freely but be attached to factory header pipe. This is
important since space going through the factory bumper
shroud is tight. This pipe should move freely so that the
exhaust can be properly aligned in a later step.
d. Place the rear muffler section into place and start the
supplied M10x1.25 35mm long bolts, nuts and 4 washers
with the supplied gasket in between. The exhaust will hang
on the hanger in Figure 2d and bolt up as shown in Figure 2e.
Figure 2c
Figure 2e
e. Trim the shroud as needed to fit. The exhaust should now
look like Figure 2f on next page. It is likely that the muffler
will be hitting the exhaust shroud. If the exhaust rests on the
shroud and cannot be trimmed back to fit you will have to
twist the exhaust slightly at the flanges and tighten the
exhaust completely, described in the next step.
Need Help With Your Installation?
Call (360) 260-CORK
Figure 2d
5 of 5
Part #Rx8-6-109
2. Install the CorkSport Catback Exhaust Continued…
Figure 2f
If you have removed the shroud in a previous step you will
want to reinstall it at this point. Trim off the back side of
the shroud as described in the next step.
Figure 2g
f. Rotate the exhaust, starting with the muffler section.
The goal is to make the exhaust fit as shown in Figure
2g. Once you are happy with the placement at the rear
tighten the rear most flange and then the flange at the
cat section. This might require a friend to help you. A
little movement at the flange changes the placement at
the shroud so this is critical.
The exhaust gets very hot on rotary motors, so make sure that
the exhaust is not touching the shroud or it will eventually melt.
It is recommended that you have at least ½” clearance between
the muffler and the shroud. Periodically inspect your rear
shroud and trim it as necessary to avoid melting the shroud
onto the muffler.
Figure 2h
g) Double check that everything is tight and that no part of the exhaust is touching the body or body
components. Figure 2h shows the trimming that was done on the rear shroud.
It could take several attempts to get everything aligned properly. Loosen flanges, rotate components, and trim the
shroud until the exhaust is aligned to taste.
This completes the installation of your Exhaust. Bring the car down off the jack stands
and start the car. Use a flashlight to check under the car to ensure that no visible exhaust
is leaking and listen for leaks (usually a whispering tick sound at the flange). Look at the
connection that you made under the vehicle. If there are leaks, 99% of the time a flange
has been over tightened or is misaligned. There may be a burning off smell as the
exhaust is heated for the first time. This smell will go away after some driving
Need Help With Your Installation?
Call (360) 260-CORK
5 of 5