1
INSTRUCTIONS FOR USE
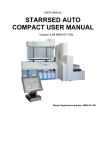
STARRSED AUTO
COMPACT INSTRUCTIONS
FOR USE
Version 1.07 MRN-074-EN
Master Registration Number: MRN-074-EN
Manufacturer:
Mechatronics Manufacturing B.V.
Phone:
+31 (0)229 - 29 11 29
Fax:
+31 (0)229 - 24 15 34
E-mail:
[email protected]
Internet:
http://www.mechatronics.nl
Postal address:
P.O. Box 225
1620 AE Hoorn
The Netherlands
Office address:
De Corantijn 13
1689 AN Zwaag
The Netherlands
© Copyright Mechatronics BV
All rights reserved.
Subject to changes without prior notice.
Issued by the After Sales Department of Mechatronics
Document history overview
Document history overview
MRN-074-EN
Published date 15 October 2014
Issue No
Date
Revised Section(s)
Changes
Authorised
1.07
October
2014
Introduction
• General safety instructions
H. Schavemaker
Safety
Appendix
• Explanation of
documentation
• Error list revised, E21, E29,
E32 added
1.06
November
2013
History screen
• Introduction of chapter
H. Schavemaker
Quality Control
Quality control
Trouble shooting
1.05
February
2013
History screen
Maintenance
screen
Maintenance
Error list
• Addition print result header
H. Schavemaker
• Hazy aspect not
suppressed in case of limit
error
• Prime/Clean text
• Maintenance items up to
level 4 included
• Reagent installation
• Error 19 added
1.04
July 2012
Reagents screen •
Reagent barcode reader
Reporting
• Limit error settings
Operation
• Air bubble trouble shooting
H.E. van Dijk
Trouble shooting
1.03
1.02
• Annual update and
January
2012
June 2011
publication
Turn off
• It is not a problem if the
H.E. van Dijk
StaRRsed Auto-Compact
is on all the time.
However,....>
StaRRsed Auto Compact Instructions For Use
Version 1.07 MRN-074-EN
Page 3
Document history overview
• Rack pictogram explained
H.E. van Dijk
1.01
February
2011
Sample screen
History screen
1.00
July 2010
All
• Reviewed
K. Artz
Preliminary
July 2010
All
• Manual build from MRN-71
K. Artz
Page 4
StaRRsed Auto Compact Instructions For Use
Version 1.07 MRN-074-EN
Contents
CONTENTS
1.
INTRODUCTION .......................................................................................................... 9
1.1.
2.
Explanation of available documentation ................................................................... 9
INSTRUMENT DESCRIPTION ................................................................................... 11
2.1.
Technical specifications ......................................................................................... 13
2.2.
Technical specifications contd. .............................................................................. 15
3.
INSTALLATION ......................................................................................................... 16
4.
GENERAL SAFETY INSTRUCTIONS ........................................................................ 17
4.1.
5.
Safety warning ....................................................................................................... 17
AUTO COMPACT PROGRAM ................................................................................... 18
5.1.
Software version .................................................................................................... 19
5.2. Sample screen ....................................................................................................... 19
5.2.1.
Carousel:..................................................................................................... 20
5.2.2.
Measure station:.......................................................................................... 20
5.2.3.
Wash station: .............................................................................................. 20
5.2.4.
Fill station: ................................................................................................... 21
5.2.5.
Pipette: ........................................................................................................ 21
5.2.6.
Rack: ........................................................................................................... 21
5.2.7.
Sample mode button: .................................................................................. 21
5.2.8.
Version information: .................................................................................... 21
5.2.9.
Manual input sample ID:.............................................................................. 21
5.2.10. Sample information: .................................................................................... 22
5.2.11. Status: ......................................................................................................... 22
5.2.12. Sample screen with keyboard ..................................................................... 22
5.2.13. Pipette information ...................................................................................... 23
5.3. History screen ........................................................................................................ 24
5.3.1.
Display pipette data ..................................................................................... 25
5.3.2.
Display Sample history ................................................................................ 26
5.3.2.1. Display patient results ............................................................................. 27
5.3.3.
Display rack history ..................................................................................... 29
5.3.3.1. Display rack status .................................................................................. 30
5.3.4.
ESR Statistics screens ................................................................................ 31
5.3.5.
QC Results screens .................................................................................... 32
5.3.5.1. QC Normal results (table) ....................................................................... 32
5.3.5.2. QC normal results screen extended ........................................................ 34
5.3.5.3. QC normal results (graph) ....................................................................... 34
5.3.5.4. QC abnormal results (table) .................................................................... 35
5.3.5.5. QC abnormal results screen extended .................................................... 37
5.3.5.6. QC abnormal results (graph) ................................................................... 38
5.3.5.7. Display sample history (QC).................................................................... 39
5.3.5.8. Linked QC ID's ........................................................................................ 40
5.3.5.9. QC Result analysis ................................................................................. 41
5.3.6.
History analyse............................................................................................ 41
5.3.7.
History analyse results high dilution ............................................................ 42
StaRRsed Auto Compact Instructions For Use
Version 1.07 MRN-074-EN
Page 5
Contents
5.3.8.
History aspect ............................................................................................. 43
5.3.9.
History analyse error ................................................................................... 43
5.3.10. History analyse warning .............................................................................. 44
5.3.11. History sample analyse option day .............................................................. 45
5.3.12. History sample analyse option ..................................................................... 45
5.3.13. Set start date ............................................................................................... 46
5.3.14. Set end date ................................................................................................ 46
5.4. Reagents screen.................................................................................................... 47
5.4.1.
Display reagent history ................................................................................ 48
5.4.2.
New reagent input ....................................................................................... 49
5.4.2.1. New reagent input (cont) ......................................................................... 49
5.5. Maintenance screen .............................................................................................. 50
5.5.1.
Prime / Clean .............................................................................................. 51
5.5.1.1. Prime Rinse solution ............................................................................... 51
5.5.1.2. Prime Saline ........................................................................................... 51
5.5.1.3. Prime Diluent .......................................................................................... 52
5.5.1.4. Prime de-ionized water ........................................................................... 52
5.5.1.5. Prime Disinfectant ................................................................................... 52
5.5.1.6. Prime all units ......................................................................................... 52
5.5.1.7. Wash each pipette .................................................................................. 52
5.5.1.8. Wash only sample pipettes ..................................................................... 52
5.5.1.9. Wash all pipettes..................................................................................... 52
5.5.1.10. Fill and clean screen ............................................................................. 53
5.5.1.11. End-of-day-wash procedure .................................................................. 53
5.5.2.
Check sensors ............................................................................................ 54
5.5.3.
Display error history .................................................................................... 56
5.5.4.
Display maintenance history........................................................................ 57
5.5.5.
Maintenance info ......................................................................................... 58
5.5.5.1. Maintenance info overview ...................................................................... 59
5.5.6.
Close ........................................................................................................... 59
5.5.7.
End-of-day-wash options ............................................................................. 59
5.5.8.
End-of-day-wash schedule settings ............................................................. 60
5.6. Settings screen ...................................................................................................... 60
5.7.
6.
Service screen ....................................................................................................... 60
REPORTING .............................................................................................................. 61
6.1.
Protocols................................................................................................................ 61
6.2. Result Printout ....................................................................................................... 62
6.2.1.
Report 60-Minute mode............................................................................... 62
6.2.2.
Report 30 Minute mode ............................................................................... 63
6.2.3.
ESR Error.................................................................................................... 64
6.2.3.1. ESR Error and Warning code messages ................................................. 64
6.2.4.
Limit error settings ....................................................................................... 65
6.2.5.
Reporting range .......................................................................................... 65
6.2.6.
Aspect Hazy ................................................................................................ 66
6.2.6.1. Analyser "HAZY" code messages ........................................................... 67
7.
OPERATION .............................................................................................................. 68
7.1. Quick start-up ........................................................................................................ 68
7.1.1.
Check list .................................................................................................... 68
Page 6
StaRRsed Auto Compact Instructions For Use
Version 1.07 MRN-074-EN
Contents
7.1.2.
Power up sequence..................................................................................... 68
7.1.3.
Priming the fluid system .............................................................................. 68
7.2. Fill procedure ......................................................................................................... 69
7.2.1.
Liquid levels ................................................................................................ 69
7.3. Checks during operation ........................................................................................ 69
7.4. Turn off .................................................................................................................. 70
7.4.1.
End-of-day-wash procedure ........................................................................ 70
7.4.2.
Turn off sequence ....................................................................................... 70
8.
QUALITY CONTROL ................................................................................................. 71
8.1.
Control pipettes...................................................................................................... 71
8.2. Monitoring measurement quality with StaRRsed Control ....................................... 71
8.2.1.
Limitations ................................................................................................... 71
8.2.2.
Expected value range.................................................................................. 72
8.2.3.
Temperature correction ............................................................................... 72
8.2.4.
Usage options ............................................................................................. 72
8.2.5.
Quality control procedure ............................................................................ 73
8.2.6.
QC Results.................................................................................................. 74
8.2.6.1. QC Error messages ................................................................................ 74
8.2.6.2. QC Result analysis ................................................................................. 75
9.
WASTE DISPOSAL.................................................................................................... 76
9.1.
10.
DATA SAFETY MANAGEMENT ................................................................................ 77
10.1.
11.
Replacing the waste container ............................................................................... 76
Power failure ...................................................................................................... 77
TROUBLE SHOOTING .............................................................................................. 78
11.1.
General error procedure ..................................................................................... 78
11.2. Flushing liquids .................................................................................................. 78
11.3. Reagents ............................................................................................................ 79
11.3.1. Reagents alarm ........................................................................................... 79
11.4. Separator error ................................................................................................... 79
11.5.
Fill time-out error ................................................................................................ 80
11.6.
Hazy reports ....................................................................................................... 81
11.7.
11.8.
Leaking pipettes ................................................................................................. 81
Liquid level sensor not sensing........................................................................... 82
11.9. Air bubbles ......................................................................................................... 82
11.9.1. Pipette looks like zebra crossing ................................................................. 82
11.9.2. Foam in column........................................................................................... 83
11.9.3. One air bubble about 5 mm under meniscus ............................................... 83
11.9.4. One air bubble rising in pipette .................................................................... 84
11.9.5. Small air bubbles rising in pipette ................................................................ 84
11.9.6. Random air bubbles in pipette ..................................................................... 84
11.10.
Quality control trouble shooting....................................................................... 85
StaRRsed Auto Compact Instructions For Use
Version 1.07 MRN-074-EN
Page 7
Contents
12.
MAINTENANCE ......................................................................................................... 88
12.1. Daily ................................................................................................................... 88
12.1.1. Check or replace sample probe or outer needle .......................................... 89
12.2. Weekly ............................................................................................................... 90
12.2.1. Check the sensors in service mode ............................................................. 90
12.2.2. Cleaning liquid separator ............................................................................. 91
12.3. Level 4 maintenance .......................................................................................... 91
12.3.1. Rinse-pump tube replacement .................................................................... 91
12.3.2. Saline-pump tube replacement.................................................................... 92
12.3.3. Replace bacterial filters ............................................................................... 93
12.3.4. Fill-nozzle O-ring replacement..................................................................... 93
12.3.5. Fill and clean procedure .............................................................................. 93
12.4. Reagents replacement ....................................................................................... 95
13.
WORK INSTRUCTION STARRSED AUTO-COMPACT ............................................. 97
14.
APPENDIX FOR STARRSED AUTO-COMPACT .................................................... 113
15.
GLOSSARY OF TERMS .......................................................................................... 125
16.
INDEX....................................................................................................................... 127
Page 8
StaRRsed Auto Compact Instructions For Use
Version 1.07 MRN-074-EN
Introduction
1. INTRODUCTION
The StaRRsed Blood Sedimentation Rate Instrument (hereafter called StaRRsed AutoCompact) is an in vitro diagnostic medical device that automatically carries out the erythrocyte
sedimentation rate analysis according to the Westergren method, conforming to CLSI approved
standard H02-A5, using closed sample tubes filled with citrate or EDTA blood.
The StaRRsed Auto-Compact is an advanced ESR system that offers many unique features and
benefits over the traditional ESR procedures. Automating this method has the following
advantages:
•
The Westergren pipettes are always filled to the correct level.
•
Using closed sample tubes reduces the possibility of contamination for the user and
environment.
•
Standard glass Westergren pipettes are used, in which the measurement can be corrected to a
constant temperature (18 C° Celsius). Even small ab normalities can be detected over a longer
period of time, irrespective of where and when the blood sample was taken.
•
Every sedimentation measurement is directly linked to an identified sample, so that a manual
work sheet is unnecessary. Patient ID errors are reduced to a minimum by using the bar-code
reader.
•
In the EDTA mode, the accuracy of dilution of EDTA blood with citrate is considerably better
than manual dilution achieved either by "tipping off" or using evacuated blood collection tubes
pre-filled with citrate solution.
•
The data can be send to your Lab Information System.
•
The used sedimentation pipettes are automatically washed and dried.
•
Minimum sample volume is 1.4 ml for the StaRRsed Auto-Compact.
•
The StaRRsed Auto-Compact has fully automatic sample loading.
•
The Rack system can work with a variety of hematology analyzer racks with most common
EDTA blood sample tubes.
The system uses rack adapters and is set up for a specific type of rack.
•
Windows based System Software is running on an external computer.
1.1. Explanation of available documentation
Manuals for the StaRRsed Auto-Compact are available on three levels: for the operator, the
supervisor and the service engineer.
The following manuals are available:
1. Instructions for Use (IFU)
Intended for the operator: Contains instructions for normal operation, safety, preventive
maintenance and trouble shooting procedures to solve the most common problems. Available
in several languages.
StaRRsed Auto Compact Instructions For Use
Version 1.07 MRN-074-EN
Page 9
Introduction
2. User Manual (UM)
Intended for the lab supervisor. Contains information from the IFU and additional information
concerning settings, service, higher maintenance levels and trouble shooting procedures to
solve more complicated problems. Only available in English.
3. Service Manual (SM)
Intended for trained service engineers. Describes maintenance, servicing and repair of the
instrument in detail. Contains detailed descriptions of parts, assembly drawings, modifications,
extended trouble shooting, flow diagrams etc. Only available in English.
4. Installation Manual (IM)
Intended for trained service engineers. Contains instructions and procedures for installation
and start-up. Only available in English.
Manuals are available in PDF and HTML-format and can be downloaded from
http://www.rrmechatronics.com.
Page 10
StaRRsed Auto Compact Instructions For Use
Version 1.07 MRN-074-EN
Instrument description
2. INSTRUMENT DESCRIPTION
The StaRRsed Auto-Compact can accommodate sample racks from different manufacturers. The
individual rack with the blood samples is snapped into the Mechatronics rack adapter and need
only be placed on the entry platform of the StaRRsed Rack unit.
The operator simply presses the button "Sample mode" and walks away.
The instrument picks up the rack and mixes the blood by rotating the rack 8 times, as
recommended by the ICSH. Barcode labels are read and, if an ESR has been requested, blood is
aspirated from the sample tube. Thereafter the Rack is rotated one time to ensure each blood
sample is thoroughly mixed and the sample is picked up to be aspirated. Aspiration takes place via
Mechatronics proprietary double needle mechanism.
The citrate dilution takes place in a 4+1 ratio and is achieved with ± 3% accuracy.
Eighty-four Westergren pipettes are housed in the carousel. Each is of precision bore glass. After
each cycle, the pipette is cleaned automatically with low foam detergent followed by a drying cycle.
The fill line is back-flushed using saline solution.
The temperature is corrected to the standard value of 18°C and ESR's may be read after one hour
or 30 minutes. A foretell one-hour result is presented in the 30-minute mode.
The StaRRsed Auto-Compact can be interfaced bidirectionally with Laboratory Information
Management Systems (LIMS) through a variety of interface protocols.
Results of the test are expressed in millimeters. This data together with the patient ID number is
sent to the Laboratory Information System along with the sedimentation time used (60 or 30
minutes), the temperature and the dilution ratio.
StaRRsed Auto Compact Instructions For Use
Version 1.07 MRN-074-EN
Page 11
Instrument description
The StaRRsed Auto-Compact analyzer consists of the following units:
StaRRsed Compact analyzer
•
ESR measuring instrument with a belt holding 84 precision's bore glass Westergren pipettes.
•
Automated aspiration of the sample tube.
•
Automated dilution of EDTA blood sample with citrate.
•
Automated measurement of ESR after 30 or 60 minutes.
•
Automated cleaning and drying of pipettes.
StaRRsed Rack
•
Add-on unit for sampling and rack handling.
•
Barcode reader for sample identification.
•
Rack transport unit.
•
Automatic mixing of sample tubes before sampling.
•
Needle unit.
•
Diluter module.
PC with touch screen LCD monitor
•
Windows based platform
•
Dedicated instrument software
•
Optional network connections
•
USB port
Option:
•
External bar code reader, which can be connected on the USB port of the Compact Analyzer.
This bar code reader can be used for reagent handling and for ID-input in sample history
search.
AutoCompact LS (special model)
This model uses large bulk containers for reagent supply instead of the 0.5-liter onboard
containers. This means longer operation time without reagent preparation and no cleaning time.
This model is delivered with longer level sensors and special reagents cover assembly.
Page 12
StaRRsed Auto Compact Instructions For Use
Version 1.07 MRN-074-EN
Instrument description
2.1. Technical specifications
Technical specifications for the StaRRsed Auto-Compact:
StaRRsed AutoCompact instrument models:
Model
Model name
Catalogue number
StaRRsed AutoCompact
VERA109000
StaRRsed AutoCompact
(LS)
VERA109010
ESR method:
ESR method
Temperature compensation
method
30 minute method
Allowed blood specimen
types
Westergren method
R.W. Manley: J. clin Path (1957), 10, 354
R. Rogers: Medical Laboratory World 1994
• For EDTA mode: Whole blood with < 1% EDTA
anticoagulant.
• For Citrate mode: Whole blood (4 vols.) with sodium
citrate anticoagulant-diluent (1 vol.)
Automatic dilution
Reported result
4 vols. blood + 1 vol. sodium citrate diluent (3.2% NaCl);
accuracy ±3%
mm after 1 hour
Reagents:
Reagents used
QRR 010931 Diluent
QRR 010947 Disinfectant
QRR 010933 Saline
QRR 010934 Rinse solution
De-ionized water
Reagent barcode label
information
Code39
Blood volume:
Aspirated blood volume per
sample
StaRRsed Auto Compact Instructions For Use
Version 1.07 MRN-074-EN
1.4 ml in EDTA mode
1.6 ml in Citrate mode
Page 13
Instrument description
Rack and tube types:
Abbott CD3500/3700
Rack types
Abbott CD4000/Sapphire
ABX Pentra 80
ABX Pentra 120
Bayer Advia
Coulter LH750, DXH800
Coulter HmX
Sysmex sample rack (low profile)
Most commonly used brands/types.
Closed tubes with concentric cap only.
Sample tube types
Barcode reader:
Barcode reader type
Reading capabilities
CCD.
Most common barcode labels
Code39, ITF, Industrial 2 or 5,
CodaBar,
EAN/UPC and CODE128.
Data storage:
Storage medium
Storage capacity
indication
Page 14
30 Gb Hard disk on external PC
approx. 5 Mb per 1000 samples (results and raw data)
StaRRsed Auto Compact Instructions For Use
Version 1.07 MRN-074-EN
Installation
2.2. Technical specifications contd.
StaRRsed Compact environment:
Less than 65 dBA
Sound level
18 - 28 °C
Environment temperature
10-90%
Relative humidity
StaRRsed Compact:
Mains voltage
Fuse (20 x 5 mm)
Power consumption
Heat output
100/240V
50-60Hz
Slow blow 220V
2.5 Amp
Slow blow 110V
5.0 Amp
Standby
60 VA
Maximum
500 VA
Standby
70 Watt
Full operation
360 Watt
Rack unit
12 Volt DC from the StaRRsed Auto
Compact
Mains voltage
50 VA
Power consumption
21.5 Kg
Weight
StaRRsed Auto-Compact overall dimensions:
Dimensions
Width
1.100 mm
Height
770 mm
Depth
660 mm
Weight
70 kg
StaRRsed Auto-Compact table size:
Table size (Min.)
Width (Exclusive space for PC)
1.100 mm
Width (Including space for PC)
1.500 mm
Depth
StaRRsed Auto Compact Instructions For Use
Version 1.07 MRN-074-EN
660 mm
Page 15
Installation
3. INSTALLATION
The instrument must be unpacked, installed and checked by a trained engineer prior to first
operation.
Detailed installation instructions are given in the StaRRsed Auto-Compact Installation manual.
Page 16
StaRRsed Auto Compact Instructions For Use
Version 1.07 MRN-074-EN
General safety instructions
4. GENERAL SAFETY INSTRUCTIONS
The instrument described in this manual is designed to be used by properly trained personnel only.
For the correct and safe use of this instrument it is essential that both operating and servicing
personnel follow generally accepted safety procedures in addition to the safety precautions
specified in this manual.
•
Execute your work according to this manual. Read the instructions before operating the
instrument. Observe all cautionary markings in the manual and on the instrument. Keep this
manual for future reference.
•
Follow the bio safety procedures when working with blood-contaminated parts.
•
Be cautious to prevent stinging during cleaning or replacing the needle assembly.
•
Repair can only be executed by trained and qualified personnel.
•
Wear protective clothing.
•
When the instrument is running it is not allowed to:
•
Open and remove safety covers.
•
Touch moving parts.
•
It is not allowed to give access to the instrument to a non-authorised person at any time.
•
Whenever it is likely that safety-protection has been impaired, the instrument must be made
inoperative and be secured against any unintended operation. The matter should then be
referred to qualified technicians.
•
Safety protection is likely to be impaired if, for example, the instrument fails to perform the
intended measurements or shows visible damage or unusual smells, smoke, liquids are flowing
out.
4.1. Safety warning
When there was an incident with the StaRRsed Auto-Compact which caused damage to the
instrument, please notify your superior and your local equipment dealer before you continue using
the instrument.
Example:
•
A collision with a moving object or a person
•
Something falling on the instrument
•
Liquids spilling into the instrument
StaRRsed Auto Compact Instructions For Use
Version 1.07 MRN-074-EN
Page 17
Auto Compact program
5. AUTO COMPACT PROGRAM
The StaRRsed Auto-Compact is controlled via an external computer on which runs the StaRRsed
Auto-Compact software. The software functions are grouped on six tabbed screens. The software
is controlled by mouse pointer or directly via the touch screen. A virtual keyboard is automatically
displayed on screen, when numerical or alphanumerical input is required.
Normal operational screens are the SAMPLE and the HISTORY screen.
The REAGENTS screen is used to check the reagent levels and log reagent replacement.
To activate priming sequences and cleaning operations, the screen MAINTENANCE is used.
The SETTINGS and SERVICE screens are protected by a password to prevent accidental change of
settings. The SERVICE menu is used for service and control purposes.
SAMPLE screen (on page 19)
HISTORY screen (on page 24)
REAGENTS screen (on page 47)
MAINTENANCE screen (on page 50)
SETTINGS screen
(is not explained in this manual)
SERVICE screen
(is not explained in this manual)
.
Page 18
StaRRsed Auto Compact Instructions For Use
Version 1.07 MRN-074-EN
Auto Compact program
5.1. Software version
The latest software and manuals for the StaRRsed Auto-Compact can be downloaded from our
website; www.rrmechatronics.com.
The following program description is valid for software up to version 5.01.
Software version V5.00 and higher runs only on a Windows 7 PC.
5.2. Sample screen
Display of the Status line in service mode:
The main menu is displayed during operation. To access other menus, select the required tab on
the display and press the mouse button.
To access the other sub menus in the selected tab, select the required button and press the mouse
button.
The following screens are selectable via the associated tabs:
1. SAMPLE screen (on page 19)
StaRRsed Auto Compact Instructions For Use
Version 1.07 MRN-074-EN
Page 19
Auto Compact program
2.
3.
4.
5.
6.
HISTORY screen (on page 24)
REAGENTS screen (on page 47)
MAINTENANCE screen (on page 50)
SETTINGS screen
SERVICE screen
The above picture is an example of the SAMPLE screen of the Compact in the normal operation
mode. If the Service mode button with light is shown in the Status line, the Compact is running in
the service mode. The User Manual button is also in the status line. Click this button to open the
StaRRsed Auto-Compact User manual.
When the Compact is running in the Service mode all kinds of settings can be changed and the
instrument will run with the changed settings.
For instance, when ESR time is set to 12 minutes, the Carousel will move according this time
setting to be in time at the measure position.
When the Compact is running in the NORMAL MODE, the instrument uses the standard saved
settings. For instance the ESR time is set back to 60 minutes or 30 minutes according the used
method.
5.2.1. Carousel:
Carousel:
This is a graphical representation of the Compact carousel. When an ESR is required the carousel
is moving to the Measure position. On the display, the belt is also moving accordingly. The decimal
numbers next to the pipettes are the numbers on the pipette belt.
When a pipette is filled successfully, a red dot marks the filled pipette. In case of a failure the
pipette is marked with a flashing red dot.
All the sample information can be found in tab HISTORY.
5.2.2. Measure station:
Measure station:
This is the position of the measure station where the ESR of the sample is measured.
5.2.3. Wash station:
Wash station: (Also named Rinse station)
This is the position where the sample is washed out of the pipette. The pipette is clean and dry
after this process.
Page 20
StaRRsed Auto Compact Instructions For Use
Version 1.07 MRN-074-EN
Auto Compact program
5.2.4. Fill station:
Fill station:
This is the position where the pipette is filled with a blood sample.
5.2.5. Pipette:
Pipette:
This is a graphical representation of the pipette. It is generated from the results of the ESR
measurement. It can be used to locate possible air bubbles.
5.2.6. Rack:
Rack:
This is a representation of a rack in process. Empty positions indicate, that no sample tube was
detected at that position.
The combinations of the pictograms have the following meaning:
Barcode could not be read (read failure).
Barcode was read correctly, but ESR is not required for this
sample.
ESR is required and waiting to be done.
ESR was measured successfully.
ESR was measured, but with fill errors.
After processing the rack, the information of the rack is transferred to the DISPLAY RACK HISTORY (on
page 29) screen.
5.2.7. Sample mode button:
Sample mode button:
This is the button to start or stop the run mode of the instrument.
5.2.8. Version information:
Version information:
Shows the version information of the software.
5.2.9. Manual input sample ID:
Manual input sample ID:
This window can be used for manual input of a barcode from a sample tube.
StaRRsed Auto Compact Instructions For Use
Version 1.07 MRN-074-EN
Page 21
Auto Compact program
5.2.10. Sample information:
Sample information:
After measurement, the results of the sample are shown in this window. This window is refreshed
after every new result of a sample.
5.2.11. Status:
Status:
Information about the current status of the instrument is shown here, such as the selected mode
(EDTA or Citrate), selected method (60 or 30 minute) and symbols that draw attention to certain
maintenance conditions or QC sample status (if applicable).
5.2.12. Sample screen with keyboard
To view the status of a specific pipette, click directly on the pipette itself or click the open space in
the center of the belt representation. A virtual number pad is shown.
Type the number of the requested pipette and press the OK button. The following screen is shown.
Page 22
StaRRsed Auto Compact Instructions For Use
Version 1.07 MRN-074-EN
Auto Compact program
5.2.13. Pipette information
The following information is shown:
•
Sample ID:
The sample identification (barcode) of the sample tube.
•
Dilution:
The dilution rate of this sample as calculated during the aspiration process.
•
Time filled:
The date and time when the sample was aspirated.
•
TIME TO GO:
The number of minutes to wait until the sample will be measured.
The indicators at the right side show the current status of the selected pipette:
•
Pipette filled OK:
A sample has been aspirated into the pipette without problems.
•
Pipette dirty:
The sample has been measured and the pipette is marked to be washed when it reaches the
rinse station. This indicator is also on when a sample could not be aspirated properly.
•
Pipette leak:
Reserved for future use.
StaRRsed Auto Compact Instructions For Use
Version 1.07 MRN-074-EN
Page 23
Auto Compact program
5.3. History screen
In History the following options can be selected:
•
DISPLAY PIPETTE DATA (on page 25)
Use button PRINT to send the selected data to the printer.
•
DISPLAY SAMPLE HISTORY (on page 26)
•
DISPLAY FULL PATIENT RESULT (on page 27)
In Display sample history are the following options available:
PRINT: Send the selected result to the printer.
PRINT RESULT HEADER: Only if option Settings - General settings "PRINT AFTER MEASUREMENT" is
switched ON it is possible to print a result header.
SEND ALL TO HOST: Send all results again to the HOST.
SEND PATIENT RESULT TO HOST: Send only the selected patient result to the HOST.
•
DISPLAY RACK HISTORY (on page 29)
•
DISPLAY RACK DETAILS (on page 30)
•
ANALYSE RESULTS (on page 41)
•
ESR STATISTICS (on page 31)
•
QC RESULTS (on page 32) (with StaRRsed Control)
•
LINKED QC ID'S (on page 40)
Page 24
StaRRsed Auto Compact Instructions For Use
Version 1.07 MRN-074-EN
Auto Compact program
5.3.1. Display pipette data
This table shows information of the samples in the carousel during the selected ESR process time.
After measuring the pipette, the pipette data is transferred to the sample history files.
In the header of the table the names of the columns are shown. Double-click the header of any
column to sort the table by this column in ascending order.
StaRRsed Auto Compact Instructions For Use
Version 1.07 MRN-074-EN
Page 25
Auto Compact program
5.3.2. Display Sample history
In the window Select date to show results: double click on the file name to select the results of the
selected date.
Press Refresh to refresh the list of available files.
In the window Sample ID type the sample ID information and press Search.
Press Options for the following search options:
•
Show today's results.
•
Show today's results from a selected time frame of the day.
•
Show results of a number of past days. Default value is set for 7 days.
•
Show results of a specific day.
•
Show results of the range between the first selected date to the next selected date.
Select in the table a 'Sample ID' and click the button DISPLAY FULL PATIENT RESULT (on page 27) for
more detailed information of the selected sample.
In the header of the table the names of the columns are shown. Double-click the header of any
column to sort the table by this column in ascending order.
Page 26
StaRRsed Auto Compact Instructions For Use
Version 1.07 MRN-074-EN
Auto Compact program
5.3.2.1. Display patient results
In the window Select date to show results: double click on the file name to select the results of the
selected date.
Press Refresh to refresh the list of available files.
In the window Sample ID type the sample ID information and press Search.
Press Options for the following search options:
•
Show today's results.
•
Show today's results from a selected time frame of the day.
•
Show results of a number of past days. Default value is set for 7 days.
•
Show results of a specific day.
•
Show results of the range between the first selected date to the next selected date.
StaRRsed Auto Compact Instructions For Use
Version 1.07 MRN-074-EN
Page 27
Auto Compact program
From the selected Sample ID detailed information is shown on this screen.
Sample ID
Sample Identification number
Aspect code
Shows the aspect code (e.g. Hazy <10)
ESR 30 min
The 30 minute method is used. This is the measured 30
minutes value.
ESR 60 min
When the 60 minute method is used, this is the measured 60
minutes value.
When the 30 minutes method is used, this is the calculated
60 minutes value.
ESR 60 min T.Corr.
Temperature correction is used. This is the 60 minutes value
corrected to 18°C.
Date / time
Date and time of the measurement of the result.
ESR time (min.)
Actual duration of the ESR.
Dilution %
The calculated dilution rate after aspiration of the sample.
Temperature (°C)
Room temperature at the time of th e measurement of the
sample.
Pipet number
Pipette in which the sample was measured.
Error code
Shows any ESR error code (e.g. "Too many borders found").
Page 28
StaRRsed Auto Compact Instructions For Use
Version 1.07 MRN-074-EN
Auto Compact program
5.3.3. Display rack history
After completion of the rack, the status of the rack is displayed here. The last 10 racks are stored
and can be selected. The selected rack is displayed left (above the selection window). The
previous 4 racks are also displayed and can be checked simultaneously. More detailed information
of the selected rack is shown with DISPLAY RACK DETAILS (on page 30) ON.
The combinations of the pictograms have the following meaning:
Barcode could not be read (read failure).
Barcode was read correctly, but ESR is not required for this
sample.
ESR is required and waiting to be done.
ESR was measured successfully.
ESR was measured, but with fill errors.
The Clear rack history button will clear the contents of the rack history file and restart to build-up a
new rack history file.
StaRRsed Auto Compact Instructions For Use
Version 1.07 MRN-074-EN
Page 29
Auto Compact program
5.3.3.1. Display rack status
More detailed information of the samples in the selected rack is shown in the status table.
The last 10 racks are stored and can be selected.
The Clear rack history button will clear the contents of the rack history file and restart to build-up a
new rack history file.
Page 30
StaRRsed Auto Compact Instructions For Use
Version 1.07 MRN-074-EN
Auto Compact program
5.3.4. ESR Statistics screens
A statistical graph is produced over a selected period. Make a selection of the following graphs;
•
Daily mean (mm)
Use this to check variations in the daily mean ESR.
•
Hazy (%)
Increasing hazy aspects are an indication for contamination of the instrument, see Aspect
Hazy (on page 66)
•
Dilution (%)
Increasing dilution errors indicate the need for maintenance of the diluter system.
•
Bubbles on top (%)
Increasing samples with bubbles indicate the need for maintenance of the aspiration system,
see Foam in column (on page 83)
•
ESR errors (%)
Increasing ESR errors may indicate the need for maintenance, see ESR Error (on page 64)
•
Number of samples
This can be used to document variations in work load.
StaRRsed Auto Compact Instructions For Use
Version 1.07 MRN-074-EN
Page 31
Auto Compact program
5.3.5. QC Results screens
In this section results and statistics from QC samples are shown, in the section Linked QC ID's
(on page 40) links can be created between QC sample ID's and Lab ID's.
The results from StaRRsed Control level N and level A are separated on their own tabs. Both tabs
have the same layout and options. Results can be displayed in table format or in graphical format.
When the StaRRsed Control sample ID is used, results are only listed here. When Lab ID barcode
is used, QC results are also listed in "Patient results".
Note: This part of the software can only be used in combination with StaRRsed Control as quality
control material.
5.3.5.1. QC Normal results (table)
Display Results (table):
Results are shown in table as default.
QC sample ID:
Read from the barcode. The original StaRRsed Control barcode (=batch number)
Linked lab ID:
The Lab ID is given if it is linked to the StaRRsed Control sample ID
Sampling date:
The date and time when the QC sample was aspirated.
Expiry date:
If the StaRRsed Control expiry date is exceeded, it is not possible to continue with this QC sample.
The sample is not measured, but the failed attempt is logged in the table.
Page 32
StaRRsed Auto Compact Instructions For Use
Version 1.07 MRN-074-EN
Auto Compact program
Expected ESR:
This is the temperature corrected mean value (incorporated in the StaRRsed barcode) and the
accepted range of deviation. The applicable values for the acceptable range depend on the user
setting.
ESR 60:
Uncorrected result from QC sample.
ESR 60 T.CORR.:
Temperature corrected result from QC sample.
T(°C):
Temperature at which the sample was measured.
Error/Warning:
Only special QC errors are mentioned here, general ESR warnings/errors are mentioned in the
next column.
After these columns additional data is shown: pipette number, dilution rate, ESR30, ESR time and
Aspect. Scroll to the right.
Results are always shown with and without Temperature correction, independent of the setting
TEMP. CORRECTION (ON or OFF).
The following options can be selected:
RELATED PATIENT RESULTS
This screen is simular to the "Display sample history" screen. The background colour of the patient
history table is switched to light yellow to distinguish these QC related patient results from the
standard patient history table. Depending on the frequency of QC samples, related patient results
may span over multiple days and are listed per date.
EXPORT TO EXCEL (CSV)
Results can be exported to a .CSV file and imported in an MS Excel file for further analyses.
BATCH
All used batches of StaRRsed Control are shown, results are shown for chosen batch ID.
CLOSE
Return to History Screen.
StaRRsed Auto Compact Instructions For Use
Version 1.07 MRN-074-EN
Page 33
Auto Compact program
5.3.5.2. QC normal results screen extended
After scrolling the general data from the QC results are shown.
5.3.5.3. QC normal results (graph)
Page 34
StaRRsed Auto Compact Instructions For Use
Version 1.07 MRN-074-EN
Auto Compact program
Display Statistics (graph):
All QC results from the chosen StaRRsed Control batch are shown in a Levey-Jennings chart.
Shown in the graph:
•
QC results (red) = values of measurements per date
•
Calculated mean (yellow) = mean value of all QC results of the specific batch
•
Expected ESR (green) = Assay mean value of chosen StaRRsed Control
Shown as value:
•
Calculated mean = mean value of all QC results of the specific batch
•
Standard deviation = the average deviation of all QC results compared with the expected
ESR
•
Coefficient of variation = ratio of the standard deviation to the expected ESR, expressed in a
percentage
•
Number of QC results
This graph gives a first indication of the measuring stability of the StaRRsed Auto-Compact.
Further analysis and identification of systematic errors have to be performed in the user's Quality
Control System.
CLOSE
Return to History Screen
5.3.5.4. QC abnormal results (table)
StaRRsed Auto Compact Instructions For Use
Version 1.07 MRN-074-EN
Page 35
Auto Compact program
The results from StaRRsed Control level A are shown.
Display Results (table)
QC sample ID:
Read from the barcode. The original StaRRsed Control barcode (=batch number)
Linked lab ID:
The Lab ID is given if it is linked to the StaRRsed Control sample ID
Sampling date:
The date and time when the QC sample was aspirated.
Expiry date:
If the StaRRsed Control expiry date is exceeded, it is not possible to continue with this QC sample.
The sample is not measured, but the failed attempt is logged in the table.
Expected ESR:
This is the temperature corrected mean value (incorporated in the StaRRsed barcode) and the
accepted range of deviation. The applicable values for the acceptable range depend on the user
setting.
ESR 60:
Uncorrected result from QC sample.
ESR 60 T.CORR.:
Temperature corrected result from QC sample.
T(°C):
Temperature at which the sample was measured.
Error/Warning:
Only special QC errors are mentioned here, general ESR warnings/errors are mentioned in the
next column.
After these columns additional data is shown: pipette number, dilution rate, ESR30, ESR time and
Aspect. Scroll to the right.
Results are always shown with and without Temperature correction, independent of the setting
TEMP. CORRECTION (ON or OFF).
The following options can be selected:
Page 36
StaRRsed Auto Compact Instructions For Use
Version 1.07 MRN-074-EN
Auto Compact program
RELATED PATIENT RESULTS
This screen is simular to the "Display sample history" screen. The background colour of the patient
history table is switched to light yellow to distinguish these QC related patient results from the
standard patient history table. Depending on the frequency of QC samples, related patient results
may span over multiple days and are listed per date.
EXPORT TO EXCEL (CSV)
Results can be exported to a .CSV file and imported in an MS Excel file for further analyses.
BATCH
All used batches of StaRRsed Control are shown, results are shown for chosen batch ID.
CLOSE
Return to History Screen.
5.3.5.5. QC abnormal results screen extended
After scrolling the general data from the QC results are shown.
StaRRsed Auto Compact Instructions For Use
Version 1.07 MRN-074-EN
Page 37
Auto Compact program
5.3.5.6. QC abnormal results (graph)
Display Statistics (graph):
All QC results from the chosen StaRRsed Control batch are shown in a Levey-Jennings chart.
Shown in the graph:
•
QC results (red) = values of measurements per date
•
Calculated mean (yellow) = mean value of all QC results of the specific batch
•
Expected ESR (green) = Assay mean value of chosen StaRRsed Control
Shown as value:
•
Calculated mean = mean value of all QC results of the specific batch
•
Standard deviation = the average deviation of all QC results compared with the expected
ESR
•
Coefficient of variation = ratio of the standard deviation to the expected ESR, expressed in a
percentage
•
Number of QC results
This graph gives a first indication of the measuring stability of the StaRRsed Auto-Compact.
Further analysis and identification of systematic errors have to be performed in the user's Quality
Control System.
CLOSE
Return to History Screen
Page 38
StaRRsed Auto Compact Instructions For Use
Version 1.07 MRN-074-EN
Auto Compact program
5.3.5.7. Display sample history (QC)
This screen shows all patient results that have been measured after the selected QC result and up
to the following QC result. The results are presented in the layout of the "DISPLAY SAMPLE HISTORY (on
page 26)" screen. Depending on the frequency of QC samples, related patient results may span
over multiple days and are listed per date. All general ESR data and errors of QC samples are
shown here.
StaRRsed Auto Compact Instructions For Use
Version 1.07 MRN-074-EN
Page 39
Auto Compact program
5.3.5.8. Linked QC ID's
Use this screen to link the StaRRsed Control sample ID with a Lab ID or to check which links are
active.
1. "StaRRsed Control sample ID": Enter the lot number or scan the barcode from the original
StaRRsed Control tube label. If the original label is already covered by the Lab ID label, find
the lot number and barcode on the package insert.
2. "Lab ID": Enter the patient number or scan the barcode from the label that the lab is using to
identify the sample.
3. Click button "Link ID's" to add the linked ID's to the list. The "Date linked" will be added
automatically.
4. Attach the Lab ID label on the StaRRsed Control sample tube so that the original barcode is
completely covered to ensure that only the Lab ID barcode can be scanned by the StaRRsed
Auto-Compact.
If the StaRRsed Control sample ID is not correct or the expiry date is exceeded, a message will be
shown and the ID's are not added to the list.
To remove a link that will no longer be used, select the link in the table and click on "REMOVE LINK".
Depending on the optional setting "AUTOMATICALLY REMOVE LINKED QC ID AFTER RESULT", (SETTINGS - QC
SETTINGS) the links can be removed automatically when a usable ESR result has been reported for
this particular Lab ID.
Page 40
StaRRsed Auto Compact Instructions For Use
Version 1.07 MRN-074-EN
Auto Compact program
5.3.5.9. QC Result analysis
Authorized staff should identify and differentiate acceptable/unacceptable random errors and
trends and/or shifts in systematic errors from the statistical data. Depending on the users Quality
Control Procedures analytical results could be accepted or rejected.
Changes in QC results can be gradual or abrupt. Gradual changes can be caused by
contamination and incidental environmental variations. Abrupt changes can be caused by change
of QC material batch or possible hardware errors.
If results are continuously out of range due to significant difference between calculated mean and
control value, but the statistics show precise results with small deviations, it should be considered
to expand the acceptable assay range with QC Settings.
If results are incidentally out of range it is advised to perform a daily maintenance and/or fill and
clean step and then perform another QC sample step before releasing patient results.
If results are not send to the LIMS QC Results can be exported to MS Excel CSV files for further
analysis in lab's own Quality Control data system.
5.3.6. History analyse
DILUTION ERROR
The dilution error detection is a user setting and can be changed in SETTINGS - dilution error
detection to 0 ... 25 %. In this example, the dilution error detection is set to 10% and limit errors set
to YES.
By selecting Dilution >= 110 all the samples with a dilution rate >= 110 are displayed in the table.
By selecting Dilution <= 90 all the samples with a dilution rate <= 90 are displayed in the table.
In the header of the table the names of the columns are shown. Double-click the header of any
column to sort the table by this column in ascending order.
StaRRsed Auto Compact Instructions For Use
Version 1.07 MRN-074-EN
Page 41
Auto Compact program
5.3.7. History analyse results high dilution
DILUTION ERROR
The dilution error detection is a user setting and can be changed in SETTINGS - dilution error
detection to 0 ... 25 %. In this example, the dilution error detection is set to 10% and limit errors set
to YES.
By selecting Dilution >= 110 all the samples with a dilution rate >= 110 are displayed in the table.
By selecting Dilution <= 90 all the samples with a dilution rate <= 90 are displayed in the table.
In the header of the table the names of the columns are shown. Double-click the header of any
column to sort the table by this column in ascending order.
Page 42
StaRRsed Auto Compact Instructions For Use
Version 1.07 MRN-074-EN
Auto Compact program
5.3.8. History aspect
ASPECT
By selecting one of the three Hazy aspect codes, all the samples with this aspect code are
displayed in the table, also in case of an error.
In the header of the table the names of the columns are shown. Double-click the header of any
column to sort the table by this column in ascending order.
5.3.9. History analyse error
ERROR
By selecting one of the error codes, all the samples with this error code are displayed in the table.
In the header of the table the names of the columns are shown. Double-click the header of any
column to sort the table by this column in ascending order.
StaRRsed Auto Compact Instructions For Use
Version 1.07 MRN-074-EN
Page 43
Auto Compact program
5.3.10. History analyse warning
WARNING
By selecting one of the warning codes, all the samples with this warning code are displayed in the
table.
In the header of the table the names of the columns are shown. Double-click the header of any
column to sort the table by this column in ascending order.
Page 44
StaRRsed Auto Compact Instructions For Use
Version 1.07 MRN-074-EN
Auto Compact program
5.3.11. History sample analyse option day
Make a selection for all of today's results or only today's results between start time and end time.
5.3.12. History sample analyse option
Make a selection for
1. A specific number of past days.
2. A specific date.
3. A range of days from start date to end date.
StaRRsed Auto Compact Instructions For Use
Version 1.07 MRN-074-EN
Page 45
Auto Compact program
5.3.13. Set start date
Input the Start date and time.
5.3.14. Set end date
Input the End date and time.
Page 46
StaRRsed Auto Compact Instructions For Use
Version 1.07 MRN-074-EN
Auto Compact program
5.4. Reagents screen
When there is a sensor alarm, an alarm indicator is shown in the tab REAGENTS. The alarm status of
the bottles and separator are shown in this screen. An empty bottle is marked by a flashing red to
yellow mark.
When the bottle status screen is active, the bottle audio alarm is switched off.
Reagent information is shown in the little text boxes. To input new reagent information when
reagent container is replaced, click on the appropriate text box.
Note: When the expire date is exceeded the text box will flash red.
The software checks the bottle status before starting a new rack. If a level alarm is ON, it will not
process the new rack. If an alarm comes ON during a rack, it will finish to aspirate that rack (10
samples max.). Washing dirty pipettes always continues, as to avoid that the samples are left in
the pipettes.
Reagents alarm is also set when the expire date of the reagent is exceeded or opened more than
three months. The message Not allowed now! See REAGENTS! appears. Processing of new samples
is stopped. A log is available for all reagents and can be accessed by clicking on DISPLAY REAGENT
HISTORY (on page 48).
StaRRsed Auto Compact Instructions For Use
Version 1.07 MRN-074-EN
Page 47
Auto Compact program
5.4.1. Display reagent history
This screen shows the history of the used reagents.
Select the reagent type on the right side.
For external use of the information all the logged reagent data can by exported to EXCEL .CSV
format by clicking Export to Excel (CSV).
Page 48
StaRRsed Auto Compact Instructions For Use
Version 1.07 MRN-074-EN
Auto Compact program
5.4.2. New reagent input
Input screen for new reagents. Make a selection to add new (default setting) or delete the current
information and continue with "Next".
Note: Only the Rinse solution input screen is shown in this manual. The input screens are the
same for all reagents.
5.4.2.1. New reagent input (cont)
Data can be entered with the keyboard or with a barcode reader.
1. First enter / read the Article number
2. Enter/ read Lot number.
3. Enter / read the Expiry date (if barcode reader is used: cursor has to be in one of the two
boxes)
4. If necessary, adjust the date when the reagent was placed.
5. Check if the preview box shows the correct information, then press OK.
StaRRsed Auto Compact Instructions For Use
Version 1.07 MRN-074-EN
Page 49
Auto Compact program
5.5. Maintenance screen
When there is a sensor alarm, an alarm indicator is shown in the tab MAINTENANCE.
This screen has 5 sub screens:
1.
2.
3.
4.
5.
PRIME (ON PAGE 51) / CLEAN
CHECK SENSORS (on page 54)
DISPLAY ERROR HISTORY (on page 56)
DISPLAY MAINTENANCE HIST. (on page 57)
MAINTENANCE INFO (on page 58)
Page 50
StaRRsed Auto Compact Instructions For Use
Version 1.07 MRN-074-EN
Auto Compact program
5.5.1. Prime / Clean
When there is a sensor alarm, an alarm indicator is shown in the tab MAINTENANCE.
All maintenance functions for the fluid system are grouped under button PRIME / CLEAN (on page 51).
After each reagent change, the fluid system must be primed to fill the relevant tubes with reagent
and remove air. This is also part of the daily start-up. Use the applicable button to perform the
automatic priming cycle for this reagent:
5.5.1.1. Prime Rinse solution
•
PRIME RINSE SOLUTION:
After each measurement, the pipettes are washed and dried automatically.
5.5.1.2. Prime Saline
•
PRIME SALINE:
After each aspiration, the outer needle, sample probe and fill nozzle are washed with saline.
StaRRsed Auto Compact Instructions For Use
Version 1.07 MRN-074-EN
Page 51
Auto Compact program
5.5.1.3. Prime Diluent
•
PRIME DILUENT:
The Diluter prime cycle is 5 strokes of the syringe.
5.5.1.4. Prime de-ionized water
•
PRIME DE-IONIZED WATER:
After each aspiration, the fill nozzle is flushed with de-ionized water.
5.5.1.5. Prime Disinfectant
•
PRIME DISINFECTANT:
During a pipette rinse cycle, a small amount of disinfectant is flushed around the bottom of the
pipette and into the waste system.
5.5.1.6. Prime all units
When the StaRRsed Auto-Compact has been idle for more than eight hours, some reagents may
have dropped from the tubes due to gravity. Prime all tubing before sampling with:
•
PRIME ALL UNITS
All priming functions are sequentially performed one time.
5.5.1.7. Wash each pipette
•
Wash each pipette:
When the pipette belt turns one position, the pipette at the rinse position will be rinsed and
dried, regardless if it was filled or not.
5.5.1.8. Wash only sample pipettes
•
Wash only sample pipettes:
All pipettes which are currently holding samples are washed and dried ones.
A warning is shown on the display: <Pipette data will be lost!>.
NOTE: Before executing this function, check carefully if there are samples in the pipette belt
that need to be measured.
Any remaining samples will be washed away and will NOT be measured!
5.5.1.9. Wash all pipettes
•
Wash all pipettes:
All pipettes on the pipette belt are washed and dried ones.
A warning is shown on the display: <Pipette data will be lost!>.
NOTE: Before executing this function, check carefully if there are samples in the pipette belt
that need to be measured.
Any remaining samples will be washed away and will NOT be measured!
Page 52
StaRRsed Auto Compact Instructions For Use
Version 1.07 MRN-074-EN
Auto Compact program
5.5.1.10.Fill and clean screen
Fill & Clean:
Automatic fill and clean function, each individual pipette on pipette belt will be filled with cleaning
solution. During prolonged use of the instrument, proteins are building up in the Westergren
pipettes which need to be removed using a strong cleaning agent.
This cycle takes about 90 minutes.
The Fill & Clean function is part of the monthly maintenance procedure.
A warning is shown on the display: <Pipette data will be lost!>.
By toggling the switch ON the Fill and clean adapter is used.
By toggling the switch OFF the Fill and clean without adapter is used.
See chapter Maintenance Fill and clean procedure (on page 93) for more information.
5.5.1.11.End-of-day-wash procedure
•
End-of-day wash:
All pipettes will be washed once and needle, fill-nozzle and rinse-nozzle (wash station) are
primed.
StaRRsed Auto Compact Instructions For Use
Version 1.07 MRN-074-EN
Page 53
Auto Compact program
5.5.2. Check sensors
When there is a sensor alarm, an alarm indicator is shown in the tab MAINTENANCE.
All functions to check the status of the sensors are grouped under button CHECK SENSORS (on page
54).
•
Check Fill stop sensor: Click the Check button. The green light is shown if the sensor value is
in range.
•
Check temperature sensor: Value must be equal to the actual room temperature near the
pipette belt.
The value can be set in tab SETTINGS.
•
Check Diluter start sensor: This sensor is only used in EDTA mode. If the diluter does not start
during the aspiration, the status of this sensor must be checked.
Click the Check button. The green light is shown if the sensor value is in range.
•
Check Diluent flow sensor: This sensor is only used in EDTA mode. When activated, the LED
Down is green and the LED Up is red. When the button Test is clicked, the LED Up must
become green. After finishing the test, both LED's must be green.
•
Check Separator sensor: Click the Check button. The green light is shown if the sensor value is
in range.
Page 54
StaRRsed Auto Compact Instructions For Use
Version 1.07 MRN-074-EN
Auto Compact program
•
Check Flow sensor: Click the Check button. The green light is shown if the sensor value is in
range.
•
Check Measure sensor: Click the Check button. The green light is shown if the sensor value is
in range.
Press the button MEASURE. The pipette currently at the measure position will be measured.
The results are displayed in graphical form:
Measure head
start position
correct
Measure head
start position
wrong
NOTE: Clean sensors first before executing this function.
NOTE: When a test pipette is installed at the measuring position the result of the test pipette is
displayed in the field "ESR (mm)".
Note: When the sensor is out of range and the light is red, the sensor values can be checked by
turning on the service mode.
StaRRsed Auto Compact Instructions For Use
Version 1.07 MRN-074-EN
Page 55
Auto Compact program
5.5.3. Display error history
When there is a sensor alarm, an alarm indicator is shown in the tab MAINTENANCE.
All errors that occurred during operation are logged automatically.
This list can be used by field engineers to check check the status of the instrument and locate
possible problems.
This log can be saved e.g. to a memory stick by clicking button Save As ...
Page 56
StaRRsed Auto Compact Instructions For Use
Version 1.07 MRN-074-EN
Auto Compact program
5.5.4. Display maintenance history
When there is a sensor alarm, an alarm indicator is shown in the tab MAINTENANCE.
All performed maintenance functions are logged automatically.
This log can be saved e.g. to a memory stick by clicking button Save As ...
StaRRsed Auto Compact Instructions For Use
Version 1.07 MRN-074-EN
Page 57
Auto Compact program
5.5.5. Maintenance info
When there is a sensor alarm, an alarm indicator is shown in the tab MAINTENANCE.
This screen is divided in 6 maintenance level sections. For maintenance levels 1 to 4, the status is
monitored and flagged if it is overdue.
Press the button Info to open the work instruction for a specific maintenance level.
When this maintenance is done press the button Done to log the completed work in the
maintenance log file.
Page 58
StaRRsed Auto Compact Instructions For Use
Version 1.07 MRN-074-EN
Auto Compact program
5.5.5.1. Maintenance info overview
When there is a sensor alarm, an alarm indicator is shown in the tab MAINTENANCE.
This screen is divided in 6 maintenance level sections. For maintenance levels 1 to 4, the status is
monitored and flagged if it is overdue.
Press the button Info to open the work instruction for a specific maintenance level.
When this maintenance is done press the button Done to log the completed work in the
maintenance log file.
5.5.6. Close
Make the selection End-of-day wash procedure or Close program:
End-of-day wash procedure will start to wash all pipettes, needle, fill-nozzle and rinse-nozzle (wash
station). The function can be set up for automatic execution in the following screen.
Close program will only close down the program.
5.5.7. End-of-day-wash options
End-of-day wash procedure:
All pipettes will be washed once, needle, fill-nozzle and rinse-nozzle (wash station) are primed.
StaRRsed Auto Compact Instructions For Use
Version 1.07 MRN-074-EN
Page 59
Auto Compact program
The following settings can be selected for the function:
•
No End-of-day wash: The function is not active.
•
Immediately: The function runs immediately after pressing the button OK.
•
Only once: The function runs only once at the selected time.
•
Weekdays: The function runs only on working days (monday till friday) at the selected time.
•
Daily: The function runs on a daily base at the selected time.
5.5.8. End-of-day-wash schedule settings
End-of-day wash procedure:
All pipettes will be washed once, needle, fill-nozzle and rinse-nozzle (wash station) are primed.
Select the time of the day in hours and minutes for automatic start of this function.
5.6. Settings screen
The SETTINGS screen is for specially trained supervisors and engineers and outside the scope of the
Instructions For Use.
5.7. Service screen
The SERVICE screen is for specially trained engineers and outside the scope of the Instruction For
Use.
Page 60
StaRRsed Auto Compact Instructions For Use
Version 1.07 MRN-074-EN
Reporting
6. REPORTING
The StaRRsed Auto-Compact is able to handle different types of protocols. The selection is made
in SERVICE - SERIAL OUTPUT SETTING.
6.1. Protocols
A protocol is a set of rules governing the communication and the transfer of data between
machines, as in a computer system. It is also a formal set of rules and procedures to be followed
during a request for information before data is transferred between machines and computer
systems.
The following protocols can be selected for data transfer to the Laboratory data processor
computer.
1. No Serial output
2. MECHATRONICS-01 bidirectional
3. MECHATRONICS-02 unidirectional
4. Sysmex SE 9000
5. Sysmex SE-9000 unidirectional
6. Sysmex R-3500
7. Sysmex R-3500 unidirectional
8. Compact bidirectional
9. Compact unidirectional (String format for StaRRsed)
10. StaRRsed III (V14)
11. Vesmatic
12. Sedimatic 15
13. Sedimatic 100
14. Opus bidirectional
15. Advia 120 bidirectional
16. Advia 120 unidirectional
The protocol can be set in tab SERVICE - Serial output settings. After selecting a protocol, save the
new settings by pressing the Save setting key.
StaRRsed Auto Compact Instructions For Use
Version 1.07 MRN-074-EN
Page 61
Reporting
6.2. Result Printout
The results of the ESR measurements are send to the printer. The layout of the report depends on
the selection of the 60- or 30 minute method.
6.2.1. Report 60-Minute mode
Colums:
1.
2.
3.
4.
Patient number.
Not corrected 30-minute ESR result (only in use if 30 minute mode is active).
Not corrected 60-minute ESR result.
60-minute ESR result in millimeters, corrected for 18°C. (only in use if temperature correction is
active).
5. Aspect (clear, hazy).
6. Manually entered code number.
7. Sedimentation pipette number (number on the pipette belt).
8. Actual sedimentation time in minutes.
9. Temperature (in degrees Centigrade).
10. Error message (if the Analyser detects an error).
11. EDTA mode.
+ REPORT EXAMPLE +(Not to scale)
-- StaRRsed-1
2
Date 20/05/14
3
4
5
Time:
6
15:28
7
8
9
10
11
905001
84 75 CLEAR
17
60
23
EDTA
905002
14 13 Hazy<10mm
18
60
23
EDTA
905003
22 21 Hazy<25mm
19
60
23
EDTA
905004
67 61 Hazy>25mm
20
60
23
EDTA
21 60
23
EDTA
22
60
23
EDTA 079
905007
24
60
23 Too many borders found
905008
25
60
23 L_err(---/ 84/ 75/200)
905005
905006
CLEAR
5
5
CLEAR
3
EDTA
905002/905003/905004
Sample results with hazy aspect
905005:
Sample result with a manual aspect, where the manual aspect is shown as a number 3 in column 6
of this data record sample.
905006:
In this sample, the dilution rate has a dilution failure of 21% and that is printed as EDTA 079.
Page 62
StaRRsed Auto Compact Instructions For Use
Version 1.07 MRN-074-EN
Reporting
905007
Sample results with a text error. This sample gives Too many borders found. Result of a pipette
possibly filled with air bubbles.
905008
Sample result with a text error. This sample is given limit error L_err(---/ 84/ 75/200)
6.2.2. Report 30 Minute mode
Columns:
1.
2.
3.
4.
Patient number.
Not corrected 30-minute ESR result (only in use if 30 minute mode is active).
Not corrected 60-minute ESR result.
60-minute ESR result in millimeters, corrected for 18°C. (only in use if temperature correction is
active).
5. Aspect (clear, hazy).
6. Manually entered code number.
7. Sedimentation pipette number (number on the pipette belt).
8. Actual sedimentation time in minutes.
9. Temperature (in degrees Centigrade).
10. Error message (if the Analyser detects an error).
11. EDTA mode.
+ REPORT EXAMPLE +(Not to scale)
- StaRRsed-1
915001
Date 20/05/14
2
3
4
5
42
84
75 CLEAR
StaRRsed Auto Compact Instructions For Use
Version 1.07 MRN-074-EN
Time:
6
15:28
7
8
9
17
30
23
10
11
EDTA
Page 63
Reporting
6.2.3. ESR Error
Error messages can be found on the printout in column 10.
If errors are found during the measurement, the Compact will give an audible alarm.
The Error message is displayed on the main screen.
6.2.3.1. ESR Error and Warning code messages
ESR "ERROR" and "WARNING" code messages
This code appears in the "sample data record" at column 10.
The following codes are defined:
0
No errors
1
No cells/plasma found
Error
No contents could be detected in the
pipette.
2
ESR Probably > 140 mm
Error
Extremely high ESR value.
3
Too many borders found
Error
More than three borders found, possibly air
bubbles. See Section Trouble shooting Air
bubbles (on page 82).
4
Column height <nnn>
Warning
Column height must be between 180 and
210mm. <nnn> = the actual column height.
5
Measure error
Warning
The down count is not equal to the up
count from the measure head.
6
Bubbles on top
Warning
Air bubbles on top of the ESR. See Section
Trouble shooting Air bubbles (on page
82).
7
Limit error
Error
One of the following limits are out of the
setting range:
• ESR Time
• Column height
• Dilution
• Bubbles on top
• Hazy aspect
• Temperature
Page 64
StaRRsed Auto Compact Instructions For Use
Version 1.07 MRN-074-EN
Reporting
6.2.4. Limit error settings
When an option (at Limit error settings) is set to YES and this limit error occurs, results will be
printed/send to the LIMS.
When an option is set to NO and this limit error occurs, the fields for 30 min ESR, 60 min ESR and
the temperature corrected ESR are filled with spaces and thus results are not printed/send to the
LIMS.
The error message in the error field (column 10) indicates that at least one of the limits (ESR time,
dilution rate, column height, bubbles on top, hazy aspects and temperature) has been exceeded.
Together with the sedimentation time and dilution rate (which are still printed at the usual position),
the operator/analyst can see what caused the error and may or may not use the ESR values which
are preserved in the error message.
Description of the error message L_err(hhh/www/ttt/ccc) :
•
L_err means it is a "limit error"
•
hhh is the 30 minutes ESR
•
www is the 60 minute ESR
•
ttt is the temperature corrected 60 minute result
•
ccc is the column height
Example of a limit error message:
•
L_err( 42/ 84/ 75/200) means 42 mm in the 30 minute method and temperature correction 75
with a correct column height.
•
L_err(---/ 84/ 75/200) means 84 mm in the 60 minute method and temperature correction 75
with a correct column height.
6.2.5. Reporting range
The reporting range in the columns 2, 3 and 4 are in millimeters. The start of the measure range is
at the top of the meniscus down to 140 mm. If the detection of cells/plasma is over 140 mm then
the report will be >140.
StaRRsed Auto Compact Instructions For Use
Version 1.07 MRN-074-EN
Page 65
Reporting
6.2.6. Aspect Hazy
The automatic reading of the Westergren sedimentation pipettes is carried out by moving an
optical sensor along the pipettes. While the sensor is moving, a reading is made every 0.25 mm.
The sensor is reading the absorption of infra red light through the Westergren pipette filled with
blood. From these readings, values at a number of absorption levels are determined. All absorption
figures are relative to the darkest and lightest reading (darkest = 100 % and the lightest = 0 %
absorption respectively).
By definition the levels are:
87.5%
Cells/ plasma separation
75.0%
Hazy detection
50.0%
Meniscus detection
Graphic showing typical absorption values of a sample
Page 66
StaRRsed Auto Compact Instructions For Use
Version 1.07 MRN-074-EN
Reporting
The 'sedimentation' value is the distance in millimeters between the cells/plasma level (87.5%
absorption) and the meniscus. If there is no haze, the absorption drops quickly to a value below the
75% level. If the distance between the 87.5% and the 75% level is less then 3mm, the report will
state 'CLEAR'. If the distance between 87.5% and 75% level is more than 3mm then the report will
state 'HAZY'.
Depending on the length of the 'hazy' area, three classes of 'haziness' are reported,
Length of
area
Hazy area
Reported
class
Hazy >25 mm
>25 mm
Hazy area
>10 mm <25 mm
Hazy <25 mm
Hazy area
>3 mm < 10 mm
Hazy <10 mm
Hazy area
< 3 mm
CLEAR <3 mm
Hazy reports are shown when the change from the hazy level to the cell/plasma separation level
occurs not within a given distance. The following code messages are reported in column 5.
6.2.6.1. Analyser "HAZY" code messages
This code appears in the "sample data record" at column 5.
The following 4 codes are defined:
0
Sample is clear.
1
Sample is Hazy < 10
2
Sample is Hazy < 25
3
Sample is Hazy > 25
Results with hazy aspect can be suppressed in the menu Limit error settings.
StaRRsed Auto Compact Instructions For Use
Version 1.07 MRN-074-EN
Page 67
Operation
7. OPERATION
7.1. Quick start-up
This section describes a quick start-up procedure and a general description of what to do before
starting a large batch of samples to run through the system.
7.1.1. Check list
Run this checklist before each large batch of samples.
1. Waste container (if applicable), should be empty.
2. Check the liquid levels.
7.1.2. Power up sequence
Switch ON procedure:
•
Switch ON the Compact.
•
Switch ON the PC and monitor.
•
Wait until "Windows" is ready for use.
•
Start the Compact software.
7.1.3. Priming the fluid system
Select MAINTENANCE -> PRIME / CLEAN (on page 51) and perform all prime sequences manually. Check
fluid flow through the applicable tubing. repeat a step if fluid flow is not correct.
1. PRIME RINSE SOLUTION, activates the Rinse pump. RINSE SOLUTION must flow through the pipette.
2. PRIME SALINE, activates the SALINE pump. Liquid must flush through the needle assembly.
3. PRIME DILUENT, activates the diluter prime cycle. Diluter system must be filled with diluent and free
of air bubbles.
•
Diluter prime cycle is executed once. In order to fully prime the system it will be necessary
to perform this step several times. (One cycle is 5 strokes of the Diluter)
4. PRIME DE-IONIZED WATER, activates the fill nozzle water valve. DE-IONIZED WATER must flow through the
tube connected to the fill nozzle cap.
5. PRIME DISINFECTANT, activates the disinfectant valve. Disinfectant must flow through the small tube
connected to the pipette wash station.
When the StaRRsed Auto-Compact has been idle for more than eight hours, some reagents may
have dropped from the tubes due to gravity. Prime all tubing before sampling with:
•
PRIME ALL UNITS
All priming functions are sequentially performed one time.
Page 68
StaRRsed Auto Compact Instructions For Use
Version 1.07 MRN-074-EN
7.2. Fill procedure
Fill the sample rack with the sample tubes. Observe that the barcodes are visible through the
opening in the rack. Place the rack in a rack adapter.
Set the Rack adapter in the rack loader with the barcodes facing the rack grabber. Select the tab
SAMPLE and press the button Sample mode.
The Rack is transported to the rack grabber, the rack grabber picks up the Rack adapter and
moves to the barcode reader position to scan the first barcode label. The rack is then mixed and
after that moved to the needle position to be aspirated.
If the barcode labels fail to read check if the barcode is facing the correct direction.
Note: BE SURE THAT THE COMPACT IS SET TO THE CORRECT MODE. i.e. EDTA or
CITRATE.
7.2.1. Liquid levels
Liquid containers and levels must be checked frequently.
If the small onboard bottles are used, wash and keep the bottles clean to avoid bacterial growth.
The StaRRsed Auto-Compact has liquid level sensors. When the level sensor alarm appears,
replace reagent as soon as possible.
7.3. Checks during operation
•
Perform regularly visual checks for air bubbles in the sample pipettes, see Air bubbles (on
page 82).
•
Check regularly the ESR statistics in the software for any increase in ESR errors, haziness,
dilution errors or bubbles on top warnings, see ESR Statistics screens (on page 31).
In case of a considerable number of pipettes with air bubbles:
•
Perform the necessary maintenance or contact the service representative.
StaRRsed Auto Compact Instructions For Use
Version 1.07 MRN-074-EN
Page 69
Operation
7.4. Turn off
It is recommended to turn the StaRRsed Auto-Compact off at the end of the day. Before the
instrument is turned off, it is good practice to carry out the Daily maintenance (on page 88) or at
least the End-of-day wash procedure. This will help to keep the instrument clean and almost free of
bacterial growth for a period of days.
W A R N I N G!!!
Always be aware of the dangers of infection, especially during maintenance. Take the appropriate
precautions.
Note: The StaRRsed Auto-Compact may remain switched ON continuously. However, the
customer should consider environmental issues such as energy consumption when the instrument
is not to be used for some time. It is also recommended to completely restart the instrument and (if
applicable) Windows once in a while to clear the memory and ensure a stable operating system.
7.4.1. End-of-day-wash procedure
Select the tab MAINTENANCE and press the button End-of-day wash. A pop-up screen is shown.
Selecting Close program will stop the program immediately without running the End-of-day wash
procedure.
When End-of-day wash procedure is selected, a selection screen for this function is shown.
The following options are available for this function:
1. Select from the list the desired option:
• No End-of-day wash!: The function is not active
•
Immediately: The function runs immediately after pressing OK.
•
Only once: The function runs only once at the selected time.
•
Weekdays: The function runs only on the working days (Mo-Fr) at the selected time.
•
Daily: The function runs on a daily base at the selected time.
2. Select the time of the day in hours and minutes for the selected option.
Pressing OK activates the settings.
7.4.2. Turn off sequence
•
Close the StaRRsed Auto-Compact software.
•
Switch the PC and monitor OFF.
•
Switch (optional) printer OFF.
•
Switch the Compact OFF.
Page 70
StaRRsed Auto Compact Instructions For Use
Version 1.07 MRN-074-EN
Quality control
8. QUALITY CONTROL
8.1. Control pipettes
The correct function of the hardware and software of the StaRRsed Auto-Compact measurement
unit should be checked at regular intervals with the aid of Mechatronics Control Pipettes (Order nr.
QTST049000). More information can be found in the Control Pipette User Manual (MRN-019).
8.2. Monitoring measurement quality with StaRRsed Control
StaRRsed Control is an in-vitro diagnostic quality control material to monitor the accuracy and
precision of Erythrocyte Sedimentation Rate (ESR) instruments and procedures. This instruction is
only applicable for StaRRsed Control, used on Mechatronics ESR StaRRsed instruments.
StaRRsed Control is available in:
- Abnormal range (Level A)
- Normal range (Level N)
The software can produce statistical data for further analysis for:
•
Defining control limits (accept or reject patient results)
•
Error detecting (systematic or random errors)
•
Evaluation of QC results
8.2.1. Limitations
StaRRsed Control is to be used for Erythrocyte Sedimentation Rate testing only and shall not be
used to control any other hematology procedure.
StaRRsed Control shall not be used as a standard.
StaRRsed Control should not be used past the expiration date.
Mechatronics as supplier of the StaRRsed Control shall not be liable for any claimed damages
arising from other than intended usage.
StaRRsed Auto Compact Instructions For Use
Version 1.07 MRN-074-EN
Page 71
Quality control
8.2.2. Expected value range
StaRRsed Control is assayed for the StaRRsed ESR analyzers.
The assayed mean values and expected ranges are derived from multiple analyses at different
sites and on multiple instruments. The values, provided on the package insert and encoded in the
tubes barcode, are specific for this lot of product. The lab should establish its own acceptable
ranges. Whenever the Controls fail to perform consistently within the acceptable ranges, patient
results should be considered invalid. Contact your StaRRsed instrument provider for assistance.
If results vary outside the specified assay ranges, discard the tube and utilize a new tube. If
difficulties persist, contact your supplier for further assistance and/or instructions.
8.2.3. Temperature correction
The assayed values are based on an 60 minutes ESR, with dilution and temperature correction.
Therefore, the measured ESR value should be compared with the expected value using
temperature correction. The calculation of a 30 minute measurement to a 60 minute ESR result
with temperature correction influences the QC result.
See chapter QC Results (on page 74) for more information.
8.2.4. Usage options
StaRRsed Control can be used in two ways:
1. With original StaRRsed barcode label:
The StaRRsed software maintains internal QC history and sends an error message when
test results are out of range.
2. With user barcode label:
The user can use his own ID labels (hereafter called "Lab ID"). Existing QC procedures and
LIMS interface settings can be maintained without any changes. The Lab ID is linked within
the StaRRsed software to the original StaRRsed Control barcode.
An external barcode reader can be used to read the 10-character QC barcode labels on the
tube or the package insert to create the link. The barcode symbology is "Code 39".
When StaRRsed Control label or a linked user barcode label is used:
•
The StaRRsed software recognises the StaRRsed Control sample by the structure of the
barcode, which contains the following information: Level A or N, the expected mean value
and range and the expiry date.
•
The history of QC results is maintained internally. Error messages are generated when the
QC results are outside the acceptable range.
•
QC samples can be optionally requested by the LIMS and QC results can be send to the
LIMS.
Page 72
StaRRsed Auto Compact Instructions For Use
Version 1.07 MRN-074-EN
Quality control
StaRRsed Control can be used on StaRRsed analysers in EDTA or in Citrate mode. Quality
Control sampling can be performed at any time during the normal ESR procedure, depending on
users Quality Control schedule.
Quality Control scheduling is the responsibility of the user. The StaRRsed software does not
provide Quality Control scheduling functionality.
8.2.5. Quality control procedure
StaRRsed Control is provided in ready-to-use sample tubes and is used in the same manner as
patient samples. StaRRsed Control is to be used for the Westergren method with dilution only as
prescribed by the "ICSH review of the measurement of the ESR" (2011) and the "CLSI Procedures
for the ESR Test; Approved standard; H02-A5" (2011).
Citrate mode: When the StaRRsed analyzer is used in the Citrate mode, the StaRRsed Control
material must be diluted manually by transferring the necessary amount of material into a precitrated ESR blood collection tube. Immediately after re-suspending, transfer the necessary
amount of material into a pre-citrated tube according instructions of the tube manufacturer. Close
the tube with the mixture and invert at least 12 times, then place the sample into the analyzer.
1. When using LAB ID: Link the Lab ID with StaRRsed Control Sample ID, see chapter Linked
QC ID's (on page 40). Attach the lab ID label on the tube on top of the original StaRRsed
Control label
2. Invert the StaRRsed Control tube until packed cells have been completely re-suspended.
Continue mixing for 30 seconds (at least 12 complete inversions).
Avoid foaming. DO NOT VORTEX.
NOTE: To ensure consistent and reproducible results, the Control material must be thoroughly
mixed and handled in the same manner each time.
3. Place StaRRsed Control tube immediately after mixing into the analyzer.
4. Start the Sample mode. The StaRRsed Control sample is processed in the same manner as a
patient sample. Depending on the settings in "QC settings", a request and/or result is send to
the LIMS.
5. Restore tube after each use (at 18°-30°C).
For detailed information see the StaRRsed Control Package Insert.
The contents of one tube of 5ml is sufficient for three Control samples. Do not mix residual material
with material from other tubes. Do not re-use empty tubes.
The software interface is described in the chapter History screen (on page 24).
StaRRsed Control should be disposed of as medical waste.
StaRRsed Auto Compact Instructions For Use
Version 1.07 MRN-074-EN
Page 73
Quality control
8.2.6. QC Results
The measured QC results are compared with the Assay mean value and the acceptable range.
The applicable values for the acceptable range depend on the user setting. See chapter "QC
Settings" for more information.
If applicable, the QC result is reported to LIMS using the chosen settings regarding temperature
correction, display of dilution rate and limit error settings.
8.2.6.1. QC Error messages
The general ESR errors and warnings are also applied on the QC results, see "ESR Error and
Warning code messages (on page 64)"
When the result is within range, no message is shown.
When the result is out of range an error message is shown in the status line of the Sample screen
and the QC icon is blinking on the Sample screen. When the sample mode is started again by the
operator, the following messages appears:
Last QC result was out of range! Continuing could produce incorrect results! Do you still
want to continue?
Press "Accept" to continue sampling without performing a new QC, press "Cancel" to return and
take appropriate action.
Messages when the general setting "Temperature Correction" is switched ON:
•
"E116: QC is out of acceptable range!"
The Sample mode is switched OFF automatically. Remaining filled pipettes are processed in
the normal manner.
Messages when the general setting "Temperature Correction" is switched OFF:
The software always calculates a temperature corrected result because only temperature corrected
results can be compared with the Assay mean value.
•
"E116: QC is out of acceptable range!"
The uncorrected and the corrected result are out of range.
•
"E117: Uncorrected QC result is out of acceptable range, but corrected result is within range!"
The uncorrected result is out of range, but the corrected result is within range.
•
"E118: Uncorrected QC result is within acceptable range, but corrected result is out of range!"
The uncorrected result is within range, but the corrected result is out of range.
See Quality control trouble shooting (on page 85) and QC Results screen (on page 32) for
more details.
Page 74
StaRRsed Auto Compact Instructions For Use
Version 1.07 MRN-074-EN
Quality control
8.2.6.2. QC Result analysis
Authorized staff should identify and differentiate acceptable/unacceptable random errors and
trends and/or shifts in systematic errors from the statistical data. Depending on the users Quality
Control Procedures analytical results could be accepted or rejected.
Changes in QC results can be gradual or abrupt. Gradual changes can be caused by
contamination and incidental environmental variations. Abrupt changes can be caused by change
of QC material batch or possible hardware errors.
If results are continuously out of range due to significant difference between calculated mean and
control value, but the statistics show precise results with small deviations, it should be considered
to expand the acceptable assay range with QC Settings.
If results are incidentally out of range it is advised to perform a daily maintenance and/or fill and
clean step and then perform another QC sample step before releasing patient results.
If results are not send to the LIMS QC Results can be exported to MS Excel CSV files for further
analysis in lab's own Quality Control data system.
StaRRsed Auto Compact Instructions For Use
Version 1.07 MRN-074-EN
Page 75
Waste disposal
9. WASTE DISPOSAL
The waste container has a level sensor and as soon as the level sensor generates a waste error,
the waste container must be emptied. The waste must be treated as potentially infectious
(biohazardous) material and disposed of according to local regulations. Preferably, discard the
complete waste container and replace it with a cleaned one. Press [ESC] to clear the error.
Disclaimer: Check your local environment rules about discharging the waste.
If the waste line is to be connected to a centralised waste collection system, the following
requirements must be met:
1. Waste tube must not exceed 5 meters or 18 feet in length.
2. Drain height must not be higher than the original waste container inside the instrument.
Disclaimer: Check the specifications of the central waste system for rules about discharging the waste.
9.1. Replacing the waste container
1.
2.
3.
4.
Lift the left cover and pull the waste container forwards.
Unscrew the cap.
Place the new waste container and tighten the screw cap.
Lift the left cover and place the waste container back into the Compact.
Note: If you are re-cycling waste containers, make sure that they are bleached and rinsed
thoroughly.
Page 76
StaRRsed Auto Compact Instructions For Use
Version 1.07 MRN-074-EN
Data safety management
10. DATA SAFETY MANAGEMENT
The StaRRsed Auto-Compact has its own external PC. This means that all collected data is stored
on the hard-disk of the external computer.
This means that all raw data and results are kept, irrespective of a power failure or if the instrument
is un-intentionally turned off. After the start-up procedure the software checks whether there are
any ESR's still outstanding. If so, these will be carried out first. After a power failure the
sedimentation time (60 or 30 min.) may be exceeded. However, the start time is saved and
therefore the actual sedimentation time can be checked.
Important system settings are kept in an internal Flash Eprom inside the instrument.
In case of corrupted files, the program will automatically load and use the backup files.
10.1. Power failure
If a power failure occurs it is recommended that the StaRRsed Auto-Compact is switched OFF by
the power switch. When the power returns, the instrument can be switched ON. After the standard
start-up process the StaRRsed Auto-Compact will continue to process the remaining samples.
StaRRsed Auto Compact Instructions For Use
Version 1.07 MRN-074-EN
Page 77
Trouble shooting
11. TROUBLE SHOOTING
Occasionally small faults may cause major problems. This chapter may help to solve the most
common faults and explain why a specific problem occurs.
A lot of the problems or errors are due to a lack of maintenance. Remember that this instrument
operates with a considerable amount of whole blood, virtually undiluted, stores it in a pipette for
one hour and then cleans pipettes for re-use. Therefore, it is important to keep to the maintenance
schedules. It is recommended that trained service personnel checks and applies service to the
instrument at least once a year. Errors which are not explained in this section can usually not be
solved by the operator. Refer to the Service manual for more information (available only in
English).
The error numbers are displayed in the PC software.
11.1. General error procedure
Whenever an error occurs, follow the instructions given in the error message on screen. If no
instructions are given, follow this general procedure:
1.
2.
3.
4.
5.
6.
Clear the error by pressing button CLEAR ERROR.
When the error is not cleared or the error occurs again:
Close the StaRRsed Auto-Compact PC software.
Switch the Compact OFF.
Switch the Compact ON.
Start the StaRRsed Auto-Compact PC software.
When the error occurs again, switch OFF all units and call for service.
11.2. Flushing liquids
After each sample aspiration the entire system is washed automatically.
If there is no liquid flow:
•
Check that the peristaltic pumps are running. If the pump tubes are worn or leaking, replace the
tubes.
•
Check that the pump tubes are installed correctly.
•
Check the tubes between the containers and pumps/valves.
•
Unscrew the cap from the container. Check the pick-up tubes in the container and that there is
enough liquid in the container.
•
Check the tubes for blockages or kinks.
Page 78
StaRRsed Auto Compact Instructions For Use
Version 1.07 MRN-074-EN
Trouble shooting
11.3. Reagents
Check the expire dates of the reagents regularly. Do not use the reagents if expired.
Note: If expired reagent has been used accidentally, the results obtained with these reagents may
only be used, when the expire date was not exceeded more than 30 days.
DILUENT is sensitive for bacterial growth. The solution should be discarded if it becomes turbid or
infected. When using the small onboard containers, clean the DILUENT container thoroughly with
10% Na-hypochlorite. Make sure that the container has been thoroughly rinsed after cleaning.
11.3.1. Reagents alarm
The software checks the bottle status before starting a new rack. If a level alarm is ON, it will not
process the new rack. If an alarm comes ON during a rack, it will finish to aspirate that rack (10
samples max.). Washing dirty pipettes always continues, as to avoid that the samples are left in
the pipettes.
Reagents alarm is also set when the expire date of the reagent is exceeded or opened more than
three months. The message Not allowed now! See REAGENTS! appears. Processing of new samples
is stopped.
11.4. Separator error
If it takes too long for the waste pump to empty the liquid separator, the system generates a
separator error.
Separator error may be caused by:
Extensive foam build-up in the liquid
separator.
Check the separator assembly and connections for
possible air leaks.
Waste-tube between liquid separator and Replace the tube.
waste pump is blocked.
Waste-tube between waste pump and
waste container blocked.
Replace the tube.
Waste pump failure.
Exchange the waste pump cassette. If the error
returns, call for service.
Electrical bridge between the waste-level Clean liquid separator, see WI-196 Cleaning liquid
electrodes.
separator (on page 112)
StaRRsed Auto Compact Instructions For Use
Version 1.07 MRN-074-EN
Page 79
Trouble shooting
11.5. Fill time-out error
Normally the fill sequence takes about 3 seconds. However, if the fill sequence exceeds 10
seconds, a fill time-out error will be generated. The Compact aborts the fill sequence and this error
message will be shown on the display and reported to the printer.
Fill time-out error may be caused by:
1. Blood clots or rubber debris from the tube cap in the sample.
• Check the condition of the outer needle.
•
Check the mixing time of the tube SETTINGS - GENERAL SETTINGS - MIXING INTERVAL <default 90 sec>
2. Filling procedure stopped by operator.
3. Insufficient sample volume.
• Should be at least 1.4 ml.
4. Faulty fill nozzle or fill nozzle washer/O-ring.
• Check fill nozzle and washer/O-ring.
5. Incorrectly adjusted sample probe depth.
• Check needle depth SETTINGS - GENERAL SETTINGS - SAMPLE PROBE DEPTH <default 5 mm>
6. No or poor vacuum.
• Check vacuum MAINTENANCE - CHECK SENSORS - CHECK FLOW SENSOR
Page 80
StaRRsed Auto Compact Instructions For Use
Version 1.07 MRN-074-EN
Trouble shooting
11.6. Hazy reports
"Hazy" reports are usually caused by build-up of proteins on the inner wall of the pipettes. Another
cause is growth of micro organisms in the diluter system. It is extremely important that the system
is kept sterile.
First run an extra Fill & Clean sequence, then check after a day's run if haziness is decreased.
When there are still many reports, it is recommended to fill the diluter system with a 5% chlorine
solution. See WI-178 Hazy problem (on page 109).
A picture example of haziness
11.7. Leaking pipettes
1. Check for particles like specks of dirt or hairs in the
pipette valve.
2. If no particles are found, replace the valve tube and
valve body.
StaRRsed Auto Compact Instructions For Use
Version 1.07 MRN-074-EN
Page 81
Trouble shooting
11.8. Liquid level sensor not sensing
1. Liquid in the container is not detected. This occurs sometimes with the DE-IONIZED WATER bottle
and is caused by a very low conductivity.
2. Add one or two drops of SALINE to the DE-IONIZED WATER to increase the conductivity.
11.9. Air bubbles
After a normal aspiration, the Westergren pipette must be free of air bubbles. In the following
examples different patterns of air bubbles which can appear in the pipettes are shown. Air bubbles
can affect the sedimentation and are mostly reported as errors and no ESR result is reported.
Usually bubbles are caused by a leakage at the bottom of the pipette. If air bubbles are visible in
the pipette, check the following :
11.9.1. Pipette looks like zebra crossing
If this always occurs in the same pipette, check the bottom of the pipette for
the following:
1. Glass may be chipped.
•
Replace pipette.
2. Dirt, e.g. dried blood.
• Clean the pipette.
•
Check disinfectant flow at the rinse nozzle.
3. Perpendicularity and straightness of the bottom face.
• Replace pipette.
If this happens randomly or with each pipette, check the following:
1. Fill nozzle O-ring or flat washer.
2. Fill nozzle alignment to pipette.
• Check the nozzle arm is tight on the rear vertical shaft. Usually
engineer’s assistance is required.
A pipette which looks like zebra crossing gives ESR Error 3.
Page 82
StaRRsed Auto Compact Instructions For Use
Version 1.07 MRN-074-EN
Trouble shooting
11.9.2. Foam in column
A layer of air bubbles that is concentrated on top of the blood column
does not affect the sedimentation process itself. The sedimentation
develops normally below the bubbles. However, too many bubbles
bring about a shortening of the effective blood column, which is a
deviation from the Westergren method.
A layer of bubbles up to 5 mm: No message. Normal ESR result is
reported.
A layer of bubbles from 5 to 25 mm: ESR warning 6: "Bubbles on top".
Results should be reviewed before release.
A layer of bubbles larger than 25 mm: ESR Error 3: "Too many
borders found". No ESR result is given.
1. Check that tube connections are not leaking.
2. Check the fill nozzle condition:
•
Inspect for any cracks or deep scratches in the base that holds
the fill nozzle washer or O-ring.
3. Check for air in diluter system.
4. Check that the sample probe O-ring is not leaking.
5. Check transparent T- piece or Y-piece block for cracks.
11.9.3. One air bubble about 5 mm under meniscus
The filling (aspiration) speed is not critical but should be within certain limits.
1. If just one air bubble is found about 5mm below the meniscus, the filling
speed may be too high.
2. The blood column should not exceed the filling height sensor by more
than 10mm.
One air bubble can result in ESR Error 3.
StaRRsed Auto Compact Instructions For Use
Version 1.07 MRN-074-EN
Page 83
Trouble shooting
11.9.4. One air bubble rising in pipette
1. Usually this is caused by a wet or dirty fill nozzle.
•
The blood column should not reach right to the base of the pipette.
There must be a clear air gap of 4...5mm at the bottom of each
pipette.
2. Insufficient sample volume.
•
Need more blood in the sample tube.
One air bubble rising can result in ESR Error code 3.
11.9.5. Small air bubbles rising in pipette
Usually this is caused by a dirty or damaged fill nozzle.
•
Observe the maintenance schedules.
•
Clean the fill nozzle.
•
Check the fill nozzle for damage. If necessary, replace the fill
nozzle.
Sample tube is leaking on the fill nozzle side.
•
Replace the silicon sample tube
Small air bubbles result in ESR Error 3.
11.9.6. Random air bubbles in pipette
1. Check Diluent flow by priming the diluter system.
2. Insufficient sample volume.
Random air bubbles result in ESR Error 3.
Page 84
StaRRsed Auto Compact Instructions For Use
Version 1.07 MRN-074-EN
Trouble shooting
11.10.
Quality control trouble shooting
Error messages
Extra information
E115: QC expired, not
sampled!
The used StaRRsed Control is
out of date, no ESR result is
given
E116: QC is out of acceptable
range!
Action
•
Check expire date
•
Use a new batch of
StaRRsed Control
•
Result is out of range, the
applicable values for the
acceptable range depend on the
user setting. E116 is shown in
•
the status line of the Sample
screen and the QC icon is
blinking on the Sample screen.
ESR Result is given.
E117: Uncorrected QC result is ESR Result is given.
out of acceptable range, but
corrected result is within range! Temperature correction not
activated.
E118: Uncorrected QC result is ESR Result is given.
within acceptable range, but
corrected result is out of range! Temperature correction not
activated.
QC result with ESR error
no ESR Result is given
StaRRsed Auto Compact Instructions For Use
Version 1.07 MRN-074-EN
Try new QC sample tube
(normal samples will be
finished)
Check acceptable range in
QC settings. If results are
continuously out of range but
the statistics show
identical/stable results, it
should be considered to
expand the acceptable
assay range with QC
Settings
•
If this error persists
check/clean instrument
•
Consider QC Sample as
correct. The mean value is
assayed with temperature
correction
•
Check temperature
correction setting.
•
Consider QC Sample as not
correct
•
Try new QC sample tube
(normal samples will be
finished)
•
Check acceptable range in
QC settings
•
If this error persists
check/clean instrument
•
Check temperature
correction setting.
•
Check general ESR data,
see ESR Error (on page 64)
•
Check sample tube volume
•
Try new QC sample tube
Page 85
Trouble shooting
QC result with ESR warning
ESR Result is given
Screen messages
Extra information
QC icon is blinking at Sample
screen
The last QC sample was not
within acceptable range or has
no result
•
Check general ESR data,
general ESR Warnings (on
page 64)
•
Check limit settings
Action
QC result out of range!
QC sample expired!
It is not possible to link this Lab The "Linked QC ID's" table may
ID. Lab ID is already linked!
only contain one link to a
particular Lab ID.
Last QC result was out of
Result of last QC sample was
range! Continuing could
not within acceptable range.
produce incorrect results! Do
you still want to continue?
•
Press on QC icon
•
Press "Accept" to
continue sampling
without performing a new
QC, continuing could
produce incorrect results.
•
Press "Cancel" to return.
Try new QC sample tube
(normal samples will be
finished)
•
Perform a new QC sample,
normal samples will be
finished
•
If this error persists
check/clean instrument
•
Use a new batch of Starrsed
Control
•
Consider changing
AUTOMATICALLY REMOVE LINKED QC
ID AFTER RESULT option to YES
•
The last QC result should be
evaluated by authorized staff
to decide whether the
StaRRsed Auto-Compact
may run patient samples
depending on the the nature
of errors
•
Press "Yes" to continue
sampling without performing
a new QC, press "No" to
return and take appropriate
action.
General errors
Extra information
Action
Barcode is not accepted
Barcode cannot be read
•
Check barcode
Data is incorrect
Page 86
StaRRsed Auto Compact Instructions For Use
Version 1.07 MRN-074-EN
Trouble shooting
QC sample is not accepted and StaRRsed Control ID is not
not performed
known in LIMS.
QC result is not visible in QC
History
A specific QC result cannot be
found in the list of results.
Deviating results
Extra information
Systematic QC errors with a
shift in control values (QC
results are out of range)
The measured control values
change abruptly up- or
downwards.
Do not compare 30 minute
method with 60 minute method
result. The calculation method
can give some deviation in the
general QC results statistics.
Systematic QC errors with a
trend in control values (QC
results out of the range or
nearly out of the range)
The measured control values
change gradually upwards or
downwards.
•
Check barcode
•
Check Lab-ID link
Action
•
Check/clean instrument and
perform a new QC sample
•
If these errors persist
perform maintenance step
•
Compare only results from
one batch.
•
If Lab ID is used check the
linked StaRRsed Control ID.
It is possible that a new
batch is in use without
changing to the new
assayed mean value
•
Irregular or insufficient
maintenance can cause
unnecessary QC errors and
ESR errors/warnings
Note on QC Errors
Error messages are only shown and stored in QC results and not send to LIMS.
QC result is given with the same general errors and warnings as a normal patient ESR-result
StaRRsed Auto Compact Instructions For Use
Version 1.07 MRN-074-EN
Page 87
Maintenance
12. MAINTENANCE
The StaRRsed Auto-Compact is an analyzer that operates with considerable amounts of whole
blood virtually undiluted, and stores it in a pipette for one hour. For this reason instrument
maintenance is of the utmost importance.
To maintain the maximum reliability of the instrument, the maintenance procedures must be strictly
followed. All procedures are based on a number of samples.
Maintenance levels
(WI) Work instruction
Daily
WI-187 Daily maintenance (on page 98)
Weekly
WI-191 Weekly maintenance (on page 99)
Level 4 Maintenance
WI-193 level 4 maintenance (on page 102)
Every 3500 samples
Level 3 Maintenance
WI-194 Level 3 maintenance Every 10000
samples
WARNING!!!
Always be aware of the danger of infection, especially during maintenance. Take appropriate precautions.
There is blood involved and therefore a BIO HAZARD
12.1. Daily
The purpose of the daily maintenance is to keep the instrument clean and contamination as low as
possible.
Clean all parts that are exposed to blood, wipe the outer surface and the stainless steel plate
below the pipette belt. See WI Daily maintenance (on page 98).
Page 88
StaRRsed Auto Compact Instructions For Use
Version 1.07 MRN-074-EN
Maintenance
12.1.1. Check or replace sample probe or outer needle
A faulty or broken needle can cause a fill time-out error or a dilution error.
Inspect sample needle condition each day, clean if necessary.
If necessary replace the sample probe or outer needle.
Remove the top cover from the
Rack unit.
1. Unfasten the screw which
prevent the outer needle to drop
out of the assembly.
2. Undo the sample probe.
3. Pull the outer needle complete
with sample probe together out
the needle assembly.
4. Mark each tube for easier
reconnecting to the correct
nipple.
5. Disconnect the tubes from the
outer needle.
Needle exchange:
1.
2.
3.
4.
5.
6.
Install (new) sample probe ESRI050909 together with a new outer needle VERA059009
Slide the new sample probe into the (new) outer needle.
Make sure the Sample probe has a (new) O-ring QWLV050003.
Install (new) sample probe ESRI050909 together with the (new) outer needle
Put the sample probe in the outer needle.
Replace the needles onto the needle assembly.
StaRRsed Auto Compact Instructions For Use
Version 1.07 MRN-074-EN
Page 89
Maintenance
7. Tighten the sample probe. Do not over-tighten the sample probe in the T-piece / Y-piece or it
will crack or strip the threading inside the block.
8. Replace the correct tubes on the outer needle.
9. Fasten the outer needle bolt.(Do not over-tighten the screw)
10. Replace the cover on the Rack unit.
12.2. Weekly
The purpose of the weekly maintenance is to carry out the daily maintenance and additionally
check the optical sensor of the measure head and the vacuum pressure.
Detailed instructions of this procedure can be found in the Work Instruction Weekly maintenance.
(on page 99)
12.2.1. Check the sensors in service mode
Vacuum pressure check
•
Go to tab MAINTENANCE -> CHECK SENSOR. Select CHECK FLOW SENSOR box.
Flow: 0925-0980-1020 Abs: 0300-360-0390
Offset: 0045-0050-0055
If the flow is not in range there might be a blockage in the vacuum flow line to the flow sensor.
Fill Stop sensor check
•
Go to tab MAINTENANCE -> CHECK SENSOR. Select CHECK FILL STOP SENSOR box.
Fill stop sensor FS 90..140..165
Diluter Start sensor check
•
Go to tab MAINTENANCE -> CHECK SENSOR. Select DILUTER START SENSOR box.
Diluter start sensor
400-700
Measure sensor check
•
Go to tab MAINTENANCE -> CHECK SENSOR. Select CHECK MEASURE SENSOR box.
Measure sensor
MS 40..50..60
Temperature sensor check
•
Go to tab MAINTENANCE -> CHECK SENSOR. Select CHECK TEMPERATURE SENSOR box.
Temperature sensor
TS [Room temperature]
Diluent flow sensor check
•
Go to tab MAINTENANCE -> CHECK SENSOR. Select CHECK DILUENT FLOW SENSOR box.
Press test. When test is finished, signal Down and signal Up must be green.
Separator check
•
Go to tab MAINTENANCE -> CHECK SENSOR. Select CHECK SEPARATOR SENSOR box.
Separator sensor <200 600 >700
Page 90
StaRRsed Auto Compact Instructions For Use
Version 1.07 MRN-074-EN
Maintenance
12.2.2. Cleaning liquid separator
The separator is designed to separate liquid from the air and can handle a lot of blood, rinse and
other used reagents from the instrument. After a period of time the separator is getting dirty and
therefore it needs to be cleaned weekly.
Detailed instructions of this procedure can be found in the Work Instruction WI-196 Cleaning
liquid separator (on page 112).
Symptoms of a dirty separator:
1. Separator errors.
2. Foam in the separator.
3. Waste pump cannot sufficiently remove the waste from of the separator.
12.3. Level 4 maintenance
The purpose of level 4 maintenance is to carry out the daily / weekly maintenance and replace the
pump tubing, bacterial filters and the Fill nozzle O-ring. After replacing those items, the instrument
needs a Fill and Clean sequence to clean the pipettes. Over a monthly period protein builds up in
the Westergren pipettes and needs to be deproteinized using a strong cleaning agent.
Detailed instructions of this procedure can be found in the Work Instruction WI-193 level 4
maintenance (on page 102).
12.3.1. Rinse-pump tube replacement
New rinse pump tube assembly ESRI090902.
New tube replacement:
1. Open left cover.
2. Pull pump tube slightly downwards and at the same time towards the front of the unit to release
the tube out of the pump plate holder.
3. Remove the old tube from the peristaltic pump rotor.
4. Disconnect the tubing at both ends of the tube connectors.
5. Connect new tubing to both ends of the connectors.
6. Place one end of the tube in the pump plate holder.
7. Pull the new tube over the peristaltic pump rotor.
StaRRsed Auto Compact Instructions For Use
Version 1.07 MRN-074-EN
Page 91
Maintenance
8. Pull pump tube slightly downwards and at the same time towards the back of the StaRRsed
Auto-Compact.
If the tube is not fitted correctly or is worn the following symptoms can occur.
•
Liquid flowing back into the container.
•
First glass tube on the pipette belt is not washed sufficiently.
Note: The wider bore tube is for the rinse pump.
12.3.2. Saline-pump tube replacement
New saline pump tube assembly ESRI090903
New tube replacement:
1. Open left cover.
2. Pull pump tube slightly downwards and at the same time towards the front of the unit to release
the tube out of the pump plate holder.
3. Remove the old tube from the peristaltic pump rotor.
4. Disconnect the tubing at both ends of the tube connectors.
5. Connect new tubing to both ends of the connectors.
6. Place one end of the tube in the pump plate holder.
7. Pull the new tube over the peristaltic pump rotor.
8. Pull pump tube slightly downwards and at the same time towards the back of the StaRRsed
Auto-Compact.
If the tube is not fitted correctly or is worn the following symptoms can occur.
•
Liquid flowing back into the container.
•
Sample needle is not washed sufficiently.
Note: The narrower bore tube is for the saline pump.
Page 92
StaRRsed Auto Compact Instructions For Use
Version 1.07 MRN-074-EN
Maintenance
12.3.3. Replace bacterial filters
Detailed instructions of this procedure can be found in WI-196 Cleaning liquid separator (on
page 112).
As part of the Cleaning liquid separator procedure the bacterial Hepa filter QWLV040002 is
replaced with a new one.
Exchange bacterial filter QWLV040001 on the waste bottle assembly.
12.3.4. Fill-nozzle O-ring replacement
As the fill nozzle O-ring (QWLV050004) ages, it looses its flexibility and air-bubbles may occur in
the Westergren pipettes, the washer needs to be replaced.
Symptoms for a bad fill-nozzle O-ring
After the aspiration, the Westergren pipette has a zebra pattern (air- blood- air -blood, nicely
divided in the column.)
Vacuum stabilisation errors may occur.
12.3.5. Fill and clean procedure
Note: Each pipette on the pipette belt will be filled with cleaning agent, after one hour the first
pipette is washed and dried. Fill and clean takes about 1 ½ hours to complete.
Fill and clean with adapter:
Cleaning agent preparation Auto Compact: Fill and clean:
This cycle takes about 90 minutes.
1. Fill the clean adapter VERA119002 with
hot de-ionized water till the first mark in
the adapter. (180 ml).
2. Add cleaning agent (QRR 010905) till the
second marker in the adapter. (18 ml).
3. Place the two caps on the adapter and
mix well.
4. Put the adapter in the Input-pool.
5. Select MAINTENANCE - PRIME/CLEAN, button FILL
AND CLEAN.
StaRRsed Auto Compact Instructions For Use
Version 1.07 MRN-074-EN
Page 93
Maintenance
Start Fill and clean procedure:
1.
2.
3.
4.
Select button OK.
The adapter will be transported to the needle position.
The needle goes down and the fill and clean process is started.
When all the pipettes are filled, the needle goes back to the home position and the
adapter is moved to the release position and will be transported into the End-pool.
Fill and clean without adapter:
Page 94
StaRRsed Auto Compact Instructions For Use
Version 1.07 MRN-074-EN
Maintenance
1.
2.
3.
4.
5.
6.
7.
8.
9.
The gripper moves to the needle position.
The needle comes down.
Fill a container with 150 ml hot de-ionized water.
Add 15 ml cleaning agent. (QRR 010905)
Stir the prepared solution.
Put the container close to the needle location.
Push the silicon tube over the sample probe.
Press CONTINUE.
The fill and clean process is started.
See also WI-178 Hazy problems (on page 109) and WI-195 Cleaning the diluent system
(Cleaning with Chlorine).
12.4. Reagents replacement
The StaRRsed Auto-Compact can be used with the small onboard reagent containers or with the
genuine Mechatronics bulk reagent containers if long level sensors are available.
After each reagents change, the fluid system must be primed:
1. Select MAINTENANCE -> PRIME / CLEAN (on page 51).
2. Perform the applicable prime step to fill the relevant tubes with reagent and remove air.
For AutoCompact LS:
To replace the bulk reagent containers:
1.
2.
3.
4.
Remove level sensors and spacers from the empty container.
Remove empty container.
Place new container.
Remove the container screw caps and pull the necks of the bottle packs out of the cardboard
box.
StaRRsed Auto Compact Instructions For Use
Version 1.07 MRN-074-EN
Page 95
Maintenance
5. Install the level sensors and spacers according the following pictures.
Make sure to place the appropriate level sensors in the containers by matching the color codes
on the tube and on the container:
The sensors and the reagents have the following numbers and color codes:
Connector
number
Color code
RINSE SOLUTION
Number 34
Green
SALINE
Number 35
Yellow
DILUENT
Number 36
Grey
DE-IONIZED WATER
Number 37
Blue
DISINFECTANT
Number 38
White
Reagent
NOTE: Wrongly placed pickup tubes may cause incorrect results or instrument malfunction.
After each reagents change, the fluid system must be primed:
1. Select MAINTENANCE -> PRIME / CLEAN (on page 51).
2. Perform the applicable prime step to fill the relevant tubes with reagent and remove air.
Page 96
StaRRsed Auto Compact Instructions For Use
Version 1.07 MRN-074-EN
Work instruction StaRRsed Auto-Compact
13. WORK INSTRUCTION STARRSED AUTO-COMPACT
Work instruction section
StaRRsed Auto Compact Instructions For Use
Version 1.07 MRN-074-EN
Page 97
Work instruction StaRRsed Auto-Compact
Work instruction Number 187
Page 1 of 1
Purpose: Daily maintenance
Safety: Bio Hazard area
Instrument: Compact
Revision: 001, March 2014
Prepare disinfectant: (if not already prepared).
Add 10 ml bleach (sodium hypochlorite) to 190 ml de-ionized water. (5% solution)
This disinfectant is for cleaning of all external parts that are exposed to blood.
1. Go to tab [MAINTENANCE] and perform the [End-of-day wash] procedure. (when Fill & Clean is
used, End-of-day wash is not required)
2. Check system for leakage.
• Inspect the peristaltic pump tubes and connections for leaks.
•
Check that liquid does not run back into the supply bottles after the pumps have stopped.
3. Clean and inspect the sample needle.
• Inspect sample needle condition.
If necessary replace the sample probe or outer needle. See Work Instruction Sample probe
or outer needle replacement.
•
Clean the outer needle with disinfectant.
4. Check tubing from the syringe for trapped air bubbles.
5. Check Diluent syringe for trapped air bubbles.
6. If trapped air bubbles are found, go to tab [MAINTENANCE], click button [PRIME / CLEAN (ON PAGE 51)]
and perform the [PRIME DILUENT] function.
7. Wipe outer surface and stainless steel plate below the pipettes with disinfectant.
Page 98
StaRRsed Auto Compact Instructions For Use
Version 1.07 MRN-074-EN
Work instruction StaRRsed Auto-Compact
Work instruction Number 191
Page 1 of 3
Purpose:Weekly maintenance
Safety: Bio Hazard area
Instrument: Compact
Revision: 001, March 2014
Prepare disinfectant: (if not already prepared).
Add 10 ml bleach (sodium hypochlorite) to 190 ml de-ionized water. (5% solution)
This disinfectant is for cleaning of all external parts that are exposed to blood.
1. Clean Fill nozzle
Disassemble the fill-nozzle:
Assemble fill-nozzle:
1. Turn the holder to the right.
2. The fill-nozzle can now be removed.
3. Disconnect the silicon tube from the fill nozzle.
1. Connect the silicon tube to the fill
nozzle.
2. Put the fill nozzle into the holder.
3. Push the fill nozzle upwards and
turn the holder to the left.
The use of a toothbrush and detergent is
recommended.
1. Carefully scrub the fill nozzle inner part.
2. Use a tissue to dry the fill nozzle.
StaRRsed Auto Compact Instructions For Use
Version 1.07 MRN-074-EN
Page 99
Work instruction StaRRsed Auto-Compact
2. Clean Liquid separator
Removing
1. Open the left cover and remove the waste container. The
liquid separator is now visible.
2. Lift the stainless steel vacuum tube with use of the lever.
3. Pull the liquid separator towards the front of the Compact.
(Note: The separator has two sensor connectors at the
rear)
4. Disconnect the silicon tube from the tube connection on
the top section.
5. Remove bacterial HEPA filter.
6. Remove and disassemble the liquid separator.
Cleaning
1. Clean all parts with hot water and a brush.
2. Use some acid free vaseline on the screw-thread of the
glass jar.
3. Assemble the separator.
Replacing
1. Replace the top section.
A little silicon grease on the rim of separator will make the
assembling and adjustment easier.
2. If applicable replace the bacterial HEPA filter
(For Maintenance Level 4: Exchange bacterial HEPA filter
QWLV040002)
3. Re-connect the silicon tube to the tube connector on the
top section.
4. Lift left cover.
5. Lift stainless steel vacuum tube up.
6. Insert the liquid separator sliding it over the support shelf.
7. Push the liquid separator towards the rear, with the sensor
connectors in the holes.
8. Release the stainless steel vacuum tube.
9. Replace the waste container.
10. Close left cover.
3. Check sensors
Vacuum pressure check
•
Go to tab MAINTENANCE -> CHECK SENSOR. Select CHECK FLOW SENSOR box.
Flow: 0925-0980-1020 Abs: 0300-360-0390
Offset: 0045-0050-0055
If the flow is not in range there might be a blockage in the vacuum flow line to the flow sensor.
Fill Stop sensor check
Page 100
StaRRsed Auto Compact Instructions For Use
Version 1.07 MRN-074-EN
Work instruction StaRRsed Auto-Compact
•
Go to tab MAINTENANCE -> CHECK SENSOR. Select CHECK FILL STOP SENSOR box.
Fill stop sensor FS 90..140..165
Diluter Start sensor check
•
Go to tab MAINTENANCE -> CHECK SENSOR. Select DILUTER START SENSOR box.
Diluter start sensor
400-700
Measure sensor check
•
Go to tab MAINTENANCE -> CHECK SENSOR. Select CHECK MEASURE SENSOR box.
Measure sensor
MS 40..50..60
Temperature sensor check
•
Go to tab MAINTENANCE -> CHECK SENSOR. Select CHECK TEMPERATURE SENSOR box.
Temperature sensor
TS [Room temperature]
Diluent flow sensor check
•
Go to tab MAINTENANCE -> CHECK SENSOR. Select CHECK DILUENT FLOW SENSOR box.
Press test. When test is finished, signal Down and signal Up must be green.
Separator check
•
Go to tab MAINTENANCE -> CHECK SENSOR. Select CHECK SEPARATOR SENSOR box.
Separator sensor <200 600 >700
4. Final preparation
1. Go to tab [MAINTENANCE] and perform the [End-of-day wash] procedure. (when Fill & Clean is
used, End-of-day wash is not required)
2. Check system for leakage.
• Inspect the peristaltic pump tubes and connections for leaks.
•
Check that liquid does not run back into the supply bottles after the pumps have stopped.
3. Clean and inspect the sample needle.
• Inspect sample needle condition.
If necessary replace the sample probe or outer needle. See Work Instruction Sample probe
or outer needle replacement.
•
Clean the outer needle with disinfectant.
4. Check tubing from the syringe for trapped air bubbles.
5. Check Diluent syringe for trapped air bubbles.
6. If trapped air bubbles are found, go to tab [MAINTENANCE], click button [PRIME / CLEAN (ON PAGE 51)]
and perform the [PRIME DILUENT] function.
7. Wipe outer surface and stainless steel plate below the pipettes with disinfectant.
StaRRsed Auto Compact Instructions For Use
Version 1.07 MRN-074-EN
Page 101
Work instruction StaRRsed Auto-Compact
Work instruction Number 193
Page 1 of 5
Purpose: Maintenance level 4
Safety: Bio Hazard area
Instrument: Auto Compact
Revision: 002, March 2014
1. Clean Fill nozzle and exchange O-ring Fill Nozzle
Disassemble the fill-nozzle:
Disassemble fill nozzle holder:
1. Turn the holder to the right.
1. Turn the holder to the right.
2. The fill-nozzle can now be removed.
2. The holder can now be removed
3. Disconnect the silicon tube from the fill
nozzle.
The use of a toothbrush and detergent is
recommended.
1. Carefully scrub the fill nozzle inner
part.
2. Use a tissue to dry the fill nozzle.
Replace O-ring:
Remove the O-ring. (QWLV050004)
Page 102
Install new O-ring. (QWLV050004)
StaRRsed Auto Compact Instructions For Use
Version 1.07 MRN-074-EN
Work instruction StaRRsed Auto-Compact
Assemble fill nozzle holder:
Assemble fill-nozzle:
Push the plastic top part down against the
spring pressure.
1. Connect the silicon tube to the fill
nozzle.
2. Put the fill nozzle into the holder.
3. Push the fill nozzle upwards and turn
the holder to the left.
1. Turn the plastic top part until you hear
of feel a click
2. Turn the plastic top part clokwise for
1.5 turns.
2. Clean Liquid Separator and exchange filters
Removing
1. Open the left cover and remove the waste container. The
liquid separator is now visible.
2. Lift the stainless steel vacuum tube with use of the lever.
3. Pull the liquid separator towards the front of the Compact.
(Note: The separator has two sensor connectors at the
rear)
4. Disconnect the silicon tube from the tube connection on
the top section.
5. Remove bacterial HEPA filter.
6. Remove and disassemble the liquid separator.
Cleaning
1. Clean all parts with hot water and a brush.
2. Use some acid free vaseline on the screw-thread of the
glass jar.
3. Assemble the separator.
StaRRsed Auto Compact Instructions For Use
Version 1.07 MRN-074-EN
Page 103
Work instruction StaRRsed Auto-Compact
Replacing
1. Replace the top section.
A little silicon grease on the rim of separator will make the
assembling and adjustment easier.
2. If applicable replace the bacterial HEPA filter
(For Maintenance Level 4: Exchange bacterial HEPA filter
QWLV040002)
3. Re-connect the silicon tube to the tube connector on the
top section.
4. Lift left cover.
5. Lift stainless steel vacuum tube up.
6. Insert the liquid separator sliding it over the support shelf.
7. Push the liquid separator towards the rear, with the sensor
connectors in the holes.
8. Release the stainless steel vacuum tube.
9. Replace the waste container.
10. Close left cover.
On waste bottle (If used):
Exchange bacterial filter QWLV040001 on the waste bottle assembly.
3. Exchange Rinse and Saline tube assembly
New rinse pump tube assembly
ESRI090902.
New saline pump tube assembly
ESRI090903
New tube replacement:
1. Open left cover.
2. Pull pump tube slightly downwards and at the same time towards the front of the unit to release
the tube out of the pump plate holder.
3. Remove the old tube from the peristaltic pump rotor.
4. Disconnect the tubing at both ends of the tube connectors.
Page 104
StaRRsed Auto Compact Instructions For Use
Version 1.07 MRN-074-EN
Work instruction StaRRsed Auto-Compact
5.
6.
7.
8.
Connect new tubing to both ends of the connectors.
Place one end of the tube in the pump plate holder.
Pull the new tube over the peristaltic pump rotor.
Pull pump tube slightly downwards and at the same time towards the back of the StaRRsed
Auto-Compact.
4. Fill and clean
Cleaning agent preparation Auto Compact: Fill and clean:
This cycle takes about 90 minutes.
1. Fill the clean adapter VERA119002 with
hot de-ionized water till the first mark in
the adapter. (180 ml).
2. Add cleaning agent (QRR 010905) till the
second marker in the adapter. (18 ml).
3. Place the two caps on the adapter and
mix well.
4. Put the adapter in the Input-pool.
5. Select MAINTENANCE - PRIME/CLEAN, button FILL
AND CLEAN.
Start Fill and clean procedure:
1.
2.
3.
4.
Select button OK.
The adapter will be transported to the needle position.
The needle goes down and the fill and clean process is started.
When all the pipettes are filled, the needle goes back to the home position and the
adapter is moved to the release position and will be transported into the End-pool.
StaRRsed Auto Compact Instructions For Use
Version 1.07 MRN-074-EN
Page 105
Work instruction StaRRsed Auto-Compact
5. Sensor check
Vacuum pressure check
•
Go to tab MAINTENANCE -> CHECK SENSOR. Select CHECK FLOW SENSOR box.
Flow: 0925-0980-1020 Abs: 0300-360-0390
Offset: 0045-0050-0055
If the flow is not in range there might be a blockage in the vacuum flow line to the flow sensor.
Fill Stop sensor check
•
Go to tab MAINTENANCE -> CHECK SENSOR. Select CHECK FILL STOP SENSOR box.
Fill stop sensor FS 90..140..165
Diluter Start sensor check
•
Go to tab MAINTENANCE -> CHECK SENSOR. Select DILUTER START SENSOR box.
Diluter start sensor
400-700
Measure sensor check
•
Go to tab MAINTENANCE -> CHECK SENSOR. Select CHECK MEASURE SENSOR box.
Measure sensor
MS 40..50..60
Temperature sensor check
•
Go to tab MAINTENANCE -> CHECK SENSOR. Select CHECK TEMPERATURE SENSOR box.
Temperature sensor
TS [Room temperature]
Diluent flow sensor check
•
Go to tab MAINTENANCE -> CHECK SENSOR. Select CHECK DILUENT FLOW SENSOR box.
Press test. When test is finished, signal Down and signal Up must be green.
Separator check
•
Go to tab MAINTENANCE -> CHECK SENSOR. Select CHECK SEPARATOR SENSOR box.
Separator sensor <200 600 >700
6. Final preparation
Prepare disinfectant: (if not already prepared).
Add 10 ml bleach (sodium hypochlorite) to 190 ml de-ionized water. (5% solution)
This disinfectant is for cleaning of all external parts that are exposed to blood.
1. Go to tab [MAINTENANCE] and perform the [End-of-day wash] procedure. (when Fill & Clean is
used, End-of-day wash is not required)
2. Check system for leakage.
• Inspect the peristaltic pump tubes and connections for leaks.
•
Check that liquid does not run back into the supply bottles after the pumps have stopped.
3. Clean and inspect the sample needle.
•
Inspect sample needle condition.
If necessary replace the sample probe or outer needle. See Work Instruction Sample probe
or outer needle replacement.
Page 106
StaRRsed Auto Compact Instructions For Use
Version 1.07 MRN-074-EN
Work instruction StaRRsed Auto-Compact
•
Clean the outer needle with disinfectant.
4. Check tubing from the syringe for trapped air bubbles.
5. Check Diluent syringe for trapped air bubbles.
6. If trapped air bubbles are found, go to tab [MAINTENANCE], click button [PRIME / CLEAN (ON PAGE 51)]
and perform the [PRIME DILUENT] function.
7. Wipe outer surface and stainless steel plate below the pipettes with disinfectant.
StaRRsed Auto Compact Instructions For Use
Version 1.07 MRN-074-EN
Page 107
Work instruction Number 169
Page 1 of 3
Purpose:Cleaning liquid separator
Safety: Bio Hazard area
Instrument: Compact:
Revision: Draft, October 2001
Prepare disinfectant: (if not already prepared).
Add 10 ml bleach (sodium hypochlorite) to 190 ml de-ionized water. (5% solution)
This disinfectant is for cleaning of all external parts that are exposed to blood.
Clean liquid separator
1. Open the left cover and remove the waste container. The liquid separator is now visible.
2. Lift the stainless steel vacuum tube with use of the lever.
3. Pull the liquid separator towards the front of the Compact. (Note: The separator has two sensor
connectors at the rear)
4. Disconnect the silicon tube from the tube connection.
5. Remove bacterial HEPA filter.
6. Open the liquid separator by pulling off the top section.
7. Clean the internal parts of the separator with disinfectant.
Replacing
1. Replace the top section.
A little silicon grease on the rim of separator will make the assembling and adjustment easier
2. If applicable replace the bacterial HEPA filter
(For Maintenance Level 4 exhange bacterial HEPA filter QWLV040002)
3. Re-connect the silicon tube to the bottom tube connector.
4. Lift left cover.
5. Lift stainless steel vacuum tube up.
6. Insert the liquid separator sliding it over the support shelf.
7. Push the liquid separator towards the rear, with the sensor connectors in the holes.
8. Release the stainless steel vacuum tube.
9. Replace the waste container.
10. Close left cover.
StaRRsed Auto Compact Instructions For Use
Version 1.07 MRN-074-EN
Page 108
Work instruction StaRRsed Auto-Compact
Work instruction Number 178
Page 1 of 1
Purpose: Hazy problems
Safety: Bio Hazard area
Instrument: StaRRsed Auto-Compact
Revision: 002, December 2013
Prepare disinfectant:
Add 10 ml bleach (sodium hypochlorite) to 190 ml de-ionized water. (5% solution)
Cleaning the diluent system:
Step 1
1.
2.
3.
4.
Remove the suction-tube from the diluent bottle.
Place the suction tube in chlorine solution.
Use the [PRIME DILUENT] function. This fills the dispenser system with the disinfectant.
After the prime sequence stops press [PRIME DILUENT] 5 times to fill the dispenser system with the
disinfectant.
5. Leave the disinfectant in the system for 15 minutes.
.
Step 2
1.
2.
3.
4.
5.
Take the diluent suction tube out of the disinfectant.
Wipe the tube clean and dry with a tissue.
Place the diluent suction tube in hot de-ionized water (80°C).
Use the [PRIME DILUENT] function.
After the prime sequence stops press [PRIME DILUENT] 5 times to fill the dispenser system with the
hot water.
.
Step 3
1.
2.
3.
4.
5.
6.
Clean the diluent bottle(s) with the disinfectant.
Rinse the diluent bottle with hot de-ionized water (80°C).
Rinse the diluent bottle with diluent solution.
Refill the diluent bottle with new diluent solution.
Use the [PRIME DILUENT] function.
After the prime sequence stops press the [PRIME DILUENT] key 5 times to fill the dispenser system
with the new diluent solution.
.
Step 4
1. Prepare a Fill and Clean arrangement.
2. Run the fill and clean sequence. When all the pipettes are filled the needle goes back to the
home position.
3. Remove the Fill and clean arrangement.
StaRRsed Auto Compact Instructions For Use
Version 1.07 MRN-074-EN
Page 109
Work instruction StaRRsed Auto-Compact
Work instruction Number 189
Page 1 of 1
Purpose: Sample probe or outer needle
replacement
Safety: Bio Hazard area
Instrument: Auto Compact
Revision: 001, October 2012
Remove the top cover from the Rack unit.
1. Unfasten the screw which prevent the
outer needle to drop out of the assembly.
2. Undo the sample probe.
3. Pull the outer needle complete with
sample probe together out the needle
assembly.
4. Mark each tube for easier reconnecting to
the correct nipple.
5. Disconnect the tubes from the outer
needle.
Needle exchange:
1.
2.
3.
4.
5.
6.
7.
Install (new) sample probe ESRI050909 together with a new outer needle VERA059009
Slide the new sample probe into the (new) outer needle.
Make sure the Sample probe has a (new) O-ring QWLV050003.
Install (new) sample probe ESRI050909 together with the (new) outer needle
Put the sample probe in the outer needle.
Replace the needles onto the needle assembly.
Tighten the sample probe. Do not over-tighten the sample probe in the T-piece / Y-piece or it
will crack or strip the threading inside the block.
8. Replace the correct tubes on the outer needle.
9. Fasten the outer needle bolt.(Do not over-tighten the screw)
10. Replace the cover on the Rack unit.
Page 110
StaRRsed Auto Compact Instructions For Use
Version 1.07 MRN-074-EN
Work instruction StaRRsed Auto-Compact
Work instruction Number 192
Page 1 of 2
Purpose:Fill and Clean with adapter
Safety: Bio Hazard area
Instrument: Auto Compact
Revision: 001, September 2012
.
Cleaning agent preparation Auto Compact: Fill and clean:
This cycle takes about 90 minutes.
1. Fill the clean adapter VERA119002 with
hot de-ionized water till the first mark in
the adapter. (180 ml).
2. Add cleaning agent (QRR 010905) till the
second marker in the adapter. (18 ml).
3. Place the two caps on the adapter and
mix well.
4. Put the adapter in the Input-pool.
5. Select MAINTENANCE - PRIME/CLEAN, button FILL
AND CLEAN.
Start Fill and clean procedure:
1.
2.
3.
4.
Select button OK.
The adapter will be transported to the needle position.
The needle goes down and the fill and clean process is started.
When all the pipettes are filled, the needle goes back to the home position and the
adapter is moved to the release position and will be transported into the End-pool.
StaRRsed Auto Compact Instructions For Use
Version 1.07 MRN-074-EN
Page 111
Work instruction StaRRsed Auto-Compact
Work instruction Number 196
Page 1 of 1
Purpose: Cleaning liquid separator (Version 2)
Safety: Bio Hazard area
Instrument: Compact
Revision: 002, March 2013
Removing
1. Open the left cover and remove the waste container. The liquid
separator is now visible.
2. Lift the stainless steel vacuum tube with use of the lever.
3. Pull the liquid separator towards the front of the Compact.
(Note: The separator has two sensor connectors at the rear)
4. Disconnect the silicon tube from the tube connection on the top
section.
5. Remove bacterial HEPA filter.
6. Remove and disassemble the liquid separator.
Cleaning
1. Clean all parts with hot water and a brush.
2. Use some acid free vaseline on the screw-thread of the glass
jar.
3. Assemble the separator.
Replacing
1. Replace the top section.
A little silicon grease on the rim of separator will make the
assembling and adjustment easier.
2. If applicable replace the bacterial HEPA filter
(For Maintenance Level 4: Exchange bacterial HEPA filter
QWLV040002)
3. Re-connect the silicon tube to the tube connector on the top
section.
4. Lift left cover.
5. Lift stainless steel vacuum tube up.
6. Insert the liquid separator sliding it over the support shelf.
7. Push the liquid separator towards the rear, with the sensor
connectors in the holes.
8. Release the stainless steel vacuum tube.
9. Replace the waste container.
10. Close left cover.
Page 112
StaRRsed Auto Compact Instructions For Use
Version 1.07 MRN-074-EN
Appendix for StaRRsed Auto-Compact
14. APPENDIX FOR STARRSED AUTO-COMPACT
Appendix section
StaRRsed Auto Compact Instructions For Use
Version 1.07 MRN-074-EN
Page 113
Appendix for StaRRsed Auto-Compact
Appendix - Error list Auto Compact
Last updated: 01-09-2014
Error
Extra explanation
Reason/Solution
E2: Communication error!
(Board: %s (%x), Command:
%x, TWSR: %x E: %d)
Communication lost after 3
•
retries between Computer and
StaRRsed Auto-Compact.
Power cable not connected
on the communication
PCB mounted on the back
panel.
• An I2C cable not
connected
• Serial cable not connected
• No power on one of the
PCB's
• Short circuit or fault on one
of the PCB's
E3: Measure motor timeout!
Measure head motor did not
move or motor is blocked.
• Measure head is not at the
Home position.
• Check the Home sensor.
• Motor is faulty.
• Motor driver on drive board
is faulty.
E4: Sample probe not in top
position! (home)
Sample probe not back at
Home position after sampling
a tube.
• Check sample probe home
sensor.
• Sample probe motor is
faulty.
• Sample probe motor driver
on needle board is faulty.
• Sample probe is blocked.
E5: Duplicated ID !!
Sample rejected. Sample
already in carousel.
• Wait until sample is
measured
• Check general settings
(Check for duplicate ID's
E6: Program was not properly There is a possibility that
shut down. Check settings
changed settings which were
before continuing!
not saved to disk are lost.
• Program stopped and
computer needed to be
reset.
• Computer reset after
power failure.
Page 114
StaRRsed Auto Compact Instructions For Use
Version 1.07 MRN-074-EN
Appendix for StaRRsed Auto-Compact
E7: Outer needle motor
position error! Timeout!
(piercing)
Outer needle did not go down
within a certain time limit.
• Outer needle motor is
faulty.
• Outer needle motor driver
on needle board is faulty.
• Outer needle is blocked.
E8: Fillnozzle not in fill
position!
Fill nozzle did not reach the fill •
position within a certain time
•
limit.
Fill nozzle motor is faulty.
Fill nozzle motor driver on
nozzle board is faulty.
• Fill nozzle is blocked.
E9: Air flow failure!
Compact was not able to get a •
stable reading during the
vacuum test before aspiration
the sample.
Check for leakage on the
pipette or fill nozzle.
E10: Sample probe was
jammed. Check both needles
before sampling!
Sample probe was probably
•
jammed when going down and
exceeded the maximum
•
current level.
Check if outer needle is
clogged up with rubber.
Sample probe maybe
bend.
Sample probe went back to its
home position after the error.
E11: Sample probe not on
position (going down)!
Timeout error!
Sample probe did not go down •
within a certain time limit.
Sample probe motor is
faulty.
• Sample probe motor driver
on needle board is faulty.
• Sample probe is blocked.
• Check diluent flow sensor
E12: Dilution error: wrong or
no diluent flow. Check the
diluter!
Diluter malfunction
E13: Fillnozzle not in home
position!
Fill nozzle did not reach the
•
Home position within a certain
•
time limit.
• Check tubes diluter system
Fill nozzle motor is faulty.
Fill nozzle motor driver on
nozzle board is faulty.
• Fill nozzle is blocked.
E14: Outer needle motor
position error! (home)
Outer needle did not reach the •
home (top) sensor within a
•
certain time limit.
Check home (top) sensor.
Outer needle motor is
faulty.
• Outer needle motor driver
on needle board is faulty.
• Outer needle is blocked.
StaRRsed Auto Compact Instructions For Use
Version 1.07 MRN-074-EN
Page 115
Appendix for StaRRsed Auto-Compact
E18: Carousel position error!
Check Rinse position.
Value of potentiometer does
not match the value stored in
memory of the current rinse
position.
• Check if the rinse position
is right.
• Set correct rinse position
and do a "Learn carousel
positions".
• Check mechanical
connection potentiometers.
E19: Drive motor timeout!
Drive motor did not move or
motor is blocked
• Check the home sensor
• Motor is faulty
• Motor driver on drive board
is faulty
E20: Outer needle motor
position error! (piercing error)
Outer needle could not go
•
down all the way. Piercing
position sensor was triggered.
Check tube 1 position
setting.
• Tube 1 not aligned well.
• Check piercing position
sensor.
E21: No USB IO device
detected. "Check USB IO
Device" settings!
USB IO Device enabled but
not detected.
• Check power to USB IO
Device
• Check USB cable
• USB IO Device driver not
installed
• Check USB IO Device
settings
• Check level sensor.
E22: Waste bottle full!
Empty waste bottle and clear
error.
E23: "Fill " sensor out of
range. Check/clean this
sensor !
The Fill sensor has reached a •
critical level.
Check and/or clean the Fill
sensor.
Continuing could result in
filling errors.
E24: "Diluter Start" sensor out The Diluter Start sensor has
of range. Check/clean this
reached a critical level.
sensor !
Continuing could result in
filling errors.
• Check and/or clean the
E25: "Measure" sensor out of
range. Check/clean this
sensor !
• Check and/or clean the
The Measure sensor has
reached a critical level.
Measure sensor.
Continuing could result in
wrong ESR results.
E26: "Diluent Flow" sensor out The EDTA Flow sensor has
of range. Check/clean this
reached a critical level.
sensor !
Continuing could result in
Page 116
Diluter Start sensor.
• Check and/or clean the
EDTA Flow sensor.
StaRRsed Auto Compact Instructions For Use
Version 1.07 MRN-074-EN
Appendix for StaRRsed Auto-Compact
filling errors.
E27: "Temperature" sensor
The measured room
out of range. Check Settings ! temperature has reached a
critical level.
• Check the temperature
sensor setting.
• Check and/or clean the
Continuing could result in
wrong ESR results.
Temperature sensor.
E29: Result path not found.
Switched to default (D:\).
Check "Result Path" setting.
Selected result path is not
valid. Software is using the
default setting
• Check result path setting
E30: No ACK/NACK received
from host after sending
inquiry!
No response from Host within
a certain time limit after
sending an inquiry 3 times.
• Check communication
• Check if network or USB
devices are used.
cable between Host and
StaRRsed Auto-Compact
computer.
• Check serial port settings
(baud rate, etc...)
• Check protocol settings.
• Check Host computer.
E31: NACK received from
host after sending inquiry!
Did not receive ACK from
Host after sending inquiry 3
times.
See E30
E32: LIMS Connection
timeout. Host not found!
The Compact could not
•
establish a connection with
•
the HOST (server) via TCP/IP.
Check TCP/IP settings
Check network cable
• Check HOST settings
•
E34: No response from host
after sending 'Sample data
record'!
No response from Host within
a certain time limit after 3
attempts.
See E30
E35: No response from host
after sending 'Sample flag
record'!
No response from Host within
a certain time limit after 3
attempts.
See E30
E36: No ACK/NACK received
after sending 'Sample result
string'!
No response from Host within
a certain time limit after 3
attempts.
See E30
E37: NACK received from
host after sending 'Sample
result string'!
Did not receive ACK from
Host after sending 'Sample
result string' 3 times.
See E30
StaRRsed Auto Compact Instructions For Use
Version 1.07 MRN-074-EN
Page 117
Appendix for StaRRsed Auto-Compact
E40: Position settings error.
Settings loaded from Eeprom.
Check settings before
sampling!
Position settings in Eeprom do •
not match settings saved to
file. Settings in Eeprom OK
and loaded from Eeprom.
Check positions and save
settings.
Configuration file maybe
corrupted.
E41: Timeout settings error.
Settings loaded from Eeprom.
Check settings before
sampling!
Timing settings in Eeprom
•
does not match settings saved
to file. Settings in Eeprom OK
and loaded from Eeprom.
Check timeouts and save
settings.
Configuration file maybe
corrupted.
E42: Mixermotor current
settings error. Settings loaded
from Eeprom. Check settings
before sampling!
Current settings in Eeprom do •
not match settings saved to
file. Settings in Eeprom OK
and loaded from Eeprom.
Check current settings and
save settings.
Configuration file maybe
corrupted.
E43: Motor settings error.
Settings loaded from Eeprom.
Check settings before
sampling!
Motor settings in Eeprom do
not match settings saved to
file. Settings in Eeprom OK
and loaded from Eeprom.
Check motor settings and
save settings.
E44: Settings in Eeprom does
not match with settings saved
to file. Check settings before
sampling!
Settings stored in Eeprom are •
OK and are loaded from
Eeprom. Check Selected rack
setting and save to file.
E45: Settings in Eeprom not
correct. Upload settings
before sampling!
Checksum error on settings
stored in Eeprom. Check
Selected rack and save
settings.
• Configuration file maybe
corrupted.
Configuration file maybe
corrupted.
• Possible hardware failure
in Eeprom.
E49:
E50: Mixing error! Total
amount of mixes not the same
as setting. Check Mix-sensor
or Rack timer setting T8 or
T11.
Mixer could not do the correct •
number of mixes within a
certain time limit. Timing
•
settings T8 or T11 are too low
or mixer (gripper) maybe
•
blocked.
Check rack timing settings
T8 & T11.
Check mix sensor (+
distance).
Mixer is blocked.
• Mixer motor is faulty.
• Mixer motor driver on rack
board is faulty.
Page 118
StaRRsed Auto Compact Instructions For Use
Version 1.07 MRN-074-EN
Appendix for StaRRsed Auto-Compact
E51: Mixer not back in its
Mixer could not come back in
vertical position! Check if
its vertical position after
mixer is in the vertical position mixing.
and clear error if OK!
• Mixer maybe hitting the
bottom transport belts.
• Mixer is blocked.
• Mixer motor is faulty.
• Mixer motor driver on rack
board is faulty.
E54: Endpool full ! Remove all This error will be cleared
racks from endpool and then automatically after removing
clear error!
the racks from the end pool.
• End pool full.
E55: Rack lost in endpool!
Remove all racks from
endpool and then clear error!
• Rack maybe on its side.
Rack is released from gripper
but did not pass the End pool
sensor.
• Check Rack out sensor.
• Check End pool full
sensor.
• Check conveyer belt
motor.
E56: Checksum error motor
settings table!
Checksum error on motor
settings stored in Eeprom.
Settings are loaded from file.
Check Motor settings and
save settings.
Possible hardware failure in
Eeprom.
E57: Checksum error current
table!
Checksum error on current
settings stored in Eeprom.
Settings are loaded from file.
Check Current settings and
save settings.
Possible hardware failure in
Eeprom.
E58: Checksum error timetable!
Checksum error on timing
settings stored in Eeprom.
Settings are loaded from file.
Check Timeout settings and
save settings.
Possible hardware failure in
Eeprom.
E59: Checksum error position- Checksum error on position
table!
settings stored in Eeprom.
Settings are loaded from file.
Check Position settings and
save settings.
Possible hardware failure in
Eeprom.
E60: Mixermotor error!
(Hardware)
• Check rack timing setting
Could not home mixer motor.
T1.
• Mixer motor is faulty
• Mixer motor is blocked.
• Mixer motor driver on rack
board is faulty.
• Check mixer motor belt.
StaRRsed Auto Compact Instructions For Use
Version 1.07 MRN-074-EN
Page 119
Appendix for StaRRsed Auto-Compact
E61: Position motor error! Not Gripper did not reach the OUT •
on position! (OUT)
(release) position. Starting
point: FILL position.
Position (gripper) motor is
faulty.
• Position (gripper) motor is
blocked.
• Motor driver on rack board
is faulty.
E62: Position motor error! Not Gripper did not reach the MIX
on position! (MIX)
position. Starting point: OUT
position.
E63: Position motor error!
Home sensor!
See E61
Position motor did not reach
•
the home position or could not
detect home sensor.
Check position (gripper)
motor Home sensor.
• Position (gripper) motor is
faulty.
• Position (gripper) motor is
blocked.
• Motor driver on rack board
is faulty.
• Check position motor belt.
E64: Position motor error! Not Gripper did not reach the IN
See E61
on position! (IN)
(catch) position. Starting point:
MIX position.
E65: Position motor error! Not Gripper did not reach the MIX
on position! (MIX)
position. Starting point: FILL
position.
See E61
E66: Gripper error! Rack not
in gripper!
• Check height of the tubes
Follow the instructions on the
screen.
in the rack.
• Check gripper sensor.
• Check rack adapter.
E67: Position motor error! Not Gripper did not reach the FILL See E61
on position! (FILL)
position. Starting point: MIX or
FILL position.
E68: Mixing motor current
overshoot. Check if the mixer
is blocked!
The mixer motor current
exceeded the Maximum
mixing current setting during
mixing.
• Check mixer motor
settings.
• Mixer motor is blocked.
• Mixer motor is faulty
• Mixer motor driver on rack
board is faulty.
• Check mixer motor belt.
E69: Position motor error! Not Gripper did not reach the MIX
on position! (MIX)
position. Starting point: IN
position.
Page 120
See E61
StaRRsed Auto Compact Instructions For Use
Version 1.07 MRN-074-EN
Appendix for StaRRsed Auto-Compact
E70: Can't home mixer! Rack
not on mix position!
Mixer motor send to home
Check the position motor.
position, but position (gripper)
motor is not on MIX position.
E71: Position motor error! Not Gripper did not reach the MIX See E61
on position! (MIX)
position. Starting point: HOME
position.
E72: Not on position!
Gripper did not reach its given See E61
position by the user.
E73: Position motor error!
Position motor is on IN
position!
Could not send the racks on
Check the position motor.
the In pool to the first stop
position. Could not start the
conveyer belt motor, because
the position (gripper) is on the
IN position.
E74: Position motor error! Not Could not release the rack
on position! (OUT)
from the gripper, because the
position (gripper) motor is not
on the OUT position.
Check the position motor.
E75: Position motor error! Not Could not send (start the
on position! (IN)
conveyer belt motor) the rack
into the gripper, because the
position (gripper) motor is not
on the IN position.
Check the position motor.
E76: Can't start mixing (long)!
Rack not on mix position!
Could not start the mixer
motor, because the position
(gripper) motor is not on the
MIX position.
Check the position motor.
E77: Can't start mixing (short)! Could not start the mixer
Rack not on mix position!
motor, because the position
(gripper) motor is not on the
MIX position.
Check the position motor.
E78: Mixer motor timeout!
Mixer motor current level did
not reach the stop level during
homing action!
It is possible that the mixer did •
not came back to its home
(vertical) position after mixing
•
within a certain time limit.
Check rack timing setting
T1.
Mixer motor is faulty.
• Mixer motor driver on rack
board is faulty.
• Check mixer motor belt.
E80:Position motor error! Not
on position! (IN)
Gripper did not reach the IN
See E61
(catch) position. Starting point:
MIX position.
E81: Position motor error! Not Gripper did not reach the MIX
on position! (MIX)
position. Starting point: IN
StaRRsed Auto Compact Instructions For Use
Version 1.07 MRN-074-EN
See E61
Page 121
Appendix for StaRRsed Auto-Compact
position.
E82: Position motor error! Not Gripper did not reach the FILL See E61
on position! (FILL)
position. Starting point: MIX
position.
E83: Position motor error! Not Gripper did not reach the MIX
on position! (MIX)
position. Starting point: FILL
position.
See E61
E84: Position motor error! Not Gripper did not reach the FILL See E61
on position! (FILL)
position. Starting point: MIX
position.
E85: Position motor error! Not Gripper did not reach the FILL See E61
on position! (FILL)
position. Starting point: last
sampled tube.
E86: Position motor error! Not Gripper did not reach the MIX
on position! (MIX)
position. Starting point: FILL
position.
See E61
E87: Position motor error! Not Gripper did not reach the OUT See E61
on position! (OUT)
(release) position. Starting
point: FILL position.
E88: Position motor error! Not Gripper did not reach the MIX
on position! (MIX)
position. Starting point: OUT
position.
See E61
E89: Position motor error!
Can't initialize motor due to a
possible hardware error!
Please exit and then restart
Auto-Compact. If this error
occurs repeatedly, please
note the error code before
seeking assistance!
After an rack error the position See E63
motor tried to initialise its
home position but could not
succeed due to a possible
fatal hardware error.
E90: Mixermotor error! Can't
initialize motor due to a
possible hardware error!
Could not home mixer motor
within a certain time limit.
E91: Can not discharge rack!
Endpool full, remove racks!
This error will be automatically •
cleared after removing the
•
racks and the rack will be
released.
E92: Position motor error! Not Gripper did not reached the
on position! (MIX)
MIX position to start a short
mix. Starting point: FILL
position.
Page 122
See E60
End pool full.
Check Rack out sensor.
See E61
StaRRsed Auto Compact Instructions For Use
Version 1.07 MRN-074-EN
Appendix for StaRRsed Auto-Compact
E93: Position motor error! Not Gripper did not reached the
on position! (MIX)
MIX position. Starting point:
FILL position.
See E61
E94: Position motor error! Not Gripper did not reached the
on position! (MIX)
MIX position after reading the
barcode. Starting point: FILL
position.
See E61
E95: Position motor error! Not Gripper did not reached the
on position! (FILL)
FILL position after mixing the
rack. Starting point: MIX
position.
See E61
E96: Position motor error! Not Gripper did not reached the
on position! (FILL)
FILL position. Starting point:
last sampled tube.
See E61
E97: Position motor error! Not Gripper did not reached the IN See E61
on position! (IN)
(catch) position. Starting point:
MIX position.
E98: Position motor error! Not Gripper did not reached the IN See E61
on position! (IN)
(catch) position after gripper
error. Starting point: MIX
position.
E99: Position motor error! Not Gripper did not reached the
on position! (MIX)
MIX position. Starting point:
FILL position.
See E61
E100: Position motor error!
Not on position! (MIX)
Gripper did not reached the
See E61
MIX position. Starting point: IN
position.
E101: Position motor error!
Not on position! (FILL)
Gripper did not reached the
FILL position. Starting point:
last sampled tube.
See E61
E102: Position motor error!
Not on position! (MIX)
Gripper did not reached the
MIX position. Starting point:
FILL position.
See E61
StaRRsed Auto Compact Instructions For Use
Version 1.07 MRN-074-EN
Page 123
Appendix for StaRRsed Auto-Compact
E104: Needle unit not in up
position!
Could not start the position
•
motor, because the outer
needle or sample probe is not
•
its home position (top).
Check outer needle home
sensor.
Check sample probe home
sensor.
• Faulty Outer needle motor.
• Faulty Sample probe
motor.
• Check if needles are
blocked.
• Faulty motor drivers on the
needle board.
E116-118
Page 124
Quality Control Errors
See section Quality control
trouble shooting (on page 85)
StaRRsed Auto Compact Instructions For Use
Version 1.07 MRN-074-EN
Glossary of Terms
15.1.1.1.4.
15. GLOSSARY OF TERMS
B
15.1.1.1.1.
Bidirectional
ESR is short for Erythrocyte Sedimentation
Rate. It is the amount of sedimentation
(setting) of erythrocytes (red blood cells) in a
blood column during a specified time.
Bidirectional communication means that
there is two-way communication from the
StaRRsed Auto-Compact to the HOST
(sample requests and results) and from the
HOST to the StaRRsed Auto-Compact
(confirmation or denial of sample requests).
H
C
15.1.1.1.6.
15.1.1.1.2.
Citrate mode
Citrate mode is used for pre-diluted samples
collected in tubes with sodium citrate
anticoagulant-diluent. The samples are not
diluted on the StaRRsed Auto-Compact
during aspiration.
The concentration of sodium citrate within the
diluent solution in the tube should be 3.2%.
This is not to be confused with the required
dilution rate of blood and diluent.
For example, in a citrate tube with a total
draw volume of 1.6 ml (= 5 volumes), the
amount of pre-filled diluent must be 0.32 ml
(= 1 volume). If this information is not
provided by the tube manufacturer, it should
be checked by the customer.
E
15.1.1.1.3.
EDTA mode
EDTA mode is used for undiluted samples
collected in tubes with EDTA anticoagulant.
The samples are automatically diluted on the
StaRRsed Auto-Compact during aspiration.
The usual amount of EDTA in sample tubes
is 1.8 mg per 1 ml blood. 1 ml of blood
weighs ca. 1060 mg and the concentration of
EDTA is therefore 0.17% and well within the
requirements for the EDTA mode on this
instrument.
StaRRsed Auto Compact Instructions For Use
Version 1.07 MRN-074-EN
ESR
15.1.1.1.5.
Hazy
A sedimentation is reported to be "hazy",
when the boundary between blood plasma
and erythrocytes can not be defined clearly.
Host
In this manual, the term HOST is used to
indicate the computer system and associated
software (LIMS) that provides the sample
management for the laboratory.
I
15.1.1.1.7.
IVD
IVD is short for In Vitro Diagnostic. This
kind of diagnostic is performed on biological
samples in a test tube, or more generally in a
controlled environment outside a living
organism. In vitro means in glass in Latin.
M
15.1.1.1.8.
MRN
MRN is short for Master Registration
Number. It is used as an identification
number for any manual for Mechatronics
products.
15.1.1.1.9.
MSDS
MSDS is short for Material Safety Data
Sheet. In this type of MSDS all kind of
important data can be found on reagents.
T
15.1.1.1.10.
Temperature correction
The sedimentation of blood cells is a
temperature dependent process. To achieve
comparable results, temperature correction
should always be used. The ESR results are
then corrected to the value they would have
been at the standard temperature of 18.3°C .
Page 125
Glossary of Terms
U
15.1.1.1.11.
Unidirectional
Unidirectional communication means that
there is only one-way communication from
the StaRRsed Auto-Compact to the HOST.
Only sample results and result related
messages are send.
W
15.1.1.1.12.
WI
WI is short for Work Instruction and is used
with an index number for a range of work
instructions.
Page 126
StaRRsed Auto Compact Instructions For Use
Version 1.07 MRN-074-EN
Index
16. INDEX
3
30 Minute method • 62, 63
6
60 Minute method • 62, 63
A
Air bubbles • 64, 69, 82
Analyser • 67
Appendix - Error list Auto Compact • 114
APPENDIX FOR STARRSED AUTOCOMPACT • 113
Aspect Hazy • 31, 66
AUTO COMPACT PROGRAM • 18
End-of-day-wash options • 59
End-of-day-wash procedure • 53, 70
End-of-day-wash schedule settings • 60
ESR • 125
ESR Error • 31, 64, 85, 86
ESR Error and Warning code messages • 64,
74
ESR Statistics screens • 24, 31, 69
Expected value range • 72
Explanation of available documentation • 9
F
B
Fill and clean procedure • 53, 93
Fill and clean screen • 53
Fill procedure • 69
Fill station: • 21
Fill time-out error • 80
Fill-nozzle O-ring replacement • 93
Flushing liquids • 78
Foam in column • 31, 83
Bidirectional • 125
G
C
General error procedure • 78
GENERAL SAFETY INSTRUCTIONS • 17
Carousel: • 20
Check list • 68
Check or replace sample probe or outer
needle • 89
Check sensors • 50, 54
Check the sensors in service mode • 90
Checks during operation • 69
Citrate mode • 125
Cleaning liquid separator • 91
Close • 59
Control pipettes • 71
D
Daily • 70, 88
DATA SAFETY MANAGEMENT • 77
Display error history • 50, 56
Display maintenance history • 50, 57
Display patient results • 24, 26, 27
Display pipette data • 24, 25
Display rack history • 21, 24, 29
Display rack status • 24, 29, 30
Display reagent history • 47, 48
Display Sample history • 24, 26, 39
Display sample history (QC) • 39
Document history overview • 3
E
EDTA mode • 125
StaRRsed Auto Compact Instructions For Use
Version 1.07 MRN-074-EN
H
Hazy • 125
Hazy reports • 81
History analyse • 24, 41
History analyse error • 43
History analyse results high dilution • 42
History analyse warning • 44
History aspect • 43
History sample analyse option • 45
History sample analyse option day • 45
History screen • 18, 20, 24, 73
Host • 125
I
INSTALLATION • 16
INSTRUMENT DESCRIPTION • 11
INTRODUCTION • 9
IVD • 125
L
Leaking pipettes • 81
Level 4 maintenance • 91
Limit error settings • 65
Limitations • 71
Linked QC ID's • 24, 32, 40, 73
Liquid level sensor not sensing • 82
Page 127
Index
Liquid levels • 69
M
MAINTENANCE • 88
Maintenance info • 50, 58
Maintenance info overview • 59
Maintenance screen • 18, 20, 50
Manual input sample ID: • 21
Measure station: • 20
Monitoring measurement quality with
StaRRsed Control • 71
MRN • 125
MSDS • 125
N
New reagent input • 49
New reagent input (cont) • 49
O
One air bubble about 5 mm under meniscus •
83
One air bubble rising in pipette • 84
OPERATION • 68
P
Pipette information • 23
Pipette looks like zebra crossing • 82
Pipette: • 21
Power failure • 77
Power up sequence • 68
Prime / Clean • 50, 51, 68, 95, 96, 98, 101,
107
Prime all units • 52
Prime de-ionized water • 52
Prime Diluent • 52
Prime Disinfectant • 52
Prime Rinse solution • 51
Prime Saline • 51
Priming the fluid system • 68
Protocols • 61
Q
QC abnormal results (graph) • 38
QC abnormal results (table) • 35
QC abnormal results screen extended • 37
QC Error messages • 74
QC normal results (graph) • 34
QC Normal results (table) • 32
QC normal results screen extended • 34
QC Result analysis • 41, 75
QC Results • 72, 74
Page 128
QC Results screens • 24, 32, 74
QUALITY CONTROL • 71
Quality control procedure • 73
Quality control trouble shooting • 74, 85, 124
Quick start-up • 68
R
Rack: • 21
Random air bubbles in pipette • 84
Reagents • 79
Reagents alarm • 79
Reagents replacement • 95
Reagents screen • 18, 20, 47
Replace bacterial filters • 93
Replacing the waste container • 76
Report 30 Minute mode • 63
Report 60-Minute mode • 62
REPORTING • 61
Reporting range • 65
Result Printout • 62
Rinse-pump tube replacement • 91
S
Safety warning • 17
Saline-pump tube replacement • 92
Sample information: • 22
Sample mode button: • 21
Sample screen • 18, 19
Sample screen with keyboard • 22
SAMPLE VOLUME • 9
Separator error • 79
Service screen • 60
Set end date • 46
Set start date • 46
Settings screen • 60
Small air bubbles rising in pipette • 84
Software version • 19
Status: • 22
T
Technical specifications • 13
Technical specifications contd. • 15
Temperature correction • 72, 125
TROUBLE SHOOTING • 78
Turn off • 70
Turn off sequence • 70
U
Unidirectional • 126
Usage options • 72
StaRRsed Auto Compact Instructions For Use
Version 1.07 MRN-074-EN
Index
V
Version information: • 21
W
Wash all pipettes • 52
Wash each pipette • 52
Wash only sample pipettes • 52
Wash station: • 20
WASTE DISPOSAL • 76
Weekly • 90
WI • 126
WORK INSTRUCTION STARRSED AUTOCOMPACT • 97
StaRRsed Auto Compact Instructions For Use
Version 1.07 MRN-074-EN
Page 129