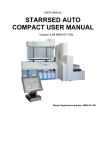
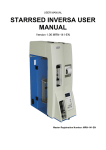
Download AUTO COMPACT USER MANUAL
Transcript
USER MANUAL AUTO COMPACT USER MANUAL Version 6.62 MRN-071-EN Master Registration Number: MRN-071-EN Manufacturer: Mechatronics Manufacturing B.V. Phone: +31 (0)229 - 29 11 29 Fax: +31 (0)229 - 24 15 34 E-mail: [email protected] Internet: http://www.mechatronics.nl Postal address: P.O. Box 225 1620 AE Hoorn The Netherlands Office address: De Corantijn 13 1689 AN Zwaag The Netherlands © Copyright Mechatronics BV All rights reserved. Subject to changes without prior notice. Issued by the After Sales Department of Mechatronics Document history overview Document history overview MRN-071-EN Published date 4 augustus 2011 Issue No Date Revised Section(s) Preliminary November 2003 All • Start of he manual H.E. van Dijk 1.00 December 2004 All • Make corrections and add the latest pictures H.E. van Dijk • Update the sections according the latest version of the Graphic User Interface • Rewrite the installation section. H.E. van Dijk Sensor information in all sections the same. Add link Weekly WI 191 in Work instruction contents H.E. van Dijk All the screen shots are updated Add new work instructions 202 and 203 H.E. van Dijk 2.00 July 2005 3.00 September 2005 Changes All sensor values • are the same in the following sections; Authorised Appendix Maintenance Section Check sensor Work instruction 186 4.00 December 2005 Auto Compact User Manual Version 6.62 MRN-071-EN Renumber the • section 5.6.1.2 to 3 Renumber section 5.6.1.3 to 4 • Insert section 5.6.1.2 Conveyer • motor test Insert in the 5.4 the fill and clean procedure Correction made in WI 191, 192, 193, 194 Add in settings-carrousel the pipette flow diagram pop-up screens Page 3 Document history overview 5.00 6.00 6.10 6.20 April 2006 March 2007 Work instructions Section 5 & 3 July 2007 February 2008 Combine Auto Compact and InteRRliner V8 manual • Review all the Work instructions and add the latest information to the instructions. • Review the Maintenance schedule Add missing maintenance item to section 11 • Add instructions to the Maintenance schedule • Add new work instructions WI 204 and WI 205 • All screen shoots are updated for software version 2.13 and higher. • Add self closing up-pops screens. • Installation section 3 and text how to connect the PC to the Auto Compact and host • Section 5 all kind of changes.Add appendix PC connections. • Some spell corrections in the manual. • Re install missing link Appendix Error list Auto Compact • In Self close script set timer longer • Combine Auto Compact manual and InteRRliner V8 manual into one manual. • Changes are made on code levels. H.E. van Dijk H.E. van Dijk H.E. van Dijk H.E. van Dijk 6.30 September 2008 Removed • installation section from manual Removed the installation section from the manual and insert this in Installation manual. H.E. van Dijk 6.40 June 2009 Update screens to • apply for the software update version 2.22 Update screens to apply for this software update in Auto Compact Program H.E. van Dijk 6.50 July 2009 Reporting section Add new analyzer error number to the list. 7 is limit error. H.E. van Dijk Page 4 • Auto Compact User Manual Version 6.62 MRN-071-EN Document history overview 6.60 6.61 6.62 July 2010 February 2011 June 2011 Auto Compact User Manual Version 6.62 MRN-071-EN Appendix • Settings Add new the new MECHATRONICS 01 and 02 string • Language selection • Make a new Settings screen for limit error • Replaced History and Amendment record for Document history • Explain Rack pictogram H.E. van Dijk Turn off • It is not a problem if the StaRRsed Auto-Compact is on all the time. However,....> H.E. van Dijk Getting started • Check limit settings • Update screen pictures Main screen H.E. van Dijk History screen Page 5 Contents CONTENTS 1. 2. INTRODUCTION .......................................................................................................... 13 1.1. PC Operation and User Interface ........................................................................... 14 1.2. Dilution principle ..................................................................................................... 14 1.3. Sedimentation measurement principle ................................................................... 15 1.4. Data backup ........................................................................................................... 15 INSTRUMENT DESCRIPTION..................................................................................... 17 2.1. Technical specifications ......................................................................................... 20 2.2. Technical specifications contd................................................................................ 21 2.3. Accessory kit .......................................................................................................... 22 3. INSTALLATION ........................................................................................................... 23 4. STANDARD OPERATING PROCEDURES (S.O.P.)................................................... 25 4.1. Basics of Bio safety ................................................................................................ 25 4.2. S.O.P. for working with bio hazardous materials.................................................... 26 4.2.1. Facts and definitions: ..................................................................................... 26 4.2.2. Medical requirements: .................................................................................... 26 4.2.3. General laboratory practices: ......................................................................... 26 4.2.4. Specific laboratory practices and requirements:............................................. 27 4.3. Safety warning........................................................................................................ 28 4.4. StaRRsed Incident Report...................................................................................... 29 4.5. E.C. Declaration StaRRsed Auto Compact ............................................................ 30 4.6. Labels and stickers on containers .......................................................................... 31 4.6.1. Stickers for the onboard reagents bottles....................................................... 31 4.6.2. Stickers of the reagents containers ................................................................ 32 5. AUTO COMPACT PROGRAM..................................................................................... 33 5.1. Sample screen ....................................................................................................... 34 5.1.1. Carousel: ........................................................................................................ 35 5.1.2. Measure station:............................................................................................. 35 5.1.3. Wash station:.................................................................................................. 35 5.1.4. Fill station: ...................................................................................................... 35 5.1.5. Pipette: ........................................................................................................... 36 5.1.6. Rack: .............................................................................................................. 36 5.1.7. Sample mode button: ..................................................................................... 36 5.1.8. Version information: ....................................................................................... 36 5.1.9. Manual input sample ID:................................................................................. 36 5.1.10. Sample information:.................................................................................... 37 5.1.11. Status: ........................................................................................................ 37 5.1.12. Sample screen with keyboard .................................................................... 37 5.1.13. Pipette information...................................................................................... 38 5.2. History screen ........................................................................................................ 40 5.2.1. Display pipette data........................................................................................ 41 Auto Compact User Manual Version 6.62 MRN-071-EN Page 7 Contents 5.2.2. Display Sample history ................................................................................... 42 5.2.2.1. Display patient results ............................................................................ 44 5.2.3. Display rack history ........................................................................................ 46 5.2.3.1. Display rack status ................................................................................. 48 5.2.4. ESR Statistics screens ................................................................................... 49 5.2.5. History analyse ............................................................................................... 50 5.2.6. History analyse results high ........................................................................... 51 5.2.7. History aspect................................................................................................. 52 5.2.8. History analyse error ...................................................................................... 53 5.2.9. History analyse warning ................................................................................. 54 5.2.10. History sample analyse option.................................................................... 55 5.2.11. History sample analyse option day............................................................. 56 5.2.12. Set start date .............................................................................................. 57 5.2.13. Set end date ............................................................................................... 58 5.3. Reagents screen .................................................................................................... 59 5.3.1. Display reagent history ................................................................................... 60 5.3.2. New reagent input .......................................................................................... 61 5.3.2.1. New reagent input (cont) ........................................................................ 61 5.4. Maintenance screen ............................................................................................... 62 5.4.1. Prime / Clean.................................................................................................. 63 5.4.1.1. Prime Rinse solution............................................................................... 63 5.4.1.2. Prime Saline ........................................................................................... 63 5.4.1.3. Prime Diluent .......................................................................................... 64 5.4.1.4. Prime de-ionized water........................................................................... 64 5.4.1.5. Prime Disinfectant .................................................................................. 64 5.4.1.6. Prime all units ......................................................................................... 64 5.4.1.7. Wash each pipette.................................................................................. 64 5.4.1.8. Wash only sample pipettes..................................................................... 64 5.4.1.9. Wash all pipettes .................................................................................... 65 5.4.1.10. Fill and Clean ......................................................................................... 65 5.4.1.11. Fill and Clean with cleaning adapter ...................................................... 65 5.4.1.12. Fill and Clean without cleaning adapter ................................................. 66 5.4.1.13. End-of-day-wash procedure................................................................... 67 5.4.2. Check sensors................................................................................................ 67 5.4.2.1. Check sensors screen short ................................................................... 69 5.4.2.2. Check sensors in service mode.............................................................. 70 5.4.2.3. Fill stop sensor ....................................................................................... 71 5.4.2.4. Temperature sensor ............................................................................... 71 5.4.2.5. Diluter start ............................................................................................. 71 5.4.2.6. Diluent flow sensor ................................................................................. 71 5.4.2.7. Separator sensor .................................................................................... 71 5.4.2.8. Flow sensor ............................................................................................ 71 5.4.2.9. Measure sensor...................................................................................... 71 5.4.3. Display error history ....................................................................................... 72 5.4.4. Display maintenance history........................................................................... 73 5.4.5. Maintenance info ............................................................................................ 74 5.4.5.1. Maintenance info overview ..................................................................... 75 5.4.6. Close .............................................................................................................. 75 5.4.7. End-of-day-wash schedule settings................................................................ 76 5.4.8. End-of-day-wash options................................................................................ 77 5.5. General settings ..................................................................................................... 78 Page 8 Auto Compact User Manual Version 6.62 MRN-071-EN Contents 5.5.1. ON and OFF selection.................................................................................... 80 5.5.2. Numerical input .............................................................................................. 81 5.5.3. Language selection ........................................................................................ 81 5.5.4. Carousel control ............................................................................................. 82 5.5.4.1. Control Carousel..................................................................................... 83 5.5.4.2. Flow test potentiometer mean ................................................................ 84 5.5.4.3. Flow test flow.......................................................................................... 85 5.5.4.4. Flow test absolute................................................................................... 86 5.5.4.5. Flow test leakage.................................................................................... 87 5.5.4.6. Flow test Fill sensor air........................................................................... 88 5.5.4.7. Flow test Fill sensor glass ...................................................................... 89 5.5.4.8. Flow test start ......................................................................................... 90 5.5.4.9. Set new rinse position ............................................................................ 91 5.5.5. Diluter settings................................................................................................ 92 5.5.5.1. Dilution adjustment 60 till 140% ............................................................. 92 5.5.5.2. Dilution error detection 0 till 25%............................................................ 93 5.5.5.3. Auto dilution adjust ................................................................................. 93 5.5.5.4. Diluent flow check................................................................................... 94 5.5.6. Limit settings .................................................................................................. 94 5.5.6.1. Results at limit error................................................................................ 95 5.6. Service screen........................................................................................................ 95 5.6.1. Rack unit setting............................................................................................. 96 5.6.1.1. Mixer motor............................................................................................. 97 5.6.1.2. Conveyer motor ...................................................................................... 99 5.6.1.3. Position motor....................................................................................... 100 5.6.1.4. Timing settings ..................................................................................... 103 5.6.2. Compact settings.......................................................................................... 104 5.6.2.1. Serial Compact output settings............................................................. 104 5.6.2.2. Set protocol settings ............................................................................. 105 5.6.3. Auto Compact settings ................................................................................. 107 5.6.3.1. Printer port............................................................................................ 108 5.6.3.2. Compact connected to.......................................................................... 108 5.6.3.3. Select barcode reader .......................................................................... 108 5.6.3.4. Search in example history .................................................................... 109 5.6.3.5. Outer needle depth............................................................................... 109 5.6.4. Manual control .............................................................................................. 110 5.6.4.1. Vacuum pump ...................................................................................... 110 5.6.4.2. Waste pump ......................................................................................... 111 5.6.4.3. Saline pump.......................................................................................... 111 5.6.4.4. Rinse pump .......................................................................................... 111 5.6.4.5. All pumps OFF...................................................................................... 111 5.6.4.6. Needle Control...................................................................................... 112 5.6.4.7. Outer needle up.................................................................................... 112 5.6.4.8. Outer needle down ............................................................................... 112 5.6.4.9. Sample probe up .................................................................................. 112 5.6.4.10. Sample probe down ............................................................................. 112 5.6.4.11. Fill nozzle up ........................................................................................ 113 5.6.4.12. Fill nozzle down:................................................................................... 113 5.6.4.13. Rinse nozzle up.................................................................................... 113 5.6.4.14. Rinse nozzle down ............................................................................... 113 5.6.4.15. Valve control ........................................................................................ 114 Auto Compact User Manual Version 6.62 MRN-071-EN Page 9 Contents 5.6.4.16. Valve's.................................................................................................. 114 5.6.4.17. Actuator................................................................................................ 115 5.6.5. Display maintenance history (Service) ......................................................... 115 5.6.6. Display error history (Service) ...................................................................... 116 5.6.7. Advanced ..................................................................................................... 117 6. GETTING STARTED.................................................................................................. 119 6.1. Limit settings ........................................................................................................ 119 6.2. Liquid levels.......................................................................................................... 119 6.3. Reagents preparation........................................................................................... 120 6.3.1. Rinse solution QRR 010934 ......................................................................... 120 6.3.2. Saline QRR 010933 ..................................................................................... 120 6.3.3. Diluent QRR 010931 .................................................................................... 120 6.3.4. De-ionised water .......................................................................................... 121 6.3.5. Disinfectant QRR 010932............................................................................. 121 6.3.6. Cleaning solution.......................................................................................... 121 6.3.7. Waste disposal ............................................................................................. 121 7. QUICK START-UP ..................................................................................................... 123 7.1. Check list.............................................................................................................. 123 7.2. Fill procedure........................................................................................................ 125 8. TURN OFF.................................................................................................................. 127 8.1. 9. End-of-day-wash procedure ................................................................................. 127 REPORTING .............................................................................................................. 129 9.1. Protocols .............................................................................................................. 129 9.2. Result Printout...................................................................................................... 129 9.2.1. Report 60-Minute mode................................................................................ 131 9.2.1.1. Analyzers Error code messages........................................................... 132 9.2.1.2. Results at limit errors............................................................................ 133 9.2.2. Report 30 Minute mode ................................................................................ 135 9.2.2.1. Analyzers Error code messages........................................................... 136 9.2.2.2. Results at limit errors............................................................................ 137 9.2.3. Reporting range............................................................................................ 137 9.2.4. Aspect Hazy ................................................................................................. 138 9.2.4.1. Analyser "HAZY" code messages ........................................................ 139 9.2.5. Analyser ERROR ......................................................................................... 139 9.2.5.1. Explanation of the error messages....................................................... 140 10. COMPACT SYSTEM MESSAGES ............................................................................ 141 10.1. System messages ............................................................................................ 141 10.2. Test messages ................................................................................................. 142 10.3. System time-out <xxxx> ................................................................................... 142 10.4. Error messages ................................................................................................ 142 11. MAINTENANCE ......................................................................................................... 143 11.1. Maintenance Schedule example ...................................................................... 143 11.2. Daily ................................................................................................................. 143 Page 10 Auto Compact User Manual Version 6.62 MRN-071-EN Contents 11.3. Weekly.............................................................................................................. 144 11.3.1. Check the sensors in service mode.......................................................... 144 11.3.2. Separator.................................................................................................. 145 11.4. Level 4 maintenance ........................................................................................ 145 11.4.1. Rinse-pump tube replacement ................................................................. 145 11.4.2. Saline-pump tube replacement................................................................. 145 11.4.3. Replace bacterial filters ............................................................................ 146 11.4.4. Fill-nozzle O-ring replacement.................................................................. 146 11.4.5. Fill and clean procedure ........................................................................... 146 11.5. Level 3 maintenance ........................................................................................ 147 11.6. Level 2 maintenance ........................................................................................ 148 11.7. Level 1 maintenance ........................................................................................ 148 12. DATA SAFETY MANAGEMENT ............................................................................... 149 12.1. Power failure .................................................................................................... 149 12.2. RS232 serial output.......................................................................................... 149 12.3. Specifications for the RS232 port..................................................................... 149 13. TROUBLE SHOOTING .............................................................................................. 151 13.1. Peristaltic pumps .............................................................................................. 153 13.1.1. Rinse solution not primed through the system ......................................... 153 13.1.2. Rinse solution spilling over the instrument ............................................... 153 13.1.3. Rinse pump defective ............................................................................... 154 13.1.4. Liquid level sensor not sensing ................................................................ 155 13.1.5. Sample probe is not washed after aspiration ........................................... 155 13.1.6. Saline dripping in the sample tube adapter .............................................. 155 13.1.7. Saline pump defective .............................................................................. 156 13.1.8. Pipettes not dry after washing and drying ................................................ 156 13.2. Liquid level sensor not sensing ........................................................................ 157 13.3. Compact stalls.................................................................................................. 157 13.4. Diluter ............................................................................................................... 159 13.4.1. Diluter errors............................................................................................. 159 13.5. Vacuum ............................................................................................................ 160 13.5.1. Vacuum stabilisation problems................................................................. 160 13.5.2. Vacuum error............................................................................................ 161 13.6. Flushing liquids................................................................................................. 163 13.6.1. De-ionised water....................................................................................... 163 13.6.2. Disinfectant............................................................................................... 163 13.7. Needle system.................................................................................................. 164 13.7.1. Needle not in top position ......................................................................... 164 13.7.2. Sample probe fails to go down ................................................................. 165 13.8. Air bubbles ....................................................................................................... 167 13.8.1. Foam in column (examples 3 & 9)............................................................ 167 13.8.2. Pipette looks like zebra crossing (example 2) .......................................... 168 13.8.3. One air bubble about 5 mm under meniscus (examples 5 & 10) ............. 168 13.8.4. One air bubble rising in pipette (examples 5 & 8)..................................... 168 13.8.5. Small air bubbles rising in pipette............................................................. 168 Auto Compact User Manual Version 6.62 MRN-071-EN Page 11 Contents 13.8.6. Random air bubbles in pipette.................................................................. 169 13.9. Leaking pipettes ............................................................................................... 171 13.10. Rinse nozzle (wash station) alignment............................................................. 172 13.11. Hazy reports ..................................................................................................... 173 13.12. Contaminated instrument ................................................................................. 174 13.13. Fill time-out....................................................................................................... 174 13.14. Position error .................................................................................................... 175 13.15. Separator error ................................................................................................. 177 13.16. Reagents .......................................................................................................... 179 13.17. Reagents alarm ................................................................................................ 179 13.18. Fill nozzle ......................................................................................................... 181 13.18.1. Fill nozzle does not engage with pipette................................................... 181 13.18.2. Fill nozzle not at fill position...................................................................... 181 13.18.3. Fill nozzle not at home position ................................................................ 181 13.19. Piercing error.................................................................................................... 182 13.20. New rack adapter ............................................................................................. 182 13.21. Rack unit errors ................................................................................................ 183 13.21.1. Gripper module......................................................................................... 184 13.21.2. Mixer module ............................................................................................ 185 13.21.3. Check the mixer........................................................................................ 185 13.22. Communications............................................................................................... 186 13.23. Not reading the barcode................................................................................... 186 13.24. Tube sensor does not detect the tube.............................................................. 186 13.25. Tube not in 1 position ....................................................................................... 187 14. APPENDIX FOR STARRSED AUTO-COMPACT ..................................................... 189 15. WORK INSTRUCTION STARRSED AUTO-COMPACT ........................................... 283 15.1. WI-207 Sample probe Auto Compact............................................................... 343 16. GLOSSARY OF TERMS ............................................................................................ 345 17. INDEX......................................................................................................................... 347 Page 12 Auto Compact User Manual Version 6.62 MRN-071-EN Introduction 1. INTRODUCTION The StaRRsed Blood Sedimentation Rate Instrument (hereafter called StaRRsed AutoCompact) is an in vitro diagnostic medical device that automatically carries out the erythrocyte sedimentation rate analysis according to the Westergren method, using closed sample tubes filled with citrate or EDTA blood. The StaRRsed Auto-Compact is an advanced ESR system that offers many unique features and benefits over the traditional ESR procedures. Automating this method has the following advantages: • The Westergren pipettes are always filled to the correct level. • Using closed sample tubes reduces the possibility of contamination for the user and environment. • Standard glass Westergren pipettes are used, in which the measurement can be corrected to a constant temperature (18 C° Celsius). Even small abnormalities can be detected over a longer period of time, irrespective of where and when the blood sample was taken. • Every sedimentation measurement is directly linked to an identified sample, so that a manual work sheet is unnecessary. Patient ID errors are reduced to a minimum by using the bar-code reader. • In the EDTA mode, the accuracy of dilution of EDTA blood with citrate is considerably better than manual dilution achieved either by "tipping off" or using evacuated blood collection tubes pre-filled with citrate solution. • The data can be send to your Lab Information System. • The used sedimentation pipettes are automatically washed and dried. • Minimum sample volume is 1.4 ml for the StaRRsed Auto-Compact. • The StaRRsed Auto-Compact has fully automatic sample loading. • The Rack system can work with a variety of hematology analyzer racks with most common EDTA blood sample tubes. The system uses rack adapters and is set up for a specific type of rack. • Windows based System Software is running on an external computer. Auto Compact User Manual Version 6.62 MRN-071-EN Page 13 Introduction 1.1. PC Operation and User Interface The entire operation of the StaRRsed Auto-Compact is driven by a personal computer with Windows operating system. The user interface is intuitive and can be activated via the keyboard or the optional touch screen. All the data from each sample, including the raw measuring data and a pictorial representation of the pipette, is stored and may be retrieved later if needed. The Main screen shows which pipettes are in use. The section in the middle of the layout gives the sample number and status for each pipette including "time to go" before the result is due; A pictorial representation of the pipette at the measuring position and a graph of the optical density over the length of the entire pipette is shown on the side. This data is retained in memory for subsequent retrieval if required. 1.2. Dilution principle The principle of adding Diluent to a flow of whole blood is unique. The StaRRsed Auto-Compact has the capability of monitoring the air displacement during the aspiration cycle. This is called online dilution. The CPU receives data from the airflow sensor and calculates the syringe speed. Diluter accuracy is ± 2%. Page 14 Auto Compact User Manual Version 6.62 MRN-071-EN Introduction 1.3. Sedimentation measurement principle The automatic reading of the Westergren sedimentation pipettes is carried out by moving an optical sensor along the pipettes. While the sensor is moving, a reading is made every 0.25 mm. The sensor is reading the absorption of infra red light through the Westergren pipette filled with blood. From these readings, values at a number of absorption levels are determined. All absorption figures are relative to the darkest and lightest reading (darkest = 100 % and the lightest = 0 % absorption respectively). By definition the levels are: 87.5% Cells/ plasma separation 75.0% Hazy detection 50.0% Meniscus detection Graphic showing typical absorption values of a sample 1.4. Data backup The StaRRsed Auto-Compact has its own external computer. This means that important collected data is stored together with a backup file on the hard-disk of the external computer. Important system settings, like needle depth are kept in an internal Flash Eprom inside the Instrument. In case of corrupted files, the program will automatically load and use the backup files. This means that important data is kept, irrespective of a power failure or if the instrument is unintentionally turned off. After the start-up procedure the software checks whether there are any ESR's still outstanding, if so, these will be carried out first. Auto Compact User Manual Version 6.62 MRN-071-EN Page 15 Instrument description 2. INSTRUMENT DESCRIPTION The StaRRsed Auto-Compact can accommodate sample racks from different manufacturers. The individual rack with the blood samples is snapped into the Mechatronics rack adapter and need only be placed on the entry platform of the StaRRsed Rack unit. The operator simply presses the button "Sample mode" and walks away. The instrument picks up the rack and mixes the blood by rotating the rack 8 times, as recommended by the ICSH. Barcode labels are read and, if an ESR has been requested, blood is aspirated from the sample tube. Thereafter the Rack is rotated one time to ensure each blood sample is thoroughly mixed and the sample is picked up to be aspirated. Aspiration takes place via Mechatronics proprietary double needle mechanism. The citrate dilution takes place in a 4+1 ratio and is achieved with ± 3% accuracy. Eighty-four Westergren pipettes are housed in the carousel. Each is of precision bore glass. After each cycle, the pipette is cleaned automatically with low foam detergent followed by a drying cycle. The fill line is back-flushed using saline solution. Positive patient identification is achieved with a barcode-reader and takes place before aspiration of the sample. The temperature is corrected to the standard value of 18°C and ESR's may be read after one hour or 30 minutes. A foretell one-hour result is presented in the 30-minute mode. Auto Compact User Manual Version 6.62 MRN-071-EN Page 17 Instrument description Results of the test are expressed in millimeters. This data together with the patient ID number is sent to the laboratory computer along with the sedimentation time used (60 or 30 minutes), the temperature and the dilution ratio. Page 18 Auto Compact User Manual Version 6.62 MRN-071-EN Instrument description The StaRRsed Auto-Compact analyser consists of the following units: StaRRsed Compact analyzer • ESR measuring instrument with a belt holding 84 precision's bore glass Westergren pipettes. • Automated aspiration of the sample tube. • Automated dilution of EDTA blood sample with citrate. • Automated measurement of ESR after 30 or 60 minutes. • Automated cleaning and drying of pipettes. StaRRsed Rack • Add-on unit for sampling and rack handling. • Barcode reader for sample identification. • Rack transport unit. • Automatic mixing of sample tubes before sampling. • Needle unit. • Diluter module. PC with touch screen LCD monitor • Windows based platform • Dedicated instrument software • Optional network connections • USB port Auto Compact User Manual Version 6.62 MRN-071-EN Page 19 Instrument description 2.1. Technical specifications Technical specifications for the StaRRsed Auto-Compact: ESR method: ESR method Temperature compensation method 30 minute method Allowed blood specimen types Westergren method R.W. Manley: J. clin Path (1957), 10, 354 R. Rogers: Medical Laboratory World 1994 • For EDTA mode: Whole blood with < 1% EDTA anticoagulant. • For Citrate mode: Whole blood (4 vols.) with sodium citrate anticoagulant-diluent (1 vol.) Automatic dilution Reported result 4 vols. blood + 1 vol. sodium citrate diluent (3.2% NaCl); accuracy ±2% mm/hr Reagents: Reagents used QRR 010931 Diluent QRR 010932 Disinfectant QRR 010933 Saline QRR 010934 Rinse solution De-ionized water Blood volume: Aspirated blood volume per sample 1.4 ml in EDTA mode 1.6 ml in Citrate mode Rack and tube types: Rack types Abbott CD3500/3700 Abbott CD4000/Sapphire ABX Pentra 80 ABX Pentra 120 Bayer Advia Coulter LH750 Coulter HmX Sysmex sample rack (low profile) Page 20 Auto Compact User Manual Version 6.62 MRN-071-EN Instrument description Most commonly used brands/types. Closed tubes with concentrical cap only. Sample tube types Barcode reader: Barcode reader type Reading capabilities CCD. Most common barcode labels Code39, ITF, Industrial 2 or 5, CodaBar, EAN/UPC and CODE128. 2.2. Technical specifications contd. StaRRsed Compact environment: Less than 65 dBA Sound level 18 - 28 °C Environment temperature 10-90% Relative humidity StaRRsed Compact: Mains voltage Fuse (20 x 5 mm) Power consumption Heat output 100/240V 50-60Hz Slow blow 220V 2.5 Amp Slow blow 110V 5.0 Amp Standby Maximum 500 VA Standby 70 Watt Full operation Auto Compact User Manual Version 6.62 MRN-071-EN 60 VA 360 Watt Page 21 Instrument description Rack unit 12 Volt DC from the StaRRsed Auto Compact Mains voltage 50 VA Power consumption 21.5 Kg Weight StaRRsed Auto-Compact overall dimensions: Dimensions Width 1.100 mm Height 660 mm Depth 800 mm Weight 70 kg StaRRsed Auto-Compact table size: Min. table size Width (Exclusive space for PC) 1.100 mm Width (Including space for PC) 1.700 mm Depth 600 mm 2.3. Accessory kit The StaRRsed Auto-Compact comes with an accessories kit. For a complete list of the the contents of accessories kit, see Appendix - Article reference code (on page 190) Page 22 Auto Compact User Manual Version 6.62 MRN-071-EN Installation 3. INSTALLATION The instrument must be unpacked, installed and checked by a trained engineer prior to first operation. Detailed installation instructions are given in the StaRRsed Auto-Compact Installation manual. Auto Compact User Manual Version 6.62 MRN-071-EN Page 23 Standard Operating Procedures (S.O.P.) 4. STANDARD OPERATING PROCEDURES (S.O.P.) In this section the following issues can be found: • Basics of Bio safety • S.O.P. for working with bio hazardous materials • Safety warning • StaRRsed Incident Report • E.C. Declaration • Labels and stickers on containers 4.1. Basics of Bio safety Basic rules on bio safety in a laboratory; • Wash hands after handling biological materials, removing gloves, or before leaving work area. • Don't eat, drink, etc. in the work area. • Never mouth pipette. • Take extreme precautions when sharps must be used. Dispose sharps carefully and properly. • Conduct procedures likely to create splashes, sprays, or aerosols within a biological safety cabinet that is certified annually. • Decontaminate work surfaces at least daily. • Decontaminate waste materials before disposal. • Wear a BUTTONED lab coat to protect street clothes. • Wear gloves when hands may contact potentially infectious materials, contaminated surfaces, or equipment. • Wear eye/face protection if splashes or sprays are anticipated during work outside a biological safety cabinet. • Transport materials outside of the laboratory using secondary containment and a cart. Avoid public areas during transport. • Transfer materials to and from the MCG according to federal and international regulations. • Be familiar with written instructions for laboratory procedures and proper responses to emergencies. • Report spills, exposures, illnesses, and injuries immediately. Auto Compact User Manual Version 6.62 MRN-071-EN Page 25 Standard Operating Procedures (S.O.P.) 4.2. S.O.P. for working with bio hazardous materials Purpose: To inform and educate all engineers that work with biohazards Effective Date: July 27, 2004 4.2.1. Facts and definitions: Biological hazards are present in all human and animal tissues and body fluids. The "normal" research activities carried out in a blood laboratory expose workers to human blood, urine, sweat, semen, saliva and muscle tissue. For the purpose of assessing risk, we assume that all volunteers to our clinical studies are not normal healthy individuals, and take appropriate precautions. We remain aware at all times that increased knowledge of disease transmission and occupational hazards may result in situations currently considered safe to be reclassified as having risk. "Universal Precautions" describes a set of procedures for dealing with subjects based on the assumption that they are positive for blood borne pathogens. Other precautions are necessary to prevent exposure to potential respiratory diseases. 4.2.2. Medical requirements: Routine personal medical assessments are advised at regular intervals (yearly) for all personal exposed to potential biohazard. Immunisation for Hepatitis B is recommended for everyone who is taking blood samples or dealing with human blood or bodily fluids. 4.2.3. General laboratory practices: The laboratory is a shared facility; it must be booked in advance with the Technician in Charge. All users must follow all Departmental Safety Guidelines and Bio safety Policy. Each user is responsible to leave a clean, disinfected and tidy work place. All biohazard waste must be properly disposed. Page 26 Auto Compact User Manual Version 6.62 MRN-071-EN Standard Operating Procedures (S.O.P.) 4.2.4. Specific laboratory practices and requirements: Biohazard waste: Dispose blood tubes into a biohazard sharps container. Dispose sharps into a biohazard sharps container. All other bio hazardous waste is to be deposited into a biohazard bag. All bio hazardous waste is deposited into the Medical Waste Management (MWM) bin for pick up. Decontamination procedures: Routine: At the end of each experiment, or each day, disinfect lab benches and any equipment Spills: Small spills of biohazard material should be treated by first covering them with an absorbent paper to avoid the formation of aerosols. Disinfect the spill by slowly pouring on a disinfecting solution working from the outside to the centre of the spill in a circular motion. Leave the spill long enough for disinfection to take place (check decontaminating instructions on the disinfectant container for time) and then carefully wipe up wearing gloves. Pick up any glass using forceps. Once all the material has been removed disinfect the area thoroughly. Inform the Technician in Charge of the spill. Food: No food or beverages will be brought into or consumed inside a blood laboratory at any time. Accident reporting: All accidents and injuries must be reported within 24 hours to the technician in Charge, to the Departmental Joint Health and Safety Committee and to the Department of Environmental Health and Safety using an Incident Report from the main office or the Technician in Charge. Laboratory access: Access to the haematology laboratory is limited to persons who are directly involved with the testing equipment. Children are not permitted in the laboratory. Personal protective equipment: Laboratory and maintenance personnel are expected to use a laboratory coat while working in the blood laboratory. We advice the use of non-canvas closed-toe shoes wherever there is a potential for foot injury from hazardous materials or from small physical objects. Personal outer clothing should not be stored in the blood laboratory. Lab coats worn in the blood laboratory should not be worn outside of the blood laboratory and should not be stored with personal outer clothing, to avoid transfer of contaminants. Gloves are considered contaminated after ones wearing. Avoid contamination of work surfaces with gloves. Dispose of gloves into a biohazard container. The use of eye protection is advised while processing samples. Remove and properly dispose of gloves and wash hands before leaving the laboratory. Auto Compact User Manual Version 6.62 MRN-071-EN Page 27 Standard Operating Procedures (S.O.P.) 4.3. Safety warning When there was an incident with the StaRRsed Auto-Compact which caused damage to the instrument, please notify your superior and your local equipment dealer before you continue using the instrument. Example: • A collision with a moving object • Something falling on the instrument • Somebody falling into or onto the Sedimentation instrument • Liquids spilling into the instrument Page 28 Auto Compact User Manual Version 6.62 MRN-071-EN Standard Operating Procedures (S.O.P.) 4.4. StaRRsed Incident Report Auto Compact User Manual Version 6.62 MRN-071-EN Page 29 Standard Operating Procedures (S.O.P.) 4.5. E.C. Declaration StaRRsed Auto Compact Page 30 Auto Compact User Manual Version 6.62 MRN-071-EN Standard Operating Procedures (S.O.P.) 4.6. Labels and stickers on containers 4.6.1. Stickers for the onboard reagents bottles Auto Compact User Manual Version 6.62 MRN-071-EN Page 31 Standard Operating Procedures (S.O.P.) 4.6.2. Stickers of the reagents containers Page 32 Auto Compact User Manual Version 6.62 MRN-071-EN Auto Compact program 5. AUTO COMPACT PROGRAM The StaRRsed Auto-Compact is controlled via an external computer on which runs the StaRRsed Auto-Compact software. The software functions are grouped on six tabbed screens. The software is controlled by mouse pointer or directly via the touch screen. A virtual keyboard is automatically displayed on screen, when numerical or alphanumerical input is required. Normal operational screens are the SAMPLE and the HISTORY screen. The REAGENTS screen is used to check the reagent levels and log reagent replacement. To activate priming sequences and cleaning operations, the screen MAINTENANCE is used. The SETTINGS and SERVICE screens are protected by a password to prevent accidental change of settings. The SERVICE menu is used for service and control purposes. SAMPLE screen (on page 34) HISTORY screen (on page 40) REAGENTS screen (on page 59) MAINTENANCE screen (on page 62) Setting screen (General) settings (on page 78) (password protected: 3964) Service screen (on page 95) (password protected: 3964) Auto Compact User Manual Version 6.62 MRN-071-EN Page 33 Auto Compact program 5.1. Sample screen Display of the Status line in service mode: The main menu is displayed during operation. To access other menus, select the required tab on the display and press the mouse button. To access the other sub menus in the selected tab, select the required button and press the mouse button. The following screens are selectable via the associated tabs: 1. 2. 3. 4. 5. 6. SAMPLE screen (on page 34) HISTORY screen (on page 40) REAGENTS screen (on page 59) MAINTENANCE screen (on page 62) SETTINGS screen (on page 78) SERVICE screen (on page 95) Page 34 Auto Compact User Manual Version 6.62 MRN-071-EN Auto Compact program The above picture is an example of the SAMPLE screen of the Compact in the normal operation mode. If the Service mode button with light is shown in the Status line, the Compact is running in the service mode. The User Manual button is also in the status line. Click this button to open the StaRRsed Auto-Compact User manual. When the Compact is running in the Service mode all kinds of settings can be changed and the instrument will run with the changed settings. For instance, when ESR time is set to 12 minutes, the Carousel will move according this time setting to be in time at the measure position. When the Compact is running in the NORMAL MODE, the instrument uses the standard saved settings. For instance the ESR time is set back to 60 minutes or 30 minutes according the used method. 5.1.1. Carousel: Carousel: This is a graphical representation of the Compact carousel. When an ESR is required the carousel is moving to the Measure position. On the display, the belt is also moving accordingly. The decimal numbers next to the pipettes are the numbers on the pipette belt. When a pipette is filled successfully, a red dot marks the filled pipette. In case of a failure the pipette is marked with a flashing red dot. All the sample information can be found in tab HISTORY. 5.1.2. Measure station: Measure station: This is the position of the measure station where the ESR of the sample is measured. 5.1.3. Wash station: Wash station: (Also named Rinse station) This is the position where the sample is washed out of the pipette. The pipette is clean and dry after this process. 5.1.4. Fill station: Fill station: This is the position where the pipette is filled with a blood sample. Auto Compact User Manual Version 6.62 MRN-071-EN Page 35 Auto Compact program 5.1.5. Pipette: Pipette: This is a graphical representation of the pipette. It is generated from the results of the ESR measurement. It can be used to locate possible air bubbles. 5.1.6. Rack: Rack: This is a representation of a rack in process. Empty positions indicate, that no sample tube was detected at that position. The combinations of the pictograms have the following meaning: Barcode could not be read (read failure). Barcode was read correctly, but ESR is not required for this sample. ESR is required and waiting to be done. ESR was measured successfully. ESR was measured, but with fill errors. After processing the rack, the information of the rack is transferred to the DISPLAY RACK HISTORY (on page 46) screen. 5.1.7. Sample mode button: Sample mode button: This is the button to start or stop the run mode of the instrument. 5.1.8. Version information: Version information: Shows the version information of the software. 5.1.9. Manual input sample ID: Manual input sample ID: This window can be used for manual input of a barcode from a sample tube. Page 36 Auto Compact User Manual Version 6.62 MRN-071-EN Auto Compact program 5.1.10. Sample information: Sample information: After measurement, the results of the sample are shown in this window. This window is refreshed after every new result of a sample. 5.1.11. Status: Status: Information about the current status of the instrument is shown here, such as the selected mode (EDTA or Citrate), selected method (60 or 30 minute) and symbols that draw attention to certain maintenance conditions. 5.1.12. Sample screen with keyboard To view the status of a specific pipette, click directly on the pipette itself or click the open space in the center of the belt representation. A virtual number pad is shown. Type the number of the requested pipette and press the OK button. The following screen is shown. Auto Compact User Manual Version 6.62 MRN-071-EN Page 37 Auto Compact program 5.1.13. Pipette information Page 38 Auto Compact User Manual Version 6.62 MRN-071-EN Auto Compact program The following information is shown: • Sample ID: The sample identification (barcode) of the sample tube. • Dilution: The dilution rate of this sample as calculated during the aspiration process. • Time filled: The date and time when the sample was aspirated. • Time to go: The number of minutes to wait until the sample will be measured. The indicators at the right side show the current status of the selected pipette: • Pipette filled OK: A sample has been aspirated into the pipette without problems. • Pipette dirty: The sample has been measured and the pipette is marked to be washed when it reaches the rinse station. This indicator is also on when a sample could not be aspirated properly. • Pipette leak: Reserved for future use. Auto Compact User Manual Version 6.62 MRN-071-EN Page 39 Auto Compact program 5.2. History screen In the sample history the following options can be selected: • DISPLAY PIPETTE DATA (on page 41) Use button Print to send the selected data to the printer. • DISPLAY SAMPLE HISTORY (on page 42) • DISPLAY FULL PATIENT RESULT (on page 44) For the sample history, the following options are available: Print: Send the selected result to the printer. Send all to HOST: Send all results again to the HOST. Send patient result to HOST: Send only the selected patient result to the HOST. • DISPLAY RACK HISTORY (on page 46) • DISPLAY RACK DETAILS (on page 48) Page 40 Auto Compact User Manual Version 6.62 MRN-071-EN Auto Compact program • ANALYSE RESULTS (on page 50) • ESR STATISTICS (on page 49) 5.2.1. Display pipette data This table shows information of the samples in the carousel during the selected ESR process time. After measuring the pipette, the pipette data is transferred to the sample history files. In the header of the table the names of the columns are shown. Double-click the header of any column to sort the table by this column in ascending order. Auto Compact User Manual Version 6.62 MRN-071-EN Page 41 Auto Compact program 5.2.2. Display Sample history Page 42 Auto Compact User Manual Version 6.62 MRN-071-EN Auto Compact program In the window Select date to show results: double click on the file name to select the results of the selected date. Press Refresh to refresh the list of available files. In the window Sample ID type the sample ID information and press Search. Press the Options key for the following search options: • Show today's results. • Show today's results from a selected time frame of the day. • Show results of a number of past days. Default value is set for 7 days. • Show results of a specific day. • Show results of the range between the first selected date to the next selected date. Select in the table a 'Sample ID' and click the button DISPLAY FULL PATIENT RESULT (on page 44) for more detailed information of the selected sample. In the header of the table the names of the columns are shown. Double-click the header of any column to sort the table by this column in ascending order. Auto Compact User Manual Version 6.62 MRN-071-EN Page 43 Auto Compact program 5.2.2.1. Display patient results Page 44 Auto Compact User Manual Version 6.62 MRN-071-EN Auto Compact program In the window Select date to show results: double click on the file name to select the results of the selected date. Press Refresh to refresh the list of available files. In the window Sample ID type the sample ID information and press Search. Press the Options key for the following search options: • Show today's results. • Show today's results from a selected time frame of the day. • Show results of a number of past days. Default value is set for 7 days. • Show results of a specific day. • Show results of the range between the first selected date to the next selected date. From the selected Sample ID detailed information is shown on this screen. Sample ID Sample Identification number Aspect code Shows the aspect code (e.g. Hazy <10) ESR 30 min The 30 minute method is used. This is the measured 30 minutes value. ESR 60 min When the 60 minute method is used, this is the measured 60 minutes value. When the 30 minutes method is used, this is the calculated 60 minutes value. ESR 60 min T.Corr. Temperature correction is used. This is the 60 minutes value corrected to 18°C. Date / time Date and time of the measurement of the result. ESR time (min.) Actual duration of the ESR. Dilution % The calculated dilution rate after aspiration of the sample. TEMPERATURE (°C) Room temperature at the time of the measurement of the sample. Pipette number Pipette in which the sample was measured. Error code Shows any ESR error codes (e.g. "Too many borders found"). Auto Compact User Manual Version 6.62 MRN-071-EN Page 45 Auto Compact program 5.2.3. Display rack history Page 46 Auto Compact User Manual Version 6.62 MRN-071-EN Auto Compact program After completion of the rack, the status of the rack is displayed here. The last 10 racks are stored and can be selected. The selected rack is displayed left (above the selection window). The previous 4 racks are also displayed and can be checked simultaneously. The combinations of the pictograms have the following meaning: Barcode could not be read (read failure). Barcode was read correctly, but ESR is not required for this sample. ESR is required and waiting to be done. ESR was measured successfully. ESR was measured, but with fill errors. The Clear rack history button will clear the contents of the rack history file and restart to build-up a new rack history file. Auto Compact User Manual Version 6.62 MRN-071-EN Page 47 Auto Compact program 5.2.3.1. Display rack status More detailed information of the samples in the selected rack is shown in the status table. The last 10 racks are stored and can be selected. The Clear rack history button will clear the contents of the rack history file and restart to build-up a new rack history file. Page 48 Auto Compact User Manual Version 6.62 MRN-071-EN Auto Compact program 5.2.4. ESR Statistics screens A statistical graph is produced over a selected period. Make a selection of the following graphs; • Daily mean (mm) Use this to check variations in the daily mean ESR. • Hazy (%) Increasing hazy reports are an indication for contamination of the instrument. • Dilution (%) Increasing dilution errors indicate the need for maintenance of the diluter system. • Bubbles on top (%) Increasing samples with bubbles indicate the need for maintenance of the aspiration system. • ESR errors (%) Increasing ESR errors may indicate the need for maintenance. • Number of samples This can be used to document variations in work load. Auto Compact User Manual Version 6.62 MRN-071-EN Page 49 Auto Compact program 5.2.5. History analyse Dilution error The dilution error detection is a user setting and can be changed in SETTINGS - dilution error detection to 0 ... 25 %. In this example, the dilution error detection is set to 10%. By selecting Dilution >= 110 all the samples with a dilution rate >= 110 are displayed in the table. By selecting Dilution <= 90 all the samples with a dilution rate <= 90 are displayed in the table. In the header of the table the names of the columns are shown. Double-click the header of any column to sort the table by this column in ascending order. Page 50 Auto Compact User Manual Version 6.62 MRN-071-EN Auto Compact program 5.2.6. History analyse results high Dilution error The dilution error detection is a user setting and can be changed in SETTINGS - dilution error detection to 0 ... 25 %. In this example, the dilution error detection is set to 10%. By selecting Dilution >= 110 all the samples with a dilution rate >= 110 are displayed in the table. By selecting Dilution <= 90 all the samples with a dilution rate <= 90 are displayed in the table. In the header of the table the names of the columns are shown. Double-click the header of any column to sort the table by this column in ascending order. Auto Compact User Manual Version 6.62 MRN-071-EN Page 51 Auto Compact program 5.2.7. History aspect Aspect By selecting one of the three Hazy aspect codes, all the samples with this aspect code are displayed in the table. In the header of the table the names of the columns are shown. Double-click the header of any column to sort the table by this column in ascending order. Page 52 Auto Compact User Manual Version 6.62 MRN-071-EN Auto Compact program 5.2.8. History analyse error Error By selecting one of the error codes, all the samples with this error code are displayed in the table. In the header of the table the names of the columns are shown. Double-click the header of any column to sort the table by this column in ascending order. Auto Compact User Manual Version 6.62 MRN-071-EN Page 53 Auto Compact program 5.2.9. History analyse warning Warning By selecting one of the warning codes, all the samples with this warning code are displayed in the table. In the header of the table the names of the columns are shown. Double-click the header of any column to sort the table by this column in ascending order. Page 54 Auto Compact User Manual Version 6.62 MRN-071-EN Auto Compact program 5.2.10. History sample analyse option Make a selection for 1. A specific number of past days. 2. A specific date. 3. A range of days from start date to end date. Auto Compact User Manual Version 6.62 MRN-071-EN Page 55 Auto Compact program 5.2.11. History sample analyse option day Make a selection for all of today's results or only today's results between start time and end time. Page 56 Auto Compact User Manual Version 6.62 MRN-071-EN Auto Compact program 5.2.12. Set start date Input the Start date and time. Auto Compact User Manual Version 6.62 MRN-071-EN Page 57 Auto Compact program 5.2.13. Set end date Input the End date and time. Page 58 Auto Compact User Manual Version 6.62 MRN-071-EN Auto Compact program 5.3. Reagents screen Auto Compact User Manual Version 6.62 MRN-071-EN Page 59 Auto Compact program When there is a sensor alarm, an alarm indicator is shown in the tab REAGENTS. The alarm status of the bottles and separator are shown in this screen. An empty bottle is marked by a flashing red to yellow mark. When the bottle status screen is active, the bottle audio alarm is switched off. Reagent information is shown in the little text boxes. To input new reagent information when reagent is replaced, click on the appropriate text box. When the expire date is exceeded the text box will flash red. The software checks the bottle status before starting a new rack. If a level alarm is ON, it will not process the new rack. If an alarm comes ON during a rack, it will finish to aspirate that rack (10 samples max.). Washing dirty pipettes always continues, as to avoid that the samples are left in the pipettes. Reagents alarm is also set when the expire date of the reagent is exceeded. Processing of new samples is stopped. A log is available for all reagents and can be accessed by clicking on DISPLAY REAGENT HISTORY (on page 60). 5.3.1. Display reagent history This screen shows the history of the used reagents. Select the reagent type on the right side. For external use of the information all the logged reagent data can by exported to EXCEL .CSV format by clicking Export to Excel (CSV). Page 60 Auto Compact User Manual Version 6.62 MRN-071-EN Auto Compact program 5.3.2. New reagent input Input screen for new reagents. Make a selection to add new (default setting) or delete the current information and continue with "Next". Note: Only the Rinse solution input screen is shown in this manual. The input screens are the same for all reagents. 5.3.2.1. New reagent input (cont) 1. 2. 3. 4. First enter the Lot number. Enter the Expire date. If necessary, adjust the date when the reagent was placed. Check if the preview box shows the correct information, then press OK. Auto Compact User Manual Version 6.62 MRN-071-EN Page 61 Auto Compact program Note: Only the Rinse solution is shown in the manual. All the other reagents input are the same as the Rinse input. 5.4. Maintenance screen When there is a sensor alarm, an alarm indicator is shown in the tab MAINTENANCE. This screen has 5 sub screens: 1. 2. 3. 4. 5. PRIME (ON PAGE 63) / CLEAN CHECK SENSORS (on page 67) DISPLAY ERROR HISTORY (on page 72) DISPLAY MAINTENANCE HIST. (on page 73) MAINTENANCE INFO (on page 74) Page 62 Auto Compact User Manual Version 6.62 MRN-071-EN Auto Compact program 5.4.1. Prime / Clean When there is a sensor alarm, an alarm indicator is shown in the tab MAINTENANCE. All maintenance functions for the fluid system are grouped under button PRIME (ON PAGE 63) / CLEAN. 5.4.1.1. Prime Rinse solution • Prime Rinse solution: After each measurement, the pipettes are washed and dried automatically. After reagent change, the fluid system must be primed to fill the relevant tubes with reagent and remove air. Use this button to perform the automatic priming cycle for this reagent. 5.4.1.2. Prime Saline • Prime Saline: After each aspiration, the outer needle, sample probe and fill nozzle are washed with saline. After reagent change, the fluid system must be primed to fill the relevant tubes with reagent and remove air. Use this button to perform the automatic priming cycle for this reagent. Auto Compact User Manual Version 6.62 MRN-071-EN Page 63 Auto Compact program 5.4.1.3. Prime Diluent • Prime Diluent: The Diluter prime cycle is 5 strokes of the syringe. After reagent change, the fluid system must be primed to fill the relevant tubes with reagent and remove air. Use this button to perform the automatic priming cycle for this reagent. 5.4.1.4. Prime de-ionized water • Prime De-ionized water: After each aspiration, the fill nozzle is flushed with de-ionized water. After reagent change, the fluid system must be primed to fill the relevant tubes with reagent and remove air. Use this button to perform the automatic priming cycle for this reagent. 5.4.1.5. Prime Disinfectant • Prime Disinfectant: During a pipette rinse cycle, a small amount of disinfectant is flushed around the bottom of the pipette and into the waste system. After reagent change, the fluid system must be primed to fill the relevant tubes with reagent and remove air. Use this button to perform the automatic priming cycle for this reagent. 5.4.1.6. Prime all units • PRIME ALL UNITS: When the StaRRsed Auto-Compact has been idle for some hours, some reagents may have dropped from the tubes due to gravity. Use this button to sequentially activate all the different priming functions once. 5.4.1.7. Wash each pipette • Wash each pipette: When the pipette belt turns one position, the pipette at the rinse position will be rinsed and dried, regardless if it was filled or not. 5.4.1.8. Wash only sample pipettes • Wash only sample pipettes: All pipettes which are currently holding samples are washed and dried ones. A warning is shown on the display: <Pipette data will be lost!>. NOTE: Before executing this function, check carefully if there are samples in the pipette belt that need to be measured. Any remaining samples will be washed away and will NOT be measured! Page 64 Auto Compact User Manual Version 6.62 MRN-071-EN Auto Compact program 5.4.1.9. Wash all pipettes • Wash all pipettes: All pipettes on the pipette belt are washed and dried ones. A warning is shown on the display: <Pipette data will be lost!>. NOTE: Before executing this function, check carefully if there are samples in the pipette belt that need to be measured. Any remaining samples will be washed away and will NOT be measured! 5.4.1.10. Fill and Clean • Fill & Clean: This button starts the Fill & Clean procedure. During prolonged use of the instrument, proteins are building up in the Westergren pipettes which need to be removed using a strong cleaning agent. This function fills all pipettes with a cleaning agent and removes the cleaning agent after a specified time. 5.4.1.11. Fill and Clean with cleaning adapter The following screen opens. Fill & Clean: Automatic fill and clean function, each individual pipette on pipette belt will be filled with cleaning solution. This cycle takes about 90 minutes. The Fill & Clean function is part of the monthly maintenance procedure. A warning is shown on the display: <Pipette data will be lost!>. By toggling the switch ON the fill and clean adapter is used. 1. Fill the clean adapter and fill it up with hot de-ionised water till the first mark in the adapter. (180 ml) 2. Add the cleaning agent (QRR010905) to the adapter till the second marker in the adapter. (18 ml) Auto Compact User Manual Version 6.62 MRN-071-EN Page 65 Auto Compact program 3. 4. 5. 6. 7. Place the two caps on the adapter and mix well. Put the adapter in the Input-pool and select OK button The adapter will be transported to the needle position. The needle goes down and the fill and clean process is started. When all the pipettes are filled, the needle goes back to her home position and the adapter is moved to the release position and will be transported into End-pool. See WI-192 Fill and Clean with adapter (on page 316) 5.4.1.12. Fill and Clean without cleaning adapter The following screen opens. Fill & Clean: Automatic fill and clean function, each individual pipette on pipette belt will be filled with cleaning solution. This cycle takes about 90 minutes. The Fill & Clean function is part of the monthly maintenance procedure. A warning is shown on the display: <Pipette data will be lost!>. 1. 2. 3. 4. 5. 6. 7. 8. 9. The gripper moves to the needle position. The needle comes down. Fill a container with 150 ml hot de-ionized water. Add 15 ml cleaning agent. (QRR010905) Stir the prepared solution. Put the container close to the needle location. Push the silicon tube over the sample probe. Press continue. The fill and clean process is started. Page 66 Auto Compact User Manual Version 6.62 MRN-071-EN Auto Compact program 5.4.1.13. End-of-day-wash procedure • End-of-day wash: All pipettes will be washed once and needle, fill-nozzle and rinse-nozzle (wash station) are primed. 5.4.2. Check sensors Auto Compact User Manual Version 6.62 MRN-071-EN Page 67 Auto Compact program When there is a sensor alarm, an alarm indicator is shown in the tab MAINTENANCE. All functions to check the status of the sensors are grouped under button CHECK SENSORS (on page 67). • Check Fill stop sensor: Click the Check button. The green light is shown if the sensor value is in range. • Check temperature sensor: Value must be equal to the actual room temperature near the pipette belt. The value can be set in tab SETTINGS. • Check Diluter start sensor :This sensor is only used in EDTA mode. If the diluter does not start during the aspiration, the status of this sensor must be checked. Click the Check button. The green light is shown if the sensor value is in range. • Check Diluent flow sensor: This sensor is only used in EDTA mode. When activated, the LED Down is green and the LED Up is red. When the button Test is clicked, the LED Up must become green. After finishing the test, both LED's must be green. • Check Separator sensor : Click the Check button. The green light is shown if the sensor value is in range. • Check Flow sensor : Click the Check button. The green light is shown if the sensor value is in range. • Check Measure sensor : Click the Check button. The green light is shown if the sensor value is in range. Press the button Measure. The pipette currently at the measure position will be measured. The results are displayed in graphical and numerical form. The first peak must be found at 760 or above. NOTE: Clean sensors first before executing this function. NOTE: When a test pipette is installed at the measuring position the result of the test pipette is displayed in the field "ESR (mm)". Note: When the sensor is out of range and the light is red, the sensor values (on page 70) can be checked by turning on the service mode. Page 68 Auto Compact User Manual Version 6.62 MRN-071-EN Auto Compact program 5.4.2.1. Check sensors screen short • Check Fill stop sensor: Click the Check button. The green light is shown if the sensor value is in range. • Check temperature sensor: Value must be equal to the actual room temperature near the pipette belt. The value can be set in tab SETTINGS. • Check Diluter start sensor :This sensor is only used in EDTA mode. If the diluter does not start during the aspiration, the status of this sensor must be checked. Click the Check button. The green light is shown if the sensor value is in range. • Check Diluent flow sensor: This sensor is only used in EDTA mode. When activated, the LED Down is green and the LED Up is red. When the button Test is clicked, the LED Up must become green. After finishing the test, both LED's must be green. • Check Separator sensor : Click the Check button. The green light is shown if the sensor value is in range. • Check Flow sensor : Click the Check button. The green light is shown if the sensor value is in range. • Check Measure sensor : Click the Check button. The green light is shown if the sensor value is in range. Press the button Measure. The pipette currently at the measure position will be measured. The results are displayed in graphical and numerical form. The first peak must be found at 760 or above. NOTE: Clean sensors first before executing this function. NOTE: When a test pipette is installed at the measuring position the result of the test pipette is displayed in the field "ESR (mm)". Note: When the sensor is out of range and the light is red, the sensor values (on page 70) can be checked by turning on the service mode. Auto Compact User Manual Version 6.62 MRN-071-EN Page 69 Auto Compact program 5.4.2.2. Check sensors in service mode When there is a sensor alarm, an alarm indicator is shown in the tab MAINTENANCE. All functions to check the status of the sensors are grouped under button CHECK SENSORS (on page 67). . Page 70 Auto Compact User Manual Version 6.62 MRN-071-EN Auto Compact program 5.4.2.3. Fill stop sensor • Check Fill stop sensor: Values must be within the following limits: FS 90..140..165 NOTE: Clean sensors first before executing this function. 5.4.2.4. Temperature sensor • Check temperature sensor: Value must be equal to the actual room temperature near the pipette belt. The value can be set in tab SETTINGS. 5.4.2.5. Diluter start • Check Diluter start sensor: This sensor is only used in EDTA mode. If the diluter does not start during the aspiration, the status of this sensor must be checked. The value should be: Diluter start sensor 400-700. 5.4.2.6. Diluent flow sensor • Check Diluent flow sensor: This sensor is only used in EDTA mode. When activated, the LED Down is green and the LED Up is red. When the button Test is clicked, the LED Up must become green. After finishing the test, both LED's must be green. 5.4.2.7. Separator sensor • Check Separator sensor : The value must be in range of <200 600 >700. 5.4.2.8. Flow sensor • Check Flow sensor: The vacuum unit switches on and the values must be in this range: Flow: 0925-0980-1020 Abs: 0340- 0360-0380 Note: If for example the yellow orifice is blocked the flow will be: Offset 0045- 0050- 0055. 5.4.2.9. Measure sensor • Check Measure sensor: When the sensor is not engaged with the pipette, the Value must be within the following limits: MS 40..50..60. Press the button Measure. The pipette currently at the measure position will be measured. The results are displayed in graphical and numerical form. The first peak must be found at 760 or above. NOTE: Clean sensors first before executing this function. NOTE: When a test pipette is installed at the measuring position the result of the test pipette is displayed in the field "ESR (mm)". Auto Compact User Manual Version 6.62 MRN-071-EN Page 71 Auto Compact program 5.4.3. Display error history When there is a sensor alarm, an alarm indicator is shown in the tab MAINTENANCE. All errors that occurred during operation are logged automatically. This list can be used by field engineers to check check the status of the instrument and locate possible problems. This log can be saved e.g. to a memory stick by clicking button Save As ... Page 72 Auto Compact User Manual Version 6.62 MRN-071-EN Auto Compact program 5.4.4. Display maintenance history When there is a sensor alarm, an alarm indicator is shown in the tab MAINTENANCE. All performed maintenance functions are logged automatically. This log can be saved e.g. to a memory stick by clicking button Save As ... Auto Compact User Manual Version 6.62 MRN-071-EN Page 73 Auto Compact program 5.4.5. Maintenance info When there is a sensor alarm, an alarm indicator is shown in the tab MAINTENANCE. This screen is divided in 6 maintenance level sections. For maintenance levels 1 to 4, the status is monitored and flagged if it is over due. Press the button Info to open the work instruction for a specific maintenance level. When this maintenance is done press the button Done to log the completed work in the maintenance log file. Page 74 Auto Compact User Manual Version 6.62 MRN-071-EN Auto Compact program 5.4.5.1. Maintenance info overview When there is a sensor alarm, an alarm indicator is shown in the tab MAINTENANCE. This screen is divided in 6 maintenance level sections. For maintenance levels 1 to 4, the status is monitored and flagged if it is over due. Press the button Info to open the work instruction for a specific maintenance level. When this maintenance is done press the button Done to log the completed work in the maintenance log file. 5.4.6. Close Make the selection End-of-day wash procedure or Close program: End-of-day wash procedure will start to wash all pipettes, needle, fill-nozzle and rinse-nozzle (wash station). The function can be set up for automatic execution in the following screen. Close program will only close down the program. Auto Compact User Manual Version 6.62 MRN-071-EN Page 75 Auto Compact program 5.4.7. End-of-day-wash schedule settings End-of-day wash procedure: All pipettes will be washed once, needle, fill-nozzle and rinse-nozzle (wash station) are primed. Select the time of the day in hours and minutes for automatic start of this function. Page 76 Auto Compact User Manual Version 6.62 MRN-071-EN Auto Compact program 5.4.8. End-of-day-wash options End-of-day wash procedure: All pipettes will be washed once, needle, fill-nozzle and rinse-nozzle (wash station) are primed. The following settings can be selected for the function: • No End-of-day wash: The function is not active. • Immediately: The function runs immediately after pressing the button OK. • Only once: The function runs only once at the selected time. • Weekdays: The function runs only on working days (monday till friday) at the selected time. • Daily: The function runs on a daily base at the selected time. Auto Compact User Manual Version 6.62 MRN-071-EN Page 77 Auto Compact program 5.5. General settings This screen has four sub screens 1. 2. 3. 4. General settings (on page 78) Carousel control (on page 82) Dilutor settings (on page 92) Limit settings (on page 94) Page 78 Auto Compact User Manual Version 6.62 MRN-071-EN Auto Compact program Selections are made by an ON-OFF switch in the screen and by numerical inputs. If virtual keyboard is switched ON a virtual keyboard is pop-up for input the data. When Virtual keyboard is switched OFF the arrow keys must be used for input of data. When ready with any selecting press SAVE SETTINGS before you continue. The selection box for the language is marked with a symbol depicting a globe. Select the language for the software and the "Instructions For Use" by clicking on the appropriate language name. Note: To switch to the selected language the first time, close and restart the software. Auto Compact User Manual Version 6.62 MRN-071-EN Page 79 Auto Compact program . 5.5.1. ON and OFF selection The following selections can be switched ON or OFF: 1. 30 MIN. METHOD • 30 MIN. METHOD ON: ESR's are measured after 30 minutes. • 30 MIN. METHOD OFF: ESR's are measured after 60 minutes. 2. DISPLAY DILUTION • DISPLAY DILUTION ON: The dilution rates of all samples are shown in the status line of the screen directly after aspiration. • DISPLAY DILUTION OFF: Dilution rates are only shown if they are outside the selected accepted range. 3. EDTA MODE • EDTA MODE ON: Samples are presented in EDTA sample tubes. The samples are diluted in the StaRRsed Auto-Compact. • EDTA MODE OFF: Samples are presented in pre-diluted CITRATE sample tubes. Dilution on the StaRRsed Auto-Compact is switched OFF. 4. DISPLAY GRAPH • DISPLAY GRAPH ON: A graphical presentation from the measured sample data is shown on the Main screen. • DISPLAY GRAPH OFF: Default setting, no graph is shown. 5. SAMPLE PROBE PROTECTION • SAMPLE PROBE PROTECTION OFF: The sample probe motor will push the sample probe (inner needle) down to the set depth. • SAMPLE PROBE PROTECTION ON: The sample probe motor will stop when a certain current limit is exceeded and return to the home position. • Reset the SAMPLE PROBE PROTECTION switch from ON to OFF and ON again. 6. TEMP. CORRECTION • TEMP. CORRECTION ON: A temperature corrected value for the ESR is shown besides the actual measured value. • TEMP. CORRECTION OFF: Only the actual measured ESR value is shown. 7. FAST FILLING Page 80 Auto Compact User Manual Version 6.62 MRN-071-EN Auto Compact program • FAST FILLING OFF (Default setting): The carrousel is filled with optimum pipette usage but completion of a sample rack takes a little longer. The rotation sequence of the carrousel is evenly divided. In 60 minute method, the carrousel moves one position every 40 seconds (approx.). In 30 minute method, the carrousel moves one position every 20 seconds (approx.). • FAST FILLING ON: The carrousel is filled with optimum sample speed. The sample tubes in the rack are faster available for the user but the carrousel shows more unused pipettes. 8. VIRTUAL KEYBOARD • VIRTUAL KEYBOARD ON: If keyboard input is required, a virtual keyboard automatically pops up on the screen. • VIRTUAL KEYBOARD OFF: No pop-up screen of virtual keyboard. 9. PRINT AFTER MEASUREMENT • This will print the measured result on a single line directly to a dot matrix printer. When other printers then dot matrix are used, every result is printed on one new page. 10. CHECK FOR DUPLICATE ID'S • CHECK FOR DUPLICATE ID'S ON: It is not possible to run the same sample ID as long as this ID is in the pipette carousel data buffer. • CHECK FOR DUPLICATE ID'S OFF: It is possible to run the same sample ID, even when it is still stored in the carousel data buffer. 5.5.2. Numerical input The following numerical inputs can be made: 1. TEMPERATURE IN CELSIUS. Input the correct room temperature. 2. ESR SEDIMENTATION TIME IN MINUTES. Input the correct time 30 or 60 minutes. This time is reset to default when Service mode is switched OFF. 3. SAMPLE PROBE DEPTH in milliliters. 4. PIPETTE WASH TIME (SEC) in seconds. Default value 7. This setting is reset to default when Service mode is switched OFF. 5. PIPETTE DRY TIME (SEC) in seconds. Default value 5. This setting is reset to default when Service mode is switched OFF.. 6. MIXING INTERVAL (30..90 SEC) between two mixing squeeze of the rack in seconds. Default value 90. 5.5.3. Language selection The selection box for the language is marked with a symbol depicting a globe. Select the language for the software and the "Instructions For Use" by clicking on the appropriate language name. Note: To switch to the selected language the first time, close and restart the software. Auto Compact User Manual Version 6.62 MRN-071-EN Page 81 Auto Compact program 5.5.4. Carousel control This screen has four sub screens 1. 2. 3. 4. General settings (on page 78) Carousel control (on page 82) Dilutor settings (on page 92) Limit settings (on page 94) Page 82 Auto Compact User Manual Version 6.62 MRN-071-EN Auto Compact program 5.5.4.1. Control Carousel CAROUSEL POSITION This display presents the position of the carousel for the Rinse station position, Measure station position and the Fill station position. FORWARD AND BACKWARD MOVEMENT OF THE CAROUSEL With this function the carrousel can be moved one position backwards and forwards.. Warning: Only for trained personal. When this function is used the built in safety functions are not active, be careful. GO TO RINSE POSITION Enter a pipette number; the carousel will then turn to the stop position, which is always the Rinse station. SET RINSE POSITION The Compact has a self-encoding pipette position system. If an intermittent 'position error' is displayed the position must be entered manually. PIPETTE FLOW TEST Warning: Pipettes must be empty, before starting this function. Before the confirmation of the function the warning <Pipette data will be lost! > is displayed. This is a useful function for checking the pipette position adjustment, vacuum adjustment and filling height sensor positioning adjustment. Each individual pipette is tested and results are sent to the printer. DELETE PIPETTE DATA This function will erase all pipette data. Make sure that there are no samples on the pipette belt. Return to Carousel control (on page 82)screen. Auto Compact User Manual Version 6.62 MRN-071-EN Page 83 Auto Compact program 5.5.4.2. Flow test potentiometer mean Pipette flow test Warning: Pipettes must be empty, before starting this function. Before the confirmation of the function the warning < PIPETTE DATA WILL BE LOST! > is displayed. This is a useful function for checking the pipette position adjustment, vacuum adjustment and filling height sensor positioning adjustment. Each individual pipette is tested and results are displayed in there own diagram. Page 84 Auto Compact User Manual Version 6.62 MRN-071-EN Auto Compact program 5.5.4.3. Flow test flow Pipette flow test Warning: Pipettes must be empty, before starting this function. Before the confirmation of the function the warning < PIPETTE DATA WILL BE LOST! > is displayed. This is a useful function for checking the pipette position adjustment, vacuum adjustment and filling height sensor positioning adjustment. Each individual pipette is tested and results are displayed in there own diagram. Auto Compact User Manual Version 6.62 MRN-071-EN Page 85 Auto Compact program 5.5.4.4. Flow test absolute Pipette flow test Warning: Pipettes must be empty, before starting this function. Before the confirmation of the function the warning < PIPETTE DATA WILL BE LOST! > is displayed. This is a useful function for checking the pipette position adjustment, vacuum adjustment and filling height sensor positioning adjustment. Each individual pipette is tested and results are displayed in there own diagram. Page 86 Auto Compact User Manual Version 6.62 MRN-071-EN Auto Compact program 5.5.4.5. Flow test leakage Pipette flow test Warning: Pipettes must be empty, before starting this function. Before the confirmation of the function the warning < PIPETTE DATA WILL BE LOST! > is displayed. This is a useful function for checking the pipette position adjustment, vacuum adjustment and filling height sensor positioning adjustment. Each individual pipette is tested and results are displayed in there own diagram. Auto Compact User Manual Version 6.62 MRN-071-EN Page 87 Auto Compact program 5.5.4.6. Flow test Fill sensor air Pipette flow test Warning: Pipettes must be empty, before starting this function. Before the confirmation of the function the warning < PIPETTE DATA WILL BE LOST! > is displayed. This is a useful function for checking the pipette position adjustment, vacuum adjustment and filling height sensor positioning adjustment. Each individual pipette is tested and results are displayed in there own diagram. Page 88 Auto Compact User Manual Version 6.62 MRN-071-EN Auto Compact program 5.5.4.7. Flow test Fill sensor glass Pipette flow test Warning: Pipettes must be empty, before starting this function. Before the confirmation of the function the warning < PIPETTE DATA WILL BE LOST! > is displayed. This is a useful function for checking the pipette position adjustment, vacuum adjustment and filling height sensor positioning adjustment. Each individual pipette is tested and results are displayed in there own diagram. Auto Compact User Manual Version 6.62 MRN-071-EN Page 89 Auto Compact program 5.5.4.8. Flow test start Pipette flow test Warning: Pipettes must be empty, before starting this function. Before the confirmation of the function the warning < PIPETTE DATA WILL BE LOST! > is displayed. This is a useful function for checking the pipette position adjustment, vacuum adjustment and filling height sensor positioning adjustment. Each individual pipette is tested and results are displayed in there own diagram. Page 90 Auto Compact User Manual Version 6.62 MRN-071-EN Auto Compact program 5.5.4.9. Set new rinse position Click on CHANGE RINSE POSITION and enter via the keyboard the accurate rinse position and press the LEARN CAROUSEL POSITION key for learning a new position table. Note: This option is used when there is a position error. Auto Compact User Manual Version 6.62 MRN-071-EN Page 91 Auto Compact program 5.5.5. Diluter settings This screen has four sub screens 1. 2. 3. 4. General settings (on page 78) Carousel control (on page 82) Dilutor settings (on page 92) Limit settings (on page 94) 5.5.5.1. Dilution adjustment 60 till 140% • Dilution adjustment 60 till 140% Adjusting the dilution rate by running a number of sample tubes filled with fresh blood and write down the dilution rate, which is shown in the numerical window. By entering the percentage deviation, a correction value can be made. Example: The average dilution rate is 92%, enter 108 in order to correct to a 100% dilution rate. Page 92 Auto Compact User Manual Version 6.62 MRN-071-EN Auto Compact program 5.5.5.2. Dilution error detection 0 till 25% • Dilution error detection 0 till 25% Dilution Error deviation report. If a dilution error occurs during the aspiration sequence, an audible alarm sounds and the deviation value will be shown on the screen. When the measure unit has evaluated the sample, the deviation value will be printed after the text "EDTA" Example: Dilution error detection is set at 10%. When the dilution error is outside the 10% range, in the last column of the report EDTA 079 is printed which indicating this sample is diluted for 79%. 5.5.5.3. Auto dilution adjust • Auto dilution adjust The Automatic Dilution adjust is by default setting ON. Feature to automatically make a correction to the dilution rate if set to ON. This mode checks the dilution rate, if the dilution rate tends to get to low or to high, it automatically makes a correction to the (manual) "dilution adjust" setting In this way long term instability or long term changes will be corrected . The system "looks" to the mean average of the 32 last dilutions to estimate the corrections on the syringe speed calculations. If Auto dilution adjust is set to OFF the system works with the number which is set in Dilution adjustment 60 till 140%. If Auto dilution adjust is set to ON the software automatically make a correction to the Dilution adjustment 60 till 140% Instructions to set-up the Auto dilution adjust Set the Auto dilution adjust OFF. Set in Settings - General settings Display dilution ON Run a few representative fresh blood samples of the day and note the dilution rate which are displayed at the status line. Add the found dilution rate and take the average. By entering the percentage deviation, a correction value can be made. Example: If the average dilution rate is 92%, enter 108 in order to correct to a 100% dilution rate. If no input is given, a warning <Out of range> is displayed. Note: Do not use samples which are from yesterday the software will settle in on a different range. • Set the average dilution rate in Dilution adjust 60%…140%. • Run more samples, to inspect the dilution rate again. • If the dilution rates are in expectation continue to the following steps • Set Auto dilution adjust ON. • Run a few more samples, to inspect the dilution rate again. Auto Compact User Manual Version 6.62 MRN-071-EN Page 93 Auto Compact program 5.5.5.4. Diluent flow check • Diluent flow check: The Diluent flow sensor check is default switched ON. When the check Diluent flow sensor is still giving error's after trouble shooting and there are no detectable faults in the liquid flow, use the switch OFF function. The check is now switched OFF and call for service. Return to Diluter settings (on page 92)screen. 5.5.6. Limit settings This screen has four sub screens 1. 2. 3. 4. General settings (on page 78) Carousel control (on page 82) Dilutor settings (on page 92) Limit settings (on page 94) Page 94 Auto Compact User Manual Version 6.62 MRN-071-EN Auto Compact program 5.5.6.1. Results at limit error • SEND RESULTS TIME EXCEEDED is set to YES: always transmit results to the output. SEND RESULTS TIME EXCEEDED is set to NO: transmit no results to the output when the ESR time is outside the selected range. • SEND RESULTS DILUTION ERRORS is set to YES: always transmit results to the output. SEND RESULTS DILUTION ERRORS is set to NO: transmit no results to the output when the dilution rate is outside the selected range. • SEND RESULTS COLUMN HEIGHT ERRORS is set to YES: always transmit results to the output. SEND RESULTS COLUMN HEIGHT ERRORS is set to NO: transmit no results to the output when the column height is outside the selected range. 5.6. Service screen This menu has all the functions related to the following items. 1. Rack unit settings 2. Check sensors (on page 67) 3. Auto Compact settings (on page 104) Auto Compact User Manual Version 6.62 MRN-071-EN Page 95 Auto Compact program 4. Manual control (on page 110) 5. Display error history (on page 72) Display error history and Display maintenance history (on page 115) 6. Advanced (on page 117) • Key Load settings is used for reload the stored the software settings. • Key Save settings as is used for storing the software settings to a file. The file name is free to choice. • Key Save settings is used for storing the software settings after settings are changed or altered. 5.6.1. Rack unit setting This screen gives excess to; 1. Mixer motor (on page 97) settings. 2. Conveyer motor (on page 99) settings. 3. Position motor (on page 100). Page 96 Auto Compact User Manual Version 6.62 MRN-071-EN Auto Compact program 4. Timing settings (on page 103). 5.6.1.1. Mixer motor This screen gives excess to; 1. 2. 3. 4. Mixer motor (on page 97) settings. Conveyer motor (on page 99) settings. Position motor (on page 100). Timing settings (on page 103). The following settings need to be set; MIXING SETTINGS; 1. NUMBERS OF TURNS FOR LONG MIX. • This is the first mix of a new sample rack. The minimum mix value is set default for 8 mixing. 2. NUMBERS OF TURNS SORT MIX. Auto Compact User Manual Version 6.62 MRN-071-EN Page 97 Auto Compact program • After the Mixing interval time a second mix is started, the number of the second mix is set default for 1 mix. Check both mixing settings by press TEST key. Observe the numbers in the numerical field. MIXING MOTOR SETTINGS; 1. MIXING DIRECTION: • Default setting is left. 2. MIXING SPEED: default setting 90% 3. HOLD LEVEL: default setting 30% 4. HOMING SPEED: default 20% After setting use the Save current key to save the new settings. If the Save current key is not pressed the old settings will be used Return to Mixer motor (on page 97) screen 5.6.1.1.1. Explain mixer The following settings need to be set; MIXING SETTINGS; 1. NUMBERS OF TURNS FOR LONG MIX. • This is the first mix of a new sample rack. The minimum mix value is set default for 8 mixing. 2. NUMBERS OF TURNS SORT MIX. • After the Mixing interval time a second mix is started, the number of the second mix is set default for 1 mix. Check both mixing settings by press TEST key. Observe the numbers in the numerical field. MIXING MOTOR SETTINGS; 1. MIXING DIRECTION: • Default setting is left. 2. MIXING SPEED: default setting 90% 3. HOLD LEVEL: default setting 30% 4. HOMING SPEED: default 20% After setting use the Save current key to save the new settings. If the Save current key is not pressed the old settings will be used Return to Mixer motor (on page 97) screen Page 98 Auto Compact User Manual Version 6.62 MRN-071-EN Auto Compact program 5.6.1.2. Conveyer motor This screen gives excess to; 1. 2. 3. 4. Mixer motor (on page 97) settings. Conveyer motor (on page 99) settings. Position motor (on page 100). Timing settings (on page 103). Auto Compact User Manual Version 6.62 MRN-071-EN Page 99 Auto Compact program 5.6.1.2.1. Explain conveyer Conveyer motor settings; Set the Conveyer belt speed at 100% Test conveyer motor; MOVE RACK moves a rack in the Input pool to the catch pins CATCH RACK moves a rack to the gripper when the gripper is in the IN position RELEASE RACK moves a rack from the grabber release position into the END pool Switch Conveyer motor is switched OFF or ON for testing the conveyer motor. Return to Conveyer motor (on page 99)screen 5.6.1.3. Position motor This screen gives excess to; 1. 2. 3. 4. Mixer motor (on page 97) settings. Conveyer motor (on page 99) settings. Position motor (on page 100). Timing settings (on page 103). Page 100 Auto Compact User Manual Version 6.62 MRN-071-EN Auto Compact program 5.6.1.3.1. Select rack Select the required rack adapter what is used on the instrument. The following rack types can be select: • Sysmex Low profile, High profile with multi tube holders • Sysmex Low profile, High profile with clips • Coulter • Coulter • Coulter short • Abbot long, black • Bayer (advia) • Abbot Short, white • ABX open • ABX closed See for rack example information Appendix Rack adapters Make your selection, press SAVE SETTINGS. Return to Position motor (on page 100) screen 5.6.1.3.2. Set as tube 1 position This section is used to check the needle sting position trough the top bracket. The following steps are needed for checking the needle sting location. 1. 2. 3. 4. 5. Go to TUBE POSITION NUMBER 1. Press outer needle DOWN. Check the needle position. Press again the needle DOWN and check the needle goes thought the hole in the top bracket. Press outer needle UP. If the needle is not passing the hole see section TROUBLESHOOTING Return to Position motor (on page 100) screen 5.6.1.3.3. Test position motor 1. Go to IN POSITION: This is the position where the rack clamp is open. The rack can be insert manual in the clamp. 2. Go to MIX POSITION: This is the rotation position where the rack clamp is rotate for mixing the sample tubes. Auto Compact User Manual Version 6.62 MRN-071-EN Page 101 Auto Compact program 3. Go to (1)TUBE POSITION : This is the first hole position in the grabber cover plate at the needle position. 4. Go to rack RELEASE POSITION: This is the position for releasing the rack. The grabber will be opened and the rack is transported into the End. 5. GO TO POSITIOn: Service purpose only. This is to move from the home position to any distance in millimeters from the home position. Return to Position motor (on page 100) screen 5.6.1.3.4. Test barcode reader The following steps are needed for checking the barcode. Take a sample tube with barcode and a rack. 1. Go to the IN POSITION. 2. Go to MIX POSITION. 3. Go to TUBE POSITION NUMBER 1. After pressing the READ BARCODE key the barcode is shown above the key. If barcode label is not read correctly see section TROUBLESHOOTING. Return to Position motor (on page 100) screen 5.6.1.3.5. Test tube sensor Switch ON CHECK TUBE DELETION SENSOR check. Now the graphical interpretation of the sensor is ON. The following steps are needed for checking the sensor. Take one rack filled with some sample tubes. Fill the rack like one sample tube on position 1, no sample tube in position 2, one sample tube on position 3, ect. 1. 2. 3. 4. 5. Go to the IN POSITION. Go to MIX POSITION. Go to TUBE POSITION NUMBER 1. The sensor must light up. Select tube number 2. Go to TUBE POSITION NUMBER 2. The sensor must not light up. If the detection is not correct see section TROUBLESHOOTING. Return to Position motor (on page 100) screen. Page 102 Auto Compact User Manual Version 6.62 MRN-071-EN Auto Compact program 5.6.1.4. Timing settings This screen gives excess to; 1. 2. 3. 4. Mixer motor (on page 97) settings. Conveyer motor (on page 99) settings. Position motor (on page 100). Timing settings (on page 103). For service purpose only. Those settings are set in the factory, no need for altering the time settings. The following timing settings T8 and T9 are used for the mixer setting. Auto Compact User Manual Version 6.62 MRN-071-EN Page 103 Auto Compact program 5.6.2. Compact settings Select a communication port to communicate with the Compact. • Key Load settings is used for reload the stored the software settings. • Key Save settings as is used for storing the software settings to a file. The file name is free to choice. • Key Save settings is used for storing the software settings after settings are changed or altered. • 5.6.2.1. Serial Compact output settings SERIAL OUTPUT COMPORT: Select the output port for communication. 1. 2. 3. 4. 5. 6. Serial output comport.ASRL2::INSTR. By default Baud rate. Selectable 1200, 4800 and 9600 * Data bits. Selectable 7 or 8 data bits Party bit: Selectable none, space, mark, even and odd Stop bits: Selectable 1, 1.5 or 2 stop bits Flow control: Selectable for; Page 104 Auto Compact User Manual Version 6.62 MRN-071-EN Auto Compact program • None • XON/XOFF • RTS/CTS • DTR/DSR • XON/XOFF & RTS/CTS • XON/XOFF & DTR/DSR *When the selection key is select the virtual keyboard pop-up. Type the correct numbers into the numerical fields, for instance in the baud rate field 9600. Return to Serial output settings screen 5.6.2.2. Set protocol settings The following protocols can be select for out putting data; 1. 2. 3. 4. 5. 6. 7. 8. No Serial output. MECHATRONICS-01 Bidirectional MECHATRONICS-02 Unidirectional SE 9000. SE 9000 Unidirectional R3500. R3500 unidirectional. Compact unidirectional . • When selected the following keys will pop-up. • Checksum On/Off. • 30 Minute method On/Off. • Ack/Nack On/Off. 9. Compact Bidirectional. • When selected the following keys will pop-up. • Checksum On/Off. • 30 Minute method On/Off. 10. StaRRsed III (v14) • When selected the following keys will pop-up. • Checksum On/Off. • 30 Minute method On/Off. • Ack/Nack On/Off. 11. Vesmatic 12. Sedimatic 15 13. Sedimatic 100 14. OPUS • When selected the following keys will pop-up. Auto Compact User Manual Version 6.62 MRN-071-EN Page 105 Auto Compact program • Checksum On/Off. • 30 Minute method On/Off. 15. Advia 120 16. Advia 120 unidirectional 17. InteRRliner For more details see section 9 Protocols (on page 129) and the Appendix SEND INQUIRE AND SEND RESULTS By pressing one of the Send keys a test inquire or a test result string is send to the host computer. Return to Serial output settings screen Page 106 Auto Compact User Manual Version 6.62 MRN-071-EN Auto Compact program 5.6.3. Auto Compact settings Auto Compact User Manual Version 6.62 MRN-071-EN Page 107 Auto Compact program • Key Load settings is used for reload the stored the software settings. • Key Save settings as is used for storing the software settings to a file. The file name is free to choice. • Key Save settings is used for storing the software settings after settings are changed or altered. Select which port the Auto COMPACT IS CONNECTED TO. No need to change the default setting ASRL1::INSTR. Return to Compact settings (on page 107) screen Select Compact connected to Select which PRINTER PORT is connected to the printer. Ne need to change the default setting ASRL10::INSTR. Return to Compact settings (on page 107) screen.SELECT BARCODE READER is used in the Auto Compact for selection which barcode reader is used. No need for re-select the barcode reader. This setting is set by the factory. Return to Compact settings (on page 107) screen. Setting for the OUTER NEEDLE DEPTH. No need to change the default 51.0 mm setting. Return to Compact settings (on page 107) screen. • • If SEARCH IN EXAMPLE HISTORY is OFF, this file will not selectable in the history window. • If search in example history is ON, this will is selectable in the history window. Return to Compact settings (on page 107) screen 5.6.3.1. Printer port Select which PRINTER PORT is connected to the printer. Ne need to change the default setting ASRL10::INSTR. Return to Compact settings (on page 107) screen. 5.6.3.2. Compact connected to Select which port the Auto COMPACT IS CONNECTED TO. No need to change the default setting ASRL1::INSTR. Return to Compact settings (on page 107) screen 5.6.3.3. Select barcode reader SELECT BARCODE READER is used in the Auto Compact for selection which barcode reader is used. No need for re-select the barcode reader. This setting is set by the factory. Return to Compact settings (on page 107) screen. Page 108 Auto Compact User Manual Version 6.62 MRN-071-EN Auto Compact program 5.6.3.4. Search in example history • If SEARCH IN EXAMPLE HISTORY is OFF, this file will not selectable in the history window. • If search in example history is ON, this will is selectable in the history window. Return to Compact settings (on page 107) screen 5.6.3.5. Outer needle depth Setting for the OUTER NEEDLE DEPTH. No need to change the default 51.0 mm setting. Return to Compact settings (on page 107) screen. Auto Compact User Manual Version 6.62 MRN-071-EN Page 109 Auto Compact program 5.6.4. Manual control To control assemblies separately by using the ON-OFF switch. • Key Load settings is used for reload the stored the software settings. • Key Save settings as is used for storing the software settings to a file. The file name is free to choice. • Key Save settings is used for storing the software settings after settings are changed or altered. 1. 5.6.4.1. Vacuum pump VACUUM PUMP: ON the main vacuum pump is switched on. OFF the main vacuum pump is switched off. Page 110 Auto Compact User Manual Version 6.62 MRN-071-EN Auto Compact program 5.6.4.2. Waste pump WASTE PUMP: ON the waste pump is switched on. OFF the waste pump is switched off. Waste pump is used for emptying the liquid separator. Do not leave this function on as it may cause waste pump damage. 5.6.4.3. Saline pump SALINE PUMP: ON the saline peristaltic pump is switched on. OFF the saline peristaltic pump is switched off. Note: If vacuum pump is off rinse solution will spill over the Auto rack unit 5.6.4.4. Rinse pump RINSE PUMP: ON the pipette wash peristaltic pump is switched on. OFF the pipette wash peristaltic pump is switched off. Note: If vacuum pump is off rinse solution will spill over the Auto rack unit 5.6.4.5. All pumps OFF ALL PUMPS OFF: All active pumps will be switched OFF. The waste pump is switched ON for a minute. Auto Compact User Manual Version 6.62 MRN-071-EN Page 111 Auto Compact program 5.6.4.6. Needle Control 5.6.4.7. Outer needle up OUTER NEEDLE UP: The Outer needle is send to the up home position. 5.6.4.8. Outer needle down OUTER NEEDLE DOWN: The Outer needle is send to the down position. 5.6.4.9. Sample probe up SAMPLE PROBE UP: The Sample probe is send to the up home position. 5.6.4.10. Sample probe down SAMPLE PROBE DOWN: The Sample probe is send to the up home position. Page 112 Auto Compact User Manual Version 6.62 MRN-071-EN Auto Compact program 5.6.4.11. Fill nozzle up FILL NOZZLE UP: The Fill nozzle is send to the pipette position 5.6.4.12. Fill nozzle down: FILL NOZZLE DOWN: The Fill nozzle is send to the fill nozzle home position. 5.6.4.13. Rinse nozzle up RINSE NOZZLE UP: The Rinse nozzle is send up to the pipette. 5.6.4.14. Rinse nozzle down RINSE NOZZLE DOWN: The Rinse nozzle is send to the rinse nozzle home position. Auto Compact User Manual Version 6.62 MRN-071-EN Page 113 Auto Compact program 5.6.4.15. Valve control • Key Load settings is used for reload the stored the software settings. • Key Save settings as is used for storing the software settings to a file. The file name is free to choice. • Key Save settings is used for storing the software settings after settings are changed or altered. 1. 5.6.4.16. Valve's 1. VALVE OUTER NEEDLE: Energizing the outer needle solenoid valve. 2. SAMPLE CONTROL SOLENOID: Sample control solenoid fill sequence energized. The function of this solenoid is to build up a vacuum in the Westergren pipette before the aspiration starts. 3. V-VALVE WASH SECTION: Pipette wash vacuum control valve, controls the main vacuum line between the wash-station and separator. 4. V-VALVE FILL SECTION: Vacuum control fill-nozzle / sample probe, controls the main vacuum line between the fill nozzle cap and separator. Page 114 Auto Compact User Manual Version 6.62 MRN-071-EN Auto Compact program 5.6.4.17. Actuator Actuator control 1. RINSE ACTUATOR: Rinse solenoid active, rinse valve-block down. 2. FILL ACTUATOR: Fill solenoid active, fill valve-block down. 5.6.5. Display maintenance history (Service) Auto Compact User Manual Version 6.62 MRN-071-EN Page 115 Auto Compact program • Key Load settings is used for reload the stored the software settings. • Key Save settings as is used for storing the software settings to a file. The file name is free to choice. • Key Save settings is used for storing the software settings after settings are changed or altered. This list contains a log of all the maintenance what is done which can be useful for the field engineer to check what the problem where with the instrument. The key CLEAR will delete all errors from the list. 5.6.6. Display error history (Service) Page 116 Auto Compact User Manual Version 6.62 MRN-071-EN Auto Compact program • Key Load settings is used for reload the stored the software settings. • Key Save settings as is used for storing the software settings to a file. The file name is free to choice. • Key Save settings is used for storing the software settings after settings are changed or altered. A list of the error detection during operation. This list contain error numbers what can be useful for the field engineer to check what the problem where with the instrument. The key CLEAR will delete all errors from the list. 5.6.7. Advanced Auto Compact User Manual Version 6.62 MRN-071-EN Page 117 Auto Compact program This screen is used for input direct commands into the software to control all kinds hardware and software settings. This is only used by Mechatronics engineers and is not available for third parties. • Key Load settings is used for reload the stored the software settings. • Key Save settings as is used for storing the software settings to a file. The file name is free to choice. • Key Save settings is used for storing the software settings after settings are changed or altered. Page 118 Auto Compact User Manual Version 6.62 MRN-071-EN Getting started 6. GETTING STARTED Check the general settings and select the required options 1. 30 minutes (Default is OFF) 2. Display dilution (Default is OFF) 3. EDTA mode (Default is ON) 4. Display graph (Default is OFF) 5. Sample probe protection (Default is ON) 6. Temperature correction (Default is ON) 7. Fast fill (Default is ON) 8. Visual keyboard (Default is ON) 9. Print after measurement (Default is OFF) 10. Check the settings Results at limit error The tab Settings is protected by the password. Select the tab Settings, type the password 3964 and press the [ ENTER ] key. 6.1. Limit settings Check the RESULT AT LIMIT ERROR settings: If it is certain that the LIMS has been programmed to handle all these exceptions correctly, these options may be set to YES. In all other situations, the options should be set to NO to avoid that results associated with exceeded limits are transmitted to LIMS and/or printed. • SEND RESULTS TIME EXCEEDED is set to YES: always transmit results to the output. SEND RESULTS TIME EXCEEDED is set to NO: transmit no results to the output when the ESR time is outside the selected range. • SEND RESULTS DILUTION ERRORS is set to YES: always transmit results to the output. SEND RESULTS DILUTION ERRORS is set to NO: transmit no results to the output when the dilution rate is outside the selected range. • SEND RESULTS COLUMN HEIGHT ERRORS is set to YES: always transmit results to the output. SEND RESULTS COLUMN HEIGHT ERRORS is set to NO: transmit no results to the output when the column height is outside the selected range. 6.2. Liquid levels Liquid containers and levels must be checked frequently. If the small onboard bottles are used, wash and keep the bottles clean to avoid bacterial growth. The StaRRsed Auto-Compact has liquid level sensors, replace reagent as soon as possible when the level sensor alarm appears. Auto Compact User Manual Version 6.62 MRN-071-EN Page 119 Getting started 6.3. Reagents preparation 1. Reagents preparation. • Use only the reagent containers which are supplied with the StaRRsed Auto-Compact. • To open the bulk reagent packages, remove the perforated flap from the cardboard box, pull the opening out of the box and fit the taps. 2. Fill up the containers with the reagents. 3. Connect the containers to the pump units and containers input tubing. 6.3.1. Rinse solution QRR 010934 Rinse solution is used for rinsing the Westergren pipettes; approximately 8 ml is used for each sample. The Rinse container is a 20- liter container (QRR 010934). Pre flush reagent bottle with deionised water. Fill rinse container with rinse solution from the 20-liter container. 6.3.2. Saline QRR 010933 Saline is used for cleaning the needle and fill-nozzle assembly, approximately 1 ml of saline is used for each sample. The saline container is a 5-liter container (QRR010933). Pre flush the saline bottle using saline from the saline container. Fill saline bottle from the 5-liter container. 6.3.3. Diluent QRR 010931 Sodium citrate is used for diluting the EDTA sample, • Approximately 0.5 ml Diluent is used for each sample. • Approximately 2.5 ml is used for one Prime cycle. The diluent container is a 5-liter container (QRR010931). The solution should be discarded if it becomes turbid. If the Diluent does become turbid, clean the Diluent container thoroughly with a 5% Nahypochlorite solution. After cleaning, rinse the container thoroughly with de-ionized water. Before refilling, flush the Diluent bottle with a little Diluent from the bulk container. NOTE: The latest version of the Material Safety Data Sheet (MSDS) of the used reagents can be found on our web site www.mechatronics.nl (http://www.mechatronics.nl). Page 120 Auto Compact User Manual Version 6.62 MRN-071-EN Getting started 6.3.4. De-ionised water De-ionised water is used for rinsing the fill-nozzle, approximately 0.5 ml. The outside of the metal fill-nozzle tube is washed automatically after each aspiration. Note: Add one or two drops of saline to the de-ionised water to avoid <bottle empty alarm>. 6.3.5. Disinfectant QRR 010932 The disinfectant is used to disinfect the waste system; approximately 0.5 ml disinfectant is used after each pipette rinse. The disinfectant bottle is a 5-liter container (QRR010932). Pre flush the disinfectant bottle using disinfectant from the disinfectant container. Fill disinfectant bottle from the 5-litre container. 6.3.6. Cleaning solution The cleaning agent needs to be prepared for a cleaning procedure which is used in level 4 maintenance. 1. Fill a container with hot 80°C de-ionised water 2. Add cleaning agent (QRR 010905) to the container. 3. Stir well. (Do not shake). 6.3.7. Waste disposal The waste container has a level sensor and as soon as the level sensor generates a waste error, the waste container must be emptied. The waste must be treated as potentially infectious (biohazardous) material and disposed of according to local regulations. Preferably, discard the complete waste container and replace it with a cleaned one. Disclaimer: Check your local environment rules about discharging the waste. Auto Compact User Manual Version 6.62 MRN-071-EN Page 121 Quick start-up 7. QUICK START-UP This section describes a quick start-up procedure and a general description of what to do before starting a large batch of samples to run through the system. 7.1. Check list Run these checks before processing a large batch of samples. 1. Waste container, should be empty. Check the reagents levels in containers. Switch ON procedure: • Switch ON the Compact. • Switch ON the PC and monitor. • Wait until "Windows" is ready for use. • Start the Compact software. Prime the fluid system at start-up: Select the MAINTENANCE -> PRIME / CLEAN to prime the system. The "prime all units" function can be used or prime each individual liquid as described next. Select and press the buttons in sequence. If the system is not sufficiently primed press the respective button again. 1. Prime Rinse solution. Activates the pipette wash pump. Action: Rinse solution must flow through the pipette. • After each measurement, pipette is washed and dried automatically. 2. Prime Saline. Activates the Saline pump. Action: Liquid must flush through the needle assembly. • After each sample, the aspiration system is flushed automatically with saline. 3. Prime Diluent. Activates the diluter prime cycle. Action: Diluter system must be filled with diluent and free of air bubbles. • Diluter prime cycle is executed once. In order to fully prime the system it will be necessary to press the key several times. (One cycle is 5 strokes of the Diluter) 4. Prime De-ionized water. Activates the fill nozzle flush valve. Action: De-ionized water must flow through the tube connected to the fill nozzle cap. • During normal operation the outside of the stainless steel tube, inside the fill-nozzle will be contaminated. The fill-nozzle will be flushed automatically after sampling with water. 5. Prime Disinfectant. Activates the disinfectant valve. Action: Disinfectant must flow through the small tube connected to the pipette wash station. Auto Compact User Manual Version 6.62 MRN-071-EN Page 123 Quick start-up • During a pipette rinse cycle, a small amount (0.5ml) of disinfectant is flushed in to the waste system. 6. PRIME ALL UNITS. This function activates all the different priming functions once. When the Compact has been idle for some hours, use the "Prime all units" key. The Compact prime diluent automatically after eight hours idle. Page 124 Auto Compact User Manual Version 6.62 MRN-071-EN Quick start-up 7.2. Fill procedure Fill the sample rack with the sample tubes. Observe that the barcodes are visible through the opening in the rack. Place the rack in a rack adapter. Set the Rack adapter in the rack loader with the barcodes facing the rack grabber. Select the tab SAMPLE and press the button Sample mode. The Rack is transported to the rack grabber, the rack grabber picks up the Rack adapter and moves to the barcode reader position to scan the first barcode label. The rack is then mixed and after that moved to the needle position to be aspirated. If the barcode labels fail to read check if the barcode is facing the correct direction. Note: BE SURE THAT THE COMPACT IS SET TO THE CORRECT MODE. i.e. EDTA or CITRATE. Auto Compact User Manual Version 6.62 MRN-071-EN Page 125 Turn off 8. TURN OFF It is recommended to turn the StaRRsed Auto-Compact off at the end of the day. Before the instrument is turned off, it is good practice to carry out the Daily maintenance (on page 143) or at least the End-of-day wash procedure. This will help to keep the instrument clean and almost free of bacterial growth for a period of days. W A R N I N G!!! Always be aware of the dangers of infection, especially during maintenance. Take the appropriate precautions. Note: The StaRRsed Auto-Compact may remain switched ON continuously. However, the customer should consider environmental issues such as energy consumption when the instrument is not to be used for some time. It is also recommended to completely restart the instrument and (if applicable) Windows once in a while to clear the memory and ensure a stable operating system. 8.1. End-of-day-wash procedure Select the tab MAINTENANCE and press the button End-of-day wash. A pop-up screen is shown. Selecting Close program will stop the program immediately without running the End-of-day wash procedure. When End-of-day wash procedure is selected, a selection screen for this function is shown. The following options are available for this function: 1. Select from the list the desired option: • No End-of-day wash!: The function is not active • Immediately: The function runs immediately after pressing the OK key • Only once: The function runs only once at the selected time. • Weekdays: The function runs only on the working days (Mo-Fr) at the selected time. • Daily: The function runs on a daily base at the selected time. 2. Select the time of the day in hours and minutes for the selected option. Pressing the OK button activates the settings. Auto Compact User Manual Version 6.62 MRN-071-EN Page 127 Reporting 9. REPORTING The StaRRsed Auto-Compact is able to handle different types of protocols. The selection is made in SERVICE - SERIAL OUTPUT SETTING. 9.1. Protocols A protocol is a set of rules governing the communication and the transfer of data between machines, as in a computer system. Also a formal set of rules and procedures to be followed during a request for information before data is transferred between machines and computer systems. The following protocols can be selected for data transfer to the Laboratory data processor computer. 1. No Serial output 2. MECHATRONICS-01 bidirectional (on page 237) 3. MECHATRONICS-02 unidirectional (on page 245) 4. Sysmex SE 9000 (on page 269) 5. Sysmex SE-9000 unidirectional (on page 273) 6. Sysmex R-3500 (on page 261) 7. Sysmex R-3500 unidirectional (on page 265) 8. Compact bidirectional (on page 251) 9. Compact uniderectional (Appendix - String format for StaRRsed (on page 221)) 10. StaRRsed III (V14) (on page 225) 11. Vesmatic (on page 235) 12. Sedimatic 15 (on page 233) 13. Sedimatic 100 (on page 229) 14. Opus bidirectional (on page 255) 15. Advia 120 bidirectional 16. Advia 120 unidirectional The protocol can be set in tab SERVICE - Serial output settings. After selecting a protocol, save the new settings by pressing the Save setting key. 9.2. Result Printout The results of the ESR measurements are send to the printer. The layout of the report depends on the selection of the 60- or 30 minute method. Auto Compact User Manual Version 6.62 MRN-071-EN Page 129 Reporting 9.2.1. Report 60-Minute mode +++++++++++++ REPORT EXAMPLE ++++++++++++++++ (Not to scale) -- StaRRsed-- 1 2 Date 20/05/07 3 4 Time 15:28 : 5 6 7 8 9 Manual Pip. Time T aspect 10 11 Error EDTA Sample ID ESR Tc Aspect 972005001 84 75 CLEAR 17 60 23 EDTA 972005002 14 13 Hazy<10m m 18 60 23 EDTA 972005003 22 21 Hazy<25m m 19 60 23 EDTA 972005004 67 61 Hazy>25m m 20 60 23 EDTA Sample result with a manual aspect, where the manual aspect is shown as a number 3 in column 6 of this data record sample. 972005005 5 4 CLEAR 3 21 60 23 EDTA In this sample, the dilution rate has a dilution failure of 21% and that is printed as EDTA 079. 972005006 5 5 CLEAR 22 60 23 EDTA 079 Sample results with a text error. This sample gives Too many borders found. Result of a pipette possibly filled with air bubbles. 972005007 24 60 23 Too many borders found Sample result with a text error. This sample is given limit error L_err(---/ 84/ 75/200) 972005001 Auto Compact User Manual Version 6.62 MRN-071-EN 25 60 23 L_err(---/ 84/ 75/200) EDTA Page 131 Reporting . 1. 2. 3. 4. Patient number. Not corrected 30-minute ESR result (only in use if 30 minute mode is active). Not corrected 60-minute ESR result. 60-minute ESR result in millimeters, corrected for 18°C. (only in use if temperature correction is active). 5. Aspect (clear, hazy). 6. Manually entered code number. 7. Sedimentation pipette number (number on the pipette belt). 8. Actual sedimentation time in minutes. 9. Temperature (in degrees Centigrade). 10. Error message (if the Analyser detects an error). 11. EDTA mode. 9.2.1.1. Analyzers Error code messages Analyzers "ERROR" code messages This code appears in the "sample data record" at column 10. The following codes are defined: 0 NO ERRORS 1 No cells/plasma found Error 2 ESR Probably > 140 mm Error 3 Too many borders found Error 4 Column height <nnn> Warning 5 Measure error Warning 6 Bubbles on top Warning 7 Limit error Page 132 Error Auto Compact User Manual Version 6.62 MRN-071-EN Reporting 9.2.1.2. Results at limit errors When this option is set to YES and a limit error occurs, results will be printed/send to the LIMS. When this option is set to NO and a limit error occurs, the fields for 30 min ESR, 60 min ESR and the temperature corrected ESR are filled with spaces and thus results are not printed/send to LIMS. The error message in the error field (column 10) indicates that at least one of the the limits (ESR time, dilution rate or column height) has been exceeded. Together with the sedimentation time and dilution rate (which are still printed at the usual position), the operator can see what caused the error and may or may not use the ESR values which are preserved in the error message. Description of the error message L_err(hhh/www/ttt/ccc) : • L_err means it is a "limit error" • hhh is the 30 minutes ESR • www is the 60 minute ESR • ttt is the temperature corrected 60 minute result • ccc is the column height Example of a limit error message: • L_err( 42/ 84/ 75/200) means 42 mm in the 30 minute method and temperature correction 75 with a correct column height. • L_err(---/ 84/ 75/200) means 84 mm in the 60 minute method and temperature correction 75 with a correct column height. Auto Compact User Manual Version 6.62 MRN-071-EN Page 133 Reporting 9.2.2. Report 30 Minute mode +++++++++++++ REPORT EXAMPLE ++++++++++++++++ (Not to scale) - StaRRsed-- Date 20/05/07 1 2 3 4 Sample ID Hh ESR Tc Time 15:28 : 5 6 7 8 9 Aspect Manual Pip. Time T aspect 10 11 Error EDTA 972005001 42 84 75 CLEAR 17 30 23 EDTA 972005002 5 14 13 Hazy<10m m 18 30 23 EDTA 972005003 8 22 21 Hazy<25m m 19 30 23 EDTA 972005004 32 67 61 Hazy>25m m 20 30 23 EDTA Sample result with a manual aspect, where the manual aspect is shown as a number 3 in column 6 of this data record sample. 972005005 2 5 4 CLEAR 3 21 30 23 EDTA In this sample, the dilution rate has a dilution failure of 21% and that is printed as EDTA 079. 972005006 2 5 5 CLEAR 22 30 23 EDTA 079 Sample results with a text error. This sample gives Too many borders found. Result of a pipette possibly filled with air bubbles. 972005007 24 30 23 Too many borders found Sample result with a text error. This sample is given limit error L_err( 42/ 84/ 75/200) 972005001 Auto Compact User Manual Version 6.62 MRN-071-EN 25 30 23 L_err(---/ 84/ 75/200) EDTA Page 135 Reporting m 1. 2. 3. 4. Patient number. Not corrected 30-minute ESR result (only in use if 30 minute mode is active). Not corrected 60-minute ESR result. 60-minute ESR result in millimeters, corrected for 18°C. (only in use if temperature correction is active). 5. Aspect (clear, hazy). 6. Manually entered code number. 7. Sedimentation pipette number (number on the pipette belt). 8. Actual sedimentation time in minutes. 9. Temperature (in degrees Centigrade). 10. Error message (if the Analyser detects an error). 11. EDTA mode. 9.2.2.1. Analyzers Error code messages Analyzers "ERROR" code messages This code appears in the "sample data record" at column 10. The following codes are defined: 0 NO ERRORS 1 No cells/plasma found Error 2 ESR Probably > 140 mm Error 3 Too many borders found Error 4 Column height <nnn> Warning 5 Measure error Warning 6 Bubbles on top Warning 7 Limit error Page 136 Error Auto Compact User Manual Version 6.62 MRN-071-EN Reporting 9.2.2.2. Results at limit errors When this option is set to YES and a limit error occurs, results will be printed/send to the LIMS. When this option is set to NO and a limit error occurs, the fields for 30 min ESR, 60 min ESR and the temperature corrected ESR are filled with spaces and thus results are not printed/send to LIMS. The error message in the error field (column 10) indicates that at least one of the the limits (ESR time, dilution rate or column height) has been exceeded. Together with the sedimentation time and dilution rate (which are still printed at the usual position), the operator can see what caused the error and may or may not use the ESR values which are preserved in the error message. Description of the error message L_err(hhh/www/ttt/ccc) : • L_err means it is a "limit error" • hhh is the 30 minutes ESR • www is the 60 minute ESR • ttt is the temperature corrected 60 minute result • ccc is the column height Example of a limit error message: • L_err( 42/ 84/ 75/200) means 42 mm in the 30 minute method and temperature correction 75 with a correct column height. • L_err(---/ 84/ 75/200) means 84 mm in the 60 minute method and temperature correction 75 with a correct column height. 9.2.3. Reporting range The reporting range in the columns 2, 3 and 4 are in millimeters. The start of the measure range is at the top of the meniscus down to 140 mm. If the detection of cells/plasma is over 140 mm then the report will be >140. Auto Compact User Manual Version 6.62 MRN-071-EN Page 137 Reporting 9.2.4. Aspect Hazy The automatic reading of the Westergren sedimentation pipettes is carried out by moving an optical sensor along the pipettes. While the sensor is moving, a reading is made every 0.25 mm. The sensor is reading the absorption of infra red light through the Westergren pipette filled with blood. From these readings, values at a number of absorption levels are determined. All absorption figures are relative to the darkest and lightest reading (darkest = 100 % and the lightest = 0 % absorption respectively). By definition the levels are: 87.5% Cells/ plasma separation 75.0% Hazy detection 50.0% Meniscus detection Graphic showing typical absorption values of a sample Page 138 Auto Compact User Manual Version 6.62 MRN-071-EN Reporting The 'sedimentation' value is the distance in millimeters between the cells/plasma level (87.5% absorption) and the meniscus. If there ins no haze, the absorption drops quickly to a value below the 75% level. If the distance between the 87.5% and the 75% level is less then 3mm, the report will state 'CLEAR'. If the distance between 87.5% and 75% level is more than 3mm then the report will state 'HAZY'. Depending on the length of the 'hazy' area, three classes of 'hazyness' are reported, Length of area Hazy area Reported class Hazy >25 mm >25 mm Hazy area >10 mm <25 mm Hazy <25 mm Hazy area >3 mm < 10 mm Hazy <10 mm Hazy area < 3 mm CLEAR <3 mm Hazy reports are shown when the change from the hazy level to the cell/plasma separation level occurs not within a given distance. The following bands are reported in the aspect column of (number 5) 9.2.4.1. Analyser "HAZY" code messages This code appears in the "sample data record" at column 5. The following 4 codes are defined: 0 Sample is clear. 1 Sample is Hazy < 10 2 Sample is Hazy < 25 3 Sample is Hazy > 25 9.2.5. Analyser ERROR Error messages can be found on the printout in column 10. If errors are found during the measurement, the Compact will give an audible alarm. The Error message is displayed on the main screen. Auto Compact User Manual Version 6.62 MRN-071-EN Page 139 Reporting 9.2.5.1. Explanation of the error messages No cells/plasma found. (Error) No contents could be detected in the pipette. ESR Probably > 140 mm. (Error) Extremely high ESR value. Too many borders found. (Error) More than three borders found, possibly air bubbles. (See Section Trouble shooting Air bubbles (on page 167)). Column height <nnn>. (Warning) Column height must be between 180 and 210mm. <nnn> = the actual column height. Measure error. (Warning) The down count is not equal to the up count from the measure head. Bubbles on top. (Warning) Air bubbles on top of the ESR. Limit error (Error) One of the following limits are out of range. • The ESR time • The column height • Dilution errors Page 140 Auto Compact User Manual Version 6.62 MRN-071-EN Compact system messages 10. COMPACT SYSTEM MESSAGES The Compact generates four main types of error messages; • System messages. • Test messages. • System time-out messages. • Error messages. 10.1. System messages During normal operation the following "system messages" may occur: 1. Waiting tube. • If a filled pipette is at the measuring position before the elapsed time has finished and the operator is ready to fill the next pipette, the waiting tube message will be displayed. • To continue the sample loading sequence the operator must wait until the pipette at the measuring position has been measured. 2. Printer failure • Check paper quantity. • Note: data will be stored in the buffer and can be printed afterwards. 3. Reagents level empty message • All reagent bottles have level detectors; the display shows an error that indicates which reagent bottle(s) is (are) empty. • Prepare new reagent as described in section Quick start-up. 4. Waste bottle full message or No waste bottle message • The waste container also has a level detector. If a waste error is shown on the display, the StaRRsed Auto-Compact will stop filling and cleaning pipettes until a new or empty container has been installed. 5. Empty the waste container and press [ ESC ] to clear the error. 6. Fatal separator error. Auto Compact User Manual Version 6.62 MRN-071-EN Page 141 Compact system messages 10.2. Test messages During the start-up sequence all the positing sensors are tested, if incorrect the instrument will generate a Test message, 1. 2. 3. 4. 5. 6. Switch printer on. Test fill-nozzle unit. Test rinse-unit. Test measure-unit. Test needle-unit. Test drive-unit. 10.3. System time-out <xxxx> If during normal operation the following "system time-out" errors occur, call distributor or local supplier of this instrument. These errors are usually fatal and need engineer's assistance. 1. 2. 3. 4. 5. 6. Drive-unit. Measure-unit. Rinse-unit. Fill-nozzle unit. Needle adapter. Sample probe. 10.4. Error messages The following error messages may occur during normal operation, 1. 2. 3. 4. 5. 6. 7. 8. Vacuum error. Vacuum stabilisation error. Fill time-out error. Diluter errors. Position error. Up sensor or down sensor error. Rinse head up error. Measure head not home error. The explanation of all these messages can be found in .Appendix - System messages Compact (3). Page 142 Auto Compact User Manual Version 6.62 MRN-071-EN Maintenance 11. MAINTENANCE The StaRRsed Auto-Compact is an analyser that operates with considerable amounts of whole blood virtually undiluted, and stores it in a pipette for one hour. For this reason instrument maintenance is of the utmost importance. To maintain the maximum reliability of the instrument, the maintenance procedures must be strictly followed. All procedures are based on a number of samples. Maintenance levels Daily (on page 143) (WI) Work instruction WI-187 Daily maintenance (on page 309) Weekly (on page 144) WI-191 Weekly maintenance (on page 310) Level 4 maintenance WI-193 level 4 maintenance (on page (on page 145) 318)Every 3500 samples Level 3 maintenance WI-194 Level 3 maintenance (on page (on page 147) 325)Every 10000 samples Level 2 maintenance WI-198 Level 2 maintenance (on page 334) (on page 148) Level 1 maintenance WI-199 Level 1 maintenance notification (on page 148) (on page 301) WARNING!!! Always be aware of the danger of infection, especially during maintenance. Take appropriate precautions. There is blood involved and therefore a BIO HAZARD 11.1. Maintenance Schedule example See the Appendix Maintenance Schedule example. 11.2. Daily The purpose of the daily maintenance is to keep the instrument clean and contamination as low as possible. Clean all parts that are exposed to blood, wipe the outer surface and the stainless steel plate below the pipette belt. See WI-187 Daily maintenance (on page 309) Auto Compact User Manual Version 6.62 MRN-071-EN Page 143 Maintenance 11.3. Weekly The purpose of the weekly maintenance is to carry out the daily maintenance and additionally check the optical sensor of the measure head and the vacuum pressure. Detailed instructions of this procedure can be found in the Work Instruction number WI-191 Weekly maintenance. (on page 310) 11.3.1. Check the sensors in service mode Vacuum pressure check • Go to tab MAINTENANCE -> CHECK SENSOR. Select CHECK FLOW SENSOR box. Compact InteRRliner version Flow: 0925-0980-1020 Abs: 0340- 0360-0380 If the flow is not in range there might be a blockage in the vacuum flow line to the flow sensor. Fill Stop sensor check. • Go to tab MAINTENANCE -> CHECK SENSOR. Select CHECK FILL SENSOR box. Filling stop sensor FS 90..140..165 Diluter Start sensor check. • Go to tab MAINTENANCE -> CHECK SENSOR. Select DILUTOR START SENSOR box. Diluter start sensor 400-700. Measure sensor. • Go to tab MAINTENANCE -> CHECK SENSOR. Select CHECK MEASURE SENSOR box. Measure sensor MS 40..50..60. Temperature sensor. • Go to tab MAINTENANCE -> CHECK SENSOR. Select CHECK TEMPERATURE SENSOR box. Temperature sensor TS [Room temperature]. Diluent flow sensor check • Go to tab MAINTENANCE -> CHECK SENSOR. Select CHECK DILUENT FLOW SENSOR box. Press test. When test is finished, signal Down and signal Up must be green. Separator check. Go to tab MAINTENANCE -> CHECK SENSOR. Select CHECK SEPARATOR SENSOR box. Separator sensor <200 600 >700 . Page 144 Auto Compact User Manual Version 6.62 MRN-071-EN Maintenance 11.3.2. Separator The separator is designed to separate liquid from the air and can handle a lot of blood, rinse and other used reagents from the instrument. After a period of time the separator is getting dirty and therefore it needs to be cleaned on a weekly bases. Symptoms of a dirty separator: 1. Separator errors. 2. Foam in the separator. 3. Waste pump gets problems when removing the waste from of the separator. Detailed instructions of this procedure can be found in .WI-196 Cleaning liquid separator (on page 299) 11.4. Level 4 maintenance The purpose of level 4 maintenance is to carry out the daily and the weekly maintenance. Replace the pump tubing, bacterial filters and the Fill nozzle washer. After replacing those items, the Instrument needs a Fill and Clean sequence to clean the pipettes. Over a monthly period protein builds up in the Westergren pipettes and needs to be de-proteinised using a strong cleaning agent. Detailed instructions of this procedure can be found in the .WI-193 level 4 maintenance (on page 318) 11.4.1. Rinse-pump tube replacement Replace the pump tube (ESRI 090902). If the tube is not fitted correctly or is worn the following symptoms can occur. • Liquid flowing back into the container. • First glass tube on the pipette belt is not washed sufficiently. Note: The wider bore tube is for the rinse pump. 11.4.2. Saline-pump tube replacement Replace the pump tube (ESRI 090903). If the tube is not fitted correctly or is worn the following symptoms can occur. • Liquid flowing back into the container. • Sample needle is not washed sufficiently. Note: The narrower bore tube is for the saline pump. Auto Compact User Manual Version 6.62 MRN-071-EN Page 145 Maintenance 11.4.3. Replace bacterial filters Remove the liquid separator from the Compact and replace old filter with a new Hepa filter QWLV040002. If applicable replace the bacterial filter on the waste container QWLV040001. 11.4.4. Fill-nozzle O-ring replacement As the fill nozzle O-ring (QWLV050004) ages, it looses its flexibility and air-bubbles may occur in the Westergren pipettes, the washer needs to be replaced. Symptoms for a bad fill-nozzle O-ring After the aspiration, the Westergren pipette has a zebra pattern (air- blood- air -blood, nicely divided in the column.) Vacuum stabilisation errors may occur. 11.4.5. Fill and clean procedure Cleaning agent preparation Auto Compact: Fill and clean: (192-1) 1. Fill the clean adapter up with hot de-ionised water till the first mark in the adapter. (180 ml) 2. Add the cleaning agent (QRR010905) to the adapter till the second marker in the adapter. (18 ml) 3. Place the two caps on the adapter and mix well. 4. Insert the adapter onto the in-pool selection. Page 146 Auto Compact User Manual Version 6.62 MRN-071-EN Maintenance Start fill and clean procedure: Put the adapter in the Input-pool and select MAINTENANCE tab and PRIME/CLEAN the FILL AND CLEAN key. The adapter will be transported to the needle piercing position by the gripper. The needle goes down and the fill and clean process is started. 1. When all the pipettes are filled the needle goes back to the home position and the adapter is moved to the release position and will be released to the End-pool. Note: Each pipette on the pipette belt will be filled with cleaning agent, after one hour the first pipette is washed and dried. Fill and clean takes about 1 ½ hours to complete. Erroneous haziness looks more like haemolytic plasma than 'normal' hazy plasma. If there is an abnormal number of 'hazy' aspects, check the dispenser system carefully and clean it if in any doubt. Symptoms for a contaminated instrument: 1. If more than 3… 5 out of 20 measurements are reported HAZY. 2. Poor meniscus may be reported. 3. Incorrect results. 11.5. Level 3 maintenance Level 3 maintenance is level 4 maintenance adding the following extra's. 1. Replace the pinch valve tube ESRI010246. 2. Replace the blue disk filter QWLV040003. 3. Replace the Peristaltic waste pump cassette ESRI 090921 including the Blotting washer ESRI090920. Auto Compact User Manual Version 6.62 MRN-071-EN Page 147 Maintenance Be careful, as there may be blood in the cassette. First, make up some disinfectant and put this in the liquid separator. Press PRIME DISINFECTANT to pump disinfectant through the pump cassette. Symptoms for a bad or faulty waste pump cassette: • Waste separator error. • Taking too long before the separator empties. • Detailed instructions of this procedure can be found in the Work Instruction WI-194 Level 3 maintenance. (on page 325) 11.6. Level 2 maintenance Level 2 maintenance is level 3 maintenance and add the following extra's. Replace the Teflon tip on the syringe of the diluter assembly. (From repair set QWLV030902.) Detailed instructions of this procedure can be found in the Work Instruction number WI-181 Disand re-assembly diluter syringe. Detailed instructions of this procedure can be found in the Work Instruction number WI-198 Level 2 maintenance (on page 334) 11.7. Level 1 maintenance Annual maintenance (Level 1 maintenance) is Level 3 Maintenance and WI-181 Dis- and reassembly diluter syringe and adds the following extras; We recommend that this procedure is carried out by dealers service engineers. The following items need to be replaced annually. 1. Replace all the tubing. 2. Replace the waste pump motor ESRI090920. 3. Replace Waste pump cassette ESRI090921. 4. Replace blue Vacuum filter disc. Part no QWLV040003. 5. Replace Fill block washer. Part no ESRI030906. 6. Check the outer needle and sample probe and replace if necessary. 7. Replace waste container filter disc QWLV040001. 8. Replace Pinch valve tubing. Part no ESRI 010246. 9. Replace the Teflon tip of syringe on the Diluter assembly. 10. Check Waste pump motor assembly and replace if necessary. ESRI0090920. Check the pipette valves bodies and replace if necessary (84 pieces) QTST040001. See appendix - maintenance schedule Appendix - Maintenance schedule (7) Page 148 Auto Compact User Manual Version 6.62 MRN-071-EN Data safety management 12. DATA SAFETY MANAGEMENT The StaRRsed Auto-Compact has its own external computer. This means that important collected data is stored together with a backup file on the hard-disk of the external computer. Important system settings are kept in an internal Flash Eprom inside the instrument. In case of corrupted files, the program will automatically load and use the backup files. This means that important data is kept, irrespective of a power failure or if the instrument is unintentionally turned off. After the start-up procedure the software checks whether there are any ESR's still outstanding. If so, these will be carried out first. 12.1. Power failure If a power failure occurs it is recommended that the StaRRsed Auto-Compact is switched OFF by the power switch. When the power returns, the Instrument can be switched ON. After the standard start-up process the StaRRsed Auto-Compact will continue to process the remaining samples. If a power failure occurs, the sedimentation time (60 or 30 min.) may be exceeded. However, the actual sedimentation time is reported to the printer and RS232 and therefore can be checked. 12.2. RS232 serial output The StaRRsed Auto-Compact PC is equipped with a serial port, which can be connected to any laboratory host computer system or PC. The data sent by the (Auto) Compact PC can also be sent to a host computer or PC. for further processing. 12.3. Specifications for the RS232 port The Serial RS232 settings need to be set in SERVICE - SERIAL OUTPUT SETTINGS. Baud rate can be set from 1200 to 19200 baud (default setting is 2400 baud). Transmission protocol is default setting: 8 bit data, 1 stop bit, and no parity. To change the baud rate go to SERIAL OUTPUT SETTINGS. For more detail information on the Serial connection see the Appendix - RS-232 hardware connections Compact. Auto Compact User Manual Version 6.62 MRN-071-EN Page 149 Trouble shooting 13. TROUBLE SHOOTING Occasionally small faults may cause major problems. This chapter may help to solve the most common faults and explain why a specific problem occurs. A lot of the problems or errors are due to a lack of maintenance. Remember that this instrument operates with a considerable amount of whole blood, virtually undiluted, stores it in a pipette for one hour and then cleans pipettes for re-use. Therefore, it is important to keep to the maintenance schedules. It is recommended that trained service personnel checks and applies service to the instrument at least once a year. Errors which are not explained in this section can usually not be solved by the operator. Refer to the Service manual for more information (available only in English). The error numbers are displayed in the PC software. Auto Compact User Manual Version 6.62 MRN-071-EN Page 151 Trouble shooting 13.1. Peristaltic pumps The Peristaltic pumps are located under the Waste bottle housing assembly flap. 13.1.1. Rinse solution not primed through the system 1. Check the rinse tube condition. It may be worn or leaking or incorrectly fitted. Check the pick-up tube in the rinse container, it may have become detached from the tube connector in the cap. See WI-162 rinse tube replacement (on page 284). 2. Check rinse solution level in rinse solution container. • If the level is insufficient, a message is displayed and the alarm sounds! 3. One of the tubes carrying the rinse solution may be blocked or kinked. 13.1.2. Rinse solution spilling over the instrument If rinse solution spills over the top of the pipettes, the following items must be checked; 1. Is the vacuum pump working? • Check the vacuum pressure by using the option CHECK FLOW SENSOR. 2. When rinsing, the rinse actuator must be energized. • The rinse actuator can be found under top cover at the top of pipette being rinsed. 3. Wash station must engage with pipette. • The Wash station is the white Rinse nozzle that engages the bottom of the pipettes. Auto Compact User Manual Version 6.62 MRN-071-EN Page 153 Trouble shooting 4. Check the piercing pin in the wash station, it must be straight. • The piercing pin is to pierce the bottom meniscus when a filled pipette is at the wash station. 5. Wash station or tubing from wash station may be blocked. • Activate the PRIME DISINFECTANT function. The disinfectant must flow through the system. 13.1.3. Rinse pump defective 1. Liquid flows back into the container. • Replace the rinse pump tube. 2. At the start of the rinse sequence the first pipette is not washed. • Replace the rinse pump tube. WI-162 rinse tube replacement (on page 284). Page 154 Auto Compact User Manual Version 6.62 MRN-071-EN Trouble shooting 13.1.4. Liquid level sensor not sensing 1. Liquid in the container is not detected. This occurs sometimes with the De-ionized water bottle. 2. Add one or two drops of Saline to the De-ionized water to increase the conductivity. 13.1.5. Sample probe is not washed after aspiration 1. Check saline level in saline container. • If the level is insufficient, usually a message will be on the display and the alarm sounds! 2. Check pick-up tube in saline container. • it may have become detached from the tube connector. • Loosen the cap of the saline container in order to inspect. 3. Check the saline peristaltic pump tube condition. • It may be worn or leak. (See Level 4 maintenance). • An incorrectly fitted saline peristaltic pump tube may cause the same problem. • One of the tubes carrying saline maybe blocked or bends. 13.1.6. Saline dripping in the sample tube adapter If Saline drips from the needle assembly check the following; 1. Does the vacuum pump work? • 2. 3. 4. 5. 6. Check the vacuum pressure by using the option CHECK FLOW SENSOR. Sample probe may be blocked. Fill nozzle may be blocked. Waste line may be blocked. Outer needle may be blocked. Pinch valve not working or blocked. • Replace pinch valve tube, technical assistance is needed. Auto Compact User Manual Version 6.62 MRN-071-EN Page 155 Trouble shooting 13.1.7. Saline pump defective 1. Liquid flowing back to the container. • Replace the saline pump tube. 2. Needle is not washed sufficiently. • Replace the saline pump tube see WI-163 saline tube replacement (on page 285). 13.1.8. Pipettes not dry after washing and drying If pipettes are not dried after the wash cycle, the following items need to be checked. 1. Does the vacuum pump work? • Check the vacuum pressure by using the option CHECK FLOW SENSOR. 2. Rinse vacuum control valve not working, technical assistance is needed. 3. Waste separator leaking, remove separator and reassemble. 4. Rinse nozzle not aligning, • Re-alignment for the rinse nozzle, technical assistance is needed. Page 156 Auto Compact User Manual Version 6.62 MRN-071-EN Trouble shooting 13.2. Liquid level sensor not sensing 1. Liquid in the container is not detected. This occurs sometimes with the De-ionized water bottle. 2. Add one or two drops of Saline to the De-ionized water to increase the conductivity. 13.3. Compact stalls When the Compact is not working again check the main fuse. The main fuse can be found at the main input socket from the Compact. Auto Compact User Manual Version 6.62 MRN-071-EN Page 157 Trouble shooting 13.4. Diluter Occasionally small faults may cause major problems, this chapter may help to solve the most common faults and explain why a specific problem occurs. A lot of the problems or errors are due to lack of maintenance. Remember this instrument operates with a large amount of whole blood virtually undiluted, and stores it in a pipette for one hour and then clean pipettes for re-use. Therefore, it is important to keep to the maintenance schedules. 13.4.1. Diluter errors Display shows diluter failure. May be caused by; 1. Mechanical obstruction. • 2. 3. 4. 5. 6. Clear obstruction. A defective diluter motor. Diluter power cable loose. Top or bottom position sensor failure. Broken flexible print cable or connector. Motor tacho failure. These faults are fatal errors, technical assistance is needed. Dilution errors; If the display shows dilution errors it indicates that the current sample has not been diluted correctly e.g. -21% Diluent added to the sample. After the sample measurement the dilution rate will be printed as: EDTA 079. Dilution errors may cause by; 1. Irregular filling speed due to poor vacuum. • Check the vacuum. (See Section vacuum.) 2. Blocked sample probe. • 3. 4. 5. 6. 7. Remove the blockage. Blocked T-piece. Sample tube Pinch valve. Sample tube not correct in the sample pinch valve. Insufficient sample volume. Diluter problem. Auto Compact User Manual Version 6.62 MRN-071-EN Page 159 Trouble shooting 13.5. Vacuum The Compact uses vacuum, for both aspirating and the wash/rinse system. If trouble occurs, it is most likely because of poor or no vacuum. Check the airflow by going to MAINTENANCE tab - CHECK SENSORS and select the CHECK FLOW SENSOR The following values are shown on the screen: Compact version Flow: 0925-0980-1020 Abs: 0340- 0360-0380 Offset 0045- 0050- 0055 If for example the yellow orifice is blocked the flow will be: 0050 (offset value). Low value for the airflow may be caused by a dirty or blocked blue disc filter, or orifices (especially the yellow one). Start the pipette wash sequence via MAINTENANCE tab - PRIME/CLEAN - WASH ALL PIPETTE and observe the drying process, pipettes must be free of water spots. 13.5.1. Vacuum stabilisation problems The Compact checks the vacuum built up in a pipette just before Sampling. A vacuum stabilisation error will occur if it takes too long to evacuate a pipette or vacuum level is not stable. Vacuum stabilisation error may cause by; 1. Leak in mixing tube connecting Perspex T-piece and filling-nozzle. • Replace the silicone tube. ESRI 070914. 2. Fill block washer defective or not in place. • Washer needs to be replaced. 3. Leaking washer in fill-nozzle. Replace fill-nozzle washer. • (See WI-203 Replace the fill nozzle O-ring (on page 304)). 4. Pinch valve next to fill-nozzle not operating. • Needs replacement, fatal error. 5. Wet or dirty blue air filter on flow-sensor board. • Replace blue air filter on flow sensor assembly. 6. Defective flow sensor board. • Needs replacement, fatal error. Page 160 Auto Compact User Manual Version 6.62 MRN-071-EN Trouble shooting It is also possible that the outer Needle valve is not functioning correctly and vacuum is leaking away. 13.5.2. Vacuum error The Compact monitors the vacuum pressure. If the vacuum pressure drops below a pre-set level, a vacuum un-stabilisation error message will be indicated on the Main screen. Vacuum error may cause by; 1. Blocked vacuum line Replace the bacterial filter. • WI-179 Replace blue air (on page 295) 2. Blocked bacterial filter. Replace the bacterial filter. • WI-179 Replace blue air filter (on page 295). Auto Compact User Manual Version 6.62 MRN-071-EN Page 161 Trouble shooting 1. Liquid separator wrongly assembled. • 2. WI-196 Cleaning liquid separator (on page 299). Main vacuum pump defective. • Fatal error. 3. Bad vacuum. Need adjustment on the vacuum. • Fatal error, technical assistance is needed.. 4. Blockage in the 3 way vacuum manifold. • Fatal error, technical assistance is needed. Page 162 Auto Compact User Manual Version 6.62 MRN-071-EN Trouble shooting 13.6. Flushing liquids After each sample aspiration the entire system is washed automatically. If there is no liquid flow: • Check that the peristaltic pumps are running. If the pump tubes are worn or leaking, replace the tubes. • Check that the pump tubes are installed correctly. • Check the tubes between the containers and pumps/valves. • Unscrew the cap from the container. Check the pick-up tubes in the container and that there is enough liquid in the container. • Check the tubes for blockages or kinks. 13.6.1. De-ionised water Select from MAINTENANCE -> PRIME / CLEAN -> [PRIME DE-IONISED WATER], the vacuum pump should operate and liquid flows through the thin tube connected to the side of the fill nozzle cap. After each sample aspirations, the fill nozzle aspiration tube is washed automatically with deionised water. If there is no liquid flow: 1. Check pick-up tube in de-ionised water container, it may have become disconnected from the nozzle in the lid. (Older models only). 2. Unscrew the cap of the deionised water container to check. 3. One of the de-ionised water lines may be blocked or kinked. 13.6.2. Disinfectant To disinfect the Compact waste, Select from MAINTENANCE -> PRIME / CLEAN -> [PRIME DISINFECTANT], the vacuum pump should operate, and liquid must be seen flowing through the thin tube connected to the side of the wash station. After each wash cycle, approximately 0.5 ml of disinfectant will be flushed through the wash station. If no disinfectant flows; 1. Check pick-up tube in disinfectant container, it may have become disconnected from the nozzle in the lid. (Older models only). 2. Unscrew the cap of the disinfectant container to check. 3. One of the disinfectant lines may be blocked or kinked. Auto Compact User Manual Version 6.62 MRN-071-EN Page 163 Trouble shooting 13.7. Needle system As soon as the barcode is accepted or the ID number keyed in manually, the sample will be processed. 13.7.1. Needle not in top position E4 E4 is the error code and the text in the status line Needle not in top position. Piercing needle not back at the home position after sampling a tube. • Check the home sensor. • Needle motor faulty. • Needle driver on needle board faulty. • Fatal error call distributor. E14 E14 is the error code and the text in the status line Tube motor position error. Outer needle did not reached the home sensor within a certain time limit • Check home top sensor. • Outer needle (tube) motor is faulty. • Outer needle driver on needle board is faulty. • Motor is blocked. • Fatal error call distributor. Page 164 Auto Compact User Manual Version 6.62 MRN-071-EN Trouble shooting 13.7.2. Sample probe fails to go down Under normal circumstances, the sample probe goes down. If sample probe fails to go down check the following. Sample probe depth wrong. Check the correct sample SETTINGS - GENERAL - SAMPLE PROBE DEPTH • if the sample probe has being set too deep, it will touch the bottom of the sample tube. The sample probe then pushes the sample tube slightly downwards, and the aspiration cycle will be aborted. • A broken outer needle may cause a similar fault. • Check for mechanical obstructions. • Electronic failure. • • Fatal error, call distributor. Mechanical failure. • Fatal error, call distributor. Auto Compact User Manual Version 6.62 MRN-071-EN Page 165 Trouble shooting 13.8. Air bubbles After a normal aspiration, the Westergren pipette must be free of air bubbles (see the first example). The following diagram indicates different types of blood columns that may appear in the pipettes. Air bubbles can affect the sedimentation and are mostly reported as errors. If air bubbles are visible in the pipette, check the following. 13.8.1. Foam in column (examples 3 & 9) 1. Check that the sample probe O-ring is not leaking. 2. Check that tube connections are not leaking. 3. Check the fill nozzle condition. Auto Compact User Manual Version 6.62 MRN-071-EN Page 167 Trouble shooting 4. Inspect for any cracks or deep scratches in the base that holds the fill nozzle washer or O-ring. 5. Check for air in diluter system. 6. Check transparent T- piece or Y-piece block for cracks. 13.8.2. Pipette looks like zebra crossing (example 2) If this always occurs in the same pipette, check the bottom of the pipette for the following: 1. Glass may be chipped. • Replace pipette. 2. Dirt, e.g. dried blood. • Clean the pipette. • Check disinfectant flow at the rinse nozzle. 3. Perpendicularity and straightness of the bottom face. • Replace pipette. If this happens randomly or with each pipette, check the following: 1. Fill nozzle O ring or flat washer. 2. Fill nozzle alignment to pipette. • Check the nozzle arm is tight on the rear vertical shaft. Usually engineer’s assistance is required. 13.8.3. One air bubble about 5 mm under meniscus (examples 5 & 10) The filling (aspiration) speed is not critical but should be within certain limits. 1. If just one air bubble is found about 5mm below the meniscus, the filling speed may be too high. 2. The blood column should not exceed the filling height sensor by more than 10mm. 3. Low filling speed may cause incorrect sample/diluent mixing or an abnormal number of hazy reports. 13.8.4. One air bubble rising in pipette (examples 5 & 8) 1. Usually this is caused by a wet or dirty fill nozzle. • The blood column should not reach right to the base of the pipette. There must be a clear air gap of 4...5mm at the bottom of each pipette. 2. Insufficient sample volume. • Need more blood in the sample tube. 13.8.5. Small air bubbles rising in pipette Usually this is caused by a dirty or damaged fill nozzle. • Observe the maintenance schedules. • Clean the fill nozzle. Page 168 Auto Compact User Manual Version 6.62 MRN-071-EN Trouble shooting • Check the fill nozzle for damage. If necessary, replace the fill nozzle. • Sample tube is leaking on the fill nozzle side, replace the silicon sample tube. 13.8.6. Random air bubbles in pipette 1. Check Diluent flow by priming the diluter system. 2. Insufficient sample volume. Auto Compact User Manual Version 6.62 MRN-071-EN Page 169 Trouble shooting 13.9. Leaking pipettes If blood or cleaning solutions leak from a pipette, perform the following procedures and check the performance of the system after each step to see if the problem has been solved. On the completion of the following steps does not result in a correction of the problem contact technical support. 1. Check for specks of dirt or hairs in the pipette valves. 2. A scratched valve tube. 3. A scratched valve body. 4. Valve on top of the pipette is dirty or damaged. 5. Check pipette bottom, glass may be chipped. 6. Check the pipette valve for contamination or wear. Auto Compact User Manual Version 6.62 MRN-071-EN Page 171 Trouble shooting 13.10. Rinse nozzle (wash station) alignment If there is a mechanical obstruction, the rinse nozzle may not align correctly with the pipette. Check that the two pieces of plastic tubing connected to the rinse nozzle have enough slack to allow for movement of the nozzle. Technical support is needed if the rinse nozzle does not line up with the pipette. Page 172 Auto Compact User Manual Version 6.62 MRN-071-EN Trouble shooting 13.11. Hazy reports "Hazy" reports are usually caused by build-up of proteins on the inner wall of the pipettes. Another cause is growth of micro organisms in the diluter system. It is extremely important that the system is kept sterile. First run an extra Fill & Clean sequence, then check after a day's run if haziness is decreased. When there are still many reports, it is recommended to fill the diluter system with a 5% chlorine solution. See WI-178 Hazy problem (on page 294) and WI-195 Cleaning the diluent system (on page 298). A picture example of haziness Auto Compact User Manual Version 6.62 MRN-071-EN Page 173 Trouble shooting 13.12. Contaminated instrument The instrument has bacterial and micro organism's growth. Clean the instrument with a strong cleaning agent MAINTENANCE - PRIME/CLEAN - FILL & CLEAN. See work instructions 192 and 195 for details. Put the adapter in the Input-pool and select MAINTENANCE tab and PRIME/CLEAN the FILL AND CLEAN key. The adapter will be transported to the needle piercing position by the gripper. The needle goes down and the fill and clean process is started. 13.13. Fill time-out Normally the fill sequence takes about 15 seconds. However, if the fill sequence exceeds 20 seconds, a fill time-out will be generated. The Compact aborts the fill sequence and the error message will be shown on the display and reported to the printer. Fill time-out error may be caused by: 1. Blood clots or rubber debris from the tube cap in the sample. • Check the mixing time of the tube. • Check the condition of the outer needle. 2. Filling procedure stopped by operator. 3. Insufficient sample volume. • Should be at least 1.4 ml. 4. Faulty filling nozzle or filling nozzle washer/O-ring. • Check filling nozzle and washer/O-ring. 5. Incorrectly adjusted sample probe depth. • Check needle depth, SETTINGS - NEEDLE DEPTH 6. No or poor vacuum. • Check vacuum MAINTENANCE - CHECK SENSORS - CHECK FLOW SENSOR Page 174 Auto Compact User Manual Version 6.62 MRN-071-EN Trouble shooting 13.14. Position error E18 E18 is the error code and the text in the status line Carousel position error. 1. Position error can occur if the Compact is switched OFF while the carrousel is moving to the next position. If the Rinse nozzle sticks up this can cause a position jump. 2. Position error. • Compact was not able to position the carousel. • There was a difference found in the pipette memory position table and the actual measured position of the position sensor. • Check in tab SETTINGS - CAROUSEL for the correct position. 3. If the position is still not correct go to SETTINGS - CAROUSEL and select Pipette flow test. During the Pipette flow test the software will learn the new position of the carousel. When the flow test is done all the new positions will be stored in memory. 4. Check the mechanical connection of the potentiometers are not loose. If position errors still occur, the positioning device needs replacement. This is a fatal error, call distributor. Position error. 1. StaRRsed Auto-Compact was not able to position the carousel. There was a difference found in the pipette memory position table and the actual measured position of the position sensor. • Check in tab SETTINGS (password 3964)- Carousel control the Rinse position If not correct select 2. Select "SET RINSE POSITION". 3. Select CHANGE RINSE POSITION and enter the right value of the pipette number at the rinse station. Close popup menu. 4. Press LEARN CAROUSEL POSITION. Auto Compact User Manual Version 6.62 MRN-071-EN Page 175 Trouble shooting Or check the position by 1. Select GO TO RINSE POSITION enter a higher value than the actual rinse position and observe that the carrousel moves without giving position error. 2. Select the Service mode Icon to leave service mode. If position errors occur frequently, or item 2 above does not cure problem the following procedure must be carried out. Warning After a position error it is highly recommended to wash all samples. This is very important. If samples or liquid is present in any pipette go to tab MAINTENANCE - PRIME/CLEAN - WASH ALL PIPETTES which first remove the liquid from the pipettes. All sample information will be lost. When it is not possible to rectify the position error does the following, • If liquid or samples are present in isolated pipettes use a combination of GO TO RINSE POSITION and PRIME RINSE SOLUTION to remove the blood samples. Or, Go to tab SETTINGS and select DELETE PIPETTE DATA the carousel stop moving, and use the above mention squeeze to remove the blood samples • Select the Service mode Icon to leave service mode. If position errors still occur, the positioning device needs replacement. This is a fatal error, call distributor. Page 176 Auto Compact User Manual Version 6.62 MRN-071-EN Trouble shooting 13.15. Separator error If it takes too long for the waste pump to empty the liquid separator, the system generates a <Separator FULL !> error. Separator error may be caused by: Extensive foam build-up in the liquid separator. Check the separator assembly and connections for possible air leaks. Waste-tube between liquid separator and Replace the tube. waste pump is blocked. Waste-tube between waste pump and waste container blocked. Replace the tube. Waste pump failure. Exchange the waste pump cassette. If the error returns, call for service. Electrical bridge between the waste-level Clean liquid separator, see WI-196 Cleaning liquid electrodes. separator (on page 299) Auto Compact User Manual Version 6.62 MRN-071-EN Page 177 Trouble shooting 13.16. Reagents Check the expire dates of the reagents regularly. Do not use the reagents if expired. Note: If expired reagent has been used accidentally, the results obtained with these reagents may only be used, when the expire date was not exceeded more than 30 days. Diluent is sensitive for bacterial growth. The solution should be discarded if it becomes turbid or infected. When using the small onboard containers, clean the Diluent container thoroughly with 10% Na-hypochlorite. Make sure that the container has been thoroughly rinsed after cleaning. 13.17. Reagents alarm The software checks the bottle status before starting a new rack. If a level alarm is ON, it will not process the new rack. If an alarm comes ON during a rack, it will finish to aspirate that rack (10 samples max.). Washing dirty pipettes always continues, as to avoid that the samples are left in the pipettes. Reagents alarm is also set when the expire date of the reagent is exceeded. Processing of new samples is stopped. Auto Compact User Manual Version 6.62 MRN-071-EN Page 179 Trouble shooting 13.18. Fill nozzle Normally the fill sequence takes about 15 seconds, however if the fill sequence exceeds 20 seconds a fill time-out will be generated. The Compact aborts the fill sequence and the error message will be shown on the display and reported to the printer. Check for mechanical obstructions and remove them. If the error returns, call for service. 13.18.1. Fill nozzle does not engage with pipette 1. Motor time out generated, fill nozzle stops half way up. 2. Check for mechanical obstruction. 3. Motor failure. Fatal error. 13.18.2. Fill nozzle not at fill position E8 is the error code and in the status line the text Fill nozzle not in the fill position. Possible reason; • The fill nozzle did not reached the fill position in a certain time limit. • Fill motor is faulty. • Fatal error call distributor. 13.18.3. Fill nozzle not at home position E13 is the error code and in the status line the text Fill nozzle did not reached the Home position within a certain time limit. • Fill nozzle motor faulty. • Fill nozzle motor driver on board faulty. • Fatal error call distributor. Auto Compact User Manual Version 6.62 MRN-071-EN Page 181 Trouble shooting 13.19. Piercing error E7 is the error code and on the status line the text Piercing error. The following reasons can cause this problem • Tube motor position error • Outer needle did not go down within a certain time limit • Outer needle motor is faulty • Tube motor driver on the needle board is faulty E20 is the error code and in the status line the text Tube motor position error. Outer needle could not go down all the way. • Piercing error sensor was not triggered • Check the tube 1 position setting and save the setting • Tube 1 not aligned proper. • Check the piercing error detection sensor. For error numbers and details See the Appendix - Error list Auto Compact (on page 206) 13.20. New rack adapter Go to SERVICE SCREEN and select POSITION MOTOR - SELECT RACK and select the required rack type. Go to TEST POSITION motor and GO TO TUBE position and set in Tube # number 1. The Gripper motor will move the rack to the first position of the rack. Check if the needle is above the first hole. If the needle is not above the first hole turn the wheel on the motor until the needle is above the hole. Check that the needle is going though the hole by using the Outer needle function DOWN. Get the needle out of the hole press the function UP. By turning the wheel the actual position numbers are changed. When the needle is going nicely through the hole press the SAVE AS TUBE 1 POSITION. Next step is press the SAVE settings key. Now all the new settings are saved in the file and Eeprom. Page 182 Auto Compact User Manual Version 6.62 MRN-071-EN Trouble shooting 13.21. Rack unit errors The rack unit can give the following errors on the • Gripper module (on page 184) • Mixer module (on page 185) • Check the mixer (on page 185) Auto Compact User Manual Version 6.62 MRN-071-EN Page 183 Trouble shooting 13.21.1. Gripper module E61 till E67, E69, E71 E72, E80 till E88 are the error codes and the text in the status line begins with "Grabber did not reach the": • The OUT (release) position. Starting point: FILL position. • The MIX position. Starting point: OUT position • The HOME position. Could not reach or detect the home sensor. • The IN (catch) position. Starting point: MIX position. • The MIX position. Starting point FILL position. • The MIX position. Starting point IN position Causes and solutions • Position gripper motor is faulty • Motor driver on rack board is faulty • Check position (grabber) motor home sensor • Position grabber motor is faulty • Position grabber motor is blocked • Check position motor belt. • Check height of the tubes in the rack • Check gripper sensor • Check rack adapter. E73 till E75 are the error codes and in the status line the text begins with "Position motor error!": • is on the IN position Could not send the rack to the IN pool to the first stop position. • is not on the OUT position. Could not release the rack from the grabber. • is not on the IN position. Could not send rack to the grabber. Causes and solutions • Check the position motor For more error numbers and details see the Appendix - Error list Auto Compact (on page 206) Page 184 Auto Compact User Manual Version 6.62 MRN-071-EN Trouble shooting 13.21.2. Mixer module E60 and E90 is the error code and the text in the status line Mixer motor error. Could not home mixer motor • Mixer motor is faulty. • Mixer motor is blocked. • Mixer motor driver on rack is board is faulty. • Check mixer motor belt. E68 is the error code and the text in the status line Mixer motor time out. The mixer motor current exceeded the maximum mixing current setting during mixing. • Check mixer motor setting • Mixer motor is blocked • Mixer motor is faulty • Mixer motor driver on rack board is faulty • Check mixer motor belt. E70 is the error code and the text in the status line Can't home mixer! Rack not on mix position. Mixer motor send to home position , but position grabber motor is not on the MIX position. • Check the position motor. For error numbers and details see the Appendix - Error list Auto Compact (on page 206) 13.21.3. Check the mixer The mixer is integrated with the rack grabber and will start mixing as soon the first barcode label is read. Check the movement during the mixing and check the mixer has enough clearance to turn. Check the following settings in SERVICE - RACK UNIT - MIXER & CONVEYER MOTOR, • Number of turns long mix (default = 8). This is the first mix of a new rack.) • Number of turn's short mix (default = 1). This is the second, third, etc… mix of the same rack. Auto Compact User Manual Version 6.62 MRN-071-EN Page 185 Trouble shooting 13.22. Communications The following error numbers E30 till E37 are related to ACK/NACK handshake communications between the Auto Compact and the Host Computer. • Check the communication cable between the Auto Compact and Host computer • Check the serial port settings (Baudrate, ect) • Check protocol settings • Check Host Computer settings • After changing the settings did not save settings 13.23. Not reading the barcode In some cases the default settings for reading a barcode label are not acceptable. The barcode reader needs to be re-adjusting for a better label detection or need to be re-programmed for the label what is in use. To test the barcode reader, select SERVICE - RACK UNIT - POSITION MOTOR. Insert a sample rack with a sample tube in the grabber. • Press GO TO IN position and put the rack inside the grabber. • Press GO TO MIX position, rack is now held in the grabber. • Press GO TO TUBE position, mixer is now moving to the 1 position Press Read barcode and check the numbers are the same as on the barcode label. 13.24. Tube sensor does not detect the tube In some cases the tube detection sensor needs to be re-adjusted for a better detection of the tube in the sample rack. Select SERVICE - RACK UNIT - POSITION MOTOR, Switch on the check tube sensor and insert a sample rack with a sample tube in the grabber. • Press GO TO IN position and put the rack inside the grabber. • Press GO TO MIX position, rack is now held in the grabber. • Press GO TO TUBE position, mixer is now moving to the 1 position Check the light is coming on. Page 186 Auto Compact User Manual Version 6.62 MRN-071-EN Trouble shooting 13.25. Tube not in 1 position Test the first hole settings, select Service - Rack unit - Position motor. Insert a sample rack with a sample tube in the grabber. 1. 2. 3. 4. Press GO TO IN position and put the rack inside the grabber. Press GO TO MIX position, rack is now held in the grabber. Press GO TO TUBE position, mixer is now moving to the 1 position. Press OUTER NEEDLE down, observe and check the alignment of the first hole. When there is a misalignment correct the setting by turning the wheel of the positioning motor till a correct alignment is achieved. Press save as tube 1 position and press save settings. Auto Compact User Manual Version 6.62 MRN-071-EN Page 187 Appendix for StaRRsed Auto-Compact 14. APPENDIX FOR STARRSED AUTO-COMPACT Appendix section Auto Compact User Manual Version 6.62 MRN-071-EN Page 189 Appendix for StaRRsed Auto-Compact Appendix - Article reference list Auto Compact The Auto Compact is delivered with a complete accessories kit ESRI 110992. This reference list is for article order numbers only. Part number QWFG010200 Description Bottle 2.5 liters QWFG010201 Cap bottle 2.5 liters ESRI010246 Pinch valve tube QWLV040002 Bacterial filter (Waste separator) QWLV050004 Fill nozzle washers EDTA ESRI030903 Westergren pipette assembly QWLV050003 O-ring sample probe ESRI050903 Sample probe assembly QWLV040001 Disc filters 25mm waste container QWLV040003 Disc filter Vacuum Regulator (blue) ESRI090902 Rinse tube assembly ESRI090903 Saline tube assembly ESRI090921 Waste pump cassette assembly ESRI090026 Blotling washer QEPT100001 Parallel Printer cable ESRI110001 Ruler StaRRsed Compact ESRI110004 Tube silicon 1.5*3.2 (Fill & clean) ESRI110105 Waste sticker 2500 ml QEDV130022 Fuses 5*20 (110V) 5.0 Amps QEDV130019 Fuses 5*20 (220V) 2,5 Amps QWFG010300 Taps for the reagents containers QEDK100001 Euro power cord VERA110008 Installation Manual Auto Compact QRR010905 Cleaning agent QRR010931 Diluent QRR010932 Disinfectants QRR010933 Saline QRR010934 Rinse solution Page 190 Auto Compact User Manual Version 6.62 MRN-071-EN Appendix for StaRRsed Auto-Compact Appendix - Cable connection diagram Auto Compact User Manual Version 6.62 MRN-071-EN Page 191 Appendix for StaRRsed Auto-Compact Appendix - Tube connection Auto Compact Page 192 Auto Compact User Manual Version 6.62 MRN-071-EN Appendix for StaRRsed Auto-Compact Appendix - 60 minutes reporting +++++++++++++ REPORT EXAMPLE ++++++++++++++++ (Not to scale) -- StaRRsed-- 1 2 Date 20/05/07 3 4 Time 15:28 : 5 6 7 8 9 Manual Pip. Time T aspect 10 11 Error EDTA Sample ID ESR Tc Aspect 972005001 84 75 CLEAR 17 60 23 EDTA 972005002 14 13 Hazy<10m m 18 60 23 EDTA 972005003 22 21 Hazy<25m m 19 60 23 EDTA 972005004 67 61 Hazy>25m m 20 60 23 EDTA Sample result with a manual aspect, where the manual aspect is shown as a number 3 in column 6 of this data record sample. 972005005 5 4 CLEAR 3 21 60 23 EDTA In this sample, the dilution rate has a dilution failure of 21% and that is printed as EDTA 079. 972005006 5 5 CLEAR 22 60 23 EDTA 079 Sample results with a text error. This sample gives Too many borders found. Result of a pipette possibly filled with air bubbles. 972005007 24 60 23 Too many borders found Sample result with a text error. This sample is given limit error L_err(---/ 84/ 75/200) 972005001 Auto Compact User Manual Version 6.62 MRN-071-EN 25 60 23 L_err(---/ 84/ 75/200) EDTA Page 193 Appendix for StaRRsed Auto-Compact . 1. 2. 3. 4. Patient number. Not corrected 30-minute ESR result (only in use if 30 minute mode is active). Not corrected 60-minute ESR result. 60-minute ESR result in millimeters, corrected for 18°C. (only in use if temperature correction is active). 5. Aspect (clear, hazy). 6. Manually entered code number. 7. Sedimentation pipette number (number on the pipette belt). 8. Actual sedimentation time in minutes. 9. Temperature (in degrees Centigrade). 10. Error message (if the Analyser detects an error). 11. EDTA mode. This code appears in the "sample data record" at column 5. The following 4 codes are defined: 0 Sample is clear. 1 Sample is Hazy < 10 2 Sample is Hazy < 25 3 Sample is Hazy > 25 Analyzers "ERROR" code messages This code appears in the "sample data record" at column 10. The following codes are defined: 0 NO ERRORS 1 No cells/plasma found Error 2 ESR Probably > 140 mm Error 3 Too many borders found Error 4 Column height <nnn> Warning 5 Measure error Warning 6 Bubbles on top Warning 7 Limit error Page 194 Error Auto Compact User Manual Version 6.62 MRN-071-EN Appendix for StaRRsed Auto-Compact Appendix - 30 minutes reporting +++++++++++++ REPORT EXAMPLE ++++++++++++++++ (Not to scale) - StaRRsed-- Date 20/05/07 1 2 3 4 Sample ID Hh ESR Tc Time 15:28 : 5 6 7 8 9 Aspect Manual Pip. Time T aspect 10 11 Error EDTA 972005001 42 84 75 CLEAR 17 30 23 EDTA 972005002 5 14 13 Hazy<10m m 18 30 23 EDTA 972005003 8 22 21 Hazy<25m m 19 30 23 EDTA 972005004 32 67 61 Hazy>25m m 20 30 23 EDTA Sample result with a manual aspect, where the manual aspect is shown as a number 3 in column 6 of this data record sample. 972005005 2 5 4 CLEAR 3 21 30 23 EDTA In this sample, the dilution rate has a dilution failure of 21% and that is printed as EDTA 079. 972005006 2 5 5 CLEAR 22 30 23 EDTA 079 Sample results with a text error. This sample gives Too many borders found. Result of a pipette possibly filled with air bubbles. 972005007 24 30 23 Too many borders found Sample result with a text error. This sample is given limit error L_err( 42/ 84/ 75/200) 972005001 Auto Compact User Manual Version 6.62 MRN-071-EN 25 30 23 L_err(---/ 84/ 75/200) EDTA Page 195 Appendix for StaRRsed Auto-Compact m 1. 2. 3. 4. Patient number. Not corrected 30-minute ESR result (only in use if 30 minute mode is active). Not corrected 60-minute ESR result. 60-minute ESR result in millimeters, corrected for 18°C. (only in use if temperature correction is active). 5. Aspect (clear, hazy). 6. Manually entered code number. 7. Sedimentation pipette number (number on the pipette belt). 8. Actual sedimentation time in minutes. 9. Temperature (in degrees Centigrade). 10. Error message (if the Analyser detects an error). 11. EDTA mode. This code appears in the "sample data record" at column 5. The following 4 codes are defined: 0 Sample is clear. 1 Sample is Hazy < 10 2 Sample is Hazy < 25 3 Sample is Hazy > 25 Analyzers "ERROR" code messages This code appears in the "sample data record" at column 10. The following codes are defined: 0 NO ERRORS 1 No cells/plasma found Error 2 ESR Probably > 140 mm Error 3 Too many borders found Error 4 Column height <nnn> Warning 5 Measure error Warning 6 Bubbles on top Warning 7 Limit error Page 196 Error Auto Compact User Manual Version 6.62 MRN-071-EN Appendix for StaRRsed Auto-Compact Appendix - Default settings Auto Compact [SETTINGS] > GENERAL SETTINGS General settings Software Default Setting Factory Setting 30 min. Method Off Off Display dilution Off Off EDTA mode On On Display graph Off Off Sample probe protection On On Temp correction On On Fast filling Off Off Virtual keyboard On On Print after measurement Off Off 22 °C 22 °C 60 Min. 60 Min. Sample probe depth 5 mm 5 mm Pipette wash time 5 sec. 5 sec. Pipette dry time 7 sec. 7 sec. Mixing interval 90 sec. 90 sec. Dilution adjust 75 75 Dilution error detect 10 10 Auto dilution adjust On On Temperature ESR sedimentation time Client Settings [SETTINGS] > DILUTER SETTINGS Diluter settings Auto Compact User Manual Version 6.62 MRN-071-EN Page 197 Appendix for StaRRsed Auto-Compact [SETTINGS] > LIMIT SETTINGS General settings Software Default Setting Factory Setting Send results time exceeded No No Send results dilution errors No No Send results column height errors No No Software Default Setting Factory Setting Mixing direction Right Right Mixing speed 90% 90% Hold level 30% 30% Homing speed 20% 20% Conveyer motor Conveyer belt speed 100% 100% Client Settings [SERVICE] > RACK UNIT SETTINGS Mixer motor settings Client Settings Position motor Rack selection Sysmex Set tube 1 position 22 mm Actual position 0.0 mm [SERVICE] > SERIAL OUTPUT SETTINGS Set serial output comport Software Default Setting Factory Setting I/o ASRL::INSTR I/o ASRL::INSTR Baud rate 9600 9600 Data bits 8 8 Serial output comport Page 198 Client Settings Auto Compact User Manual Version 6.62 MRN-071-EN Appendix for StaRRsed Auto-Compact Parity None None 1.0 1.0 None None Compact unidirectional Compact unidirectional Checksum On On 30 Minute Output Off Off Ack/Nack Off Off Stop bits Flow control Set protocol settings Select protocol [SERVICE] > SERIAL OUTPUT SETTINGS StaRRsed Auto-Compact settings Software Default Setting Factory Setting StaRRsed AutoCompact connected to comport I/o ASRL1::INSTR I/o ASRL1::INSTR Printer port I/o ASRL10::INSTR I/o ASRL1::INSTR Select barcode reader Opticon or Keyence Opticon or Keyence Search in example history Outer Needle settings Auto Compact User Manual Version 6.62 MRN-071-EN Off Off 51.0 51.0 Client Settings Page 199 Appendix for StaRRsed Auto-Compact Appendix - Compact system messages The Compact generates four types of messages • System messages. • Test messages. • System time-out messages. • Error messages. During normal operation the following "System message” may occur. • • • • Waiting tube. • If a filled pipette is at the measuring position before the elapsed time has finished and the operator is ready to fill the next pipette, the waiting tube message will be displayed. • To continue the sample loading sequence the operator must wait until the pipette at the measuring position has been measured. Printer failure. • Check paper feed and quantity. • Check printer cable connection. • Printer must be on-line. • Check power is ON. Reagents level empty message. • All reagent bottles have level detectors, the display shows which reagent bottle(s) is (are) empty. • Prepare new reagent as described in section Installation, Reagents preparation. Waste bottle full message • • The waste container also has a level detector. If the "Waste bottle full" message is indicated on the display, the Compact will stop the "rinse and fill" cycle until a new or empty container has been installed. Fatal Separator error • The Separator container has also a level detector. If the "Fatal Separator error" message is indicated on the display, the Compact will stop the "rinse" cycle until the separator is empty. • The cause of this problem can be foam or the waste pump is not working. The Compact will continue to measure and send the ESR results on time to the printer, but the rinse and fill sequences are stopped until the error solved. Page 200 Auto Compact User Manual Version 6.62 MRN-071-EN Appendix for StaRRsed Auto-Compact During the start-up sequence all the positioning sensors are tested, if incorrect the instrument will generate test messages 1. Test fill-nozzle unit. • Checks position of the fill-nozzle unit, if incorrect the unit will be re-positioned by the system. 2. Test rinse-unit. • Checks position of the rinse-unit, if incorrect the unit will be re-positioned by the system. 3. Test measure-unit. • Checks position of the measure-unit, if incorrect the unit will be re-positioned by the system. 4. Test Needle-unit. • Checks position of the needle-unit, if incorrect the unit will be re-positioned by the system. 5. Test Diluter-unit • Check the position of the syringe, if incorrect the unit will be re-positioned by the system. 6. Test drive. • Checks position of the drive unit, if incorrect the unit will be re-positioned by the system. 7. Test Rack unit • Check the position of the Mixing motor, if incorrect the unit will be re-positioned by the system • Check the rack, if incorrect the unit will be re-positioned by the system During normal operation the following "system time-out" errors may occur. These are usually fatal errors. Call distributor or your local supplier of the Compact.. 1. Drive-unit. • Compact was not able to position the pipette belt within a certain time limit. • Check for mechanical obstructions. 2. Measure-unit. • Compact was not able to position the measure-unit within a certain time limit. • Check for mechanical obstructions. 3. Rinse-unit. • Compact was not able to position the rinse-unit within a certain time limit. Auto Compact User Manual Version 6.62 MRN-071-EN Page 201 Appendix for StaRRsed Auto-Compact • Check for mechanical obstructions. 4. Fill-nozzle unit. • Compact was not able to position the fill-nozzle unit within a certain time limit. • Check for mechanical obstructions. 5. Needle adapter. • Compact was not able to position the needle adapter within a certain time limit. • Check for mechanical obstructions. 6. Sample probe. • Compact was not able to position the sample probe within a certain time limit. • Check for mechanical obstructions. The following error messages may occur during normal operation. 1. Vacuum error • Check if vacuum is available. • Check in screen Service Sensor the value of flow sensor. • Fatal error call distributor. 2. Vacuum stabilisation error. • Compact was not able to get a stable reading during the vacuum test before aspiration the sample. • Check for leakage on the pipette or fill nozzle. • Fatal error call distributor. 3. Fill time error. • The fill sensor was not triggered in time. • Not enough liquid was sucked up in the pipette. • Insufficient sample. • No vacuum or a blocked needle or fill block. 4. Diluter error. • Diluter not started. Can be seen in the run mode display as EDTA 001 • Check in screen Service Sensor the value of the diluter sensor. • Check in screen Service Sensor if vacuum is available. • Check in screen Service Sensor the value of flow sensor. • Fatal error call distributor. 5. Position error. Page 202 Auto Compact User Manual Version 6.62 MRN-071-EN Appendix for StaRRsed Auto-Compact • Compact was not able to position the carousel. There was a difference found in the position table and the actual measured position of the position sensor. • Check in screen Settings Carousel the pipette number at rinse position on the page carousel control. • If not correct select the key Set rinse position carousel and type the correct number of the pipette number at the rinse station. 6. Up or Down sensor error. • Compact was not able to detect the position of the fill nozzle on the sensors. • Up sensor failure, the fill nozzle is not at the fill position. • Down sensor failure the fill nozzle is not at the home position. • Check for mechanical obstruction around the fill nozzle. • Fatal error call distributor. 7. Rinse head up error. • The Rinse head down sensor was not triggered during the movement time of the carousel. • Check the gap between the top of the rinse nozzle and the bottom of the pipette. Should be 1.5 to 2 mm. • Check the sensor is correct, or re-adjust the sensor. • Fatal error call distributor. 8. Measure head Not home error. • Measure head is not at the Home position. • Check the home sensor. • Measure motor is faulty. Auto Compact User Manual Version 6.62 MRN-071-EN Page 203 Appendix for StaRRsed Auto-Compact Appendix - Configuration barcode readers The Barcode interface can handle two types of barcode readers, • The Opticon (6 mil resolution). • The Keyence (4 mil resolution). If you are using labels with a higher density, contact your local distributor or agent. The Barcode reader may be set to accept check digits, however this needs to be programmed by the distributor. Coda bar, Code 39, Code128, UPC, EAN and ITF 2 or 5 barcode types can be read with those barcode reader types. To set-up the barcode readers to client specifications, use the set-up tools for the barcode readers. Detailed information can be found in Keyence Configuration manual MRN-011 or in Opticon Configuration manual MRN-015. Page 204 Auto Compact User Manual Version 6.62 MRN-071-EN Appendix for StaRRsed Auto-Compact Appendix - PC connections for Auto Compact At the back side of the computer the following connections must be made; • VGA monitor cable comes from the monitor. • USB cable comes from the touch screen. • Auto Compact serial cable comes from the Auto Compact. • Power cable comes from the power supply. • When the printer is used connect the printer cable onto the 25 pink connector. • The host serial cable is connected where to the connecter with by the arrow. Auto Compact User Manual Version 6.62 MRN-071-EN Page 205 Appendix for StaRRsed Auto-Compact Appendix - Error list Auto Compact Last updated: 01-01-2010 Error Extra explanation Reason/Solution E2: Communication error! (Board: %s (%x), Command: %x, TWSR: %x E: %d) Communication lost after 3 • retries between Computer and Auto-Compact. Power cable not connected on the communication PCB mounted on the back panel. • An I2C cable not connected • Serial cable not connected • No power on one of the PCB's • Short circuit or fault on one of the PCB's E3: Measure motor timeout! Measure motor did not move or motor is blocked. • Measure head is not at the Home position. • Check the Home sensor. • Measure motor is faulty. • Measure motor driver on drive board is faulty. E4: Sample probe not in top position! (home) Sample probe not back at Home position after sampling a tube. • Check the Home sensor. • Sample probe motor is faulty. • Sample probe motor driver on needle board is faulty. • Sample probe is blocked. Page 206 Auto Compact User Manual Version 6.62 MRN-071-EN Appendix for StaRRsed Auto-Compact E5: Duplicated ID !! E6: Program was not properly There is a possibility that shut down. Check settings changed settings which were before continuing! not saved to disk are lost. • Program stopped and computer needed to be reset. • Computer reset after power failure. E7: Outer needle motor position error! Timeout! (piercing) Outer needle did not go down within a certain time limit. • Outer needle motor is faulty. • Outer needle motor driver on needle board is faulty. • Outer needle is blocked. E8: Fillnozzle not in fill position! Fill nozzle did not reach the fill • position within a certain time • limit. Fill nozzle motor is faulty. Fill nozzle motor driver on nozzle board is faulty. • Fill nozzle is blocked. E9: Air flow failure! Compact was not able to get a • stable reading during the vacuum test before aspiration the sample. Check for leakage on the pipette or fill nozzle. E10: Sample probe was blocked. Check both needles before sampling! Sample probe was probably • blocked when going down and exceeded the maximum • current level. Check if outer needle is clogged up with rubber. Sample probe went back to its home position after the error. E11: Sample probe not on position (going down)! Timeout error! Sample probe did not go down • within a certain time limit. Sample probe maybe bend. Sample probe motor is faulty. • Sample probe motor driver on needle board is faulty. • Sample probe is blocked. E12: Dilution error: wrong or no diluent flow. Check the diluter! E13: Fillnozzle not in home position! Fill nozzle did not reached the • Home position within a certain • time limit. Fill nozzle motor is faulty. Fill nozzle motor driver on nozzle board is faulty. • Fill nozzle is blocked. Auto Compact User Manual Version 6.62 MRN-071-EN Page 207 Appendix for StaRRsed Auto-Compact E14: Outer needle motor position error! (home) Outer needle did not reached • the home (top) sensor within a • certain time limit. Check home (top) sensor. Outer needle (tube) motor is faulty. • Outer needle motor driver on needle board is faulty. • Outer needle is blocked. Page 208 Auto Compact User Manual Version 6.62 MRN-071-EN Appendix for StaRRsed Auto-Compact E18: Carousel position error! Check Rinse position. Value of potentiometer does not match the value stored in memory of the current rinse position. • Check is the rinse position is right. • Set correct rinse position and do a "Learn carousel positions". • Check mechanical connection potentiometers. Outer needle could not go down all the way. Piercing error sensor was triggered. Check tube 1 position setting. • Tube 1 not aligned well. E22: Waste bottle full! Empty waste bottle and clear error. • Check level sensor. E23: "Fill " sensor out of range. Check/clean this sensor ! The Fill sensor has reached a • critical level. E20: Outer needle motor position error! (piercing error) • Check piercing error detect sensor. E21: Check and/or clean the Fill sensor. Continuing could result in filling errors. E24: "Diluter Start" sensor out The Diluter Start sensor has of range. Check/clean this reached a critical level. sensor ! Continuing could result in filling errors. • Check and/or clean the E25: "Measure" sensor out of range. Check/clean this sensor ! • Check and/or clean the The Measure sensor has reached a critical level. Diluter Start sensor. Measure sensor. Continuing could result in wrong ESR results. E26: "Diluent Flow" sensor out The EDTA Flow sensor has of range. Check/clean this reached a critical level. sensor ! Continuing could result in filling errors. • Check and/or clean the E27: "Temperature" sensor The Temperature sensor has out of range. Check/clean this reached a critical level. sensor ! Continuing could result in wrong ESR results. • Auto Compact User Manual Version 6.62 MRN-071-EN EDTA Flow sensor. Check and/or clean the Temperature sensor. Page 209 Appendix for StaRRsed Auto-Compact E30: No ACK/NACK received from host after sending inquiry! No response from Host within a certain time limit after sending an inquiry 3 times. • Check communication cable between Host and Auto-Compact computer. • Check serial port settings (baud rate, etc...) • Check protocol settings. • Check Host computer. E31: NACK received from host after sending inquiry! Did not receive ACK from Host after sending inquiry 3 times. See E30 E34: No response from host after sending 'Sample data record'! No response from Host within a certain time limit after 3 attempts. See E30 E35: No response from host after sending 'Sample flag record'! No response from Host within a certain time limit after 3 attempts. See E30 E36: No ACK/NACK received after sending 'Sample result string'! No response from Host within a certain time limit after 3 attempts. See E30 E37: NACK received from host after sending 'Sample result string'! Did not receive ACK from Host after sending 'Sample result string' 3 times. See E30 E40: Position settings error. Settings loaded from Eeprom. Check settings before sampling! Position settings in Eeprom do Configuration file maybe not match settings saved to corrupted. file. Settings in Eeprom OK and loaded from Eeprom. Check positions and save settings. E41: Timeout settings error. Settings loaded from Eeprom. Check settings before sampling! Timing settings in Eeprom Configuration file maybe does not match settings saved corrupted. to file. Settings in Eeprom OK and loaded from Eeprom. Check timeouts and save settings. E42: Mixermotor current settings error. Settings loaded from Eeprom. Check settings before sampling! Current settings in Eeprom do • not match settings saved to file. Settings in Eeprom OK and loaded from Eeprom. Check current settings and save settings. Page 210 Configuration file maybe corrupted. Auto Compact User Manual Version 6.62 MRN-071-EN Appendix for StaRRsed Auto-Compact • Configuration file maybe E43: Motor settings error. Settings loaded from Eeprom. Check settings before sampling! Motor settings in Eeprom do not match settings saved to file. Settings in Eeprom OK and loaded from Eeprom. Check motor settings and save settings. E44: Settings in Eeprom does not match with settings saved to file. Check settings before sampling! Settings stored in Eeprom are • OK and are loaded from Eeprom. Check Selected rack setting and save to file. E45: Settings in Eeprom not correct. Upload settings before sampling! Checksum error on settings stored in Eeprom. Check Selected rack and save settings. corrupted. Configuration file maybe corrupted. • Possible hardware failure in Eeprom. E46: E47: E48: E49: E50: Mixing error! Total amount of mixes not the same as setting. Check Mix-sensor or Rack timer setting T8 or T11. Mixer could not do the correct • number of mixes within a certain time limit. Timing • settings T8 or T11 are too low or mixer (gripper) maybe • blocked. Check rack timing settings T8 & T11. Check mix sensor (+ distance). Mixer is blocked. • Mixer motor is faulty. • Mixer motor driver on rack board is faulty. E51: Mixer not back in its Mixer could not come back in vertical position! Check if its vertical position after mixer is in the vertical position mixing. and clear error if OK! • Mixer maybe hitting the bottom transport belts. • Mixer is blocked. • Mixer motor is faulty. • Mixer motor driver on rack board is faulty. E54: Endpool full ! Remove all This error will be cleared racks from endpool and then automatically after removing clear error! the racks from the end pool. • End pool full. E55: Rack lost in endpool! Remove all racks from endpool and then clear error! • Rack maybe on its side. Rack is released from gripper but did not pass the End pool sensor. • Check End pool full sensor. • Check End pool full sensor. • Check conveyer belt motor. Auto Compact User Manual Version 6.62 MRN-071-EN Page 211 Appendix for StaRRsed Auto-Compact E56: Checksum error motor settings table! Checksum error on motor settings stored in Eeprom. Settings are loaded from file. Check Motor settings and save settings. Possible hardware failure in Eeprom. E57: Checksum error current table! Checksum error on current settings stored in Eeprom. Settings are loaded from file. Check Current settings and save settings. Possible hardware failure in Eeprom. E58: Checksum error timetable! Checksum error on timing settings stored in Eeprom. Settings are loaded from file. Check Timeout settings and save settings. Possible hardware failure in Eeprom. E59: Checksum error position- Checksum error on position table! settings stored in Eeprom. Settings are loaded from file. Check Position settings and save settings. Possible hardware failure in Eeprom. E60: Mixermotor error! (Hardware) • Check rack timing setting Could not home mixer motor. T1. • Mixer motor is faulty • Mixer motor is blocked. • Mixer motor driver on rack board is faulty. • Check mixer motor belt. E61: Position motor error! Not Gripper did not reached the on position! (OUT) OUT (release) position. Starting point: FILL position. • Position (gripper) motor is faulty. • Position (gripper) motor is blocked. • Motor driver on rack board is faulty. E62: Position motor error! Not Gripper did not reach the MIX on position! (MIX) position. Starting point: OUT position. Page 212 See E61 Auto Compact User Manual Version 6.62 MRN-071-EN Appendix for StaRRsed Auto-Compact E63: Position motor error! Home sensor! Position motor did not reach • the home position or could not detect home sensor. Check position (gripper) motor Home sensor. • Position (gripper) motor is faulty. • Position (gripper) motor is blocked. • Motor driver on rack board is faulty. • Check position motor belt. E64: Position motor error! Not Gripper did not reached the IN See E61 on position! (IN) (catch) position. Starting point: MIX position. E65: Position motor error! Not Gripper did not reach the MIX on position! (MIX) position. Starting point: FILL position. See E61 E66: Gripper error! Rack not in gripper! • Check height of the tubes Follow the instructions on the screen. in the rack. • Check gripper sensor. • Check rack adapter. E67: Position motor error! Not Gripper did not reach the FILL See E61 on position! (FILL) position. Starting point: MIX or FILL position. E68: Mixing motor current overshoot. Check if the mixer is blocked! The mixer motor current exceeded the Maximum mixing current setting during mixing. • Check mixer motor settings. • Mixer motor is blocked. • Mixer motor is faulty • Mixer motor driver on rack board is faulty. • Check mixer motor belt. E69: Position motor error! Not Gripper did not reached the See E61 on position! (MIX) MIX position. Starting point: IN position. E70: Can't home mixer! Rack not on mix position! Mixer motor send to home Check the position motor. position, but position (gripper) motor is not on MIX position. E71: Position motor error! Not Gripper did not reach the MIX See E61 on position! (MIX) position. Starting point: HOME position. E72: Not on position! Gripper did not reach its given See E61 position by the user. E73: Position motor error! Could not send the racks on Auto Compact User Manual Version 6.62 MRN-071-EN Check the position motor. Page 213 Appendix for StaRRsed Auto-Compact Position motor is on IN position! the In pool to the first stop position. Could not start the conveyer belt motor, because the position (gripper) is on the IN position. E74: Position motor error! Not Could not release the rack on position! (OUT) from the gripper, because the position (gripper) motor is not on the OUT position. Check the position motor. E75: Position motor error! Not Could not send (start the on position! (IN) conveyer belt motor) the rack into the gripper, because the position (gripper) motor is not on the IN position. Check the position motor. E76: Can't start mixing (long)! Rack not on mix position! Could not start the mixer motor, because the position (gripper) motor is not on the MIX position. Check the position motor. E77: Can't start mixing (short)! Could not start the mixer Rack not on mix position! motor, because the position (gripper) motor is not on the MIX position. Check the position motor. E78: Mixer motor timeout! Mixer motor current level did not reach the stop level during homing action! It is possible that the mixer did • not came back to its home (vertical) position after mixing • within a certain time limit. Check rack timing setting T1. Mixer motor is faulty. • Mixer motor driver on rack board is faulty. • Check mixer motor belt. E80:Position motor error! Not on position! (IN) Gripper did not reached the IN See E61 (catch) position. Starting point: MIX position. E81: Position motor error! Not Gripper did not reached the See E61 on position! (MIX) MIX position. Starting point: IN position. E82: Position motor error! Not Gripper did not reached the on position! (FILL) FILL position. Starting point: MIX position. See E61 E83: Position motor error! Not Gripper did not reached the on position! (MIX) MIX position. Starting point: FILL position. See E61 E84: Position motor error! Not Gripper did not reached the on position! (FILL) FILL position. Starting point: See E61 Page 214 Auto Compact User Manual Version 6.62 MRN-071-EN Appendix for StaRRsed Auto-Compact MIX position. E85: Position motor error! Not Gripper did not reached the on position! (FILL) FILL position. Starting point: last sampled tube. See E61 E86: Position motor error! Not Gripper did not reached the on position! (MIX) MIX position. Starting point: FILL position. See E61 E87: Position motor error! Not Gripper did not reached the on position! (OUT) OUT (release) position. Starting point: FILL position. See E61 E88: Position motor error! Not Gripper did not reached the on position! (MIX) MIX position. Starting point: OUT position. See E61 E89: Position motor error! Can't initialize motor due to a possible hardware error! Please exit and then restart Auto-Compact. If this error occurs repeatedly, please note the error code before seeking assistance! After an rack error the position See E63 motor tried to initialise its home position but could not succeed due to a possible fatal hardware error. E90: Mixermotor error! Can't initialize motor due to a possible hardware error! Could not home mixer motor within a certain time limit. E91: Can not discharge rack! Endpool full, remove racks! This error will be automatically • cleared after removing the • racks and the rack will be released. See E60 End pool full. Check End pool full sensor. E92: Position motor error! Not Gripper did not reached the on position! (MIX) MIX position to start a short mix. Starting point: FILL position. See E61 E94: Position motor error! Not Gripper did not reached the on position! (MIX) MIX position. Starting point: FILL position. See E61 E94: Position motor error! Not Gripper did not reached the on position! (MIX) MIX position after reading the barcode. Starting point: FILL position. See E61 E95: Position motor error! Not Gripper did not reached the on position! (FILL) FILL position after mixing the rack. Starting point: MIX position. See E61 Auto Compact User Manual Version 6.62 MRN-071-EN Page 215 Appendix for StaRRsed Auto-Compact E96: Position motor error! Not Gripper did not reached the on position! (FILL) FILL position. Starting point: last sampled tube. See E30 E97: Position motor error! Not Gripper did not reached the IN See E61 on position! (IN) (catch) position. Starting point: MIX position. E98: Position motor error! Not Gripper did not reached the IN See E61 on position! (IN) (catch) position after gripper error. Starting point: MIX position. E99: Position motor error! Not Gripper did not reached the on position! (MIX) MIX position. Starting point: FILL position. See E61 E100: Position motor error! Not on position! (MIX) Gripper did not reached the See E61 MIX position. Starting point: IN position. E104: Needle unit not in up position! Could not start the position (gripper) motor, because the outer needle or sample probe is not its home position (top). • Check outer needle home sensor. • Check sample probe home sensor. • Faulty Outer needle motor. • Faulty Sample probe motor. • Check if needles are blocked. • Faulty motor drivers on the needle board. • Page 216 Auto Compact User Manual Version 6.62 MRN-071-EN Appendix for StaRRsed Auto-Compact Appendix - Maintenance schedule Maintenance schedule StaRRsed Compact InteRRliner and Auto Compact Sample volume <200 Per day Daily Sample volume Daily Once a week Level 4 Level 3 Level 2 Level 1 Total amount / year 150 Clean outside of the aspiration needle 1 Shut down procedure / Wash all pipettes 1 Check Measure sensor MS 40..50..60 1 Check Fill sensor FS 90..140..165 1 Check Flow sensor Abs: 0340- 0360-0380 1 Check Flow sensor Abs: 0315- 0327-0345 1 Check Based on Level 5 1 750 Fill Nozzle cleaning every 7 days Clean diluter every 183 days Based on 750 Clean separator every 7 days Based on 3000 Run fill and clean procedure (Cleaning agent) every 28 days QWLV020065 C/R Connector 1/4-28UNFx1/16 QWVR031020 C/R Compression spring steel Ø4.4x16.5 90 Check Poulie grub 90 Auto Compact User Manual Version 6.62 MRN-071-EN Page 217 Appendix for StaRRsed Auto-Compact VERA120051 Check Positing nut 90 QWBM035050 Check Set ring 90 VERA059009 C/R Outer needle assembly 365 ESRI050909 C/R Sample Probe assembly 365 QWOB200004 Check Timing belt 750 mm 365 QWOB200001 Check Timing belt 160 mm 365 QWOB200002 Check Timing belt 380 mm 365 VERA120047 Check Rack grabber tension spring 365 QWVR020004 Check Spring (in grapper) 365 QWVR020005 Check Spring (Rack transport) 365 ESRI090920 C/R Waste pump motor assembly 365 QTST040001 C/R Valve Tubing silicon 365 Note C/R Check if not correct Replace the part Maintenance schedule StaRRsed Compact Sample volume <200 Per day Daily Daily Sample volume 150 Article number Article description Once a week Level 5 Level 4 Ever Level 3 Level 2 Level 1 Days QWLV040002 Bacterial Air Filter (Hepa) 30 12 QWLV060001 Flat Washer Fill-Nozzle EDTA 30 12 QWLV050004 O-ring 2.5x1.5 (Valve body A) (Fill nozzle) 30 12 Page 218 Auto Compact User Manual Version 6.62 MRN-071-EN Appendix for StaRRsed Auto-Compact ESRI030906 Flat washer for fill block ESRI060911 Teflon tip repair set (Version I diluter 2 rings) 183 2 QWLV030901 Teflon tip repair set (1 ring) 183 2 QWLV040001 Disc Filter 25 mm (white) QWLV040003 Disc filter (blue) ESRI090902 Rinse Tube assembly 30 12 ESRI090903 Saline Tube assembly 30 12 ESRI090921 Waste cassette assembly 91 4 ESRI010246 Pinch valve tube 91 4 ESRI050909 Sample Probe assembly QTST040001 Valve Tubing silicon ESRI090920 Waste pump motor assembly ESRI090026 Blotting washer VERA059009 Outer needle assembly VERA070901 Sample tube assembly VERA079200 Tubing Set Auto Compact Auto Compact User Manual Version 6.62 MRN-071-EN 365 1 30 12 91 4 if needed 1 If needed 84 365 1 91 4 if needed 1 if needed 1 365 1 Page 219 Appendix for StaRRsed Auto-Compact Appendix - String format for StaRRsed ESR string format for StaRRsed 60 minutes format [stx]PPPPPPPPPP www WWW AAAAAAAAmm ppp TTT CC EEEEEEEEEEEEEEEEEEEEEE MMMMMMMMMM[cr][lf][eot] stx 80 data characters cr lf eot stx 80 data characters cr lf etx Data consists, if 30 min. output is switched to OFF Position Description cs eot Checksum - OFF 60 min Checksum - ON 60 min Format 1 10 Patient identification text Text PPPPPPPPPP 13 15 E.S.R. in mm. 60 minute xxx www 18 20 E.S.R. in mm. (60 min corrected for temp) xxx WWW 22 30 Aspect Text AAAAAAAAA 31 32 Manually added code xx mm 34 36 Pipette number xxx ppp 39 41 Sedimentation time xxx TTT 45 46 Temperature in degree. (Default C.) xx CC 48 69 Error messages Text EEEEEEEEEEEEEEEEEEEEEE 71 80 EDTA message Text MMMMMMMMMM CS =1 byte checksum = 256 - (modulo 256 ( ASCII string sum)). ASCII string sum = the ASCII sum of all preceding characters incl. stx, cr, lf and ext modulo 256 (ASCII string sum) = the remainder of the ASCII string sum when divided by 256.. Auto Compact User Manual Version 6.62 MRN-071-EN Page 221 Appendix for StaRRsed Auto-Compact Page 222 Auto Compact User Manual Version 6.62 MRN-071-EN Appendix for StaRRsed Auto-Compact ESR string format for StaRRsed 30 minutes format [stx]PPPPPPPPPP hhh www WWW AAAAAAAAAmm ppp TTT CC EEEEEEEEEEEEEEEEEEEEEE MMMMMMMMMM[cr][lf][eot] stx 80 data characters cr lf eot stx 80 data characters cr lf etx Data consists, if 30 min. output is switched to ON Position Description cs eot Checksum - OFF 30 min Checksum - ON 30 min Format 1 10 Patient identification text Text PPPPPPPPPP 12 14 E.S.R. in mm. Half hour method xxx hhh 16 18 E.S.R. in mm. (calculated to 60 minutes) xxx www 20 22 E.S.R. in mm. (60 min corrected for temp) xxx WWW 24 32 Aspect Text AAAAAAAAA 33 34 Manually added code xx mm 37 39 Pipette number xxx ppp 41 43 Sedimentation time xxx TTT 45 46 Temperature in degree. (Default C.) xx CC 48 69 Error messages Text EEEEEEEEEEEEEEEEEEEEEE 71 80 EDTA message Text MMMMMMMMMM Where STX ETX ASCII ASCII HEX $02 DEC 02 ASCII $03 03 Auto Compact User Manual Version 6.62 MRN-071-EN Page 223 Appendix for StaRRsed Auto-Compact EOT ASCII $04 04 LF ASCII $0A 10 CR ASCII $0D 13 CS 1 byte Text.: left aligned followed by spaces (ASCII $20). xx.…: number made up of (xx...) digits 0 9 (ASCIII $30 $39) with leading zeros. Leading zeros and non-specified positions are filled with spaces (ASCII $20). Page 224 Auto Compact User Manual Version 6.62 MRN-071-EN Appendix for StaRRsed Auto-Compact Appendix - String format for StaRRsed (V14) ESR string format for StaRRsed 60 minutes format [stx]PPPPPPPPPP www WWW AAAAAAAAmm ppp TTT CC EEEEEEEEEEEEEEEEEEEEEE MMMMMMMMMM[cr][lf][eot] stx 80 data characters cr lf eot stx 80 data characters cr lf etx Data consists, if 30 min. output is switched to OFF Position Description cs eot Checksum - OFF 60 min Checksum - ON 60 min Format 1 10 Patient identification text Text PPPPPPPPPP 13 15 E.S.R. in mm. 60 minute xxx www 18 20 E.S.R. in mm. (60 min corrected for temp) xxx WWW 22 30 Aspect Text AAAAAAAAA 31 32 Manually added code xx mm 34 36 Pipette number xxx ppp 39 41 Sedimentation time xxx TTT 45 46 Temperature in degree. (Default C.) xx CC 48 69 Error messages Text EEEEEEEEEEEEEEEEEEEEEE 71 80 EDTA message Text MMMMMMMMMM Auto Compact User Manual Version 6.62 MRN-071-EN Page 225 Appendix for StaRRsed Auto-Compact CS =1 byte checksum = 256 - (modulo 256 ( ASCII string sum)). ASCII string sum = the ASCII sum of all preceding characters incl. stx, cr, lf and ext modulo 256 (ASCII string sum) = the remainder of the ASCII string sum when divided by 256.. Page 226 Auto Compact User Manual Version 6.62 MRN-071-EN Appendix for StaRRsed Auto-Compact ESR string format for StaRRsed 30 minutes format [stx]PPPPPPPPPP hhh www WWW AAAAAAAAAmm ppp TTT CC EEEEEEEEEEEEEEEEEEEEEE MMMMMMMMMM[cr][lf][eot] stx 80 data characters cr lf eot stx 80 data characters cr lf etx Data consists, if 30 min. output is switched to ON Position Description cs eot Checksum - OFF 30 min Checksum - ON 30 min Format 1 10 Patient identification text Text PPPPPPPPPP 12 14 E.S.R. in mm. Half hour method xxx hhh 16 18 E.S.R. in mm. (calculated to 60 minutes) xxx www 20 22 E.S.R. in mm. (60 min corrected for temp) xxx WWW 24 32 Aspect Text AAAAAAAAA 33 34 Manually added code xx mm 37 39 Pipette number xxx ppp 41 43 Sedimentation time xxx TTT 45 46 Temperature in degree. (Default C.) xx CC 48 69 Error messages Text EEEEEEEEEEEEEEEEEEEEEE 71 80 EDTA message Text MMMMMMMMMM Where STX ETX ASCII ASCII HEX $02 DEC 02 ASCII $03 03 Auto Compact User Manual Version 6.62 MRN-071-EN Page 227 Appendix for StaRRsed Auto-Compact EOT ASCII $04 04 LF ASCII $0A 10 CR ASCII $0D 13 CS 1 byte Text.: left aligned followed by spaces (ASCII $20). xx.…: number made up of (xx...) digits 0 9 (ASCIII $30 $39) with leading zeros. Leading zeros and non-specified positions are filled with spaces (ASCII $20). Page 228 Auto Compact User Manual Version 6.62 MRN-071-EN Appendix for StaRRsed Auto-Compact Appendix - Sedmatic 100 string format Normal result string: pp[ ]PPPPPPPPPP[ ]WWWW[ ][ ][ ][ ][ ][ ][ ][ ][cr][lf] 26 data characters CR Total length = 28 characters LF - Or - -: Result string with Aspect: pp[ ]PPPPPPPPPP[ ]WWWW[ ][ ][ ][ ][ ][ ][ ][ ]AAAAAAAAAAA[cr][lf] - Or -: Result string with Error: pp[ ]PPPPPPPPPP[ ][ ][ ][ ][ ][ ][ ][ ][ ][ ][ ][ ][ ]EEEEEEEEEEE[cr][lf] 37 data characters CR Total length = 39 characters LF Data consists: Position Description Format 1 2 Pipette number xx pp 4 13 Patient identification text Text PPPPPPPPPP 15 18 E.S.R. in mm. (60 min) xxxx WWWW String with Aspect or Error 27 37 Aspect Text AAAAAAAAAAA 27 37 Error Text EEEEEEEEEEE Auto Compact User Manual Version 6.62 MRN-071-EN Page 229 Appendix for StaRRsed Auto-Compact Where CR Hex Dec ASCII $0D 013 LF ASCII $0A 010 [ ] = Space ASCII $20 032 Text.: left aligned followed by spaces (ASCII $20). xx.…: number made up of (xx...) digits 0 9 (ASCIII $30 $39) with leading zeros.. Leading zeros and non-specified positions are filled with spaces (ASCII $20). Aspect messages: Aspect Hazy < 10 AAAAAAAAAAA Hazy[ ]<[ ]10 Hazy < 25 Hazy[ ]<[ ]25 Hazy > 25 Hazy[ ]>[ ]25 Error messages: Error 1.No cells / plasma found EEEEEEEEEEE Error[ ]1 2.ESR Probably >140 mm Error[ ]2 3.Too many borders found Error[ ]3 7.Limit error Error[ ]7 Page 230 Auto Compact User Manual Version 6.62 MRN-071-EN Appendix for StaRRsed Auto-Compact Note: If the Compact is switched to the 30 min method the output string has the same format. The Compact automatic apply the conversion table to the 60 min method. If temperature correction is switched on the ESR value will be the temperature corrected ESR value. Auto Compact User Manual Version 6.62 MRN-071-EN Page 231 Appendix for StaRRsed Auto-Compact Appendix - Sedmatic 15 string format 1 2..28 29..30 31..32 STX stx Data (28 characters) R04PPPPPPPP01pp01WWWW[ ][ ][ ][ ][ ][ ][ ] CC CC ETX etx Data consists: Position Description Format 4 11 Patient identification text 14 15 Pipette number 18 21 E.S.R. in mm. (60 min) 29 30 Checksum Text xx xxxx xx PPPPPPPP pp WWWW CC Checksum = EXOR sum off all 28 data characters. If checksum is equal to the [ETX] character the checksum is converted to [DEL]. Where STX Hex ASCII $02 002 ETX ASCII $03 003 ACK ASCII $06 006 NACK ASCII $15 021 [ ] = Space ASCII $20 032 DEL ASCII $7F 127 Auto Compact User Manual Version 6.62 MRN-071-EN Dec Page 233 Appendix for StaRRsed Auto-Compact Text.: left aligned followed by spaces (ASCII $20). xx.…: number made up of (xx...) digits 0 9 (ASCIII $30 $39) with leading zeros. Note: • Timeout for response (ACK/NACK) from HOST is 20 seconds. • If the Compact is switched to the 30 min method, the output string has the same format. The Compact automatic applies the conversion table to the 60 min method. • If temperature correction is switched on, the ESR value will be the temperature corrected ESR value. • If the result has an error, the ESR value will be 4 space characters (ASCII $20). Page 234 Auto Compact User Manual Version 6.62 MRN-071-EN Appendix for StaRRsed Auto-Compact Appendix - String format Vesmatic [CR] [SP] XX [SP] = [SP] AAAAAAAAAAAAA [SP] NNN [SP] [cr ] + 24 data characters Total length = 25 characters Where cr sp ASCII Hex $0D Dec 13 ASCII $20 32 Data consists, if 30 min. method is switched to OFF Position Description Format 2 3 Pipette number (1..84) Number XX 7 19 Patient identification text Text AAAAAAAAAAAAA 21 23 The ESR value 60 minute method Text NNN Text [sp]EN If error is detected 21 23 E and an error number (see table for number translation ) Data consists, if 30 min. method is switched to ON Position Description Format 2 3 Pipette number (1..84) 7 19 Patient identification text Text AAAAAAAAAAAAA 21 23 The ESR value convert to 60 minute method Text NNN Auto Compact User Manual Version 6.62 MRN-071-EN Number XX Page 235 Appendix for StaRRsed Auto-Compact If error is detected 21 23 E and an error number (see table for number translation ) Text [sp]EN Text.: left aligned followed by spaces (ASCII $20). xx.…: number made up of (xx...) digits 0 9 (ASCII $30 $39) Leading zeros and non-specified positions are filled with spaces (ASCII $20). The following error codes are defined: EN E1 No cells / plasma found Error E2 ESR Probably >140 mm Error E3 Too many borders found Error E7 Limit error Error Note: If the Compact is switch to the 30 min method the output string has the same format. The Compact automatics apply the conversion table to the 60minute method. If temperature correction is switched on the ESR value will be the temperature corrected ESR value. Page 236 Auto Compact User Manual Version 6.62 MRN-071-EN Appendix for StaRRsed Auto-Compact Appendix - Protocol MECHATRONICS-01 bidirectional MECHATRONICS_01 request / workorder record 1 2..126 127 128 STX Data (125 characters) CS ETX Position 1 # of Bytes 1 Data field Start of text Format [STX] 2 Text distinction code 8 "ESRSR" 10 Instrument ID 20 text 30 Sample ID 40 text 70 Reserved (spaces) 55 text 125 Request / workorder 1 text 126 Space 1 text 127 Checksum 1 [CS] 128 End of text 1 128 [ETX] Total Text.: Comment Left aligned followed by spaces If applicable "R" = Request; "Y" = ESR yes; "N" = ESR no See section Checksum calculation left aligned followed by spaces Auto Compact User Manual Version 6.62 MRN-071-EN Page 237 Appendix for StaRRsed Auto-Compact xx.…: number (digits 0-9) with leading spaces Non-specified positions are filled with spaces Page 238 Auto Compact User Manual Version 6.62 MRN-071-EN Appendix for StaRRsed Auto-Compact Request record from analyser to LIMS: Request (capital R on position 125) STX Data "R" space CS ETX Workorder record from LIMS to analyser: ESR = Yes (capital Y on position 125) STX Data "Y" space CS ETX "N" space CS ETX ESR = No (capital N on position 125) STX Data MECHATRONICS result record 1 2..254 255 256 STX Data (253 characters) CS ETX Position 1 Data field Start of text # of Bytes 1 Format [STX] 2 Text distinction code 8 "ESRRE" 10 Instrument ID 20 text 30 Sample ID 40 text 70 Reserved (spaces) 15 text 85 Aspiration date 10 Auto Compact User Manual Version 6.62 MRN-071-EN Comment Left aligned followed by spaces If applicable ddmmyyyy Text format. E.g. 01012010 = January 1, 2010 Page 239 Appendix for StaRRsed Auto-Compact 95 Aspiration time 5 hhmm 100 ESR 30 minutes (mm/½h) 5 xxxxx 105 E.S.R. in mm. 60 minute (mm/h) 5 xxxxx 110 ESR 60 minutes temperature corrected (mm/h) 5 xxxxx 115 ESR 120 minutes (mm/h) 5 xxxxx 120 Reserved (spaces) 10 text 130 Sample code 5 xxxxx See section Sample codes 135 Aspect code 5 xxxxx See section Aspect codes 140 Manually added code 5 xxxxx 145 Pipette numberPipette number 5 xxxxx 150 Sedimentation time (minutes) 5 xxxxx 155 Temperature 5 xxxxx 160 Dilution rate (%) 5 xxxxx 165 Column height (mm) 5 xxxxx 170 Error code 5 xxxxx 175 Limit error message (results) 30 text 205 Reserved (spaces) 50 text 255 Checksum 1 [CS] 256 End of text 1 256 [ETX] Total Page 240 Text format. E.g. 0001 = 0:01 (24-hour clock) If applicable See section ESR error codes See section Limit error message See section Checksum calculation Auto Compact User Manual Version 6.62 MRN-071-EN Appendix for StaRRsed Auto-Compact Text.: left aligned followed by spaces xx.…: number (digits 0-9) with leading spaces Non-specified positions are filled with spaces Auto Compact User Manual Version 6.62 MRN-071-EN Page 241 Appendix for StaRRsed Auto-Compact Sample type Patient sample Transmitted code 0 QC normal 1 QC abnormal 2 Note: Transmission of QC codes 1 and 2 is part of an internal QC procedure which is still under development. Until this procedure is introduced, all samples are treated as Patient sample (code 0). Aspect Clear Transmitted code 0 Hazy < 10 1 Hazy < 25 2 Hazy > 25 3 ESR error Transmitted code 0 No Error Comment No cells/plasma found 1 Error, no result transmitted! ESR Probably > 140 mm 2 Error, no result transmitted! Too many borders found 3 Error, no result transmitted! Column height 4 Warning! Measure error 5 Warning! Bubbles on top 6 Warning! Page 242 Auto Compact User Manual Version 6.62 MRN-071-EN Appendix for StaRRsed Auto-Compact Limit error 7 Error, see Limit error message Note: See analyser manual for more information about limit error settings! When a limit error occurs, the fields for ESR 30 min, ESR 60 min, temperature corrected ESR and ESR 120 min are filled with spaces and thus results are not send to LIMS. Together with the other data fields, e.g. the sedimentation time, the operator can see what caused the error and may or may not use the ESR values which are preserved in the limit error message. Description of the limit error message: L_err(hhh www ttt ccc ddd) • L_err means "limit error" • hhh is the 30 minutes ESR • www is the 60 minute ESR • ttt is the temperature corrected 60 minute ESR • ccc is the column height • ddd is the 120 minute ESR (if applicable) Example of a limit error message without 30 minute ESR and 120 minute ESR: L_err(--- 123 89 200 ---) Auto Compact User Manual Version 6.62 MRN-071-EN Page 243 Appendix for StaRRsed Auto-Compact Appendix - Protocol MECHATRONICS-02 unidirectional 1 2..254 255 256 STX Data (253 characters) CS ETX Position 1 Data field Start of text # of Bytes 1 Format [STX] Comment 2 Text distinction code 8 "ESRRE" 10 Instrument ID 20 text 30 Sample ID 40 text 70 Reserved (spaces) 15 text 85 Aspiration date 10 95 Aspiration time 5 hhmm 100 ESR 30 minutes (mm/½h) 5 xxxxx 105 E.S.R. in mm. 60 minute (mm/h) 5 xxxxx 110 ESR 60 minutes temperature corrected (mm/h) 5 xxxxx 115 ESR 120 minutes (mm/h) 5 xxxxx 120 Reserved (spaces) 10 text 130 Sample code 5 xxxxx See section Sample codes 135 Aspect code 5 xxxxx See section Aspect codes Auto Compact User Manual Version 6.62 MRN-071-EN Left aligned followed by spaces If applicable ddmmyyyy Text format. E.g. 01012010 = January 1, 2010 Text format. E.g. 0001 = 0:01 (24-hour clock) If applicable Page 245 Appendix for StaRRsed Auto-Compact 140 Manually added code 5 xxxxx 145 Pipette numberPipette number 5 xxxxx 150 Sedimentation time (minutes) 5 xxxxx 155 Temperature 5 xxxxx 160 Dilution rate (%) 5 xxxxx 165 Column height (mm) 5 xxxxx 170 Error code 5 xxxxx 175 Limit error message (results) 30 text 205 Reserved (spaces) 50 text 255 Checksum 1 [CS] 256 End of text 1 256 [ETX] Total Text.: left aligned followed by spaces xx.…: number (digits 0-9) with leading spaces See section ESR error codes See section Limit error message See section Checksum calculation Non-specified positions are filled with spaces Page 246 Auto Compact User Manual Version 6.62 MRN-071-EN Appendix for StaRRsed Auto-Compact Sample type Patient sample Transmitted code 0 QC normal 1 QC abnormal 2 Note: Transmission of QC codes 1 and 2 is part of an internal QC procedure which is still under development. Until this procedure is introduced, all samples are treated as Patient sample (code 0). Aspect Clear Transmitted code 0 Hazy < 10 1 Hazy < 25 2 Hazy > 25 3 ESR error Transmitted code 0 No Error Comment No cells/plasma found 1 Error, no result transmitted! ESR Probably > 140 mm 2 Error, no result transmitted! Too many borders found 3 Error, no result transmitted! Column height 4 Warning! Measure error 5 Warning! Bubbles on top 6 Warning! Auto Compact User Manual Version 6.62 MRN-071-EN Page 247 Appendix for StaRRsed Auto-Compact Limit error 7 Error, see Limit error message Note: See analyser manual for more information about limit error settings! When a limit error occurs, the fields for ESR 30 min, ESR 60 min, temperature corrected ESR and ESR 120 min are filled with spaces and thus results are not send to LIMS. Together with the other data fields, e.g. the sedimentation time, the operator can see what caused the error and may or may not use the ESR values which are preserved in the limit error message. Description of the limit error message: L_err(hhh www ttt ccc ddd) • L_err means "limit error" • hhh is the 30 minutes ESR • www is the 60 minute ESR • ttt is the temperature corrected 60 minute ESR • ccc is the column height • ddd is the 120 minute ESR (if applicable) Example of a limit error message without 30 minute ESR and 120 minute ESR: L_err(--- 123 89 200 ---) CS = Checksum, XOR sum off all the data (with the exception of CS, STX, and ETX). E.g.: CS = ((byte2 XOR byte3) XOR byte 4) XOR….etc. Note: Cannot be equal to that of the ETX byte (03h). Page 248 Auto Compact User Manual Version 6.62 MRN-071-EN Appendix for StaRRsed Auto-Compact The CS byte verifies the accuracy of each transmitted message. Before transmission, the value of the CS byte is calculated by the “exclusive-or’ing” of all data bytes in the message, with the exception of CS, STX, and ETX. Since the CS byte precedes the ETX byte within the data stream, the calculated value for CS cannot be equal to that of the ETX byte (03h). Therefore, if the calculated CS value is 03h, the transmitted CS byte is set to the substitute value 83h in order to avoid erroneous action by the receiving device. Auto Compact User Manual Version 6.62 MRN-071-EN Page 249 Appendix for StaRRsed Auto-Compact Appendix - Protocol Compact bi-directional Bidirectional protocol definition of the sample request string from the StaRRsed Auto-Compact to the Host computer Positions in the string. 1 2 3 4 5 6 7 8 9 10 11 12 13 14 15 16 17 18 19 20 21 22 23 24 25 26 27 28 29 30 31 15 16 17 18 SP R SP cs ETX ESR Sample request string definition from StaRRsed Auto-Compact to host computer. STX SP E S R S R SP 1 2 3 4 5 6 7 8 9 10 11 12 13 14 Definition of the string: STX and ETX are at fixed position, first (1) and last (31th) position respectively. SP Space character ($20) E Capital letter E S Capital letter S R Capital letter R 1…18 Position of the sample identification (left adjusted) and filled up with spaces at the end of the string cs Checksum, one char ($00 .. $FF) that is the EXOR sum of all the data. Data = The position from position 2 up to and including position 29. Take position 2 and position 3 and EXOR those 2. Take the result and EXOR this with position 3 ect till the position 29. R At position 28, means that this is the Request string STX Char $02 ETX Char $03 Auto Compact User Manual Version 6.62 MRN-071-EN Page 251 Appendix for StaRRsed Auto-Compact Sample conformation string definition, replied by the host computer to perform an ESR test. STX SP E S R S R SP 1 2 3 4 5 6 7 8 9 10 11 12 13 14 15 16 17 18 SP Y SP cs ETX 15 16 17 18 SP N SP cs ETX Y = Capital Y at position 28 of the string. Sample refuse string definition, replied by the host computer to skip the ESR test. STX SP E S R S R SP 1 2 3 4 5 6 7 8 9 10 11 12 13 14 N = Capital N at position 28 of the string. If either the host computer as well the StaRRsed Auto-Compact receives a string it should reply by sending an Acknowledge (char $06) if the string is found okay. If either the host computer as well the StaRRsed Auto-Compact receives a string it should reply by sending a Non Acknowledge (char $15) if the string is found faulty. Sample request: Checksum = always ON After sending the request string, the StaRRsed Auto-Compact expects a ACK/NACK (seeCompact bi-directional protocol definition) from the Hostcomputer: • If the StaRRsed Auto-Compact receives an ACK it will wait for the conformation string and respond with a ACK/NACK according to the protocol definition. • When the conformation string is received it will: Respond with an ACK if the conformation string is OK and goes to the next sample. - Or Page 252 Auto Compact User Manual Version 6.62 MRN-071-EN Appendix for StaRRsed Auto-Compact • When the string is not OK it is responding with an NACK and the Host-computer must send the conformation string again. After 3 attempts the Host-computer must stop sending the conformation string and the StaRRsed Auto-Compact won’t do an ESR on this sample and goes to the next sample. The Host-computer needs to be ready for the request string of the next sample! • If the StaRRsed Auto-Compact does not receive the conformation string within 10 seconds it will send the request string again. After 3 attempts it won’t do an ESR on this sample and goes to the next sample. • If the StaRRsed Auto-Compact receives a NACK it will send the request string again. After 3 attempts it will stop communication and generate an error. • If the StaRRsed Auto-Compact does not get any response, (timeout 10 sec.) it will send the request string again. After 3 attempts it will stop communication and generate an error. Request string example: Sample ID = 123456789 Request string = ..ESRSR.123456789..........R...(31 bytes) Sample result: • Checksum ON/OFF = user defined • 30 minute output ON/OFF = user defined The sample result will be output according to the standard Compact/StaRRsed ESR string (See String format for StaRRsed) . If the host computer receives the result string it should reply by sending an ACK or a NACK: • If the StaRRsed Auto-Compact receives an ACK it will start sending the next result. • If the StaRRsed Auto-Compact receives a NACK it will send the result string again. After 3 attempts it will start sending the next result. • If the StaRRsed Auto-Compact does not get any response from the host, (timeout 10 sec) it will send the result string again. After 3 attempts it will stop communication and generate an error. Auto Compact User Manual Version 6.62 MRN-071-EN Page 253 Appendix for StaRRsed Auto-Compact Page 254 Auto Compact User Manual Version 6.62 MRN-071-EN Appendix for StaRRsed Auto-Compact Appendix - Protocol Opus bi-directional Bidirectional protocol definition of the sample request string from the StaRRsed Auto-Compact to the Host computer Positions in the string. 1 2 3 4 5 6 7 8 9 10 11 12 13 14 15 16 17 18 19 20 21 22 23 24 25 26 27 28 29 30 31 15 16 17 18 SP R SP cs ETX ESR Sample request string definition from StaRRsed Auto-Compact to host computer. STX SP E S R S R SP 1 2 3 4 5 6 7 8 9 10 11 12 13 14 Definition of the string: STX and ETX are at fixed position, first (1) and last (31th) position respectively. SP Space character ($20) E Capital letter E S Capital letter S R Capital letter R 1…18 Position of the sample identification (left adjusted) and filled up with spaces at the end of the string cs Checksum, one char ($00 .. $FF) =((EXOR sum off all the data) OR 128). R At position 28, means that this is the Request string STX Char $02 ETX Char $03 Auto Compact User Manual Version 6.62 MRN-071-EN Page 255 Appendix for StaRRsed Auto-Compact Sample conformation string definition, replied by the host computer to perform an ESR test. STX SP E S R S R SP 1 2 3 4 5 6 7 8 9 10 11 12 13 14 15 16 17 18 SP Y SP cs ETX 15 16 17 18 SP N SP cs ETX Y = Capital Y at position 28 of the string. Sample refuse string definition, replied by the host computer to skip the ESR test. STX SP E S R S R SP 1 2 3 4 5 6 7 8 9 10 11 12 13 14 N = Capital N at position 28 of the string. If either the host computer as well the StaRRsed Auto-Compact receives a string it should reply by sending an Acknowledge (char $06) if the string is found okay. If either the host computer as well the StaRRsed Auto-Compact receives a string it should reply by sending a Non Acknowledge (char $15) if the string is found faulty. Checksum ON/OFF = always ON After sending the request string, the StaRRsed Auto-Compact expects a ACK/NACK (see Opus protocol request string ) from the Host-computer: • If the StaRRsed Auto-Compact receives an ACK it will wait for the conformation string and respond with a ACK/NACK according to the protocol definition. • When the conformation string is received it will: Respond with an ACK if the conformation string is OK and goes to the next sample. - Or • When the string is not OK it is responding with an NACK and the Host-computer must send the conformation string again. After 3 attempts the Host-computer must stop sending the conformation string and the StaRRsed Auto-Compact won’t do an ESR on this sample and goes to the next sample. The Host-computer needs to be ready for the request string of the next sample! Page 256 Auto Compact User Manual Version 6.62 MRN-071-EN Appendix for StaRRsed Auto-Compact • If the StaRRsed Auto-Compact does not receive the conformation string within 10 seconds it will send the request string again. After 3 attempts it won’t do an ESR on this sample and goes to the next sample. • If the StaRRsed Auto-Compact receives a NACK it will send the request string again. After 3 attempts it will stop communication and generate an error. • If the StaRRsed Auto-Compact does not get any response, (timeout 10 sec.) it will send the request string again. After 3 attempts it will stop communication and generate an error. Request string example: Sample ID = 123456789 Request string = ..ESRSR.123456789..........R...(31 bytes) Sample result: • Checksum ON/OFF = user defined • 30 minute output ON/OFF = user defined The sample result will be output according to the standard Compact/StaRRsed ESR string (See String format for StaRRsed) . If the host computer receives the result string it should reply by sending an ACK or a NACK: • If the StaRRsed Auto-Compact receives an ACK it will start sending the next result. • If the StaRRsed Auto-Compact receives a NACK it will send the result string again. After 3 attempts it will start sending the next result. • If the StaRRsed Auto-Compact does not get any response from the host, (timeout 10 sec) it will send the result string again. After 3 attempts it will stop communication and generate an error. Auto Compact User Manual Version 6.62 MRN-071-EN Page 257 Appendix for StaRRsed Auto-Compact OPUS string format [stx]PPPPPPPPPP www WWW AAAAAAAAmm ppp TTT CC EEEEEEEEEEEEEEEEEEEEEE MMMMMMMMMM[cr][lf][eot] stx 80 data characters cr lf eot stx 80 data characters cr lf etx Data consists, if 30 min. output is switched to OFF Position Description cs eot Checksum - OFF 60 min Checksum - ON 60 min Format 1 10 Patient identification text Text PPPPPPPPPP 13 15 E.S.R. in mm. 60 minute xxx www 18 20 E.S.R. in mm. (60 min corrected for temp) xxx WWW 22 30 Aspect Text AAAAAAAAA 31 32 Manually added code xx mm 34 36 Pipette number xxx ppp 39 41 Sedimentation time xxx TTT 45 46 Temperature in degree. (Default C.) xx CC 48 69 Error messages Text EEEEEEEEEEEEEEEEEEEEEE 71 80 EDTA message Text MMMMMMMMMM CS = 1 byte checksum = 256 - (modulo 256 ( ASCII string sum)) OR 128). ASCII string sum = the ASCII sum of all preceding characters incl. stx, cr, lf and ext modulo 256 (ASCII string sum) = the remainder of the ASCII string sum when divided by 256. OR 128 = setting the MSB-bit to 1. Page 258 Auto Compact User Manual Version 6.62 MRN-071-EN Appendix for StaRRsed Auto-Compact OPUS string format [stx]PPPPPPPPPP hhh www WWW AAAAAAAAAmm ppp TTT CC EEEEEEEEEEEEEEEEEEEEEE MMMMMMMMMM[cr][lf][eot] stx 80 data characters cr lf eot stx 80 data characters cr lf etx Data consists, if 30 min. output is switched to ON Position Description cs eot Checksum - OFF 30 min Checksum - ON 30 min Format 1 10 Patient identification text Text PPPPPPPPPP 12 14 E.S.R. in mm. Half hour method xxx hhh 16 18 E.S.R. in mm. (calculated to 60 minutes) xxx www 20 22 E.S.R. in mm. (60 min corrected for temp) xxx WWW 24 32 Aspect Text AAAAAAAAA 33 34 Manually added code xx mm 37 39 Pipette number xxx ppp 41 43 Sedimentation time xxx TTT 45 46 Temperature in degree. (Default C.) xx CC 48 69 Error messages Text EEEEEEEEEEEEEEEEEEEEEE 71 80 EDTA message Text MMMMMMMMMM Where ASCII HEX Auto Compact User Manual Version 6.62 MRN-071-EN DEC Page 259 Appendix for StaRRsed Auto-Compact STX ASCII $02 02 ETX ASCII $03 03 EOT ASCII $04 04 LF ASCII $0A 10 CR ASCII $0D 13 CS 1 byte Text.: left aligned followed by spaces (ASCII $20). xx.…: number made up of (xx...) digits 0 9 (ASCIII $30 $39) with leading zeros. Leading zeros and non-specified positions are filled with spaces (ASCII $20). Page 260 Auto Compact User Manual Version 6.62 MRN-071-EN Appendix for StaRRsed Auto-Compact Appendix - Sysmex R-3500 Protocol R-3500 sample data record format (202 bytes) This is a modified data record coming from a R-3500. Sample data record format (202 bytes) Parameter Text distinction code I # Of chars 1 Example Comment "D" Text distinction code II 1 "1" Sample distinction code 1 "U" Day 2 23 Day 23 Month 2 03 Month 3 = march Year 2 00 Year 00 = 2000 Rack no. 4 Tube position no. 2 Sequence no. 5 ID information 1 Sample ID number 13 Patient number Instrument ID number 9 ID number from compact Analysis information 1 0 n.a. Reserved 18 0 n.a. RET% 5 12300 Esr value = 123 RET# 5 01200 Hazy code = 12 RBC 5 00200 Error code = 2 IRF 5 01200 Temperature in degr. Celsius = 12 degr. LFR 5 01200 Sedimentation time in minutes = 12 min. MFR 5 10100 Dilution rate = 101 HFR 5 12300 30 minute ESR value = 123 Reserved 105 1234 Rack number = 1234 05 Tube position in rack = 5 00000 n.a. 4 Barcode from barcode label 0000… n.a. n.a. = not applicable Auto Compact User Manual Version 6.62 MRN-071-EN Page 261 Appendix for StaRRsed Auto-Compact Page 262 Auto Compact User Manual Version 6.62 MRN-071-EN Appendix for StaRRsed Auto-Compact R3500 Sample data flag record format (131 bytes) Parameter Text distinction code I # Of chars 1 Text distinction code II 1 "B" Sample distinction code 1 "U" Day 2 23 Day 23 Month 2 03 Month 3 = march Year 2 00 Year 00 = 2000 Rack no. 4 Tube position no. 2 Sequence no. 5 ID information 1 Sample ID number 13 Flags 97 Example Comment "D" 1234 Rack number = 1234 05 Tube position in rack = 5 00000 n.a. 4 Barcode from barcode label Patient number 0 n.a. R3500 Inquiry data record format (21 bytes) Parameter Text distinction code I # Of chars 1 Inquiry mode 1 Sample ID no. 13 Rack no. 4 Tube position no. 2 Example Comment "R" 1 Real time inquiry Patient number (same as sample data) 1234 Rack number = 1234 03 Tube position in rack = 3 R-3500 order information record format (156 bytes) Parameter Text distinction code I # of char Example s 1 Information status 1 Date ordered 8 Sample ID no. 13 Rack no. 4 Auto Compact User Manual Version 6.62 MRN-071-EN Comment "S" 0 0 = sample does not exist 1 = sample exists "yyyymmdd" Must be the same as inquiry record Page 263 Appendix for StaRRsed Auto-Compact Tube position no. 2 Inquiry mode 1 Patient ID no. 13 Patient name 25 Sex 1 Patient birthday 8 Doctor name 15 Ward 8 Patient comments 20 Reserved 20 RET% 1 Reserved 15 "yyyymmdd" 0 Esrflag: 0 = ESR no 1 = ESR yes Compact "HAZY" code messages. The code appears in the "sample data record" at variable 'RBC' This code appears in the "sample data record" at column 5. The following 4 codes are defined: 0 Sample is clear. 1 Sample is Hazy < 10 2 Sample is Hazy < 25 3 Sample is Hazy > 25 Compact "ERROR" code messages This code appears in the "sample data record" at variable 'HGB'. The following 7 codes are defined: 0 NO ERRORS 1 No cells/plasma found Error 2 ESR Probably > 140 mm Error 3 Too many borders found Error 4 Column height <nnn> Warning 5 Measure error Warning 6 Bubbles on top Warning 7 Limit error Page 264 Error Auto Compact User Manual Version 6.62 MRN-071-EN Appendix for StaRRsed Auto-Compact Appendix - Sysmex R-3500 unidirectional protocol R-3500 sample data record format (202 bytes) This is a modified data record coming from a R-3500. Sample data record format (202 bytes) Parameter Text distinction code I # Of chars 1 Example Comment "D" Text distinction code II 1 "1" Sample distinction code 1 "U" Day 2 23 Day 23 Month 2 03 Month 3 = march Year 2 00 Year 00 = 2000 Rack no. 4 Tube position no. 2 Sequence no. 5 ID information 1 Sample ID number 13 Patient number Instrument ID number 9 ID number from compact Analysis information 1 Auto Compact User Manual Version 6.62 MRN-071-EN 1234 Rack number = 1234 05 Tube position in rack = 5 00000 n.a. 4 Barcode from barcode label 0 n.a. Page 265 Appendix for StaRRsed Auto-Compact Reserved 18 RET% 5 12300 Esr value = 123 RET# 5 01200 Hazy code = 12 RBC 5 00200 Error code = 2 IRF 5 01200 Temperature in degr. Celsius = 12 degr. LFR 5 01200 Sedimentation time in minutes = 12 min. MFR 5 10100 Dilution rate = 101 HFR 5 12300 30 minute ESR value = 123 Reserved 105 0 n.a. 0000… n.a. n.a. = not applicable R-3500 Sample data flag record format (131 bytes) Parameter Text distinction code I # Of chars 1 Text distinction code II 1 "B" Sample distinction code 1 "U" Day 2 23 Day 23 Month 2 03 Month 3 = march Year 2 00 Year 00 = 2000 Rack no. 4 Page 266 Example Comment "D" 1234 Rack number = 1234 Auto Compact User Manual Version 6.62 MRN-071-EN Appendix for StaRRsed Auto-Compact Tube position no. 2 Sequence no. 5 ID information 1 Sample ID number 13 Flags 97 05 Tube position in rack = 5 00000 n.a. 4 Barcode from barcode label Patient number 0 n.a. Compact "HAZY" code messages. The code appears in the "sample data record" at variable 'RBC' This code appears in the "sample data record" at column 5. The following 4 codes are defined: 0 Sample is clear. 1 Sample is Hazy < 10 2 Sample is Hazy < 25 3 Sample is Hazy > 25 Compact "ERROR" code messages This code appears in the "sample data record" at variable 'HGB'. The following 7 codes are defined: 0 NO ERRORS 1 No cells/plasma found Error 2 ESR Probably > 140 mm Error 3 Too many borders found Error Auto Compact User Manual Version 6.62 MRN-071-EN Page 267 Appendix for StaRRsed Auto-Compact 4 Column height <nnn> Warning 5 Measure error Warning 6 Bubbles on top Warning 7 Limit error Page 268 Error Auto Compact User Manual Version 6.62 MRN-071-EN Appendix for StaRRsed Auto-Compact Appendix - Sysmex SE9000 protocol SE9000 Sample data record format (234 bytes) This is a modified data record from SE9000 without instrument ID Sample data record format (234 bytes) Parameter Text distinction code I # of chars 1 Text distinction code II 1 "1" Sample distinction code 1 "U" Day 2 23 Day 23 Month 2 03 Month 3 = march Year 2 00 Year 00 = 2000 Rack no. 4 Tube position no. 2 Sequence no. 5 ID information 1 Sample ID number 13 Analysis information 1 0 n.a. NEG/POS/ERR information 1 0 n.a. POSITIVE (diff.) 1 0 n.a. POSITIVE (morph.) 1 0 n.a. POSITIVE (count) 1 0 n.a. ERROR (func.) 1 0 n.a. ERROR (result) 1 0 n.a. Order information 1 0 n.a. Reserve 1 0 n.a. Reserve 1 0 n.a. Reserve 1 0 n.a. Reserve 1 0 n.a. Reserve 1 0 n.a. IP message information 6 000000 n.a. WBC 6 123000 Esr value = 123 mm Auto Compact User Manual Version 6.62 MRN-071-EN Example Comment "D" 1234 Rack number = 1234 05 Tube position in rack = 5 00000 n.a. 4 Barcode from barcode label Patient number Page 269 Appendix for StaRRsed Auto-Compact RBC 5 102000 Hazy code = 12 HGB 5 00200 Error code = 2 HCT 5 01200 Temperature in degr. Celsius i.e. 12 degr. MCV 5 01200 Sedimentation time in minutes i.e. 12 min MCH 5 10100 Dilution rate = 101 MCHC 5 12300 30 minute ESR value = 123 Reserved 145 0000… n.a. n.a. = Not applicable SE 9000 Sample data flag record format (131 bytes) Parameter Text distinction code I # Of chars 1 Text distinction code II 1 "B" Sample distinction code 1 "U" Day 2 23 Day 23 Month 2 03 Month 3 = march Year 2 00 Year 00 = 2000 Rack no. 4 Tube position no. 2 Sequence no. 5 ID information 1 Sample ID number 13 Flags 97 Example Comment "D" 1234 Rack number = 1234 05 Tube position in rack = 5 00000 n.a. 4 Barcode from barcode label Patient number 0 n.a. SE9000 Inquiry data record format (21 bytes) Parameter Text distinction code I # Of chars 1 Inquiry mode 1 Sample ID no. 13 Rack no. 4 Tube position no. 2 Example Comment "R" 1 Real time inquiry Patient number (same as sample data) 1234 Rack number = 1234 03 Tube position in rack = 3 SE9000 order information record format (171 bytes) Page 270 Auto Compact User Manual Version 6.62 MRN-071-EN Appendix for StaRRsed Auto-Compact Parameter Text distinction code I # of chars 1 Example Comment "S" Information status 1 0 Date ordered 8 "yyyymmdd" Sample ID no. 13 Rack no. 4 Tube position no. 2 Inquiry mode 1 Patient ID no. 13 Patient name 25 Sex 1 Patient birthday 8 Doctor name 15 Ward 8 Sample comments 40 Wbc 1 Reserved 30 0 = sample does not exist 1 = sample exists Must be the same as inquiry record "yyyymmdd" 0 Esrflag: 0 = ESR no 1 = ESR yes Compact "HAZY" code messages. The code appears in the "sample data record" at variable 'RBC' This code appears in the "sample data record" at column 5. The following 4 codes are defined: 0 Sample is clear. 1 Sample is Hazy < 10 2 Sample is Hazy < 25 3 Sample is Hazy > 25 Compact "ERROR" code messages This code appears in the "sample data record" at variable 'HGB'. The following 7 codes are defined: 0 NO ERRORS 1 No cells/plasma found Error 2 ESR Probably > 140 mm Error Auto Compact User Manual Version 6.62 MRN-071-EN Page 271 Appendix for StaRRsed Auto-Compact 3 Too many borders found 4 Column height <nnn> Warning 5 Measure error Warning 6 Bubbles on top Warning 7 Limit error Page 272 Error Error Auto Compact User Manual Version 6.62 MRN-071-EN Appendix for StaRRsed Auto-Compact Appendix - Protocol Sysmex SE-9000 unidireectional SE9000 Sample data record format (234 bytes) This is a modified data record from SE9000 without instrument ID Sample data record format (234 bytes) Parameter Text distinction code I # of chars 1 Text distinction code II 1 "1" Sample distinction code 1 "U" Day 2 23 Day 23 Month 2 03 Month 3 = march Year 2 00 Year 00 = 2000 Rack no. 4 Tube position no. 2 Sequence no. 5 ID information 1 Sample ID number 13 Analysis information 1 0 n.a. NEG/POS/ERR information 1 0 n.a. POSITIVE (diff.) 1 0 n.a. Auto Compact User Manual Version 6.62 MRN-071-EN Example Comment "D" 1234 Rack number = 1234 05 Tube position in rack = 5 00000 n.a. 4 Barcode from barcode label Patient number Page 273 Appendix for StaRRsed Auto-Compact POSITIVE (morph.) 1 0 n.a. POSITIVE (count) 1 0 n.a. ERROR (func.) 1 0 n.a. ERROR (result) 1 0 n.a. Order information 1 0 n.a. Reserve 1 0 n.a. Reserve 1 0 n.a. Reserve 1 0 n.a. Reserve 1 0 n.a. Reserve 1 0 n.a. IP message information 6 000000 n.a. WBC 6 123000 Esr value = 123 mm RBC 5 102000 Hazy code = 12 HGB 5 00200 Error code = 2 HCT 5 01200 Temperature in degr. Celsius i.e. 12 degr. MCV 5 01200 Sedimentation time in minutes i.e. 12 min MCH 5 10100 Dilution rate = 101 MCHC 5 12300 30 minute ESR value = 123 Reserved 145 0000… n.a. n.a. = Not applicable Page 274 Auto Compact User Manual Version 6.62 MRN-071-EN Appendix for StaRRsed Auto-Compact SE9000 Sample data flag record format (131 bytes) Parameter Text distinction code I # Of chars 1 Text distinction code II 1 "B" Sample distinction code 1 "U" Day 2 23 Day 23 Month 2 03 Month 3 = march Year 2 00 Year 00 = 2000 Rack no. 4 Tube position no. 2 Sequence no. 5 ID information 1 Sample ID number 13 Flags 97 Example Comment "D" 1234 Rack number = 1234 05 Tube position in rack = 5 00000 n.a. 4 Barcode from barcode label Patient number 0 n.a. Compact "HAZY" code messages. The code appears in the "sample data record" at variable 'RBC' This code appears in the "sample data record" at column 5. The following 4 codes are defined: 0 Sample is clear. Auto Compact User Manual Version 6.62 MRN-071-EN Page 275 Appendix for StaRRsed Auto-Compact 1 Sample is Hazy < 10 2 Sample is Hazy < 25 3 Sample is Hazy > 25 Compact "ERROR" code messages This code appears in the "sample data record" at variable 'HGB'. The following 7 codes are defined: 0 NO ERRORS 1 No cells/plasma found Error 2 ESR Probably > 140 mm Error 3 Too many borders found Error 4 Column height <nnn> Warning 5 Measure error Warning 6 Bubbles on top Warning 7 Limit error Page 276 Error Auto Compact User Manual Version 6.62 MRN-071-EN Appendix for StaRRsed Auto-Compact Appendix - TDLIMS protocol Tdlims sample data record format ( 234 bytes ) This is a modified data record coming from a SE9000 with instrument ID. Sample data record format (234 bytes) Parameter Text distinction code I # of chars 1 Text distinction code II 1 "1" Sample distinction code 1 "U" Day 2 23 Day 23 Month 2 03 Month 3 = march Year 2 00 Year 00 = 2000 Rack no. 4 Tube position no. 2 Sequence no. 5 ID information 1 Sample ID number 13 Analysis information 1 0 n.a. NEG/POS/ERR information 1 0 n.a. POSITIVE (diff.) 1 0 n.a. Auto Compact User Manual Version 6.62 MRN-071-EN Example Comment "D" 1234 Rack number = 1234 05 Tube position in rack = 5 00000 n.a. 4 Barcode from barcode label Patient number Page 277 Appendix for StaRRsed Auto-Compact POSITIVE (morph.) 1 0 n.a. POSITIVE (count) 1 0 n.a. ERROR (func.) 1 0 n.a. ERROR (result) 1 0 n.a. Order information 1 0 n.a. Reserve 1 0 n.a. Reserve 1 0 n.a. Reserve 1 0 n.a. Reserve 1 0 n.a. Reserve 1 0 n.a. IP message information 6 000000 n.a. WBC 6 123000 Esr value = 123 mm RBC 5 102000 Hazy code = 12 HGB 5 00200 Error code = 2 HCT 5 01200 Temperature in degr. Celsius i.e. 12 degr. MCV 5 01200 Sedimentation time in minutes i.e. 12 min MCH 5 10100 Dilution rate = 101 MCHC 5 12300 30 minute ESR value = 123 Reserved 145 0000… n.a. n.a. = Not applicable Page 278 Auto Compact User Manual Version 6.62 MRN-071-EN Appendix for StaRRsed Auto-Compact No Sample data flag record format. This protocol contains no sample flag record. Tdlims Inquiry data record format (21 bytes) Parameter Text distinction code I # Of chars 1 Inquiry mode 1 Sample ID no. 13 Rack no. 4 Tube position no. 2 Example Comment "R" 1 Real time inquiry Patient number (same as sample data) 1234 Rack number = 1234 03 Tube position in rack = 3 Tdlims order information record format (171 bytes) Parameter Text distinction code I # of chars 1 Example Comment "S" Information status 1 0 Date ordered 8 "yyyymmdd" Sample ID no. 13 Rack no. 4 Auto Compact User Manual Version 6.62 MRN-071-EN 0 = sample does not exist 1 = sample exists Must be the same as inquiry record Page 279 Appendix for StaRRsed Auto-Compact Tube position no. 2 Inquiry mode 1 Patient ID no. 13 Patient name 25 Sex 1 Patient birthday 8 Doctor name 15 Ward 8 Sample comments 40 Wbc 1 Reserved 30 "yyyymmdd" 0 Esrflag: 0 = ESR no 1 = ESR yes Compact "HAZY" code messages. The code appears in the "sample data record" at variable 'RBC' This code appears in the "sample data record" at column 5. The following 4 codes are defined: 0 Sample is clear. 1 Sample is Hazy < 10 2 Sample is Hazy < 25 3 Sample is Hazy > 25 Page 280 Auto Compact User Manual Version 6.62 MRN-071-EN Appendix for StaRRsed Auto-Compact Compact "ERROR" code messages. This code appears in the "sample data record" at variable 'HGB'. The following 7 codes are defined: 0 NO ERRORS 1 No cells/plasma found Error 2 ESR Probably > 140 mm Error 3 Too many borders found Error 4 Column height <nnn> Warning 5 Measure error Warning 6 Bubbles on top Warning 7 Limit error Auto Compact User Manual Version 6.62 MRN-071-EN Error Page 281 Work instruction StaRRsed Auto-Compact 15. WORK INSTRUCTION STARRSED AUTO-COMPACT Work instruction section Auto Compact User Manual Version 6.62 MRN-071-EN Page 283 Work instruction StaRRsed Auto-Compact Work instruction Number 162 Page 1 of 1 Purpose: Change pump tube rinse Safety: None Bio Hazard area Instrument: Compact Revision: Draft,October 2001 New rinse pump tube assembly ESRI090902 (162-1). Open left cover. New tube replacement (162-2) 1. Pulls pump tube slightly downwards and at the same time towards the front of the StaRRsed unit to release the tube out of the pump plate holder. 2. Remove the old tube from the peristaltic pump rotor. 3. Disconnect the tubing at both ends of the tube connectors 4. Connect new tubing to both ends of the connectors. 5. Place one end of the tube in the pump plate holder. 6. Pull the new tube over the peristaltic pump rotor. 7. Pulls pump tube slightly downwards and at the same time towards the back of the StaRRsed unit. Page 284 Auto Compact User Manual Version 6.62 MRN-071-EN Work instruction StaRRsed Auto-Compact Work instruction Number 163 Page 1 of 1 Purpose: Change pump tube saline Safety: None Bio Hazard area Instrument: Compact Revision: Draft,October 2001 New saline pump tube assembly ESRI090903 (163-1) Open left Cover. New tube replacement (162-2) 1. Pulls pump tube slightly downwards and at the same time towards the front of the StaRRsed unit to release the tube out of the pump plate holder. 2. Remove the old tube from the peristaltic pump rotor. 3. Disconnect the tubing at both ends of the tube connectors 4. Connect new tubing to both ends of the connectors. 5. Place one end of the tube in the pump plate holder. 6. Pull the new tube over the peristaltic pump rotor. 7. Pulls pump tube slightly downwards and at the same time towards the back of the StaRRsed unit. Auto Compact User Manual Version 6.62 MRN-071-EN Page 285 Work instruction StaRRsed Auto-Compact Work instruction Number 166 Page 1 of 2 Purpose: Peristaltic waste pump cassette replacement Safety: Bio Hazard area Instrument: Compact Revision: Draft,October 2008 Waste Cassette (166-1) 1. Open the left cover and remove the waste container. The liquid separator is now visible. 2. Lift the stainless steel vacuum tube. 3. Pull the liquid separator towards the front of the Compact. 4. Remove the bacterial filter. 5. Fill waste separator with 100ml disinfectant or 100 ml water with 2% bleach. 6. Replace the bacterial filter. 7. Insert the liquid separator sliding it over the support shelf. 8. Lift stainless steel vacuum tube up and push the liquid separator towards the rear. 9. Release the stainless steel vacuum tube. 10. Lift the left cover and replace the waste container. Prime Saline (166) 1. Select PRIME SALINE. Repeat the prime saline until the liquid separator is empty. Page 286 Auto Compact User Manual Version 6.62 MRN-071-EN Work instruction StaRRsed Auto-Compact Waste Cassette (166-2) 1. Disconnect the two tubes from the waste pump cassette. 2. Press levers (at three o'clock and nine o'clock positions) and pull at the same time. 3. Clean peristaltic pump motor shaft using a tissue soaked in alcohol. 4. Remove the old blotting washer ESRI090026 5. Place the new blotting washer ESRI090026. 6. Insert new waste pump cassette ESRI090921 until it clicks into place. 7. Connect the two tubes to new waste pump cassette. Auto Compact User Manual Version 6.62 MRN-071-EN Page 287 Work instruction StaRRsed Auto-Compact Work instruction Number 168 Page 1 of 3 Purpose: Pipette handling valve Safety: Bio Hazard area Instrument: Compact Revision: Version 1, October 2008 Removals of the top cover (172) 1. Switch StaRRsed Auto-Compact OFF. 2. Remove the two rear screws of the top cover (if present). Lift the top cover carefully from the instrument. Pipette valve check or replacement: (168) 1. Hold the top pipette clamp and remove the valve body QTST040002 2. Clean or replace the valve body. 3. Check the silicon tube position inside the pipette clamp, it must be in the centre of the hole and equidistant from the sides. 4. Re-install pipette valve body. Pipette installation (172) 1. Hook pipette assembly on to the pipette belts. 2. Make sure that pipette assemblies are correctly fitted on to the pipette belts, 3. Visually check height of all pipette valves, they must all be at the same height. 4. Visually check the bottom of the pipette V shape ring. 5. Incorrect fitted pipettes may cause mechanical damage to the instrument. 6. Check for leakage after the first FILL & CLEAN Replace the top cover: (172) 1. Put the cover carefully over the instrument. 2. Replace the two rear screws of the top cover. (If present or if needed). Page 288 Auto Compact User Manual Version 6.62 MRN-071-EN Work instruction StaRRsed Auto-Compact Work instruction Number 172 Page 1 of 3Purpose: Purpose: Cleaning measure sensor Safety: Bio Hazard area Instrument: Compact Revision: Draft, October 2001 Removals of the top cover (172) 1. Switch StaRRsed Auto-Compact OFF. 2. Remove the two rear screws of the top cover (if present). Lift the top cover carefully from the instrument. If the measure sensor is out of range, the sensor must be cleaned. (172) In order to clean the measure sensor remove the pipette at the measuring position (complete with top and bottom clamp). For cleaning use a cotton bud dipped in deionised water or aerosol air blower, make sure the cotton bud is just damp. Do not use any organic solvents. Pipette removal (172) 1. Push and pull vertically the pipette from the holding position of the belts. 2. The pipette will disengage from the pipette belt. 3. Take pipette off the belt. 4. Store the pipette on a safe place. Switch Compact ON 1. Carefully clean the inner part of the measuring sensor by using a cotton bud. 2. Check the values of the Measure sensor MS 40..50..60 by using the check MEASURE SENSOR FUNCTION. 3. If not in range repeat cleaning the inner part of the measuring sensor. 4. When in range switch OFF the Compact. Auto Compact User Manual Version 6.62 MRN-071-EN Page 289 Work instruction StaRRsed Auto-Compact Pipette installation (172) 1. Hook pipette assembly on to the pipette belts. 2. Make sure that pipette assemblies are correctly fitted on to the pipette belts, 3. Visually check height of all pipette valves, they must all be at the same height. 4. Visually check the bottom of the pipette V shape ring. 5. Incorrect fitted pipettes may cause mechanical damage to the instrument. 6. Check for leakage after the first FILL & CLEAN Replace the top cover: (172) 1. Put the cover carefully over the instrument. 2. Replace the two rear screws of the top cover. (If present or if needed). Switch ON the Compact. Page 290 Auto Compact User Manual Version 6.62 MRN-071-EN Work instruction StaRRsed Auto-Compact Work instruction Number 175 Page 1 of 3 Purpose:: Pipette handling, valve tube Safety: Bio Hazard area Instrument: Compact Revision: Version 1,October 2007 Removals of the top cover (172) 1. Switch StaRRsed Auto-Compact OFF. 2. Remove the two rear screws of the top cover (if present). Auto Compact User Manual Version 6.62 MRN-071-EN Page 291 Work instruction StaRRsed Auto-Compact Lift the top cover carefully from the instrument. Pipette removal (172) 1. Push and pull vertically the pipette from the holding position of the belts. 2. The pipette will disengage from the pipette belt. 3. Take pipette off the belt. 4. Store the pipette on a safe place. . Re-assemble pipette(175) 1. Re-assemble valve body ESRI 030522 and silicon valve tube ESRI 030516. 2. Insert the re-assembly in top pipette clamp. 3. Wet the top of the pipette with water. (black C-clip indicates pipette top) 4. Compress the valve body into the pipette clamp and insert the pipette into pipette clamp. 5. The black C-clip must be as close to the pipette clamp as possible! 6. The flat surface of the C-clip must be next to the pipette clamp. 7. Remove the valve body and check the silicon tube position, it must be exactly centred. 8. Fit the bottom tube clamp and V-seal ring. 9. Check the position of the valve. If incorrect, disassemble pipette valve and tube and re-assemble again. Pipette installation (172) 1. Hook pipette assembly on to the pipette belts. 2. Make sure that pipette assemblies are correctly fitted on to the pipette belts, 3. Visually check height of all pipette valves, they must all be at the same height. 4. Visually check the bottom of the pipette V shape ring. 5. Incorrect fitted pipettes may cause mechanical damage to the instrument. 6. Check for leakage after the first FILL & CLEAN Replace the top cover: (172) 1. Put the cover carefully over the instrument. Page 292 Auto Compact User Manual Version 6.62 MRN-071-EN Work instruction StaRRsed Auto-Compact 2. Replace the two rear screws of the top cover. (If present or if needed). Auto Compact User Manual Version 6.62 MRN-071-EN Page 293 Work instruction StaRRsed Auto-Compact Work instruction Number 178 Page 1 of 1 Purpose:: Cleaning the diluent system Safety: Bio Hazard area Instrument: StaRRsed Auto-Compact Revision: Draft, October 2001 Prepare disinfectant: (if not already prepared) (180). Add 10 ml bleach (sodium hypochlorite) to 190 ml de-ionized water. (5% solution) This disinfectant is for cleaning of all external parts that are exposed to blood. 1. 2. 3. 4. 5. 6. 1. 2. 3. 4. 5. . . 1. 2. 3. 4. 5. 6. . 1. Remove the suction-tube from the diluent bottle, Place the suction tube in chlorine solution. Use the [PRIME DILUENT] function. This fills the dispenser system with the chlorine solution, After the prime sequence stops press the [PRIME DILUENT] key 5 times to fill the dispenser system with the Chlorine solution. Leave the chlorine solution in the system for 15 minutes. Take the diluent suction tube out of the chlorine solution. Wipe the tube clean and dry with a tissue. Take hot de-ionised water (80°C). Use the [PRIME DILUENT] function. After the prime sequence stops press the [PRIME DILUENT] key 5 times to fill the dispenser system with the hot water. Clean the diluent bottle(s) with the chlorine solution. Rinse the diluent bottle with hot de-ionised water (80°C). Rinse the diluent bottle with diluent solution. Refill the diluent bottle with fresh diluent solution. Use the [PRIME DILUENT] function After the prime sequence stops press the [PRIME DILUENT] key 5 times to fill the dispenser system with the fresh diluent solution. Prepare a hot Fill and Clean and run the fill and clean squeeze. Page 294 Auto Compact User Manual Version 6.62 MRN-071-EN Work instruction StaRRsed Auto-Compact Work instruction Number 179 Page 1 of 1 Purpose: Replace blue air filter Safety: Bio Hazard area Instrument: Compact Revision: Draft, October 2001 Removals of the top cover (172) 1. Switch StaRRsed Auto-Compact OFF. 2. Remove the two rear screws of the top cover (if present). Lift the top cover carefully from the instrument. Air filter replacement (ESRI) (179) 1. Pull both tube connectors out of the blue filter. 2. Replace with new blue filter 3. Reconnect the tube connectors on the filter Replace the top cover: (172) 1. Put the cover carefully over the instrument. 2. Replace the two rear screws of the top cover. (If present or if needed). Auto Compact User Manual Version 6.62 MRN-071-EN Page 295 Work instruction StaRRsed Auto-Compact Work instruction Number 180 Page 1 of 1 Purpose: Prepare disinfectants bleach Safety: Bio Hazard area For cleaning bio hazard area's Instrument: StaRRsed Auto-Compact Revision: Draft, October 2001 Prepare disinfectant: (if not already prepared) (180). Add 10 ml bleach (sodium hypochlorite) to 190 ml de-ionized water. (5% solution) This disinfectant is for cleaning of all external parts that are exposed to blood. Page 296 Auto Compact User Manual Version 6.62 MRN-071-EN Work instruction StaRRsed Auto-Compact Work instruction Number 188 Page 1 of 2 Purpose: Replace diluter tip Safety: None Bio Hazard area Instrument: Compact Revision: Draft, October 2001 1. Take the syringe from the diluter assembly. 2. Pull the plunger out of the syringe. 3. Cut the Teflon tip of the plunger with a sharp knife. Be careful not to damage the metal plunger. 4. Replace the O-ring and then the tip. 5. Replace the old tip for the new tip assembly. (From repair set QWLV030902) 6. Moisten the tip with water to ease the tip back into the glass syringe barrel. 1. PRIME DILUENT 2. Repeat above step until there are no air bubbles in the whole diluent system. Check your dilution settings: (188) 1. 2. 3. 4. 5. 6. Go to tab SETTINGS> DILUTER SETTINGS and select DISPLAY DILUTION OFF Run 10 samples through the instrument and make a note of the dilution rate. Calculate the mean of the 10 samples. Make adjustment if necessary in SETTINGS> DILUTEr and adjust the Dilution adjustment Go to tab SETTINGS> DILUTER SETTINGS and select Display dilution ON Auto Compact User Manual Version 6.62 MRN-071-EN Page 297 Work instruction StaRRsed Auto-Compact Work instruction Number 195 Page 1 of 1 Purpose: Cleaning diluent system Safety: Bio Hazard area Instrument: Compact Revision: Draft, October 2008 Prepare disinfectant: (195) Take 5% chlorine solution 1. 2. 3. 4. 5. Remove the suction-tube from the diluent bottle . Place the suction tube in chlorine solution. Use the "Prime diluent" function. This fills the dispenser system with the chlorine solution After the prime sequence stops press the button "Prime diluent" 5 times to fill the dispenser system with the Chlorine solution. 6. Leave the chlorine solution in the system for 15 minutes. 1. 2. 3. 4. 5. Take the diluent suction-tube out of the chlorine solution. Wipe the tube with clean and dry with a tissue. Take hot de-ionised water (80°C) Use the "Prime diluent" function. After the prime sequence stops press button "Prime diluent" 5 times to fill the dispenser system with the hot water 1. 2. 3. 4. Clean the diluent bottle with hot de-ionised water (80°C) Refill the diluent bottle with fresh diluent solution. Use the "Prime diluent" function. After the prime sequence stops press button "Prime diluent" 5 times to fill the dispenser system with the fresh diluent solution. Page 298 Auto Compact User Manual Version 6.62 MRN-071-EN Work instruction StaRRsed Auto-Compact Work instruction Number 196 Page 1 of 3 Purpose: Cleaning liquid separator Version 2 Safety: Bio Hazard area Instrument: Compact Revision: Draft, October 2004 Cleaning the liquid separator (169-1) 1. To remove the liquid separator from the Compact. Open the left cover and remove the waste container. The liquid separator is now visible. Remove the liquid separator. 1. 2. 3. 4. 5. 6. Lift the stainless steel vacuum tube. Pull the liquid separator towards the front of the Compact. Disconnect the silicon tube from the bottom tube connection. Remove the bacterial filter. Open the liquid separator by pulling off the top section. Clean the internal parts of the separator with disinfectant. Cleaning liquid separator (196-1) 1. 2. 3. 4. Remove Hepa filter and disassemble the separator. Clean all parts with hot water and a brush. Use some acid free vaseline on the screw-thread of the glass jar. Assemble the separator and replace Hepa filter. Auto Compact User Manual Version 6.62 MRN-071-EN Page 299 Work instruction StaRRsed Auto-Compact Replace the liquid separator (169-3) 1. Replace the top section. A little silicon grease on the rim of separator will make the assembling and adjustment easier 2. If applicable replace the bacterial HEPA filter (For Maintenance Level 4 and Level 5 replace Hepa filter QWLV040002) 3. Re-connect the silicon tube to the bottom tube connector. 4. Lift the left cover. 5. Replace the liquid separator sliding it over the support. 6. Lift stainless steel vacuum tube up and push the liquid separator towards the rear. 7. Release the stainless steel vacuum tube. 8. Replace the waste container and close the left cover. Page 300 Auto Compact User Manual Version 6.62 MRN-071-EN Work instruction StaRRsed Auto-Compact Work instruction Number 199 Page 1 of 1 Purpose: Maintenance level 1 Safety: Bio Hazard area Instrument: Compact Revision: Draft, October 2001 We recommend that this procedure is carried out by dealers service engineers. The following items need to be replaced annually. 1. Replace all the tubing. 2. Replace the waste pump motor ESRI090920. 3. Replace Waste pump cassette ESRI090921. 4. Replace blue Vacuum filter disc. Part no QWLV040003. 5. Replace Fill block washer. Part no ESRI030906. 6. Check the outer needle and sample probe and replace if necessary. 7. Replace waste container filter disc QWLV040001. 8. Replace Pinch valve tubing. Part no ESRI 010246. 9. Replace the Teflon tip of syringe on the Diluter assembly. 10. Check Waste pump motor assembly and replace if necessary. ESRI0090920. Check the pipette valves bodies and replace if necessary (84 pieces) QTST040001. Auto Compact User Manual Version 6.62 MRN-071-EN Page 301 Work instruction StaRRsed Auto-Compact Work instruction Number 201 Page 1 of 1 Purpose: Dis- and assembly the fill nozzle Safety: Bio Hazard area Instrument: Compact Revision: Draft, February 2005 Instructions for disassembling and assembling the fill nozzle Note: For the O-ring replacing, only take of the top part of the fill nozzle. Page 302 Auto Compact User Manual Version 6.62 MRN-071-EN Work instruction StaRRsed Auto-Compact Work instruction Number 202 Page 1 of 1 Purpose: Cleaning the fill nozzle Safety: Bio Hazard area Instrument: Compact Revision: Draft, February 2005 Disassemble the fill-nozzle: (202) 1. Turn the holder to the right. 2. The fill-nozzle can now be removed. 3. Disconnect the silicon tube from the fill nozzle. Clean fill-nozzle: (202) The use of a toothbrush and detergent is recommended. 1. Carefully scrub the fill nozzle inner part. 2. Use a tissue to dry the fill nozzle. Assemble fill-nozzle: (202) 1. Connect the silicon tube to the fill nozzle. 2. Put the fill nozzle into the holder. 3. Push the fill nozzle upwards and turn the holder to the left. Auto Compact User Manual Version 6.62 MRN-071-EN Page 303 Work instruction StaRRsed Auto-Compact Work instruction Number 203 Page 1 of 3 Purpose: Replace the fill nozzle O-ring Safety: Bio Hazard area Instrument: Compact Revision: Draft, February 2005 Assemble fill-nozzle: (202) 1. Connect the silicon tube to the fill nozzle. 2. Put the fill nozzle into the holder. 3. Push the fill nozzle upwards and turn the holder to the left. Clean fill-nozzle: (202) The use of a toothbrush and detergent is recommended. 1. Carefully scrub the fill nozzle inner part. 2. Use a tissue to dry the fill nozzle. Page 304 Auto Compact User Manual Version 6.62 MRN-071-EN Work instruction StaRRsed Auto-Compact Disassemble fill nozzle holder: (203) 1. Turn the holder to the right. 2. The holder can now be removed Replace O-ring: (203) 1. Remove the O-ring. (QWLV050004) 1. Install new O-ring. (QWLV050004) Auto Compact User Manual Version 6.62 MRN-071-EN Page 305 Work instruction StaRRsed Auto-Compact Assembly holder: (203) Push the head down 1. Turn the head anti clockwise till clicking sound 2. Turn the head clockwise for 1.5 turns. Assemble fill nozzle holder: (203) Push the plastic top part down against the spring pressure. 1. Turn the plastic top part anti clockwise until you hear or feel a click. 2. Turn the plastic top part clockwise for 1.5 turns. Assemble fill-nozzle: (202) 1. Connect the silicon tube to the fill nozzle. 2. Put the fill nozzle into the holder. 3. Push the fill nozzle upwards and turn the holder to the left. Page 306 Auto Compact User Manual Version 6.62 MRN-071-EN Work instruction StaRRsed Auto-Compact Work instruction Number 205 Page 1 of 1 Purpose: Replace the pinch valve tube ESRI010246 Safety: Bio Hazard area Instrument: Compact Revision: Draft, February 2005 Replace the pinch valve tube ESRI010246 (205) 1. Open the left cover. 2. Pull the tube out the pinch vale. 3. Disconnect the silicon tube from the bottom connector and the top connector. 4. Remove the tube. 5. Connect the silicon tube to the bottom connector and the top connector. 6. Push the tube in the pinch vale. 7. Close the left cover. Auto Compact User Manual Version 6.62 MRN-071-EN Page 307 Work instruction StaRRsed Auto-Compact Work instruction Number 181 (7) Page 1 of 1 Purpose:Replace diluter syringe Teflon tip Safety: None Bio Hazard area Instrument: Compact with new diluter Revision: Draft, October 2001 version Disassembly diluter syringe: (181) 1. Unscrew the syringe from the attachment. 1. Take the syringe from the diluter assembly. 2. Pull the plunger out of the syringe. 3. Cut the Teflon tip of the plunger with a sharp knife. Be careful not to damage the metal plunger. 4. Replace the O-ring and then the tip. 5. Replace the old tip for the new tip assembly. (From repair set QWLV030902) 6. Moisten the tip with water to ease the tip back into the glass syringe barrel. 1. Install the syringe back on to the attachment 1. Prime diluent [MAINTENANCE] [PRIME DILUENT] 2. Repeat this step until there are no air bubbles in the total diluent system. Check your dilution settings: 1. 2. 3. 4. Select display dilution on [SETTINGS] -> [GENERAL SETTINGS] -> [DISPLAY DILUTION] -> ON. Run 10 samples through the instrument and make a note of the dilution rate. Calculate the mean value of the 10 samples. Make adjustment if necessary in [SETTINGS] -> [DILUTER SETTINGS] -> [DILUTION ADJUSTMENT]. Page 308 Auto Compact User Manual Version 6.62 MRN-071-EN Work instruction StaRRsed Auto-Compact Work instruction Number 187 Page 1 of 1 Purpose: Daily maintenance Safety: Bio Hazard area Instrument: Compact Revision: Draft, October 2001 Prepare disinfectant: (if not already prepared) (180). Add 10 ml bleach (sodium hypochlorite) to 190 ml de-ionized water. (5% solution) This disinfectant is for cleaning of all external parts that are exposed to blood. 1. Wipe outer surface and stainless steel plate below the pipettes. 2. Go to tab [MAINTENANCE] and perform the [End-of-day wash] procedure function. (when Fill & Clean is used End-of-day wash is not required) 3. Check system for leakage. 4. Inspect the peristaltic pump tubes and connections for leaks. 5. Check that liquid does not run back into the supply bottles after the pumps have stopped. 6. Inspect sample needle condition. If necessary replace the inner and/or the outer needles. 7. Check tubing from the syringe for trapped air bubbles. 8. Check Diluent syringe for trapped air bubbles. 9. If trapped air bubbles are found, Go to tab [MAINTENANCE], click button [PRIME (ON PAGE 63) / CLEAN] and perform the [Prime Diluent] function. Auto Compact User Manual Version 6.62 MRN-071-EN Page 309 Work instruction StaRRsed Auto-Compact Work instruction Number 191 Page 1 of 6 Purpose:Weekly maintenance Safety: Bio Hazard area Instrument: Compact Revision: Draft, October 2001 Prepare disinfectant: (if not already prepared) (180). Add 10 ml bleach (sodium hypochlorite) to 190 ml de-ionized water. (5% solution) This disinfectant is for cleaning of all external parts that are exposed to blood. 1. Wipe outer surface and stainless steel plate below the pipettes. 2. Go to tab [MAINTENANCE] and perform the [End-of-day wash] procedure function. (when Fill & Clean is used End-of-day wash is not required) 3. Check system for leakage. 4. Inspect the peristaltic pump tubes and connections for leaks. 5. Check that liquid does not run back into the supply bottles after the pumps have stopped. 6. Inspect sample needle condition. If necessary replace the inner and/or the outer needles. 7. Check tubing from the syringe for trapped air bubbles. 8. Check Diluent syringe for trapped air bubbles. 9. If trapped air bubbles are found, Go to tab [MAINTENANCE], click button [PRIME (ON PAGE 63) / CLEAN] and perform the [Prime Diluent] function. Disassemble the fill-nozzle: (202) 1. Turn the holder to the right. 2. The fill-nozzle can now be removed. 3. Disconnect the silicon tube from the fill nozzle. Clean fill-nozzle: (202) The use of a toothbrush and detergent is recommended. 1. Carefully scrub the fill nozzle inner part. 2. Use a tissue to dry the fill nozzle. Page 310 Auto Compact User Manual Version 6.62 MRN-071-EN Work instruction StaRRsed Auto-Compact Assemble fill-nozzle: (202) 1. Connect the silicon tube to the fill nozzle. 2. Put the fill nozzle into the holder. 3. Push the fill nozzle upwards and turn the holder to the left. Cleaning the liquid separator (169-1) 1. To remove the liquid separator from the Compact. Open the left cover and remove the waste container. The liquid separator is now visible. Remove the liquid separator. 1. 2. 3. 4. 5. 6. Lift the stainless steel vacuum tube. Pull the liquid separator towards the front of the Compact. Disconnect the silicon tube from the bottom tube connection. Remove the bacterial filter. Open the liquid separator by pulling off the top section. Clean the internal parts of the separator with disinfectant. Cleaning liquid separator (196-1) 1. 2. 3. 4. Remove Hepa filter and disassemble the separator. Clean all parts with hot water and a brush. Use some acid free vaseline on the screw-thread of the glass jar. Assemble the separator and replace Hepa filter. Replace the liquid separator (169-3) 1. Replace the top section. A little silicon grease on the rim of separator will make the assembling and adjustment easier 2. If applicable replace the bacterial HEPA filter (For Maintenance Level 4 and Level 5 replace Hepa filter QWLV040002) 3. Re-connect the silicon tube to the bottom tube connector. 4. Lift the left cover. 5. Replace the liquid separator sliding it over the support. 6. Lift stainless steel vacuum tube up and push the liquid separator towards the rear. 7. Release the stainless steel vacuum tube. 8. Replace the waste container and close the left cover. Auto Compact User Manual Version 6.62 MRN-071-EN Page 311 Work instruction StaRRsed Auto-Compact Vacuum pressure check • Go to tab MAINTENANCE -> CHECK SENSOR. Select CHECK FLOW SENSOR box. Compact InteRRliner version Flow: 0925-0980-1020 Abs: 0340- 0360-0380 If the flow is not in range there might be a blockage in the vacuum flow line to the flow sensor. Fill Stop sensor check. • Go to tab MAINTENANCE -> CHECK SENSOR. Select CHECK FILL SENSOR box. Filling stop sensor FS 90..140..165 Diluter Start sensor check. • Go to tab MAINTENANCE -> CHECK SENSOR. Select DILUTOR START SENSOR box. Diluter start sensor 400-700. Measure sensor. • Go to tab MAINTENANCE -> CHECK SENSOR. Select CHECK MEASURE SENSOR box. Measure sensor MS 40..50..60. Temperature sensor. • Go to tab MAINTENANCE -> CHECK SENSOR. Select CHECK TEMPERATURE SENSOR box. Temperature sensor TS [Room temperature]. Diluent flow sensor check • Go to tab MAINTENANCE -> CHECK SENSOR. Select CHECK DILUENT FLOW SENSOR box. Press test. When test is finished, signal Down and signal Up must be green. Separator check. Go to tab MAINTENANCE -> CHECK SENSOR. Select CHECK SEPARATOR SENSOR box. Separator sensor <200 600 >700 . Page 312 Auto Compact User Manual Version 6.62 MRN-071-EN Work instruction StaRRsed Auto-Compact Work instruction Number 204 Page 1 of 1 Purpose: Check sensors Safety: Bio Hazard area Instrument: Compact Revision: Draft, February 2005 Vacuum pressure check • Go to tab MAINTENANCE -> CHECK SENSOR. Select CHECK FLOW SENSOR box. Compact InteRRliner version Flow: 0925-0980-1020 Abs: 0340- 0360-0380 If the flow is not in range there might be a blockage in the vacuum flow line to the flow sensor. Fill Stop sensor check. • Go to tab MAINTENANCE -> CHECK SENSOR. Select CHECK FILL SENSOR box. Filling stop sensor FS 90..140..165 Diluter Start sensor check. • Go to tab MAINTENANCE -> CHECK SENSOR. Select DILUTOR START SENSOR box. Diluter start sensor 400-700. Measure sensor. • Go to tab MAINTENANCE -> CHECK SENSOR. Select CHECK MEASURE SENSOR box. Measure sensor MS 40..50..60. Temperature sensor. • Go to tab MAINTENANCE -> CHECK SENSOR. Select CHECK TEMPERATURE SENSOR box. Temperature sensor TS [Room temperature]. Diluent flow sensor check • Go to tab MAINTENANCE -> CHECK SENSOR. Select CHECK DILUENT FLOW SENSOR box. Press test. When test is finished, signal Down and signal Up must be green. Separator check. Go to tab MAINTENANCE -> CHECK SENSOR. Select CHECK SEPARATOR SENSOR box. Separator sensor <200 600 >700 . Auto Compact User Manual Version 6.62 MRN-071-EN Page 313 Work instruction StaRRsed Auto-Compact Work instruction Number 189 Page 1 of 1 Purpose:: Sample probe or outer needle replacement Safety: Bio Hazard area Instrument: Auto Compact Revision: Draft, October 2008 Remove the top cover from the Rack unit. 1. Unfasten the screw which prevent the outer needle to drop out of the assembly. 2. Undo the sample probe. 3. Pull the outer needle complete with sample probe together out the needle assembly. 4. Mark each tube for easier reconnecting to the correct nipple. 5. Disconnect the tubes from the outer needle. 6. outer needle. Page 314 Auto Compact User Manual Version 6.62 MRN-071-EN Work instruction StaRRsed Auto-Compact Needle exchange: 1. Install (new) sample probe ESRI050909 together with a new outer needle VERA059009 2. Slide the new sample probe into the (new) outer needle. 3. Install (new) sample probe ESRI050909 and make sure the Sample probe has a (new) O-ring QWLV05003 together with the (new) outer needle VERA059009. 4. Put the sample probe in the outer needle. 5. Replace the needles onto the needle assemble. 6. Tighten the sample probe. Do not over-tighten the sample probe in the T-piece / Y-piece or it will crack or strip the threading inside the block. 7. Replace the correct tubes on the outer needle. 8. Fasten the outer needle bolt.(Do not over-tighten the screw) 9. Replace the cover on the Rack unit. Auto Compact User Manual Version 6.62 MRN-071-EN Page 315 Work instruction StaRRsed Auto-Compact Work instruction Number 192 Page 1 of 2 Purpose:Fill and Clean with adapter Safety: Bio Hazard area Instrument: Auto Compact Revision: Draft, February 2005 . Cleaning agent preparation Auto Compact: Fill and clean: (192-1) 1. Fill the clean adapter up with hot de-ionised water till the first mark in the adapter. (180 ml) 2. Add the cleaning agent (QRR010905) to the adapter till the second marker in the adapter. (18 ml) 3. Place the two caps on the adapter and mix well. 4. Insert the adapter onto the in-pool selection. Page 316 Auto Compact User Manual Version 6.62 MRN-071-EN Work instruction StaRRsed Auto-Compact . Start fill and clean procedure: Put the adapter in the Input-pool and select MAINTENANCE tab and PRIME/CLEAN the FILL AND CLEAN key. The adapter will be transported to the needle piercing position by the gripper. The needle goes down and the fill and clean process is started. 1. When all the pipettes are filled the needle goes back to the home position and the adapter is moved to the release position and will be released to the End-pool. Note: Each pipette on the pipette belt will be filled with cleaning agent, after one hour the first pipette is washed and dried. Fill and clean takes about 1 ½ hours to complete. Auto Compact User Manual Version 6.62 MRN-071-EN Page 317 Work instruction StaRRsed Auto-Compact Work instruction Number 193 Page 1 of 12 Purpose: Maintenance level 4 Safety: Bio Hazard area Instrument: Auto Compact Revision: Draft, October 2001 Disassemble the fill-nozzle: (202) 1. Turn the holder to the right. 2. The fill-nozzle can now be removed. 3. Disconnect the silicon tube from the fill nozzle. Clean fill-nozzle: (202) The use of a toothbrush and detergent is recommended. 1. Carefully scrub the fill nozzle inner part. 2. Use a tissue to dry the fill nozzle. Page 318 Auto Compact User Manual Version 6.62 MRN-071-EN Work instruction StaRRsed Auto-Compact Disassemble fill nozzle holder: (203) 1. Turn the holder to the right. 2. The holder can now be removed Replace O-ring: (203) 1. Remove the O-ring. (QWLV050004) 1. Install new O-ring. (QWLV050004) Auto Compact User Manual Version 6.62 MRN-071-EN Page 319 Work instruction StaRRsed Auto-Compact Assemble fill nozzle holder: (203) Push the plastic top part down against the spring pressure. 1. Turn the plastic top part anti clockwise until you hear or feel a click. 2. Turn the plastic top part clockwise for 1.5 turns. Assemble fill-nozzle: (202) 1. Connect the silicon tube to the fill nozzle. 2. Put the fill nozzle into the holder. 3. Push the fill nozzle upwards and turn the holder to the left. Cleaning the liquid separator (169-1) 1. To remove the liquid separator from the Compact. Open the left cover and remove the waste container. The liquid separator is now visible. Remove the liquid separator. 1. 2. 3. 4. 5. 6. Lift the stainless steel vacuum tube. Pull the liquid separator towards the front of the Compact. Disconnect the silicon tube from the bottom tube connection. Remove the bacterial filter. Open the liquid separator by pulling off the top section. Clean the internal parts of the separator with disinfectant. Cleaning liquid separator (196-1) 1. 2. 3. 4. Remove Hepa filter and disassemble the separator. Clean all parts with hot water and a brush. Use some acid free vaseline on the screw-thread of the glass jar. Assemble the separator and replace Hepa filter. Replace the liquid separator (169-3) 1. Replace the top section. A little silicon grease on the rim of separator will make the assembling and adjustment easier 2. If applicable replace the bacterial HEPA filter (For Maintenance Level 4 and Level 5 replace Hepa filter QWLV040002) 3. Re-connect the silicon tube to the bottom tube connector. 4. Lift the left cover. Page 320 Auto Compact User Manual Version 6.62 MRN-071-EN Work instruction StaRRsed Auto-Compact 5. 6. 7. 8. Replace the liquid separator sliding it over the support. Lift stainless steel vacuum tube up and push the liquid separator towards the rear. Release the stainless steel vacuum tube. Replace the waste container and close the left cover. New rinse pump tube assembly ESRI090902 (162-1). Open left cover. New tube replacement (162-2) 1. Pulls pump tube slightly downwards and at the same time towards the front of the StaRRsed unit to release the tube out of the pump plate holder. 2. Remove the old tube from the peristaltic pump rotor. 3. Disconnect the tubing at both ends of the tube connectors 4. Connect new tubing to both ends of the connectors. 5. Place one end of the tube in the pump plate holder. 6. Pull the new tube over the peristaltic pump rotor. 7. Pulls pump tube slightly downwards and at the same time towards the back of the StaRRsed unit. New saline pump tube assembly ESRI090903 (163-1) Open left Cover. New tube replacement (162-2) 1. Pulls pump tube slightly downwards and at the same time towards the front of the StaRRsed unit to release the tube out of the pump plate holder. Auto Compact User Manual Version 6.62 MRN-071-EN Page 321 Work instruction StaRRsed Auto-Compact 2. 3. 4. 5. 6. 7. Remove the old tube from the peristaltic pump rotor. Disconnect the tubing at both ends of the tube connectors Connect new tubing to both ends of the connectors. Place one end of the tube in the pump plate holder. Pull the new tube over the peristaltic pump rotor. Pulls pump tube slightly downwards and at the same time towards the back of the StaRRsed unit. Cleaning agent preparation Auto Compact: Fill and clean: (192-1) 1. Fill the clean adapter up with hot de-ionised water till the first mark in the adapter. (180 ml) 2. Add the cleaning agent (QRR010905) to the adapter till the second marker in the adapter. (18 ml) 3. Place the two caps on the adapter and mix well. 4. Insert the adapter onto the in-pool selection. Page 322 Auto Compact User Manual Version 6.62 MRN-071-EN Work instruction StaRRsed Auto-Compact Start fill and clean procedure: Put the adapter in the Input-pool and select MAINTENANCE tab and PRIME/CLEAN the FILL AND CLEAN key. The adapter will be transported to the needle piercing position by the gripper. The needle goes down and the fill and clean process is started. 1. When all the pipettes are filled the needle goes back to the home position and the adapter is moved to the release position and will be released to the End-pool. Note: Each pipette on the pipette belt will be filled with cleaning agent, after one hour the first pipette is washed and dried. Fill and clean takes about 1 ½ hours to complete. Vacuum pressure check • Go to tab MAINTENANCE -> CHECK SENSOR. Select CHECK FLOW SENSOR box. Compact InteRRliner version Flow: 0925-0980-1020 Abs: 0340- 0360-0380 If the flow is not in range there might be a blockage in the vacuum flow line to the flow sensor. Fill Stop sensor check. • Go to tab MAINTENANCE -> CHECK SENSOR. Select CHECK FILL SENSOR box. Filling stop sensor FS 90..140..165 Diluter Start sensor check. • Go to tab MAINTENANCE -> CHECK SENSOR. Select DILUTOR START SENSOR box. Diluter start sensor 400-700. Measure sensor. • Go to tab MAINTENANCE -> CHECK SENSOR. Select CHECK MEASURE SENSOR box. Measure sensor MS 40..50..60. Temperature sensor. Auto Compact User Manual Version 6.62 MRN-071-EN Page 323 Work instruction StaRRsed Auto-Compact • Go to tab MAINTENANCE -> CHECK SENSOR. Select CHECK TEMPERATURE SENSOR box. Temperature sensor TS [Room temperature]. Diluent flow sensor check • Go to tab MAINTENANCE -> CHECK SENSOR. Select CHECK DILUENT FLOW SENSOR box. Press test. When test is finished, signal Down and signal Up must be green. Separator check. Go to tab MAINTENANCE -> CHECK SENSOR. Select CHECK SEPARATOR SENSOR box. Separator sensor <200 600 >700 . Prepare disinfectant: (if not already prepared) (180). Add 10 ml bleach (sodium hypochlorite) to 190 ml de-ionized water. (5% solution) This disinfectant is for cleaning of all external parts that are exposed to blood. 1. Wipe outer surface and stainless steel plate below the pipettes. 2. Go to tab [MAINTENANCE] and perform the [End-of-day wash] procedure function. (when Fill & Clean is used End-of-day wash is not required) 3. Check system for leakage. 4. Inspect the peristaltic pump tubes and connections for leaks. 5. Check that liquid does not run back into the supply bottles after the pumps have stopped. 6. Inspect sample needle condition. If necessary replace the inner and/or the outer needles. 7. Check tubing from the syringe for trapped air bubbles. 8. Check Diluent syringe for trapped air bubbles. 9. If trapped air bubbles are found, Go to tab [MAINTENANCE], click button [PRIME (ON PAGE 63) / CLEAN] and perform the [Prime Diluent] function. Page 324 Auto Compact User Manual Version 6.62 MRN-071-EN Work instruction StaRRsed Auto-Compact Work instruction Number 194 Page 1 of 16 Purpose:Maintenance level 3 Safety: Bio Hazard area Instrument: Auto Compact Revision: Draft, October 2001 Disassemble the fill-nozzle: (202) 1. Turn the holder to the right. 2. The fill-nozzle can now be removed. 3. Disconnect the silicon tube from the fill nozzle. Clean fill-nozzle: (202) The use of a toothbrush and detergent is recommended. 1. Carefully scrub the fill nozzle inner part. 2. Use a tissue to dry the fill nozzle. Auto Compact User Manual Version 6.62 MRN-071-EN Page 325 Work instruction StaRRsed Auto-Compact Disassemble fill nozzle holder: (203) 1. Turn the holder to the right. 2. The holder can now be removed Replace O-ring: (203) 1. Remove the O-ring. (QWLV050004) 1. Install new O-ring. (QWLV050004) Page 326 Auto Compact User Manual Version 6.62 MRN-071-EN Work instruction StaRRsed Auto-Compact Assemble fill nozzle holder: (203) Push the plastic top part down against the spring pressure. 1. Turn the plastic top part anti clockwise until you hear or feel a click. 2. Turn the plastic top part clockwise for 1.5 turns. Assemble fill-nozzle: (202) 1. Connect the silicon tube to the fill nozzle. 2. Put the fill nozzle into the holder. 3. Push the fill nozzle upwards and turn the holder to the left. Cleaning the liquid separator (169-1) 1. To remove the liquid separator from the Compact. Open the left cover and remove the waste container. The liquid separator is now visible. Remove the liquid separator. 1. 2. 3. 4. 5. 6. Lift the stainless steel vacuum tube. Pull the liquid separator towards the front of the Compact. Disconnect the silicon tube from the bottom tube connection. Remove the bacterial filter. Open the liquid separator by pulling off the top section. Clean the internal parts of the separator with disinfectant. Cleaning liquid separator (196-1) 1. 2. 3. 4. Remove Hepa filter and disassemble the separator. Clean all parts with hot water and a brush. Use some acid free vaseline on the screw-thread of the glass jar. Assemble the separator and replace Hepa filter. Replace the liquid separator (169-3) 1. Replace the top section. A little silicon grease on the rim of separator will make the assembling and adjustment easier 2. If applicable replace the bacterial HEPA filter (For Maintenance Level 4 and Level 5 replace Hepa filter QWLV040002) 3. Re-connect the silicon tube to the bottom tube connector. 4. Lift the left cover. Auto Compact User Manual Version 6.62 MRN-071-EN Page 327 Work instruction StaRRsed Auto-Compact 5. 6. 7. 8. Replace the liquid separator sliding it over the support. Lift stainless steel vacuum tube up and push the liquid separator towards the rear. Release the stainless steel vacuum tube. Replace the waste container and close the left cover. New rinse pump tube assembly ESRI090902 (162-1). Open left cover. New tube replacement (162-2) 1. Pulls pump tube slightly downwards and at the same time towards the front of the StaRRsed unit to release the tube out of the pump plate holder. 2. Remove the old tube from the peristaltic pump rotor. 3. Disconnect the tubing at both ends of the tube connectors 4. Connect new tubing to both ends of the connectors. 5. Place one end of the tube in the pump plate holder. 6. Pull the new tube over the peristaltic pump rotor. 7. Pulls pump tube slightly downwards and at the same time towards the back of the StaRRsed unit. New saline pump tube assembly ESRI090903 (163-1) Open left Cover. New tube replacement (162-2) 1. Pulls pump tube slightly downwards and at the same time towards the front of the StaRRsed unit to release the tube out of the pump plate holder. Page 328 Auto Compact User Manual Version 6.62 MRN-071-EN Work instruction StaRRsed Auto-Compact 2. 3. 4. 5. 6. 7. Remove the old tube from the peristaltic pump rotor. Disconnect the tubing at both ends of the tube connectors Connect new tubing to both ends of the connectors. Place one end of the tube in the pump plate holder. Pull the new tube over the peristaltic pump rotor. Pulls pump tube slightly downwards and at the same time towards the back of the StaRRsed unit. Cleaning agent preparation Auto Compact: Fill and clean: (192-1) 1. Fill the clean adapter up with hot de-ionised water till the first mark in the adapter. (180 ml) 2. Add the cleaning agent (QRR010905) to the adapter till the second marker in the adapter. (18 ml) 3. Place the two caps on the adapter and mix well. 4. Insert the adapter onto the in-pool selection. Auto Compact User Manual Version 6.62 MRN-071-EN Page 329 Work instruction StaRRsed Auto-Compact . Start fill and clean procedure: Put the adapter in the Input-pool and select MAINTENANCE tab and PRIME/CLEAN the FILL AND CLEAN key. The adapter will be transported to the needle piercing position by the gripper. The needle goes down and the fill and clean process is started. 1. When all the pipettes are filled the needle goes back to the home position and the adapter is moved to the release position and will be released to the End-pool. Note: Each pipette on the pipette belt will be filled with cleaning agent, after one hour the first pipette is washed and dried. Fill and clean takes about 1 ½ hours to complete. Vacuum pressure check • Go to tab MAINTENANCE -> CHECK SENSOR. Select CHECK FLOW SENSOR box. Compact InteRRliner version Flow: 0925-0980-1020 Abs: 0340- 0360-0380 If the flow is not in range there might be a blockage in the vacuum flow line to the flow sensor. Fill Stop sensor check. • Go to tab MAINTENANCE -> CHECK SENSOR. Select CHECK FILL SENSOR box. Filling stop sensor FS 90..140..165 Diluter Start sensor check. • Go to tab MAINTENANCE -> CHECK SENSOR. Select DILUTOR START SENSOR box. Diluter start sensor 400-700. Measure sensor. • Go to tab MAINTENANCE -> CHECK SENSOR. Select CHECK MEASURE SENSOR box. Measure sensor MS 40..50..60. Temperature sensor. Page 330 Auto Compact User Manual Version 6.62 MRN-071-EN Work instruction StaRRsed Auto-Compact • Go to tab MAINTENANCE -> CHECK SENSOR. Select CHECK TEMPERATURE SENSOR box. Temperature sensor TS [Room temperature]. Diluent flow sensor check • Go to tab MAINTENANCE -> CHECK SENSOR. Select CHECK DILUENT FLOW SENSOR box. Press test. When test is finished, signal Down and signal Up must be green. Separator check. Go to tab MAINTENANCE -> CHECK SENSOR. Select CHECK SEPARATOR SENSOR box. Separator sensor <200 600 >700 . Waste Cassette (166-1) 1. Open the left cover and remove the waste container. The liquid separator is now visible. 2. Lift the stainless steel vacuum tube. 3. Pull the liquid separator towards the front of the Compact. 4. Remove the bacterial filter. 5. Fill waste separator with 100ml disinfectant or 100 ml water with 2% bleach. 6. Replace the bacterial filter. 7. Insert the liquid separator sliding it over the support shelf. 8. Lift stainless steel vacuum tube up and push the liquid separator towards the rear. 9. Release the stainless steel vacuum tube. 10. Lift the left cover and replace the waste container. Auto Compact User Manual Version 6.62 MRN-071-EN Page 331 Work instruction StaRRsed Auto-Compact Waste Cassette (166-2) 1. Disconnect the two tubes from the waste pump cassette. 2. Press levers (at three o'clock and nine o'clock positions) and pull at the same time. 3. Clean peristaltic pump motor shaft using a tissue soaked in alcohol. 4. Remove the old blotting washer ESRI090026 5. Place the new blotting washer ESRI090026. 6. Insert new waste pump cassette ESRI090921 until it clicks into place. 7. Connect the two tubes to new waste pump cassette. . Replace the pinch valve tube ESRI010246 (205) 1. Open the left cover. 2. Pull the tube out the pinch vale. 3. Disconnect the silicon tube from the bottom connector and the top connector. 4. Remove the tube. 5. Connect the silicon tube to the bottom connector and the top connector. 6. Push the tube in the pinch vale. 7. Close the left cover. Prepare disinfectant: (if not already prepared) (180). Add 10 ml bleach (sodium hypochlorite) to 190 ml de-ionized water. (5% solution) This disinfectant is for cleaning of all external parts that are exposed to blood. 1. Wipe outer surface and stainless steel plate below the pipettes. 2. Go to tab [MAINTENANCE] and perform the [End-of-day wash] procedure function. (when Fill & Clean is used End-of-day wash is not required) 3. Check system for leakage. 4. Inspect the peristaltic pump tubes and connections for leaks. 5. Check that liquid does not run back into the supply bottles after the pumps have stopped. Page 332 Auto Compact User Manual Version 6.62 MRN-071-EN Work instruction StaRRsed Auto-Compact 6. Inspect sample needle condition. If necessary replace the inner and/or the outer needles. 7. Check tubing from the syringe for trapped air bubbles. 8. Check Diluent syringe for trapped air bubbles. 9. If trapped air bubbles are found, Go to tab [MAINTENANCE], click button [PRIME (ON PAGE 63) / CLEAN] and perform the [Prime Diluent] function. Air filter replacement (ESRI) (179) 1. Pull both tube connectors out of the blue filter. 2. Replace with new blue filter 3. Reconnect the tube connectors on the filter Auto Compact User Manual Version 6.62 MRN-071-EN Page 333 Work instruction StaRRsed Auto-Compact Work instruction Number 198 Page 1 of 18 Purpose: Maintenance level 2 Safety: Bio Hazard area Instrument: Auto Compact Revision: Draft, October 2001 Disassemble the fill-nozzle: (202) 1. Turn the holder to the right. 2. The fill-nozzle can now be removed. 3. Disconnect the silicon tube from the fill nozzle. Clean fill-nozzle: (202) The use of a toothbrush and detergent is recommended. 1. Carefully scrub the fill nozzle inner part. 2. Use a tissue to dry the fill nozzle. Page 334 Auto Compact User Manual Version 6.62 MRN-071-EN Work instruction StaRRsed Auto-Compact Disassemble fill nozzle holder: (203) 1. Turn the holder to the right. 2. The holder can now be removed Replace O-ring: (203) 1. Remove the O-ring. (QWLV050004) 1. Install new O-ring. (QWLV050004) Auto Compact User Manual Version 6.62 MRN-071-EN Page 335 Work instruction StaRRsed Auto-Compact Assemble fill nozzle holder: (203) Push the plastic top part down against the spring pressure. 1. Turn the plastic top part anti clockwise until you hear or feel a click. 2. Turn the plastic top part clockwise for 1.5 turns. Assemble fill-nozzle: (202) 1. Connect the silicon tube to the fill nozzle. 2. Put the fill nozzle into the holder. 3. Push the fill nozzle upwards and turn the holder to the left. Cleaning the liquid separator (169-1) 1. To remove the liquid separator from the Compact. Open the left cover and remove the waste container. The liquid separator is now visible. Remove the liquid separator. 1. 2. 3. 4. 5. 6. Lift the stainless steel vacuum tube. Pull the liquid separator towards the front of the Compact. Disconnect the silicon tube from the bottom tube connection. Remove the bacterial filter. Open the liquid separator by pulling off the top section. Clean the internal parts of the separator with disinfectant. Cleaning liquid separator (196-1) 1. 2. 3. 4. Remove Hepa filter and disassemble the separator. Clean all parts with hot water and a brush. Use some acid free vaseline on the screw-thread of the glass jar. Assemble the separator and replace Hepa filter. Replace the liquid separator (169-3) 1. Replace the top section. A little silicon grease on the rim of separator will make the assembling and adjustment easier 2. If applicable replace the bacterial HEPA filter (For Maintenance Level 4 and Level 5 replace Hepa filter QWLV040002) 3. Re-connect the silicon tube to the bottom tube connector. 4. Lift the left cover. 5. Replace the liquid separator sliding it over the support. Page 336 Auto Compact User Manual Version 6.62 MRN-071-EN Work instruction StaRRsed Auto-Compact 6. Lift stainless steel vacuum tube up and push the liquid separator towards the rear. 7. Release the stainless steel vacuum tube. 8. Replace the waste container and close the left cover. New rinse pump tube assembly ESRI090902 (162-1). Open left cover. New tube replacement (162-2) 1. Pulls pump tube slightly downwards and at the same time towards the front of the StaRRsed unit to release the tube out of the pump plate holder. 2. Remove the old tube from the peristaltic pump rotor. 3. Disconnect the tubing at both ends of the tube connectors 4. Connect new tubing to both ends of the connectors. 5. Place one end of the tube in the pump plate holder. 6. Pull the new tube over the peristaltic pump rotor. 7. Pulls pump tube slightly downwards and at the same time towards the back of the StaRRsed unit. New saline pump tube assembly ESRI090903 (163-1) Open left Cover. New tube replacement (162-2) 1. Pulls pump tube slightly downwards and at the same time towards the front of the StaRRsed unit to release the tube out of the pump plate holder. 2. Remove the old tube from the peristaltic pump rotor. Auto Compact User Manual Version 6.62 MRN-071-EN Page 337 Work instruction StaRRsed Auto-Compact 3. 4. 5. 6. 7. Disconnect the tubing at both ends of the tube connectors Connect new tubing to both ends of the connectors. Place one end of the tube in the pump plate holder. Pull the new tube over the peristaltic pump rotor. Pulls pump tube slightly downwards and at the same time towards the back of the StaRRsed unit. Cleaning agent preparation Auto Compact: Fill and clean: (192-1) 1. Fill the clean adapter up with hot de-ionised water till the first mark in the adapter. (180 ml) 2. Add the cleaning agent (QRR010905) to the adapter till the second marker in the adapter. (18 ml) 3. Place the two caps on the adapter and mix well. 4. Insert the adapter onto the in-pool selection. Page 338 Auto Compact User Manual Version 6.62 MRN-071-EN Work instruction StaRRsed Auto-Compact Start fill and clean procedure: Put the adapter in the Input-pool and select MAINTENANCE tab and PRIME/CLEAN the FILL AND CLEAN key. The adapter will be transported to the needle piercing position by the gripper. The needle goes down and the fill and clean process is started. 1. When all the pipettes are filled the needle goes back to the home position and the adapter is moved to the release position and will be released to the End-pool. Note: Each pipette on the pipette belt will be filled with cleaning agent, after one hour the first pipette is washed and dried. Fill and clean takes about 1 ½ hours to complete. Vacuum pressure check • Go to tab MAINTENANCE -> CHECK SENSOR. Select CHECK FLOW SENSOR box. Compact InteRRliner version Flow: 0925-0980-1020 Abs: 0340- 0360-0380 If the flow is not in range there might be a blockage in the vacuum flow line to the flow sensor. Fill Stop sensor check. • Go to tab MAINTENANCE -> CHECK SENSOR. Select CHECK FILL SENSOR box. Filling stop sensor FS 90..140..165 Diluter Start sensor check. • Go to tab MAINTENANCE -> CHECK SENSOR. Select DILUTOR START SENSOR box. Diluter start sensor 400-700. Measure sensor. • Go to tab MAINTENANCE -> CHECK SENSOR. Select CHECK MEASURE SENSOR box. Measure sensor MS 40..50..60. Temperature sensor. Auto Compact User Manual Version 6.62 MRN-071-EN Page 339 Work instruction StaRRsed Auto-Compact • Go to tab MAINTENANCE -> CHECK SENSOR. Select CHECK TEMPERATURE SENSOR box. Temperature sensor TS [Room temperature]. Diluent flow sensor check • Go to tab MAINTENANCE -> CHECK SENSOR. Select CHECK DILUENT FLOW SENSOR box. Press test. When test is finished, signal Down and signal Up must be green. Separator check. Go to tab MAINTENANCE -> CHECK SENSOR. Select CHECK SEPARATOR SENSOR box. Separator sensor <200 600 >700 . Waste Cassette (166-1) 1. Open the left cover and remove the waste container. The liquid separator is now visible. 2. Lift the stainless steel vacuum tube. 3. Pull the liquid separator towards the front of the Compact. 4. Remove the bacterial filter. 5. Fill waste separator with 100ml disinfectant or 100 ml water with 2% bleach. 6. Replace the bacterial filter. 7. Insert the liquid separator sliding it over the support shelf. 8. Lift stainless steel vacuum tube up and push the liquid separator towards the rear. 9. Release the stainless steel vacuum tube. 10. Lift the left cover and replace the waste container. Page 340 Auto Compact User Manual Version 6.62 MRN-071-EN Work instruction StaRRsed Auto-Compact Waste Cassette (166-2) 1. Disconnect the two tubes from the waste pump cassette. 2. Press levers (at three o'clock and nine o'clock positions) and pull at the same time. 3. Clean peristaltic pump motor shaft using a tissue soaked in alcohol. 4. Remove the old blotting washer ESRI090026 5. Place the new blotting washer ESRI090026. 6. Insert new waste pump cassette ESRI090921 until it clicks into place. 7. Connect the two tubes to new waste pump cassette. Replace the pinch valve tube ESRI010246 (205) 1. Open the left cover. 2. Pull the tube out the pinch vale. 3. Disconnect the silicon tube from the bottom connector and the top connector. 4. Remove the tube. 5. Connect the silicon tube to the bottom connector and the top connector. 6. Push the tube in the pinch vale. 7. Close the left cover. Prepare disinfectant: (if not already prepared) (180). Add 10 ml bleach (sodium hypochlorite) to 190 ml de-ionized water. (5% solution) This disinfectant is for cleaning of all external parts that are exposed to blood. 1. Wipe outer surface and stainless steel plate below the pipettes. 2. Go to tab [MAINTENANCE] and perform the [End-of-day wash] procedure function. (when Fill & Clean is used End-of-day wash is not required) 3. Check system for leakage. 4. Inspect the peristaltic pump tubes and connections for leaks. Auto Compact User Manual Version 6.62 MRN-071-EN Page 341 Work instruction StaRRsed Auto-Compact 5. Check that liquid does not run back into the supply bottles after the pumps have stopped. 6. Inspect sample needle condition. If necessary replace the inner and/or the outer needles. 7. Check tubing from the syringe for trapped air bubbles. 8. Check Diluent syringe for trapped air bubbles. 9. If trapped air bubbles are found, Go to tab [MAINTENANCE], click button [PRIME (ON PAGE 63) / CLEAN] and perform the [Prime Diluent] function. Air filter replacement (ESRI) (179) 1. Pull both tube connectors out of the blue filter. 2. Replace with new blue filter 3. Reconnect the tube connectors on the filter 1. Take the syringe from the diluter assembly. 2. Pull the plunger out of the syringe. 3. Cut the Teflon tip of the plunger with a sharp knife. Be careful not to damage the metal plunger. 4. Replace the O-ring and then the tip. 5. Replace the old tip for the new tip assembly. (From repair set QWLV030902) 6. Moisten the tip with water to ease the tip back into the glass syringe barrel. 1. PRIME DILUENT 2. Repeat above step until there are no air bubbles in the whole diluent system. Check your dilution settings: (188) 1. 2. 3. 4. 5. 6. Go to tab SETTINGS> DILUTER SETTINGS and select DISPLAY DILUTION OFF Run 10 samples through the instrument and make a note of the dilution rate. Calculate the mean of the 10 samples. Make adjustment if necessary in SETTINGS> DILUTEr and adjust the Dilution adjustment Go to tab SETTINGS> DILUTER SETTINGS and select Display dilution ON Page 342 Auto Compact User Manual Version 6.62 MRN-071-EN Work instruction StaRRsed Auto-Compact 15.1. WI-207 Sample probe Auto Compact Work instruction Number 207 Page 1 of 1 Purpose: Sample probe or outer needle replacement Safety: Bio Hazard area Instrument: Auto Compact Revision: Draft, October 2008 Sample probe or outer needle replacement: 1. To replace the sample probe and or outer needle for the Auto Compact remove the top cover. Needle exchange: 1. Unscrew sample probe manually. 2. Pull the sample probe, complete with outer needle, towards the front edge of the Compact. The outer needle must be supported to protect it from falling. 3. Slide the new sample probe into the (new) outer needle. 4. Install (new) sample probe ESRI050909 and make sure the Sample probe has a (new) O-ring QWLV05003 together with the (new) outer needle ESRI050901, 5. Tighten the sample probe. Do not over-tighten the sample probe in the T-piece / Y-piece or it will crack or strip the threading inside the block. 6. Replace the correct tubes on the outer needle. Replace top cover on to the Auto Compact. Auto Compact User Manual Version 6.62 MRN-071-EN Page 343 Glossary of Terms 16.1.1.1.4. 16. GLOSSARY OF TERMS B 16.1.1.1.1. Bidirectional ESR is short for Erythrocyte Sedimentation Rate. It is the amount of sedimentation (setting) of erythrocytes (red blood cells) in a blood column during a specified time. Bidirectional communication means that there is two-way communication from the StaRRsed Auto-Compact to the HOST (sample requests and results) and from the HOST to the StaRRsed Auto-Compact (confirmation or denial of sample requests). H C 16.1.1.1.6. 16.1.1.1.2. Citrate mode Citrate mode is used for pre-diluted samples collected in tubes with sodium citrate anticoagulant-diluent. The samples are not diluted on the StaRRsed Auto-Compact during aspiration. The concentration of sodium citrate within the diluent solution in the tube should be 3.2%. This is not to be confused with the required dilution rate of blood and diluent. For example, in a citrate tube with a total draw volume of 1.6 ml (= 5 volumes), the amount of pre-filled diluent must be 0.32 ml (= 1 volume). If this information is not provided by the tube manufacturer, it should be checked by the customer. E 16.1.1.1.3. EDTA mode EDTA mode is used for undiluted samples collected in tubes with EDTA anticoagulant. The samples are automatically diluted on the StaRRsed Auto-Compact during aspiration. The usual amount of EDTA in sample tubes is 1.8 mg per 1 ml blood. 1 ml of blood weighs ca. 1060 mg and the concentration of EDTA is therefore 0.17% and well within the requirements for the EDTA mode on this instrument. Auto Compact User Manual Version 6.62 MRN-071-EN ESR 16.1.1.1.5. Hazy A sedimentation is reported to be "hazy", when the boundary between blood plasma and erythrocytes can not be defined clearly. Host In this manual, the term HOST is used to indicate the computer system and associated software (LIMS) that provides the sample management for the laboratory. I 16.1.1.1.7. IVD IVD is short for In Vitro Diagnostic. This kind of diagnostic is performed on biological samples in a test tube, or more generally in a controlled environment outside a living organism. In vitro means in glass in Latin. M 16.1.1.1.8. MRN MRN is short for Master Registration Number. It is used as an identification number for any manual for Mechatronics products. T 16.1.1.1.9. Temperature correction The sedimentation of blood cells is a temperature dependent process. To achieve comparable results, temperature correction should always be used. The ESR results are then corrected to the value they would have been at the standard temperature of 18.3°C. Page 345 Glossary of Terms U 16.1.1.1.10. Unidirectional Unidirectional communication means that there is only one-way communication from the StaRRsed Auto-Compact to the HOST. Only sample results and result related messages are send. W 16.1.1.1.11. WI WI is short for Work Instruction and is used with an index number for a range of work instructions. Page 346 Auto Compact User Manual Version 6.62 MRN-071-EN Index 17. INDEX 3 30 Minute method • 131, 133, 135, 149, 193, 195 6 60 Minute method • 131, 135, 193, 195 A Accessory kit • 22 Actuator • 115 Advanced • 96, 117 Air bubbles • 140, 167 All pumps OFF • 111 Analyser • 139 Analyser ERROR • 139 Analyzers Error code messages • 132, 136 Appendix - 30 minutes reporting • 195 Appendix - 60 minutes reporting • 193 Appendix - Article reference list Auto Compact • 22, 190 Appendix - Cable connection diagram • 191 Appendix - Compact system messages • 200 Appendix - Configuration barcode readers • 204 Appendix - Default settings Auto Compact • 197 Appendix - Error list Auto Compact • 182, 184, 185, 206 Appendix - Maintenance schedule • 217 Appendix - PC connections for Auto Compact • 205 Appendix - Protocol Compact bi-directional • 129, 251 Appendix - Protocol MECHATRONICS-01 bidirectional • 129, 237 Appendix - Protocol MECHATRONICS-02 unidirectional • 129, 245 Appendix - Protocol Opus bi-directional • 129, 255 Appendix - Protocol Sysmex SE-9000 unidireectional • 129, 273 Appendix - Sedmatic 100 string format • 129, 229 Appendix - Sedmatic 15 string format • 129, 233 Appendix - String format for StaRRsed • 129, 221 Auto Compact User Manual Version 6.62 MRN-071-EN Appendix - String format for StaRRsed (V14) • 129, 225 Appendix - String format Vesmatic • 129, 235 Appendix - Sysmex R-3500 Protocol • 129, 261 Appendix - Sysmex R-3500 unidirectional protocol • 129, 265 Appendix - Sysmex SE9000 protocol • 129, 269 Appendix - TDLIMS protocol • 277 Appendix - Tube connection Auto Compact • 192 APPENDIX FOR STARRSED AUTOCOMPACT • 189 Aspect Hazy • 138 AUTO COMPACT PROGRAM • 33 Auto Compact settings • 107, 108, 109 Auto dilution adjust • 93 B Basics of Bio safety • 25 baud rate • 104 Bidirectional • 345 Bubbles on top • 140 C Carousel control • 78, 82, 83, 92, 94 Carousel: • 35 Check list • 123 Check sensors • 62, 67, 68, 70, 95 Check sensors in service mode • 68, 69, 70 Check sensors screen short • 69 Check the mixer • 183, 185 Check the sensors in service mode • 144 Checksum • 221 Citrate mode • 345 Cleaning solution • 121 Close • 75 Communications • 186 Compact connected to • 108 Compact settings • 95, 104 Compact stalls • 157 COMPACT SYSTEM MESSAGES • 141 Contaminated instrument • 174 Control Carousel • 83 Conveyer motor • 96, 97, 99, 100, 103 D Daily • 127, 143 Data backup • 15 DATA SAFETY MANAGEMENT • 149 Page 347 Index De-ionised water • 121, 163 Diluent flow check • 94 Diluent flow sensor • 71 Diluent QRR 010931 • 120 Diluter • 159 Diluter errors • 159 Diluter settings • 78, 82, 92, 94 Diluter start • 71 Dilution adjustment 60 till 140% • 92 Dilution error detection 0 till 25% • 93 Dilution principle • 14 Disinfectant • 163 Disinfectant QRR 010932 • 121 Display error history • 62, 72, 96 Display error history (Service) • 116 Display maintenance history • 62, 73 Display maintenance history (Service) • 96, 115 Display patient results • 40, 43, 44 Display pipette data • 40, 41 Display rack history • 36, 40, 46 Display rack status • 40, 48 Display reagent history • 60 Display Sample history • 40, 42 Document history overview • 3 E E.C. Declaration StaRRsed Auto Compact • 30 EDTA mode • 345 End-of-day-wash options • 77 End-of-day-wash procedure • 67, 127 End-of-day-wash schedule settings • 76 Error messages • 142 ESR • 345 ESR Statistics screens • 41, 49 Explain conveyer • 100 Explain mixer • 98 Explanation of the error messages • 140 F Facts and definitions: • 26 Fill and Clean • 65 Fill and clean procedure • 146 Fill and Clean with cleaning adapter • 65 Fill and Clean without cleaning adapter • 66 Fill nozzle • 181 Fill nozzle does not engage with pipette • 181 Fill nozzle down: • 113 Fill nozzle not at fill position • 181 Fill nozzle not at home position • 181 Page 348 Fill nozzle up • 113 Fill procedure • 125 Fill station: • 35 Fill stop sensor • 71 Fill time-out • 174 Fill-nozzle O-ring replacement • 146 Flow sensor • 71 Flow test absolute • 86 Flow test Fill sensor air • 88 Flow test Fill sensor glass • 89 Flow test flow • 85 Flow test leakage • 87 Flow test potentiometer mean • 84 Flow test start • 90 Flushing liquids • 163 Foam in column (examples 3 & 9) • 167 G General laboratory practices: • 26 General settings • 33, 34, 78, 82, 92, 94 GETTING STARTED • 119 Gripper module • 183, 184 H Hazy • 345 Hazy reports • 173 History analyse • 41, 50 History analyse error • 53 History analyse results high • 51 History analyse warning • 54 History aspect • 52 History sample analyse option • 55 History sample analyse option day • 56 History screen • 33, 34, 40 Host • 345 I INSTALLATION • 23 INSTRUMENT DESCRIPTION • 17 INTRODUCTION • 13 IVD • 345 L Labels and stickers on containers • 31 Language selection • 81 Leaking pipettes • 171 Level 1 maintenance • 143, 148 Level 2 maintenance • 143, 148 Level 3 maintenance • 143, 147 Level 4 maintenance • 143, 145 Limit settings • 78, 82, 92, 94, 119 Auto Compact User Manual Version 6.62 MRN-071-EN Index Liquid level sensor not sensing • 155, 157 Liquid levels • 119 M MAINTENANCE • 143 Maintenance info • 62, 74 Maintenance info overview • 75 Maintenance Schedule example • 143 Maintenance screen • 33, 34, 62 Manual control • 96, 110 Manual input sample ID: • 36 Measure sensor • 71 Measure station: • 35 Medical requirements: • 26 Mixer module • 183, 185 Mixer motor • 96, 97, 98, 99, 100, 103 MRN • 345 N Needle Control • 112 Needle not in top position • 164 Needle system • 164 New rack adapter • 182 New reagent input • 61 New reagent input (cont) • 61 Not reading the barcode • 186 Numerical input • 81 O ON and OFF selection • 80 One air bubble about 5 mm under meniscus (examples 5 & 10) • 168 One air bubble rising in pipette (examples 5 & 8) • 168 Outer needle depth • 109 Outer needle down • 112 Outer needle up • 112 P PC Operation and User Interface • 14 Peristaltic pumps • 153 Piercing error • 182 Pipette information • 38 Pipette looks like zebra crossing (example 2) • 168 Pipette: • 36 Pipettes not dry after washing and drying • 156 Position error • 175 Position motor • 96, 97, 99, 100, 101, 102, 103 Auto Compact User Manual Version 6.62 MRN-071-EN Power failure • 149 Prime / Clean • 62, 63, 309, 310, 324, 333, 342 Prime all units • 64 Prime de-ionized water • 64 Prime Diluent • 64 Prime Disinfectant • 64 Prime Rinse solution • 63 Prime Saline • 63 Printer port • 108 Protocols • 106, 129 Q QUICK START-UP • 123 R Rack unit errors • 183 Rack unit setting • 96 Rack: • 36 Random air bubbles in pipette • 169 Reagents • 179 Reagents alarm • 179 Reagents preparation • 120 Reagents screen • 33, 34, 59 Replace bacterial filters • 146 Report 30 Minute mode • 135 Report 60-Minute mode • 131 REPORTING • 129 Reporting range • 137 Result Printout • 129 Results at limit error • 95 Results at limit errors • 133, 137 Rinse nozzle (wash station) alignment • 172 Rinse nozzle down • 113 Rinse nozzle up • 113 Rinse pump • 111 Rinse pump defective • 154 Rinse solution not primed through the system • 153 Rinse solution QRR 010934 • 120 Rinse solution spilling over the instrument • 153 Rinse-pump tube replacement • 145 RS232 serial output • 149 S S.O.P. for working with bio hazardous materials • 26 Safety warning • 28 Saline dripping in the sample tube adapter • 155 Page 349 Index Saline pump • 111 Saline pump defective • 156 Saline QRR 010933 • 120 Saline-pump tube replacement • 145 Sample information: • 37 Sample mode button: • 36 Sample probe down • 112 Sample probe fails to go down • 165 Sample probe is not washed after aspiration • 155 Sample probe up • 112 Sample screen • 33, 34 Sample screen with keyboard • 37 SAMPLE VOLUME • 13 Search in example history • 109 Sedimentation measurement principle • 15 Select barcode reader • 108 Select rack • 101 Separator • 145 Separator error • 177 Separator sensor • 71 Serial Compact output settings • 104 Service screen • 33, 34, 95 Set as tube 1 position • 101 Set end date • 58 Set new rinse position • 91 Set protocol settings • 105 Set start date • 57 Small air bubbles rising in pipette • 168 Specific laboratory practices and requirements: • 27 Specifications for the RS232 port • 149 STANDARD OPERATING PROCEDURES (S.O.P.) • 25 StaRRsed Incident Report • 29 Status: • 37 Stickers for the onboard reagents bottles • 31 Stickers of the reagents containers • 32 System messages • 141 System time-out <xxxx> • 142 TROUBLE SHOOTING • 151 Tube not in 1 position • 187 Tube sensor does not detect the tube • 186 TURN OFF • 127 U Unidirectional • 346 V Vacuum • 160 Vacuum error • 161 vacuum pressure • 153, 155, 156, 161 Vacuum pump • 110 Vacuum stabilisation problems • 160 Valve control • 114 Valve's • 114 Version information: • 36 W Wash all pipettes • 65 Wash each pipette • 64 Wash only sample pipettes • 64 Wash station: • 35 Waste disposal • 121 Waste pump • 111 Weekly • 143, 144 WI • 346 WI-207 Sample probe Auto Compact • 343 WORK INSTRUCTION STARRSED AUTOCOMPACT • 283 T Technical specifications • 20 Technical specifications contd. • 21 Temperature correction • 345 Temperature sensor • 71 Test barcode reader • 102 Test messages • 142 Test position motor • 101 Test tube sensor • 102 Timing settings • 97, 99, 100, 103 Page 350 Auto Compact User Manual Version 6.62 MRN-071-EN