1
HSAJET CBF4 installation manual
Optional steps:
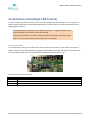
• Connect the cable from the encoder bracket to the appropriate connector labeled "Encoder".
Connector fits one way only. Make sure it is all the way in.
Encoder bracket is mounted with a FEMALE SUBD 9 connector.
•
Connect the cable from the serial connection bracket to the appropriate connector labeled
"RS232 #1" Notice that "RS232#0" is NOT being used for external communication.
RS232 bracket is mounted with a MALE SUBD 9 connector
•
Either remove an additional filler bracket from the PC and install the ENC / RS232 bracket here, OR
mount connectors directly in PC chassis without the bracket.
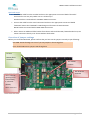
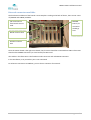
Overview of jumper settings
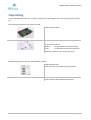
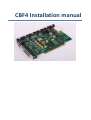
Before you install the CBF board, please confirm that you have set the jumpers correctly as per following:
CAUTION: Serious damage can occur if you set jumpers in the wrong place.
Users should ONLY move jumpers K8 through K13
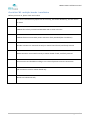
K8..K13
Master/Slave
see below
JP3: NEVER
connect
JP1: 1-2 for HP
(printing or ink
low on OUT2);
2-3 for Xaar
(lowink)
JP6: MUST be
mounted
JP4-7: set to 1-2
Version: 2010-12-16
Page 9 of 22