1
8II$TllH EilNOHË'
RevTech@ s-Speed Transrn ission
Assembly Check List
lnstruotion $
I
!
seæt X Potish 45 Speed 2.94 Bario
æsozx Btack/chrome softail 2.94 Ratio
D
f]
I
sasozX Btack/chrome Dyna 2.94 Ratio
sggogx Black/chrome FXB 2.94
Ratio
D
sesoex potisty'chrome Dyna 2.94 Ratio
Eææsx
Polistr/chrome softail 2.94 Rato
ssg06X potistr/Chrome FXR 2.94 Rario
EægæX
Blacuchrome FLT 2.94 Bario
Copyright @ 1996 Custom Chrom6, lnc.
I
f]
flsaslsx Blacuchrome Dyna3.24 Ratio n
! saslox potistr/chrome FLT 3.24 Ratio f]
flsaotox
!
sest+x
polisry'chrome FLT 2.94 Rat¡o
potistr/chrome Dyna 3.24 Ratio
TRANSMrssroN
sERrALuS
S$IZX
Btacldchrome FLT 3.24 Rario
S$3aX polistr/chrome sofrail 3.24 Rat¡o
5$ít5X Black/Chrome softait3.24 Ratio
SgSslX Glossy Btac* softait
I 2I
5367+
t.
STUD TRANSMTSSTON CASE (tF NECESSARY).
2.
INSTALL COUNTER SHAFT NEEDLE BEARING.
3.
BALL BEARING MAIN DRIVE GEAR AND RETAINER CLIP. (NOTE:
RETAINER CLIP DIRECT¡ON, BEVEL FACtNc OUn.
INSTALL TRANSMISSION OIL SEAL-MAIN SHAFT LEVER SEAL.
4.
5.
6.
INSTALL SHIFT LEVER ASSEMBLY PREVIOUSLY ASSEMBLED.
INSTALL ADJUSTING SCREW SHIFT ABM TO DESTRED DEprH
3.24 Batio
WtrH LocK NUT (FtNGER TtcHT).
7.
INSTALL FIFTH GEAR AND QUAD SEAL, SPACER.
8.
A) ÍNSTALL BALL BEA.RING IN SIDE DOOR WITH RETAINING CLIPS BEVELED
SIDE FACING OUT IF APPLICABLE.
B) INSTALL COUNTEB AND MAIN SHAFT WlrH INNER SPACERS. (NOTE:
SHOULDERED SPACER GOES ON
MAINSHAFT. PLACE OUTER SPACERS AND NYLOCK ON THE TWO
SHAFTS. TIGHTEN TO 45.55 FT. LBS.
9.
C) INSTALL ALL GEATIS, BEARINGS, WASHERS AND SNAP RINGS
ON COUNTER SHAFT AND MAINSHAFI'.
INSTALL SIDE DOOR ASSEMBLY INTO CASE WITH GASKET.
10. INSTALL
5/16INCH SIDE BOLTS TÍGHTEN TO 13.16 FT. LBS., 1/4INCH SIDE BOLTS
TIGHTEN TO 7-9 FT. LBS.
11. PLACE SHIFT FORKS AND SHAFT IN CASE. INSERT
LEFT PLUG UNTIL SHIFT FORK ROD IS FLUSH WITH RIGHT
SIDE OF CASE.
12. A) SHIFT DRUM ASSEMBLY. PLACE SHIFT DRUM RIGHT
SUPPORT AND PLACE OUTER SHIM AND SNAP RING ON
OUTSIDE OF SUPPORT BLOCK. END PLAY MUST BE.OO1"TO.OO4',
B) PLACE LEFT SUPPORT ON SHIFT DRUM. INSTALL SHIFT DRUM
AND SUPPORTS ON TRANSMISSION CASE WITH
WASHER AND BOI.TS. TORQUE TO 7 TO 9 FT. LBS.
t3. PLACE THROW OUT I]EARING IN RIGHT END OF MAINSHAFT,
SIDE COVER GASKET AND OUÏER SIDE COVER ON
TRANSMISSION CASE SIDE DOOR. INSTALL OUTER SIDE
COVER HARDWARE SNUG. (NOTE: HARDWARE W|LL
HAVE TO BE REMOVËD AT LATER DATE TO INSTALL CLUTCH
CABLE
)
INSTALL PRIMARY BEARING INNER RACE ON MAINSHAFL (NOTE:
LEAVE .100" cAP BETWEEN TNNER AND FTFTH
GEAR).
15' INSTALL TOP COVER AND HARDWARE. TIGHTEN TOP BOLIS TO 7-9 FT.
LBS. OF TOROUE.
16. PLACE SPROCKET AND SPROCKET NUT ON FIFTH GEAR. TORQUE NUT
TO
110.120 FT. LBS. THEN TIGHTEN NUT
AN ADDITIONAL 30" TO 40" TURN. PLACE LOCK PLATE OVER
NUT AND SECURE WITH THE TWO LOCK PLATE
SCREWS USING RED LOCKTITE. TORQUE SCREWS TO 50.60 IN.
LBS.
17. AÏTACH CCI WARRANTY STICKER ON BOTTOM OF TRANSMISSION
CASE AND TRAP DOOR.
WABBANTY VOID IF SEAL IS BROKEN.
NOTE: TO PROTECT THE WARRANTY PLEASE SEND IN WARRANTY
cARD wITH IN 30 DAYS oF PuRcHASE.
161(10
Jacqueline court, Morgan H¡ll, cA gsOg7-ssgg
cct# 58-302Xi
Revised 1/19/99
RevTechr¡ü U5 Speed Transmission
For FXE, FXWG and FL Models
ccr #58-301
Elt$rut Eiln[tE'
lnstruct¡ons
BILL OF MATEBIAL
NO
QTY
-----DESC-ã¡Þnd¡r--
IHANSMISSION ASSEÑ
6
3/8'SPIRAL LOCK WASHER
3
4
5
Y8'-24 UNF HEX NUT
5/16' SAE FLAT WASHER
5
o
¿
5/16'SNAP CAPS
6' SPIRAL LOCK WASHEF
5t1€, -18x1 -1 t2' HEX SOCKETHEAD SCREW
5/1
7
I
5i1 6"-1 8x1
v
f0
I
'11
1
-1l4" HEX SOCKETHEAD SCREW
5/16".24 UNF HEX NUT
CLUTCH CABLE EXTENSION 4/5-SPEED TRANS.
sHll-l LINKAGE lìOD 5i16'-24x10-1p' LCNG
Copyright @ 1996 Custom Chrome, lnc.
BILL OF MATERIAL
PART NO.
58-301
NO
OT
93-61 4
IJ
25'184
14
25-177
32-532
ll
)
to
3
25-174
17
32-117
JZ- I ID
18
25-1 83
20
93-61 0
¿t
19-318
22
19
¿J
5
- orsc-nFtloñ-
ÞÃni
r.¡-ö
SPACER WASHER .375'x 8"x.188"
93-616
SPACER 31 2"x.62"x.455'
:R .31 2"x.62"x.580'
ACER .312"x.62"x.770"
STUD 5/16"-24 UNF TO 5/16'-18UNC x 1.3/4'LONG
CHROME BOD END
BUTTON HEAD BOLT 5116'-24x1" CHR. (10 PACK)
NYLOCK NUT 5/16"-24 CHR. 11O PACK)
FUFXWG SHIFI
FXE MID SHIFT ARM - SPECIAL
5/16'-24x1" HEX HEAD BOLT
93-ti08
CL
-ot/
93-609
93-613
- L9:?991
4-626
93.
93-806
25.1 61
13.947
E
IMPORTANTiIOTES: Disconnecl negative battery cable from the frame. There is NO OIL in this transmission. This transmission requires
20 ounces of transmission lube (CCl# 35-055). Fill with transmission lube after installation. Do not use lock nuts on bottom case studs.
_
Use Blue Loctite (CCl # 35-007) on first three threads of all hardware before final assembly.
For relocation of a transmission speedo drive, use speedodrive kit CC¡ #26-Tgl lor a f 6" front wheel or CCI #26.738 for a 2.|" front wheel.
LEFT SIDE
Remove OEM inner and outeaprimary covers and 4-speed transmission if applicable.
Bemove transmission mounting plate from OEM transmission and clean.
Loosely install the new RevTech transmission
to tne mounting plate using .375' LD. spacer washers
and 3/g"
, 3/8" lock washers
1.
2.
3.
e
@
v '- @
'
hexnuts@provided.(Seeittustration5,6orfl
4. Bolt ínner primary cover securely to transmission assembly on bench. Verify shift linkage and sprocket nut clearance. BEFORE PROCEEDING
READ REFERENCE NOTES BELOW.
NOTE # 1 Cast Aluminum lnner Primary (1970 thru 1978). On the transmission side, the lour riser posts around the main shaft seal area
:
must be machined down for sprocket nut lock screw clearance.
(See illustration 1A)
NOTE # 2 : Cast Aluminum lnner Primary (1970 thru 197S). On the front'side of the inner primary, the bearing seal spigot must be
machined down .050" for finger spool clearance. (See illustration 2)
NOTE # 3 : OEM Die Cast lnner Primary (1979 thru 19S4). This primary must be checked for clearance.
NOTE # 4 : CCI lnner Primary (CCl#2S{01 and 28-{l6il}. On the transmission side, the bearing seal spigot must be machined down .08S"
for proper clearance. (See illustration 1B)
lllustration
1
lllustration 2
l
1ßlOfl .laenuelinc Cnrrrt- Moroan H¡ll e 9S03Z-SS9B
of 3
ccl # 5&301i
Bovis€d'lO5/98
5'
Remove the clutch release arm from the transmission assembly. This willallow clearance for
installation. place
the transmission assembly in the motorcycle frame. lnstall moúnting plate to frame hardware (use
Loctite on first
three threads). Tighten hardware to 30-93 ft. lbs. of torque.
_
6.
Place the starter motor in position over the transmissidn. Place rear chain over
sprocket and install master link.
FXWG and
t.
FLshitffiåï'iffiåii'i:::i;i:'i'i'ì;''[."nijiil'jlïlåå"ð:'ffi:Iå'åiilffij:
and two 5116"-24 chrome nuts ($ . lnstall front rod end linkâge asiembly ontoãn¡ft arm
using one
d b-q[ @ and one ùrocr nu1 @ . lnstatt rearrõdend assembty onto provided shift tever
using hex
!,ItkQp . Tighten and secure bolts. (See iltustration
bolt
@
3)
8' f,I| Mid shift linkage installation. Usinq$e existing rod 'end qssembty, insral Íront rodend tinkage assembty onto
snln arm q;l usrng.button head bolt
($
and nylock
shift lever using hex head bolt
L
@) .
Qp
nut
. lnstall
rearshift linkage assembly onto provided
tigtrten and secure Oolts. (See illuskation 4)
lnstallthe inner primary cover as described in the OEM manual.
10.
Tighten transmjssion tonount¡ng plate bolts. Torque lo 21-27 ft. lbs. place .37s" LD.
spacer washer
lock washer @ and 3/8'-2a heinut
@ on transmission to frame stud. Tighten lo 2i -27 ft. lbs,of
@
, Ola"
torque.
11. Reinstall clutch release lever on kansmission. lnstall clutch cable using cluich cable extender
@.
NOTE: This transmissþ_a¡¡9$ty uses a (Supplied) stock tg86 FXSï standard tength cturcù-cabte.
(ccr #13-947
12.
f3.
- OEet #3s607-S7A)
lnstalf starter housing bolt and torque to 10 ft. lbs. lnstall clutch, primary drive
and engine sprocket as per OEM
manual.
lnstall outer primary cover.
14. Adjust clutch as per OEM manual for t97g-19g4 5-speeds.
FXWG
FL
lllustration 3
Transmission shift
lever (Provided)
FXE
lllustration 4
Existing rod end assembly
Transmission shifl
lever (Provided)
2
of3
RIGHT SIDE
15.
FL - FLH Starter motor bracket and battery tray support bracLet mounting procedures. lnstall starter support
bracket onto side cover
of transmission using$o 511îi"'18x1 112'sockethead bofts
, two 5/i6" tock washers
, t*o s¡id" nat washers @ and two
.770" long spacers
. Tighten to 18-20 ft. lbs. of torque. Mount starter stud to starter slpport bracket using OEM bãwasher
and OEM 114'-20 nut. Tighten to 9-'11 ft. lbs. of torque.
-lnstall battery tray support bracket onio side of transmission usino two 5/i6',18x1-1/4" socket head bolts (Ç , 5/16" lock washers (q) , slto" flat washers'@ and two .4S5" spacers
@ . rignt.nio 1¡-22ft.
lbs. of torque. Mount battery kay support bracket to batery tray using existingi-ardware. (See illustration S)
@
(p
@
NOTE: Some models may require two .580" (instead of .455") spacerõ to keetthe srpport bracket parallet to the transmission
side cover.
16.
FXE - FXWG battery lray / starler motor bracket mountrng procedures. lnstall bracket onto side cover of transmission
usinq two 5/16'18x1-1t4" socketheadbolt@),5/l6"tockwashers
@',slro'latwasners@mit*0.¿sl;;;.;;;
22 ft' lbs. of torque. lnstall bracket onto starter stud and battery tray lord mount úing OEM lock washers anlog¡l nuts and
tighten
securely. (See illustration 6 or 7)
NOTE: Some models may require two .580" (instead of .455") spacers to keep the support bracket parallel to the transmission
69.iiõ¡,ã.'lårl.re-
side cover
17.
(!
FXE Brake Pedal lnstallation. lnstall three studs
onto side of cover using Loctite on first three threads. place three .455"
onto studs. Mount bracket and pedaTassembty onto rtror rcin!ìiìä;nrr rro
making sure the brake rod is in the master cylinder piston. The brake rod must be adjùsted for ilee play as per
OEM manuàil
Adjust rear chain if necessary and check all current hardware for correct fit and torque.
Reconnect battery cable. You are now readv to test ride.
18'
19.
öffi;i6" jäffi!,,]ö
@
spacers
lllustration
,
5
FL. FLH
OEM Bracket
Starter stud
lllustration
6
FXE
OEM hardware
''#T
OEM Bracket
Battery mounl
@'@d
lllustration 7
Mounting
Plale
FXWG
Battery mounl
OEM bracket
Starter slud mount
Mqrnting Plate
2" Bolt Actualsize
---l
Revis€d 1O198
3of3
tu$rut Hn[t['
lnstluctions
RevTech@ Electron ic Speedometer
Recalibration Unit
For use with CCI RevTech S-Speed or
6-Speed Gear Sets and Transmissions
ccl #58-318
Copyr¡ght O 1998 Custom Chrome, lnc.
High Performance by Custom Chrome
Box lnstallation:
1. Disconnect the connector between the speed sender and the speedometer gauge.
2. Attach the female connector from the speed sender to the male connector tóm ine speedometer calibrator.
3. Attach the male connector from the speedometer gauge to the female connector from the speedometer calibrator.
4" Route the red wire from the speedometer calibrator to-a switched ignition source. CCI recommends connecting the red
5.
wire to the instrument circuit breakers'orange wire using the supplied scotch lock.
Wire tie the speedometer calibrator unit to a desired bcãtion on the motorcycle for a permanent mount.
Gauge Calibration:
1. Plug the push-button'switch assembly into the receptacle on the speedometer calibrator unit.
Press in and hold the button and turn the ignition on, but DO NOT START THE ENGINE.
Determine what speed you would like to calibrate your speedometer at. This will be your calibration speed.
Hold and/or press the push-button switch (Approx. 20 sec), until the gauge reads yoúr desired calibraiion
speed.
5. Turn off the ignition.
6. Temporarily mount the push-button switch assembly on the bike where it would be easily accessible while riding.
Start the engine.
Pace the bike behind another moving vehicle. When your pace vehicle reaches your calibration speed, press
the pushbutton switch.
9. Your speedometer is now calibrated.
10. When the bike is stopped, turn off the ignition. Unplug and remove the push-button switch assembly and place
into a
safe keeping. The push-button switch assembly is nol needed for normäloperation. Do not remove the speedometer
calibrator unit.
2.
3.
4.
7.
8.
Gauge Re-Galibration:
you remember your calibration speed, follow the Gauge Calibration steps 6 thru 10.
1. lflf you
DO NOT remember your calibration speed, follow Gauge Calibratión steps 1 thru 10.
2.
16100 Jacqueline Court, Morgan Hill, CA gS0g7-SSgg
ccr #s8-318i
Revised 4114100
EIt$0t t¡ttutÍ-
Heauy Duty Kicker Cover Spacers/Hardware
Kit
for use with CCI #ZS.94B
lnstru ctions
specrar spacrng ror lattrry rray and nld-mount
NO. OTY
Os
-ìq-
Z.--'F+
5/f 6'.18 UNC x 1.5" Socket HeaO golt
Heavy Duly Kicker Spacer
O4
Heavy Duly Kicker Washer
@s
5/1
6" Splil Lockwashers
€xlsfs tNKtf
25.94A
F#g,.,,,,åÞ
*\-'\w
6''5r"o';Ð1¿
DESCBIPTION
@s
ô'
o\
[rare conrrors
HEAVV DUTY KICR€R
IKICK STARIER REMOVTO
FOR CLANIIY'
.*'{
.^'-{p
ìr.rr.,2+92t,21926.
or'*r^,
25.94ÃANo z5.9dL
WHERE APPLICAELEI
cct
10100 Jacqucllne Court, Morgan Hilt,
rCA 950J7.559S
#40-404
lnst. Sheet
7lzl.9?
IV
è
wtwtwt¡v¡tv
l\)lJlOl(Ol@
(ol@
\¡
o
o,
\¡
(O
aí
è
ffiMt
=
+
ru (tl 5 (o
(n z. z. @ x a) C)
l¡ lo)l-n loluto tolc,lcnlv¡lø
lx U) c) c) rt- - @ x x lo U) lx x
to t(D l9
o lrlo
q) l(D c
c :+c c c, 9) o) x- o
¡- l€
() o t+
lc) lf¡) tcn
c) t)
c, )< u, c) Fc¡ tq
U'
Ø K
tß
x
tx
x F =.
3
c)
P. ãx
4
-a
lc, o
(Þ = z - @ lo
l=' tã
-u 'li
= U) c) E v) =
!
r0 a
P
x
=
fqtqE
lq)
€
€
c
€
o
tct
q,
D
À, õ
F
Þ
o
Ð
IU' l(D
c)
o)
U)
c)
(n
Ð
o- 5 l-o
cJ
o.
J !
l"ã = lo) lE lS l-' l(D
2\ U' (t
x
o) a,
g¡ D
lc
x
c o) o
=
=
()
fl) =
o_ lo lo lõ r o
e
l3
lgt
q)
Õ
cl
^
= co ^ l9
:ñ
l='
t- v) Þ ^
ja = C) G) (D
(o õ U' lØlC¡.)ro -{ x c) v, U'
6)
l\) f\)
Þ tn -(n
l:D
-c)
N) õ' f
o
lQ 19 lo o
c
5
U)
Þ
e
c)
5
lo
Ð
l(D t(D to
r! c) g) o) c, c)
@ s
U' c)
-È õ
x x^ u,
-l
lo- 3 I 3 Ð
o
(t) É €l€19 €
-c) N)
= c=t o
o 9) J o
o
- q
=
(Jr
5 =
o
c
o
=
c)
()
x
qlq[c>
l(D
b ;{ tql
G)
C)
o,
5
:'
lo)
J
O)
(D
(D
(D
(D
C)
(D
(D
Ê)
(D
(D
(D
(D
(D
(D
(D
(D
(D
qJ
(D
C)
(D
(D
A)
(D
iD
(D
=1 o,
(Dt
g,
(D
Â)
(D
(D
(D
(D
@
o¡lo:19
qt
-l
o
o
g)
JlJl=
U'I @ @l@l(D
(nt x
xtxt=
o
I
CN
c)
c) (D
9)
(D
c)
o
3
(D
Ð
Il**l#
ql l=l
=t -l
Þl
u)l
qt
(Dt
f\)
*l
o
o
I
I
I
5 G) OJ OJ C,)
(o
N) t\) N) t\)
r--
(,)
=
=r
c
E
I
I
SIBiEIE
æ
--¡ o) f\) ('l
lc) lru
l\) t\)
N) }) lr\) f\) l\) f\) N) \) tN) l\) l\)
itl (.¡l (¡
(¡ N)
í'lqt (tl ('| ctr (tl ? tçt ('l (Jr l\)
(¡ CO @ (tl (Jt f\) l\) N) l\)
10 (o (¡ ,l lò f\) N) l\)
O
f\)
Ð
C.) Yt@ (O co æ l\) r\) tÍ\)
\¡ 5 o o À f\) l\) o
_.J
3 æ
\¡
r
t<o
co
._.t
æ
(¡
ñ
00 lco @ @
è
l(JJ
f\) 5
--J
(rl N)
OJ
! t\)
o) (Jr
rÐ
O)
5
(o
(tt (¡
C¡
(O Jì
D
O)
O) o) O)
G) N)
Ct)
(tl (tl
l\) (¡t (tl
o
{
¡
JN
(¡
À
atì
('r
A) N)
(¡ l- Þ
o
.è
è
.Þ
Þ o,
A Þ
JI
@ !
.È
è è oÀ
(, t, (¡)
(o æ .\¡ h)
(¡ 3)
Þ ¡t
D
(¡) (^)
N)
c,
o
c,
F-
--rlr
ln
€
l(D
õ'
O) =lo
lo) loJ lgl+l'"lr ct>
õ'l€
x-l(D (D
t=
(D
=FlË c)
lã l='
¡o
! (Jl
t\
o
=
¡J
-
(CI
gt
lälËHE
lã
l='
fi) ¡o
lÃ- ln
I
-
lØ
l(D
c)
Þ
(9
(tl
(¡)
r
x
lc)
(D
-Tt
À À
c
ã tllo
v, T
-J
D
¡o
o
('r
I
Fl
t,
I
¡
I
(o (0 (o o
t\)
s (¡)
(Jt (o
ÚJ a)
(Jl cù
(o co o
.\t
o
èào æ D
o À
Jl
i)
I
tlc)
;IP
ã
"r)
<=lq
lt
r)t
l
l
it=
¡)lO
I
I
rt
=l
cnl
-
()
l@
I
O)
<t
I
lcD
i
T
IJ
(D
aJ)
U
)
D
Jl
n) )t
I
;lr-l
rl
DI
tot !l
tãt :l
tãt
DI
rl
j'l
I
,,
fDt !
5'l õ
ot
:-
(D
(D
o_
I ^l
)t
-¡ jl
JI
rt
It
s
C)
Ot
=-l
Þt t)
- lr¡, I
t=l DJ
(o o
(^)
(o ^)
_.¡ Þ
o
o
c)
c
(D
{5 lor à
Ètf
.)l
o
t, <l(D
ft 3
äEFF
I
€t stål I
zt
:tt
\t U'I
I q,
Ðl
I
I
I
c)
C)
-l
I
I
@
rl
(o o o
00
À)
Ð
f
o
io o
\¡ l) n
)
'J
o (o (o
,) (¡)
(,
æ @
o cO (O
Þ
N)
(o (o
o
\¡
OJ
æ
--¡ æ
\¡ @
o,
<o (o
úJ (^) !¡)
(o (o
Cr)
S'ã
È9
oru
,È@
õ9
(¡
(¡
itl
N)
Ð (/) N)
3
lrJ (O
(¡
o, t, o) Jrl
O (O t,
\¡
\) t\) :^)
s
@
ã
=
'gååË*Fuãåãäãlí
t, 5
\¡
@
è t\)
o {\¡
(Jt
(¡
e;i
ü8He
@ *.r c¡t
r* (Jl
I
-r- ;ii
äõPüDC?
gEFåö5
(tËgO\rJ
ã+ãqg$
w-tt
HS*q-4õ
'eþÐËg#
1çsî:æ
9HRS@;Ë
i=ääqffi=
rñ#q€=@
¿s'
Þ
(o t¡
q)
;+
+
æ
--
g g.a
tv,
l4ä=q-93€ãåEFíEä
r'D
c,
¡o)
t<-
f\)
c)@
FIF
f) f) rr
ägaæ
4* 6
lu>
I
=
;
É;eõÊeá'
iãâE=R;;
*_ão+4sF=5iö=*Xö å
trÈ q E ãåeã 3 Ðo-H,=
åF ut ia
I
ó
EË=äa;Ëã=ãË.9
=H=ãax5'9'o
=
Jø
ìE
5
3t
DI
(Þt
()-t
+íõã.=ì<\H1=o^-*
c)
öt9
(Dl=
()1
I
Cr)
3
<D
=.
=
O)
O)
=
(D
lo K
lx lã -'rì lo
lz l-{ tc)
Itn l:! g)
I ce) o 9)ç) lU)l=.
lc)
19 i(D
lc) IO)
lix.
lo
c)
¡c
lc) lc) tØ l(D l- l(D
è5 lg)
(D c)
-=
U)
l(D
lã
l=l-o
= g lx
o) 9) = I= :* E'l=
@ =
o,
TT T
t<
t(D Ø o- -o -r]
+
lz
t€
c
lO)
(t, ã@
lq) f¡) +
-l
(D
(D v) (t
Þ
lq)
loo)
c,
i l(D lcD --.| c) lv)
õ Elæ
5' ¡)
=lË
D U' (D
o -E o dlã
\
= lc)
lo ò
I _lJ (D(Dc,
õ
€
ë
5
.:
t-o
9)
lõ
o
Þ
Þ U)
(¡
@ lo
€
5 o
)< _æ l<
g
O)
9lo' Þ=
3 ¡t x
(D
5 o (D
F o)
a
(¡
o
À
Þ )
x
='
(t>
=
=Io o=
Ð.
9lo
U) 9,o = À) oU) e
N) \ @
:) t) :n þ)
;t8
o
(Þ
U)
(DLi
x ct x
(Þ I
3 :t (=
D
D
@l
U'
9J1 (Dt -o_ (t
atc)
è
o
l@
o) l(D (D It
lg) o). (D
E ='
. rc) f\)
o
< lcl) ('l(o t) o
l\)
l(D
=
o
øl
JI
ot (/)lrl-
_(,r
(Crl
4lb
õ l=.
C^)
lv,
e
(¡t
\d
I
ot
5
T
O)
Þ
=
\¡ Þ
\) +
E
=.
-E
=.=
=Ê
ã=
o
n
f
I
ËCE
=-
f
I
É
I
=E¡
cl
(D f\)
(o
a o
6'
õ'
U)
t =
Ð
(D
(=
D
-
+
(¡
æ
(D
I
J
lalÈls
l-
o
(¡) o,
o)
A'
C¡
(?
lx
=
U'
lI
I
õ
l=
¡o
f
ø,
(Dl (Dl
I
I
(D
J--
T
(D
-E
44
(D
(D
(D
CN
(D
(D
C)
=
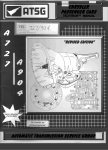
Ghrome RevTech@
4/5'speed Kick starter Kit Assembly
cq #59-290, 59.295
mT,T,HEila0rH
Copyright@ t99A Custom Chrome, lnc.
Main and Counter
shafl gears nol shown
High Perlomance by Custom Chrom
II'PORTANT NOTE: Use Loctiterm (CCl #35'007) onto the first
three threads of all hardware, before the finat assembly.
1' use your proper oEM service manual and remóve the existing sn¡tter
àssemur1, an¿ éãar
sãiiip'lãp
door from the transmission case.
"m;i:lill¡;fl:i:randpositionofeachexistiniçar,trriust*ásrlerãn¿reta¡n¡ngã|iptorleassemble.nemoueallgears,thrustwashers,bearingsandreta
3'
Remove both existing shafts from the trap door. set aside the main
shaft and trap door, these items will be replaced with a new
main shaft (longer) and your new kicker trap d
shart is pr+installed into the kicker trap coor. lnstål
vouiexistini counter srratt with the exiitin! spacer (ueveleoi¡a'e oown¡ into the kicker täp
iff',fdT
:' irf;Jf
Reassemble all gears onto
5'
t
9. lntt
8'
main shaft and counter shaft accordingly using the existing lhrust
washers, bearings and the new supplied
JPvrruu rËtarrrrrrg
retaining rrngs'
rings, He
Refer to back page for
the complete gear set with trap door and gasket into transmiséion caîe
using thã supplied
ll
service manuarror aojustins rhe shit pawr, ir needed Berore continuins,
remove nut
rrom the main r
h.,ã*.r..
l}ifl:ll,iïiliffl$,loj|i.'Jttiåilff|ii,',3ï¡Yrî.J.1;::tt
lnstallkicker'cranki clutchgearassemblyinthefollowiçrde.r.
@
Placeorlf-:l^rlîf
,kick,starrergear
wirhrey €Ð ontotheprotruding
:prlq,@
@,-s¡arterctutch
this assembly
a mt, yagp
and ng!=@;. Apply Loctiteil onto threads
:9c.urq
then securety tighren nut to 22-28 fr.-tbs.
9. slide the clutch push rod assembly (clutchþsh r99 @n¡*' otistinger
and
main shafr.
10' The kicker cover is pre-assembled excgrt for the kíckþdal spring
anä mcþeoat arm. stioeþé -inï.ri
clutch push rod assembly out 2-3 inches then ínstallthe
kicker cover wirh gas
hardware' slide the kick pedal spring
@ onto kicker én.t.n'o .titth tp¡.g
rhe kick peoat arm assembry onro kicker shaft using
the suppried hard
rusingthesuppliedi'.,o*,,.andplacetÈáa,t.np,,ilffi;il''ö.,.oppositesideofmainshaft'Tightenallhar
-
{n
@
@
Ñ;döirtrì¡,.
.rJ:l$$"ö
@
16100 Jacgueline Court, Morgan H¡ll, CA gS0OZ-S5gg
cct
#
5&2
1læ,