1
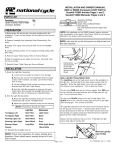
INSTALLATION OF SADDLE BAG TO FRAME
Rest the stainless steel clips attached to the outside of the bag to the lower section of the frame.
Engage the quarter turn fastener to the frame.
Push in and turn clockwise one quarter turn. There
will be a slight spring pressure against the fastener,
turn until it stops. Grab the side of the bag, wiggle
it. The bag should be firmly set. If fastener is
loose, repeat installation of bag to frame.
INSTALLATION INSTRUCTIONS
Harley-Davidson® Sportster ‘94-current
Installation Kit SB403
10-111403
Rest clip on
lower section
of frame
Turn Fastener
clockwise one
quarter turn.
Saddlebag Care: Wash with a mild soap or detergent and warm water. Use a soft cloth. To remove
tar use naphtha or turpentine.
Painting: Lightly sand the surface with 600 grit
sandpaper and spray lacquer, urethane or other
paint.
Replacement Parts: Contact National Cycle, Inc.
Quality Is Reflected In Our Name
Not to exceed 11 lbs (5kg) weight per bag. Do
not exceed 80 mph (129 kph) when saddlebags
are mounted.
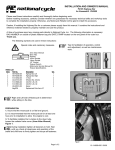
INSTALLATION OF SADDLE BAG TO FRAME
Rest clip on
lower section
of frame
On some motorcycles, additional accessories can
reduce a motorcycle’s stability and safe operating
speed. Never ride a motorcycle that exhibits any
unsafe handling characteristics. Remove all
accessories and cargo at once. Have your dealer
diagnose and solve the problem before remounting your accessories.
02-99
Turn Fastener
clockwise one
quarter turn.
Painting: Lightly sand the surface with 600 grit
sandpaper and spray lacquer, urethane or other
paint.
Not to exceed 11 lbs (5kg) weight per bag. Do
not exceed 80 mph (129 kph) when saddlebags
are mounted.
™
SADDLE BAG
INSTALLATION INSTRUCTIONS
Harley-Davidson® Sportster ‘94-current
Installation Kit SB403
10-111403
Saddlebag Care: Wash with a mild soap or detergent and warm water. Use a soft cloth. To remove
tar use naphtha or turpentine.
Replacement Parts: Contact National Cycle, Inc.
CRUISELINER
NATIONAL CYCLE, INC.
PO Box 158
Maywood, IL 60153-0158 USA
708-343-0400 Fax:708-343-0625
E - M a i l : i n fo @ n a t i o n a l c y c l e. c o m
h t t p : / / w w w. n a t i o n a l c y c l e. c o m
On some motorcycles, additional accessories can
reduce a motorcycle’s stability and safe operating
speed. Never ride a motorcycle that exhibits any
unsafe handling characteristics. Remove all
accessories and cargo at once. Have your dealer
diagnose and solve the problem before remounting your accessories.
Rest the stainless steel clips attached to the outside of the bag to the lower section of the frame.
Engage the quarter turn fastener to the frame.
Push in and turn clockwise one quarter turn. There
will be a slight spring pressure against the fastener,
turn until it stops. Grab the side of the bag, wiggle
it. The bag should be firmly set. If fastener is
loose, repeat installation of bag to frame.
02-99
Quality Is Reflected In Our Name
CRUISELINER
SADDLE BAG
NATIONAL CYCLE, INC.
PO Box 158
Maywood, IL 60153-0158 USA
708-343-0400 Fax:708-343-0625
E - M a i l : i n fo @ n a t i o n a l c y c l e. c o m
h t t p : / / w w w. n a t i o n a l c y c l e. c o m
™
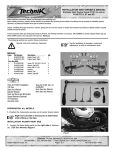
INSTALLATION OF MOUNTING BRACKETS
1. Remove Seat Assembly
2. Disconnect Turn signal Wires, refer to Service Manual.
3. Remove mounting bolts for fender strut covers (Wrench
1/2”)
4. Remove Turn signal, refer to Service Manual.
5. Remove Turn signal mounting bolt, replace with 5/16-18 x 1”
Hex Bolt (3), use original nut (Wrench, 1/2”).
6. Assemble Turn signal to Relocation Bracket (4) using 5/16-24
x 2 3/4” Hex Screws (2) (Wrench, 1/2”).
Someone to help hold the Turn signal Relocation
Bracket into position will be useful in step 7.
7. Assemble Relocation Bracket to Fender Strut (outside of
OEM Backrest Side Support if used
*) using Saddle
Bag Mounting Bracket and supplied screws (5/16-18 x 2 1/4”)
(1) and original equipment locking nuts (Wrench, 1/2”).
8. Tighten Mounting Bracket Screws to 30 ft.lbs.
torque.
(4.5m-kg)
9. Re-route Turn signal Wires under seat (same routing as original,) and reconnect. Verify operation of turnsignals and if necessary correct before riding.
Tools Needed
Wrench, 1/2” (2)
Hex Key. 1/4”
Motorcycle’s service manual
Parts List
Index Description
1
Screws, Hex Socket 5/16-18 x 2 1/4”
2
Screws, Hex, 5/16-24 x 2 3/4”
3
Screws, Hex, 5/16-18 x 1”
4
Brackets, T-S Relocation
5
Mount, Saddle Bag, Right
6
Mount, Saddle Bag, Left
ORIGINAL NUTS
Qty.
4
2
2
2
1
1
STEP 6.
2
4
1
*
5
1
*When using
HarleyDavidson®
detachable backrest replace (1)
with a 3 1/4”
Socket Screw
purchased
through your
local hardware
store.
STEP 7.
INSTALLATION OF MOUNTING BRACKETS
1. Remove Seat Assembly
2. Disconnect Turn signal Wires, refer to Service Manual.
3. Remove mounting bolts for fender strut covers (Wrench
1/2”)
4. Remove Turn signal, refer to Service Manual.
5. Remove Turn signal mounting bolt, replace with 5/16-18 x 1”
Hex Bolt (3), use original nut (Wrench, 1/2”).
6. Assemble Turn signal to Relocation Bracket (4) using 5/16-24
x 2 3/4” Hex Screws (2) (Wrench, 1/2”).
Someone to help hold the Turn signal Relocation
Bracket into position will be useful in step 7.
7. Assemble Relocation Bracket to Fender Strut (outside of
Tools Needed
Wrench, 1/2” (2)
Hex Key. 1/4”
Motorcycle’s service manual
Parts List
Index Description
1
Screws, Hex Socket 5/16-18 x 2 1/4”
Screws, Hex, 5/16-24 x 2 3/4”
2
Screws, Hex, 5/16-18 x 1”
3
4
Brackets, T-S Relocation
5
Mount, Saddle Bag, Right
Mount, Saddle Bag, Left
6
ORIGINAL NUTS
Qty.
4
2
2
2
1
1
3
ORIGINAL NUT
STEP 6.
2
*) using Saddle
Bag Mounting Bracket and supplied screws (5/16-18 x 2 1/4”)
(1) and original equipment locking nuts (Wrench, 1/2”).
8. Tighten Mounting Bracket Screws to 30 ft.lbs.
torque.
(4.5m-kg)
9. Re-route Turn signal Wires under seat (same routing as original,) and reconnect. Verify operation of turnsignals and if necessary correct before riding.
10. Repeat on other side of motorcycle.
ORIGINAL NUT
Purchase from a hardware store 3 1/4” Socket
Screws to use in place of the 2 1/4” Socket Screws
when mounting Cruiseliner™ Bags with the HarleyDavidson® detachable back rest.
10. Repeat on other side of motorcycle.
OEM Backrest Side Support if used
3
* Purchase from a hardware store 3 1/4” Socket
Screws to use in place of the 2 1/4” Socket Screws
when mounting Cruiseliner™ Bags with the HarleyDavidson® detachable back rest.
STEP 7.
4
1
5
1
*When using
HarleyDavidson®
detachable backrest replace (1)
with a 3 1/4”
Socket Screw
purchased
through your
local hardware
store.