1
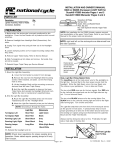
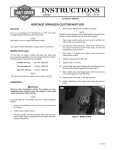
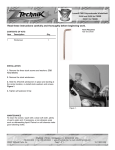
INSTALLATION OF MOUNTING BRACKETS
1. Remove Seat Assembly
2. Disconnect Turn signal Wires, refer to Service Manual.
3. Remove mounting bolts for fender strut covers (Wrench
1/2”)
4. Remove Turn signal, refer to Service Manual.
5. Remove Turn signal mounting bolt, replace with 5/16-18 x 1”
Hex Bolt (3), use original nut (Wrench, 1/2”).
6. Assemble Turn signal to Relocation Bracket (4) using 5/16-24
x 2 3/4” Hex Screws (2) (Wrench, 1/2”).
Someone to help hold the Turn signal Relocation
Bracket into position will be useful in step 7.
7. Assemble Relocation Bracket to Fender Strut (outside of
OEM Backrest Side Support if used
*) using Saddle
Bag Mounting Bracket and supplied screws (5/16-18 x 2 1/4”)
(1) and original equipment locking nuts (Wrench, 1/2”).
8. Tighten Mounting Bracket Screws to 30 ft.lbs.
torque.
(4.5m-kg)
9. Re-route Turn signal Wires under seat (same routing as original,) and reconnect. Verify operation of turnsignals and if necessary correct before riding.
Tools Needed
Wrench, 1/2” (2)
Hex Key. 1/4”
Motorcycle’s service manual
Parts List
Index Description
1
Screws, Hex Socket 5/16-18 x 2 1/4”
2
Screws, Hex, 5/16-24 x 2 3/4”
3
Screws, Hex, 5/16-18 x 1”
4
Brackets, T-S Relocation
5
Mount, Saddle Bag, Right
6
Mount, Saddle Bag, Left
ORIGINAL NUTS
Qty.
4
2
2
2
1
1
STEP 6.
2
4
1
*
5
1
*When using
HarleyDavidson®
detachable backrest replace (1)
with a 3 1/4”
Socket Screw
purchased
through your
local hardware
store.
STEP 7.
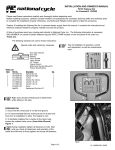
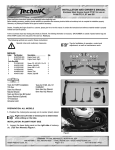
INSTALLATION OF MOUNTING BRACKETS
1. Remove Seat Assembly
2. Disconnect Turn signal Wires, refer to Service Manual.
3. Remove mounting bolts for fender strut covers (Wrench
1/2”)
4. Remove Turn signal, refer to Service Manual.
5. Remove Turn signal mounting bolt, replace with 5/16-18 x 1”
Hex Bolt (3), use original nut (Wrench, 1/2”).
6. Assemble Turn signal to Relocation Bracket (4) using 5/16-24
x 2 3/4” Hex Screws (2) (Wrench, 1/2”).
Someone to help hold the Turn signal Relocation
Bracket into position will be useful in step 7.
7. Assemble Relocation Bracket to Fender Strut (outside of
Tools Needed
Wrench, 1/2” (2)
Hex Key. 1/4”
Motorcycle’s service manual
Parts List
Index Description
1
Screws, Hex Socket 5/16-18 x 2 1/4”
Screws, Hex, 5/16-24 x 2 3/4”
2
Screws, Hex, 5/16-18 x 1”
3
4
Brackets, T-S Relocation
5
Mount, Saddle Bag, Right
Mount, Saddle Bag, Left
6
ORIGINAL NUTS
Qty.
4
2
2
2
1
1
3
ORIGINAL NUT
STEP 6.
2
*) using Saddle
Bag Mounting Bracket and supplied screws (5/16-18 x 2 1/4”)
(1) and original equipment locking nuts (Wrench, 1/2”).
8. Tighten Mounting Bracket Screws to 30 ft.lbs.
torque.
(4.5m-kg)
9. Re-route Turn signal Wires under seat (same routing as original,) and reconnect. Verify operation of turnsignals and if necessary correct before riding.
10. Repeat on other side of motorcycle.
ORIGINAL NUT
Purchase from a hardware store 3 1/4” Socket
Screws to use in place of the 2 1/4” Socket Screws
when mounting Cruiseliner™ Bags with the HarleyDavidson® detachable back rest.
10. Repeat on other side of motorcycle.
OEM Backrest Side Support if used
3
* Purchase from a hardware store 3 1/4” Socket
Screws to use in place of the 2 1/4” Socket Screws
when mounting Cruiseliner™ Bags with the HarleyDavidson® detachable back rest.
STEP 7.
4
1
5
1
*When using
HarleyDavidson®
detachable backrest replace (1)
with a 3 1/4”
Socket Screw
purchased
through your
local hardware
store.