1
SERVICE MANUAL 4-Stroke Engine MPE 850 MARINE This service manual is valid for the following engine variants: –– 408101 I2 846 MAR TC-100 (TC-80) (TC-120) –– 408014 I2 846 MAR TC-120 –– 408090 I2 846 MAR TC-155 407477_SHB Rev 1.2 16.08.2013 en_English Read this service manual thoroughly before operating the engine for the first time. Weber Motor GmbH strives to make continual improvements as part of the ongoing technical development of its products. All documentation is therefore subject to technical modifications. Reprints and translations, in whole or in part, require written permission from Weber Motor GmbH. All rights reserved according to the copyright law. Weber Motor GmbH Zepernicker Chaussee 23-37 16321 Bernau bei Berlin Germany www.weber-motor.com Table of contents Table of contents 1 About this document 6 1.1 Meaning of symbols and signal words . . . . . . . . . . . . . . . . . . . . . . . . . . . . . . . . . . . . . . . . . . . 6 2 Safety 7 2.1 Meaning of safety alert symbol and signal words . . . . . . . . . . . . . . . . . . . . . . . . . . . . . . . . . . . 7 2.2 Important safety messages . . . . . . . . . . . . . . . . . . . . . . . . . . . . . . . . . . . . . . . . . . . . . . . . . . . 8 3 Description 11 3.1 Intended use . . . . . . . . . . . . . . . . . . . . . . . . . . . . . . . . . . . . . . . . . . . . . . . . . . . . . . . . . . . . . . 3.2 Identification . . . . . . . . . . . . . . . . . . . . . . . . . . . . . . . . . . . . . . . . . . . . . . . . . . . . . . . . . . . . . . 3.3 Fuel . . . . . . . . . . . . . . . . . . . . . . . . . . . . . . . . . . . . . . . . . . . . . . . . . . . . . . . . . . . . . . . . . . . . . 3.4 Engine oil . . . . . . . . . . . . . . . . . . . . . . . . . . . . . . . . . . . . . . . . . . . . . . . . . . . . . . . . . . . . . . . . 3.5 Coolant . . . . . . . . . . . . . . . . . . . . . . . . . . . . . . . . . . . . . . . . . . . . . . . . . . . . . . . . . . . . . . . . . . 3.6 Engine components and information . . . . . . . . . . . . . . . . . . . . . . . . . . . . . . . . . . . . . . . . . . . 3.7 Engine fuses and relays . . . . . . . . . . . . . . . . . . . . . . . . . . . . . . . . . . . . . . . . . . . . . . . . . . . . . 3.8 Technical specifications . . . . . . . . . . . . . . . . . . . . . . . . . . . . . . . . . . . . . . . . . . . . . . . . . . . . . 4 Operation 21 4.1 Service intervals . . . . . . . . . . . . . . . . . . . . . . . . . . . . . . . . . . . . . . . . . . . . . . . . . . . . . . . . . . . 4.2 Operation during the break-in period . . . . . . . . . . . . . . . . . . . . . . . . . . . . . . . . . . . . . . . . . . . 4.3 Service before driving . . . . . . . . . . . . . . . . . . . . . . . . . . . . . . . . . . . . . . . . . . . . . . . . . . . . . . . 4.3.1 Inspecting the exhaust and fuel system . . . . . . . . . . . . . . . . . . . . . . . . . . . . . . . . . . . . . . . 4.3.2 Checking coolant level . . . . . . . . . . . . . . . . . . . . . . . . . . . . . . . . . . . . . . . . . . . . . . . . . . . . . 4.3.3 Checking oil level . . . . . . . . . . . . . . . . . . . . . . . . . . . . . . . . . . . . . . . . . . . . . . . . . . . . . . . . . 4.4 Service after driving . . . . . . . . . . . . . . . . . . . . . . . . . . . . . . . . . . . . . . . . . . . . . . . . . . . . . . . . 4.4.1 Flushing sea water cooling circuit . . . . . . . . . . . . . . . . . . . . . . . . . . . . . . . . . . . . . . . . . . . . 4.4.2 Corrosion protection . . . . . . . . . . . . . . . . . . . . . . . . . . . . . . . . . . . . . . . . . . . . . . . . . . . . . . 4.4.3 Transport and storage of the vehicle . . . . . . . . . . . . . . . . . . . . . . . . . . . . . . . . . . . . . . . . . . 5 Special scenarios 5.1 5.2 5.3 5.4 21 23 24 24 25 26 28 28 29 29 30 Engine idle for more than 30 days . . . . . . . . . . . . . . . . . . . . . . . . . . . . . . . . . . . . . . . . . . . . . Operating engine without sea water . . . . . . . . . . . . . . . . . . . . . . . . . . . . . . . . . . . . . . . . . . . . Towing vehicle in water . . . . . . . . . . . . . . . . . . . . . . . . . . . . . . . . . . . . . . . . . . . . . . . . . . . . . . Measures in case of flooded engine . . . . . . . . . . . . . . . . . . . . . . . . . . . . . . . . . . . . . . . . . . . . 6 Malfunctions 11 11 13 13 14 15 19 20 30 30 30 31 32 6.1 Malfunctions table . . . . . . . . . . . . . . . . . . . . . . . . . . . . . . . . . . . . . . . . . . . . . . . . . . . . . . . . . . 32 6.2 Checking engine fuses . . . . . . . . . . . . . . . . . . . . . . . . . . . . . . . . . . . . . . . . . . . . . . . . . . . . . . 35 4 SHB MPE850 Rev 1.2 | 408014 | 408090 | 408101 | Table of contents 7 Dealer and servicing network 7.1 Locating a workshop . . . . . . . . . . . . . . . . . . . . . . . . . . . . . . . . . . . . . . . . . . . . . . . . . . . . . . . . 7.2 Service and spare parts . . . . . . . . . . . . . . . . . . . . . . . . . . . . . . . . . . . . . . . . . . . . . . . . . . . . . 7.3 Repairs . . . . . . . . . . . . . . . . . . . . . . . . . . . . . . . . . . . . . . . . . . . . . . . . . . . . . . . . . . . . . . . . . . 7.4 Warranty . . . . . . . . . . . . . . . . . . . . . . . . . . . . . . . . . . . . . . . . . . . . . . . . . . . . . . . . . . . . . . . . . 8 Service tasks in the workshop 8.1 Safety messages workshop . . . . . . . . . . . . . . . . . . . . . . . . . . . . . . . . . . . . . . . . . . . . . . . . . . 8.2 Tools and accessories . . . . . . . . . . . . . . . . . . . . . . . . . . . . . . . . . . . . . . . . . . . . . . . . . . . . . . 8.2.1 Weber Motor service parts . . . . . . . . . . . . . . . . . . . . . . . . . . . . . . . . . . . . . . . . . . . . . . . . . 8.2.2 Weber Motor diagnostic case . . . . . . . . . . . . . . . . . . . . . . . . . . . . . . . . . . . . . . . . . . . . . . . 8.2.3 Equipment workshop . . . . . . . . . . . . . . . . . . . . . . . . . . . . . . . . . . . . . . . . . . . . . . . . . . . . . . 8.2.4 Supplies . . . . . . . . . . . . . . . . . . . . . . . . . . . . . . . . . . . . . . . . . . . . . . . . . . . . . . . . . . . . . . . . 8.3 Changing engine oil and oil filter . . . . . . . . . . . . . . . . . . . . . . . . . . . . . . . . . . . . . . . . . . . . . . 8.4 Checking sacrificial anode . . . . . . . . . . . . . . . . . . . . . . . . . . . . . . . . . . . . . . . . . . . . . . . . . . . 8.5 Checking and adjusting valve play . . . . . . . . . . . . . . . . . . . . . . . . . . . . . . . . . . . . . . . . . . . . . 8.5.1 Checking valve play . . . . . . . . . . . . . . . . . . . . . . . . . . . . . . . . . . . . . . . . . . . . . . . . . . . . . . . 8.5.2 Adjusting valve play . . . . . . . . . . . . . . . . . . . . . . . . . . . . . . . . . . . . . . . . . . . . . . . . . . . . . . . 8.6 Replacing spark plugs and igition coils . . . . . . . . . . . . . . . . . . . . . . . . . . . . . . . . . . . . . . . . . . 8.7 Checking spark plugs . . . . . . . . . . . . . . . . . . . . . . . . . . . . . . . . . . . . . . . . . . . . . . . . . . . . . . . 8.8 Replacing rubber mount . . . . . . . . . . . . . . . . . . . . . . . . . . . . . . . . . . . . . . . . . . . . . . . . . . . . . 8.9 Adjusting waste gate valve . . . . . . . . . . . . . . . . . . . . . . . . . . . . . . . . . . . . . . . . . . . . . . . . . . . 8.10 Checking flame arrester . . . . . . . . . . . . . . . . . . . . . . . . . . . . . . . . . . . . . . . . . . . . . . . . . . . . 8.11 Changing coolant . . . . . . . . . . . . . . . . . . . . . . . . . . . . . . . . . . . . . . . . . . . . . . . . . . . . . . . . . 8.12 Replacing fuel filter . . . . . . . . . . . . . . . . . . . . . . . . . . . . . . . . . . . . . . . . . . . . . . . . . . . . . . . . 8.13 Storing engine and putting into operation . . . . . . . . . . . . . . . . . . . . . . . . . . . . . . . . . . . . . . . 8.13.1 Preparing engine for storage . . . . . . . . . . . . . . . . . . . . . . . . . . . . . . . . . . . . . . . . . . . . . . . 8.13.2 Putting engine into operation after storage . . . . . . . . . . . . . . . . . . . . . . . . . . . . . . . . . . . . 8.14 Disposal . . . . . . . . . . . . . . . . . . . . . . . . . . . . . . . . . . . . . . . . . . . . . . . . . . . . . . . . . . . . . . . . 9 Confirmation of service tasks 37 37 37 37 37 38 38 40 40 41 42 44 45 52 53 53 57 60 62 65 70 72 74 77 78 78 80 81 82 Appendix84 Engine manufacturer . . . . . . . . . . . . . . . . . . . . . . . . . . . . . . . . . . . . . . . . . . . . . . . . . . . . . . . . . . . . Exhaust type authorization and certification . . . . . . . . . . . . . . . . . . . . . . . . . . . . . . . . . . . . . . . . . . USA EPA EMISSION LIMITED WARRANTY . . . . . . . . . . . . . . . . . . . . . . . . . . . . . . . . . . . . . . . . . Index . . . . . . . . . . . . . . . . . . . . . . . . . . . . . . . . . . . . . . . . . . . . . . . . . . . . . . . . . . . . . . . . . . . . . . . . SHB MPE850 Rev 1.2 | 408014 | 408090 | 408101 | 84 84 85 86 5 1 About this document 1.1 Meaning of symbols and signal words 1 About this document This service manual was designed to help you operate the engine safely and reliably. Observe the following information: –– Read this service manual thoroughly before operating the engine for the first time. –– The service manual is for the engine in your vehicle. –– Keep the service manual in a safe place. –– Make sure that all personnel using the vehicle have access to the service manual. –– If you sell the vehicle, always pass on the service manual to the new owner. –– The latest version of the service manual is available for download in other languages from our web site www.weber-motor.com. –– Always read the vehicle manufacturer‘s documentation. –– Some figures in this service manual are general illustrations and may differ from the actual engine. 1.1 Meaning of symbols and signal words Item NOTICE Information 6 Meaning The signal word NOTICE indicates potential property damage. The signal word Information indicates specific features and recommendations. SHB MPE850 Rev 1.2 | 408014 | 408090 | 408101 | 2 Safety 2.1 Meaning of safety alert symbol and signal words 2 Safety This engine is state-of-the-art and built according to recognized safety-technical regulations. Ignoring the information in this service manual may result in personal injury or property damage. Read and observe the following safety messages carefully before operating the engine for the first time. Observe all generally applicable laws and regulations in addition to the information in this service manual: –– Accident prevention –– Environmental protection –– Handling of hazardous materials –– Personal safety equipment –– Traffic laws 2.1 Meaning of safety alert symbol and signal words Item Meaning The safety alert symbol draws your attention to possible dangers. WARNING The signal word WARNING indicates a potentially dangerous situation that may lead to a serious or fatal injury. CAUTION The signal word CAUTION indicates a potentially dangerous situation that may lead to a minor or moderately severe injury. SHB MPE850 Rev 1.2 | 408014 | 408090 | 408101 | 7 2 Safety 2.2 Important safety messages 2.2 Important safety messages Service tasks In order to keep your engine in a safe operating condition, regular servicing is essential. It is your responsibility to ensure that the engine is serviced correctly. ►► Perform regular inspections and observe the specified service intervals. Service tasks in the workshop All service tasks described in Chapter 8 Service tasks in the workshop require special technical knowledge of the engine. ►► All service tasks described in chapter 8 Service tasks in the workshop must be performed by a workshop authorized by Weber Motor or the vehicle manufacturer. Malfunctions Engine malfunctions pose a safety risk to personnel. ►► Only operate the engine when in perfect condition. ►► All malfunctions must be repaired immediately in a workshop authorized by Weber Motor or the vehicle manufacturer. Spare parts All the components in your engine have been carefully tested and fulfill strict quality and safety requirements. Externally supplied parts cannot fulfill these requirements. ►► Always use original Weber Motor spare parts. Add-on parts and modifications The consequences of attaching add-on parts and making unauthorized modifications to the engine are unknown and pose a safety risk to personnel. ►► Modifications and the attachment of add-on parts is only permitted if approved or instigated by Weber Motor. Hot engine components Engine components become extremely hot during operation. ►► Do not touch any engine components during operation. ►► Switch off the engine and wait until the components have cooled. 8 SHB MPE850 Rev 1.2 | 408014 | 408090 | 408101 | 2 Safety 2.2 Important safety messages Engine power supply Some service tasks require disconnection of the engine from the power supply. Starting the engine inadvertently may endanger the safety of personnel. Read the vehicle manufacturer‘s documentation for more information. ►► Disconnect the engine from the power supply when requested. Engine exhaust gases Engine exhaust gases contain carbon monoxide (CO). Inhalation of carbon monoxide can deprive the body of oxygen and result in organ damage or even death by asphyxiation. ►► When operating the engine in enclosed spaces, use exhaust hoses to direct the engine exhaust gases into the open. Handling of fuel, engine oil and coolant Operating materials pose a health risk. ►► Always read the manufacturer's instructions. ►► Always wash your hands prior to eating, smoking and using the toilet as well as at the end of the working shift when working with operating materials. Operating materials are hazardous to the environment. ►► Never allow operating materials to escape into the groundwater, water courses or sewage system. Always dispose of operating materials according to applicable national regulations. Danger of slipping on spilled fluids. ►► Always use a filler neck or funnel when filling components with operating materials. ►► Always clean up any spilled operating materials immediately. Fuel Fuel is highly flammable. Vapors may ignite and cause an explosion. ►► Do not smoke in the vicinity of the engine and do not allow naked flames or sparks near the engine or the fuel system. ►► Never fill with fuel while the engine is running. ►► Do not start the engine if there is a smell of fuel or you suspect that fuel is leaking. Have a workshop authorized by Weber Motor or the vehicle manufacturer inspect the engine immediately. ►► Fuel on hot surfaces can cause fires. ►► Do not extinguish with water. In the event of a fire, use foam, dry chemical or carbon dioxide extinguishers. SHB MPE850 Rev 1.2 | 408014 | 408090 | 408101 | 9 2 Safety 2.2 Important safety messages California Proposition 65 10 Warning against chemicals/hazardous materials according to the law of the state of California. This product contains chemicals known to the State of California to cause cancer, birth defects, or other reproductive harm. SHB MPE850 Rev 1.2 | 408014 | 408090 | 408101 | 3 Description 3.1 Intended use | 3.2 Identification 3 Description 3.1 Intended use The MPE 850 MARINE has been designed for powering watercrafts. The engine was not designed or intended for any other use. 3.2 Identification Each engine is assigned two identification numbers. Both numbers are printed on a label affixed to the engine. The part number “Part No.:” the engine variant. 2 1 is the number of The serial number “Serial No.:” 3 is an unique number for each individual engine. 1 2 Date: Part No.: 999999 Serial No.: 3 Take the time to enter the part number and serial number in chapter 9 Confirmation of service tasks. Both numbers are required when making queries about your engine. 26.10.2012 999999 9999999999 9999999999 Engine variants I2 846 MAR TC-80, TC-100 and TC-120 The label with the part number and the serial number is located on the expansion tank 4 . The serial number is also engraved on the crankcase 5 . 4 5 The label “Emission Control Information” indicates the certification of the engine according to the legal exhaust emission guidelines. (See in appendix exhaust type authorization and certification.) The label is located on the expansion tank. SHB MPE850 Rev 1.2 | 408014 | 408090 | 408101 | 11 3 Description 3.1 Intended use | 3.2 Identification Engine variant I2 846 MAR TC-155 The label with the part number and the serial number is located on the expansion tank 6 . The serial number is also engraved on the crankcase 7 . The label “Emission Control Information” indicates the certification of the engine according to the legal exhaust emission guidelines. (See in appendix exhaust type authorization and certification.) 6 7 The label is located on the expansion tank. 12 SHB MPE850 Rev 1.2 | 408014 | 408090 | 408101 | 3 Description 3.3 Fuel | 3.4 Engine oil 3.3 Fuel Recommended fuel quality Engine variants I2 846 MAR TC-80, TC-100 and TC-120: Unleaded gasoline (super) with an octane rating of 95 ROZ or 85 MOZ. USA: "Premium 91", unleaded Engine variant I2 846 MAR TC-155: Unleaded gasoline (super) with an octane rating of 98 ROZ or 88 MOZ. USA: „Premium 93“, unleaded Minimum requirement NOTICE! Low octane fuel can cause loss of power and/or increased fuel consumption. Unleaded gasoline with an octane rating of at least 91 ROZ or 82,5 MOZ. USA: At least "Regular 87", unleaded NOTICE! An increased share of ethanol can lead to premature abrasion and poor starting performance of the engine. Permissible share of ethanol Maximum 15 % (E15) 3.4 Engine oil Engine damage due to incorrect engine oil grade or viscosity. An incorrect engine oil grade or viscosity causes excessive wear and moving parts may start to seize up. ►► Always use the recommended engine oil. ►► Do not mix engine oils of different grades or degrees of viscosity. Engine oil 0W 40 completely synthetic, at least API SJ, ACEA A3/B3 Fill quantity Initial filling 3,5 liters [3.7 qt (US)] After changing oil 2,9 liters [3.1 qt (US)] I n f o rma t i on ! Weber Motor recommends you always to keep a supply of engine oil to hand. Consult your local vehicle dealer. SHB MPE850 Rev 1.2 | 408014 | 408090 | 408101 | 13 3 Description 3.5 Coolant 3.5 Coolant Freezing, overheating or corrosion due to incorrect mixing ratio or unauthorized coolant additives. An incorrect mixing ratio reduces the cooling capacity. Combining different coolant additives may trigger a chemical reaction and they may lose their effectiveness. ►► Use the same coolant throughout the year in the mixing ratio specified. ►► When topping up the coolant, do not change the mixing ratio. ►► Always use approved coolant additives when topping up the coolant. Coolant additive Coolant additive based on ethylene glycol, silicate- and nitrite- free, suitable for aluminium engines. Mixing ratio 50 % water + 50 % coolant additive Fill quantity 2,75 liters [2.9 qt (US)] Approved coolant additives BASF Glysantin G 30 Chevron Havoline Extended Life Coolant XLC+B Valvoline Zerex G 30 I n f o rma t i on ! Weber Motor recommends you always to keep an adequate supply of ready mixed coolant to hand. Consult your local vehicle dealer. 14 SHB MPE850 Rev 1.2 | 408014 | 408090 | 408101 | 3 Description 3.6 Engine components and information 3.6 Engine components and information I n f o rma t i on ! If you remove the vehicle connector "Engine-Chassis” the engine will not be disconnected from the battery. The battery is connected separately to the wire harness. The wire harness is not shown in the figures. Engine variants I2 846 MAR TC-80, TC-100 and TC-120 –– Oil filter 2 1 –– Drainage for storage –– Fuse box 1 2 3 3 –– Waste gate valve –– Flame arrester 4 4 5 –– Heat exchanger 6 –– Connection for flushing device sea water cooling circuit 7 5 6 7 –– Sacrificial anode –– Exhaust pipe 8 9 –– Sea water return 10 8 9 10 SHB MPE850 Rev 1.2 | 408014 | 408090 | 408101 | 15 3 Description 3.6 Engine components and information –– 1st cylinder 11 –– 2nd cylinder –– Fuel supply 11 12 12 13 –– Engine rotation direction –– Stub shaft 14 15 13 14 15 –– Engine cover –– Oil tank 16 16 17 –– Expansion tank coolant –– Sea water supply 18 19 –– Vehicle connector "EngineChassis" 20 –– Relay starter 21 17 18 19 20 21 16 SHB MPE850 Rev 1.2 | 408014 | 408090 | 408101 | 3 Description 3.6 Engine components and information Engine variant I2 846 MAR TC-155 –– Oil filter 1 1 –– Drainage for storage –– Waste gate valve –– Flame arrester 2 3 3 4 –– Heat exchanger 2 5 –– Connection for flushing device sea water cooling circuit 6 4 5 6 –– Sacrificial anode –– Exhaust pipe 7 8 –– Sea water return 9 7 8 9 SHB MPE850 Rev 1.2 | 408014 | 408090 | 408101 | 17 3 Description 3.6 Engine components and information –– 1st cylinder 10 –– 2nd cylinder –– Fuel supply –– Fuse Box 10 11 11 12 13 –– Engine rotation direction –– Stub shaft 14 12 13 15 14 15 –– Engine cover –– Oil tank 16 16 17 –– Expansion tank coolant –– Sea water supply 18 17 19 –– Vehicle connector "EngineChassis" 20 18 –– Relay starter 19 21 20 21 18 SHB MPE850 Rev 1.2 | 408014 | 408090 | 408101 | 3 Description 3.7 Engine fuses and relays 3.7 Engine fuses and relays The engine fuses and relays are located in the fuse box on the engine. (See chapter 3.6 Engine components and information.) ►► Remove the cover 1 from the fuse box. 1 Overview configuration fuses and relays 1 Relay “MAIN”, relay main 2 Relay “FUEL“, relay fuel pump 3 15 A fuse “IGK“, terminal 30 key switch 4 15 A fuse “VBD“, terminal 30 battery 5 15 A fuse “SERVICE“, electric circuit for ignition coils, injectors 6 10 A spare fuse “SPARE“ 7 10 A fuse „FUEL“, fuel pump 8 15 A fuse „VBR“, terminal 30 after relay main 9 15 A spare fuse “SPARE“ SHB MPE850 Rev 1.2 | 408014 | 408090 | 408101 | 19 3 Description 3.8 Technical specifications 3.8 Technical specifications Engine variant I2 846 MAR Type TC-80 TC-100 TC-120 TC-155 4-Takt-Otto-Motor, Parallel-Twin mit Ausgleichswelle und oben liegender Nockenwelle (SOHC) Displacement 846 cm³ Number of cylinders 2 Bore x stroke 89 x 68 mm [3.5 x 2.7 in] Compression ratio 9 : 1 Engine power ISO 8178 58,5 kW @ 6600 min-1 [rpm] 74 kW @ 7200 min-1 [rpm] 91 kW @ 7500 min-1 [rpm] 112 kW @ 7500 min-1 [rpm] Engine power SAE J1228 59 kW @ 6600 min-1 [rpm] 75 kW @ 7200 min-1 [rpm] 92 kW @ 7500 min-1 [rpm] 113 kW @ 7500 min-1 [rpm] Engine speed limit 8000 min-1 [rpm] Idle speed 1600 min-1 [rpm] Carburation Sequential multipoint intake manifold injection Lubrication system Cooling system Dry sump Closed coolant circuit and open sea water cooling circuit Engine management system Throttle body Synerject M3D Electronically controlled, dia. = 44 mm [1.73 in] Ignition system Electronically controlled distributorless ignition system with single spark ignition coils Starter system Electric starter Generator, internal Fuses Weight including engine oil and coolant > 450 W @ 4000 min-1 [rpm] Automotive fuses mini blade-type 10 A and 15 A 95 kg [209 lb] 95 kg [209 lb] 95 kg [209 lb] Dimensions L 743 mm [30 in] Dimensions B 539 mm [22 in] Dimensions H 509 mm [20 in] 20 100 kg [221 lb] SHB MPE850 Rev 1.2 | 408014 | 408090 | 408101 | 4 Operation 4.1 Service intervals 4 Operation Familiarize yourself with the vehicle before operating the engine. Read the vehicle manufacturer‘s documentation. 4.1 Service intervals In order to keep your engine in a safe operating condition, regular servicing is essential. Following service tasks you can perform yourself. before driving daily every 10 h1 or after driving Inspecting exhaust and fuel system Checking coolant level Checking oil level ■ ■ ■ Flushing sea water cooling circuit Corrosion protection 1 2 ■2 ■2 ■2 h = hours of operation only after operating in salt water I n f o rma t i on ! The engine management system supports the feature of a service light. Read the vehicle manufacturer‘s documentation for more information. SHB MPE850 Rev 1.2 | 408014 | 408090 | 408101 | 21 4 Operation 4.1 Service intervals The following service tasks require mechanical knowledge and special technical knowledge of this engine. These service tasks must be performed in a workshop authorized by Weber Motor or the vehicle manufacturer. 1st service after 12 h Subsequent service intervals Preparing for storage3 every 60 h every 120 h every 360 h or not later than 25 h or at least once a year Changing engine oil and oil filter ■ ■ Checking and adjusting valve play ■ or at least every 2 years ■ ■ ■ Replacing spark plugs ■ Replacing ignition coils ■ Replacing rubber mount ■ Adjusting waste gate valve ■ Checking flame arrester Flushing sea water cooling circuit Checking sacrificial anode Corrosion protection or at least every 4 years ■ ■ ■ ■ ■ ■ Checking spark plugs Fuel stabilizer Engine internal preservation Inspecting exhaust and fuel system Changing coolant Replacing fuel filter 3 4 ■ after 4 years4 See the vehicle manufacturer‘s documentation. if you do not intend to operate the engine for more than 30 days observe the coolant manufacturer‘s recommendations for the following service intervals 22 SHB MPE850 Rev 1.2 | 408014 | 408090 | 408101 | 4 Operation 4.2 Operation during the break-in period 4.2 Operation during the break-in period The way you operate the engine during the first five hours of operation is a major factor in achieving the required performance and extending the service life of the engine. Observe the following points to ensure that the engine parts break in properly: Avoid engine speeds over 6000 min-1 [rpm] long periods of idle operation long operating periods at low engine speeds long operating periods at the same engine speed long operating periods at full load Good changes in engine speed when the engine is warm, momentary bursts of acceleration SHB MPE850 Rev 1.2 | 408014 | 408090 | 408101 | 23 4 Operation 4.3 Service before driving 4.3 Service before driving 4.3.1 Inspecting the exhaust and fuel system ►► Remove the engine cover 1 . 1 Exhaust system WARNING! Engine exhaust gases contain carbon monoxide (CO). Inhalation of carbon monoxide can deprive the body of oxygen and result in organ damage or even death by asphyxiation. ►► Check if hose clamps, bolts or metal parts of the exhaust system 2 have noticeable corrosion. ►► Check if hoses are mounted properly and if cracks have been formed on hoses. 2 Fuel system WARNING! Fuel is highly flammable. Vapors may ignite and cause an explosion. ►► Check if hose clamps, bolts or metal parts of the fuel system 3 have noticeable corrosion. ►► Check if hoses are mounted properly and if cracks have been formed on hoses. ►► Do not start the engine if there is a smell of fuel or you suspect that fuel is leaking. ►► Attach and press down the engine cover until it is snapped. 24 3 SHB MPE850 Rev 1.2 | 408014 | 408090 | 408101 | 4 Operation 4.3 Service before driving 4.3.2 Checking coolant level Check the coolant level with a cold engine. ►► Check the coolant level in the expansion tank 1 . The coolant level must be between the MIN-marking 3 and the MAX-marking 2 . NOTICE! Danger of overheating caused by a lack of coolant. ►► When coolant level is below the MINmarking, continue with the section Refilling coolant. 1 2 3 NOTICE! Leaks in the hoses due to increased pressure. ►► When the MAX-marking is exceeded, pump out excessive coolant with a suction pump. Refilling coolant CAUTION! Scalding caused by hot steam. Open expansion tank only with a cold engine. ►► Unscrew the expansion tank cover ►► Refill coolant, until the coolant level is between the MIN-marking 6 and the MAX-marking 5 . ►► Close the expansion tank. ►► Allow the engine to run at idle for 10 seconds. ►► Check the coolant level. 4 4 . SHB MPE850 Rev 1.2 | 408014 | 408090 | 408101 | 5 6 25 4 Operation 4.3 Service before driving 4.3.3 Checking oil level I n f o rma t i on ! Your engine uses a dry sump lubrication system. Engine oil is pumped from the engine into the oil tank while the engine is operating. When the engine is switched off, a portion of the engine oil flows from the oil tank slowly back into the engine. Therefore inspect the oil level immediately after switching off the engine. Check the oil level with a warm engine. ►► Warm up the engine. (See the vehicle manufacturer‘s documentation.) 1 CAUTION! Scalding caused by hot engine oil. Wear protective gloves. ►► Unscrew the oil dipstick ►► Wipe the oil dipstick and insert into the oil tank. Do not screw in. ►► Remove the oil dipstick level. 1 2 at the oil tank. and check oil 2 The oil level must be between the MIN-marking 4 and the MAX-marking 3 . NOTICE! Engine damage caused by a lack of engine oil. ►► When oil level is below the MIN-marking, continue with the section Refilling engine oil. NOTICE! Engine damage caused by too much engine oil. ►► When oil level is exceeded the MAXmarking, pump out excessive engine oil with oil suction pump. ►► Screw in the oil dipstick. 26 3 4 SHB MPE850 Rev 1.2 | 408014 | 408090 | 408101 | 4 Operation 4.3 Service before driving Refilling engine oil NOTICE! Engine damage caused by too much engine oil. Refill engine oil in small quantities with repeatedly checking. The difference between the MIN-marking 7 and the MAX-marking 6 is approximately 0,5 liter [0.5 qt (US)] engine oil. ►► Fill engine oil through the opening 5 of the oil dipstick until the oil level is between the MIN-marking and the MAX-marking. ►► Check the oil level. 5 6 7 SHB MPE850 Rev 1.2 | 408014 | 408090 | 408101 | 27 4 Operation 4.4 Service after driving 4.4 Service after driving 4.4.1 Flushing sea water cooling circuit I n f o rma t i on ! Regularly use a cleansing concentrate to flush the sea water cooling circuit. Consult your local vehicle dealer. Damage in exhaust system caused by deposits. If the sea water cooling circuit is not flushed regularly after driving, sediments appear. Particularly within the cooling jacket of exhaust system. ►► Flush the sea water cooling circuit after each drive in salt water. ►► Take the vehicle out of water. A 13 mm [1/2“] connection 1 for the flushing device is installed at the engine. The flushing device is attached at this connection. ►► Connect the flushing device. (See the vehicle manufacturer‘s documentation.) NOTICE! Engine damage due to water in the engine. When the engine is switched off, the water may get into the engine through the exhaust system. First start the engine and then open the water tap. 1 NOTICE! Engine damage caused by overheating. Operate the engine without supply of water only at idle and only for a maximum period of 30 seconds. ►► Start the engine and run the engine at idle. ►► Open the water tap. The sea water cooling circuit will be flushed. Weber Motor recommends to flush the sea water cooling circuit at least for 5 minutes. ►► Close the water tap. ►► Switch off the engine. ►► Remove the flushing device. 28 SHB MPE850 Rev 1.2 | 408014 | 408090 | 408101 | 4 Operation 4.4 Service after driving 4.4.2 Corrosion protection I n f o rma t i on ! For information about suitable products and their using, please consult your local vehicle dealer. If you operate your vehicle in salt water, regularly use a corrosion protection spray. (See chapter 4.1 Service intervals.) 4.4.3 Transport and storage of the vehicle If you intend to transport or place the vehicle in storage, read the following instructions: ►► If you do not intend to operate the engine for 30 days or more, prepare the engine for storage. (See chapter 5.1 Engine idle for more than 30 days.) ►► Transport and store the vehicle on a preferably stable and flat surface. If you do not have any flat surface available, note for storage necessarily the angles in the figure. Do not exceed these angles. ►► Store the vehicle in a clean, dry place with an ambient temperature of -30 – 45 °C [-22 – 113 °F]. SHB MPE850 Rev 1.2 | 408014 | 408090 | 408101 | 29 5 Special scenarios 5.1 Engine idle for more than 30 days | … 5 Special scenarios 5.1 Engine idle for more than 30 days If you do not intend to operate the engine for 30 days or more, prepare the engine for storage. Preparing the engine for storage will prevent the cylinder from corroding and ensure the engine starts again correctly at the end of the storage period. Preparations for storage require special technical knowledge. Preparations must be performed in a workshop authorized by Weber Motor or the portable fire pump manufacturer. 5.2 Operating engine without sea water Engine damage caused by overheating. If you operate the engine without sea water, the optimal engine cooling is no longer provided. Select one of the following procedures. ►► Operate the engine only at idle and only for a maximum period of 30 seconds. ►► Flush the sea water cooling circuit. (See chapter 4.4.1 Flushing sea water cooling circuit.) 5.3 Towing vehicle in water Engine damage due to water in the engine. If you tow the vehicle in water, the water may get into the engine through the exhaust system. ►► If your vehicle has a towing valve or a similar device, close it. Read the vehicle manufacturer‘s documentation for more information. ►► Without a towing valve tow the vehicle only for a short time with maximum speed of 16 km/h [10 mph] [9 knots]. 30 SHB MPE850 Rev 1.2 | 408014 | 408090 | 408101 | 5 Special scenarios 5.4 Measures in case of flooded engine 5.4 Measures in case of flooded engine Engine damage due to water in the engine. If your vehicle has been capsized and/or the engine has been flooded, the water may get into the engine through the exhaust system. It can still happen even if the engine has been partially flooded. The longer you postpone the necessary service tasks, the more severe will be the engine damage. ►► Do not try to start the engine. ►► Remove the water from the engine immediately. ►► Do not waste your time. Contact immediately or at least within 24 hours a workshop authorized by Weber Motor or the vehicle manufacturer. SHB MPE850 Rev 1.2 | 408014 | 408090 | 408101 | 31 6 Malfunctions 6.1 Malfunctions table 6 Malfunctions 6.1 Malfunctions table If you cannot correct a malfunction yourself using the malfunctions table below, contact a workshop authorized by Weber Motor or the vehicle manufacturer immediately. Malfunction Possible cause Remedy The engine warning light (MIL) is flashing. There is an emission-related malfunction. The engine warning light (MIL) is illuminating. There is a malfunction. Contact immediately a workshop authorized by Weber Motor or the vehicle manufacturer. The engine warning light (MIL) does not illuminate after engine start. The engine warning light comes on after starting the engine for a few seconds. If the (MIL) engine warning light is not on, an error has occurred. The temperature warning light is flashing or illuminating. Too high engine temperature. The oil pressure light is on. The oil pressure light comes on after starting the engine until the required oil pressure has built up. If the oil pressure light does not go out, an error has occurred. Do not start the engine. Contact immediately a workshop authorized by Weber Motor or the vehicle manufacturer. The service light is illuminating. There is no malfunction. Service tasks must be performed. The service tasks must be performed in a workshop authorized by Weber Motor or the vehicle manufacturer. 32 SHB MPE850 Rev 1.2 | 408014 | 408090 | 408101 | 6 Malfunctions 6.1 Malfunctions table Malfunction Possible cause Remedy The engine does not crank. The ignition is turned off. Turn on ignition. The power supply of vehicle is disconnected for safety reasons. Depending on equipment of the vehicle there are several options. Read the vehicle manufacturer‘s documentation for more information. For example: Insert the safety lanyard. Put the throttle control in neutral position. Switch on the battery isolator. After start failure the starter can stay disabled for a few seconds. Wait a few seconds and start the engine again. A fuse is defective. Check the engine fuses. (See chapter 6.2 Checking engine fuses.) Check the fuses located in the vehicle. See the vehicle manufacturer's documentation. The battery is discharged or defective. Contact immediately a workshop authorized by Weber Motor or the vehicle manufacturer. The drive train is blocked. Remove the blockage. See the vehicle manufacturer's documentation. A fuse is defective or the service fuse is unplugged. Check the engine fuses or plug in the service fuse. (See chapter 6.2 Checking engine fuses.) Check the fuses located in the vehicle. See the vehicle manufacturer's documentation. Lack of fuel. Fill up fuel. See the vehicle manufacturer's documentation. The battery is discharged or defective. Contact immediately a workshop authorized by Weber Motor or the vehicle manufacturer. The engine cranks, but does not start. SHB MPE850 Rev 1.2 | 408014 | 408090 | 408101 | 33 6 Malfunctions 6.1 Malfunctions table Malfunction Possible cause Remedy The engine stalls and can be started again. Lack of fuel. Fill up fuel. See the vehicle manufacturer's documentation. The engine stalls and cannot be started again. No fuel. Fill up fuel. See the vehicle manufacturer's documentation. The engine does not provide the full power. There is no malfunction. The engine has not reached the operating temperature yet. – There is a malfunction and a speed limitation is activated. Contact immediately a workshop authorized by Weber Motor or the vehicle manufacturer. 34 SHB MPE850 Rev 1.2 | 408014 | 408090 | 408101 | 6 Malfunctions 6.2 Checking engine fuses 6.2 Checking engine fuses Risk of fire caused by incorrect or bridged fuse. The fuse protects the cable from cable fire. A higher amperage rating bypasses this protection. ►► Never use a higher ampere rating. ►► Never bypass a fuse. ►► Disconnect the engine from the power supply. (See the vehicle manufacturer‘s documentation.) The engine fuses and relays are located in the fuse box on the engine. (See chapter 3.6 Engine components and information.) ►► Remove the cover 1 from the fuse box. 1 Two spare fuses 2 provided by Weber Motor can be found in the fuse box. (See chapter 3.7 Engine fuses and relays.) 2 2 ►► Remove the fuse 3 . 3 SHB MPE850 Rev 1.2 | 408014 | 408090 | 408101 | 35 6 Malfunctions 6.2 Checking engine fuses ►► Check the fuse. The wire intact. 4 in the fuse must to be ►► If the wire is damaged, replace the fuse. ►► Insert the fuse ►► Repeat the procedure with other fuses. 4 . 5 5 ►► Insert the cover ►► Connect the power supply to the engine. (See the vehicle manufacturer‘s documentation.) 36 6 into the fuse box. 6 SHB MPE850 Rev 1.2 | 408014 | 408090 | 408101 | 7 Dealer and servicing network 7.1 Locating a workshop | … 7 Dealer and servicing network 7.1 Locating a workshop An extensive global dealer and servicing network is available. The dealer and servicing network provides assistance with any queries relating to the engine. Visit our web site www.weber-motor.com for a list of all authorized Weber Motor workshops. 7.2 Service and spare parts Weber Motor offers a selection of accessories to prepare you for the most important situations. Visit your local vehicle dealer or our web site www.weber-motor.com for more information. 7.3 Repairs Repairs require mechanical knowledge and special technical knowledge of this engine. Weber Motor recommends you have any repairs performed by a workshop authorized by Weber Motor or the vehicle manufacturer. 7.4 Warranty In the case of warranty claims, always consult a workshop authorized by the vehicle manufacturer. If that is not possible, contact your local vehicle dealer. SHB MPE850 Rev 1.2 | 408014 | 408090 | 408101 | 37 8 Service tasks in the workshop 8.1 Safety messages workshop 8 Service tasks in the workshop 8.1 Safety messages workshop Service tasks in the workshop All service tasks described in the following chapter require mechanical knowledge and special technical knowledge of this engine. ►► All service tasks described in chapter 8 Service tasks in the workshop must be performed by a workshop authorized by Weber Motor or the vehicle manufacturer. Service manual Before reading chapter 8 Service tasks in the workshop, you must have read and understood all other information in the service manual. ►► Read through the service manual carefully before performing any service tasks. Pay particular attention to the safety messages. Engine power supply All service tasks require disconnection of the engine from the power supply. Starting the engine inadvertently may endanger the safety of personnel. Read the vehicle manufacturer‘s documentation for more information. ►► Disconnect the engine from the power supply before performing any servicing tasks. ►► Only reconnect the power supply to the engine once all service tasks are complete and all protective equipment is correctly fitted. Workspace Performing the service tasks on the vehicle located in water may endanger the safety of personnel. ►► Take the vehicle out of water to perform any service tasks. Protective equipment Missing protective equipment poses a safety risk to personnel. ►► Attach all protective equipment after completing the service tasks. Tools Unsuitable tools pose a safety risk to personnel. ►► Always use tools listed in chapter 8.2 Tools and accessories. 38 SHB MPE850 Rev 1.2 | 408014 | 408090 | 408101 | 8 Service tasks in the workshop 8.1 Safety messages workshop Spring band clamps Serious eye injuries caused by sudden release of spring band clamps. ►► Wear protective glasses, also people in the nearby working place. ►► Use only suitable tools, as described in Section 8.2 Tools and accessories. ►► Observe the tool manufacturer‘s installation instructions. SHB MPE850 Rev 1.2 | 408014 | 408090 | 408101 | 39 8 Service tasks in the workshop 8.2 Tools and accessories 8.2 Tools and accessories 8.2.1 Weber Motor service parts Weber Motor offers a service case that contains the following service parts. Visit your local vehicle dealer or our web site www.weber-motor.com for more information. Figure 40 Description Figure Description Oil filter Valve adjustment shims in different sizes O-rings for oil filter change Serrated lock washer Spark plug Champion RC7PYCBX Valve adjustment kit Feeler gauge 0,05 – 2 mm Sacrifical anode including seal Sealing kit valve cover Seal for sacrifical anode SHB MPE850 Rev 1.2 | 408014 | 408090 | 408101 | 8 Service tasks in the workshop 8.2 Tools and accessories For the service intervals every 4 years, you also need the following parts: Figure Description Ignition coil Figure Description Rubber mount 8.2.2 Weber Motor diagnostic case Weber Motor offers a diagnostic case that contains the Weber Diagnostic Tool. The Weber Diagnostic Tool is designed for fault diagnostics and service tasks for Weber engines using a Synerject engine management system. Visit your local vehicle dealer or our web site www.weber-motor.com for more information. SHB MPE850 Rev 1.2 | 408014 | 408090 | 408101 | 41 8 Service tasks in the workshop 8.2 Tools and accessories 8.2.3 Equipment workshop In addition to the service case, you will require the following tools and accessories for service tasks. The figures are only examples of suitable tools. All tools and accessories are available from specialist retailers. Figure 42 Description Figure Description Torque wrench 2 – 50 Nm [1 – 37 lbf ft] with extension and insert adapter 6-point socket wrench 7 Reversible ratchet with extension and insert adapter Open-end wrench 10, 15, 17 Hexagon screwdriver 5 Insert open-end wrench 15, 17 Hexagon screwdriver socket 5 Caliper Measuring accuracy 0,05 mm Torx® screwdriver T30 Bar magnet Torx® screwdriver socket T30 Spark plug wrench Wrench size 16 mm [5/8“] Diameter: maximum 22 mm [0.87 in] Hexagon nut-driver 7 Spark plug brush SHB MPE850 Rev 1.2 | 408014 | 408090 | 408101 | 8 Service tasks in the workshop 8.2 Tools and accessories Figure Description Oil suction pump Drain tray Hose clamp pliers for spring band clamps SHB MPE850 Rev 1.2 | 408014 | 408090 | 408101 | 43 8 Service tasks in the workshop 8.2 Tools and accessories 8.2.4 Supplies You will require the following supplies to perform service tasks. Unless otherwise specified, use the products as directed by the manufacturer. All supplies are available from specialist retailers. Supplies Recommended products Cleansing concentrate for flushing the sea water cooling circuit Stopsel, Kalyscom France Salt-Away, Salt-Away Products Inc. USA Anti-Seize assembly paste for lubricating threaded connections Weicon Anti-Seize "High-Tech" ASW 040 P Loctite 8150 Engine internal preservative Liqui Moly, Germany Fuel stabilizer Liqui Moly, Germany Sealing surface cleaner Liqui Moly brake and parts cleaner AIII, Germany Corrosion protection spray Würth corrosion protection spray, Germany The product must be salt water resistant and suitable for different surfaces such as metals, paintet surfaces, plastic and rubber. Lacquer for touching up paintwork defects DUPLI-COLOR acrylic lacquer silver RAL 9006 DUPLI-COLOR acrylic lacquer white RAL 9010 Flame arrester cleaning spray K&N Power Kleen, Netherlands 44 SHB MPE850 Rev 1.2 | 408014 | 408090 | 408101 | 8 Service tasks in the workshop 8.3 Changing engine oil and oil filter 8.3 Changing engine oil and oil filter I n f o rma t i on ! The engine oil will be pumped out in two stages. First as much as possible engine oil will be pumped out from the oil tank. The remaining engine oil will be pumped out with the suction pump in the dry sump. ►► Warm up the engine. (See the vehicle manufacturer‘s documentation.) ►► Remove the engine cover 1 . CAUTION! Scalding caused by hot engine oil. Wear protective gloves. ►► Unscrew the oil dipstick 2 at the oil tank. SHB MPE850 Rev 1.2 | 408014 | 408090 | 408101 | 1 2 45 8 Service tasks in the workshop 8.3 Changing engine oil and oil filter Pumping out engine oil ►► Insert the suction hose of the oil suction pump through the opening in oil dipstick 3 until the hose reaches the oil tank bottom 4 . ►► Pump out the engine oil from oil tank. 3 4 The engine fuses and relays are located in the fuse box on the engine. (See chapter 3.6 Engine components and information.) ►► Remove the cover 5 from the fuse box. 5 Ignition coils and injectors are supplied with electricity through the service fuse. When the service fuse is removed, you can rotate the engine using the starter avoiding starting the engine. ►► 46 Remove the service fuse 6 . 6 SHB MPE850 Rev 1.2 | 408014 | 408090 | 408101 | 8 Service tasks in the workshop 8.3 Changing engine oil and oil filter ►► Unscrew the bolts 7 on the oil tank. 7 7 ►► Lift the oil tank 9 . 8 from the oil tank bracket 8 9 NOTICE! Breakage risk due to work on the oil tank. When removing the hose from the oil tank, you need to move the oil tank. This can brake the oil tank pins. ►► Put the oil tank beside bracket. 10 the oil tank 10 SHB MPE850 Rev 1.2 | 408014 | 408090 | 408101 | 47 8 Service tasks in the workshop 8.3 Changing engine oil and oil filter and . ►► Open the hose clamps ►► Hold the hoses 12 and 14 over a drain tray. Extend hoses if necessary. ►► Actuate the starter. 11 13 The engine cranks and the engine oil will be pumped out of the engine. 11 The starting sequence will be aborted automatically after a few seconds. 12 ►► Wait a moment and repeat the procedure until no more engine oil is being pumped out. ►► Connect the hose ►► Close the hose clamp 18 13 14 with the oil tank. 17 . Tightening torque: 3 Nm +0,5 Nm [2.2 lbf ft +0.4 lbf ft] ►► Connect the hose ►► Close the hose clamp 16 with the oil tank. 15 . 15 16 Tightening torque: 17 5 Nm +0,5 Nm [3.7 lbf ft +0.4 lbf ft] 18 Replacing oil filter Hold the oil filter ►► Unscrew the banjo bolt ►► Remove the oil filter. 19 19 . ►► 20 . 20 48 SHB MPE850 Rev 1.2 | 408014 | 408090 | 408101 | 8 Service tasks in the workshop 8.3 Changing engine oil and oil filter ►► Clean the sealing surface surface cleaner. ►► Replace the oil filter ►► Coat the oil filter seal oil. 21 23 with sealing 21 . 22 lightly with engine 22 23 ►► Replace both o-rings 24 . ►► Coat the o-rings and thread lightly with engine oil. on the banjo bolt 25 24 25 25 ►► Hold the oil filter ►► Screw in the banjo bolt 26 in position. . 27 26 Tightening torque: 14 Nm +2 Nm [10.3 lbf ft +1.5 lbf ft] 27 ►► Insert the service fuse 28 . 28 SHB MPE850 Rev 1.2 | 408014 | 408090 | 408101 | 49 8 Service tasks in the workshop 8.3 Changing engine oil and oil filter ►► Insert the cover into the fuse box. 29 29 ►► Lift the oil tank 30 and insert it into the oil tank bracket 31 . 30 31 ►► Screw in the bolts 32 at the oil tank. Tightening torque: 32 8 Nm +2 Nm [5.9 lbf ft +1.5 lbf ft] 32 50 SHB MPE850 Rev 1.2 | 408014 | 408090 | 408101 | 8 Service tasks in the workshop 8.3 Changing engine oil and oil filter ►► Place the engine cover 33 and press down the engine cover until it is snapped. 33 Filling with engine oil ►► Fill in 2,5 liter [2.6 qt (US)] of new engine oil through the opening 34 of the oil dipstick. ►► Screw in the oil dipstick ►► Check the oil level. (See chapter 4.3.3 Checking oil level.) ►► Touch up the paintwork defects. ►► Clearing service counter for service light. (See the Weber Diagnostic Tool manual.) ►► Update the engine control unit calibration. (See the Weber Diagnostic Tool manual.) ►► Test-drive the vehicle. 35 34 . SHB MPE850 Rev 1.2 | 408014 | 408090 | 408101 | 35 51 8 Service tasks in the workshop 8.4 Checking sacrificial anode 8.4 Checking sacrificial anode I n f o rma t i on ! The water jacket in the exhaust manifold is protected from corrosion by a passive cathodic protection. ►► Unscrew the sacrificial anode 1 . 1 ►► Check the sacrificial anode 2 . At least half of the original size 60 mm [2.4 in], Ø 16 mm [0.6 in] exists. ►► If the sacrificial anode is less than half of the original size, replace the sacrificial anode. ►► Replace the seal ►► Screw in the sacrificial anode 4 2 . 3 . Tightening torque: 41 Nm +9 Nm [30.2 lbf ft +6.6 lbf ft] ►► Touch up the paintwork defects. 3 4 52 SHB MPE850 Rev 1.2 | 408014 | 408090 | 408101 | 8 Service tasks in the workshop 8.5 Checking and adjusting valve play 8.5 Checking and adjusting valve play 8.5.1 Checking valve play ►► Remove the engine cover 1 . 1 Check valve play with a cold engine. WARNING! Danger of serious cuts from the gear on the camshaft when the engine is started. Disconnect the engine from the power supply. ►► Disconnect the wire harness connectors from the ignition coils 2 and sensor camshaft 3 . ►► Unscrew the bolts 4 . ►► Pull the ignition coils 5 out. 2 3 4 5 SHB MPE850 Rev 1.2 | 408014 | 408090 | 408101 | 53 8 Service tasks in the workshop 8.5 Checking and adjusting valve play ►► Unscrew the bolts ►► Remove the valve cover 6 . 7 . 6 7 I n f o rma t i on ! The camshaft is turned using the crankshaft. The vehicle manufacturer has devised a suitable procedure for this. Read the vehicle manufacturer‘s documentation for more information. Always turn the crankshaft in the same direction as the engine rotates. (See chapter 3.6 Engine components and information.) Two rotations of the crankshaft correspond to one rotation of the camshaft. Checking the valve play on the 2nd cylinder ►► Turn the camshaft until the position of the camshaft is as illustrated. (See the vehicle manufacturer‘s documentation.) 8 The camshaft is marked at the 2nd cylinder end only. The marking bar. 8 ends flush with the cross 9 All rocker arms 9 on the cylinder have a certain amount of play. ►► Check the valve play 10 of all valves on the cylinder using a feeler gauge. Required valve play: 0,2 – 0,3 mm ►► 54 If the valve play of one or more valves is not right, continue with chapter 8.5.2 Adjusting valve play. 10 SHB MPE850 Rev 1.2 | 408014 | 408090 | 408101 | 8 Service tasks in the workshop 8.5 Checking and adjusting valve play Checking the valve play on the 1st cylinder ►► Turn the camshaft until the position of the camshaft is as illustrated. (See the vehicle manufacturer‘s documentation.) The camshaft is marked at the 2nd cylinder end only. The inscription 11 is not visible. on the cylinder have a All rocker arms certain amount of play. 12 ►► 11 12 Check the valve play 13 of all valves on the cylinder using a feeler gauge. Required valve play: 0,2 – 0,3 mm ►► ►► If the valve play of one or more valves is not right, continue with chapter 8.5.2 Adjusting valve play. Replace the valve cover seals 14 13 . 14 ►► Clean the sealing surface surface cleaner. 15 with sealing 15 SHB MPE850 Rev 1.2 | 408014 | 408090 | 408101 | 55 8 Service tasks in the workshop 8.5 Checking and adjusting valve play ►► Put the valve cover ►► Apply Anti-Seize assembly paste to all bolts 17 . ►► Screw in the bolts in the sequence as illustrated 18 . 16 on. 16 8 18 Tightening torque: 2 17 4 5 6 3 8 Nm +2 Nm [5.9 lbf ft +1.5 lbf ft] 1 7 ►► Insert the ignition coils ►► Replace the serrated lock washers 20 . Assemble the bolts 21 , washers 22 and serrated lock washers as illustrated. 19 . Tightening torque: 8 Nm +2 Nm [5.9 lbf ft +1.5 lbf ft] 19 20 21 22 ►► Connect the wire harness connectors to the ignition coils 23 and sensor camshaft 24 . ►► Touch up the paintwork defects. ►► Clear the service counter to reset service light. (See the Weber Diagnostic Tool manual.) ►► Update the engine control unit calibration. (See the Weber Diagnostic Tool manual.) ►► Place the engine cover 25 and press down the engine cover until it is snapped. ►► Test-drive the vehicle. 56 23 24 25 SHB MPE850 Rev 1.2 | 408014 | 408090 | 408101 | 8 Service tasks in the workshop 8.5 Checking and adjusting valve play 8.5.2 Adjusting valve play I n f o rma t i on ! The camshaft is turned using the crankshaft. The vehicle manufacturer has devised a suitable procedure for this. Read the vehicle manufacturer‘s documentation for more information. Always turn the crankshaft in the same direction as the engine rotates. (See chapter 3.6 Engine components and information.) Two rotations of the crankshaft correspond to one rotation of the camshaft. Adjusting valve play on the 2nd cylinder WARNING! Danger of serious cuts from the gear on the camshaft when the engine is started. Disconnect the engine from the power supply. ►► Turn the camshaft until the position of the camshaft is as illustrated. (See the vehicle manufacturer‘s documentation.) The camshaft is marked at the 2nd cylinder end only. The marking bar. 1 1 2 ends flush with the cross All rocker arms 2 on the cylinder have a certain amount of play. ►► Continue with the section Replacing valve adjustment shim. Adjusting valve play on the 1st cylinder ►► Turn the camshaft until the position of the camshaft is as illustrated. (See the vehicle manufacturer‘s documentation.) The camshaft is marked at the 2nd cylinder end only. The marking 3 ends flush with the cross bar. Otherwise, no inscription is visible. 3 4 All rocker arms 4 on the cylinder have a certain amount of play. ►► Continue with the section Replacing valve adjustment shim. SHB MPE850 Rev 1.2 | 408014 | 408090 | 408101 | 57 8 Service tasks in the workshop 8.5 Checking and adjusting valve play Replacing valve adjustment shim NOTICE! Engine damage from small components in the engine or cylinder head. Operating the engine when there are small components in the crankcase and cylinder head can result in serious damage and cause the crank drive to seize. ►► Cover the chain channel ►► Hold the valve adjustment tool position. ►► Screw in the bolts 5 6 . 7 in 5 6 7 . Tightening torque: 8 Nm +2 Nm [5.9 lbf ft +1.5 lbf ft] ►► Position the rocker arm pusher rocker arm 9 . 8 on the 8 9 ►► Press down the slide plate 11 using the rocker arm pusher 10 until the pin 12 engages. 10 11 12 58 SHB MPE850 Rev 1.2 | 408014 | 408090 | 408101 | 8 Service tasks in the workshop 8.5 Checking and adjusting valve play ►► Remove the valve adjustment shim using a bar magnet. ►► Measure the valve adjustment shim using a caliper. ►► Insert the new valve adjustment shim. 13 13 in position. ►► Hold the rocker arm pusher ►► Press down the slide plate the rocker arm pusher. ►► Slide the pin ►► Slowly release the rocker arm pusher. 16 14 15 slightly using 14 forward by hand. 15 The valve spring slides the slide plate upwards again. 16 . ►► Unscrew the bolts ►► Remove the valve adjustment tool ►► Remove the cover from the chain channel. 17 18 . 17 NOTICE! Valve breakage due to insufficient valve play. ►► Check the valve play. ►► Continue with chapter 8.5.1 Checking valve play. SHB MPE850 Rev 1.2 | 408014 | 408090 | 408101 | 18 59 8 Service tasks in the workshop 8.6 Replacing spark plugs and igition coils 8.6 Replacing spark plugs and igition coils ►► Remove the engine cover 1 . 1 Remove the spark plugs with a cold engine. ►► Disconnect the wire harness connectors from the ignition coils 2 . ►► Unscrew the bolts 3 . ►► Pull the ignition coils 4 out. 2 3 4 60 SHB MPE850 Rev 1.2 | 408014 | 408090 | 408101 | 8 Service tasks in the workshop 8.6 Replacing spark plugs and igition coils using a spark ►► Unscrew the spark plugs plug wrench. ►► Replace the spark plugs. ►► Screw in the spark plugs using a spark plug wrench. 5 5 Tightening torque: 22 Nm +10 Nm [16.2 lbf ft +7.4 lbf ft] The ignition coils must not be replaced always. (See chapter 4.1 Service intervals.) . ►► Replace the ignition coils ►► Insert the ignition coils. ►► Replace the serrated lock washers 7 . Assemble the bolts 8 , washers 9 and serrated lock washers as illustrated. 6 Tightening torque: 6 7 8 9 8 Nm +2 Nm [5.9 lbf ft +1.5 lbf ft] ►► Connect the wire harness connectors to the ignition coils 10 . ►► Touch up the paintwork defects. ►► Clear the service counter to reset service light. (See the Weber Diagnostic Tool manual.) ►► Update the engine control unit calibration. (See the Weber Diagnostic Tool manual.) ►► Place the engine cover 11 and press down the engine cover until it is snapped. ►► Test-drive the vehicle. SHB MPE850 Rev 1.2 | 408014 | 408090 | 408101 | 10 11 61 8 Service tasks in the workshop 8.7 Checking spark plugs 8.7 Checking spark plugs ►► Remove the engine cover 1 . 1 Remove the spark plugs with a cold engine. ►► Disconnect the wire harness connectors from the ignition coils 2 . ►► Unscrew the bolts 3 . ►► Pull the ignition coils 4 out. 2 3 4 62 SHB MPE850 Rev 1.2 | 408014 | 408090 | 408101 | 8 Service tasks in the workshop 8.7 Checking spark plugs ►► Unscrew the spark plugs plug wrench. 5 using a spark 5 ►► If the electrodes 6 are extremely sooty, clean carefully using a spark plug brush. ►► Check the spark plug gap gauge. 7 using a feeler Required spark plug gap: 0,69 – 0,84 mm [0.028 – 0.032 in] ►► If the spark plug gap is not satisfactory, replace the spark plug. Always replace the spark plugs in pairs. 6 7 ►► Screw in the spark plugs plug wrench. 8 using a spark Tightening torque: 22 Nm +10 Nm [16.2 lbf ft +7.4 lbf ft] SHB MPE850 Rev 1.2 | 408014 | 408090 | 408101 | 8 63 8 Service tasks in the workshop 8.7 Checking spark plugs . ►► Insert the ignition coils ►► Replace the serrated lock washers 10 . Assemble the bolts 11 , washers 12 and serrated lock washers as illustrated. 9 Tightening torque: 8 Nm +2 Nm [5.9 lbf ft +1.5 lbf ft] 9 10 11 12 ►► Connect the wire harness connectors to the ignition coils 13 . ►► Touch up the paintwork defects. ►► Test-drive the vehicle. ►► Place the engine cover 14 and press down the engine cover until it is snapped. ►► Test-drive the vehicle. 64 13 14 SHB MPE850 Rev 1.2 | 408014 | 408090 | 408101 | 8 Service tasks in the workshop 8.8 Replacing rubber mount 8.8 Replacing rubber mount Engine variants I2 846 MAR TC-80, TC-100 and TC-120 1 Remove the rubber mount with a cold engine. ►► Mark 2 the hose and intercooler 1 3 . 2 3 ►► Open the spring band clamps ►► Remove the hose 5 4 . 4 . 5 4 ►► Disconnect the wire harness connector from the throttle body 7 . ►► Open the hose clamp 8 6 . 6 7 8 SHB MPE850 Rev 1.2 | 408014 | 408090 | 408101 | 65 8 Service tasks in the workshop 8.8 Replacing rubber mount ►► Remove the throttle body 9 . 9 . ►► Unscrew the bolts ►► Remove the rubber mount ►► Replace the rubber mount. ►► Hold the rubber mount in position. ►► Screw in the bolts. 10 11 . 10 Tightening torque: 8 Nm +2 Nm [5.9 lbf ft +1.5 lbf ft] 11 ►► Insert the hose clamp 12 . 13 and throttle body 12 13 66 SHB MPE850 Rev 1.2 | 408014 | 408090 | 408101 | 8 Service tasks in the workshop 8.8 Replacing rubber mount ►► Close the hose clamp 14 . Tightening torque: 3 Nm +0,5 Nm [2.2 lbf ft +0.4 lbf ft] 14 ►► Insert the hose 16 . 15 Observe the marking. . ►► Close the spring band clamps ►► Touch up the paintwork defects. ►► Clear the service counter to reset service light. (See the Weber Diagnostic Tool manual.) 15 ►► Update the engine control unit calibration. (See the Weber Diagnostic Tool manual.) ►► Switch on the ignition for a minute. 16 15 The throttle body is calibrated. ►► Test-drive the vehicle. Engine variant I2 846 MAR TC-155 1 Remove the rubber mount with a cold engine. ►► Open the hose clamps ►► Remove the connecting pipe 1 . 2 . 2 1 SHB MPE850 Rev 1.2 | 408014 | 408090 | 408101 | 67 8 Service tasks in the workshop 8.8 Replacing rubber mount ►► Disconnect the wire harness connector from the throttle body 4 . ►► Open the hose clamp 5 3 3 4 . 5 ►► Remove the throttle body 6 . 6 ►► Unscrew the bolts ►► Remove the rubber mount ►► Replace the rubber mount. ►► Hold the rubber mount in position. ►► Screw in the bolts. 7 . 8 . 7 Tightening torque: 8 Nm +2 Nm [5.9 lbf ft +1.5 lbf ft] 8 68 SHB MPE850 Rev 1.2 | 408014 | 408090 | 408101 | 8 Service tasks in the workshop 8.8 Replacing rubber mount ►► Insert the hose clamp 9 . and throttle body 10 9 10 ►► Close the hose clamp 11 . Tightening torque: 3 Nm +0,5 Nm [2.2 lbf ft +0.4 lbf ft] 11 ►► Hold the the connecting pipe ►► Close the hose clamps 12 13 in position. . 12 Tightening torque: 3 Nm +0,5 Nm [2.2 lbf ft +0.4 lbf ft] ►► Touch up the paintwork defects. ►► Clear the service counter to reset service light. (See the Weber Diagnostic Tool manual.) ►► Update the engine control unit calibration. (See the Weber Diagnostic Tool manual.) ►► Switch on the ignition for a minute. 13 12 The throttle body is calibrated. ►► Test-drive the vehicle. SHB MPE850 Rev 1.2 | 408014 | 408090 | 408101 | 69 8 Service tasks in the workshop 8.9 Adjusting waste gate valve 8.9 Adjusting waste gate valve Adjust the waste gate valve with a cold engine. Observe the indicated directions of rotation One nut 4 has a left-hand thread. ►► Hold the threaded rod ►► Open the two nuts rotating. 2 3 4 1 . with a wrench. in direction of 1 2 3 4 ►► Open the spanner nut 5 in the indicated direction of rotation until no longer pretensioning exists 5 70 SHB MPE850 Rev 1.2 | 408014 | 408090 | 408101 | 8 Service tasks in the workshop 8.9 Adjusting waste gate valve ►► Close the spanner nut in the indicated direction of rotation until the following conditions are met. The lever 7 does not move anymore. The thread rod 6 has not moved yet. 6 7 ►► Attach the marking ►► Close the spanner nut with two full turns in the indicated direction of rotation. 8 . 8 in direction of ►► Close the two nuts rotation 9 . ►► Touch up the paintwork defects. ►► Clear the service counter to reset service light. (See the Weber Diagnostic Tool manual.) ►► Update the engine control unit calibration. (See the Weber Diagnostic Tool manual.) 9 ►► Test-drive the vehicle. 10 10 11 11 SHB MPE850 Rev 1.2 | 408014 | 408090 | 408101 | 71 8 Service tasks in the workshop 8.10 Checking flame arrester 8.10 Checking flame arrester ►► Check the flame arrester 1 . The fabric must be visible. ►► When the fabric filter is no longer visible, continue with section Cleaning the flame arrestor. 1 Cleaning flame arrester ►► Open the clamp 3 . The clamp built in by the engine manufacturer in these place is destroyed during removal. After removing the clamp must be replaced by an hose clamp. ►► Remove the hose ►► Open the hose clamp 2 2 3 . 4 . 4 72 SHB MPE850 Rev 1.2 | 408014 | 408090 | 408101 | 8 Service tasks in the workshop 8.10 Checking flame arrester . ►► Remove the flame arrester ►► Clean the flame arrester with cleaning spray according to the manufacturer's instructions. ►► Attach the flame arrester. ►► Close the hose clamp 6 5 5 . Tightening torque: 4,5 Nm +1 Nm [3.3 lbf ft +0.7 lbf ft] 6 ►► Replace the clamp ►► Insert the hose ►► Close the hose clamp. 7 8 . . Tightening torque: 3 Nm +0,5 Nm [2.2 lbf ft +0.4 lbf ft] SHB MPE850 Rev 1.2 | 408014 | 408090 | 408101 | 7 8 73 8 Service tasks in the workshop 8.11 Changing coolant 8.11 Changing coolant Drain the coolant with a cold engine. ►► Unscrew the expansion tank cover 1 . 1 Draining coolant on ►► Put the drain tray under the fitting heat exchanger. ►► Open the hose clamp ►► Remove the hose and keep it over the drain tray. Coolant drains off. 2 3 . 2 3 74 SHB MPE850 Rev 1.2 | 408014 | 408090 | 408101 | 8 Service tasks in the workshop 8.11 Changing coolant 4 Flushing coolant circuit ►► Fill the expansion tank water. with clean fresh 4 Water drains off through the heat exchanger. ►► Repeat the procedure until only clear water drains off through the heat exchanger. ►► Insert the hose. ►► Close the hose clamp 5 . Tightening torque: 5 Nm +0,5 Nm [3.7 lbf ft +0.4 lbf ft] 5 SHB MPE850 Rev 1.2 | 408014 | 408090 | 408101 | 75 8 Service tasks in the workshop 8.11 Changing coolant Filling with coolant ►► Fill coolant to the expansion tank until the MAX-marking 6 . ►► Close the expansion tank. ►► Warm up the engine. (See the vehicle manufacturer‘s documentation.) ►► Check the coolant level. CAUTION! Scalding caused by hot steam. Open expansion tank only with a cold engine. NOTICE! Danger of overheating caused by a lack of coolant. ►► When coolant level is below the MINmarking 7 , wait until the engine has cooled down. ►► Refill coolant, until the coolant level is between the MIN-marking and the MAXmarking. 6 7 NOTICE! Leaks in the hoses due to increased pressure. ►► When the MAX-marking is exceeded, pump out excessive coolant with a suction pump. ►► Touch up the paintwork defects. ►► Clear the service counter to reset service light. (See the Weber Diagnostic Tool manual.) ►► Update the engine control unit calibration. (See the Weber Diagnostic Tool manual.) ►► Test-drive the vehicle. 76 SHB MPE850 Rev 1.2 | 408014 | 408090 | 408101 | 8 Service tasks in the workshop 8.12 Replacing fuel filter 8.12 Replacing fuel filter See the vehicle manufacturer‘s documentation. SHB MPE850 Rev 1.2 | 408014 | 408090 | 408101 | 77 8 Service tasks in the workshop 8.13 Storing engine and putting into operation 8.13 Storing engine and putting into operation 8.13.1 Preparing engine for storage ►► Change the engine oil and oil filter. (See chapter 8.3 Changing engine oil and oil filter.) ►► Flush the sea water cooling circuit using cleansing concentrate. (See chapter 4.4.1 Flushing sea water cooling circuit.) ►► Check the sacrificial anode. (See chapter 8.4 Checking sacrificial anode.) ►► Fill up the fuel tank. Add a fuel stabilizer according to the manufacturer's instructions. ►► Check the spark plugs. (See chapter 8.7 Checking spark plugs.) ►► Spray engine internal preservative into the cylinder through the spark plug bores 1 according to the manufacturer's instructions. 1 Do not start the engine again. ►► Perform a visual inspection. (See chapter 4.3.1 Inspecting the exhaust and fuel system.) ►► Apply corrosion protection according to the manufacturer's instructions. NOTICE! Corrosion damage due to stagnant sea water inside the sea water cooling circuit. If the sea water does not circulate for a long period of time, corrosion can appear in sea water cooling circuit. The open drainage hose at the lowest point of the engine compartment allows sea water to drain off. ►► 78 Pull out the drainage hose hose clip 2 . 3 2 3 from the SHB MPE850 Rev 1.2 | 408014 | 408090 | 408101 | 8 Service tasks in the workshop 8.13 Storing engine and putting into operation ►► Open the hose clamp 4 . 4 ►► Remove the plug ►► Place the hose 6 at the lowest point of the engine compartment. 5 . Do not start the engine again. NOTICE! Water inside the engine due to open drainage hose. ►► 5 6 Inform the user of the vehicle about the measures before the next drive. (See chapter 8.13.2 Putting engine into operation after storage.) SHB MPE850 Rev 1.2 | 408014 | 408090 | 408101 | 79 8 Service tasks in the workshop 8.13 Storing engine and putting into operation 8.13.2 Putting engine into operation after storage ►► Insert the plug 1 . 1 ►► Close the hose clamp 2 . Tightening torque: 3 Nm +0,5 Nm [2.2 lbf ft +0.4 lbf ft] 2 on the hose ►► Mount the drainage hose clip 3 . ►► Turn on the ignition, wait a moment and then turn the ignition off. ►► Repeat the procedure twice. 4 3 4 The fuel system is filled. 80 SHB MPE850 Rev 1.2 | 408014 | 408090 | 408101 | 8 Service tasks in the workshop 8.14 Disposal 8.14 Disposal When disposing of operating materials, replaced parts or the whole engine, always comply with the relevant applicable national laws and guidelines. SHB MPE850 Rev 1.2 | 408014 | 408090 | 408101 | 81 9 Confirmation of service tasks 9 Confirmation of service tasks Have the workshop personnel provide certification confirming that your engine was serviced. You can use the following documents. Engine variant (6-digit) _________________ Serial number (10-digit) _________________ Date: Status hours of operation: Company seal, signature Date: Status hours of operation: Company seal, signature 82 Work carried out: Engine oil and oil filter changed Sacrificial anode checked Valve play checked Spark plugs replaced Rubber mount replaced Waste gate valve adjusted Flame arrester checked Coolant changed Fuel filter replaced Date of initial registration Date: Status hours of operation: _________________ Work carried out: Engine oil and oil filter changed Sacrificial anode checked Valve play checked Spark plugs replaced Rubber mount replaced Waste gate valve adjusted Flame arrester checked Coolant changed Fuel filter replaced ���������������������������������������������������� ���������������������������������������������������� ���������������������������������������������������� ���������������������������������������������������� ���������������������������������������������������� ���������������������������������������������������� ���������������������������������������������������� ���������������������������������������������������� ���������������������������������������������������� Work carried out: Engine oil and oil filter changed Sacrificial anode checked Valve play checked Spark plugs replaced Rubber mount replaced Waste gate valve adjusted Flame arrester checked Coolant changed Fuel filter replaced Company seal, signature Date: Status hours of operation: ���������������������������������������������������� Work carried out: Engine oil and oil filter changed Sacrificial anode checked Valve play checked Spark plugs replaced Rubber mount replaced Waste gate valve adjusted Flame arrester checked Coolant changed Fuel filter replaced ���������������������������������������������������� ���������������������������������������������������� ���������������������������������������������������� ���������������������������������������������������� ���������������������������������������������������� ���������������������������������������������������� ���������������������������������������������������� ���������������������������������������������������� ���������������������������������������������������� Company seal, signature ���������������������������������������������������� SHB MPE850 Rev 1.2 | 408014 | 408090 | 408101 | 9 Confirmation of service tasks Date: Status hours of operation: Company seal, signature Date: Status hours of operation: Company seal, signature Date: Status hours of operation: Company seal, signature Work carried out: Engine oil and oil filter changed Sacrificial anode checked Valve play checked Spark plugs replaced Rubber mount replaced Waste gate valve adjusted Flame arrester checked Coolant changed Fuel filter replaced Date: Status hours of operation: Work carried out: Engine oil and oil filter changed Sacrificial anode checked Valve play checked Spark plugs replaced Rubber mount replaced Waste gate valve adjusted Flame arrester checked Coolant changed Fuel filter replaced ���������������������������������������������������� ���������������������������������������������������� ���������������������������������������������������� ���������������������������������������������������� ���������������������������������������������������� ���������������������������������������������������� ���������������������������������������������������� ���������������������������������������������������� ���������������������������������������������������� Work carried out: Engine oil and oil filter changed Sacrificial anode checked Valve play checked Spark plugs replaced Rubber mount replaced Waste gate valve adjusted Flame arrester checked Coolant changed Fuel filter replaced Company seal, signature Date: Status hours of operation: ���������������������������������������������������� Work carried out: Engine oil and oil filter changed Sacrificial anode checked Valve play checked Spark plugs replaced Rubber mount replaced Waste gate valve adjusted Flame arrester checked Coolant changed Fuel filter replaced ���������������������������������������������������� ���������������������������������������������������� ���������������������������������������������������� ���������������������������������������������������� ���������������������������������������������������� ���������������������������������������������������� ���������������������������������������������������� ���������������������������������������������������� ���������������������������������������������������� Work carried out: Engine oil and oil filter changed Sacrificial anode checked Valve play checked Spark plugs replaced Rubber mount replaced Waste gate valve adjusted Flame arrester checked Coolant changed Fuel filter replaced Company seal, signature Date: Status hours of operation: ���������������������������������������������������� Work carried out: Engine oil and oil filter changed Sacrificial anode checked Valve play checked Spark plugs replaced Rubber mount replaced Waste gate valve adjusted Flame arrester checked Coolant changed Fuel filter replaced ���������������������������������������������������� ���������������������������������������������������� ���������������������������������������������������� ���������������������������������������������������� ���������������������������������������������������� ���������������������������������������������������� ���������������������������������������������������� ���������������������������������������������������� ���������������������������������������������������� SHB MPE850 Rev 1.2 | 408014 | 408090 | 408101 | Company seal, signature ���������������������������������������������������� 83 Appendix Engine manufacturer | Exhaust type authorization and certification Appendix Engine manufacturer Engine manufacturer Weber Motor GmbH Zepernicker Chaussee 23-37 16321 Bernau bei Berlin Germany www.weber-motor.com Exhaust type authorization and certification This engine family complies with U.S. EPA Exhaust regulation for inboard/sterndrive marine engines as defined in 40 CFR 1045. For further details see the „Emission Control Information“ label on engine expansion tank. (See chapter 3.2 Identification.) 84 SHB MPE850 Rev 1.2 | 408014 | 408090 | 408101 | Appendix USA EPA EMISSION LIMITED WARRANTY USA EPA EMISSION LIMITED WARRANTY Weber Motor Engine Family DWEBM.850DTG / DWEBM.850DTH Model Year 2013 Weber Motor GmbH (Weber) warrants that the certified sterndrive/inboard (SD/I) engines are: (1) designed, built, and equipped to conform at the time of initial sale with the requirements of 40 CFR part 1045 and, (2) free from defects in materials and workmanship that may keep it from meeting these requirements. This emission limited warranty is in addition into vehicle manufacturer’s standard limited warranty for inboard/ sterndrive (SD/I) applications. The emission warranty period for these certified engines begins on the date the engines is first purchased and ends after a period of 48 month or 480 hours of engine use, whichever occurs first. This emission related warranty covers components whose failure would increase an engine’s emissions, including electronic controls, fuel injection, exhaust gas recirculation, aftertreatment, or any other system developed to control emissions. Replacing or repairing other components not covered by this emissions warranty or the standard warranty is the responsibility of the owner, including the parts and other costs associated with recommended maintenance. The exclusive remedy for breach of this limited warranty shall be, at the exclusive option of Weber, repair or replacement of any defective materials, components or products. THE REMEDIES SET FORTH IN THIS LIMITED WARRANTY ARE THE ONLY REMEDIES AVAILABLE TO ANY PERSON FOR BREACH OF THIS WARRANTY. WEBER MOTOR GMBH SHALL HAVE NO LIABILITY TO ANY PERSON FOR INCIDENTAL, CONSEQUENTIAL OR SPECIAL DAMAGES OF ANY DESCRIPTION, WHETHER ARISING OUT OF EXPRESS OR IMPLIED WARRANTY OR ANY OTHER CONTRACT, NEGLIGENCE OR OTHER TORT OR OTHERWISE. ALL IMLPIED WARRANTIES (INCLUDING BUT NOT LIMITED TO ANY IMPLIED WARRANTIES OF MERCHANTABILITY AND FITNESS FOR A PARTICULAR PURPOSE) ARE LIMITED IN DURATION TO THE WARRANTY PERIOD DESCRIBED HEREIN. WEBER DISCLAIMS ALL EXPRESS WARRANTIES NOT STATED IN THIS WARRANTY. Some states do not allow limitations on how long an implied warranty lasts, so the above limitation may not apply if it is inconsistent with controlling state law. This limited warranty excludes failures not caused by a defect in material or workmanship. This limited warranty does not cover damage due to accidents, abuse or improper handling, maintenance or use. This limited warranty also does not cover any engine that has been structurally altered, or any engine that has been used in racing competition. This limited warranty also does not cover physical damage, corrosion or defects caused by fire, explosions or similar causes beyond the control of Weber. If you have any questions regarding your warranty rights and responsibilities, you should contact the Vehicle Manufacturers Warranty Department. Weber Motor GmbH, Zepernicker Chaussee 23-37, 16321 Bernau bei Berlin, Germany Parts covered by emission warranty statement for Model Year 2013 Weber Motor personal watercraft engines: –– Spark Plug –– Turbocharger –– Sensor P/T –– Ignition Coil –– Fuel Rail –– Catalyst –– Injector –– Engine Control Unit –– Catalyst Housing –– Intake Manifold –– Lambda Sensor –– Catalyst End Cap –– Exhaust Manifold –– Sensor Crank –– Throttle SHB MPE850 Rev 1.2 | 408014 | 408090 | 408101 | 85 Appendix Index Index B Oil level, check 26 Break-in period, engine 23 P C Part number, engine 11 Certification 84 Components, engine 15 Coolant, change 74 Coolant level, check 25 Coolant, specification 14 Corrosion protection, after driving 29 R D Sacrificial anode, check 52 Sea water cooling circuit, flush 28 Serial number, engine 11 Service case, overview 40 Service intervals 21 Service parts, overview 40 Spark plugs, check 62 Spark plugs, replace 60 Spark plugs, spark plug gap 63 Storage 78 Storage, vehicle 29 Supplies, overview 44 Dealer and servicing network 37 Diagnostic case 41 Direction of rotation, engine 15 Disposal 81 E Engine fuse, check 35 Engine oil, change 45 Engine oil, refill 27 Engine oil, specification 13 Exhaust type authorization 84 F Fuel filter, replace 77 Fuel, specification 13 Fuse, check 35 Fuses, engine 19 I Identifikation, engine 11 Ignition coils, replace 60 Initial operation 80 Inspection, before driving 24 Intended use, engine 11 L Relays, engine 19 Repairs 37 Rubber mount, replace 65 S T Technical specifications 20 Tools, overview 42 Transport, vehicle 29 V Valve play, adjust 57 Valve play, check 53 Valve play, required 54 W Warranty 37 Waste gate valve, adjust 70 Locating a workshop 37 M Malfunctions 32 Manufacturer, engine 84 O Oil filter, replace 45 86 SHB MPE850 Rev 1.2 | 408014 | 408090 | 408101 |


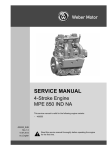

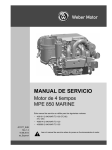

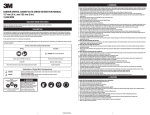

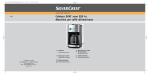


![v .] jCg _ 1l(_ `o,C..NN EinCOR `1_11E1](http://vs1.manualzilla.com/store/data/005961751_1-73960e1521729271050e00b8575619b8-150x150.png)