1
Accessory
INSTALLATION
INSTRUCTIONS
Application
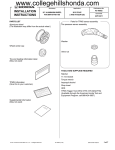
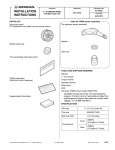
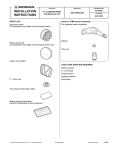
PARTS LIST
Wood trim steering wheel
Publications No.
AII 26041
WOOD TRIM
STEERING WHEEL
P/N 08U97-S0X-110A
ODYSSEY
Issue Date
AUG 2003
2.
Disconnect the negative cable from the battery,
and wait for at least 3 minutes before you start to
install the wood trim steering wheel.
3.
Pry up on the retaining tabs, and remove the
access panel from the underside of the driver’s
side airbag.
AIRBAG
CONNECTOR
BOSS PLATE
COVER
2 Torx bolts, 6 x 12 mm
4 Torx bolts, 6 x 9 mm
ACCESS
PANEL
TOOLS REQUIRED
Phillips screwdriver
10 mm Combination wrench
Flat-tip screwdriver
19 mm Socket
Torque wrench
Combination wrench
Steering wheel puller
Service Manual
T30 Torx bit
T40 Torx bit
PIN
INSULATOR COVER
INSULATOR
SOCKET
INSULATOR
Do not hold on the
harness wires.
INSTALLATION
Customer Information: The information in this
installation instruction is intended for use only by
skilled technicians who have the proper tools,
equipment, and training to correctly and safely add
equipment to your vehicle. These procedures should
not be attempted by “do-it-yourselfers.”
1.
4.
Remove the airbag connector from the boss
plate cover.
5.
Unplug the airbag connector; while holding the
pin insulator, pull out on the cover insulator. Do
not pull on the socket insulator.
Make sure you have the anti-theft code for the
radio, then write down the frequencies for the
preset buttons.
© 2003 American Honda Motor Co., Inc - All Rights Reserved.
AII 26041 (0308)
08U97-S0X-1A00-91
1 of 6
6.
Remove and discard the two bolts securing the
airbag, and remove the airbag. Carefully set the
airbag in a secure location with the pad facing
up. Do not drop or bump the airbag against
anything.
10. Using a felt-tip pen, mark the top of the steering
wheel stud at a position corresponding to the
existing mark on the steering wheel.
EXISTING MARK
ON STEERING
WHEEL
TORX BOLT
(Discard.)
TORX BOLT
(Discard.)
FELT-TIP PEN
STEERING
WHEEL
STUD
AIRBAG
7.
Turn the steering wheel so the front wheels are
in the straight-ahead position.
8.
Disconnect the gray audio control switch
connector (if equipped), the green cruise control
switch connector, the black ground terminal, and
the white horn connector.
CLIP
CRUISE CONTROL
SWITCH CONNECTOR
(green)
STEERING
WHEEL
11. Remove the steering wheel nut. Slowly and
carefully remove the steering wheel while routing
the wires through the hole in the steering wheel.
Be careful not to move the steering wheel during
removal.
If a steering wheel puller is needed to remove
the steering wheel, be careful not to thread the
steering wheel puller bolts in more than 10 mm.
HORN
CONNECTOR
(white)
STEERING WHEEL
PULLER BOLTS
AUDIO CONTROL
SWITCH CONNECTOR
(gray)
9.
GROUND TERMINAL
(black)
Release the airbag harness, the audio control
switch harness (if equipped), the cruise control
switch harness, and the ground terminal from the
four clips on the boss plate cover.
STEERING
WHEEL NUT
2 of 6
STEERING WHEEL
PULLER
AII 26041 (0308)
STEERING
WHEEL
© 2003 American Honda Motor Co., Inc - All Rights Reserved.
12. Using a T40 Torx bit, remove the four Torx bolts
that fasten the horn plate to the steering wheel,
and remove the horn plate. Discard the four Torx
bolts.
14. Remove the two screws that fasten the audio
control switch (if equipped) and the two screws
that fasten the cruise control switch. Remove the
switch(es).
If the springs fall out of position from the back of
the horn plate, reinstall the blue springs at the
two upper holes and the silver springs at the two
lower holes.
AUDIO
CONTROL
SWITCH
SPRINGS
(blue)
SPRINGS
(silver)
SCREWS
TORX BOLT
(Discard.)
SCREWS
CRUISE CONTROL
SWITCH
STEERING
WHEEL
15. Remove the steering wheel lower cover from the
steering wheel (four screws).
STEERING WHEEL
LOWER COVER
HORN PLATE
13. Remove the steering wheel balance weight (two
screws).
STEERING
WHEEL
BALANCE
WEIGHT
GROUND TAB
SCREW
SCREWS
STEERING
WHEEL
© 2003 American Honda Motor Co., Inc - All Rights Reserved.
16 Remove the ground tab (one screw).
AII 26041 (0308)
3 of 6
19. Install the steering wheel balance weight onto the
wood trim steering wheel with the two screws.
Tighten the screws securely.
17. Transfer the steering wheel lower cover (four
screws) and the ground tab (one screw) to the
wood trim steering wheel. Tighten the screws
securely.
STEERING WHEEL
BODY COVER
STEERING
WHEEL
BALANCE
WEIGHT
GROUND TAB
SCREWS (reused)
WOOD TRIM
STEERING
WHEEL
SCREW (reused)
WOOD TRIM
STEERING
WHEEL
20. Position the horn plate on the wood trim steering
wheel, and install the four Torx bolts supplied.
Torque the bolts to 4 to 5 N·m (3 to 3.5 lb-ft).
18. Transfer the audio control switch (if equipped) and
the cruise control switch to the wood trim steering
wheel. Tighten the screws securely.
WOOD TRIM
STEERING WHEEL
If the springs fall out of position from the back of
the horn plate, reinstall the blue springs at the
two upper holes and the silver springs at the two
lower holes.
NEW TORX BOLT
Torque to 4 to 5 N·m
(3 to 3.5 lb-ft).
AUDIO
CONTROL
SWITCH
SCREW
4 of 6
CRUISE
CONTROL
SWITCH
HORN PLATE
AII 26041 (0308)
© 2003 American Honda Motor Co., Inc - All Rights Reserved.
If the cable reel was moved, continue with step 21; if
it was not moved, go to step 22.
21. Align the cable reel:
•
Rotate the cable reel clockwise all the way
until it will no longer move.
•
Turn the cable reel counterclockwise about
two complete turns until the “TOP” arrow on
the cable reel points up.
24. Plug in the connectors for the green cruise control
switch and the gray audio control switch (if
equipped). Connect the black ground terminal to
the ground tab, and connect the white horn
connector to the horn plate.
CLIP
22. Install the wood trim steering wheel on the
steering column shaft in the straight-ahead
position:
HORN
CONNECTOR
(white)
•
Carefully route the wire harnesses through
the opening in the wood trim steering wheel.
•
Align the two tabs of the canceling sleeve
with the two cutouts in the steering wheel as
shown.
•
Align the mark made on the top of the stud in
step 10 with the mark on the wood trim
steering wheel.
•
Check that the wire harnesses are not
pinched.
•
Install the steering wheel nut. Torque the
steering wheel nut to 49 N·m (36 lb-ft).
CUTOUT
CRUISE CONTROL
SWITCH CONNECTOR
(green)
AUDIO CONTROL
SWITCH CONNECTOR
(gray)
GROUND
TERMINAL
(black)
AIRBAG
CONNECTOR
(yellow)
25. Attach the cruise control switch wires, the audio
control switch wires, the airbag connector wires,
the horn wire, and the ground terminal wire to the
wire clips.
“TOP” ARROW
TAB
Mark made
in step 10
26. Get the airbag, and route the airbag harness
down through the steering wheel. Position the
airbag on the wood trim steering wheel, and
install the two Torx bolts supplied. Torque the
bolts to 10 N·m (7 lb-ft).
Mark on
STEERING
WHEEL
NEW
TORX BOLT
CABLE REEL
STUD
STEERING
WHEEL NUT
Torque to 49 N·m
(36 lb-ft).
NEW
TORX BOLT
WOOD TRIM
STEERING WHEEL
© 2003 American Honda Motor Co., Inc - All Rights Reserved.
AIRBAG
AII 26041 (0308)
5 of 6
27. Connect the airbag harness connectors:
28. Reconnect the negative cable to the battery.
•
Push the socket insulator onto the pin
insulator until it contacts the tab on the pin
insulator.
•
Do not push the socket insulator onto the pin
insulator by pushing on the cover insulator.
•
Continue pushing on the socket insulator in the
same direction until the cover insulator rides
over the tab on the pin insulator and is locked
securely.
•
Reattach the airbag harness connector to the
boss plate cover.
•
Reinstall the access panel.
29. Make sure the steering wheel is in the straightahead position with the front wheels. If the spoke
angle of the steering wheel is not in the straightahead position with the front wheels, adjust the
front toe as described in the Service Manual.
NOTE: The flat-rate time for installing the steering
wheel includes toe adjustment.
30. Verify that the horn works.
31. Turn the ignition switch to ON (II), and verify that
the SRS warning light comes on and stays on for
6 seconds. Turn off the ignition switch to make
sure the SRS warning light goes off.
32. Enter the customer's radio anti-theft code, and
reset the radio station presets.
33. Reset the clock.
BOSS PLATE
COVER
ACCESS
PANEL
AIRBAG HARNESS
CONNECTORS
TAB
COVER
INSULATOR
PIN
INSULATOR
SOCKET
INSULATOR
PIN
INSULATOR
COVER
INSULATOR
TAB
6 of 6
SOCKET
INSULATOR
AII 26041 (0308)
© 2003 American Honda Motor Co., Inc - All Rights Reserved.