1
INSTALLATION
INSTRUCTIONS
Accessory
Application
ENGINE BLOCK HEATER (L4)
P/N 08T44-TA0-100
2008 ACCORD
2-AND 4-DOOR
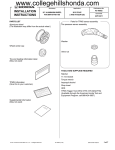
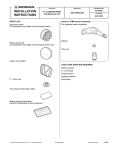
PARTS LIST
Publications No.
AII 35355
Issue Date
AUG 2007
Coolant concentration label
Engine block heater
TOOLS AND SUPPLIES REQUIRED
Ratchet
Aluminum washer
10 mm, 12 mm, 19 mm, and 24 mm Sockets
10 mm Hex Socket
100 mm Extension
Heater harness
Torque wrench
Diagonal cutters
Heavy gloves
Drain pan
Tape measure
White marker
Protective cap
Honda All Season Antifreeze/Coolant Type 2,
P/N OL999-9011A
Honda Coolant Concentrate, P/N OL999-9020
Fender cover
12 Black wire ties
(Some may not used)
7
Wire tie with clips
5
White wire ties
(Not used)
© 2007 American Honda Motor Co., Inc. – All Rights Reserved.
AII 35355 (0708)
08T44-TA0-1000-91
1 of 7
5.
INSTALLATION
Remove the tower bar (six nuts and release the
vehicle hose).
NOTE:
• Always use Honda All Season Antifreeze/Coolant
Type 2 and Honda Coolant Concentrate. Using a
non-Honda coolant can result in corrosion, causing the
cooling system to malfunction or fail.
RADIATOR CAP
• To avoid burning out the element, do not operate the
engine block heater before it is installed in the vehicle
and before you add coolant.
• Follow steps 29 through 31 and increase the concentration rate of coolant to 60 ±2%.
Customer Information: The information in this
installation instruction is intended for use only by skilled
technicians who have the proper tools, equipment, and
training to correctly and safely add equipment to your
vehicle. These procedures should not be attempted by
“do-it-yourselfers.”
1.
Make sure you have the anti-theft code for the audio
system and the navigation system (if equipped).
2.
Disconnect the negative cable from the battery.
3.
Allow the engine and all cooling system components
to cool down.
4.
Place a clean drain pan under the radiator drain
plug, then remove the drain plug from the bottom of
the radiator to drain the coolant. Remove the radiator
cap to increase the flow.
DRAIN PLUG
FRONT
7227170Y
6.
Remove the vehicle bracket (one vehicle bolt).
VEHICLE
BRACKET
VEHICLE
BOLT
NOTICE: Radiator coolant will damage paint. Quickly
rinse any spilled coolant from painted surfaces.
FRONT
722702AY
2 of 7
AII 35355 (0708)
© 2007 American Honda Motor Co., Inc. – All Rights Reserved.
7.
Disconnect the vehicle connector from the ABS or
VSA Modulator, and release the harness clip from
the vehicle bracket.
9.
Disconnect the two vehicle connectors.
VEHICLE
CONNECTORS
3 NUTS
TOWER BAR
3 NUTS
FRONT
VEHICLE
HOSE
7227010Y
8.
Get the heater harness. Using a tape measure,
install a wire tie with clip to the heater harness at
each of the measurements shown.
722705AY
ENGINE BLOCK
HEATER SIDE
10. Release the vehicle harness holder from the vehicle
bracket (two hooks).
160 mm
A
B
2 WIRE TIES
WITH CLIPS
230 mm
470 mm
620 mm
890 mm
990 mm
C
E
D
VEHICLE HARNESS
HOLDER
VEHICLE
BRACKET
F
HOOK
2 WIRE TIES
WITH CLIPS
G
3 WIRE
TIES
WITH CLIPS
HOOK
470 mm
FRONT
PLUG SIDE
722707CY
VEHICLE HARNESS
HOLDER
© 2007 American Honda Motor Co., Inc. – All Rights Reserved.
AII 35355 (0708)
722706AY
3 of 7
11. Using a 10 mm hex socket, remove the drain plug
from the engine block. Coolant remaining in the
engine jackets will flow out the hole when the plug is
removed. Retain the plug; it will be used if the engine
block heater is removed.
13. Plug the connector end of the heater harness into
the engine block heater. Route the heater harness
as shown, and secure the two wire ties with clips
(points A and B) to the vehicle bracket.
VEHICLE
BRACKET
VEHICLE
HARNESS
HEATER
HARNESS
FRONT
WIRE TIE
WITH CLIP
(point B)
FRONT
HEATER HARNESS
CONNECTOR
DRAIN PLUG
(Retain.)
722708CY
12. Install the engine block heater with aluminum washer into the engine block using a 24 mm socket with a
100 mm extension. Torque the engine block heater
to 60 N·m (44 lbf-ft). Using an extension longer than
100 mm will give you a incorrect torque.
ENGINE
BLOCK
HEATER
WIRE TIE
WITH CLIP
(point A)
722710CY
14. Route the heater harness as shown, and secure the
wire tie with clip (point C) to the vehicle frame.
RIGHT
HEADLIGHT
VEHICLE
FRAME
FRONT
HEATER
HARNESS
WIRE TIE
WITH CLIP
(point C)
FRONT
ENGINE BLOCK HEATER ALUMINUM
WASHER
60 N·m (44 lbf-ft)
(Use a 24 mm socket.)
722709AY
722711CY
4 of 7
AII 35355 (0708)
© 2007 American Honda Motor Co., Inc. – All Rights Reserved.
15. Route the heater harness as shown, and secure the
wire tie with clip (point D) to the vehicle frame.
RIGHT
HEADLIGHT
17. Route the heater harness as shown, and secure the
two wire ties with clips (points E and F) to the vehicle
bracket.
VEHICLE
FRAME
VEHICLE
BRACKET
RIGHT
HEADLIGHT
HEATER
HARNESS
WIRE TIE
WITH CLIP
(point D)
FRONT
FRONT
732120BY
16. Release the power steering reservoir (one hook).To
prevent oil leakage, be careful not to tilt the power
steering reservoir.
HOOK
HEATER
HARNESS
WIRE TIE
WITH CLIP
(point F)
WIRE TIE
WITH CLIP
(point E)
722712CY
18. Release the radiator reservoir (one hook).
POWER STEERING
RESERVOIR
RADIATOR
RESERVOIR
RIGHT
HEADLIGHT
RIGHT
HEADLIGHT
FRONT
FRONT
HOOK
7227030Y
© 2007 American Honda Motor Co., Inc. – All Rights Reserved.
AII 35355 (0708)
732205BY
5 of 7
19. Route the heater harness as shown, and secure it to
the vehicle harness with three black wire ties.
21. Route the heater harness inside the bumper, and
secure it with the two black wire ties.
RIGHT
HEAD LIGHT
FRONT
If the vehicle you are working on is a 4-DOOR,
continue with step 21; 2-DOOR, go to step 23.
FRONT
BUMPER
VEHICLE
HARNESS
HEATER
HARNESS
3 BLACK
WIRE TIES
VEHICLE
CLIP
2 BLACK
WIRE TIES
722713AY
HEATER
HARNESS
20. Route the heater harness as shown, and secure the
wire tie with clip (points G) to the vehicle frame.
VEHICLE
FRAME
FRONT
BUMPER
GRILLE
722715AY
22. Attach the protective cap to the front bumper grille,
and plug the connector of the heater harness into the
protective cap. Go to step 25.
HEATER
HARNESS
PROTECTIVE
CAP
WIRE TIE
WITH CLIP
(point G)
HEATER HARNESS
CONNECTOR
FRONT
BUMPER
GRILLE
FRONT
BUMPER
722716AY
722714BY
6 of 7
AII 35355 (0708)
© 2007 American Honda Motor Co., Inc. – All Rights Reserved.
23. Route the heater harness inside the bumper, and
secure it with the three black wire ties.
BUMPER
BEAM
25. Reinstall all removed parts except for the radiator
cap.
BLACK
WIRE TIE
26. Check that the heater harness is routed properly and
all connectors are plugged in.
27. Reconnect the negative cable to the battery.
28. Reinstall the radiator drain plug.
29. Pour 1.6 lit. of the 100% concentration coolant
through the radiator filler port.
30. Pour the 50% concentration coolant up to the top of
the radiator filler port.
31. Check the cooling system for proper bleeding, and
check the coolant level according to the instructions
described in the Service Manual.
32. Install the coolant concentration label to the radiator
as shown.
FRONT
BUMPER
GRILLE
FRONT
BUMPER
RADIATOR CAP
2 BLACK
HEATER
WIRE TIES HARNESS
COOLANT
CONCENTRATION
LABEL
771832BY
24. Attach the protective cap to the front bumper grille,
and plug the connector of the heater harness into the
protective cap.
PROTECTIVE
CAP
HEATER HARNESS
CONNECTOR
RADIATOR
780205AB
33. Reinstall the radiator cap to the radiator.
34. Put the drain plug (removed in step 11) in the glove
box.
FRONT
BUMPER
FRONT
BUMPER
GRILLE
© 2007 American Honda Motor Co., Inc. – All Rights Reserved.
35. Enter the anti-theft codes for the audio system and
the navigation system (if equipped).
36. Reset the clock on vehicles without navigation.
771833CY
AII 35355 (0708)
7 of 7