1
INSTRUCTION MANUAL
ADM4201
1-800-547-5740 • Fax: (503) 643-6322
www.ueiautomotive.com • email: [email protected]
Introduction
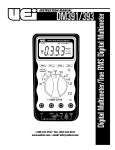
The ADM5201 is a handheld battery operated professional automotive
multimeter designed to provide trouble shooting solutions to the most
difficult problems encountered in today’s sophisticated automotive
electronic systems. The ADM4201 has a bright LED backlight. A battery
access door allows users to replace the battery and fuse without breaking
calibration seals! High impact over-molded case absorbs shock over more
of the case than a conventional rubber boot design.
Features include
• Accurate RPM measurement for 2 and 4 stroke automotive
engines with 1 to 8 cylinders using the inductive pickup
• ms-pulse Width function to test on-time of both PFI type and
TBI type fuel injectors
• Duty Cycle and direct DWELL reading
• 4 step adjustable triggers on 1 to 8 cylinders
• Temperature measurement up to 2,498˚F or 1,370˚C
• 3-3/4 digit, 4,000 count display with bar-graph
(Frequency range: 99,999 counts)
• Backlit display
• Auto power off
• High impact over-molded case
• CE-mark
• IEC 1010.1-92, CAT II 1000 V rating
Safety Notes
Before using this meter, read all safety information carefully. In
this manual the word "WARNING" is used to indicate conditions
or actions that may pose physical hazards to the user. The word
"CAUTION" is used to indicate conditions or actions that may
damage this instrument.
WARNING!
Exceeding the specified limits of this meter is dangerous and can
expose the user to serious or possibly fatal injury.
• Disconnect the test leads from the test points before changing
functions to avoid damaging the meter when testing above 350V AC
• Choose the proper range and function for the measurement Always set the meter to the highest range and work downward for
an unknown value if you are using manual ranging mode
• Do not try voltage or current measurements that may exceed the
ratings marked on the input limit for switch or terminal
• Use current probes to measure circuits exceeding 10A
• Disconnect the “LIVE” test lead before disconnecting the
“COMMON” test lead
• Do not test a recently recharged lead-acid battery
• Disconnect the power and discharge all high-voltage capacitors
before testing in the resistance, continuity, and diode functions
• If the engine has been running, do not place the meter and its
accessories near the engine or the exhaust manifold which might
be hot and can damage the meter
• If any of the following indications occur during testing, turn
off the power source to the circuit under test:
• Arcing
• Flame
• Smoke
• Extreme Heat
• Smell of Burning Materials
• Discoloration or Melting of Components
• Read the safety precautions associated with the equipment being
tested and seek assistance or advice when performing
unfamiliar tasks.
• Keep your fingers away from the test lead metal probe contacts
and bus-bars when making measurements. Always grip the
instrument and test-leads behind the hand guards (molded into
the probes).
• In the event of electrical shock, ALWAYS bring the victim to
the emergency room for evaluation, regardless of the victim’s
apparent recovery. Electrical shock can cause an unstable heart
rhythm that may need medical attention.
International Symbols
• DO NOT attempt to measure any voltage that exceeds 600 volts
with this meter - UEi offers numerous alternatives for measuring
high voltage and current
• Voltages above 600 volts DC or 25 volts AC may constitute a
serious shock hazard
• DO NOT attempt to use this meter if either the meter or the test
leads have been damaged. Send unit in for repair by a qualified
repair facility
• Test leads must be fully inserted prior to taking measurements
• Never attempt a voltage measurement with the test leads inserted
into the “A” terminal and the “COM” terminal - The “A” terminal is
protected by a fuse. You might be injured or damage the meter
• Always disconnect the live test lead before disconnecting the
common test lead from a circuit
• Turn the engine off before connecting or disconnecting inductive
pickup to avoid a shock.
ADM4201-MAN
P. 1
Controls and Indicators
LCD Display Functional Description
18
19
20 21
22 23
24
1
17
16
25
15
11
2
10
3
9
14
13
12
4
26
12. TRIG ±: These annunciators indicate that positive (+) or negative
(-) “Trigger Slope” is selected.
13. 8 TRIG: These annunciators indicate trigger level status.
7
5
8
6
14.
: This symbol indicates the “Relative” function is activated.
15.
: This symbol indicates “Negative Polarity”.
16. AC: AC annunciator indicates alternating current is selected.
17. DATA: Digital readings of data being measured.
18. AUTO: This annunciator indicates “Autoranging”.
1. LCD Display: 3-3/4 digit, 4000 count display with bar-graph.
2. LEVEL Push-button: Press this push-button momentarily to select
trigger levels. Press this push-button for more than 1 second to toggle
b e tween positive and negative trigger slopes.
3. HOLD Push-button: Press this push-button momentarily to
activate “HOL D” for simply freezing a reading. Press this
push-button for more than 1 second to turn the LCD backlight on.
4. SELECTOR: Turn the power ON/OFF and select a function.
5. COM: Common (ground reference) input terminal for all functions
except RPM functions.
6. VΩHz
, ms-Pulse & Temp: Input terminal for all functions
except current and RPM functions.
19.
: Low battery alert. Replace the battery as soon as possible
to ensure accura cy.
20.
: This symbol indicates the “Continuity Test” function is selected.
21.
: This symbol indicates the “Diode Test” function is selected.
22. HOL D : This annunciator indicates the “Hold” function is activated.
23.
: This annunciator indicates the “Re cord” function is activated.
24. MIN/MAX/AVG: These annunciators indicate Minimum,
Maximum and Average reading is being displayed.
25. ˚8 CYL...: These annunciators indicate the function being selected
and/or the appropriate measurement units.
26.
: Analog bar-graph with scale.
7. RPM +: Input terminal (+) for RPM function.
8. mA A/RPM-: Input terminal (+) for mA A functions. Ground
reference (-) input terminal for RPM function.
9. REC Push-button: Press this push-button momentarily to activate
“Record” function. Press this push-button for more than 1 second
to select “Relative Zero”.
10. SELECT Push-button: Press this push-button momentarily to
select (blue colored around selector) secondary functions.
11. RANGE Push-button: Press this push-button momentarily to
select ranges in the manual ranging mode of most functions or
number of cylinders on “Dwe l l” function. Press this push-button
momentarily to toggle between the “PFI” mode and the “TBI”
mode when measuring on-time of fuel injectors. Press this
push-button for more than 1 second to toggle “Auto/Manual”
ranging in most functions.
ADM4201-MAN
P. 2
Operating Instructions
Measuring Voltage (V)
To measure DC or AC volts:
1. Set rotary selector to “ “ position. The meter defaults at DC.
2. Press the “SELECT” push-button momentarily to select AC,
if required.
3. Insert red lead into “V” terminal and black lead into “C OM” terminal.
4. Touch black probe to ground or negative side of the circuit and
touch red probe to positive side of the circuit coming from the
power source (Fig 1).
NOTE: Voltage must be measured in parallel (red probe
measuring circuit from power source).
The analog bar graph is easier to read when the data causes the
digital display to rapidly change. It is also useful for trend setting or
directional data.
Parallel Connection
(Fig 2)
Measuring Continuity (
)
CAUTION!
Turn off power off on the test circuit. A beeper tone does not necessarily
mean zero resistance.
To measure Continuity:
1. Set rotary selector to “Ω
“ position.
2. Press the “SELECT” push-button to select “Continuity” function.
“OFL” is displayed.
3. Insert black lead into “COM” terminal and red lead into
“Ω” terminal.
4. Touch the test lead probes across the device being tested (Fig 3).
Parallel Connection
(Fig 1)
Measuring Resistance (Ω)
If the resistance of the device is more than 50Ω, there is a continuous
beep tone.
If the resistance of the device is more than 50Ω, there is no beep tone.
This is useful for checking wiring connections and operation of switches.
CAUTION!
Turn off power and discharge all capacitors on circuit to be tested
before attempting in circuit resistance measurements. Accurate
measurement is not possible if external or residual voltage is present.
To measure Resistance:
1. Set rotary selector to “Ω
“ position. The meter defaults at Ω
function. “OFL” is displayed.
2. Insert black lead into “COM” terminal and red lead into
“Ω” terminal.
3. Touch the test lead probes across the resistance or circuit
to be tested (Fig 2).
NOTE: The resistance in the test leads can affect accuracy in the
400Ω range. Short the leads together and press the “REL “
push-button to automatically subtract the test lead resistance
from the measured resistance.
ADM4201-MAN
(Fig 3)
P. 3
Measuring Diode Test (
Measuring Temperature (˚F/˚C)
)
To measure Temperature:
CAUTION!
Turn off power off on the test circuit.
1. Set rotary selector to “˚F/˚C” position.
The meter defaults at “˚F”. “OFL” is displayed with LCD
annunciators ˚F turned on. If required, press the “SELECT”
push-button to select “˚C” function.
To perform Diode test:
“ position. “OFL” is displayed.
1. Set rotary selector to “
2. Connect the test leads as shown and observe the digital display.
Normal forward voltage drop (forward biased) for a good silicon
diode is between 0.4V to 0.9V. A reading higher than that indicates
a leaky diode (defective). A zero reading indicates a shorted diode
(defective). An “OFL” indicates an open diode (defective) (Fig 4).
3. Reverse the test leads connections (reverse biased) across
the diode.
4. The primary display shows “OFL” if the diode is good. Any other
readings indicate the diode is resistive or shorted (defective).
Forward Bias
Reverse Bias
(Fig 4)
2. Insert banana plug K-type temperature bead probe with
correct +/- polarities. You can also use a thermocouple probe
adapter (optional accessory) to adapt other standard K-type
temperature probes (Fig 5).
3. Touch the end of the thermocouple probe to the measurement
point and read the digital display with ˚F or ˚C.
NOTE: The measured temperature is displayed with 0.1˚F (0.1˚C)
resolution up to 400˚F (400˚C) and with 1˚F (1˚C) resolution up to
2,498˚F (1,370˚C) from 401˚F (401˚C).
Banana plug
K-type temperature probe
Collects under test
(Fig 5)
Use the table to determine if the diode is good or bad.
Diode
Good
Bad
Forward Bias (
0.4V to 0.9V
OFL
OFL
1.0V to 3.0V
0.4V to 0.9V
OFL
0.000V
ADM4201-MAN
)
Reverse Bias (
OFL
0.4V to 0.9V
1.0V to 3.0V
OFL
0.4V to 0.9V
OFL
0.000V
)
P. 4
RPM
WARNING!
Be sure the inductive pickup is in the terminals marked “- RPM +”
when measuring RPM’s. If the pickup is in the wrong terminal, personal
injury or meter damage may occur.
Fuel Injection On Time
This function applies to both Port Fuel Injectors (PFI) which operate with a
single On Time pulse and Throttle Body Injectors (TBI) which operate with
twin pulses.
The ignition system can generate a potential shock hazard. Ensure that
the engine is off before connecting or removing the inductive pickup.
ON TIME
To perform Diode test:
ON TIME
Port Fuel Injection Waveform
1. Set rotary selector to “RPM
“ position.
3
The meter defaults at TRIG (trigger) level.
2. Press the “SELECT” push-button to toggle between “RPM “
for 4-stroke engine and “RPM “ for 2-stroke and DIS engine.
3. Insert the dual banana connector into the “RPM -” and the
“RPM +” input terminals. Ensure the plug with the ground tab
goes into the “RPM -” terminal (Fig 6).
4. Clamp the inductive pickup to a spark plug wire with the arrow
sign facing the spark plug as shown. Ensure the pickup jaws are
completely closed.
5. Read RPM in the primary display.
Port Body Injection Waveform
1. Set rotary selector to “ms-Pulse, Dwell, Duty“ position.
The meter defaults at ms-Pulse with -TRIG 1 2 3 level in the “PFI”
mode (“P” appears in the display).
Press the “RANGE” push-button to toggle between the “PFI” and
the “TBI” mode (“E” appears in the display).
4 trigger levels (-TRIG 1 2 3
-TRIG 1 2
-TRIG 1
-TRIG 1 2 3 4) are selectable by pressing “LEVEL” push-button
momentarily in this function.
2. Insert black lead into “COM” terminal and red lead into
“ms(-Pulse)” terminal.
3. Connect the test leads as shown and read “On Time” in the
primary display (Fig 7).
Signal
Ground Tab
12V Supply ORB +
Jumper Wires
Inductive
Pickup
Distributor
Cap
Conventional
Ignition Coil
Spark Plug
(Fig 6)
PFI or TBI
Injector
(Fig 7)
ADM4201-MAN
P. 5
Dwell
Duty Cycle
1. Set rotary selector to “ms-Pulse, Dwell, Duty“ position.
1. Set rotary selector to “ms-Pulse, Dwell, Duty“ position.
2. Press the “SELECT” push-button to select “DWELL” function. The
meter defaults at 4 cylinders (4 CYL). Press the “RANGE”
(Cylinder) button momentarily and repeatedly to select the
required number of cylinder and display the cylinder setting at the
upper right corner.
2. Press the “SELECT” push-button twice to select “DUTY” function.
3. Insert black lead into “COM” terminal and red lead into
“ms(-Pulse)” terminal.
4. Connect the test leads as shown and read Dwell angle. Adjust
trigger levels by pressing the “LEVEL” push-button momentarily,
if necessary (Fig 8).
5. Press the “SELECT” push-button momentarily to display Dwell
reading in terms of percentage if required.
6. Adjust the Dwell angle according to the procedures outlined in
your vehicle service manual.
NOTE: Recheck the timing whenever the Dwell angle has
been adjusted.
3. Insert black lead into “COM” terminal and red lead into
“ms(-Pulse)” terminal.
4. Connect the test leads as shown and read the Duty Cycle
percentage. Adjust trigger levels by pressing the “LEVEL”
push-button momentarily, if necessary (Fig 9).
5. Press the “SELECT” push-button or 3 momentarily to display
“Duty Cycle” reading in terms of ms (Pulse Width) or (Dwell)
angle if required.
In most applications, the negative trigger slope is assigned to display
the percentage of time that the plunger is in the closed position (low
duty cycle) during one duty cycle. The positive slop is assigned to
display the percentage of time that the plunger is in the open position.
Refer to the car’s service manual to verify slope assigned to position for
each component. Press the “LEVEL” (±Trigger) push-button for more
than 1 second to toggle between the negative (-) slope and the positive
(+) slope, if required.
To
Distributor
Distributor
Coil
Chassis
Ground
ADM4201-MAN
(Fig 8)
To DCM
(Fig 9)
P. 6
Frequency (Hz)
AC or DC Current (
)
1. Set rotary selector to “Hz“ position.
WARNING!
Do not measure any circuit that draws more than the current rating
of the installed fuse. Replace the defective fuse with a proper fuse
only. Failure to do this may result in injury or damage to the meter.
Do not attempt current measurements where the open circuit voltage is
above 600V.
2. Insert black lead into “COM” terminal and red lead into
“ms(-Pulse)” terminal.
3. Touch black probe to ground and touch red probe to the
“Signal out” wire on the sensor (Fig 10).
Adjust trigger levels by pressing the “LEVEL” push-button
momentarily, if necessary.
For measuring circuits of more than 10A, use voltage output current
clamp adapters compatible with the meter voltage functions.
1. Set rotary selector to “
at DC current.
“ position. The meter defaults
2. Press the “LEVEL” push-button to select AC.
3. Insert black lead into “COM” terminal and red lead into
“mA A” terminal.
4. Connect red lead probe to the side of the circuit closest to
the power source (Fig 11).
5. Connect black lead probe to the side of the circuit closest
to ground.
6. Turn the power ON and test. DO NOT crank the engine.
Ground
Signal Out
Electronic Voltage
(Fig 10)
AC Terminal
(Fig 11)
ADM4201-MAN
P. 7
Manual and Auto Ranging
Press the “RANGE” push-button momentarily to select manual ranging,
and the meter will remain in the range it was with LCD annunciator
“AUTO” turned off. Press this button momentarily again to step through
the ranges. Press this button for more than 1 second to resume
autoranging.
In Dwell “
“ function, press the “RANGE” (Cylinder) push-button
momentarily to display the cylinder setting at the upper right corner of
the LCD. Defaults is “4 CYL” (4 Cylinder). Press this button momentarily
again to select the number of cylinders from 1 through 8 (1, 2, 3, 4, 5, 6
and 8 cylinders) to match the engine under test.
Record Mode ( R )
Press the “REC” push-button momentarily to activate record mode with
LCD annunciators “ R MIN MAX AVG” turned on. The meter beeps
when new maximum or minimum reading is updated. Press this button
momentarily to read throughout the Minimum (MIN), Maximum (MAX)
and Average (AVG) readings. Press this button for more than 1 second
to exit the “Record” mode.
In some cases, positive trigger levels may be required for measuring
Dwell, ms-Pulse, or Duty. Press the “LEVEL” (±Trigger) push-button for
more than 1 second to toggle between positive (+) and negative (-)
trigger level for the selected trigger level.
NOTE: Positive (+) trigger or negative (-) trigger is to identify whether
the On or Off portion of the signal under test is of measuring interest.
For example, if you get a reading of 10% Duty Cycle in the Positive (+)
Trigger (On portion), you then will get a reading of 90% Duty Cycle in
the Negative (-) Trigger (Off portion).
Backlight
Press the “HOLD” (
) push-button for more than 1 second to toggle
the backlight On and Off. The backlight will also automatically be Off 30
seconds after each activation to extend the battery life.
Auto-Power Off
The meter automatically turns off after approximately 30 minutes of no
activities to extend the battery life. However, if there is any activity
within 100 counts from the last activity, the Auto-Power Off time will
always be counted from the new last activity.
Relative Mode (∆)
Press the “REC” (REL∆) push-button for more than 1 second to select
the “Relative Zero” (∆) mode with annunciator ∆ turned on.
This feature allows the user to offset the measured value with a relative
reference value. Press the “REC” (REL∆) push-button for more than 1
second to exit the “Relative” mode and resume normal measurements.
RPM
Selection
In the “RPM” function, the meter defaults to RPM for conventional
4-stroke engine. Press the “SELECT” push-button momentarily to toggle
to “RPM “ for DIS or 2-stroke engine.
Trigger Level and ± Trigger Slop Selection
This feature is available for Hz, RPM, Dwell, ms-Pulse, or Duty function.
The meter is set at selected trigger level as power up default in
individual function as follows:
Functions
Default Trigger Level
Hz, RPM
Dwell, ms-Pulse, Duty
3
TRIG
3
TRIG
+ (= + TRIG 1 2 3)
- (= - TRIG 1 2 3)
However, car signal levels under test may vary due to aging of
components, abnormal conditions, and each car manufacturer’s
different design. Therefore, positive and/or negative 4 selectable trigger
levels, which are carefully designed and tested to cover all the extreme
conditions, are available in these functions to provide more flexibility to
cope with your applications.
If your reading is unstable, select lower sensitivities (high trigger level
number) by pressing the “LEVEL” push-button momentarily.
If your reading shows zero, select higher sensitivities (lower trigger
level number).
The 4 selectable trigger levels are cycled through as follows:
• Hz, RPM:
3
➞ TRIG +(=
2
1
4
+TRIG 1 2 3) ➞TRIG +(= +TRIG 1 2) ➞ TRIG+(= +TRIG 1)➞ TRIG+(= +TRIG 1 2 3 4)
• Dwell, ms-Pulse, Duty:
➞
3
TRIG -(= -T RIG
2
1
4
1 2 3) ➞ TRIG-(= -TRIG 1 2) ➞ TRIG-(= -T RIG 1) ➞ TRIG-(= -T RIG 1 2 3 4)
ADM4201-MAN
Maintenance
Periodic service
WARNING!
Repair and service of this instrument is to be performed by qualified
personnel only. Improper repair or service could result in physical
degradation of the meter. This could alter the protection from
electrical shock and personal injury this meter provides to the
operator. Perform only those maintenance tasks that you are
qualified to do.
These guidelines will help you attain long and reliable service from
your meter:
1. Calibrate your meter annually to ensure it meets original
performance specifications.
2. Keep your meter dry. If it gets wet, wipe it dry immediately. Liquids
damage electronic circuits.
3. Whenever pra c t i cal, keep the meter away from dust and dirt, which
can cause premature wear.
4. Although your meter is built to withstand the rigors of daily use, it
can be damaged by severe impacts. Use reasonable caution when
using and storing the meter.
NOTE: When servicing the meter, use only the replacement parts specified.
Battery: 9V, NEDA 1604 or IEC 6F 22
Fuse: 600V / 15 A IR 100 kA fast acting fuse for A input
Cleaning and Decontamination
Periodically clean your meter’s case using a damp cloth. DO NOT use
abrasives, cleaning solvents or strong detergents, as they may damage
the finish or affect the reliability of the structural components.
P. 8
Battery Replacement
Always use a fresh replacement battery of the specified size and type.
Immediately remove the old or weak battery from the meter and dispose of it in accordance with your local disposal regulations. Old or
defective batteries can leak chemicals that corrode electronic circuits.
WARNING!
To avoid electric shock, be sure to turn off the meter’s power and
disconnect both test leads from any equipment before you remove
or install batteries.
To install a new battery, follow these procedures:
1. Remove the screw from the battery compartment cover on the
back (lower half) of the meter and lift the cover.
2. Remove and discard the old battery. Always dispose of old batteries
promptly in a manner consistent with local disposal regulations.
WARNING!
Under NO circumstance should you expose batteries to extreme heat or
fire as they may explode and cause injury.
3. Place a fresh 9V battery in the compartment.
NOTE: If you do not plan to use the meter for a month or more,
remove the battery and store it in an area that won’t be damaged by a
leaking battery.
4. Reattach the battery compartment cover to the meter and
reinstall the screw.
Specifications
Safety & Compliance
Maximum voltage between
any terminal and
earth ground
Compliance
Certifications
Surge Protection
Fuse Protection for
A input
600V DC/AC (but, 1000V DC/AC peak for
and
functions)
Complies with UL&cUL standard UL 3111-1,
CSA C22.2 No. 1010.1-92, ANSI/ISA-S82,
01-94 to 1000V Overvoltage Category II
CE-marking certificated
6.5 kV peak per IEC 1010.1-92
600V / 15 A IR 100 kA fast fuse
Physical Specifications
Display (LCD)
Operating Temperature
Storage Temperature
Temperature Coefficient
Relative Humidity
Altitude
Battery Type
Battery Life
Shock Vibration
Pollution Degree
E.M.C
Size (H x W x D)
Weight
Warranty
Calibration Interval
Digital - 4000 counts display updates
3/sec nominal
Analog - 41 segments, updates 3/sec
32˚ to 122˚F (0˚ to 50˚C)
-4˚ to 140˚F (-20˚ to 60˚C)
nominal 0.15 x (specified accuracy) /˚C
@ (0˚ to 18˚C or 28˚ to 50˚C) or
otherwise specified
0% to 80% @ (32˚ to 95˚F)
0% to 70% @ (94˚ to 122˚F)
Operating - up to 2000 m
Storage - 10000 m
Single 9V battery - NEDA 1604, JIS 006P or
IEC 6F 22
180 hrs. typical (with backlight off)
Per MIL-T-P RF 28800 for a Style D,
Class III Instrument
2
Meets EN 61326 : 1997 + A1
6.77 x 3.62 x 1.59” (172 x 92 x 40.5mm)
without mounted accessory
Approx. 386g (0.86 lbs.)
3 years
1 year
Feature Summary
Backlight
Fast Autoranging
HOLD
Continuity/Open test
Bar Graph
Record Mode
Relative
Level
±Trigger
Cylinder
RPM 4
RPM 2
ms-Pulse/Duty Cycle
Battery/Fuse Access Door
High-impact Over molded
Case
For clear readings in poorly lighted areas
Meter automatically selects the best range
momentarily
Holds readings on display for later view
Beeper sounds
41 segments for peaking an nulling
Record maximum, minimum, and
average values
Relative zero
4 selectable trigger levels
Selectable positive and negative trigger slope
7 selectable number of cylinders in Dwell
For 4-stroke engine application
For DIS and 2-stroke engine application
Measures the time signal is On or Off in
milliseconds or in %
Battery or fuse replaceable without voiding
calibration
Protective holster features
Electrical Specifications
Accuracy is given as ±([% of reading] + [number of digits]), or otherwise
specified, at 23˚C ±5˚C and less than 80% RH for a period of one year
after calibration.
DC Voltage
Range
400.0 mV
4.000 V
40.00 V
400.0 V
1000 V
NMRR:
CMRR:
Input Impedance:
ADM4201-MAN
Resolution
0.1 mV
0.001 V
0.01 V
0.1 V
1V
Accuracy
0.5% + 2 d
> 50 dB @ 50/60 Hz
> 100 dB @ DC 50/60 Hz, RS = 1 KΩ
10 MΩ, 30 pF nominal
(16 MΩ nominal for 400.0 mV range)
P. 9
AC Voltage (50 - 400 Hz)
Range
4.000 V
40.00 V
400.0 V
1000 V
CMRR:
Input Impedance:
Frequency
Resolution
0.001 V
0.01 V
0.1 V
1V
Accuracy
0.75% + 3 d
1.2% + 5 d
> 60 dB @ DC to 60 Hz, RS = 1 KΩ
10 MΩ, 30 pF nominal
Range
4000 mA
10.00 A
Resolution
1 mA
0.01 A
Accuracy
0.75% + 3 d
1.0% + 10 d
Accuracy
0.02% + 3 d
Minimum frequency 0.5 Hz, sensitivity 250 mV
4 Selectable trigger levels
Range
4000 mA
10.00 A
Resolution
1 mA
0.01 A
Accuracy
1.5% + 3 d
1.5% + 10 d
0.03 V/A
Resolution
0.1 Ω
0.001 kΩ
0.01 kΩ
0.1 kΩ
0.001 MΩ
0.01 MΩ
Accuracy
0.75% + 10 d
0.75% + 3 d
0.75% + 3 d
0.75% + 3 d
.075% + 5 d
1.5% + 10 d
Typical 1.3V DC (2.7V DC @ 400.0Ω Range)
Diode Tester
Range
2.00 V
Resolution
120 - 19999 RPM
60 - 10000 RPM
Accuracy
±2 RPM
Dwell
Range*
0.0 - 356.4
Resolution
0.1
Accuracy
1.2/krpm + 2 d
*Selectable trigger levels and ± trigger slopes
*Selectable cylinders 1, 2, 3, 4, 5, 6, 8
*Specified ranges depend on ± trigger slopes, engine RPM
Ohms
Range
400.0 Ω
4.000 kΩ
40.00 kΩ
400.0 kΩ
4.000 MΩ
40.00 MΩ
Range
4-stroke
2-stroke
4 Selectable trigger levels
AC Current (50 - 400 Hz)
Open Circuit Voltage:
Resolution
0.01 Hz
0.1 Hz
1 Hz
0.01 kHz
RPM
DC Current
Burden Voltage:
Range
199.99 Hz
199.9 Hz
19.999 kHz
199.99 kHz
Resolution
3.0 mA
Accuracy
<3.0V DC
Resolution
0.1˚F
(0.1˚C)
0.1˚F
(0.1˚C)
1˚F
(1˚C)
Accuracy
±(5.4˚F)
±(3.0˚C)
±1.0% + 3.6˚F
(±1.0% + 2.0˚C)
±3% of reading
(±3% of reading)
ms-Pulse and Duty Cycle
Mode
Multi-Point-Injection
Single-Point-Injection
Resolution*
0.5 ms - 1999.9 ms
0.0% - 100.0%
0.5 ms - 1999.9 ms
0.0% - 100.0%
Accuracy
0.5 ms + 1 d
0.2%/krpm + 2 d
0.5 ms + 1 d
0.2%/krpm/cyl + 2 d
Fuel Injection Detector (Both TBI & PFI)
*Selectable trigger levels and ± trigger slopes
*Specified ranges depend on ± trigger slopes, engine RPM and
number of cylinders
Temperature
Range
-40˚ to 68˚F
(-40˚ to 20˚C)
68˚ to 400˚F
(20˚ to 400˚C)
400˚ to 2,498˚F
(400˚ to 1,370˚C)
Sensor:
K-type Thermocouple, sensor accuracy
not included
Audible Continuity Tester
Audible Threshold
Open circuit voltage
ADM4201-MAN
Approx < 50Ω
< 1.2V
P. 10
ADM4201
Digital Multimeter
Limited Warranty
The ADM4201 is warranted to be free from defects in materials and workmanship for a period
of three years from the date of purchase. If within the warra n ty period your instrument should
become inoperative from such defects, the unit will be repaired or replaced at UEi’s option.
This warra n ty covers normal use and does not cover damage which occurs in shipment or
failure which results from alteration, tampering, accident, misuse, abuse, neglect or improper
maintenance. Batteries and consequential damage resulting from failed batteries are not
covered by warra n ty.
Any implied warranties, including but not limited to implied warranties of merchantability
and fitness for a particular purpose, are limited to the express warranty. UEi shall not be
liable for loss of use of the instrument or other incidental or consequential damages,
expenses, or economic loss, or for any claim or claims for such damage, expenses or
economic loss. A purchase receipt or other proof of original purchase date will be required
before warra n ty repairs will be rendered. Instruments out of warra n ty will be repaired (when
repairable) for a service charge. Return the unit postage paid and insured to:
1-800-547-5740 • FAX: (503) 643-6322
www.ueiautomotive.com • Email: [email protected]
This warranty gives you specific legal rights. You may also have other rights which vary from
state to state.
PLEASE
RECYCLE
Copyright © 2007 UEi Automotive
ADM4201-MAN 1/07