1
DISCUS-C REASSEMBLY AFTER SHIPPING AND BREAKDOWN FOR SHIPPING
PROCEDURES
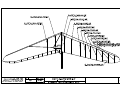
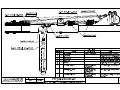
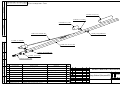
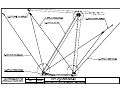
The front leading edge is 60 mm oversleeved with 62 mm at the crossbar junction. The rear leading edge is 50 mm
oversleeved with 52 mm at the washout tube “outboard sprog” attachment point. The rear end of the aft leading edge
contains a receptacle for the tip wand, secured in place by a clevis pin and a small screw 12 mm from the end of the tube.
The clevis pin also passes through a grommet on the rear sail mount webbing strap and secures this strap to the rear leading
edge.
REASSEMBLING THE DISCUS-C AFTER
BREAKDOWN FOR SHIPPING
1. Lay the glider down on it's back (bag zipper up) on a smooth,
clean work surface. Unzip the glider bag, pull it off of the glider at
the front and rear, flip the glider upside down to the kingpost up
position, remove the velcro ties and unfold the sail to it's full length.
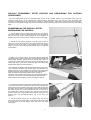
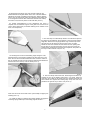
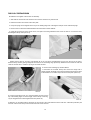
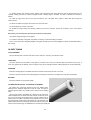
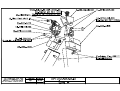
2. Identify the rear leading edges as to left and right in order to
make sure you are mounting the correct rear leading edge into the
correct front. Check the “right” / “left” marking on the rear leading
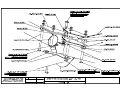
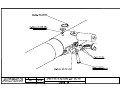
edges. The photo 1 shows the right rear leading edge, in a right side
up orientation.
Photo 1
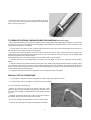
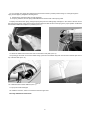
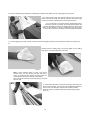
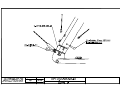
3. Working on one wing at a time, and working with the appropriate
rear leading edge, fold the outer sprog, which is attached to the rear
leading edge "forward" against the rear leading edge. Slide the
outboard end of the leading edge tube into the sail through the sail
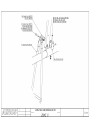
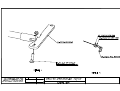
mount strap zipper. (The photo 2 shows the right rear leading edge
being inserted into the sail as described.)
Then slide the rear leading edge forward, allowing the sprog end to
come outside the sail at the long “access zipper”, and slide the rear
leading edge into the front leading edge. Align the rear leading edge
properly so that the sprog bracket is on the inside of the leading
edge, and slide the rear leading edge forward, rotating as
necessary, until the button spring in the rear leading edge engages
securely into the holes in the front leading edge. When the rear
leading edge is fully engaged, you will not be able to rotate it.
Photo 2
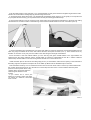
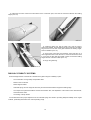
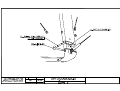
4. Reach into the sail from the sail mount strap zipper, find the sail
mount strap and stretch it towards the aft end of the leading edge.
Position the sail mount strap on the bottom of the leading edge tube
and make sure the strap is not wrapped around the tube. Remove
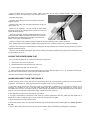
the safety ring from the clevis pin located 100 mm from the end of
the leading edge, remove the clevis pin, and pass it through the
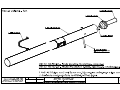
grommet in the sail mount webbing. Re-install the clevis pin in the
leading edge, and re-install the safety ring on the clevis pin
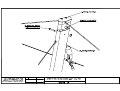
(Photo 3).
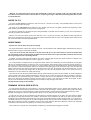
5. Put the outboard end of the rear leading edge into the sail
through the sail mount strap zipper. Verify that the sail mount strap
is on the bottom of the rear leading edge. Zip up the sail mount
strap zipper.
Photo 3
4