1
MAN1510 Rev. 7.0 August 2008 edition
User Manual
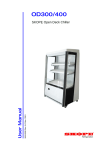
SKOPE Open Deck Chiller
OD1100
SKOPE OD1100
Open Deck Chiller
User Manual
MAN1510
Rev. 7.0 August 2008 edition.
Copyright © 2005
SKOPE Industries Limited.
All rights reserved.
SKOPE Industries Limited reserve the
right to alter specifications without notice.
is a registered trade mark
of SKOPE Industries Limited.
TRADE MARK INFRINGEMENT
The SKOPE trade mark on this product is infringed if the owner, for the time being,
does any of the following:
•
Applies the trade mark to the product after their state, condition, get-up or
packaging has been altered in any manner
•
Alters, removes (including part removal) or obliterates (including part
obliteration) the trade mark on the product
•
Applies any other trade mark to the product
•
Adds to the product any written material that is likely to damage the reputation
of the trade mark
Notice of the above contractual obligations passes to:
•
Successors or assigns of the buyer
•
Future owners of the product
i
SKOPE OD1100 Open Deck Chiller
User Manual
TABLE OF CONTENTS
INSTALLATION
Safety Information. . . . . . . . . . . . . . . . . . . . . . . . . . . . . . . . . . . . . . 4
Positioning the Cabinet. . . . . . . . . . . . . . . . . . . . . . . . . . . . . . . . . . 5
Fitting the High Sign . . . . . . . . . . . . . . . . . . . . . . . . . . . . . . . . . . . . 7
Shelving . . . . . . . . . . . . . . . . . . . . . . . . . . . . . . . . . . . . . . . . . . . . . 9
Security Grille (optional) . . . . . . . . . . . . . . . . . . . . . . . . . . . . . . . . 13
OPERATION
Cabinet Operation. . . . . . . . . . . . . . . . . . . . . . . . . . . . . . . . . . . . . 14
Night Blind . . . . . . . . . . . . . . . . . . . . . . . . . . . . . . . . . . . . . . . . . . 15
ELECTRONIC CONTROLLER
Controller Display . . . . . . . . . . . . . . . . . . . . . . . . . . . . . . . . . . . . . 16
Controller Operation . . . . . . . . . . . . . . . . . . . . . . . . . . . . . . . . . . . 17
Temperature Setpoint . . . . . . . . . . . . . . . . . . . . . . . . . . . . . . . . . . 18
Controller Reset . . . . . . . . . . . . . . . . . . . . . . . . . . . . . . . . . . . . . . 19
Controller Alarms . . . . . . . . . . . . . . . . . . . . . . . . . . . . . . . . . . . . . 20
SERVICING
Lighting . . . . . . . . . . . . . . . . . . . . . . . . . . . . . . . . . . . . . . . . . . . . . 22
Cleaning . . . . . . . . . . . . . . . . . . . . . . . . . . . . . . . . . . . . . . . . . . . . 24
Advanced Servicing . . . . . . . . . . . . . . . . . . . . . . . . . . . . . . . . . . . 25
SKOPE Contact Addresses . . . . . . . . . . . . . . . . . . . . . . . . . . . . . 25
SKOPE OD1100 Open Deck Chiller
TABLE OF CONTENTS
ii
INSTALLATION
Safety Information
When using any electrical appliance, safety precautions should always be
observed. Read these instructions carefully and retain for future reference.
•
When used by, or near, young children or infirm persons, close supervision is
necessary. Young children should be supervised to ensure that they do not
play with the appliance.
•
Do NOT use this appliance for other than its intended use.
•
Do NOT cover the grilles or block the entry or exhaust of airflow by placing
objects up against the refrigeration unit.
•
Do NOT probe any opening.
•
Only use this appliance with voltage specified on the rating label.
•
Ensure adequate ventilation of the SKOPE refrigeration system.
•
Be careful not to touch moving parts and hot surfaces.
•
Regulations require that all electrical work be carried out by authorised
persons. For your own safety and that of others, ensure this is done.
•
If the supply cord becomes damaged, it must be replaced by a SKOPE
authorised service agent or similarly qualified person.
•
This chiller is not designed to be stable in motion. Exercise caution when
moving or transporting this chiller.
Warning:
Do NOT overload the power supply. See the rating label inside the cabinet for
power supply and current draw.
Do NOT allow liquids or any other materials to drain into the bottom of the
cabinet, as this could lead to refrigeration system failure.
Caution:
Disconnect the cabinet from the mains power supply before attempting any
cleaning or maintenance.
4
SKOPE OD1100 Open Deck Chiller
INSTALLATION - Safety Information
Positioning the Cabinet
Ensure the cabinet is positioned on a level surface to prevent the condensate tray
from overflowing.
Power Supply
The power supply cord, which exits out the bottom rear of the cabinet, should be
retrieved before the cabinet is positioned. The power supply must be plugged
directly into a dedicated wall socket. Extension cords or multi-boxes should NOT be
used.
Air Movement
The cabinet must NOT be situated where it is affected by air-conditioning air outlets,
ventilation fans or air re-circulation fans, as this will compromise the airflow and
thus product temperature in the open cabinet zone.
There must be NO air movement directly into the cabinet opening. Air movement
will cause failure of the air curtain over the product, resulting in excessive
temperature rise. Detectable air draft will adversely effect the cabinet operation.
Maximum air movement across the cabinet opening must not exceed 0.2 m/s.
Warning:
There must be NO air movement directly into the cabinet opening.
Ventilation
Never store cardboard cartons or other items in front or rear of the refrigeration unit.
The ventilation slots in the front and rear of the cabinet must be kept clear at all
times.
For efficient operation of the chiller, it is essential that adequate ventilation
clearance be provided around the refrigeration unit. Normal operating conditions
should not exceed 25°C at 60% RH (Climatic Class 3). It is critical that the hot
refrigeration exhaust air is not restricted and that it can easily flow up, away from
the cabinet.
Warning:
For efficient operation of the chiller, it is essential that adequate ventilation
clearance be provided around the refrigeration unit.
SKOPE OD1100 Open Deck Chiller
INSTALLATION - Positioning the Cabinet
5
75mm
200mm
Ceiling
Sign
Unimpeded
refrigeration exhaust
airflow - clear of any
obstruction.
Rear Wall
Front
Rear Ventilation slots
Air intake
Figure 1: Cabinet Ventilation
Important:
The minimum clearance between the cabinet back and the rear wall
must be at least 75mm (see Figure 1 below). The minimum clearance
above the cabinet must be at least 200mm. The cabinet should also
have 60mm clearance on both sides.
6
SKOPE OD1100 Open Deck Chiller
INSTALLATION - Positioning the Cabinet
Fitting the High Sign
For transit purposes the OD1100 High Sign model has the high sign assembly
packed separately inside the cabinet. The OD1100 Low Sign model has the sign
assembly already fitted to the cabinet and requires no additional assembly.
To fit the high sign assembly to the cabinet:
1.
Unpack the sign assembly. There should be four pieces - two identical side
panels, one rear panel and the sign assembly.
2.
Loosen the four retaining screws on the roof of the cabinet and fit each sign
side panel over the screws. Slide the sign side panels forward, flush with the
front of the cabinet and tighten all four retaining screws (see Figure 2 below).
3.
Fit the sign rear panel across the back of the sign side panels by clipping
each end tag into the retaining slot in the side panels (see Figure 3 below).
Retaining Screw
Retaining Slot
Sign Side Panel
Sign Rear Panel
Cabinet Roof
Figure 2: Sign Side Panel
SKOPE OD1100 Open Deck Chiller
INSTALLATION - Fitting the High Sign
Figure 3: Sign Rear Panel
7
4.
Attach the high sign assembly onto the cabinet by clipping the top of the sign
into the retaining slots at the top of both side panels and then locating the
bottom of the sign over both the bottom keyhole screws (see Figure 4 below).
5.
Pull the sign assembly down to ensure it is securely attached.
6.
To remove the sign assembly from the cabinet, lift the sign up to disengage
from the sign sides and then pull the sign assembly away from the cabinet.
Top Retaining Slot
Hign Sign Assembly
Sign Side Panel
Bottom
Keyhole
Screw
Figure 4: Attaching the High Sign Assembly
8
SKOPE OD1100 Open Deck Chiller
INSTALLATION - Fitting the High Sign
Shelving
The SKOPE OD1100 Open Deck Chiller is supplied with the following standard
shelving items, packed inside the cabinet:
•
2 adjustable height top shelves (shallow depth)
•
2 adjustable height middle shelves (medium depth)
•
1 fixed bottom shelf (deep - supplied fitted)
•
5 merchandising ticket strips
•
16 shelf support clips
Adjustable Shelves
The four top shelves can be positioned at different heights to suit various products
and are each held in place with four shelf support clips. The two top shelves are
shallow depth and the two middle shelves are medium depth.
The four adjustable shelves are designed to be positioned either flat or angled down
to accommodate the optional gravity feed shelf slides and dividers.
To fit the adjustable height shelves:
1.
Unpack all the shelving items from inside the cabinet.
2.
Establish the desired position for each of the shelves, based on the height of
the product intended to go on each shelf.
3.
Fit four shelf clips in each of the shelf support strips. To angle the shelves, fit
the front clips two holes lower than the back clips (see Figure 5 on page 10).
4.
Fit the four shelves, beginning with the bottom shelf working up to the top
shelf.
SKOPE OD1100 Open Deck Chiller
INSTALLATION - Shelving
9
Bottom Shelf
The bottom shelf is deeper than the adjustable shelves and is fixed at an angle to
the floor of the cabinet.
Ticket Strips
The merchandising ticket strips, which go on the front of all the shelves, are
intended for inserting advertising material.
Before fitting the shelves, fit the merchandising ticket strips to the front of each
shelf, as required, by sliding the strips on to the metal strip riveted to the front of the
shelf (see Figure 5 below).
To fit a ticket strip to the fixed bottom shelf, press the ticket strip on from the front
ensuring it engages along the full length of the shelf.
Shelf Support
Strip
Top Shelf
Merchandising
Ticket Strip
Shelf Clip
Shelf Support
Strip
Figure 5: Adjustable Top Shelf (angled down)
10
SKOPE OD1100 Open Deck Chiller
INSTALLATION - Shelving
Gravity Feed Shelf Slides and Dividers (optional)
When the adjustable shelves are positioned angled down, optional gravity feed
shelf slides and dividers can be fitted to the shelves. The angle ensures that cold
product slides to the front of the shelf.
The shelf slides are different depths to match the different depths of the shelves.
The two top shelves are shallow depth, the two middle shelves are medium depth
and the bottom fixed shelf is deep depth.
To fit the gravity shelf slides and dividers (see Figure 6 below):
1.
Place the gravity slides onto the corresponding shelf, with the smooth side
facing up and the upstand towards the front.
2.
Clip the dividers into the gravity shelf slides, as per the installation
instructions printed on the side of each divider. The spacing between the
dividers depends on the size and quantity of product.
Divider
Gravity Shelf
Slide
Merchandising
Ticket Strip
Figure 6: Optional Gravity Feed Shelf Slides and Dividers
SKOPE OD1100 Open Deck Chiller
INSTALLATION - Shelving
11
Loading
When loading the cabinet shelves with product:
•
Ensure all shelves are securely fitted (see Figure 5 on page 10).
•
Allow air space around all packages etc. for even cooling and efficient
operation of the chiller.
•
Leave an air space of at least 50mm (2”) above packages etc. on the top shelf.
•
Do not allow products to overhang the front of the shelves, as this will effect the
air flow.
•
Do not exceed a maximum loading of 20kg per shelf.
•
Remove some product if the shelves are flexing or bending.
Spill Trays
The two supplied spill trays aid in the capture of any spilt liquid. Unpack both spill
trays and place in the bottom of the cabinet (see Figure 7 below). The trays can be
removed for ease of cleaning.
Spill Trays
Figure 7: Fitting the Spill Trays
12
SKOPE OD1100 Open Deck Chiller
INSTALLATION - Shelving
Security Grille (optional)
For security purposes an optional lockable security grille is available for the SKOPE
OD1100 Open Deck Chiller. The security grille fits in the front opening of the cabinet
and is locked by means of two keyed security bolts. For convenience both locks use
the same key.
To fit the optional security grille:
1.
Position the security grille (with the tags at the top and locks on the sides) into
the top of the cabinet opening.
2.
Manoeuvre the security grille into position so as both the tags at the top of the
grille locate into the slots under the sign assembly (see Figure 8 below).
3.
Position the sides of the grille to align both the security lock bolts with the
holes in the sides of the cabinet.
4.
Engage both the lock bolts and lock with the security key (see Figure 9
below).
5.
Removing the security grille is a reversal of the above fitting instructions.
Sercurity Grille Tag
Sercurity Grille Lock
Sign
Assembly
Cabinet
Side
Sercurity Grille
Figure 8: Security Grille Tag
SKOPE OD1100 Open Deck Chiller
INSTALLATION - Security Grille (optional)
Figure 9: Security Grille Lock
13
OPERATION
Cabinet Operation
Connect the cabinet to the mains power supply and check operation of the
refrigeration unit, electronic controller and cabinet lighting. The mains flex exits out
the bottom rear left hand side of the cabinet.
Refrigeration Unit
The refrigeration unit evaporator and condenser fans should all operate
continuously from the time the cabinet is plugged in. This may be verified by
listening for compressor switch-on and checking for air movement inside the
cabinet. The internal cabinet air will continue to circulate at all times.
The compressor will start after approximately one minute. The compressor will
switch off when the cabinet internal temperature reaches approximately +1.5°C,
and on again at approximately +4°C.
Electronic Controller
When the cabinet is connected to the power supply, the electronic controller will
display the current cabinet temperature. The compressor LED
will indicate the
compressor is operating and the evaporator fan LED
will normally come on
within 2 minutes (see page 16 for controller display).
Cabinet Lighting
The illuminated sign and cabinet interior light will both go on when the cabinet is
plugged in. The cabinet lighting will stay on permanently while the night blind is up
and will turn off when the night blind is pulled down (see ‘Night Blind’ on the
following page). The only time that a light should not turn on is either if a bulb is
faulty or the ‘CHt’ high temperature shutdown alarm has been activated (see pages
20-21 for controller alarms). The fluorescent lights will require a period of time to
stabilise following initial start up.
Service Notes:
1.
The two cabinet lights both share the same electrical control, therefore if one
fluorescent tube fails neither light will operate.
2.
When replacing a faulty fluorescent tube, ensure to use the correct wattage.
3.
To replace a fluorescent tube see the service instructions on pages 22-23.
14
SKOPE OD1100 Open Deck Chiller
OPERATION - Cabinet Operation
Night Blind
The SKOPE OD1100 Open Deck Chiller is fitted with an energy saving night blind.
The blind, located behind the sign, may be pulled down outside of trading hours to
save energy (see Figure 10 below).
When the night blind is down the cabinet enters into ‘Night Mode, temperature
setting automatically alters to maintain an optimum temperature. When in Night
Mode, the controller will display ‘nHt’.
Lowering the night blind also operates the light switch - turning all the cabinet
lighting off (including the sign). The cabinet lighting will turn on again when the night
blind is fully raised.
To lower the blind, pull down the centre handle (see Figure 11). To keep the blind
down, locate the bottom of the blind into the captive brackets on each side of the
cabinet opening (see Figure 12 below).
Night Blind
(up)
Night Blind
(down)
Figure 11: Centre Handle
Night Blind
Captive
Bracket
Figure 10: Night Blind (down)
SKOPE OD1100 Open Deck Chiller
OPERATION - Night Blind
Figure 12: Captive Bracket
15
ELECTRONIC CONTROLLER
Controller Display
Figure 8: Controller Display
ITEM
ICON
FUNCTION
1
Prg / mute: To initiate ‘f’ type programme sets, press for 5 seconds. Mutes the
audible alarm (buzzer) and deactivates the alarm relay.
2
UP / aux: To scroll settings UP (in programme mode).
3
Set: If pressed for more than 2 seconds displays and / or enables changing the
temperature setpoint (see page 18).
4
DOWN / def: To scroll settings DOWN (in programme mode). Press for more than
5 seconds to initiate manual defrost.
5
COMPRESSOR: ON when the compressor and condenser fan starts. Flashes
when activation of the compressor is temporarily delayed.
6
FAN: ON when the internal cabinet fans are activated. Flashes when activation of
the fans is temporarily delayed.
7
DEFROST: ON when the defrost is activated. Flashes when the activation of the
defrost is temporarily delayed due to procedures in progress.
8
AUX: n.a.
9
ALARM: Flashes in the event of alarms.
10
CLOCK: n.a.
11
LIGHT: n.a.
12
SERVICE: Flashes in the event of malfunctions.
13
HACCP: On if HACCP function is enabled. Flashes if HACCP alarm has occurred.
14
CONTINUOUS CYCLE: n.a.
Table 1: Controller Functions
16
SKOPE OD1100 Open Deck Chiller
ELECTRONIC CONTROLLER - Controller Display
Controller Operation
The CAREL ir33 electronic controller controls and displays the cabinet temperature.
The preset temperature setting controls the product temperature between 0°C and
5°C. The electronic controller also signals temperature alarms (see Table 3 on
pages 20-21).
The electronic controller is located inside the controller box assembly, attached to
the front of the refrigeration unit.
To ensure efficient operation, the electronic controller forces automatic defrosts
when required. During the defrost cycle, the compressor switches off.
Temperature Setting
The controller temperature setting is factory set at 1.5°C. If necessary the setting
can be altered between 0.5°C and 4.5°C. SKOPE do not recommend that the
temperature setting be modified unless it is absolutely necessary, and then only by
small increments at a time.
Note: When the night blind is down the temperature setting automatically alters to
maintain an optimum temperature. The temperature display will lower slightly but
the product temperature will remain relatively constant.
Night Mode
The chiller enters into Night Mode when the night blind is pulled down. During the
night mode programme the chiller enters a power saving mode with the cabinet
lights off and the temperature setting automatically alters to maintain an optimum
temperature. The controller will display ‘nHt’ when in night mode.
The controller will display ‘nHt’ when in Night Mode.
The chiller will exit night mode when the night blind is fully raised.
SKOPE OD1100 Open Deck Chiller
ELECTRONIC CONTROLLER - Controller Operation
17
Temperature Setpoint
The chiller temperature setpoint is factory set at 2.0°C. If necessary the standard
setting can be adjusted between 1.5°C and 3.5°C.
Note: The setpoint is overridden by the minimum compressor run time of 5 minutes.
SKOPE do not recommend that the setpoint be changed unless it is absolutely
necessary, and then only by small increments at a time.
To View and Adjust the Temperature Setpoint:
1. To view the setpoint:
Press and hold the
key for 2 seconds, until
the setpoint value flashes.
2. To adjust the setpoint:
Press either the
or
required setpoint value.
keys to display the
3. Press the
key again to memorise the new
setpoint value. If this is not done within 60
seconds changes will be lost and you will need to
repeat the above procedure.
18
SKOPE OD1100 Open Deck Chiller
ELECTRONIC CONTROLLER - Temperature Setpoint
Controller Reset
To delete programme modifications and reset the controller to SKOPE default
programme, or if the chiller operation is erratic, a ‘Controller Reset’ must be
performed.
To Perform a Controller Reset:
1. Unplug the chiller from the mains power supply.
2. Press and hold the
key while
plugging the chiller into the power
supply (this may require two
people). After a few seconds the
controller is reset and programme
mode ‘bn0’ is displayed. The
controller must never be left in
programme mode ‘bn0’ as failure
will occur.
3. Press the
or
keys to select
‘bn1’ for SKOPE default
programme (suitable for perishable
product), ‘bn2’ for non-perishable
product, or ‘bn3’ for a remote
refrigeration system.
SKOPE Default
Non-Perishable
Remote System
4. Immediately press the
key to
confirm the preferred programme. If
not confirmed within 60 seconds
the chiller will remain in programme
mode ‘bn0’ (and cause failure). If
this occurs, repeat the above
procedure.
Warning:
The controller must never be left in programme mode ‘bn0’ as failure will occur.
SKOPE OD1100 Open Deck Chiller
ELECTRONIC CONTROLLER - Controller Reset
19
Controller Alarms
CODE
DISPLAY LED
BUZZER
ALARM DESCRIPTION
Flashing
on
Product HIGH temperature alarm
(auto reset)
Flashing
on
Product LOW temperature alarm
(auto reset)
Flashing
off
Refrigeration system high temperature
pre-warning (auto reset)
Flashing
on
Refrigeration system high
temperature shutdown (manual reset)
Flashing
off
Ambient probe fault (also flashes ‘rE’)
Flashing
off
Evaporator probe fault
Flashing
off
Condenser probe fault
off
Defrost over-time limit
Flashing
off
Real-time clock fault
Flashing
off
Controller E prom error
Flashing
off
Controller E prom error
None
None
-
Start defrost request
None
-
End defrost request
Table 3: Controller Alarms
20
SKOPE OD1100 Open Deck Chiller
ELECTRONIC CONTROLLER - Controller Alarms
INITIAL ACTION
FINAL ACTION
1. Check the cabinet product loading to ensure ventilation slots are not blocked
and that product does not overhang the shelves.
2. Ensure the cabinet is installed with good refrigeration unit ventilation.
3. If immediate alarm recovery is required - unplug the cabinet from the power
supply for 1 minute, then reconnect to power supply.
1. Check refrigeration ventilation. Ensure clear airpath at the top and front of
the cabinet (to extract hot air). A minimum of 200mm clear space is required
above and in front of the refrigeration unit.
2. Ensure the cabinet is installed in a suitable environment.
3. To reset the ‘CHt’ alarm - unplug the cabinet from the power supply for 1
minute, then reconnect to power supply.
If alarm persists,
contact SKOPE.
To reset alarm - unplug the cabinet from the power supply for 1 minute, then
reconnect to power supply.
None
None
Table 3: Controller Alarms (continued)
SKOPE OD1100 Open Deck Chiller
ELECTRONIC CONTROLLER - Controller Alarms
21
SERVICING
Lighting
Sign Light
The illuminated sign is fitted with one 54 Watt T5 fluorescent tube (Ø16mm x
1150mm, Daylight colour 860).
To replace the fluorescent tube:
1.
Disconnect the cabinet from the mains power supply.
2.
Remove the sign assembly from the cabinet, by lifting the sign up to
disengage from the sign side panels and then pulling forward to separate the
sign from the cabinet (see Figure 4 on page 8).
3.
Revolve the fluorescent tube until the pin position allows withdrawal and then
lift the tube up to remove (see Figure 14 below).
4.
Replace the fluorescent tube with SKOPE part no. ELL1296.
Sign Side Panel
Fluorescent Tube
Figure 14: Replacing the Sign Light
22
SKOPE OD1100 Open Deck Chiller
SERVICING - Controller Alarms
Cabinet Interior Light
The cabinet interior light is fitted with one 54 Watt T5 fluorescent tube (Ø16mm x
1150mm, Daylight colour 860).
To replace the fluorescent tube:
1.
Disconnect the cabinet from the mains power supply.
2.
Reach inside the cabinet and remove the light diffuser, from underneath the
sign assembly, by compressing the front section of the diffuser until it
disengages from the aluminium housing (see Figure 15 below).
3.
Revolve the fluorescent tube until the pin position allows withdrawal and then
pull the tube down to remove.
4.
Replace the fluorescent tube with SKOPE part no. ELL1296.
Sign Assembly
Aluminium
Housing
Fluorescent Tube
Light Diffuser
Figure 15: Replacing the Cabinet Interior Light
SKOPE OD1100 Open Deck Chiller
SERVICING - Controller Alarms
23
Cleaning
When necessary, wipe both the interior and exterior of the cabinet with a damp
cloth. Ensure the cabinet is disconnected from the mains power supply before
cleaning the cabinet. The spill trays, in the base of the cabinet, can be removed for
ease of cleaning.
Warning:
Do NOT wash any solvents down into the refrigeration system, as this could
lead to refrigeration failure.
The bottom air vent panel can be opened to remove any foreign objects that may
fall down the air slots into the unit compartment (see Figure 16 below).
To open the bottom air vent panel:
1.
Disconnect the cabinet from the mains power supply.
2.
Undo the centre screw and hinge the air vent panel up.
Warning:
Care must be taken, when the air vent panel is open, not to allow anything to
drop into this area, as retrieval would be difficult.
Bottom Air Vent Panel
Refrigeration System
Unit Compartment
Figure 16: Opening the Bottom Air Vent
24
SKOPE OD1100 Open Deck Chiller
SERVICING - Cleaning
Advanced Servicing
Advanced servicing should be carried out by an authorised service agent. Servicing
must comply with all relevant standards and regulations, including Australian and
New Zealand ‘Refrigerant Handling Code of Practice 2007’ (Part 1 and Part 2) and
AS/NZS 3000:2000 Wiring Rules.
Detailed service and spare parts information is available in the SKOPE OD1100
Operating and Service Manual (SKOPE part no. MAN1511).
SKOPE Contact Addresses
New Zealand
SKOPE INDUSTRIES LIMITED
Head Office
PO Box 1091, Christchurch
New Zealand
Freephone: 0800 947 5673
Fax: (03) 983 3896
E-mail: [email protected]
Website: www.skope.co.nz
Australia
SKOPE AUSTRALIA PTY LTD
A.C.N. 000 384 270
PO Box 7543, Baulkham Hills B.C.
NSW 2153, Australia
Freephone: 1800 121 535
Fax: 1800 121 533
E-mail: [email protected]
Website: www.skope.com.au
SKOPE OD1100 Open Deck Chiller
SERVICING - Advanced Servicing
25