Transcript
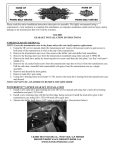
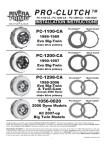
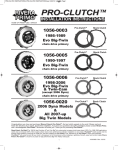
INSTRUCTIONS
12450 Whittier Blvd. Whittier Ca. 90602
(562)907-2600 Fax: (562)907-2606
www.riveraprimoinc.com
Kit Number
1240-0002
REMOVAL
WARNING:
To prevent accidental vehicle
start-up, which could cause
death or serious injury, remove
main fuse before proceeding.
1.Remove the main fuse &
headlamp by following the
instructions in the appropriate
OE service manual.
2. Disconnect the OEM head lamp
jumper harness from the main
harness 1240-0002 and discard
the jumper.
HEADLAMP ADAPTER HARNESS
FOR 1116-0200 LED HEDLED™
2. See Figure 2. Cut off connector
(4) from the adapter harness.
Figure 1. Reconfigure Harness: FLHRlC
operating properly before riding.
1. Verify head lamp operation:
a. High beam: Only the lower
segment should light
b. Low beam: Only the upper
segment should light.
1
7
NOTE: The blue wire on the LED
adapter harness is not used in all
cases. Wrap with electrical tape to
insulate.
3. HDI models: Cut off the sealed
caps (5). If the original head lamp
was not equipped with a position l
amp, do not cut off the
sealed caps.
4.See Figure 1. Strip and splice
the wires following the sealed
splice connector procedure in the
appropriate service manual.
a) Match wire colors.
INSTALLATION
b) Use the blue splice connectors
Fairing Models
for the 16 Ga. wires that were
1.The two capped wires are not
cut from connector (4).
used. secure these to the
c) HDI models: Use the red splice
jumper harness with
connectors for the blue and
electrical tape.
black 20 ga wires that connect
2. Connect the LED adapter
to the position lamp on
harness to the main
certain models.
harness connector.
5. Follow the instructions included
NOTE: The fourth wire on the LED
with the new LED headlamp
adapter harness is not used in all
to connect and finish head
cases. It is for the position light on
lamp installation.
some headlamps.
6. Install main fuse. Follow the
3. Follow the instruction included
instructions in the appropriate
with the new LED head/amp
service manual.
to connect and finish head
lamp installation.
FINALIZE INSTALLATION
4. Install main fuse. Follow the
WARNING
instructions in the appropriate
Be sure headlamp, tail and
service manual.
stop lamp and turn signals are
Road King Models
1. Cut the OEM harness
connectors off. If the vehicle
may be returned to halogen
lighting at a later date, leave
enough wire at the connectors
to allow splicing.
SERVICE PARTS
Black
Blue/Yellow
Black
Blue/Yellow
Blue
Blue/White
Black
Blue/White
2
Black
Blue
6
4
5
3
8
Black
Blue/Yellow
Black
Blue/Yellow
Blue
Blue/White
Blue
Blue/White
Blac
Blue
Blue
1.
2.
3.
4.
5.
6.
7.
8.
k
Low beam connector
High beam connector
Position lamp connector (some markets)
LED harness connector
Wire caps
LED adapter harness
OEM harness
New connections
Figure 2.
Service Parts: LED Headlamp Harness Adapter Kit
1
2
3
Table 1.
Service Parts: LED Headlamp Harness Adapter Kit
Item Description (Quantity)
Part Number
1
Headlamp adapter harness 1240-0002
2
3
Connector, blue (4)
Connector, red (2)
70586-93 (HD)
70585-93 (HD)
Scan with your smart
phone to access
www.riveraprimoinc.com
1108-0026