1
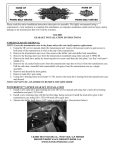
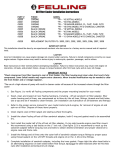
HOME OF PRIMO® BELT DRIVES
QUALITY & PERFORMANCE SINCE 1973
INSTALLATION INSTRUCTIONS FOR
Brute IV
Belt Drives
TM
BRUTE IV TM SHOWN WITH STANDARD POLISHED
ALUMINUM BELT GUARD (PP-419-P-AY),
SUPPLIED IN KIT (NON RUBBER-MOUNT MODELS)
3” Wide
8mm Belt
Fits 1970-2006
Big Twins
(Except Late 1978-86
w/Rotary Top 4-Speed Trans)
** To prevent serious injury, all
open belt drives must be run
with a full coverage Belt Guard !
BRUTE IV TMKIT SHOWN WITH
OPTIONAL FLAMED BELT GUARD
# 2014-0010
It’s common knowledge that a belt drive primary can provide advantages and service that a chain
cannot, especially considering the new technology present in every belt. For dependable, high performance, long-life service nothing beats a modern Primo ® Belt Driv es primary-drive belt-kit!
Primo’s long-time tradition of “Quality & Performance” has made our belt drives the most popular in the world. That same quality & performance is now available in the Brute IV TM 3” wide open
electric-start primary belt-drive for most Big-Twin motorcycles. The Brute IV TM is ideal for streetperformance, competition, and show-bike applications. It looks as good as it works. Carefully read
and follow these instructions for a quick, convenient installation. If you have any questions regarding this installation call (562) 907-2600 and a PRIMO ® BELT DRIVES technician will be happy to
assist you!
Use of the word Harley-Davidson, various motorcycle model names & designations & OEM part numbers are for end-user reference or application information
only. No affiliation between Rivera Primo Inc. & The Harley-Davidson Motor Company exists or is implied by the use of said information. Rivera Engineering, ProClutch, Primo, and Primo Belt Drives are registered trademarks of Rivera Primo Inc. Unauthorized use is prohibited by law. law.
IMPORTANT SAFETY NOTE....
When performing any motorcycle work such as installing a belt drive it should be securely fastened in an upright position with
easy access to the primary drive. If you are working with a lift, fasten the motorcycle securely to prevent it from falling.
Always remove the battery to prevent accidental start-up.
www.riveraprimo.com
1
2108-0005
STEP 1:
Begin by disconnecting battery cables. Removing all the OEM
primary-drive components including the inner primary cover,
AND THE FACTORY INNER-BEARING RACE ON THE TRANSMISSION MAIN SHAFT! Check the motor shaft & transmission
main shaft for leaky seals. Check & thoroughly clean the motor
drive shaft & trans main shaft. Check & tighten the shift-lever
as needed at this time!
If you wish to change the final drive
ratio, now is the time to install a rear
belt drive transmission pulley (tighten
nut perprocedure outlined in HD factory service manual). Primo’s billet aluminum rear drive pulley is
available with 29, 30, 32, or 34 teeth & weighs 3 pounds less
than the OEM unit.
1
2
STEP 2:
Install the starter coupler onto the end of the starter
motor as shown. This component must be installed
prior to the installation of the bearing support.
1986-1988 Softail / FXR applications:
Adequate clearance for the coupler must be made. Remove
approximately .150” of material in the area indicated by the X
(use the 7 o’clock position as your guide).
2A
A 1990 or later starter motor is required. The Primo Belt
Drives adapter plate (PP-407H) is mounted between the
starter motor and the transmission starter boss as pictured.
1970-78 Shovelhead applications (ratchet top only).
A 1990 & later starter motor is required for Shovelheads. A
Primo Belt Drives adapter plate (PP-306) is mounted between
the starter motor & the transmission starter similar to the Softail
adapter.
3
STEP 3:
Install the bearing support (rear motor plate section PP-304,
PP-404, PP-504, or PP-604). Carefully align the bolt-holes
and install the bearing support over the starter extender. Only
hand tighten the bolts at this time. Attach the 1990 or later
starter motor to the rear of the bearing support (1986 Softails
require an adapter PP-407-I) (1970-78 Shovelhead with
ratchet top requires the starter adapter PP-306).
2
STEPS 3A & 3B:
Primo Belt Drives PP-502 Motor Plate assembly (rear section) for
Dyna Glide is notched for swing-arm pivot-boss clearance (photo 3A).
Approximately .125” of material must be removed from the end of the
nut & swing arm pivot bolt assembly (photo 3B) to allow clearance for
the Brute IV starter ring-gear before installing the clutch basket.
Remove enough material from the end of the nut & bolt to allow the
starter ring gear & clutch basket assembly to be installed & rotated with
approximately .100” clearance between the ring gear & the nut-bolt.
STEP 4:
Install the Motor Plate (front section PP-303, PP-403, PP-503,
or PP-603), start the four front section bolts, but only hand tighten at this time!
Install the 4 center bolts that attach the front section of the
Motor Plate Assembly to the rear section. TIGHTEN THE
MOTOR PLATE BOLTS, THE BEARING SUPPORT BOLTS
AND THE CENTER BOLTS TO 29 FOOT POUNDS OF
TORQUE AT THIS TIME, WHILE ENSURING THAT THE
PLATES ARE PROPERLY SEATED AND ALIGNED. If you
have a PP-400 (show chromed alternator cover) install it now!
3A
3B
4
5
PP-400
STEP 5:
Apply a liberal amount of bearing grease to the transmission main-shaft
splines to act as a corrosion inhibitor. The grease also protects the
splines by absorbing shock-loads & preventing rust.
6
STEP 6:
Install the starter jack shaft mechanism (extender, spring, pinion gear, thrust washer, lock washer, and bolt). Make sure the
lock washer is correctly oriented. Use 1-2 drops of blue
threadlock & snug the bolt. Bend the locking-tab over to keep
the bolt from vibrating loose.
See page 7 for starter mechanism diagram!
7
Air gap between ring gear
and pinion gear
Measuring the air gap
STEP 7:
Install the rear pulley (clutch basket) and hand tighten the clutch hub nut making sure it is snug. Note that this
nut is left-hand thread. At this time it is important to check the air gap between the back side of the starter ring
gear and the pinion gear. Recommended gap should be .075” to .125”. Use an 1/8” Allen wrench to measure the gap.
Just slip the short end of the wrench between the ring gear & the pinion gear. If it fits, great. If there is too much gap,
the jackshaft assembly should be shimmed to reduce the gap to the spec above (order #1185-0500 shim kit).
3
8
STEP 8:
If you’re installing the Brute IV on a Dyna Glide, check for
clearance between the rear of the starter ring gear and the
swing arm pivot nut/bolt assembly. If needed remove additional material from the swingarm pivot nut/bolt assembly.
STEP 9:
Install the front pulley & nut (hand tighten to snug). Check alignment of
the pulleys by placing a straight edge flush with the inside lip of the
clutch basket as shown. If needed, spacers can be used behind the
front pulley to correct minor mis-alignment. The straight edge should
line-up flush with both the inside of the front pulley
lip and the inside of the clutch basket lip. Space
the front pulley as needed for alignment.
Available is a laser etched, number front pulley
(part no. P-48-S-3N as shown here)
Also tighten the two stand-off studs at this time using one(1) drop of
“Blue” threadlock on each stud. IF YOUR KIT INCLUDED 5/16”
STUDS TORQUE TO 29 FOOT POUNDS. IF YOUR KIT CAME WITH
3/8” STUDS, TORQUE THEM TO 47 FOOT POUNDS.
STEP 10:
9
10
After checking and/or correcting pulley alignment, permanently install
the rear pulley & hub assembly on the trans mainshaft using 2-3 drops
of “Blue” or “Red” threadlock or equivalent. TORQUE THE MAINSHAFT (CLUTCH HUB) NUT TO FACTORY SPECS (70-80 FOOT
POUNDS OF TORQUE).
Note: Nut is left-hand thread.
STEP 11:
Remove the front pulley. Wrap the belt around the rear pulley, slide the
front pulley into the belt. SLIDE THE FRONT PULLEY ONTO THE MOTOR
SHAFT AND TIGHTEN THE NUT TO 150-165 FOOT POUNDS OF
TORQUE (use “Blue” or “Red” threadlock). With a cold drive-train there
should be enough slack in the belt to allow the front pulley to easily slide
into place (approx. 3/4” of slack is ideal).
Check belt tension now. Belt should have
no more than 1” total up and down play, and
no less than 1/4” at the center of the belt. A
small measure of adjustment can be had
Evo Softail & FXR applications can adjusted by loosening the four bolts of the motor
plate and the transmission bolts. Evo Dyna
Glide and Twin Cam applications have no
adjustment (movement) because the transmission is bolted solid to the motor.
4
11
STEPS 12 & 13:
With both pulleys and the belt installed the
clutch plates can now be installed. Install the
clutch plates in exactly the same order as they
were shipped. The steel .120” thick plate first,
then a fiber plate, then steel, alternating until
all the plates are installed. Last plate in is
steel. When in doubt, call Rivera Primo Inc.,
and consult a technician.
13
12
14
STEP 14:
Apply anti-seize compound liberally to the the threads of the
Pro-Clutch studs as shown to prevent the shouldered nuts from
sticking to the clutch-hub stud threads during disassembly.
STEP 15:
Install the pressure plate, diaphragm spring,
spring retainer (beveled side in) lock-tabs and
shouldered nuts as shown.
15
5
STEP 16:
TIGHTEN THE SHOULDERED NUTS
EQUALLY UNTIL THEY BOTTOM, AND
THEN TIGHTEN TO 30 INCH POUNDS
(NOT FOOT POUNDS) OF TORQUE.
Install the clutch adjustment screw &
adjust the clutch following factory procedures as found the Harley-Davidson service manual. Bend the lock tabs over to
prevent the nuts from coming loose.
16
Note: Never use Loctite on these threads
17
STEP 17:
Install the starter support housing (over the starter extender
mechanism) as pictured. Carefully locate the housing to align
the bolts. Check to make sure the starter can turn freely as the
bolts are tightened. TORQUE TO 29 FOOT POUNDS.
STEP 18 & 18A
This is what your installation should look like.
Be sure & install either the belt guard that
came with the kit, or one of Rivera Primo
Inc.’s optional belt guards.
To check belt tension grasp the top belt and
move up and down. It should have approximately 3/4” of total movement with a cold
drive train.
18
18A
A belt guard is included with all Brute IVTM kits.
Using one(1) drop of “red” threadlock or equivalent
on each fastener, bolt the belt guard to the standoff studs using the supplied 5/16” buttonheads &
TORQUE TO 29 FOOT POUNDS.
Y O U R
A T T E N T I O N
P L E A S E ! !
DO NOT OPERATE
this or any other Rivera Primo Inc. open-primary belt-drive without the proper safety guard or belt cover in place. A well designed
belt guard actually adds to the appearance of the motorcycle while protecting you as well as the belt drive from incidental
damage caused by rocks or debris between the belt and the pulleys. Be safe, always use a belt guard!
6
REPLACEMENT PARTS LIST
BELT GUIDES / WASHER
FRONT PULLEYS (w/o INSERT)
PP-113 . . . . . . . . . INSIDE GUIDE FOR OFFSET PULLEYS
PP-115-45-1.25 . . . OUTSIDE GUIDE FOR FRONT 45T PULLEY
PP-117-S-1.25 . . . . FRONT PULLEY WASHER
P-48-3 . . . . 48 TOOTH / 1986-UP / FITS SOFTAIL/DYNA-GLIDE
P-49-3 . . . . 49 TOOTH / 1986-2000 / FITS FLH & FXR MODELS
OFFSET FRONT PULLEY INSERTS /(PULLEY/HARDWARE NOT INCLUDED)
OFFSET INSERTS
PP-IS-1A . . . . STANDARD INSERT (NO OFFSET)
PP-IS-8A . . . . 1/4” (.250”) OFFSET INSERT
PP-IS-2A . . . . 1/2” (.500”) OFFSET INSERT
PP-IS-9A . . . . 3/4” (.750”) OFFSET INSERT
PP-IS-3A . . . . 1” (1.00) OFFSET INSERT
PP-IS-20A . . . 1-7/16” (1.4375”) OFFSET INSERT
PP-IS-5A . . . . 1-1/2” (1.50”) OFFSET INSERT
PP-IS-12A . . . 1-3/4” (1.750”) OFFSET INSERT
PP-IS-6A . . . . 2” (2.00) OFFSET INSERT
2100-0010 . . INSERT BOLTS - 5/16-18 x 3/4” SHCS / BLK OXIDE
SPECIAL ACORN MOTOR NUTS FOR OFFSET INSERTS
PP-116-S . . . . . . NUT FOR STANDARD & 1/4” INSERT
PP-116-S-.5A . . . . NUT FOR 1/2” OFFSET INSERT
PP-116-S-.750A . . NUT FOR 3/4” OFFSET INSERT
PP-116-S-1A . . . . NUT FOR 1” OFFSET INSERT
PP-116-S-1.25A . . . NUT FOR 1-1/4” OFFSET INSERT
PP-116-S-1.5A . . . .NUT FOR 1-7/16” & 1-1/2” OFFSET INSERT
PP-116-S-1.75A . . .NUT FOR 1-3/4” OFFSET INSERT
PP-116-S-2A . . . . . NUT FOR 2” OFFSET INSERT
STARTER RING GEAR KIT
REAR PULLEYS
2020-0019 . . . . . 8mm / 3” WIDE / 76 TOOTH / SPLINED
2020-0011 . . . . . 8MM / 3” WIDE / 76 TOOTH / TAPERED
2171-0009 . . . STARTER RING GEAR KIT / 66 TOOTH w/SCREWS
REPLACEMENT BELTS
2021-0018 (OLD # 37144-3) . . . 8mm / 3” WIDE / 144 TOOTH / FOR 47-76, 48-76 PULLEY COMBINATIONS
2024-0010 (OLD # 37144-3-K) . SAME SPECS AS ABOVE, BUT “KEVLAR”
2021-0015 (OLD # 37135-3) . . . 8mm / 3” WIDE / 135 TOOTH / 49-76 PULLEY COMBINATIONS / FOR 1986 & UP FXR/FLH, FLT MODELS
REAR MOTOR PLATE ASSEMBLY / POLISHED
FRONT MOTOR PLATE ASSEMBLY / POLISHED
PP-403-P . . . . FRONT MOTOR PLATE SECTION / ALL SOFTAILS
PP-503-P . . . . FRONT MOTOR PLATE SECTION / DYNA GLIDES
PP-603-P . . . . FRONT MOTOR PLATE SECTION / FXR MODELS
PP-303-P . . . . FRONT MOTOR PLATE SECTION / SHOVELS ‘70-’84
PP-408 . . . . . . MOTOR PLATE BOLTS
PP-308 . . . . . . MOTOR PLATE BOLTS (SHOVELHEAD)
PP-408-A . . . . ALLEN BOLTS (REQUIRES QTY 4)
PP-408-B . . . . THRUST WASHER (REQUIRES QTY 4)
PP-703-1-P . . SHIFTER SHAFT CROSSOVER (FLH/FLT/FLHT/FLHR)
COMPLETE 1-PIECE MOTOR PLATE ASSY / POLISHED
PP-702-P . . . FITS 2000 & LATER TWIN CAM B-MOTOR SOFTAILS
PP-703-P . . . FITS 2001 & LATER FLH/FLT/FLHT/FLHR MODELS
STARTER SHAFT SUPPORT HOUSING KIT / POLISHED
PP-404-P . . . REAR MOTOR PLATE SECTION / ALL SOFTAILS
PP-504-P . . . REAR MOTOR PLATE SECTION / DYNA GLIDES
PP-604-P . . . REAR MOTOR PLATE SECTION / FXR MODELS
PP-304-P . . . REAR MOTOR PLATE SECTION / SHOVELS ‘70-’84
PP-410 . . . . MOTOR PLATE BEARING (EXCEPT SHOVELHEADS)
PP-409 . . . . BEARING SUPPORT BOLT (REQUIRES QTY 4)
PP-410-A . . . SNAP RING FOR MOTOR PLATE BEARING
PP-409-A . . . BOLT, TRANS TO INNER MOUNT / FXR MODELS
PP-409-B . . . LOCKWASHER / FXR MODELS
PP-310 . . . . MOTOR PLATE BEARING / SHOVELHEADS ‘70-’84
PP-304-P . . . BEARING SUPPORT / SHOVELHEADS ‘70-’84
PP-309 . . . . BOLTS-BRNG SUPPORT/SHOVEL (REQUIRES QTY 4)
PP-305 . . . . CABLE ADAPTER / SHOVELHEADS ‘70-’84
PP-307SQ . . CLUTCH ARM (SQUARE) / BILLET / SHOVEL ‘70-’84
STARTER EXTENSION (JACKSHAFT) ASSEMBLY
PP-406-P . . . . . SUPPORT HOUSING
PP-405-B . . . . . REPLACEMENT BUSHING
PP-408-2.25 . . MOUNTING BOLTS (REQUIRES QTY 2)
PP-408-2.00 . . MOUNTING BOLTS -FLH/T/R, FLT (REQUIRES
PP-407-66 . . . COMPLETE JACKSHAFT ASSEMBLY
PP-407-C-66 . . PINION GEAR / 9-T / MATES TO 66-T RING GEAR
PP-407-F . . . . EXTENDER / MALE SPLINE BOTH ENDS / ‘89-UP
PP-407-F-86 . . EXTENDER / MALE SPLINE BOTH ENDS / ‘86-’88
BELT GUARD KIT / POLISHED
PP-407-H . . . . ADAPTER PLATE / 1986-1988 SOFTAIL MODELS
PP-419-P -AY. BELT GUARD / RIBBED ALUMINUM (EXCEPT FXR/FLH/T) PP-407-G . . . . COUPLER / STARTER EXTENSION / FEMALE SPLINE
PP-613-P-AY. BELT GUARD / FLAT ALUMINUM / FXR/FLH/FLT/FLHT/R PP-407-A-86 . STARTER SHAFT BOLT / 1986-1988 STARTERS
PP-412 . . . . . STAND-OFF / 5/16-18 x 1/2” (REQUIRES QTY 2)
PP-407-A-90 . STARTER SHAFT BOLT / 1990-1993 STARTERS
PP-412-A . . . SET SCREWS (REQUIRES QTY 2)
PP-407-A-94 . STARTER SHAFT BOLT / 1994 & LATER STARTERS
PP-1064B . . . BUTTONHEAD SCREWS (2) (EXCEPT FXR/FLH/FLT/FLHR) PP-407-B . . . . STARTER EXTENSION SPRING
PP-1064B . . BUTTONHEAD SCREWS (2) /FXR/FLH/FLT/FLHR MODELS PP-407-D . . . . STARTER EXTENSION THRUST WASHER
PP-412-D . . . LOCKWASHER (REQUIRES QTY 2)
PP-407-E . . . . LOCKING TAB
7
CLUTCH ASSEMBLY - BRUTE IV TM / 3” WIDE / 8 mm BELT
IMPORTANT INFORMATION
DO NOT OPERATE this or any other Rivera Primo Inc. open primary belt drive without the proper safety guard or belt cover
in place. A stamped billet aluminum safety guard has been supplied with this belt drive kit. Install the supplied guard or suitable other guards and/or belt covers available from Rivera Primo Inc. prior to starting the motorcycle.
ADEQUATE GROUND CLEARANCE is extremely important, especially when turning to the left. Once installed, make certain
the belt drive assembly does not in any way interfere with this turning geometry. Should there appear to be a problem, correct
it immediately so as to provide adequate & safe ground clearance. DO NOT OPERATE the motorcycle until this is done!
LIMITED WARRANTY:
All pulleys are warranted to be free from defects in material and workmanship under normal use for a period of one year from
actual date of purchase. Seller’s liability shall be limited to repair or replacement of any materials found to be defective, free
of charge at it’s plant or authorized service depots, of specific manufactures components. It is further warranted that products
that were designed for a specific purpose, shall perform for that purpose when installed exactly as defined in the Installation
Instructions accompanying the unit. In no event shall Rivera Primo Inc. or seller be liable for consequential or special damages asserted to be attributed to malfunction of our product, for any reason including, but not limited to, damage asserted to
be from improper installation of our purchased Primary Belt Drive components.
This warranty shall not apply to any products which have been subjected to abuse, neglect or accident, nor shall it apply to
any product which has been repaired or modified by any person not specifically authorized in writing by the manufacturer.
THERE IS NO WARRANTY ON BELTS. Due to the differing conditions and circumstances under which all belts are installed
and used, Gates Rubber Company will not warranty any belt for length of service. Regardless of belt type, keeping your
system free of debris and other objects is most important. Remember too, improper handling of the belt can shorten service
life. Do not crimp the belt. Do not twist the belt. Do not pry the belt onto the application. If you’re shipping or storing, try to
eliminate forward and back-bending of the belt.
LIMITATION OF LIABILITY:
THERE ARE NO IMPLIED WARRANTIES WHICH EXTEND BEYOND THE DESCRIPTION ON THE FACE OF ANY SHIPMENT AND THERE IS NO IMPLIED WARRANTY OF MERCHANTABILITY AND FITNESS EXCEPT THAT THE MATERIAL
SOLD HEREUNDER SHALL BE OF SELLER’S STANDARD QUALITY, and buyer assumes all risk and liability for all loss,
damage or injury to person or property resulting from the use of said material in manufacturing processes or in combination
with other substances, or otherwise. Except as otherwise provided herein quality shall be in accordance with seller’s specifications. Final determination of the suitability of the material for the use contemplated by buyer is the sole responsibility of
buyer, and seller shall have no responsibility in connection with such suitability.
RIVERA PRIMO Inc. 12450 Whittier Blvd, WHITTIER, CA 90602
(562) 907-2600 FAX (562) 907-2606 E-mail: [email protected]
www.riveraprimoinc.com
8