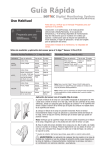
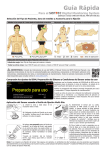
1
Instruction Manual For the Digital Monitoring System (Software version SMB SW-V08.00; MPB SW-V06.00) SenTec Digital Monitoring System Noninvasive Ventilation and Oxygenation Moni toring [Sarah Miller] [John Smith] 1 2 3 4 6 5 75 25 - 15 min 0 min 100 70 100% + - - 15 min 0 min 12 sec AD 7.7h 0 min 42.0 0 °C RHP 39.4 96 84 50 30 7 PCO2 mmHg 100 85 140 50 %SpO2 2.0 PI PR bpm 2014-04-28 15:28:31 [John Smith] 14 11 13 15 19 9 12 16 20 21 10 17 22 23 8 18 24 1 Trend Display Area 2 Numerical Display Area 3 Menu/Previous Level Button 4 AUDIO PAUSED/OFF Button 5 AUDIO PAUSED/OFF Indicator (yellow LED) 6 Door Handle 7 Docking Station Door (colored dot in center of door indicates the SDM’s PO2 activation status: blue if activated, orange otherwise) 8 Enter Button 9 Display Button 10 AC Power/Battery Indicator (green/yellow LED) 11 UP/DOWN Buttons 12 ON/OFF Indicator (green LED) 13 Status Bar 14 Speaker (on the side) 15 Sensor Connection Port 16 Multipurpose l/O-Port (Nurse Call & Analog Output) 17 Serial Data Port (RS-232) 18 Network Port (LAN) 19 Gas Bottle Slot 20Fan 21 Equipotential Terminal Connector (ground) 22 Fuse Holder 23 AC Power Connector 24 ON/OFF Switch Warranty The manufacturer warrants to the initial purchaser that each new component of the SenTec Digital Monitoring System will be free from defects in workmanship and materials. The manufacturer’s sole obligation under this warranty is to at its own choice repair or replace any component – for which the manufacturer acknowledges the warranty cover – with a replacement component. Warranty Exclusions and System Performance SenTec AG can neither guarantee or verify instrument performance characteristics nor accept warranty claims or product liability claims if the recommended procedures are not carried out, if the product has been subject to misuse, neglect or accident, if the product has been damaged by extraneous causes, if accessories other than those recommended by SenTec AG are used, if the warranty seal on the lower side of the monitor is broken, or if instrument repairs are not carried out by SenTec authorized service personnel. CAUTION: Federal law (U.S.) restricts this device to sale by or on the order of a physician. C LA SSIFIE UL R D C Patents/Trademarks/Copyright International Industrial Design No. DM/054179, Japanese Design No. 1137696, U.S. Design Patent No. D483488. Canadian Patent No. 2466105, European Patent No. 1335666, German Patent No. 50111822.5-08, Spanish Patent No. 2278818, Hongkong Patent No. HK1059553, U.S. Patent No. 6760610. Chinese Patent No. ZL02829715.6, European Patent No. 1535055, German Patent No. 50213115.2, Spanish Patent No. 2316584, Indian Patent No. 201300, Japanese Patent No. 4344691, U.S. Patent No. 7862698. SenTec™, V-Sign™, OxiVenTTM, V‑STATS™, V‑CareNeT™, V‑Check™, Staysite™, Illuminate Ventilation™ and Advancing Noninvasive Patient Monitoring™ are trademarks of SenTec AG / © 2014 SenTec AG. All rights reserved. The contents of this document may not be reproduced in any form or communicated to any third party without the prior written consent of SenTec AG. While every effort is made to ensure the correctness of the information provided in this document, SenTec AG assumes no responsibility for errors or omissions. This document is subject to change without notice. US Patient Monitor WITH RESPECT TO ELECTRICAL SHOCK, FIRE AND MECHANICAL HAZARDS ONLY IN ACCORDANCE WITH UL 60601-1/CAN/CSA C22.2 No. 601.1, IEC 60601-1-4, IEC 60601-2-23 20LW SenTec AG, Ringstrasse 39, CH-4106 Therwil, Switzerland, www.sentec.ch Contents Intended Use, Principles of Operation and Limitations............................................................... 5 Intended Use of the SenTec Digital Monitoring System (SDMS)....................................................................................... 5 Transcutaneous PCO2 and PO2 ..........................................................................................................................................5 Pulse Oximetry..................................................................................................................................................................7 SenTec TC Sensors............................................................................................................................................................9 The SenTec Digital Monitoring System (SDMS)......................................................................... 10 Setting up the SDMS.................................................................................................................. 12 Connect SDM to AC Power.............................................................................................................................................. 12 Battery Operation of the SDM......................................................................................................................................... 12 Turning on the SDM......................................................................................................................................................... 12 Installation of the Gas Bottle (Service Gas-0812)........................................................................................................... 13 Connection/Disconnection of Digital Sensor Adapter Cable............................................................................................ 13 Connection of a SenTec TC Sensor.................................................................................................................................. 14 Sensor Check, Sensor Calibration/Storage and Membrane Change.......................................... 15 Checking a SenTec TC Sensor......................................................................................................................................... 15 Sensor Calibration and Storage....................................................................................................................................... 16 Changing the Sensor Membrane..................................................................................................................................... 17 Patient Monitoring with the SDMS ........................................................................................... 20 Selection of Patient Type, Measurement Site, and Sensor Attachment Accessory ......................................................... 20 Check SDM Settings and System Readiness.................................................................................................................... 22 Sensor Application Using a Multi‑Site Attachment Ring................................................................................................... 24 Sensor Application Using an Ear Clip............................................................................................................................... 27 Patient Monitoring........................................................................................................................................................... 29 Sensor Removal with Multi‑Site Attachment Ring........................................................................................................... 38 Sensor Removal with Ear Clip.......................................................................................................................................... 40 Page 3 . Contents Controls, Indicators and Alarms................................................................................................. 42 Controls (Buttons)........................................................................................................................................................... 42 LED Indicators................................................................................................................................................................. 45 Auditory Indicators/Signals.............................................................................................................................................. 45 Alarms............................................................................................................................................................................. 46 Status Bar with Status Icons and Status Messages......................................................................................................... 48 Maintenance of the SDMS.......................................................................................................... 50 Routine Checks................................................................................................................................................................ 50 Service............................................................................................................................................................................. 51 Intended Use, Principles of Operation and Limitations Intended Use of the SenTec Digital Monitoring System (SDMS) Transcutaneous PCO2 and PO2 The SenTec Digital Monitoring System (SDMS) – consisting of the SenTec Digital Monitor (SDM), sensors and accessories (p. 10) – is indicated for continuous, noninvasive monitoring of carbon dioxide tension and oxygen tension as well as oxygen saturation and pulse rate in adult and pediatric patients. In neonatal patients the SDMS is indicated for carbon dioxide and oxygen tension monitoring only. Oxygen tension monitoring is contraindicated for patients under gas anesthesia. The SDMS is indicated for use in clinical and non-clinical settings such as hospitals, hospital-type facilities, intra-hospital transport environments, clinics, physician offices, ambulatory surgery centers and – if under clinical supervision – home environments. The SDMS is for prescription use only. Carbon dioxide (CO2) and Oxygen (O2) are gases that readily diffuse through body and skin tissue and, therefore, can be measured by an adequate noninvasive sensor being applied at the skin surface. If the skin tissue beneath the sensor site is warmed up to a constant temperature local capillary blood flow increases, metabolism stabilizes, gas diffusion improves and, hence, reproducibility and accuracy of CO2/O2 measurements at the skin surface improves. CO2 tensions measured at the skin surface (PcCO2) are usually consistently higher than arterial PCO2 values (PaCO2) in patients of all ages. It is therefore possible to estimate PaCO2 from the measured PcCO2 using an adequate algorithm. TcPCO2 designates an estimate of PaCO2 calculated from the measured PcCO2 with an algorithm developed by J.W. Severinghaus. The ‘Severinghaus Equation’ first corrects PcCO2 measured at the sensor temperature (T) to 37 °C by using an anaerobic temperature factor (A) and then subtracts an estimate of the local ‘Metabolic Offset’ (M). Note: The above phrasing corresponds to an abbreviated version of the SDMS’ Intended Use. Please refer to the current issue of the Technical Manual for the SDM (HB-005752) for the full phrasing of the SDMS’ Intended Use. Principles of Operations of tcPCO2 and tcPO2 Note: Hence, the tcPCO2 values displayed by the SDM are corrected/normalized to 37 °C and provide an estimate of PaCO2 at 37 °C. On the SDM and throughout this manual (unless explicitly stated otherwise) ‘tcPCO2’ is displayed/ labeled as ‘PCO2’. Page 5 . Intended Use, Principles of Operation and Limitations In newborns PO2 measured at the skin surface (PcO2) correlates with arterial PO2 (PaO2) almost in a one to one relationship at a sensor temperature of 43 to 44 °C, whereby the accuracy of PcO2 compared to PaO2 is best up to PaO2 of 80 mmHg (10.67 kPa), above which it increasingly tends to read lower than PaO2 (especially in adults). As target PaO2 levels in newborns are usually below 90 mmHg (12 kPa), a correction of PcO2 values measured at a sensor temperature of 43 to 44 °C is normally not necessary. TcPO2 designates an estimate of PaO2 and corresponds to the measured PcO2. Note: On the SDM and throughout this manual (unless explicitly stated otherwise) ‘tcPO2’ is displayed/labeled as ‘PO2’. Good to know! Warming the skin tissue beneath the sensor to a constant temperature improves accuracy as it a) increases capillary blood flow/induces local arterialization, b) stabilizes metabolism, and c) improves gas diffusion through skin tissue. With increasing sensor temperature the application duration (‘Site Time’) must be evaluated carefully and adjusted accordingly to reduce the risk of burns. Special attention must be given to patients with sensitive skin at the sensor site (e.g. preterm or geriatric patients, burn victims, patients with skin diseases) and/or very low skin tissue perfusion beneath the sensor site (e.g. hypothermic patients, patients with vasoconstrictions, low blood pressure, or circulatory centralization (shock)). Please refer to Technical Manual for the SDM (HB-005752) and the references cited therein for additional information on transcutaneous blood gas monitoring. Limitations of tcPCO2 and tcPO2 The following clinical situations or factors may limit the correlation between transcutaneous and arterial blood gas tensions: ••Hypo-perfused skin tissue beneath the sensor site due to low cardiac index, circulatory centralization (shock), hypothermia (e.g. during surgery), use of vasoactive drugs, arterial occlusive diseases, mechanical pressure exercised on measurement site, or inadequate (too low) sensor temperature. ••Arterio-venous shunts, e.g. ductus arteriosus (PO2 specific). ••Hyperoxemia (PaO2 > 100 mmHg (13.3 kPa)) (PO2 specific). ••Inadequate measurement site (placement over large superficial veins, on areas with skin edema (e.g. oedema neonatorum), skin breakdown, and other skin anomalies). ••Improper sensor application resulting in an inadequate, not hermetically sealed contact between the sensor surface and the patient’s skin causing the CO2 and O2 gases diffusing out of the skin to intermix with ambient air. ••Exposure of the sensor to high ambient light levels (PO2 specific). CAUTION: Compared to the corresponding arterial blood gases PCO2 readings are typically too high and PO2 readings typically too low if the measurement site is hypo-perfused. CAUTION: The SDMS is not a blood gas device. Keep the above mentioned limitations in mind when interpreting PCO2 and PO2 values displayed by the SDM. When comparing PCO2/PO2 values displayed by the SDM with PaCO2/PaO2 values obtained from arterial blood gas (ABG) analysis, pay attention to the following points: ••Carefully draw and handle blood samples. ••Blood sampling should be performed in steady state conditions. ••The PaCO2/PaO2 value obtained from ABG analysis should be compared to the SDM’s PCO2/PO2 reading at the time of blood sampling. ••In patients with functional shunts, the sensor application site and the arterial sampling site should be on the same side of the shunt. ••If the menu-parameter ‘Severinghaus Correction Mode’ is set to ‘Auto’, the PCO2 values displayed by the SDM are automatically corrected to 37 °C (regardless of the patient’s core temperature). When performing the ABG analysis, be sure to properly enter the patient’s core temperature into the blood gas analyzer. Use the blood gas analyzer’s ‘37 °C-PaCO2’ value to compare with the SDM’s PCO2 value. ••Verify proper operation of the blood gas analyzer. Periodically compare the blood gas analyzer’s barometric pressure against a known calibrated reference barometer. Pulse Oximetry Principles of Operations of Pulse Oximetry The SDMS uses pulse oximetry to measure functional oxygen saturation (SpO2) and pulse rate (PR). Pulse oximetry is based on two principles: firstly, oxyhemoglobin and deoxyhemoglobin differ in their absorption of red and infrared light (spectrophotometry) and secondly, the volume of arterial blood in tissue (and hence, light absorption by that blood) changes during the pulse (plethysmography). Pulse oximeter sensors pass red and infrared light into a pulsating arteriolar vascular bed and measure changes in light absorption during the pulsatile cycle. Red and infrared lowvoltage light-emitting diodes (LED) serve as light sources and a photodiode serves as photodetector. The software of a pulse oximeter uses the ratio of absorbed red to infrared light to calculate SpO2. Pulse oximeters use the pulsatile nature of arterial blood flow to differentiate the oxygen saturation of hemoglobin in arterial blood from the one in venous blood or tissue. During systole, a new pulse of arterial blood enters the vascular bed: blood volume and light absorption increase. During diastole, blood volume and light absorption decrease. By focusing on the pulsatile light signals, effects of nonpulsatile absorbers such as tissue, bone and venous blood are eliminated. Page 7 . Intended Use, Principles of Operation and Limitations Note: The SDMS measures and displays functional oxygen saturation: the amount of oxygenated hemoglobin expressed as a percentage of the hemoglobin that can transport oxygen. The SDMS does not measure fractional saturation: oxygenated hemoglobin expressed as a percentage of all hemoglobin, including dysfunctional hemoglobin such as carboxyhemoglobin or methemoglobin. Good to know! Oxygen saturation measurement techniques – including pulse oximetry – are not able to detect hyperoxemia. Due to the S-shape of the oxyhemoglobin dissociation curve (ODC) SpO2 alone cannot reliably detect hypoventilation in patients being administered with supplemental oxygen. Limitations of Pulse Oximetry The following clinical situations or factors may limit the correlation between functional oxygen saturation (SpO2) and arterial oxygen saturation (SaO2) and may cause the loss of the pulse signal: ••dysfunctional hemoglobins (COHb, MetHb) ••anemia ••intravascular dyes, such as indocyanine green or methylene blue ••low perfusion at the measurement site (e.g. caused by inflated blood pressure cuff, severe hypotension, vasoconstriction in response to hypothermia, medication, or a spell of Rynaud’s syndrome) ••venous pulsations (e.g. due to use of the forehead, cheek or earlobe as a measurement site on a patient in steep Trendelenburg position) ••certain cardiovascular pathologies ••skin pigmentation ••externally applied coloring agents (e.g. nail polish, dye, pigmented cream) ••prolonged and/or excessive patient movement ••exposure of the sensor to high ambient light levels ••defibrillation SenTec TC Sensors SenTec TC Sensors provide superior performance, are robust, reliable and require comparatively low maintenance. They combine within a patented digital sensor design the optical components needed for 2-wavelength, reflectance pulse oximetry with the components needed to measure PCO2 and – in case of the OxiVenT™ Sensor only – PO2. PO2 (OxiVenT™ Sensor) is measured with dynamic fluorescence quenching, an oxygen sensing technology measuring the oxygen molecules present in the vicinity of a fluorescent dye being immobilized in a thin carrying layer incorporated within the sensor surface. The PCO2 measurement of SenTec TC Sensors (V-Sign™ Sensor 2, OxiVenT™ Sensor) is based on a Stow-Severinghaus type PCO2 sensor, i.e. a thin electrolyte layer is confined to the sensor surface with a hydrophobic, CO2 and O2 permeable membrane. Membrane and electrolyte must be exchanged every 28 to 42 days. With SenTec’s patented Membrane Changer the membrane and electrolyte can be changed with the ease of 4 identical Press-and-Turn steps in a highly reproducible manner (p. 17). Calibration of the PCO2 segment of SenTec TC Sensors is recommended every 6 to 12 hours and mandatory every 12 to 16 hours (p. 16). The PO2 measurement of the OxiVenT™ Sensor is virtually drift free and, hence, calibration free. Nevertheless, the SDM, as a precaution, calibrates PO2 during each mandatory calibration and subsequently approximately once every 24 hours during one of the anyways ongoing PCO2 calibrations. To achieve local arterialization of the skin tissue at the measurement site SenTec TC Sensors are operated at a constant sensor temperature of typically 41 °C in neonatal and 42 °C in adult/pediatric patients if PO2 is disabled and – if PO2 is enabled – of typically 43 °C in neonatal and 44 °C in adult/ pediatric patients, respectively. Controls of sensor temperature and application duration are designed to meet all applicable standards. To guarantee safe operation, SenTec TC Sensors reliably supervise the sensor temperature with two independent circuits. Additionally, the SDM firmware redundantly controls the temperature of the connected sensor. Page 9 . Intended Use, Principles of Operation and Limitations The SenTec Digital Monitoring System (SDMS) The SenTec Digital Monitoring System (SDMS) comprises the following main components: SenTec Digital Monitor (SDM) Note: SDMs with firmware version SMB SW-V08.00/MPB SWV06.00 or newer are available in a software-configuration without activated PO2-option (SDM) and in a configuration with activated PO2-option (SDM-PO2). The respective configuration is indicated on the SDM’s ‘Power On Self Test’ Screen and on the second page of the menu ‘System Information’. Furthermore, the colored dot in the center of a SDM’s Docking Station Door 7 is orange, if PO2 is not activated, and blue, if PO2 is activated. V-Sign™ Sensor 2 (for PCO2, SpO2/PR monitoring) or OxiVenT™ Sensor (for PCO2, PO2, SpO2/PR monitoring) Note: Throughout this manual the notion ‘SenTec TC Sensor’ refers to SenTec sensors providing transcutaneous blood gas measurements (i.e. to the V-Sign™ Sensor 2 and the OxiVenT™ Sensor). Digital Sensor Adapter Cable (to connect a SenTec TC Sensor to SDM) Ear Clip and Multi‑Site Attachment Rings (to attach SenTec TC Sensors to patients) Staysite™ Adhesive (to improve attachment of Multi‑Site Attachment Rings, e.g. in high humidity environments, for patients who perspire profusely and/or in challenging patient motion conditions). Contact Gel (contact liquid for the application of SenTec TC Sensors) Service Gas (to calibrate SenTec TC Sensors) Membrane Changer (to change membrane and electrolyte of SenTec TC Sensors) V‑STATS™ (PC based Trend Data Download/Analysis, Remote Monitoring, and Configuration Software for SenTec Digital Monitors) SDMS Quick Reference Guide and SDMS Instruction Manual (the present document) SDMS Manual CD (with the exception of the ‘Service and Repair Manual for the SDMS’ all manuals and Directions for Use being related to the SDMS are provided on the Manual CD) Note: The components listed above do not necessarily correspond to the scope of delivery. A complete list of available products including disposables and accessories is provided at www.sentec.ch/products. Additional information on SenTec TC Sensors, the Ear Clip, the Multi‑Site Attachment Rings, the Staysite™ Adhesive, the Membrane Changer, and the Membrane Changer Inserts is provided in the respective Directions for Use. Detailed information on the SenTec Digital Monitor is provided in the Technical Manual for the SDM (HB-005752). Information on maintenance, service and repair procedures that do not require opening the cover of the SDM as well as on maintenance and service procedures for SenTec TC Sensors are provided in the SDMS Service Manual (HB-005615). Note: SDMS related tutorials are available for online viewing at www.sentec.ch/tv. To ensure proper operation of the SDMS, precisely follow the instructions provided in this Instruction Manual step by step. WARNING: The instructions given in the SDMS Quick Reference Guide, the SDMS Instruction Manual, the Technical Manual for the SDM, and on the SDMS Manual CD must be followed in order to ensure proper instrument performance and to avoid electrical hazards. Note: Statements in this manual are only applicable for SDMs with the software version indicated on the cover page. Note: The SDMS Quick Reference Guide, the SDMS Instruction Manual and various other manuals are available for online viewing at www.sentec.ch/support-services/product-manuals. Page 11 . The SenTec Digital Monitoring System (SDMS) Setting up the SDMS Connect SDM to AC Power Plug the female connector of the power cord into the AC power connector on the rear of the monitor 23 . Plug the male connector of the power cord into a properly grounded AC power outlet. Note: The SDM will automatically adapt to the applicable local voltage: 100 - 240V~ (50/60Hz). Verify that the AC power/battery indicator 10 is lit. If the AC power/battery indicator is not lit, check the power cord, fuses, and the AC power outlet. Battery Operation of the SDM The AC Power/Battery Indicator 10 provides information on the charging status of the battery: Green: SDM connected to AC power, battery fully charged Yellow: SDM connected to AC power, battery charging LED OFF: SDM not connected to AC power (i.e. powered by internal battery) Turning on the SDM Turn on the SDM by pushing the ON/OFF Switch on the rear panel 24 . The SDM will automatically perform a ‘Power On Self Test’ (POST). Check the date/time settings of the SDM and adjust if necessary. Note: If the POST fails, discontinue use of the SDM and contact qualified service personnel or your local SenTec representative. Refer to the Technical Manual for the SDM (HB-005752) for a detailed description of the POST. The SDM is equipped with a rechargeable internal Li-Ion battery that can be used to power the monitor during transport or when AC power is not available. The Status Icon ‘Battery’ (p. 48) indicates the remaining battery charge (%). Good to know! In case of a SDM with a LED backlight display a new, fully charged battery will provide up to 10 hours of monitoring time if Sleep Mode=OFF or Auto, and up to 12 hours of monitoring time if Sleep Mode=ON. It takes approximately 7 hours to fully charge a drained battery. ON/OFF switch Installation of the Gas Bottle (Service Gas-0812) The gas bottle slot is located on the rear of the SDM 19 . Remove the old gas bottle by turning it counter-clockwise. Insert the new gas bottle by turning it clockwise approx. 4.5 turns and thoroughly tighten it (without applying undue force). CAUTION: Failure to properly insert the gas bottle may result in incorrect sensor calibrations and may cause increased gas consumption. WARNING: Do not use expired gas bottles or gas bottles from manufacturers other than SenTec. The use of nonSenTec gas bottles may damage the Docking Station. Improper calibration gas mixtures will result in incorrect sensor calibrations and subsequently result in inaccurate PCO2 and/or PO2 data. Dispose empty gas bottles according to local waste disposal regulations for aluminum containers. Connection/Disconnection of Digital Sensor Adapter Cable Connect the Digital Sensor Adapter Cable to the SDM. The connection is properly established when both clamps of the plug snap into place in the sensor connection port 15 . Disconnect the cable from the SDM by pressing the two latches on the black plug to release the clamps (see picture) and pull to remove the cable. The Status Icon ‘Gas’ (p. 48) indicates the remaining capacity of the gas bottle in %. It is only displayed if a SenTec TC Sensor is connected to the SDM and is in the Docking Station. WARNING: The Service Gas bottle is a pressurized container. Protect from sunlight and do not expose to temperatures exceeding 50 °C (122 °F). Do not pierce or burn, even after use. Do not spray on a naked flame or any incandescent material. Press Page 13 . Setting up the SDMS Connection of a SenTec TC Sensor Take a SenTec TC Sensor (V-Sign™ Sensor 2 or OxiVenT™ Sensor). Important: For PO2 monitoring you must use an OxiVenT™ Sensor and a SDM with activated PO2-option. Check the condition of the sensor membrane and the integrity of the sensor (p. 15). Change the membrane if necessary (p. 17). Do not use the sensor if any problems are noted. Once sensor check/inspection of its membrane is completed successfully connect the SenTec TC Sensor to the Digital Sensor Adapter Cable. Thereafter, the SDM usually will display the message ‘Calibrate sensor’ (for exceptions see description of the feature SMART CALMEM, p. 17). Insert the sensor into the Docking Station for sensor calibration (p. 16). If the sensor’s ‘Membrane Change Interval’ has elapsed (this is usually the case for new sensors) the SDM will trigger the message ‘Change sensor membrane’ upon insertion of the sensor into the Docking Station. In this case you must change the sensor membrane (p. 17) before the SDM will calibrate the sensor. Note: If you have changed the sensor membrane just before connecting the sensor to the SDM it is not necessary to change it once again. In this case simply confirm the membrane change on the monitor (menu ‘Membrane Change’, only accessible if the sensor is outside the Docking Station). Sensor Check, Sensor Calibration/Storage and Membrane Change Checking a SenTec TC Sensor Check the condition of the sensor membrane and the integrity of the sensor before and after each use and after changing the membrane (p. 17)! Ensure that the sensor is clean before visually checking it. If necessary, carefully wipe off any residue from the sensor’s surface (including membrane, housing and cable) with 70% isopropanol or another approved cleaning agent (refer to sensor’s Directions for Use). CAUTION: Do not touch the delicate optical/glass components embedded in the sensor’s surface should the membrane be missing. b) Do not use the sensor if there is any visible damage to the sensor housing or cable, if the color of the ring around the glass electrode has a metallic luster (should be brown), or if the sensor’s red LED does not light when the sensor is connected to the SDM. Instead contact qualified service personnel or your local SenTec representative. c) In case of an OxiVenT™ Sensor, do not use the sensor if the off-centered, white, round spot on the sensor surface is missing or is not illuminated in greencyan color when the OxiVenT™ Sensor is connected to the SDM. a) Change the sensor membrane if it is damaged or missing, has a loose fit, or if there is trapped air or dry electrolyte under the membrane. Page 15 . Sensor Check, Sensor Calibration/Storage and Membrane Change Sensor Calibration and Storage If a sensor calibration is mandatory, the SDM displays the message ‘Calibrate sensor’, a low priority alarm sounds and PCO2 and PO2 are marked as ‘invalid’ (values replaced by ‘---’). Good to know! ‘Calibration Intervals’ for SenTec TC Sensors can last up to 12 hours. Once the ‘Calibration Interval’ has elapsed, sensor calibration is recommended (message ‘Sensor calibration recommended’) and monitoring is possible for another 4 to 6 hours with PCO2 marked as ‘questionable’ (p. 32). Thereafter, sensor calibration is mandatory. The SDM, as a precaution, calibrates PO2 during each mandatory calibration and subsequently approximately once every 24 hours during one of the anyways ongoing PCO2 calibrations. To calibrate the sensor: 1. Open the Docking Station Door 7 by pulling the door handle. 2. Check the gasket (arrow) in the Docking Station. If necessary, clean the Docking Station and gasket by using a cotton swab moistened with 70% isopropanol (for other approved cleaning agents refer to the Technical Manual for the SDM). CAUTION: Always clean the sensor before placing it in the Docking Station. 3. Hang the sensor into the holder in the inside of the door. Ensure that the sensor’s red light is visible. CAUTION: Incorrect orientation of the sensor in the Docking Station may cause damage to the sensor, the Docking Station, or parts thereof when closing the Docking Station door. 4. Close the Docking Station Door. The SDM will check the sensor and – if necessary – start the sensor calibration (message ‘Calibration in progress’). The message ‘Ready for use’ will display once calibration is finished. WARNING: Correct calibration requires the sensor to be positioned correctly in the Docking Station Door and the Docking Station Door to be properly closed. Note: If the sensor is stored in the Docking Station additional sensor calibrations can be activated via a ‘Quick Access Menu’ (p. 42). If enabled, PO2 is also calibrated during calibrations that are activated with the menu-function ‘Calibrate sensor’. Note: After switching on the SDM or after a membrane change (p. 17), it is recommended to store the sensor in the Docking Station at least for the duration indicated by the yellow information message ‘Recommended Sensor Stabilization [min]:’ on the ‘Ready for use’ screen and on the ‘Calibration’ screen. Note: To maintain monitor readiness in-between monitoring, always keep the monitor switched on and always store the sensor in the Docking Station. Good to know! SMART CALMEM is a feature of SenTec TC Sensors permitting disconnection of the sensor from the SDM for up to 30 minutes without losing the calibration status! Consequently, monitoring can temporarily be interrupted without the need to remove the sensor from the patient, e.g. to untangle cables, to turn or move the patient, or if the patient needs to go to the restroom. Furthermore, SMART CALMEM reduces the number of required calibrations and, hence, the consumption of calibration gas. Changing the Sensor Membrane The membrane of a SenTec TC Sensor must be changed if the ‘Membrane Change Interval’ has elapsed. In this case the SDM displays the message ‘Change sensor membrane’, triggers a low priority alarm, marks PCO2/PO2 as invalid and activates the menu ‘Membrane Change’ provided the sensor is in the Docking Station. Good to know! In default settings the ‘Membrane Change Interval’ is 28 days. Depending on the specific requirements of various clinical settings it can be customized by the institution between 1 and 42 days. CAUTION: Without being requested by the SDM, the sensor membrane must additionally be changed if any of the conditions described in the section ‘Checking a SenTec TC Sensor’ (p. 15) apply. CAUTION: Use Membrane Changers with a green center dot only for V-Sign™ Sensors! Membrane Changers with blue center dot can be used for all SenTec TC Sensors. CAUTION: The Contact Gel is not needed in any of the membrane change steps. The Contact Gel is only used for sensor application. Page 17 . Sensor Check, Sensor Calibration/Storage and Membrane Change Note: A Membrane Change Tutorial is available for online viewing at www.sentec.ch/tv/v0. Note: The Membrane Changer can be reused by replacing its insert. To prepare the Membrane Changer for reuse, refer to the Directions for Use of the Membrane Changer Inserts or see tutorial at www.sentec.ch/tv/v1. Inserting Sensor into Membrane Changer 1. Verify that the sensor is clean before changing its membrane. If necessary, carefully wipe off any residue from is o pr the sensor’s surface (including op 70 an % ol membrane, housing and cable) with 70% isopropanol (for other approved cleaning agents refer to the sensor’s Directions for Use). 2. Place the Membrane Changer on a smooth stable surface with the colored dot facing up. 3. Insert the sensor into the Membrane Changer with the sensor side facing up. The insert receiver is designed so that improper alignment of the sensor is difficult if not impossible. Note: Neither touch nor hold the sensor cable while the sensor is inside in the Membrane Changer nor pick up the Membrane Changer as this may lead to dislodging the sensor from the Membrane Changer. Four Press-and-Turn Membrane Steps to Change the The membrane change procedure consists of four identical Press-and-Turn steps having the following effects: Step 1 removes the old sensor membrane. Step 2 cleans the sensor surface (old electrolyte). Step 3 applies new electrolyte on sensor surface, and Step 4 places a new membrane on the sensor. Keep the Membrane Changer horizontal while executing the following Press-and-Turn step 4 times: 1x press 3 sec. a. Press down slowly but firmly with palm of hand and hold for 3 seconds. 1x 1x b. Turn the top portion one click clockwise to the next stop. Keep the Membrane Changer horizontal! Hold the changer’s bottom half in place while turning the top half. Important: Repeat the Press-and-Turn step 4 times! Confirming Membrane Change on SDM Once the inspection of the sensor membrane is completed successfully, confirm the membrane change on the monitor (menu ‘Membrane Change’). Note: The membrane timer only resets if you confirm the membrane change on the monitor. Note: The menu ‘Membrane Change’ is only accessible if the Docking Station Door is open. Removing Sensor from Membrane Changer Press once again or lift the sensor to release and remove the sensor from the Membrane Changer. Inspecting Sensor Membrane Check the condition of the sensor membrane and the integrity of the sensor (p. 15). Repeat the membrane change if necessary. Do not use the sensor if any problems are noted. Page 19 . Sensor Check, Sensor Calibration/Storage and Membrane Change Patient Monitoring with the SDMS Selection of Patient Type, Measurement Site, and Sensor Attachment Accessory Refer to the pictures below to select the patient type on the SDM, the measurement site and the sensor attachment accessory. Refer to the following page for additional (important) information. ‘Adult’ if Older than Term Birth + 1 Month. : PCO2/PO2 :PCO2/PO2/SpO2/PR ‘Neonatal’ if Younger than Term Birth + 1 Month : best : good Selection of Sensor Attachment Accessory Earlobe: Use Ear Clip for mature, intact skin. All other sites: Use MAR-MI for mature, intact skin or MAR-SF for sensitive, fragile skin. : fair : application area Note: For PO2 monitoring an OxiVenT™ Sensor and a SDM with activated PO2-option is needed. The respective configuration is indicated on the SDM’s ‘Power On Self Test’ Screen and on the second page of the menu ‘System Information’. Furthermore, the colored dot in the center of a SDM’s Docking Station Door 7 is orange, if PO2 is not activated and blue if PO2 is activated. CAUTION: A flat, well-perfused area of intact skin is needed (centrally located sites are preferable). Avoid placement over large superficial veins or areas of skin breakdown or edema. CAUTION: A good, hermetically sealed contact between the sensor and the skin is essential for TC monitoring! Note: To attach a SenTec TC Sensor with the Ear Clip (p. 27), the earlobe should be large enough to cover the entire sensor membrane (dark surface of the sensor). Furthermore, application of a SenTec TC Sensor on pierced earlobes may result in incorrect PCO2/PO2 measurements. If the earlobe is too small or has multiple piercings consider using a Multi‑Site Attachment Ring (model MAR‑MI or model MAR‑SF) to attach the sensor to an alternate site (p. 24). Note: If more secure sensor attachment is required, e.g. in high humidity environments, for patients who perspire profusely and/or in challenging patient motion conditions, the Staysite™ Adhesive (model SA‑MAR) can be used complementary with the Multi‑Site Attachment Rings. Please refer to the Directions for Use for the Staysite™ Adhesive. WARNING: The measurement of SpO2 and PR with SenTec TC Sensors is only defined on sites specified in the pictures above. In order to avoid erroneous readings and false alarms of SpO2 and PR, ensure that the appropriate patient type (Adult) is selected. Ensure to disable the parameters SpO2/PR for sensor application on other measurement sites. WARNING: It is not recommended to use sensor attachment accessories in patients who exhibit allergic reactions to adhesive tapes. It is not recommended to use the Contact Gel in patients who exhibit allergic reactions. WARNING: To prevent skin burns change the sensor site at least every 4 hours for sensor temperatures higher than 43 °C in neonates or higher than 44 °C in adult/pediatric patients. Page 21 . Patient Monitoring with the SDMS Check SDM Readiness Settings and System Before initiating patient monitoring ensure the current SDM Settings/SDM Profile are appropriate for the patient, for the selected measurement site (p. 20), for the skin condition/skin tissue perfusion at the selected measurement site, and for the specific clinical setting. At least check the patient type and the enabled parameters as well as sensor temperature, ‘Site Time’ and alarm specific settings. Change SDM Settings/SDM Profile if necessary. Furthermore, verify system readiness (message ‘Ready for use’) and check the ‘Available Monitoring Time’. Note: If the connected sensor is in the Docking Station, the ‘Ready for use’ or ‘Calibration’ screen (summarizing important system information (see below)) displays. ‘Ready for use’/‘Calibration’ screen If the connected sensor is in the Docking Station ‘Ready for use’ or ‘Calibration in progress’ displays in yellow big font in the center of the ‘Ready for use’/‘Calibration’ screen. 1 2 3 4 7 5 Note: Pressing the Enter Button (p. 42) while the ‘Ready for use’ screen displays activates a ‘Quick Access Menu’ with the possibility to activate additional calibrations (p. 16), to access the sub-menu ‘Profiles’, or to activate the V‑Check™ Mode (p. 35). The following information is displayed in the upper area of the ‘Ready for use’/‘Calibration’ screen: 1 Patient Type Indicator (yellow): Displays the current patient type (Neonatal or Adult). 2 Patient Info (orange): During remote monitoring with and if enabled within V‑CareNeT™ the ‘Patient Info’ (the patient’s name, the patient number, or a comment) being displayed in the corresponding station’s ‘Remote Monitoring Window’ is duplicated on the SDM. Note: The ‘Patient Info’ is also duplicated in the SDM’s main menu and – if no status message has to be displayed – in the SDM’s status bar enclosed in ‘[ ]’. 3 Sensor Type Indicator: Displays the model/type of the currently connected sensor. 6 4 Current SDM Profile indicator: Indicates the name of the currently selected ‘Standard Profile’ (e.g. ‘SLEEP’). An asterisk (*) displays behind the profile name (e.g. ‘SLEEP*’) if at least one setting of the selected ‘Standard Profile’ is modified (only displayed when SDM in ‘Institutional Mode’). Note: In ‘Institutional Mode’ it is possible – by using V‑STATS™ – to store up to 4 SDM Profiles on the SDM and select one of these profiles as ‘Standard Profile’. During subsequent use, the operator can restore the selected ‘Standard Profile’ (if modified) or select a different ‘Standard Profile’ in the menu ‘Profiles’. Furthermore, if at power-up of the SDM the LAST settings differ from those of the selected ‘Standard Profile’ this menu activates and offers the option to keep the modified settings, to restore the selected ‘Standard Profile’ or to select another ‘Standard Profile’. SP OFF SP ON (or ON and T≤ 41.0 °C in (if T > 41.0 °C in adults/ adults/T ≤ 40.0 °C in neonates) T > 40.0 °C in neonates) IH OFF (or *) IH ON (if **) * ON and T = 44.5 °C in adults/T ≥ 43.5 °C in neonates Good to know! ** T < 44.5 °C in adults/< 43.5 °C in neonates Various profiles preconfigured by SenTec and tailored to optimally fit the specific needs of varying clinical settings are available within V‑STATS™. 5 Sensor Temperature: Displays the currently selected sensor temperature (this indicator is only displayed if the connected sensor is heated). WARNING: The use of temperatures higher than 41 °C requires special attention to patients with susceptible skin, e.g. neonates, geriatric patients, burn victims, patients with skin diseases. 6 Special Temperature Settings: Split-arrow indicating the current configuration of INITIAL HEATING (IH, left part of arrow) and SITE PROTECTION (SP, right part of arrow). 7 V‑Check™ Mode Indicator: If the V‑Check™ Mode (p. 35) is ON the ‘V‑Check™ Mode Indicator’ displays on the left of the ‘Sensor Temperature Indicator’ 5 and the ‘Special Temperature Settings Indicator’ 6 . The following information is displayed in the center of the screen: Enabled Parameters: Indicates the parameters that are currently enabled. Ensure to select an option that is approved for the patient’s age and the intended measurement site (p. 20, 21). Note: The selectable options depend on the sensor type, the SDM’s PO2 activation status, and the selected patient type. Page 23 . Patient Monitoring with the SDMS Available Monitoring Time [hrs]: Indicates the time available for patient monitoring, i.e. the time interval after removing the sensor from the Docking Station or applying the sensor to the patient until the selected ‘Site Time’ or – if PCO2 is enabled – the ‘Calibration Interval’ (p. 16) will elapse (whichever will occur first). Membrane Change is due in [days]: Indicates the number of days left until the next membrane change (p. 17) is mandatory (only if PCO2 is enabled). Recommended Sensor Stabilization [mins]: Indicates the recommended sensor stabilization duration in minutes. Only displayed if sensor stabilization is recommended and if the display of this message is enabled. Status Bar: If the ‘Ready for use’ screen displays, temporary display of the ‘Status Bar’ (p. 48) can be activated by pressing any of the control-buttons (p. 42). The ‘Status Bar’ also displays during an ongoing sensor calibration or if an alarm condition occurs. Note: If the SDM is in Sleep Mode, the display is inactive (black). Press any of the control-buttons (p. 42) to activate the display. Sensor Application Using a Multi‑Site Attachment Ring According to the procedure described point by point below a Multi‑Site Attachment Ring is first attached to the measurement site, one small drop of contact liquid is then applied to skin area in the center of the ring, and finally the sensor is snapped into the ring. Alternatively you may also click the sensor into the ring first, remove the protective liner of the adhesive tape, and then apply one small drop of contact liquid on the center of the sensor. In this case ensure to keep the sensor/ring assembly such that the contact liquid does not run off the sensor face and flip-over the sensor/ring assembly just before attaching it to the skin. WARNING: Application of any pressure to measurement site (e.g. by using a pressure bandage) cause pressure ischemia at the measurement site consequently, inaccurate measurements, necrosis or combination with heated sensors – burns. the may and, – in 1. Check current SDM Settings/SDM Profile and verify system readiness (message ‘Ready for use’, p. 22). Change SDM Settings/SDM Profile if necessary. 2. Clean the site with a swab wetted with 70% isopropanol (or according to your institution’s skin cleaning/degreasing procedures) and let it dry. If necessary remove hair. 3. Take a Multi‑Site Attachment Ring out of the package and pull off the liner protecting the adhesive tape of the ring. 8. Apply one small drop of contact liquid to the skin area in the center of the attachment ring. Alternatively you can use a cotton swab (Q-tip) to apply the contact liquid. CAUTION: The Multi‑Site Attachment Rings (models MAR‑MI and MAR‑SF) are for single-use. Neither reattach used rings on the same nor on another patient! 4. Attach the ring to the measurement site. Verify that the skin under the adhesive is not wrinkled. Then press gently on the retainer ring and move your finger around the ring circumference to ensure a good adhesion of the ring’s adhesive to the skin. 5. Open the Docking Station Door and remove the sensor. Note: Always grab the sensor at its neck to avoid pulling and tearing the sensor cable. 6. Close the Docking Station Door. 7. Check the condition of the sensor membrane and the integrity of the sensor (p. 15). Change the membrane if necessary (p. 17). Do not use the sensor if any problems are noted. Note: Avoid wetting the adhesive tape! Note: As long the sensor is not yet applied to the patient try to keep the measurement site as horizontal as possible so that the contact liquid does not run off the measurement site. Note: As contact liquid you may use SenTec’s Contact Gel, clean tap water, sterile water or sterile saline solution. Note: Alternatively you may first apply one small drop of contact liquid in the middle of the sensor surface. In this case ensure to keep the sensor horizontal (membrane pointing upwards) as good as possible so that the contact liquid does not run off the membrane and flip over the sensor just before inserting it into the ring. WARNING: Do not swallow Contact Gel. Keep away from children. Avoid contact with eyes and injured skin. Do not use in patients who exhibit allergic reactions. Use only approved SenTec Contact Gel, clean tap water, sterile water or sterile saline solution. Page 25 . Patient Monitoring with the SDMS 9. Holding the sensor at its neck, approach the MAR from the flap side and first insert the nose of the sensor into the retainer ring. Then apply slight downward pressure on its neck. The spring tension of the retainer ring will pull the sensor into place with little to no pressure on the skin. Rotate the sensor in the ring and press the sensor gently against the skin to spread the contact liquid. Note: Check that the sensor can be easily rotated to ensure it is snapped in correctly. 10. Check sensor application! Ensure that air gaps are eliminated between the skin and the sensor. Note: A good, hermetically sealed contact between the sensor and the skin is essential for TC monitoring! WARNING: Ensure the sensor is applied correctly. Incorrect application of the sensor can cause incorrect measurements. 11. Twist the sensor into the best position. For forehead/cheek placement wrap the sensor cable once around the ear and tape the cable to the cheek or another applicable site. For other application sites, tape the cable to the skin at a distance of 5 to 10 cm from the sensor head. Route the sensor cable properly to avoid entanglement or strangulation and secure it with a Clothing Clip to an appropriate site of the patient’s clothing or bed linen. Ensure that the sensor cable is loose enough for not to be stretched during monitoring. Gently press on the sensor as a final application check. 12. Verify that the SDM detects that the sensor was placed on the patient, initiates monitoring and that the enabled parameters stabilize. If necessary, readjust sensor application or reposition the sensor. Note: Typically, PCO2 is rising and PO2 (if enabled) is falling to reach a stabilized value within 2 to 10 minutes (p. 30). SpO2 and PR usually stabilize within a few seconds. Note: If more secure sensor attachment is required, e.g. in high humidity environments, for patients who perspire profusely and/or in challenging patient motion conditions, the Staysite™ Adhesive (model SA‑MAR) can complementary be used in addition to the Multi‑Site Attachment Rings. Please refer to the Directions for Use for the Staysite™ Adhesive. 2. Clean the earlobe with a swab wetted with 70% isopropanol (or according to your institution’s skin cleaning/ degreasing procedures) and let it dry. If necessary remove hair. Sensor Application Using an Ear Clip Alternatively you may click the sensor into the clip’s retainer ring first, apply one small drop of contact liquid in the center of the sensor, pull off both liners protecting the clips adhesive tapes, and then apply the sensor/clip assembly to the earlobe. In this case ensure to keep open the clips jaws and to hold the sensor/clip assembly such that the contact liquid does not run off the sensor face until the sensor/clip assembly is applied to the earlobe. WARNING: Application of any pressure to measurement site (e.g. by using a pressure bandage) cause pressure ischemia at the measurement site consequently, inaccurate measurements, necrosis or combination with heated sensors – burns. the may and, – in 1. Check current SDM Settings/SDM Profile and verify system readiness (message ‘Ready for use’, p. 22). Change SDM Settings/SDM Profile if necessary. propan Iso 70% According to the procedure described point by point below the Ear Clip is first attached to the earlobe, then one small drop of contact liquid is applied on the sensor surface, and, finally, the sensor is snapped into the Ear Clip already being attached at the earlobe. ol 3. Take an Ear Clip out of the package, open the clip jaws and pull off both liners protecting the adhesive tapes of the clip. CAUTION: The SenTec Ear Clip (model EC-MI) is for single-use. Neither reattach used clips on the same nor on another patient! squeeze gently Page 27 . Patient Monitoring with the SDMS 4. Pull the earlobe to stretch its skin and then attach the Ear Clip with its retainer ring on the backside of the earlobe. Verify that the skin under the retainer ring’s adhesive is not wrinkled and that the hole in the center of the retainer ring completely covers the skin. Then squeeze gently to ensure that both adhesive tapes stick firmly to the earlobe. 5. Open the Docking Station Door and remove the sensor. Note: Always grab the sensor at its neck to avoid pulling and tearing the sensor cable. 6. Close the Docking Station Door. 7. Check the condition of the sensor membrane and the integrity of the sensor (p. 15). Change the membrane if necessary (p. 17). Do not use the sensor if any problems are noted. 8. Take the sensor and apply one small drop of contact liquid in the middle of the sensor surface. Note: Until the sensor is applied to the earlobe ensure to hold the sensor such that the contact liquid does not run off the sensor face. Avoid wetting the adhesive tapes! Note: As contact liquid you may use SenTec’s Contact Gel, clean tap water, sterile water or sterile saline solution. Note: Alternatively you may apply one small drop of contact liquid to the visible skin area in the center of the Ear Clips tainer ring or use a cotton swab (Q-tip) to apply the contact liquid. WARNING: Do not swallow Contact Gel. Keep away from children. Avoid contact with eyes and injured skin. Do not use in patients who exhibit allergic reactions. Use only approved SenTec Contact Gel, clean tap water, sterile water or sterile saline solution. 9. Pull the earlobe with the Ear Clip in horizontal position. Move the sensor horizontally into place with the cable preferably pointing to the crown of the head and insert it into the clips’ retainer ring by gently pressing until it snaps into the clip. Then guide the earlobe back in vertical position and – if this is not the case yet – rotate the sensor such that its cable points to the crown of the head. Note: Check that the sensor can be easily rotated to ensure it is snapped in correctly. 10. Check sensor application! The sensor is applied correctly if its entire dark surface is covered by the earlobe. Ensure that air gaps are eliminated between the skin and the sensor. CAUTION: A good, hermetically sealed contact between the sensor and the skin is essential for TC monitoring! WARNING: Ensure the sensor is applied correctly. Incorrect application of the sensor can cause incorrect measurements. 11. Wrap the sensor cable around the ear once and tape the cable to the cheek as shown in the picture. Route the sensor cable properly to avoid entanglement or strangulation and secure it with a Clothing Clip to an appropriate site of the patient’s clothing or bed linen. Ensure that the sensor cable is loose enough for not to be stretched during monitoring. Gently squeeze the sensor and Ear Clip as a final application check. 12. Verify that the SDM detects that the sensor was placed on the patient, initiates monitoring and that the enabled parameters stabilize. If necessary, readjust sensor application or reposition the sensor. Note: Typically, PCO2 is rising and PO2 (if enabled) is falling to reach a stabilized value within 2 to 10 minutes (p. 30). SpO2 and PR usually stabilize within a few seconds. Patient Monitoring ‘Sensor-On-Patient’ Detection Once the sensor is correctly applied to the patient (see previous sections), the SDM in most cases automatically detects that the sensor was put on the patient and initiates monitoring for the enabled parameters. If the sensor is applied on a site approved for SpO2/PR monitoring (p. 20) ‘Sensor-OnPatient’ is typically detected within a few seconds, otherwise within less than 2 minutes. When obtaining an adequate patient signal is difficult, it may be possible that the SDM is unable to automatically detect ‘Sensor-On-Patient’. If in this case PCO2 is enabled, you may use the ‘Start Monitoring’ function in the ‘Quick Access Menu’ (p. 42) to activate the ‘Enforced Sensor-On-Patient Mode’ bypassing normal ‘Sensor-On-Patient’ detection. To reset the SDM to ‘Normal Sensor-On-Patient Mode’ simply insert the sensor into the Docking Station. Note: If the ‘Enforced Sensor-On-Patient Mode’ is active the SDM’s ‘Sensor-Off-Patient’ detection is disabled, i.e. in this case no ‘Sensor off patient (8 )’ alarm will be triggered, if the sensor is dislodged or intentionally removed from the patient. Instead the SDM’s algorithms typically will flag the PCO2 and PO2 readings to be unstable (displayed in grey) and the SpO2 and PR readings to be invalid (respective values replaced by ‘---’) within 15 seconds and within 30 seconds the low priority alarm ‘SpO2 signal quality’ will sound. Page 29 . Patient Monitoring with the SDMS Once ‘Sensor-On-Patient’ is detected, the SDM initiates monitoring and the enabled parameters stabilize. SpO2 and PR usually stabilize within a few seconds, whereas PCO2 is typically rising and PO2 is typically falling to reach a stabilized value within 2 to 10 minutes (see below). TC-Stabilization ‘TC-Artifacts’ after Sensor Application or A good, hermetically sealed contact between the TC Sensor and the skin provided, TC-readings typically stabilize within 2 to 10 minutes after sensor application, i.e. the time required to warm up the measurement site and to achieve equilibrium between the gas concentrations in the skin tissue and the gas concentrations on the sensor surface. Good to know! For faster perfusion and results the SDM will temporarily increase the sensor temperature after sensor application if INITIAL HEATING is ON (during approx. 13 minutes +1.5 °C (with a maximum of 43.5 °C) in Neonatal Mode and +2 °C (with a maximum of 44.5 °C) in Adult Mode). Note: The use of INITIAL HEATING is subject to institution’s permission. Once stabilized, TC-readings can be disturbed by so-called ‘TCArtifacts’. Ambient air penetrating between the sensor surface and the skin – the most frequent reason for ‘TC-Artifacts’ – typically will cause PCO2 to fall and PO2 to rise very fast. If the penetration of ambient air is of short duration only, TCreadings will typically restabilize within a few minutes. After sensor application or occurrence of a ‘TC-Artifact’ the SDM displays the message ‘PCO2/PO2 stabilizing’ if both TC-parameters are stabilizing or ‘PCO2 stabilizing’ or ‘PO2 stabilizing’, respectively, if only one TC parameter is stabilizing. To indicate that TC-readings during stabilization do not reflect the patient’s real PCO2 and/or PO2 levels the SDM displays PCO2 and/or PO2 readings in grey and inhibits alarms related to PCO2 and/or PO2 limit violations during stabilization. Furthermore, if stabilization for one or both TC parameters cannot be achieved within 10 minutes the SDM will trigger the low priority alarm ‘Check sensor application’ to indicate that adequacy of sensor application should be verified. Preconfigured Measurement Screens Good to know! In order to reduce the number of ‘TC-Artifacts’ a good, hermetically sealed contact between the sensor and the skin is essential! Ensure to use one small drop of contact liquid when applying the sensor. Furthermore, ensure to verify good contact between the sensor and the skin after sensor application and to properly secure the sensor cable as well as to routinely inspect adequacy of sensor application during monitoring. Note: Excessive motion may cause ‘TC-Artifacts’. In such cases, try to keep the patient still or change the sensor site to one with less motion. The SDM’s numeric values and online trends provide continuous monitoring of the enabled parameters. Depending on the sensor type, the selected patient type, and the enabled parameters different sets of preconfigured measurement screens are available (numerical, numerical with online trends, numerical with online trend and ∆x-/baseline values (p. 32), if SpO2/PR are enabled all with either a wiper bar Pleth Wave or blip bar reflecting relative pulse amplitude). Use the Display Button (p. 42) to cycle between the available measurement displays. Page 31 . Patient Monitoring with the SDMS Quality Indicators for Measurement Parameters ∆x-Values and Baseline Values The SDM continuously evaluates the quality of the measured parameters and the ∆x-values and baseline values derived thereof by assessing the severity of conditions presented to the SDM. The results of this evaluation are used to display status messages and/or quality indicators for the different parameters. While a parameter is marked as: Certain preconfigured measurement screens provide online trends with ∆x-values, baseline values and baselines for PCO2, PO2, SpO2 and/or RHP. Valid: Alarm surveillance for the respective parameter (if applicable) is active and the SDM displays the parameter in the selected color. Questionable (‘?’): Alarm surveillance for the respective parameter (if applicable) is active and the SDM displays the parameter in the selected color and a ‘?’ adjacent to the parameter; Unstable (grey): Alarm surveillance for the respective parameter is not active and the SDM displays the parameter in grey. PCO2, for example, is displayed in grey when stabilizing after sensor application or occurrence of a ‘PCO2 artifact’ (p. 30). Invalid (‘---’): Alarm surveillance for the respective parameter is not active and the SDM replaces the parameter with ‘---’. A parameter’s ∆x-value is displayed to the right of its online trend and corresponds to the difference between its current reading and its reading x minutes ago. x is called ‘DeltaTime’ and is adjustable between 1 and 120 minutes within a password-protected area of V‑STATS™. The default value for ‘Delta-Time’ is 10 minutes. Example: A ‘∆10-value for PCO2’ of ‘+ 8.8 mmHg’ indicates that the current PCO2 reading is 8.8 mmHg higher than the PCO2 reading 10 minutes ago. Good to know! Good to know! The change of a parameter’s reading within a certain time (‘Delta-Time’) may indicate a gradual worsening of the patient’s status. A ‘∆10-value for PCO2’ of ‘+ 7 mmHg’ or more in a patient receiving opioid analgesics and sedatives, for example, indicates opioid induced hypoventilation and, therefore, may help to earlier recognize a developing respiratory depression, especially in patients receiving supplemental oxygen. During patient monitoring a baseline can be set by using the respective function in the ‘Quick Access Menu’. The moment the baseline was set and the baseline itself are subsequently displayed graphically (vertical and horizontal white lines). A timer in the top left of the screen numerically indicates the elapsed time (hh:mm) since the baseline was set. A parameter’s baseline is numerically indicated on the left and its ∆Bvalue, i.e. the difference between its current reading and its reading at the moment the baseline was set, on the right of its online trend. Example: ‘Baseline values for PCO2’ of ‘33.3 + 10.1 mmHg (00:12)’ indicate that the current PCO2 reading is 10.1 mmHg higher than the baseline of 33.3 mmHg which was set 12 minutes ago. To assess the possible impact of a change in patient treatment (e.g. changing ventilator settings, administration of drugs such as sedatives or opioids, changing supply of supplemental oxygen etc.) on the patient’s ventilation and/or oxygenation, it is recommended to set a baseline just before changing the treatment. Operator Events By using the ‘Quick Access Menu’ it is possible to store 8 different types of Operator Events in the internal memory of the SDM for subsequent display in V‑STATS™ after downloading trend data. Within V‑STATS™ operator events are visualized as colored triangles and, among other, can be used to split a measurement into multiple ‘Analysis Periods’ (e.g. to analyze the different phases of a split night). Note: Operator Events are not visualized on the SDM. RHP Online Trends/Setting RHP Reference Once a SenTec TC Sensor is stabilized on the skin in an environment with constant ambient temperature, the heating power required to maintain the sensor temperature depends to a small fraction on the local skin blood flow beneath the sensor site and, hence, heating power fluctuations may indicate changes in local skin blood flow. Page 33 . Patient Monitoring with the SDMS By using the menu-parameter ‘Heating Power Mode’ the operator can select between the display of the ‘Absolute Heating Power’ (AHP), the ‘Relative Heating Power’ (RHP), or disable the display of the heating power. AHP and RHP values are both displayed in Milliwatts (mW). In ‘RHP-Mode’ deviations of the current heating power from a stored RHP-reference value are displayed as plus or minus RHP values once the sensor is stabilized on the skin (‘plus’ if the current heating power is higher than the RHP-reference value, ‘minus’ if lower, and ‘0’ if identical). On most measurement screens RHP readings are – as the AHP readings – displayed in the ‘Heating Power Icon’ (p. 48). On certain measurement screens, however, the RHP-value is displayed underneath the PCO2 or PO2 value and the RHP online trend is provided underneath the PCO2 online trend or PO2 online trend. The RHP-reference value (‘408’ in this example) and the time that has elapsed since it has been determined/set (‘00:16’ in this example) are displayed underneath the RHP online trend. The dashed horizontal center-line in the RHP online trend corresponds to a RHP of 0 mW and reflects the RHP-reference value. RHP values below/above the center-line correspond to episodes during which the sensor required less/more power to maintain the sensor temperature than the AHP-reference value. At constant ambient temperature, consequently, RHP values below/ above the center-line may indicate episodes with a decreased/ increased local skin blood flow beneath the sensor site. Keeping in mind the possible influence of local skin blood flow fluctuations on transcutaneous blood gases (p. 6), it is understandable that an abrupt change of transcutaneous blood gases coupled with a significant change of RHP readings may indicate a change in local skin blood flow, while abrupt changes of transcutaneous blood gases unaccompanied by a significant change of RHP readings may indicate consistent blood flow but a change in arterial blood gases. Providing RHP online trends underneath PCO2 online trends or PO2 online trends, consequently, permits the clinicians to assess at a glance whether a change of PCO2 and/or PO2 reflects a corresponding change of the respective arterial blood gases or is caused or influenced by a significant change of the local skin blood flow beneath the sensor site. If in RHP-mode the sensor is applied to the patient when no RHP-reference value is yet available, the SDM automatically determines the RHP-reference value once the sensor is stabilized on the skin (which is typically the case 5 to 10 minutes after sensor application). If the sensor is stabilized on the skin the RHP-reference value can be set either a) by using the respective function in the ‘Quick Access Menu’ that activates after pressing the Enter Button when a measurement screen is active or b) by cycling the menu-parameter ‘Heating Power Mode’ from ‘Relative’ to ‘Absolute’ or ‘OFF’ and back to ‘Relative’. To clear/reset the RHP-reference value either remove the sensor from the patient and insert it into the Docking Station or set the menu-parameter ‘Relative Heating Mode’ to ‘OFF’. ‘V‑Check™ Mode’ In standard configuration the SDM’s numeric values and online trends provide continuous monitoring of the enabled parameters. If the menu-parameter ‘V‑Check™ Mode’ is set to ON (only selectable if enabled by the institution), the SDM provides a Ventilation Spot Check with statistical result screen displaying mean, minimum, maximum, median and standard deviation for the enabled parameters. A V‑Check™ Measurement consists of the V‑Check™ Stabilization Phase (default duration 8 minutes) and the V‑Check™ Measurement Phase (default duration 2 minutes). If the V‑Check™ Measurement is finished two short signal tones sound and the V‑Check™ Results Screen activates, displaying the above mentioned statistical results for the data assessed during the V‑Check™ Measurement Phase. The V‑Check™ Results Screen remains displayed until the Menu or Display Button are pressed or another V‑Check™ Measurement is started. Note: The ‘V‑Check™ Mode Indicator’ displays on the ‘Ready for use’ and ‘Calibration’ screen (p. 22) if the V‑Check™ Mode is ON. On measurement screens (p. 31) the V‑Check™ Down-Counter (format hh:mm:ss) is displayed on the very right of the Status Bar (p. 48). This down-counter indicates the duration of the V‑Check™ Measurement if the V‑Check™ Measurement has not yet been started, the remaining time to finish the V‑Check™ Measurement during an ongoing V‑Check™ Measurement, and 00:00:00 once the V‑Check™ Measurement is finished. If the SDMS is not ready for use, it indicates --:--:--. Note: Print-out of the trend curves (including the statistical results) is automatically activated upon completion the V‑Check™ Measurement if the protocol ‘Serial Printer’ is selected and a printer is connected to the SDM. Note: The SDM automatically stores V‑Check™ Events in its internal memory at the start and at the end of each V‑Check™ Measurement Phase. After trend data download to V‑STATS™ the start and end of a V‑Check™ Measurement Phase are visualized by two colored triangles and it is possible to generate a report which includes the same information as is provided on the SDM’s V‑Check™ Results Screen. Page 35 . Patient Monitoring with the SDMS Good to know! To use V‑Check™ select the SenTec-preconfigured SDM Profile V‑CHECK as standard ‘SDM Profile’. This will set the sensor temperature to 43.5 °C, the ‘Site Time’ to 0.5 hours, SITE PROTECTION to ON, the ‘Calibration Interval’ to 1 hour, and the ‘Time Range for Trends’ to 15 minutes. PCO2 In-Vivo Correction Subject to institution’s permission, ‘In-Vivo Correction’ (IC) of PCO2 values is possible at the bedside. The ‘PCO2 In-Vivo Correction’ allows for adjusting the SDM’s PCO2 readings based on the result of an arterial blood gas analysis. The ‘PCO2 InVivo Correction’ adjusts the ‘Metabolic Offset’ (M) used in the ‘Severinghaus Equation’ (p. 5) such that the difference between the PCO2 value displayed by the SDM when taking the blood sample and the PaCO2 value as determined by the blood gas analysis cancels out. The ‘PCO2 In-Vivo Correction’ should only be used when a systematic difference between the SDM’s PCO2 readings and PaCO2 is clearly established by several arterial blood gas measurements. Note: ‘The Quick Access Menu’ provides a short-cut to the sub-menu ‘PCO2 In-Vivo Correction’, which is only accessible if enabled by the institution. Note: If PCO2 values are in-vivo corrected the ‘PCO2 In-Vivo Correction’ indicator (‘IC-indicator’) is displayed adjacent to the PCO2 label (IC=xx.x (if ‘mmHg’); IC=x.xx (if ‘kPa’), where xx.x/x.xx is the current offset, respectively; if additionally a fixed ‘Severinghaus Correction’ is used the ‘PCO2 In-vivo Correction’ offset is marked with an asterisk: e.g. ‘IC=x.xx*’.). WARNING: A ‘PCO2 In-Vivo Correction’ should only be made by personal understanding the principles and limitations of transcutaneous PCO2 monitoring (p. 6). If a ‘PCO2 InVivo Correction’ is made it must be checked periodically and adapted in case of changes. Patient Data Management The SDM automatically stores PCO2, PO2, SpO2, PR, RHP and PI data as well as system status information in its internal memory for subsequent on-screen viewing or printing of graphical trends and statistical summary/histograms. The Data Recording Interval is institution-selectable between 1 and 8 seconds and provides between 35.2 and 229.9 hours of monitoring data, respectively. V‑STATS™ provides fast data download to the PC with V-STATS™ (approx. 3 min. for 8 hours data at 4-seconds resolution) for subsequent display, analysis, and reporting within V‑STATS™. Patient data acquired by the SDM can be output through the multipurpose I/O-port (analog output; nurse call), the serial data port (RS-232) or the LAN port, all located on the rear panel of the SDM. These ports can be connected to external instruments such as multiparameter bedside monitors, personal computers (PC), poly(somno)graphs, nurse call systems, chart recorders, or data loggers. With V‑CareNeT™, for example, remote monitoring and secondary alarm surveillance of multiple SDMs being connected to the same network as the PC with V‑CareNeT™ is possible. ‘Operator Events’, ‘Baselines’, and certain SDM settings can be set/controlled remotely on the included SDMs. Furthermore, download of SDM Trend Data is simultaneously possible for multiple SDMs. ‘Remaining Monitoring Time’/‘Site Time Elapsed’ Alarm During monitoring, the ‘Remaining Monitoring Time’ Icon (p. 48) continuously indicates the ‘Remaining Monitoring Time’, i.e. the time until either the selected ‘Site Time’ or – if PCO2 is enabled – the ‘Calibration Interval’ elapse (whichever will occur first). When the ‘Calibration Interval’ elapses before the selected ‘Site Time’, the ‘Remaining Monitoring Time’ Icon highlights yellow, the message ‘Sensor calibration recommended’ displays and monitoring is possible another 4 to 6 hours with PCO2 marked as ‘questionable’. Thereafter, sensor calibration is mandatory and PCO2 and PO2 are marked as ‘invalid’ (values replaced by ‘---’). When the ‘Site Time’ elapses the icon highlights red and the low priority alarm ‘Site time elapsed’ is triggered. In this case the sensor must be removed from the patient for site inspection. Note: To terminate the ‘Site time elapsed’ alarm, remove the sensor from the patient and either press the Enter Button while the message ‘Sensor off patient (8 )’ displays or insert the sensor into the Docking Station. CAUTION: Do not reattach the sensor to the same site if any skin irritations are noted during site inspection. Good to know! If the safety feature SITE PROTECTION is ON the SDM will reduce the sensor temperature to safe values once the sensor application duration overruns the selected ‘Site Time’ by more than 10% or 30 minutes. PCO2/PO2 will be marked as ‘invalid’ thereafter (values replaced by ‘---’). During monitoring, the current setting for SITE PROTECTION is indicated in the ‘Sensor Temperature’ icon (p. 48). A ‘red-blue rightward arrow with tip down’ displays if SITE PROTECTION is ON, a ‘red rightward arrow’ otherwise. Page 37 . Patient Monitoring with the SDMS Sensor Removal with Multi‑Site Attachment Ring is o pr o 70 pan % o Remove the sensor from the patient when monitoring is completed or monitoring time has elapsed (message ‘Site time elapsed’ or ‘Calibrate sensor’). CAUTION: For site inspection and/or calibration the Multi‑Site Attachment Ring can remain on the same site for up to 24 hours and may be reused for another sensor application. It is recommended to remove and to discard the Multi‑Site Attachment Ring after 24 hours and to keep the measurement site free of adhesive for 8 to 12 hours. Sensor Removal for Subsequent Reattachment to Same Site 1. Remove the adhesive tape securing the sensor cable. l 3. Clean the sensor with a swab wetted with 70% isopropanol to remove any contact liquid residues or dirt (for other approved cleaning agents refer to the sensor’s Directions for Use). 4. Check the condition of the sensor membrane and the integrity of the sensor (p. 15). Change the membrane if necessary (p. 17). Do not use the sensor if any problems are noted. Important: Before reapplying the sensor to the same site, we recommend calibrating the sensor even if calibration is not yet mandatory or recommended by the SDM. If you skip the calibration, at least reset the Site Timer by pressing the Enter Button when the message ‘Sensor off patient (8 )’ displays and then continue at step 6. 2. Place a finger on each side of the ring and rotate the sensor towards the index finger. The index finger will act as a wedge and will disengage the sensor 39.4 from the ring. 96 84 50 30 PCO2 mmHg 100 85 140 50 %SpO2 2.0 PI PR bpm 14-04-28 15:28:31 5. To calibrate the sensor open the Docking Station Door and then hang the sensor in the holder in the inside of the Docking Station Door (the red light will be visible). Close the Docking Station Door. Note: Sensor calibration – if necessary – will start (message ‘Calibration in progress’). The message ‘Ready for use’ will display once calibration is finished. 6. Clean the skin in the center of the ring with a dry swab or a swab with 70% isopropanol (or according to your institution’s skin cleaning/degreasing procedures) to remove any contact liquid residues or dirt and let it dry. 7. Carefully inspect the measurement site. CAUTION: Do not reattach the sensor to the same site if any skin irritations are noted during site inspection. 8. To reapply the sensor to the same site, continue at step 5 in section ‘Sensor Application using a Multi‑Site Attachment Ring’ (p. 25). Make sure to reapply one small drop of contact liquid to the site before reinserting the sensor into the MAR. Sensor Removal without Reattachment to Same Site 1. Remove the sensor together with the Multi‑Site Attachment Ring by carefully lifting the ring’s little tab. 2. Clean the skin with a dry swab or a swab with 70% isopropanol (or according to your institutions skin cleaning/degreasing procedures) to remove any contact liquid residues or dirt and then carefully inspect the site to note any potential skin irritations. 3. Remove the sensor from the Multi‑Site Attachment Ring, discard the ring and then follow steps 3 to 5 above to clean the sensor, to check the condition of its membrane and its integrity as well as to insert it in the Docking Station for calibration and/ or storage. CAUTION: To maintain monitor readiness and minimize PCO2 drift potential always keep the SDM switched on and store the sensor in the Docking Station in between monitoring! Page 39 . Patient Monitoring with the SDMS Sensor Removal with Ear Clip is o pr o 70 pan % o Remove the sensor from the patient when monitoring is completed or monitoring time has elapsed (message ‘Site time elapsed’ or ‘Calibrate sensor’). CAUTION: For site inspection and/or calibration the Ear Clip can remain on the same earlobe for up to 24 hours and be reused for another sensor application. It is recommended to remove and to discard the Ear Clip after 24 hours and to keep the earlobe free of adhesive for 8 to 12 hours. Sensor Removal for Subsequent Reattachment to Earlobe 1. Remove the adhesive tape securing the sensor cable. 2. Hold the sensor at the cable neck with one hand and detach it from the Ear Clip while retaining the clip with the other hand. l 3. Clean the sensor with a swab wetted with 70% isopropanol to remove any contact liquid residues or dirt (for other approved cleaning agents refer to the sensor’s Directions for Use). 4. Check the condition of the sensor membrane and the integrity of the sensor (p. 15). Change the membrane if necessary (p. 17). Do not use the sensor if any problems are noted. Important: Before reapplying the sensor to the same earlobe, we recommend calibrating the sensor even if calibration is not yet mandatory or recommended by the SDM. If you skip the calibration, at least reset the Site Timer by pressing the Enter Button when the message ‘Sensor off patient (8 )’ displays and then continue at step 6. 39.4 96 84 50 30 PCO2 mmHg 100 85 140 50 %SpO2 2.0 PI PR bpm 14-04-28 15:28:31 5. To calibrate the sensor open the Docking Station Door and then hang the sensor in the holder in the inside of the Docking Station Door (the red light will be visible). Close the Docking Station Door. Note: Sensor calibration – if necessary – will start (message ‘Calibration in progress’). The message ‘Ready for use’ will display once calibration is finished. Sensor Removal without Reattachment to Same Earlobe 1. Open the Ear Clip’s jaws and remove it from the earlobe together with the sensor by turning it sideways. 6. Clean the skin in the center of the Ear Clip’s retainer ring with a dry swab or a swab with 70% isopropanol (or according to your institutions skin cleaning/degreasing procedures) to remove any contact liquid residues or dirt and let it dry. 7. Carefully inspect the earlobe. CAUTION: Do not reattach the sensor to the same earlobe if any skin irritations are noted during site inspection. 8. To reapply the sensor to the same earlobe, continue at step 5 in section ‘Sensor Application using an Ear Clip’ (p. 27). Make sure to reapply one small drop of contact liquid in the middle of the sensor surface before reinserting the sensor into the Ear Clip. 2. Clean the earlobe with a dry swab or a swab with 70% isopropanol (or according to your institution’s skin cleaning/ degreasing procedures) to remove any contact liquid residues or dirt and then carefully inspect the earlobe to note any potential skin irritations. 3. Remove the sensor from the Ear Clip, discard the Ear Clip and then follow steps 3 to 5 above to clean the sensor, to check the condition of its membrane and its integrity as well as to insert it in the Docking Station for calibration and/ or storage. CAUTION: To maintain monitor readiness and minimize PCO2 drift potential always keep the SDM switched on and store the sensor in the Docking Station in between monitoring! Page 41 . Patient Monitoring with the SDMS Controls, Indicators and Alarms Controls (Buttons) The ON/OFF switch is located on the rear panel of the SDM 24 . The following controls (buttons) are located on the front panel of the SDM: Menu/ Previous Level Button UP Button DOWN Button ••to activate the menu ••to return to the menu on the next higher level (only if ‘editing mode’ is inactive, exits the menu if pressed while at top level) ••to deactivate ‘editing mode’ for the selected menu-parameter* Note: Menu access can be disabled by the institution (e.g. for home use) AUDIO PAUSED /AUDIO OFF Button Enter Button ••to select a menu-item by scrolling the blue menu bar upwards through the menu (only if ‘editing mode’ is inactive) ••to increase the value of the menu parameter for which ‘editing mode’ is active* ••to increase the brightness of the display (only if a measurement screen is active) ••to select a menu-item by scrolling the blue menu bar downwards through the menu (only if ‘editing mode’ is inactive) ••to decrease the value of the menu parameter for which ‘editing mode’ is active* ••to decrease the brightness of the display (only if a measurement screen is active) Display Button ••to pause auditory alarm signals for 1 or 2 minutes (depending on respective menu setting) ••to switch OFF auditory alarm signals permanently (by pressing > 3 seconds) Note: Switching off auditory alarm signals is only possible if enabled by the institution. Note: This button is inactive if the menu parameter ‘Alarm Settings/Alarm Volume’ is set to OFF. ••to activate the selected sub-menu or function ••to activate/deactivate ‘editing mode’ for the selected menu parameter* ••to activate ‘Quick Access Menus’ (only if menu is not open) ••to terminate the ‘Sensor off patient (8 )’** and ‘Remote Monitoring Interrupted (8 )’ alarms ••to activate the second ‘System Information’ page (only if first ‘System Information’ page is open) ••to cycle between the available measurement screens ••to deactivate ‘editing mode’ for the selected menu-parameter* ••to exit the menu from any menu level (only if ‘editing mode’ is inactive) *For parameters that in ‘editing mode’ are highlighted with a blue menu bar changes immediately become effective without confirmation (see example 1 below). In case of parameters that in ‘editing mode’ are highlighted with a yellow menu bar changes must be confirmed by pressing the Enter Button before they become effective (see example 2 below). To cancel changes/deactivate ‘editing mode’ in this case use the Menu/ Previous Level Button or the Display Button. ** will also reset the Site Timer Example 1: ‘SpO2 Low Limit’ The parameter ‘SpO2 Low Limit’ is included in the menu ‘Alarm Settings’. It is an example of a parameter for which changes made with the UP/Down Buttons become immediately effective without confirmation. To change the parameter ‘SpO2 Low Limit’, proceed as follows: ••Press to access the menu. ••Press to open/activate the menu ‘Alarm Settings’. ••Press 3-times to scroll down the blue menu bar to the parameter ‘SpO2 Low Limit’. ••Press to activate ‘editing mode’ for the parameter ‘SpO2 Low Limit’. Note that the ‘Enter’ symbol at the end of the line is replaced by up/down arrows and that the color of the menu bar remains blue. ••Press or as many times as required to select the desired SpO2 low limit. Note that changes become immediately effective. ••Press , or to deactivate ‘editing mode’ for the parameter ‘SpO2 Low Limit’. Note that the ‘Enter’ symbol reappears at the end of the line and that the color of the menu bar remains blue. ••Press menu. to return to the main menu or to exit the Note: Changes made with the UP/Down Buttons immediately become effective without confirmation for all parameters but the parameters ‘Patient’, ‘Enabled Parameters’, and ‘Language’ (see example 2). Example 2: ‘Language selection’ The parameter ‘Language’ is included in the menu ‘System Settings’. It is an example of a parameter for which changes must be confirmed by pressing the Enter Button before they become effective. To change the parameter ‘Language’, proceed as follows: ••Press to access the menu. ••Press 3-times to scroll down the blue menu bar to the menu ‘System Settings’. ••Press to open/activate the menu ‘System Settings’. ••Press 3-times to scroll down the blue menu bar to the parameter ‘Language’. ••Press to activate ‘editing mode’ for the parameter ‘Language’. Note that the ‘Enter’ symbol at the end of the line is replaced by up/down arrows followed by an ‘Enter’ symbol and that the color of the menu bar changes from blue to yellow. Page 43 . Controls, Indicators and Alarms ••Press or as many times as required to select the desired language. Note that changes do not become effective. ••Press to confirm the selected language and to deactivate ‘editing mode’. To cancel changes and deactivate ‘editing mode’ press or . Note that upon deactivation of the ‘editing mode’ the ‘Enter’ symbol reappears at the end of the line and the color of the menu bar changes from yellow to blue. Note: After language-confirmation, the SDM automatically exits the menu. Note: Operator access to the parameter ‘Language’ can be disabled by the institution by using V‑STATS™ within a password protected area. Example 3: ‘Confirmation of Membrane Change’ To reset the membrane timer after a successful membrane change, the membrane change must be confirmed on the SDM by using the function ‘Membrane Change Done’ in the menu ‘Membrane Change’. To confirm a membrane change, proceed as follows: ••Press to access the menu. ••Press twice to scroll down the blue menu bar to the menu ‘Membrane Change’. ••Press to open/activate the menu ‘Membrane Change’. Note: The SDM automatically activates the menu ‘Membrane Change’ if a sensor with expired membrane timer is in the Docking Station. ••Press once to scroll down the blue menu bar to the function ‘Membrane Change Done’. ••Press to confirm the membrane change. Note: The menu ‘Membrane Change’ and the function ‘Membrane Change Done’ are dimmed grey (not accessible) if the sensor is attached to the patient or in the Docking Station. In this case remove the sensor from the patient or the Docking Station to confirm the membrane change. LED Indicators Auditory Indicators/Signals The following visual LED indicators are located on the front panel of the SDM. The SDM, among other, provides the following auditory indicators/signals: AUDIO PAUSED/ AUDIO OFF Indicator ••Yellow LED: Auditory alarm signals paused for 1 or 2 minutes ••Yellow LED flashes: Auditory alarm signals permanently switched off (activated by pressing AUDIO PAUSED/AUDIO OFF Button > 3 seconds) ••LED OFF: Auditory signals either active or permanently switched off by setting menu parameter ‘Alarm Settings/Alarm Volume’ to OFF. ••Green: SDM turned on ••LED OFF: SDM turned off ••The ‘AUDIO OFF Reminder’ (short signal tone) sounds every 60 seconds if the auditory alarm signals are permanently switched off. Operator access to switch off this reminder signal is subject to institution’s permission; its volume is not adjustable. ••The ‘Auditory Power On Self Test Signal’ (three short tones) sounds during the ‘Power On Self Test’; its volume is not adjustable. ON/OFF Indicator AC Power/ Battery Indicator ••Auditory alarm signals for high, medium, and low priority alarm conditions (p. 46); use the parameter ‘Alarm Volume’ to adjust the volume of these signals. ••Green LED: Connected to AC power, battery fully charged ••Yellow LED: Connected to AC power, battery charging ••LED OFF: Not connected to AC power (i.e. powered by internal battery) Note: The AC Power/Battery Indicator functions irrespective of the SDM being switched on or off. ••The ‘Ready for use’ Beep (short tone) sounds at the end of a successful calibration of a SenTec TC Sensor. This signal can only be switched ON/OFF by the institution; its volume is not adjustable. ••The Key Click (short tone) indicates that a button has been properly pressed; use the parameter Key Click to switch off/ adjust the volume of this signal. Page 45 . Controls, Indicators and Alarms ••The ‘Pulse Beep’ (short tone) sounds once for each pulse. Its automatic pitch modulation reflects changing SpO2 levels; use the parameter ‘Pulse Beep’ to switch off/adjust the volume of this signal. ••The ‘Button Disabled Beep’ (long tone) sounds if a button is pressed that currently is disabled (e.g. the Menu Button if ‘Menu Access’ has been disabled by the institution); its volume is not adjustable. ••The ‘Button Disabled Beep’ (low pitched tone) sounds if a Control Button is pressed that is currently disabled (e.g. if the Menu/Previous Level Button is pressed when ‘Menu Access’ is disabled by institution). ••The ‘V‑Check™ Completed Beep’ (high pitched two beep tone) sounds upon termination of a V‑Check™ Measurement; use the parameter ‘Alarm Volume’ to adjust the volume of this signal. Note: The SDM ranks the priority of auditory alarm signals and, to ensure that auditory signals do not superpose, only outputs the highest priority acoustical signal. Alarms The SDM uses visual and auditory alarm signals, to alert the user when a physiological measurement parameter (PCO2, PO2, SpO2, PR) violates its alarm limits and to inform the user about technical conditions of the equipment that require operator response or awareness. By degree of urgency the SDM’s alarm conditions are assigned to the following priorities: High priority (SpO2 limit violation), medium priority (PCO2, PO2, or PR limit violation, ‘Battery Critical’ (if SDM not connected to AC power)), low priority (various technical alarm conditions). All alarm signals of the SDM automatically stop being generated when the associated triggering event no longer exists. WARNING: Setting alarm limits for physiological measurement parameters to extreme values may render the SDM’s alarm system for the respective parameter useless. WARNING: Ensure to select the upper alarm limit for PO2 and SpO2 carefully and in accord with accepted clinical standards. High oxygen levels may predispose a premature infant to develop retinopathy. Note: Alarm surveillance for physiological measurement parameters (PCO2, PO2, SpO2, PR) is only active if the respective parameter is valid or questionable (p. 32). Otherwise generation of alarm signals for the respective parameter is automatically suspended. Visual Alarm Signals Auditory Alarm Signals The ‘Alarm Status Icon’ (p. 48) indicates the highest currently active alarm priority. If a physiological parameter violates its alarm limits the respective parameter and the ‘Alarm Status Icon’ flash (with 0.7 Hz for SpO2 and 1.4 Hz for PCO2, PO2, PR). ‘Status Messages’ (only one at a time) and/or various ‘Status Icons’ visualize technical alarm conditions and general information on the system status. The SDM’s visual alarm signals cannot be inactivated. The SDM’s auditory alarm signals are priority encoded. A high priority alarm condition is indicated by an high-pitched fast pulsing tone (two bursts of five short pulses repeated every 10 seconds), a medium priority alarm condition by a medium‑pitched pulsing tone (one burst of three pulses repeated every 10 seconds), and a low priority alarm condition by a low‑pitched slow pulsing tone (one burst of two pulses repeated every 15 seconds). Alarm Melodies can be enabled/ disabled by the institution. WARNING: If the display of the SDM is inactive when the parameter ‘Display in Sleep Mode’ is set to ON the display will not reactivate if an alarm condition occurs. In this case visual alarm signals will not be visible. WARNING: Current values of monitored parameters and visual alarm signals may become illegible if the display brightness is dimmed too much. WARNING: Do not inactivate or dim the brightness of the monitor’s display if the patient’s safety could be compromised. The volume of auditory alarm signals can be adjusted (levels OFF, 1 to 6, Rising). OFF is only selectable if enabled by the institution. If ‘Rising’ is selected the volume of auditory alarm signals – starting at level 2 – increases at each burst by one level. If OFF is selected auditory alarm signals are permanently switched off. CAUTION: With the AUDIO PAUSED/OFF Button auditory alarm signals can be paused or permanently be switched off (p. 42). Note: If auditory alarm signals are permanently switched off the ‘AUDIO OFF Reminder’ sounds every 60 seconds (unless disabled by the institution). Page 47 . Controls, Indicators and Alarms Note: The operating status of the SDM’s auditory alarm signals is visually indicated by the ‘AUDIO STATUS Icon’ (p. 48), the ‘AUDIO PAUSED/AUDIO OFF Indicator’ (p. 45), and acoustically indicated by the ‘AUDIO OFF Reminder’. WARNING: If an alarm condition occurs while the auditory alarm signals are paused or permanently switched off, the only alarm indication will be visual, but no alarm tone will sound. WARNING: Verify that the alarm volume is adjusted such that the alarm signals are clearly audible for the operator in the intended environment. Do not disable the audible alarm function or decrease the audible alarm volume if the patient’s safety could be compromised. WARNING: Ensure that the speaker is clear of any obstructions. Failure to do so could result in an inaudible alarm signal. WARNING: The nurse call feature is inactive whenever the auditory alarm signals are PAUSED or OFF. Note: When the alarm system of a SDM that is remotely monitored with V-CareNeT™ is in the AUDIO OFF state, the SDM will terminate the AUDIO OFF state if the connection between the SDM and the V‑CareNeT™ Central Station interrupts. For details refer to the Technical Manual for the SDM (HB-005752). Status Bar with Status Icons and Status Messages The Status Bar displays in the bottom of almost all screens. 100% AD + - 1 2 7.7h 3 41.9 -/°C RHP 4 5 2011-07-01 15:28:30 [Joe Miller] 6 7 8 9 At the left, it displays up to 5 Status Icons (1 to 5). The ‘Battery’ Icon 1 indicates the remaining battery capacity in %. The icon highlights yellow below 10% battery capacity and red if the remaining battery capacity is critical. On measurement/menu screens position 2 displays the ‘Patient Type’ Icon (‘AD’ in ‘Adult’ mode or ‘NEO’ in ‘Neonatal’ mode), whereas position 2 displays the ‘Barometric Pressure’ Icon on the ‘Calibration Screen’. The ‘Barometric Pressure’ Icon indicates the measured ambient barometric pressure in ‘mmHg’ or ‘kPa’. The icon highlights red if a barometer fault is detected and yellow if the barometric pressure is unstable during sensor calibration. The ‘Remaining Monitoring Time’ Icon 3 indicates the ‘Remaining Monitoring Time’ (Format: xx.x h) on measurement/ menu screens, whereas on the ‘Calibration Screen’ the same icon indicates the ‘Available Monitoring Time’. The pie chart – which is updated in steps of 20% – indicates the remaining monitoring time in percentage. The Icon highlights yellow if only the ‘Calibration Interval’ has elapsed and it highlights red whenever the ‘Site Time’ has elapsed. The ‘Sensor Temperature’ Icon 4 indicates the measured sensor temperature (°C) and the current setting of SITE PROTECTION. A ‘red-blue rightward arrow with tip down’ displays if SITE PROTECTION is ON, a ‘red rightward arrow’ otherwise. The ‘Sensor Temperature’ Icon highlights yellow during INITIAL HEATING, blue if SITE PROTECTION has reduced the sensor temperature and red if the SDMS’ temperature surveillance detected a sensor temperature related problem. On measurement/menu screens position 5 either displays the ‘Absolute Heating Power’ (AHP), the ‘Relative Heating Power’ (RHP), both in mW, or no icon if Heating Power Mode is OFF, whereas position 5 displays the ‘Gas Icon’ on the ‘Calibration Screen’. The ‘Gas Icon’ indicates the remaining capacity of the Service Gas Bottle in %. It highlights yellow if the remaining capacity is < 10% and red if the gas bottle is empty (Format: xxx%). Note: On measurement/menu screens with RHP online trends no icon displays at position 5 . The Status Text Field 6 in the middle displays Status Messages (alarm/information messages). If no Status Message has to be displayed, the name of the currently active menu displays in the status text field of menu screens and – during remote monitoring with and if enabled within V-CareNeT™ – the ‘Patient Info’ displays in the status text field of measurement screens. The AUDIO Status Icon 7 on the right of the status text field indicates the status of the SDM’s auditory alarm signals (ON, PAUSED, OFF). The Alarm Status Icon 8 indicates the priority of the highest priority alarm condition (flashing white triangle with curved line and exclamation mark on red background in a high priority alarm condition; flashing black triangle with curved line and exclamation mark on yellow background in a medium priority alarm condition; black triangle with curved line and exclamation mark on cyan background in a low priority alarm condition; light grey check mark symbol on dark-grey background if no alarm condition). On the very right 9 , the Status Bar usually indicates the monitor’s date/time in the ‘yyyy-mm-dd hh:mm:ss’ format. On measurement screens (p. 31) the date/time indication is replaced by the V‑Check™ Down-Counter (format hh:mm:ss) in V‑Check™ Mode (p. 35). This down-counter indicates the duration of the V‑Check™ Measurement if the V‑Check™ Measurement has not yet been started, the remaining time to finish the V‑Check™ Measurement during an ongoing V‑Check™ Measurement, and 00:00:00 once the V‑Check™ Measurement is finished. If the SDMS is not ready for use, it indicates --:--:--. Good to know! The date/time of the SDM can be adjusted in the menu or by using V‑STATS™ it is possible to set the SDM’s date/time to the current date/time of the PC (i.e. to synchronize the date/ time setting of the SDM and the PC). Page 49 . Controls, Indicators and Alarms Maintenance of the SDMS During normal use, the SDM does not require any internal adjustments or additional calibrations. However, to guarantee continuous performance, reliability and safety of the SDMS, routine checks and maintenance procedures (including cleaning/disinfection) as well as safety and functionality checks should be performed regularly. Instructions for cleaning and/or disinfecting the SenTec Digital Monitor (SDM) and the Digital Sensor Adapter Cable, provided in the Technical Manual for the SDM. Please refer to the respective Directions for Use for instructions for cleaning and/ or disinfection of SenTec TC Sensors. Routine Checks The following checks should be performed regularly: ••Before and after every use check the SenTec TC Sensors (p. 15). ••Weekly clean and disinfect SenTec TC Sensors and the Digital Sensor Adapter Cable. ••‘Power On Self Test’ (POST): Every time the SDM is switched on (p. 12), the POST is performed automatically. If you keep the SDM always switched on, switch it off and on again each month to perform a POST. ••Weekly clean the Docking Station gasket using a cotton swab moistened with 70% isopropanol (for other approved cleaning agents refer to the Technical Manual for the SDM). ••Monthly inspect the Docking Station Door and gasket for mechanical and functional damages. ••Monthly check the SDM, sensors, sensor adapter cables and power cord for mechanical or functional damages. Defective parts must be replaced by original replacement parts. ••Monthly perform a ‘Sensitivity Test’ PCO2/PO2 (can be activated in the menus ‘PCO2 Settings’ or ‘PO2 Settings’). ••Monthly check the sensor temperature by comparing the displayed sensor temperature to the sensor SET Temperature. ••Monthly check the barometer reading of the SDM against a known calibrated barometer. ••Monthly check the alarm function of the SDM and correct function of its interfaces (if used). Refer to the Service Manual for the SDMS and the Directions for Use for the sensors for additional/complete check lists and detailed maintenance procedures. Note: Check the disposables monthly and replace any expired products. Service It is recommended that a complete safety and functionality check is performed at regular intervals (recommended every 12 months but at least once every 24 months) or in accordance with institutional, local and governmental regulations (refer to the Service Manual for the SDMS for details). To perform a safety check and for service or repair, contact qualified service personnel or your local SenTec representative. Please note that repair and service procedures which require opening the cover of the SDM must be performed by SenTec authorized service personnel. WARNING: The cover should only be removed by SenTec authorized service personnel. There are no userserviceable parts inside the SDM. Page 51 . Maintenance of the SDMS ADVANCING NONINVASIVE PATIENT MONITORING HB-005771-h ∙ Art. 100978