1
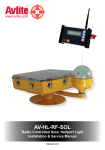
AV-425-RF Radio Controlled Solar Aviation Light Installation & Service Manual Version 2.2 AV-425-RF Solar Aviation Light 16 segment, multi-focus lens Internal 2.4GHz RF module Integrated handle LED light unit, with visible and near infrared lighting outputs Global 2.4GHz RF Radio control 4 Integrated user-replaceable solar panels Push button switch to cycle through operational modes External ON/OFF switch 12vdc input for cable connection (auxiliary charging port system) AV-425-RF Radio Controlled Solar Aviation Light Table of Contents Introduction...........................................................................................Page 4 Technology............................................................................................Page 4 AV-425-RF Model..................................................................................Page 5 Activation..............................................................................................Page 7 Avlite Radio Controller.........................................................................Page 8 Assembly & Installation of Radio Controller.....................................Page 9 Radio Controller Menu.......................................................................Page 10 Radio Controller System Setup.........................................................Page 12 Using the Radio Control to Activate the Airfield Lighting System (ALS)............................................................Page 20 Installation...........................................................................................Page 22 Solar Calculation & Operating Capabilities.....................................Page 25 Simple Approach Lighting.................................................................Page 26 Runway End Identifier Light (REIL)..................................................Page 28 Maintenance and Servicing...............................................................Page 30 Trouble Shooting................................................................................Page 35 Documentation...................................................................................Page 37 AV-SB-10 Solar Booster™.................................................................Page 38 Solar Booster™ Installation Procedure...........................................Page 40 Avlite Light Warranty..........................................................................Page 42 Version No. Description Date Approved 1.0 1.1 1.2 1.3 2.0 2.1 2.2 Manual Launch Spec Update & Solar Booster Addition: Reil & Approach lighting Alteration to Installation section New Product Code Torque setting REIL flash character added October 2010 November 2010 November 2011 May 2012 January 2013 February 2014 March 2015 M. Henry M. Henry M. Henry C. Procter J. Dore P. Rainey T. Stewart Latest products and information available at www.avlite.com 3 AV-425-RF Radio Controlled Solar Aviation Light Introduction Congratulations! By choosing to purchase an Avlite light, you have become the owner of one of the most advanced solar LED airfield lights in the world. Avlite Systems draws on more than 25 years experience in the design and manufacture of navigation aids, and particular care has been taken to ensure your light gives years of trouble free service. As a commitment to producing the highest quality products for our customers, Avlite has been independently certified as complying with the requirements of ISO 9001:2008 quality management system. By taking a few moments to browse through this booklet, you will become familiar with the versatility of your light, and be able to maximise its operating function. Please remember to complete the Avlite warranty registration card accompanying your light. Technology Avlite Systems is a world-class solar lighting systems manufacturer with a proven reputation for rapid, innovative, and agile technology solutions designed specifically for defense, government, civil and humanitarian aid operations in the most remote, toughest environments. Electronics Avlite employs leading in-house electronic engineers in the design and development of software and related circuitry. All individual electronic components are sourced directly by Avlite procurement staff ensuring that only the highest quality components are used in our products. LED Technology All aviation lights use the latest advancements in LED (Light Emitting Diode) technology as a light source. The major advantage of LED’s over traditional light sources is well established in that they typically have an operational life in excess of 100,000 hours, resulting in substantial savings to maintenance and servicing costs. Precision Construction Commitment to investing in the design and construction of injection-moulded parts including optic lenses, light bases and a range of other components ensures that all Avlite products are of a consistent and superior quality. Optical Performance Avlite manufactures a range of aviation LED lenses moulded from multi-cavity dies. The company has superior in-house lens manufacturing capabilities to support outstanding optical performance. Award-winning, Patented Technology Several United States and Australian patent registrations are held on Avlite’s range of innovative designs, with other regional patents pending in Canada, United Kingdom and Europe. Latest products and information available at www.avlite.com 4 AV-425-RF Radio Controlled Solar Aviation Light AV-425-RF Model The robust design of the AV-425-RF self-contained light ensures up to 12 years of reliable service with minimal ongoing maintenance. Specifically designed to survive the harshest environments the AV-425-RF features seven stage powder coated aluminium top, base and internal chassis. The corners are made from UV stabilised rubber.This method allows the customer to change a solar panel in the unlikely event of damage. The top casting is constructed with an integrated handle that helps with any manual handling of the unit. The high impact resistant polycarbonate lens ensures even light visibility. The solar panels provide efficient and year round charging of the large 12V 20Ah SLA battery. The four hole bolt pattern will fit directly onto any 200mm OD mount. The AV-425-RF is fitted with an external ON/OFF switch; this means the light can be turned on once in position, with the flick of a switch. It is also fitted with an external charging port for charging the battery while it is stored for extended periods. When the AV-425-RF is used in conjunction with an RF Network (FCC compliant), a number of options are available such as the ability to use visible and IR LEDs fitted to the same light head. All this is backed by Avlite’s industry leading, 3-year warranty. To suit localised standards, the AV-425-RF can be supplied with optic head to comply with either FAA L861 or ICAO Annex 14 photometrics. Latest products and information available at www.avlite.com 5 SPECIFICATIONS•* AV-425-RF Light Characteristics Light Source Available colors Peak Intensity @ temporary high (cd)† Horizontal Output (degrees) Vertical Divergence (degrees) Available Flash Characteristics Intensity Adjustments LED Life Expectancy (hours) 16 ultra-high intensity LEDs Red, Green, White, Yellow, Amber, Blue, Sectored Combinations. IR Steady-on: Red - 25.0 Green - 370.0 White - 275.0 Yellow - 92.5 As per L861 and L861E As per L861 and L861E >250 including steady-on (user-adjustable) including Morse Code and RF sequenced & synchronised flashing FAA: Low (10%), Medium (30%), High (100%) ICAO: Low (20%), Medium (40%), High (100%) >100,000 Electrical Characteristics Circuit Protection Operating Voltage (V) Temperature Range Integrated 12 -40 to 80°C Solar Characteristics Solar Module Type Output (watts) Solar Module Efficiency (%) Charging Regulation Multicrystalline 18 14 Microprocessor controlled Power Supply Battery Type Battery Capacity (Ah) Nominal Voltage (V) Autonomy - FAA Optic (hours) Autonomy - ICAO Optic (hours) SLA (Sealed Lead Acid) 24 12 Steady-on: Low intensity: >320 hours Medium intensity: >130 hours High intensity: >50 hours Steady-on: Low intensity: >170 hours Medium intensity: >110 hours High intensity: >60 hours Radio Controlled Frequency Range Expandability Compliance 2.4GHz ISM Band Up to 1.4km relayed AvMesh® FCC / CE Physical Characteristics • Specifications subject to change or variation without notice * Subject to standard terms and conditions † Intensity setting subject to solar availability Body Material Lens Material Lens Diameter (mm/inches) Lens Design Mounting Height (mm/inches) Width (mm/inches) Mass (kg/lbs) Product Life Expectancy 7-stage powder coated aluminium LEXAN® Polycarbonate – UV stabilized 155 / 61/8 16 segment, multi-focus lens (Patent pending) 4 hole 200mm bolt pattern 507 / 20 233 / 91/5 14 / 307/8 Up to 12 years Environmental Factors Humidity Icing Wind Speed Shock Vibration 0 to 100%, MIL-STD-810F 22kg per square inch Up to 160kph MIL-STD-202G, Test Condition G, Method 213B MIL-STD202G, Test Condition B, Method 204 Certifications CE Quality Assurance Waterproof EN61000-6-3:1997. EN61000-6-1:1997 ISO9001:2008 IP68 Intellectual Property Patents Trademarks Warranty * Options Available Patents pending AVLITE® is a registered trademark of Avlite Systems 3 year warranty • Avlite Pilot Activated Lighting Control • IR LEDs • Without RF Radio Control AV-425-RF Radio Controlled Solar Aviation Light Activation Charging the Battery New lights should be left in the sun for several days to ensure battery is charged before placing in service. Preferred Installation Location For best light performance, ensure solar modules are not covered and are in clear view of the sky with no shadows. Lantern Operation The AV-425-RF is activated via the ON/OFF switch, at the base of the unit. 9 2 6 10 amp multi point regulator 5 7 4 wiring to solar panels 3 4-pin Connector 2-pin Connector 8 10 13 1 Item Description AV425 Base 1 2 AV425 Lens Assembly 1 1 3 Battery 12v 24Ah 4 Battery Clamp 1 5 Washer M4 2 6 M4 Cap Screw 2 7 M5 Nylock Nut 2 8 O-Ring, ID 145 x 4.0 1 9 Socket Head Screw M6 x 16 4 10 Mounting Insert 4 11 External Charging Port 1 12 ON/OFF Switch 1 13 Momentary Button 1 11 12 av425_rev1_exploded_psp.dxf Quantity 1 Fig 2. AV-425-RF Solar Light components Latest products and information available at www.avlite.com 7 AV-425-RF Radio Controlled Solar Aviation Light Avlite Radio Controller The Avlite Radio Controller is a compact handheld unit that allows complete control of the airfield lighting system. The unit allows for easy activation, inspection and testing of the airfield lights. The Avlite Radio Controller works on the 2.4GHz ISM Band using a low power RF module. The backlit, LCD can be seen during day or night. The straightforward menu makes the ALS easy to operate. The Avlite Radio Controller comes standard with an IP68 rated charging plug, omni-directional antenna and ON/OFF switch and cover. The Radio Controller and charger come in an IP68 ‘Pelican’ Case to protect it from the harsh environment to which it may be subjected. The Avlite Radio Controller can be rack mounted in a standard 19” rack for use with other airfield electronic equipment such as Pilot Activated Lighting Control (PALC). Fig 4 Radio Controller Side View Fig 5 Radio Controller Front View 1 LCD Screen 2 MENU Button 3 SEND Button 4 UP Button 5 DOWN Button 6 6” Di pole Omni Directional, Right Angle Whip Antenna 7 Charging Port – IP68 sealed plug. (Charger not shown) Latest products and information available at www.avlite.com 8 AV-425-RF Radio Controlled Solar Aviation Light Assembly & Installation of Radio Controller The installation of the Radio Controller includes the following steps:• • • • Unpacking Initial Inspection Assembling & Charging the Radio Controller Using the Radio Controller Components Your pelican case contains the following: • 2.4GHz Radio Controller • Charger • Power Supply for charger • Programming Cable Please contact your Avlite office if there is any hardware missing. Initial inspection Inspect the Radio Controller for damage. If there is any damage, please contact your Avlite office. Retain original packing material for possible future use. Assembly & Charging The Radio Controller can be activated after raising the aerial into the upright position, see Fig 5. It is advisable to charge the Radio Controller before use. Turning the Unit On To turn the unit on, lift the red missile cover and turn the switch to the ON position. The radio controller will take 5 seconds to start up and it may take up to 30 seconds for the embedded RF Module to be configured, before a command can be sent. Charging the Radio Controller a. Unscrew the protective cap from the charging port, on the left side of the Radio Controller. b. Insert the charging terminal into the Radio Controller. c. Plug the charger into a wall socket and turn the charger on. d. The light on the charger will flash Green, Orange, Red then back to Orange. e. The charger has a LED to indicate the charge sequence. i. Green – Unit is fully charged. The Radio Controller can be left connected in state. ii. Orange – Unit is charging. The unit will charge for a maximum of 8 hours before automatically shutting down. iii. Red – A fault is occurring, please contact Avlite Office. Latest products and information available at www.avlite.com 9 AV-425-RF Radio Controlled Solar Aviation Light Radio Controller Menu This section of the document will provide a short explanation of all the menu screens on the control unit. Operation Mode The Operation Mode defines how the light will respond to different environmental conditions & user inputs. There are three operational modes that can be selected via the controller. ON, STANDBY & DUSK to DAWN. ALWAYS ON Operation Mode The light is Always On. The light will be on both night & day until it is commanded to OFF. While the light is in this mode it will only turn off when the battery drops below the Flat Battery Voltage level. (AV425-RF = 10.5V) STANDBY Operation Mode LEDs are OFF but light will respond to and pass commands sent by the radio controller. This mode should be used if the lights have been installed outside but are not currently required. Note: The light is not completely powered down in a manner suitable for storage. If the light is to be stored in a warehouse or other dark environment the ON/OFF switch should be turned off. DUSK to DAWN Operation Mode The light is turned on and off based on the light sensor input. Sensors include a light sensor internal to each light and the light will turn on when the ambient light threshold falls below 100 lux and will turn off once the ambient light threshold reaches 150 lux. Advanced Op Mode This enables you to select visible or near IR LEDs.The options include VISIBLE LEDs & IR/NGV LEDs. Note: this menu will not be enabled if the selected Operation Mode is STANDBY Light Group This menu is used to select the current light group. The controller can select any one of the 15 individual light groups. Taxiway lights, sign lights and runway lights are able to be controlled seperately using programmable groups. ( 0 -> 15) or select all radio lights at once. Note: The units are set with a light group of 0 in the factory. LED Intensity Default = LOW This menu is used to select the intensity of the LEDs on the light. The options include Low, Medium & High. a. Low – LED intensity is set to low setting b. Medium - LED intensity is set to medium intensity c. High - LED intensity is set to high intensity Note: this menu will not be enabled if the selected operational mode is STANDBY Timeout Mode This menu is used to setup the LED high intensity timeout feature found in each light. Light will revert from high intensity to low intensity after a programmable duration. The options include Enabled LOW, Disable. a. Enabled LOW – The immediate LED intensity is selected via the LED Intensity menu, after Timer Duration the LED Intensity will revert back to the LOW setting b. Disable – The high intensity LED timeout is disabled. The LED intensity will be selected via the LED intensity menu. Note: this menu will not be enabled if the selected operational mode is STANDBY Latest products and information available at www.avlite.com 10 AV-425-RF Radio Controlled Solar Aviation Light Timeout Duration This menu is only visible when the timeout Mode is enabled. This menu is used to select the timeout duration, the time before the LED intensity reverts back to its LOW intensity state. The timeout duration can be set from 1 minute to 60 minutes. Diagnostic This feature can be used to check the battery voltage in every light in the airfield. The command can be sent any time and it will not affect the current state of the light. If the light is in STANDBY mode the light will flash as shown below and revert to STANDBY mode after the diagnostic has been completed. For addional diagnostic information please see Section 3 of the ‘Radio Control System Setup’ section of this manual. EXTERNAL POWER Diagnostic Checks for external power connection NODE (MAIN NET) Diagnostic Checks which lights are nodes in the main network NODE (SUB NET) Diagnostic Checks which lights are nodes in the sub network BATTERY (HEALTHY) Diagnostic Battery above 12.5V BATTERY (LOW) Diagnostic Battery above 10.5V, but below 12.5V BATTERY (FLAT) Diagnostic Battery below 10.5V (1 x 1 second flash) (2 x 300 milli second flashes) Radio Encryption The AV-425-RF is fitted with 128bit Radio Encryption. This includes user-adjustable encryption keys and 12 user-adjustable channel settings. Synchronization The integrated mesh network radio system can provide true synchronization flash patterns including flare paths and approach sequences. Sending Commands Every time the SEND button is pressed a command is sent containing all the current settings in the Radio Controller. The SEND button can be used after changing one setting or after changing multiple settings. Latest products and information available at www.avlite.com 11 AV-425-RF Radio Controlled Solar Aviation Light Radio Control System Setup Your radio control system has been shipped preprogrammed with a default 128 bit encryption key. It is not necessary to alter the default encryption key, however, if required the encryption key can be changed (see Secion 1, i.). Note: If you change the radio control encryption key in Section 1, it will be necessary to change the encryption key in ALL the lights in the system To ensure trouble free set up of the Radio control System it is necessary to step through the following set up procedures. The setting up of the Radio control system is divided into 3 sections Section 1 - Programming the Radio Control System (must be done before Section 2 and 3) Section 2 - Programming the light, using a direct cable connection Section 3 - Operating the lights using the controller Section 1 Programming the Radio Control System 1. Fold out the aerial on the top of the ALS 2.4 GHz Handheld Radio Controller. 2. Turn on the ALS 2.4GHz Handheld Radio Controller by actuating the red rocket switch on the side of the controller 3. Press and hold the menu button for 3 seconds 4. The screen will display the following massage: 5. The Menu contains the following Sub menu (Press the Menu button to step between the menu items) a. [Screen back light] Using the [UP] or [DOWN} keys select from: [0-100%] b. [Connection Method] Using the [UP] or [DOWN} keys select from: [Radio Control] - standard wireless connection [Direct Connection] - use for programming light Latest products and information available at www.avlite.com 12 AV-425-RF Radio Controlled Solar Aviation Light c. [Flash Code Selection] Using the [UP] or [DOWN} keys select from: [Disable] [Enable] d. [Sync Menu Selection] Using the [UP] or [DOWN} keys select from: [Disabled] [Enabled] e. [Advanced Operation] Using the [UP] or [DOWN} keys select from: [Disabled] [Enabled] f.[Diagnostic] Using the [UP] or [DOWN} keys select from: [Disabled] [Enabled] g. [Radio Information] Displays the address of the radio in the ALS2.4GHz Hand Held Controller Note: There are no user-adjustable settings in this menu item h. [Radio Channel] Note: There are two sub menus in this menu. To toggle between the two Sub menus, press both the [UP] and [DOWN] keys together at the same time. Using the [UP] or [DOWN} keys select from: [Encrypted] [Unencrypted] Using the [UP] or [DOWN} keys select from: [0C-17] i. [Radio Encryption Key] Note: If you change the radio control encryption key in Section 1, it will be necessary to change the encryption key in ALL the lights in the system Using the [UP] and [DOWN] keys set the encryption key. Hold down the key to scroll quickly to the required number. Pressing both the [UP] and [DOWN] keys together will toggle across the encryption key in banks of 2 digits. Set the encryption key in banks of 2 digits. For Example: To set an encryption Key of 12345678910111213141 The digits would be set in pairs of 12 34 56 78 91 01 11 21 31 41 Using the [UP] or [DOWN] keys select any combination from [00000000000000000000 to FFFFFFFFFFFFFFFFFFFF] Record and keep this Encryption key secure in case the controller becomes lost or broken. Latest products and information available at www.avlite.com 13 AV-425-RF Radio Controlled Solar Aviation Light The encryption key can be re-entered into the new controller without the need to reprogram all the lights in the Radio Control System. Encryption key cannot be 00000000000000000000 Press [SEND] to save the Radio Control System settings Note: Failure to select appropriate settings and save the settings will result in the Radio Control System not being appropriately optioned. Congratulations you have now set up your Radio Control System please continue to the next section to setup each light in the system. Section 2 Programming the light using the cable interface and hand held controller NOTE: In this programming mode it is necessary to press send to save each option as each option is selected in the sub menu, before moving to the next sub menu item. Failure to press send before moving to the next menu item will result in selections not being saved. 1. The programming port is located under the light head. It is necessary to remove the light head to access this programming port. 2. Ensure that the light is turned off at the red master switch on the control panel at the base of the solar unit 3. Remove the 4 socket head cap screws and remove the light head from the solar unit enough to access the programming port. The light needs to remain connected the solar unit. Remove the blue waterproof cap from the programming port. Programming Port Replace blue cap after programming 4. Connect the programming cable to the light head. 5. Connect the programming cable to the programming/charging port located on the left hand side of the ALS2.4GHz handheld radio controller. 6. Turn on the controller at the Red Master switch located on the right hand side of the ALS 2.4 GHz handheld radio controller. Latest products and information available at www.avlite.com 14 AV-425-RF Radio Controlled Solar Aviation Light 7. Turn on the light at the red master switch on the solar chassis. 8. Unit is ready to receive programming signals. Note: Light head needs to be connected to the solar chassis during programming to be able to recieve power enabling it to be programmed. 9. Press and hold the [MENU] button for 3 Seconds. The screen will display the following message. 10. Using the menu key scroll down the submenu to [CONNECTION METHOD] 11. Using the [UP] and [Down] keys select [DIRECT CONNECTION] 12. Press [SEND] 13. This Menu contains the following Sub Menu Press [MENU] to scroll through the menu Note: In this menu the programmed option will be indicated by a, if the option is indicated by an X then this option has not been selected and saved. Press [SEND] to save options at each change. a. Lantern Info This displays the current Light information only, there are no adjustable options. Type Version Radio Latest products and information available at www.avlite.com 15 AV-425-RF Radio Controlled Solar Aviation Light b. Operation Mode Using the [UP and [DOWN] keys select from the following: [Always On] [Dusk till Dawn] [Standby] Press [SEND] after selection c. Advanced Operation Mode (if Advanced Operation Mode is enabled during Radio Control System Programming - Section 1) Using the [UP and [DOWN] keys select from the following: [Visible LEDS] [IR/NVG LEDS] Press [SEND] after selection d. Light Group Using the [UP and [DOWN] keys select from the following: [0-15] (Select any one of the 0-15 light groups) Press [SEND] after selection e. Intensity Using the [UP and [DOWN] keys select from the following [Low] [Medium] [High] Press [SEND] after selection f. Flash Code (if Flash Code is enabled during Radio Control System Programming - Section 1) Using the [UP and [DOWN] keys select from the following [000 to 1FF] A full list of available flash codes is available from Avlite Press [SEND] after selection g. Sync Offset (if Synchronisation is enabled during Radio Control System Programming Section 1) Note: Sync offsets can be set using an absolute value or a percentage (Flash Delay) of the flash sequence or a combination or both. If you select Sync Offset value and also Sync delay value, the combination offset/delay value will be the combined total off both values. Using the [UP and [DOWN] keys select from the following: [-10.23 to +10.23] seconds Press [SEND] after selection h. Sync Delay (if Synchronisation is enabled during Radio Control System Programming Section 1) Using the [UP and [DOWN] keys select from the following [0 to 99.6%] Press [SEND] after selection Latest products and information available at www.avlite.com 16 AV-425-RF Radio Controlled Solar Aviation Light i. Radio Channel Note: There are two sub menus in this menu. To toggle between the two Sub menus, press both the [UP] and [DOWN] keys together at the same time. Using the [UP] or [DOWN} keys select from: [Encrypted] [Unencrypted] Using the [UP] or [DOWN} keys select from: [0C-17] Press [SEND] after selection j. Radio Encryption Key (If Encryption is Enabled during Radio Control System Programming- Section 1) Set the encryption key in banks of 2 digits. For Example To set an encryption Key of 12345678910111213141 The digits would be set in pairs of 12 34 56 78 91 01 11 21 31 41 Using the [UP] and [DOWN] keys set the encryption key. Hold down the key to scroll quickly to the required number. Pressing both the [UP] and [DOWN] keys together will toggle across the encryption key in banks of 2 digits. [Insert Radio Encryption Key] Note: Radio Encryption Key must be the same key as set in the Radio Control system (section 1)] or the light will not respond to the controller. Press [SEND] after selection Note: Turn the light off at the red master switch, before disconnecting the Hand Held Radio interface cable. The light must be depowered before the settings will take effect. Repeat this process for every light in the system Important: When you have finished programming all of the lights the Radio Controller must be put back into Radio Connection Mode 1. Using the menu key scroll down the submenu to [CONNECTION METHOD] 2. Using the [UP] and [Down] keys select [RADIO CONNECTION] 3. Press [SEND] to save settings. Failure to place the Radio Controller back into RADIO CONNECTION mode will cause the Radio Controller to be unable to communicate with the lights Congratulations you have now programmed your lights to your Radio Control System please continue to the next section. Latest products and information available at www.avlite.com 17 AV-425-RF Radio Controlled Solar Aviation Light Section 3 Operating the lights using the ALS 2.4GHz Handheld Controller Note: Some menu options may not appear if they were not enabled in the Radio Control System set up menu, and programmed in to the light. 1. Fold out the aerial on the top of the ALS 2.4 GHz handheld Controller. 2. Turn on the ALS 2.4GHz Handheld radio Controller by actuating the red rocket switch on the side of the controller 3. The Menu contains the following Sub menu Press the [MENU] button to scroll through the Sub Menu a. Operation Mode Using the [UP and [DOWN] keys select from the following: [Always On] [Dusk till Dawn] [Standby] b. Advanced Operation Mode (If Enabled during Radio Control System ProgrammingSection 1) Using the [UP and [DOWN] keys select from the following: [Visible LEDS] [IR/NVG LEDS] c. Light group Using the [UP and [DOWN] keys select from the following: [0-15] [All] (Select any one of the 0-15 light groups) (Selects all of the light groups) d.Intensity Using the [UP and [DOWN] keys select from the following: [Low] [Medium] [High] e. Timeout Mode Using the [UP and [DOWN] keys select from the following: [Enabled, Low] (Recommended) [Disabled] f. Timeout Duration Using the [UP and [DOWN] keys select from the following: [1-60 Minutes] g. Flash Code (If Enabled during Radio Control System Programming- Section 1) Using the [UP and [DOWN] keys select from the following [000 to 1FF] Latest products and information available at www.avlite.com 18 AV-425-RF Radio Controlled Solar Aviation Light h. Sync Mode (If Enabled during Radio Control System Programming- Section 1) Using the [UP and [DOWN] keys select from the following: [Full] (Use for Flare Path or Approach sequence) [Basic] (Use for synchronised Flashing) [Disabled] i.Diagnostic For the following diagnostic tests to following diagnostic flash results can be displayed for the light. (1 x 1 second flash) (2 x 300 milli second flashes) Using the [UP and [DOWN] keys select from the following [Node Sub Net] Pass= Confirms light is a node on the Sub Network [Node Main Net] Pass= Confirms light is a node on the Main Network [External Power] Pass= Confirms external power is connected via HVPS [Battery Flat] Pass= Confirms battery voltage is under 10.5 Volts [Battery Low] Pass= Confirms battery voltage is between 10.5 and 12.5 Volts [Battery Healthy] Pass= Confirms battery voltage is over 12.5 Volts Press [Send] to receive a diagnostic flash sequence When the controller is in operation mode, multiple changes can be set and sent at the same time. It is not necessary to press send after each change. Latest products and information available at www.avlite.com 19 AV-425-RF Radio Controlled Solar Aviation Light Using the Radio Control to Activate the Airfield Lighting System (ALS) The Radio Controller is very easy to use and by reading through the How To section below, all of the advanced features will be well within your grasp. Make sure that all the lights in the same Light Group. Turn All the Lights ON • Turn the Radio Controller On • Use the arrow keys to adjust the operational Mode to ON • Press MENU button once to reach Light Group • Set the Light Group to ALL • Press SEND button • Every radio light within range of the control unit will now turn on. Setup the Lights to Operate in DUSK till DAWN mode • Turn the Control unit On • Use the arrow keys to adjust the operational Mode to DUSK till DAWN • Press MENU button once to reach Light Group • Set the Light Group to ALL • Press SEND button • Every radio light within range of the control unit will now turn on at night, during the day the lights will turn off automatically. Runway B Only is to be HIGH Intensity, but Runway A will Remain in Current Configuration • On Runway A, set the light group to 0 (follow the instruction in Section 2 in the ‘Radio Control System Setup’ section of this manual. • On Runway B, set the light group to 1 or any group different to Runway A.. • Turn the Control unit On • Use the arrow keys to adjust the operational Mode to Always On • Press MENU button to reach Light Group • Set the Light Group to 1 • Press MENU button to reach LED Intensity • Use the arrow keys to adjust the LED Intensity to HIGH • Press MENU button to reach Advanced Operation Mode • Use the arrow keys to select Visible LEDs • Press SEND button - Runway A will not change state. - Runway B will now be High Intensity. Latest products and information available at www.avlite.com 20 AV-425-RF Radio Controlled Solar Aviation Light Runway B Only is to be HIGH Intensity, with a Timeout of 8 Minutes and Runway A will be I/R Low Intensity • On Runway A, set the light group to 0. • On Runway B, set the light group to 1. • Turn the Control unit On • Use the arrow keys to adjust the operational Mode to Always On • Press MENU button to reach Light Group • Set the Light Group to 1 • Press MENU button to reach LED Intensity • Use the arrow keys to adjust the LED Intensity to HIGH • Press MENU button to reach Timeout Mode • Use the arrow keys to adjust the Timeout Mode to Enabled LOW • Press MENU button to reach Timeout Duration • Use the arrow keys to adjust the Timeout Duration to 8 Minutes • Press SEND button - Runway A will not change state. - Runway B will now be High Intensity. After 8 minute Runway will revert back to LOW intensity. • Press MENU button until you reach Light Group • Set the Light Group to 0 • Press MENU button once to reach LED Intensity • Use the arrow keys to adjust the LED Intensity to LOW • Press MENU button to reach Advanced Operation Mode • Use the arrow keys to select IR/NGV LEDs • Press SEND button - - Runway A will be in LOW Intensity IR mode Runway B will not change state. Lights on Runway B will still receive and pass on the message intended for Runway A. Latest products and information available at www.avlite.com 21 AV-425-RF Radio Controlled Solar Aviation Light Installation Runway Edge / Light Height Diagram Installing the Light Assembly to the Frangible Stake Mount The completed AV-425-RF - mount plate assembly is to be mounted on the stake in firm soil (not loose sand, screenings or other unbound material). a. Fit the AV-425-RF on the top of the mounting plate. Insert bolts through the four holes in the mount, entering from the bottom. Install a penny washer and a Nylock nut on each bolt. Tighten Nylock nuts. b. Use a sledge hammer to drive the stake into the soil at the chosen location. Drive the stake down until the bottom of the stake sleeve is at ground level. c. Fit the AV-425-RF and mounting plate assembly on top of the stake. The point of frangibility should be completely clear of the stake sleeve or ground support hardware. Use the socket head cap screws supplied to hold the frangibility point above the sleeve. Using a 6mm Allen key, tighten the bottom socket head cap screws against the stake sleeve. Note: After adjustments, ensure all nuts and bolts are tightened securely and all tools, spares and packaging are removed from the runway. Installing the Light Assembly to the Frangible Concrete Mount a. Mount the base plate to the concrete using 4 x M8 concrete bolts. b. Fit the frangible mounting plate onto the concrete base plate and secure using the M8 x 16 SHCS c. Level the light mounting plate using a spitit level. d. Fit the AV-425-RF to the light mounting plate using M8 SHCS, large flat washers and Nylock nuts. e. For further adjustments on levelling the light, see next section on leveling the light. Note: After adjustments, ensure all nuts and bolts are tightened securely and all tools, spares and packaging are removed from the runway. Latest products and information available at www.avlite.com 22 AV-425-RF Radio Controlled Solar Aviation Light AV-425-RF on Frangible Mount Latest products and information available at www.avlite.com 23 AV-425-RF Radio Controlled Solar Aviation Light Levelling the light During Installation every effort should be made to ensure that the light is level when installation is complete. The following guide lines will help to ensure that the lights will be installed correctly. - When installing a stake mount into the ground ensure that the stake is installed straight into the ground and not on an angle. - When installing a concrete mount plate ensure that the concrete pad is level using a spirit level. Check the mounting plate with a spirit level in all directions - Fit the frangible coupling and top mounting plate and using a spirit level check that the light mounting plate is level using a spirit level. - If the mounting assembly can not be levelled to a satisfactory plane, then spacers can be used under the 4 mounting points to complete levelling. - Spacers must be secured. Flat penny Washers that can be placed under the 4 mounting points and secured in place by the mounting bolts. - Washers of different thicknesses can be used, as can multiple washers. One spacer fitted here either side of the two washers Two spacer fitted here Incorrect InstallationCorrect Installation Important: Please ensure that spacers are not just under one mounting point. Please fill in spacers under other mounting points. Failure to space gaps will result in damage to the base or the mounting plate. Latest products and information available at www.avlite.com 24 AV-425-RF Radio Controlled Solar Aviation Light Solar Calculation & Operating Capabilities For information relating to charging and power please refer to the Avlite Power Calculator. To obtain a copy of the Avlite Power Calculator please contact your Avlite Distributor or email [email protected] Select location Select usage profile Important Note: To ensure the battery is maintained in a healthy state of charge it is recommended that the light battery diagnostic check be performed once per day. Important Note: Hours of Effective Sunlight are dependent upon the location in the world of the light. Effective hours alter with the seasons and this must be taken into account when setting up the Radio Control System. Effective sunlight hours for various locations can be found at: www.sealite.com.au/technical/solar_chart.php Important Note: the AV425 is a solar-powered light fixture. It is the operator’s responsibility to ensure usage demand does not exceed the charging capacity of the light fixture. Avlite holds no responsibility for product failure due to excessive usage demand. Latest products and information available at www.avlite.com 25 AV-425-RF Radio Controlled Solar Aviation Light Simple Approach Lighting The AV-425-RF-REIL-W can be configured into a simple approach lighting system. A simple approach lighting system is a lighting system intended for a non-instrument or a non-precision approach runway. This is done through selecting different sync delay or sync offset. All lights must be in the same light group and the same REIL group. Sync option must be activated in the system menu. Flash code selected must be the same. Each individual light is then set with a sync delay or sync offset. Please refer to Radio Control System Setup, Section 2, Programming the light using the cable interface and handheld controller, paragraph G or H on Sync offset and Sync Delay for information on how to set Sync Offset or Sync delay. The information contained in this publication is advisory only. Please contact your local authority for rules and regulations particular to your region. Latest products and information available at www.avlite.com 26 AV-425-RF Radio Controlled Solar Aviation Light W W W W Runway White (or amber) runway lights W W R R R R R R G G G G G G Bi-directional threshold and runway end light units - red to departing aircraft and green to landing aircraft W W W Sequenced flashing approach lights W W Latest products and information available at www.avlite.com 27 AV-425-RF Radio Controlled Solar Aviation Light Runway End Identifier Light (REIL) The AV-425-RF is available in a REIL configuration. The AV-425-RF-REIL-W must be ordered preset from the factory. It is not possible to configure a REIL from a standard AV-425-RF runway edge light. REILS will be pre-programmed and clearly labelled upon dispatch. REILS from the same light group and same REIL group must be installed together. The recommended flash character for a REIL is 112 (120 FPM). Light groups Light groups are used to enable control of separate sections of the airfield lighting system. For example, Runway1, Runway 2, Taxiway, Obstruction and REILS can all be independently controlled by the ALS RF controller. This function allows the Air Traffic controller to turn on or off different sections of the airfield as required. Please refer to Radio Control System Setup, Section 2, Programming the light using the cable interface and handheld controller, paragraph D on light groups for information on how to set a light group. REIL Groups A REIL group is the group of lights that will flash in sync together. REILS from different REIL groups will not flash in sync together. When installing 2 pairs of REILS on the airfield one pair at each end, it is advisable to ensure they are in different light groups and different REIL groups. The information contained in this publication is advisory only. Please contact your local authority for rules and regulations particular to your region. Latest products and information available at www.avlite.com 28 AV-425-RF Radio Controlled Solar Aviation Light W W W W Runway White (or amber) runway lights W W W R R R G G G R R R G G G Sequenced flashing Runway End Identifier Light (REIL) W W W W Bi-directional threshold and runway end light units - red to departing aircraft and green to landing aircraft Sequenced flashing approach lights W W Latest products and information available at www.avlite.com 29 AV-425-RF Radio Controlled Solar Aviation Light Maintenance and Servicing Designed to be almost maintenance-free, the AV-425-RF requires minimal attention, though the following maintenance and servicing information is provided to help ensure the life of your Avlite Systems product. 1. Cleaning Solar Panels- occasional cleaning of the solar panels may be required. Using a cloth and warm soapy water, wipe off any foreign matter before rinsing the panels with fresh water. 2. Battery Check- inspection of batteries should be performed every three years (minimum) to ensure that the charger, battery and ancillary electronics are functioning correctly. Using a voltage meter, check that the battery voltage is at least 12 volts under 100mA load, and ensure all terminals are clear of foreign matter. 3. O-Ring Check- inspect the condition of the o-ring for damage, wear or if it is brittle, and replace if necessary. The o-ring should be a rubber texture to ensure a complete and even seal. Service Tools 1 x M2 Allen Key 1 x M5 Allen Key 1 x 13mm Combination Wrench 1 x M8Allen Key 1 x 10mm Combination Wrench 1 x Silicone Grease Replacement Part Numbers Complete Units: AV425-R/G AV425-W AV425-W/Y Light Head only: ALA-AV425-R/G ALA-AV425-W ALA-AV425-W/Y Solar Unit Only: ABA-AV425 Test Lead: BTL-SLA.12v Battery Charger 12 volt: Solar Booster™: BTC-SLA.12v AV-SB-10 Installing the Light Head Assembly on the Solar Unit After servicing, it will be necessary to reinstall the light head on the solar unit. 1. 2. 3. 4. Connect the 4 bullet connectors Ensure the o-ring seal on the top of the solar chassis is in place, clean and lightly greased Feed the wires into the corner of the solar unit Locate the light head onto the solar unit in the correct orientation to the runway. The light head is fitted with reflective tape indicators to show light output. This colour indication should be aligned with the colour indication on the solar unit to ensure correct alignment. 5. Fit the 4 x M6 x 20 SHCS 6. Tighten the SHCS evenly and firmly. Recommended torque settings for Fitment of Light Heads to Solar Base units using the 4 Hex Bolts supplied. It is recommended that the bolts for holding the light heads to the Solar Base units have a torque setting applied of 3Nm for a satisfactory seal. Applying a higher Torque setting is not recommended and may void warranty. If in doubt, please contact your local Avlite representative. 7. Remove all tools, nuts and bolts from the runway Latest products and information available at www.avlite.com 30 AV-425-RF Radio Controlled Solar Aviation Light Replacing the Battery The AV-425-RF has an internal battery compartment, which provides the user with the ability to change the battery after years of operation. 1. Remove the four socket-head screws on the top lens assembly and separate the AV-425-RF lens assembly from the body/base section. 2. Remove 2 x M4 SHCS & washers from the top battery bracket. 3. Remove the 2 x M5 Nylock nuts and washers from the top battery bracket. 4. Separate the light head at the connectors. 5. Lift the upper battery bracket out of the AV-425-RF. 6. Disconnect the old battery 7. Remove the old battery from the chassis. 8. Discard old battery in a safe manner. 9. Reconnect the new battery. 10. Place battery back inside light body, and position the upper battery bracket in the top of the chassis. 11. Secure using 2 x M4 Cap screws & washers and 2 x M5 Nylock nuts and washers. 12. Feed all wiring back inside light body, and make sure the o-ring is properly placed at the top of the light body. 12. Please realign bidirectional indicators on teh base with the light head to ensure correct alignment of the light output on the runway. 13. Place the top lens assembly back onto the light body and replace 4 socket head screws. Half tighten all 4 socket head screws, and then fully tighten each socket head screw to ensure an even seal. Recommended torque settings for Fitment of Light Heads to Solar Base units using the 4 Hex Bolts supplied. It is recommended that the bolts for holding the light heads to the Solar Base units have a torque setting applied of 3Nm for a satisfactory seal. Applying a higher Torque setting is not recommended and may void warranty. If in doubt, please contact your local Avlite representative. 14. To test place dark cover (towel or jacket) on top of light to activate sensor, light will come on. Care must be taken to observe the polarity of each wire before they are connected. To ensure waterproofing of the unit, make sure that there is an even seal. AV-425-RF Long Term Battery Storage & Maintenance If the AV-425-RF is to be placed in storage for an extended period please follow the below information. The Sealed Lead Acid batteries inside the lights must always be stored in a fully charged state. Always make sure the ON/OFF switch is in the OFF position. All batteries will discharge over time and the rate of discharge is dependent on temperature. If the light is being stored in temperatures greater than 40°C the battery will discharge faster. Please check battery regularly and recharge if necessary, charge the battery via the external charging port on the base of the unit. Only attach the plug with your hand, do not use multi-grips to attach the plug. Turn the ON/OFF switch to the ON position and place unit in the sun for 2-4 days. The AV-425-RF is fitted with a 12 volt charge port that can be used to charge the battery and test the battery voltage. Connect the test lead (Avlite Part Number BTL-SLA.12v) to a multimeter on volts. Latest products and information available at www.avlite.com 31 AV-425-RF Radio Controlled Solar Aviation Light Safe Battery Handling Charging and Discharging • Always ensure batteries are fully charged when installing new lights. The light will be dispatched from the Avlite factory fully charged. However if time has elapsed between dispatch and installation, battery voltage must be checked. • Never short-circuit or reverse polarity a battery, damage to the battery and devise may occur, and there is a risk of fire. • Do not use different types of batteries in the same battery assembly. Sealed lead acid and NIMH do not mix. • If the battery has been deep-discharged, a prolonged charging time is required to bring the battery back to full capacity. Storage • Always store batteries in a cool, dry place. • After long storage, it is desirable to cycle (charge/discharge) the battery 3 times to restore full capacity. • Do not mix batteries with metal objects during storage or transportation to avoid accidental shortcircuit. • Do not store large quantities of batteries in a densely packed condition when they are in a charged or partially charged state. Battery Handling • Do not incinerate or dismantle batteries. Cell components are corrosive and may be harmful to skin and eyes. • Do not pull on battery lead wires or connector. Excessive force on the leads or connectors can damage the welding joints or other connections. • Batteries are recyclable. Please dispose of properly. Latest products and information available at www.avlite.com 32 AV-425-RF Radio Controlled Solar Aviation Light Battery Voltage States of Charge Avlite has provided the following guides for battery states of charge: Battery Voltage: 12 Volt Sealed Lead Acid State of Charge Voltage 100% 12.70+ 90% 12.5 80% 12.42 70% 12.32 60% 12.2 50% 12.05 40% 11.9 30% 11.75 20% 11.58 10% 11.31 0% 10.5 Latest products and information available at www.avlite.com 33 AV-425-RF Radio Controlled Solar Aviation Light Solar Panel Replacement The AV-425-RF is built around an internal aluminium chassis. The solar panels can be user-replaced, by a trained technician, in the unlikely event that one is broken or damaged during the product life (as demonstrated below). Follow the steps below or contact [email protected] for more details. 1. Remove 4 x socket head cap screws and disconnect the light head from the chassis. 2. Remove the upper battery bracket. 3. Disconnect the battery. 4. Remove the battery. 5. Remove 4 x M6-35mm long socket head cap screws, to remove the top casting from the chassis. Note: Be careful not to damage the o-rings on each of these screws. If replacements are required please use standard 6x1.0mm o-ring. 6. Slide the rubber corner out of the chassis. It may be necessary to lubricate the edges of the solar panels with grease or oil based lubricant if this is difficult to remove. 7. Disconnect the faulty solar panelfrom the Auxiliary Power out, J5, J6, J7 or J8. 8. Remove the faulty solar panel from the aluminium chassis. 9. Clean any silicon off the chassis from the solar panel junction box hole and add a new silicone seal to ensure the solar panel is watertight when assembled. 10. Repeat the process in the reverse order to replace a new panel. Note: Make sure the O-rings on the top casting and 4 x M6-35mm long socket head cap screws are coated in silicon grease before reassembling. Recommended torque settings for Fitment of Light Heads to Solar Base units using the 4 Hex Bolts supplied. It is recommended that the bolts for holding the light heads to the Solar Base units have a torque setting applied of 3Nm for a satisfactory seal. Applying a higher Torque setting is not recommended and may void warranty. If in doubt, please contact your local Avlite representative. The replacement of a solar panel should only be performed by a confident technician. Solar panel replacement is undertaken at customer’s own risk. Avlite will only guarantee an IP68 rating if this is undertaken by Avlite Personnel. To test for any leaks remove the gore vent and pressurise the assembled light to 1.5psi. Latest products and information available at www.avlite.com 34 AV-425-RF Radio Controlled Solar Aviation Light Trouble Shooting Fault Possible Cause Remedy Different encryption key in the light from the controller Reenter the encryption key into the light using the direct connection. See Programming - Section 1 Different radio channel in the light light from the controller Check the radio channel in the light using the direct connection is the same as the controller. Encryption turned off in the controller but not in the light Turn encryption On and set encryption key in the controller and all the lights Incorrect Light bank selected Ensure that the light bank selected in the controller is the same as the light bank settings in the lights Light will not change between visible and IR/NVG modes Advanced Operation not enabled Enable Advanced operation Mode in the Radio Control System Menu. See Programming - Section 1 Light will not change Flash Codes Flash Codes not enabled in the Radio Control System Menu Enable Flash Codes in the Radio Control System Menu. See Programming- Section 1 Sync delay not avaliable Sync not enabled in the Radio Control System Menu Enable Sync in the radio Control Menu. See Programming- Section 1 Light will not actvate Battery is flat Recharge Battery or connect light to external power supply Light is not switched ON at the master switch Switch light on at the Red Master Switch on the I/O panel Light is set to Dusk till Dawn and it is not dark Cover the light for at least 60 seconds of continuos darkness for the light to activate Light will not respond to controller in Radio Control Mode Lights will not activate during the Day To activate lights during the day, temporarily change the light settings to Always On. Important: Lights must be turned back to Dusk till Dawn or Standby after required daytime use. Light will not activate at night Light is in Standby Mode Using the Remote control change light to the Dusk till Dawn Light is not switched on at the master switch Switch light on at the Red Master Switch on the I/O panel Latest products and information available at www.avlite.com 35 AV-425-RF Radio Controlled Solar Aviation Light Fault Possible Cause Remedy Light will not operate all night Battery is low Recharge battery, connect battery to external power supply or replace battery Light is exposed to ambient light Remove ambient light source or shield light from ambient light Battery has failed Replace battery Solar panels are dirty Clean solar panels Light is installed in the shade Remove shade or move light Battery continually goes flat Latest products and information available at www.avlite.com 36 AV-425-RF Radio Controlled Solar Aviation Light Documentation For future reference, please record the follwing data and store securely: Controller Encryption Key:___________________________________________________ Controller Serial No.:________________________________________________________ Radio Channel:____________________________________________________________ Light Bank Location, eg. Runway 1, Taxiway, Runway 2: Light Bank Location 0:________________________________________________________ Light Bank Location 1:________________________________________________________ Light Bank Location 2________________________________________________________ Light Bank Location 3:________________________________________________________ Latest products and information available at www.avlite.com 37 AV-425-RF Radio Controlled Solar Aviation Light AV-SB-10 Solar Booster™ The AV-SB-10 Solar Booster™ can be connected to AV425 light to provide additional solar collection to charge the battery. The Solar Booster™ can be used in areas of reduced sunlight to help ensure optimum battery charge or where longer periods of high intensity mode is required. The solar panel is connected to the light via the external charge port and the panel is mounted at an angle to maximise solar collection during daylight hours. The solar Booster™ will provide up to 0.5Ah of additional charge into the battery. In areas of high solar conditions, this may allow the fixture to operate in a high-intensity L-861 output setting for up to 11hrs per night. In lower solar regions, fitting the Solar Booster™ may widen the operating latitudes where the standard AV425 may not be sufficient. For detailed solar profiling of your region please contact Avlite Systems. Latest products and information available at www.avlite.com 38 AV-425-RF Radio Controlled Solar Aviation Light SPECIFICATIONS•* AV-SB-10 Electrical Characteristics Voltage (v) Amperage (mA) Temperature Range 12 580 -40 to 80°C Solar Characteristics Solar Module Type Output (watts) Solar Module Efficiency (%) Charging Regulation Multicrystalline 10 14 Microprocessor controlled Physical Characteristics Body Material Mounting Height (mm/inches) Width (mm/inches) Length (mm/inches) Mass (kg/lbs) Product Life Expectancy 7-stage powder-coated aluminium 4 hole 200mm bolt pattern 150 / 57/8 370 / 141/2 560 / 22 3.2 / 7 Up to 12 years Certifications CE Quality Assurance Waterproof EN61000-6-3:1997. EN61000-6-1:1997 ISO9001:2008 IP68 Intellectual Property Trademarks Warranty * Solar Booster™ is a registered trademark of Avlite Systems 3 year warranty • Specifications subject to change or variation without notice * Subject to standard terms and conditions AV-SB-10 Solar Booster™ shown with AV-425-RF Latest products and information available at www.avlite.com 39 AV-425-RF Radio Controlled Solar Aviation Light Solar Booster™ Installation Procedure Preferred Installation Location For best light performance, ensure solar modules are not covered and are in clear view of the sky with no shadows. Remove the AV-SB-10 from the box and remove all packaging. Locate the AV-SB-10 Solar Booster™, in a position for best solar collection. Remove the bolts from the existing installation. Fit the AV-SB-10 Solar Booster™ under the top mounting plate. Fit the bolts back through the light, mounting plate and AV-SB-10 Solar Booster™. Tighten the bolts securely. Important: To eliminate the possibility of electrical shorts please read this before connecting the AV-SB-10 Solar Booster™ to the light Remove the Light head from the unit. Remove the fuse from the battery positive wire. Connect the AV-SB-10 Solar Booster™ to the external charge port on the light. Refit the fuse to the battery positive wire and refit the light head. Cover the light head to ensure that light activates. AV-SB-10 Solar Booster™ front view AV-SB-10 Solar Booster™ rear view Latest products and information available at www.avlite.com 40 AV-425-RF Radio Controlled Solar Aviation Light Notes Latest products and information available at www.avlite.com 41 AV-425-RF Radio Controlled Solar Aviation Light Avlite Light Warranty V1.2 Activating the Warranty Upon purchase, the Avlite Systems warranty must be activated for recognition of future claims. To do this you need to register on-line. Please complete the Online Registration Form at: www.avlite.com Avlite Systems will repair or replace your lantern in the event of electronic failure for a period of up to three years from the date of purchase. Avlite Systems will repair or replace any ancillary or accessory products in the event of failure for a period of up to one year from the date of purchase, as per the terms & conditions below. The unit must be returned to Avlite freight prepaid. Warranty Terms 1. Avlite Systems warrants that any Avlite aviation products fitted with telemetry equipment including but not limited to AIS, GSM, GPS or RF (“Telemetry Products”) will be free from defective materials and workmanship under normal and intended use, subject to the conditions hereinafter set forth, for a period of twelve (12) months from the date of purchase by the original purchaser. 2. Avlite Systems warrants that any rotationally-moulded products (“Roto-Moulded Products”) and accessory products (“Accessory Products”) will be free from defective materials and workmanship under normal and intended use, subject to the conditions hereinafter set forth, for a period of twelve (12) months from the date of purchase by the original purchaser. 3. Avlite Systems warrants that any Avlite aviation products other than the Telemetry Products, RotoMoulded Products and Accessory Products (“Avlite Products”) will be free from defective materials and workmanship under normal and intended use, subject to the conditions hereinafter set forth, for a period of three (3) years from the date of purchase by the original purchaser. 4. Avlite Systems will repair or replace, at Avlite’s sole discretion, any Telemetry Products, RotoMoulded Products, Accessory Products or Avlite Products found to be defective in material and workmanship in the relevant warranty period so long as the Warranty Conditions (set out below) are satisfied. 5. If any Telemetry Products or Avlite Products are fitted with a rechargeable battery, Avlite Systems warrants the battery will be free from defect for a period of one (1) year when used within original manufacturer’s specifications and instructions. Warranty Conditions This Warranty is subject to the following conditions and limitations; 1. The warranty is applicable to lanterns manufactured from 1/1/2009. 2. The warranty is void and inapplicable if: a. the product has been used or handled other than in accordance with the instructions in the owner’s manual and any other information or instructions provided to the customer by Avlite; b. the product has been deliberately abused, or misused, damaged by accident or neglect or in being transported; or c. the defect is due to the product being repaired or tampered with by anyone other than Avlite or authorised Avlite repair personnel. 3. The customer must give Avlite Systems notice of any defect with the product within 30 days of the customer becoming aware of the defect. 4. Rechargeable batteries have a limited number of charge cycles and may eventually need to be replaced. Typical battery replacement period is 3-4 years. Long term exposure to high temperatures will shorten the battery life. Batteries used or stored in a manner inconsistent with the manufacturer’s specifications and instructions shall not be covered by this warranty. 5. No modifications to the original specifications determined by Avlite shall be made without written approval of Avlite Systems. 6. Avlite lights can be fitted with 3rd party power supplies and accessories but are covered by the 3rd Latest products and information available at www.avlite.com 42 AV-425-RF Radio Controlled Solar Aviation Light party warranty terms and conditions. 7. The product must be packed and returned to Avlite Systems by the customer at his or her sole expense. Avlite Systems will pay return freight of its choice. A returned product must be accompanied by a written description of the defect and a photocopy of the original purchase receipt. This receipt must clearly list model and serial number, the date of purchase, the name and address of the purchaser and authorised dealer and the price paid by the purchaser. On receipt of the product, Avlite Systems will assess the product and advise the customer as to whether the claimed defect is covered by this warranty. 8. Avlite Systems reserves the right to modify the design of any product without obligation to purchasers of previously manufactured products and to change the prices or specifications of any product without notice or obligation to any person. 9. Input voltage shall not exceed those recommended for the product. 10. Warranty does not cover damage caused by the incorrect replacement of battery in solar lantern models. 11. This warranty does not cover any damage or defect caused to any product as a result of water flooding or any other acts of nature. 12. There are no representations or warranties of any kind by Avlite or any other person who is an agent, employee, or other representative or affiliate of Avlite, express or implied, with respect to condition of performance of any product, their merchantability, or fitness for a particular purpose, or with respect to any other matter relating to any products. Limitation of Liability To the extent permitted by acts and regulations applicable in the country of manufacture, the liability of Avlite Systems under this Warranty will be, at the option of Avlite Systems, limited to either the replacement or repair of any defective product covered by this Warranty. Avlite Systems will not be liable to Buyer for consequential damages resulting from any defect or deficiencies in accepted items. Limited to Original Purchaser This Warranty is for the sole benefit of the original purchaser of the covered product and shall not extend to any subsequent purchaser of the product. Miscellaneous Apart from the specific warranties provided under this warranty, all other express or implied warranties relating to the above product is hereby excluded to the fullest extent allowable under law. The warranty does not extend to any lost profits, loss of good will or any indirect, incidental or consequential costs or damages or losses incurred by the purchaser as a result of any defect with the covered product. Warrantor Avlite Systems has authorised distribution in many countries of the world. In each country, the authorised importing distributor has accepted the responsibility for warranty of products sold by distributor. Warranty service should normally be obtained from the importing distributor from whom you purchased your product. In the event of service required beyond the capability of the importer, Avlite Systems will fulfil the conditions of the warranty. Such product must be returned at the owner’s expense to the Avlite Systems factory, together with a photocopy of the bill of sale for that product, a detailed description of the problem, and any information necessary for return shipment. Information in this manual is subject to change without notice and does not represent a commitment on the part of the vendor. Sealite products are subject to certain Australian and worldwide patent applications. Latest products and information available at www.avlite.com 43 AV-425-RF Radio Controlled Solar Aviation Light Other Avlite Products Available Solar Aviation Lighting Helipad Lighting Obstruction Lighting Airfield Markers & Accessories Typical Applications • Temporary & permanent airfield lighting • Remote, emergency & defence airfield lighting • Barricade, hazard & perimeter lighting • Helipad lighting • Obstruction lighting For a complete list of product compliances including ICAO & FAA, please contact Avlite today Area & Sign Lighting Avlite Systems 11 Industrial Drive Somerville Vic 3912 AUSTRALIA 61 Business Park Drive Tilton New Hampshire 03276 USA t: +61 (0)3 5977 6128 t: +1 (603) 737 1311 f: +61 (0)3 5977 6124 f: +1 (603) 737 1320 e: [email protected] w: www.avlite.com A subsidiary of Sealite Pty Ltd www.sealite.com Latest products and information available at www.avlite.com 44