1
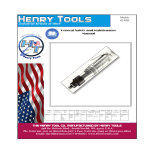
H ENRY T OOLS
Models
660VL
660VS
Industrial Airtools at Work
General Safety and Maintenance
Manual
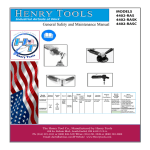
SUPER HEAVY DUTY VERTICAL GRINDERS
4 Horsepower Vertical Grinders
4 HORSEPOWER
Model
Number
Throttle
Type
660VL
LEVER
660VS
SAFETY
LEVER
Power
Output
4 H.P.
(3000 W)
Weight
11.0 Lbs.
(5.0 Kg)
Height over
Spindle
7.7 Inches
(196 cm)
Air
Consumption
50 cfm
(23.6 L/s)
Rated Speed/Wheel Capacity
4500 RPM w/ 9 Inch T27 Wheel Guard
4500 RPM w/ 9 Inch T28 Wheel Guard
6000 RPM w/ 7 Inch T27 Wheel Guard
6000 RPM w/ 7 Inch T28 Wheel Guard
6000 RPM w/ 9 Inch T27 Wheel Guard
6000 RPM w/ 9 Inch T28 Wheel Guard
8000 RPM w/ 7 Inch T27 Wheel Guard
8000 RPM w/ 7 Inch T28 Wheel Guard
(NOTE: Standard RPM is 6000RPM)
The Henry Tool Co., Manufactured by Henry Tools
498 So. Belvoir Blvd., South Euclid, OH 44121 U.S.A.
Ph: (216) 291-1011 or (800) 826-5257 ● Fax: (216) 291-5949 or (800) 303-2800
Email: [email protected] ● Website: www.Henrytools.com
General Operators Instructions and Service Manual
Models
660VL
660VS
HENRY TOOLS, INC.
Ph: (216) 291-1011 or (800) 826-5257
REPAIR KIT AVAILABLE: SEE CHART
Revised 05/13/10
www.HenryTools.com | Page 129
For additional product information visit our website.
General Operators Instructions and Service Manual
Part Number
Description
Part Number
Description
200-9
O-Ring
AA-650-1-AL
500-46
Snap Ring
550-33-L
Live Handle Adaptor
bushing
Handle Assembly (Complete)(Non-lockout
handle)
AA-650-1-ALS
550-33-SW
Screen Filter
Safety Lock Handle Assembly (Complete)
550-33-SP
Spacer
650-33
550-38
Lever
Screen
Bushing(1/2x3/8)
550-50
Lever Pin
650-54
Safety Lock Pin
560-13
Throttle Valve Assembly
650-55
Safety Lock Spring
650-56
Safety Lock Lever
650-57
Set Screw
700-30
O-Ring
700-48
Cap Screw
700-54
Lock Washer
700-S-26
Plug
700-S-26-GK
Gasket
841555
Screen Bushing
(1/2X1/2)
with 200-9 O-ring
installed
600-51
Plunger Spring
650-1-AL
Live Handle Body (NonLockout type)
650-1-ALS
Safety Lock Valve
Body(Bare)
www.HenryTools.com | Page 130
For additional product information visit
our website.
Revised 05/13/10
HENRY TOOLS, INC.
Ph: (216) 291-1011 or (800) 826-5257
Models
660VL
660VS
General Operators Instructions and Service Manual
Models
660VL
660VS
700-11
700-12
700-13
700-15
700-16
700-30
700-37
700-46
700-47A
700-48
700-49
700-7
700-9
GUARDS
700-200
700-201
Revised 05/13/10
7” TYPE 27 GUARD
9” TYPE 27 GUARD
PART NUMBER
412988
WRENCHES
1102-015
1100-094
1100-200
102-SPWR
ASSEMBLIES
510088
650-60
AA-660-1
AA-650-1-AL
AA-650-1-ALS
DESCRIPTION
6” CUP GUARD
WHEEL LOCK WRENCH
15/16” WRENCH
2” WRENCH
SANDING PAD NUT
WRENCH
REPAIR KIT: Includes
(1)700-7 Bearing, (1)700-9
Bearing, (1) 1000-5 Ring,
(1) 560-20 Washer, (4)70013 Blades, (1) 650-13
Gasket
WHEEL LOCK ASSY.
CASE ASSY.(Comes with
all screws)Specify the
speed
LEVER LIVE HANDLE ASSEMBLY COMPLETE with
screwsNON lockout Style
LOCKOUT LEVER LIVE
HANDLE ASSEMBLY COMPLETE with screws
GOVERNORS
AA-550-45
GOV.ASSY. (4500 RPM)
AA-550-60
GOV.ASSY. (6000 RPM)
AA-550-72
GOV.ASSY.(7200 RPM)
AA-550-80
GOV.ASSY. (8000 RPM)
• OTHER SPEEDS AVAILABLE
ACCESSORIES
849259
5/8-11 SANDING PAD NUT
849913
7” SANDING PAD
(MAX 8500 RPM
849914
9” SANDING PAD (MAX
6500RPM)
849269
DEPRESSED CENTER
WHL ADAPT KIT
Ph: (216) 291-1011 or (800) 826-5257
650-13
650-1-BTG
650-33
650-57
650-58
650-59
650-60
650-8
650-H-14
660-10
660-1-B
DESCRIPTION
O-RING
1/2x1/2 BUSHING
SNAP RING
WHEEL FLANGE
WHEEL FLANGE
DEAD HANDLE
PIN
WASHER (4 REQ.)
WAVY SPRING SPACER
MOTOR CASE (BARE)with
RPM tag
GASKET
GASKET (3 holed)
3/8-1/2 BUSHING
SET SCREW
SCREW
WASHER
WHEEL LOCK
SPINDLE
SEAL
FRONT BEARING PLATE
FRONT BEARING SUPPORT
CYLINDER (WITH ROLL
PINS)
ROTOR
BLADE (4 REQ.)
KEY
REAR ENDPLATE
O-RING
CYLINDER PIN
WASHER (4-8 REQ.)
SCREW (4 REQ.)
SCREW
SCREW (Old Style)
BEARING
BEARING
HENRY TOOLS, INC.
PART NUMBER
200-9
841555
1000-5
550-12A
550-12B
550-1-C
550-49
550-54
560-20
650-1
www.HenryTools.com | Page 131
For additional product information visit our website.
General Operators Instructions and Service Manual
Models
660VL
660VS
SAFETY FIRST!!!!
to meet our exacting standards.
ALWAYS COMPLY WITH:
www.HenryTools.com | Page 132
A recommended spare part (or set) for every
five (5) tools. Small, low cost or easily lost parts
should be stocked as 3-4 per 10 tools.
WARNING’ Disconnect the air supply hose before servicing the tool.
For most efficient operation, 90 psig (620 kPa) of
clean dry air is required at the tool with the tool
running, with-out extreme fluctuation. Minimum recommended hose size is 3/8” I.D. when
the length of the hose is eight feet or less. An air
line filter and lubricator, should be used. Hose
should be blown out before attaching to the
tool.
Loss of Power
A loss of power may not be related to the tool.
First, check the air line pressure. It should be 90
psi at the tool while operating.
LUBRICATION
Lubricate the motor with an air line lubricator,
using a light air motor oil. Adjust the lubricator
to dispense one drop per cycle orthree drops
per minute.
CAUTION Do not use substitutes for oil and
grease. This could result in damage to the tool.
MAINTENANCE
1. Proper and continuous lubrication.
2. Blow out air hose to assure a clean air supply.
3. Be sure the air filter and line lubricator are
clean.
4. Fill the line lubricator before operation.
5. Place a few drops of oil into the air inlet of
the tool be-fore attaching the air line.
6. Use moisture separators to remove water
from the air line.
7. CAUTION Do not use solvent on bearings or
on any parts made of a synthetic material.
8. Do not remove bearings unless replacement
is necessary; bearings are press fit.
DISASSEMBLY
1. Disconnect air and remove all wheels and
accessories from grinder.
For additional product information visit
our website.
Revised 05/13/10
Ph: (216) 291-1011 or (800) 826-5257
INSTALLATION
HENRY TOOLS, INC.
1. General Industry Safety & Health Regulations, Part 1910,OSHA
2206, available from: Sup’t of Documents; Government Printing
Office; Washington DC 20402.
2. Safety Code for Portable Air Tools, ANSI B186.1 available from:
American National Standards Institute, Inc.; 1430 Broadway; New
York, NY 10018
3. State and Local regulations. Portions of the above codes and
regulations are listed below for quick reference.
THESE EXCERPTS ARE NOT INTENDED TO BE ALL INCLUSIVE STUDY AND COMPLY WITH ALL REGULATIONS!
1. TOOL INTENT - Tools shall be used only for purposes intended
in their design (refer to product catalog).
2. AIR SUPPLY - Test and operate tools at 90 PSIG maximum unless tool is marked otherwise. Use recommended airline filtersregulators-lubricators.
3. UNUSUAL SOUND or VIBRATION - If tool vibrates or produces
an unusual sound, repair immediately for correction.
4. OPERATOR PROTECTIVE EQUIPMENT - Safety goggles, ear
muffs, safety gloves, dust masks and, if grinding conditions are severe, additional face protection, leather aprons and safety shoes
must be worn. Keep others a safe distance from your work area, or
ensure they use appropriate Personal Protective Equipment. SEE
REGULATIONS.
5. SAFETY MAINTENANCE PROGRAM - Employ a safety program
to provide inspection and maintenance of all phases of
tool operation and air supply equipment in accordance with
“Safety Code for Portable Air Tools.”
WARNING: The signal word ‘Warning” identifies all notes on safe
work practices in this operating instruction, alerting to hazards for
life and health of people. Observe these notes and proceed with
special care in the cases described. Pass all safety instructions on
to
other operators. In addition to the safety instructions in this operating
instruction, the general local safety and accident prevention
rules must be observed.
WARNING: NEVER MODIFY ANY PART OF THIS TOOL!!!! DO NOT
modify the tool, safety devices, or accessories. DO NOT tamper
with any internal parts of this air grinder. DO NOT modify the tool
handle, safety guard devices, or accessories.
6. If there is a problem with your tool, return it to an authorized
Henrytool service center or our factory. Our certified parts ensure
your tool performs as it was originally designed. When you use
Henrytool repair, you know your tool has been repaired and tested
General Operators Instructions and Service Manual
Models
660VL
660VS
REASSEMBLY
1. Press new seal (650-H-14) into bearing support (660-1B).
2. Press bearing (700-7) onto spindle (650-8).
3. Press bearing and spindle assembly into front thrust
(660-10). Place key (700-15) into spindle keyway.
4. Clamp spindle holder in vise vertically. Line up the keyway in the holder and slide the assembly through.
5. Place and center belleville washer (560-20) on top of
bearing.
6. Place the bearing support over the washer and front
thrust plate.
7. Lightly grease the small outside diameter of the wheel
flange (550-12A). Thread wheel flange clockwise by hand
Revised 05/13/10
while rotating the bearing support counter-clockwise until wheel flange bottoms on bearing. Tighten
down with suitable wrench. Remove assembly from
spindle holder.
8. Line up cylinder pin holes in the bearing support
(660-1-B) and the front thrust (660-10). Clamp wheel
flange In vise.
9. Put key (700-15) in spindle keyway slide rotor
(700-12)down and insert blades (700-13). Put cylinder (700-11) into place with long dowel pin down.
This dowel pin must go through hole in front thrust
plate and through front bearing support.
10.Slip rear bearing (700-9) in rear thrust (700-16)
and press on spindle.(Press on inner race of bearing.) Be sure that short dowel pin in cylinder goes
into hole in rear thrust plate.
11.Put lock ring (1000-5) on spindle. (Thereis no
groove.)
12.Prior to reassembly inspect governor for
gouges,nicks or dents. Screw governor tight in rear
spindle.(NOTE:THIS IS LEFT HAND THREAD) Oil governor and inside of motor.
13.Assemble live handle; add live and dead handles
to case; place gasket (650-13) in rear face of case.
14.Drop motor assembly package in case and line up
the three holes in front bearing support with those
in front of case.
15.Line up guard with motor holes. Install the three
bolts (700-47A) and lockwashers (700-46). Tighten
bolts down until snug then backoff 1/2 turn.
16.Connect tool to air supply and apply air in several
short bursts tightening the motor screws (700-47A)
till tool runs smoothly.
17.Check speed of tool with a reliable tachometer.
HENRY TOOLS, INC.
2. Secure the dead handle (550-1-C) of the qrinder in a
vise. Remove the three socket head screws (700-47A) and
remove wheel guard.
3. Grasp the wheel flange (550-12A) and pull the complete
motor assembly from the case. If the case is too tight, put
5/8-11 hex nut on shaft and grip firmly in vise; using soft
hammer, remove case assembly by tapping alternately at
live and dead handle joints.
4. Put the flats of the wheel flange in the vise and remove
governor. (NOTE:LEFT HAND THREAD)
5. Remove lock ring (1000-5). Holding the cylinder (70011) in the left hand, place a long pin type tool into the hole
left by the removal of the governor. With a small hammer,
tap lightly on the end of this pin, which seperates the
spindle (650-8) from the rear bearing (700-9) and the rear
thrust (700-16).
6. Remove cylinder (700-11), rotor blades (700-13) and rotor (700-12). Do not remove key (660-10) at this time.
7. Clamp spindle holder in vise vertically. Line up the keyway in the holder and slide the spindle assembly through.
Remove wheel flange (right hand thread) with a suitable
wrench.
8. Lift off bearing support (660-1B) and Belleville wavy
washer (560-20). Remove seal (650-H-14) by tapping with
a small punch.
9. Remove spindle assembly from holder. Remove key and
press spindle out of end plate (660-10). Support bearing
(700-7) and press spindle throuqh.
10.
OPTIONAL: To check throttle valve, unscrew plug
(700-S-26) and lift out valve spring (600-51) and plunger
(560-13). Remove the “o” ring (200-9) with a sharp tool and
replace with a new ring.
Ph: (216) 291-1011 or (800) 826-5257
DISSASEMBLY (continued)
www.HenryTools.com | Page 133
For additional product information visit our website.