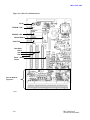
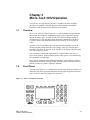
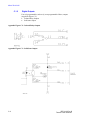
Download Micro-Tech - Hoferick Engineering GmbH
Transcript
Micro-Tech™ 3000 Model 3102/3202 Batch Controller REC 4192 Rev B Part Number 074807 - English Revision History Revision Number Revision A Revision B Date Released July 2003 October 2006 ECO Number Release Specifics Manual First Released Technical Specification Correction (fusing) ©2005 Thermo Fisher Scientific. All rights reserved. This document is confidential and is the property of Thermo Fisher Scientific (Thermo Scientific). It may not be copied or reproduced in any way without the express written consent of Thermo Scientific. This document also is an unpublished work of Thermo Scientific. Thermo Scientific intends to, and is maintaining the work as confidential information. Thermo Scientific also may seek to protect this work as an unpublished copyright. In the event of either inadvertent or deliberate publication, Thermo Scientific intends to enforce its rights to this work under the copyright laws as a published work. Those having access to this work may not copy, use, or disclose the information in this work unless expressly authorized by Thermo Scientific. “Microsoft” and “Windows” are either registered trademarks or trademarks of Microsoft Corporation in the united States and/or other countries. All other trademarks are the property of Thermo Fisher Scientific and its subsidiaries. Software Program Licence Terms The Software Program is licensed, not sold. Thermo Fisher Scientific, grants you a license for the Software Program only in the country where you acquired the Equipment, as defined below. You obtain no rights other than those granted you under this license. The term “Equipment” means the equipment with which the Software Program is used. The term “Software Program” means the original and all whole or partial copies of the Software Program used in connection with Equipment sold by Thermo Fisher Scientific to the user, including modified copies or portions of the Software Program. Thermo Scientific retains title to the Software Program, as well as all improvements, modifications and enhancements to the Software Program, whether made by Thermo Scientific or any other party. Thermo Scientific owns, or has licensed from the owner, copyrights in the Software Program. You are responsible for the selection of the Equipment. Following the commissioning of the Equipment, any change made by the user to the Software Program will terminate all warranties with respect to the Equipment and Software Program. All other trademarks are the property of Thermo Fisher Scientific and its subsidiaries. License Under this license, you may: 1. Use the Software Program on only one piece of equipment at any one time, unless the license information specifies otherwise; 2. Copy the Software Program for backup or in order to modify it; 3. Modify the Software Program and/or merge it into another Software Program; and 4. Subject to the following limitations, transfer the possession of the Software Program to another party, but only in connection with a transfer of the Equipment. If you transfer the Software Program, you must transfer a copy of these License Terms, all other documentation and at least one complete, unaltered copy of the Software Program to the other party. Unless you have other copies of the Software Program to be used in connection with other Equipment purchased from Thermo Scientific, or one of its divisions, you must, at the same time, either transfer all your other copies of the Software Program to the transferee of the Equipment or destroy them. Your license is then terminated. The other party agrees to these terms and conditions by its first use of the Software Program. You must reproduce the copyright notices(s) on each copy of the Software Program. You may not: 1. Use, copy, modify, merge, or transfer copies of the Software Program except as provided in this license; 2. Reverse engineer, decompile, or disassemble the Software Program; or 3. Sub-license, rent, lease, or assign the Software Program. Limitation of Remedies Thermo Scientifics’ entire liability under this license is the following: Thermo Scientific will: (a) replace defective media, or (b) make a warranted Software Program operate or (c) replace the Software Program with a functionally equivalent Software Program, as warranted. For any claim (including breach), in any form, related in any way to this license, Thermo Scientifics liability will be for the actual value of the Software Program. Thermo Scientific will not be liable for any lost profits, lost savings, any incidental damages, or other economic consequential damages, even if Thermo Scientific, or its authorized supplier, has been advised of the possibility of such damages. Thermo Scientific will not be liable for any damages claimed by you based on any third party claim. General Thermo Scientific may terminate your license if you fail to comply with the terms and conditions of this license. In such event, you must destroy all your copies of the Software Program. You are responsible for payment of any taxes, including personal property taxes, resulting from this license. Occupational Safety and Health Act (OSHA) The Occupational Safety and Health Act clearly places the burden of compliance on the user of the equipment and the act is generalized to the extent that determination of compliance is a judgment decision on the part of the local inspection. Hence, Thermo Scientific will not be responsible for meeting the full requirements of OSHA in respect to the equipment supplied or for any penalty assessed for failure to meet the requirements, in respect to the equipment supplied, of the Occupational Safety and Health Act, as interpreted by an authorized inspector. Thermo Scientific will use their best efforts to remedy such violation at a reasonable cost to the buyer. Certifications The following section outlines the list of symbols and certifications specific to the machine. Some of the Symbols and/or Certifications listed are not required in all countries but are listed in this document for simplicities sake. Thermo Scientific Warranty The seller agrees, represents, and warrants that the equipment delivered hereunder shall be free from defects in material and workmanship. Such warranty shall not apply to accessories, parts, or material purchased by the seller unless they are manufactured pursuant to seller's design, but shall apply to the workmanship incorporated in the installation of such items in the complete equipment. To the extent purchased parts or accessories are covered by the manufacturer's warranty, seller shall extend such warranty to buyer. Seller's obligation under said warranty is conditioned upon the return of the defective equipment, transportation charges prepaid, to the seller's factory in Minneapolis, Minnesota, and the submission of reasonable proof to seller prior to return of the equipment that the defect is due to a matter embraced within seller's warranty hereunder. Any such defect in material and workmanship shall be presented to seller as soon as such alleged errors or defects are discovered by purchaser and seller is given opportunity to investigate and correct alleged errors or defects and in all cases, buyer must have notified seller thereof within one (1) year after delivery, or one (1) year after installation if the installation was accomplished by the seller. Said warranty shall not apply if the equipment shall not have been operated and maintained in accordance with seller's written instructions applicable to such equipment, or if such equipment shall have been repaired or altered or modified without seller's approval; provided, however, that the foregoing limitation of warranty insofar as it relates to repairs, alterations, or modifications, shall not be applicable to routine preventive and corrective maintenance which normally occur in the operation of the equipment. “EXCEPT FOR THOSE WARRANTIES SPECIFICALLY CONTAINED HEREIN, SELLER DISCLAIMS ANY AND ALL WARRANTIES WITH RESPECT TO THE EQUIPMENT DELIVERED HEREUNDER, INCLUDING THE IMPLIED WARRANTIES OF MERCHANTABILITY AND FITNESS FOR USE. THE SOLE LIABILITY OF SELLER ARISING OUT OF THE WARRANTY CONTAINED HEREIN SHALL BE EXCLUSIVELY LIMITED TO BREACH OF THOSE WARRANTIES. THE SOLE AND EXCLUSIVE REMEDY FOR BREACH OF THE WARRANTIES SET OUT ABOVE SHALL BE LIMITED TO THE REPAIR OR REPLACEMENT OF ANY DEFECTIVE ACCESSORY, PART OR MATERIAL WITH A SIMILAR ITEM FREE FROM DEFECT, AND THE CORRECTION OF ANY DEFECT IN WORKMANSHIP. IN NO EVENT SHALL SELLER BE LIABLE FOR ANY INCIDENTAL OR CONSEQUENTIAL DAMAGES.” Purchaser agrees to underwrite the cost of any labor required for replacement; including time, travel, and living expenses of a Thermo Scientific Field Service Engineer at the closest factory base. Thermo Fisher Scientific 501 90th Ave. NW Minneapolis, MN 55433 Phone: (800) 227-8891 Fax: (763) 783-2525 Disclaimer Though the information provided herein is believed to be accurate, be advised that the information contained herein is not a guarantee for satisfactory results. Specifically, this information is neither a warranty nor guarantee, expressed or implied, regarding performance, merchantability, fitness, or any other matter with respect to the products, and recommendation for use of the product/process information in conflict with any patent. Please note that Thermo Scientific reserves the right to change and/or improve the product design and specifications without notice. Micro-Tech 3102 Table of Contents Table of Contents..................................................................................................................i List of Figures ......................................................................................................................v List of Tables........................................................................................................................v About this Manual ..............................................................................................................vii Who Should Use this Manual ........................................................................................... vii Organization of the Manual .............................................................................................. vii Documentation Conventions ............................................................................................viii Safety Messages ..............................................................................................................viii General Precaution ........................................................................................................... ix Chapter 1 Introduction to the Micro-Tech 3102..........................................................1-1 1.1 Unpacking and Inspection ....................................................................................1-1 1.2 Storage .................................................................................................................1-1 1.3 Application ............................................................................................................1-1 1.4 Main Features.......................................................................................................1-1 1.5 Configuration ........................................................................................................1-3 1.6 Monitoring Functions ............................................................................................1-4 1.7 Print Functions......................................................................................................1-5 1.8 Communications ...................................................................................................1-6 1.9 Symbol Identification ............................................................................................1-6 1.10 Technical Specifications ...................................................................................1-7 Chapter 2 Installing the Micro-Tech 3102 ...................................................................2-1 2.1 Safety Precautions ...............................................................................................2-1 2.2 Incoming Power ....................................................................................................2-3 2.2.1 Critical Wiring Conditions ..............................................................................2-4 2.3 Field Mount Installation.........................................................................................2-4 2.3.1 Mounting........................................................................................................2-4 2.3.2 Connecting Incoming Power - Field Mount....................................................2-5 2.4 Panel Mount Installation .......................................................................................2-6 2.4.1 Mounting........................................................................................................2-6 2.4.2 Connecting Incoming Power – Panel Mount .................................................2-8 2.5 Batch Controller Configuration..............................................................................2-8 2.5.1 Mother Board Configuration Jumpers and Switches .....................................2-8 2.5.2 A/D Jumpers – Load Cell Sense .................................................................2-11 2.5.3 Analog Output (Motherboard)......................................................................2-14 2.5.4 Analog Input/Output Board (Option) ............................................................2-14 2.5.5 Communications Configuration (Motherboard) COMM ...............................2-15 2.6 Initial Setup Procedure .......................................................................................2-17 2.7 Programming the Micro-Tech 3102 (Initial Setup) ..............................................2-17 2.7.1 Selecting the language ................................................................................2-17 2.7.2 Define the Number of Scales.......................................................................2-18 REC 4192 Rev B Thermo Fisher Scientific i Micro-Tech 3102 2.7.3 The SCALE Soft Key...................................................................................2-19 2.7.4 Measure Units .............................................................................................2-19 2.7.5 Weight Units................................................................................................2-20 2.7.6 Total Units ...................................................................................................2-20 2.7.7 Max Scale Capacity ....................................................................................2-21 2.7.8 Scale Divisions............................................................................................2-21 2.7.9 Load Cells Number .....................................................................................2-21 2.7.10 Defining Load Cells Capacity ......................................................................2-21 2.7.11 Quick Automatic Calibration of the Scale (s)...............................................2-23 Chapter 3 Micro-Tech 3102 Operation ........................................................................3-1 3.1 Overview ..............................................................................................................3-1 3.2 Front Panel...........................................................................................................3-1 3.2.1 LED Status Indicators ...................................................................................3-2 3.2.2 LCD Graphic Display.....................................................................................3-2 3.2.3 Keypad ..........................................................................................................3-2 3.3 General Navigation...............................................................................................3-3 3.4 Menu Displays......................................................................................................3-3 3.5 Normal Power On.................................................................................................3-4 3.6 Hardware Configuration .......................................................................................3-4 3.7 Run Menu.............................................................................................................3-5 3.7.1 Main Run Scroll.............................................................................................3-5 3.7.2 Recipe Scroll .................................................................................................3-6 3.7.3 Cycles Scroll .................................................................................................3-6 3.7.4 Weight and Message Scroll ..........................................................................3-6 3.7.5 Alarm Pending...............................................................................................3-7 3.7.6 Print Key........................................................................................................3-8 3.8 COMMAND KEYS..............................................................................................3-10 3.8.1 AUTO/MAN Key ..........................................................................................3-10 3.8.2 Recipe Key..................................................................................................3-10 3.8.3 Total Key .....................................................................................................3-15 3.8.4 Recipes Definition .......................................................................................3-16 3.8.5 START Key .................................................................................................3-20 3.8.6 STOP Key ...................................................................................................3-21 3.8.7 The MENUS ................................................................................................3-21 3.9 Calibration ..........................................................................................................3-21 3.9.1 Zero Calibration Scroll.................................................................................3-21 3.9.2 Span Calibration Scroll................................................................................3-23 Chapter 4 Micro-Tech 3102 Maintenance ...................................................................4-1 4.1 Frequent Checkpoints ..........................................................................................4-1 4.2 Troubleshooting....................................................................................................4-1 4.3 Alarm Messages...................................................................................................4-2 4.3.1 Alarms List ....................................................................................................4-2 4.4 Micro-Tech 3102 Cold Start .................................................................................4-5 4.5 Internal Test Procedure........................................................................................4-5 ii REC 4192 Rev B Thermo Fisher Scientific Micro-Tech 3102 4.6 Load Cell Excitation and Signal Voltage...............................................................4-6 4.7 Resetting Master Total..........................................................................................4-6 4.7.1 No Password Installed...................................................................................4-6 4.7.2 Active Password ............................................................................................4-7 4.8 Removing a Forgotten Password .........................................................................4-7 4.9 Lithium Battery Replacement................................................................................4-8 4.10 Disposal of Hazardous Waste...........................................................................4-8 4.11 Cleaning Instructions ........................................................................................4-8 Chapter 5 Micro-Tech 3102 Replacement Parts .........................................................5-1 5.1 Order Information..................................................................................................5-1 5.1.1 Parts List .......................................................................................................5-4 Appendix A Micro-Tech 3102/3202 Menus.........................................................................1 A.1. Menu Displays .........................................................................................................1 A.2. Common Key Functions ..........................................................................................2 A.3. MAIN Menu 1 – Calibration Menu............................................................................2 A.3.1. Zero Calibration Scroll ......................................................................................2 A.3.2. Span Calibration ...............................................................................................4 A.4. Main Menu 2 – Setup and Configuration Menus .....................................................9 A.4.1. Display..............................................................................................................9 A.4.2. Scale Data Scroll ............................................................................................12 A.4.3. Calibration Data Scroll....................................................................................16 A.5. Main Menu 3 ..........................................................................................................18 A.5.1. Changing the Protection Level .......................................................................18 A.5.2. Diagnostics .....................................................................................................20 A.5.3. Tests...............................................................................................................24 A.6. Main Menu 4 ..........................................................................................................28 A.6.1. I/O Definition...................................................................................................28 A.6.2. Alarms Definition ............................................................................................38 A.6.3. Alarm List .......................................................................................................41 A.7. MAIN MENU 5 .......................................................................................................41 A.7.1. Communication A Scroll .................................................................................42 A.7.2. Communication B (Field Bus).........................................................................44 A.7.3. Print ................................................................................................................45 A.8. MAIN MENU 6 .......................................................................................................48 A.8.1. Audit Trails .....................................................................................................48 A.8.2. Linearization ...................................................................................................50 Appendix B Micro-Tech 3102 Cycle Sequence .................................................................1 B.1. Overview..................................................................................................................1 B.2. Definition of the components ...................................................................................1 B.2.1 Charge Batch Component ................................................................................4 B.2.2 Discharge Batch Component............................................................................4 B.2.3 Discharge Component......................................................................................4 B.2.4 Refill Component ..............................................................................................4 B.2.5 Time Based Component...................................................................................5 REC 4192 Rev B Thermo Fisher Scientific iii Micro-Tech 3102 B.3. Definition of the recipe............................................................................................. 5 B.3.1 Recipe Verify.................................................................................................... 9 B.4. Definition of the I/O.................................................................................................. 9 B.4.1 Digital Inputs .................................................................................................... 9 B.4.2 Digital Outputs................................................................................................ 10 B.4.3 Current Outputs.............................................................................................. 12 B.4.4 BCD Input....................................................................................................... 12 B.4.5 BCD Output.................................................................................................... 12 B.5. The Run Scroll....................................................................................................... 13 B.5.1 Select the Recipe ........................................................................................... 13 B.5.2 Define the Cycles Number ............................................................................. 13 B.5.3 Status of the Cycle ......................................................................................... 13 B.5.4 The Weight Indicator ...................................................................................... 16 B.6. The Commands..................................................................................................... 16 B.6.1 Start Command .............................................................................................. 16 B.6.2 Stop Command .............................................................................................. 16 B.6.3 Abort Command ............................................................................................. 17 B.6.4 End Cycle Command ..................................................................................... 17 B.6.5 AUTO / MANUAL ........................................................................................... 17 B.7. The Sequence ....................................................................................................... 18 B.7.1 After the Start ................................................................................................. 18 B.7.2 Execute the Recipe Line ................................................................................ 18 B.7.3 End Recipe Line and Recipe End .................................................................. 22 B.8. Multiscales............................................................................................................. 22 B.8.1 Multiscales – Group Mode ............................................................................. 24 B.9 Troubleshooting..................................................................................................... 26 B.9.1 Status Messages (RUN Scroll) ...................................................................... 27 B.9.2 Alarms ............................................................................................................ 28 Appendix C Digital and Analog Input/Output.................................................................... 1 C.1 Mother Board Digital I/O.......................................................................................... 1 C.1.1 Digital Inputs .................................................................................................... 1 C.1.2 Digital Outputs.................................................................................................. 2 C.2 Digital Input/Output Board Configuration................................................................. 3 C.2.1 16 In/4 Out DIO Board Specifications (OPTION) ............................................. 4 C.2.2 4 In/16 Out DIO Board Specifications .............................................................. 4 C.3 BCD Input Option .................................................................................................... 8 C.4 Analog I/O Boards ................................................................................................... 9 C.5 Communications Options ...................................................................................... 14 C.5.1 Standard Comm A Board ............................................................................... 14 C.5.2 Allen-Bradley Remote I/O .............................................................................. 14 C.5.3 Profibus-DP.................................................................................................... 14 C.5.4 DeviceNet....................................................................................................... 14 Appendix D Optional Documentation ................................................................................ 1 iv REC 4192 Rev B Thermo Fisher Scientific Micro-Tech 3102 List of Figures Figure 1-1: Figure 1-2: Figure 2-1: Figure 2-2: Micro-Tech 3102/3202 Field Mount Batch Controller .................................... 1-3 Micro-Tech 3102/3202 Panel Mount Batch Controller.................................... 1-3 Typical Micro-Tech 3102/3202 Installation .................................................... 2-4 Electrical and Mounting Guidelines of the Micro-Tech Model 3102/3202 (Field Mount) Batch Controller ................................................................................ 2-5 Figure 2-3: Field Mount Inside Front Panel....................................................................... 2-6 Figure 2-4: Electrical and Mounting Guidelines Micro-Tech 3102 (Panel Mount)............ 2-7 Figure 2-5: Installation Micro-Tech Model 3102 (Panel Mount) ........................................ 2-7 Figure 2-6: Micro-Tech Motherboard ............................................................................... 2-9 Figure 2-7: Area of Detail ................................................................................................ 2-12 Figure 3-1: Micro-Tech 3102 Front Panel .............................................................................. 3-1 List of Tables Table 1-1: Table 2-1: Table 2-2: Table 2-3: Table 2-4: Table 2-5: Table 2-6: Table 2-7: Table 5-1: Table 5-2: Symbol Identification .................................................................................... 1-6 Programmable Input Choices .................................................................... 2-10 Programmable Output Choices ................................................................. 2-11 Load Cell Jumper Settings ......................................................................... 2-11 Micro-Tech Motherboard Jumpers ............................................................ 2-13 Terminal Wiring Configurations................................................................. 2-13 Relay Output Board .................................................................................... 2-14 Motherboard Current Output - TB 5........................................................... 2-14 Parts List ........................................................................................................ 5-4 Optional Plugin Boards ................................................................................ 5-4 REC 4192 Rev B Thermo Fisher Scientific v Micro-Tech 3102 **** THIS PAGE LEFT BLANK INTENTIONALLY **** vi REC 4192 Rev B Thermo Fisher Scientific About this Manual This manual provides the information you need to install, operate, and maintain the Micro-Tech 3102. Read this manual before working with the product. For personal and system safety, and for the best product performance, make sure you thoroughly understand the manual before installing or using this product. Who Should Use this Manual The Micro-Tech 3102 manual is a learning resource and reference for anyone concerned with installing, operating, or maintaining Ramsey Micro-Tech 3102. Read this manual before working with the system. For personal and system safety, and for the best product performance, make sure you thoroughly understand the manual before installing, operating, or maintaining this machine. Organization of the Manual This manual is organized into five chapters and six Appendixes. Chapter 1: Introduction to the Micro-Tech 3102 gives an overview of the device’s capabilities, describes its functions, and lists its technical specifications. Chapter 2: Installing the Micro-Tech 3102 provides information about installing the Batch Controller including procedures for mounting, wiring, and configuring the Micro-Tech 3102 system. Chapter 3: Micro-Tech 3102 Operation provides an overview of the MicroTech 3102 front panel, a description of how the menus operate, and information about setting up, calibrating, and operating the Batch Controller. Chapter 4: Micro-Tech 3102 Maintenance provides an overview of standard maintenance associated with the Mod. 3102. Chapter 5: Micro-Tech 3102 Replacement Parts- provides a list of replacement parts for the Mod. 3102 and part ordering information. Appendix A: Micro-Tech 3102 Menu gives an overview of the menus. Appendix B: Cycle Sequence Appendix C: Digital and Analog Input/Output Appendix D: Optional Documentation REC 4192 Rev B Thermo Fisher Scientific vii Micro-Tech 3102 Documentation Conventions The following conventions are used in this manual to help easily identify certain types of information: • Italic is used to introduce new terms and for emphasis. • Italic/blue type is used for references to other sections of the manual and work as links on line and in pdf format. • The names of setup, calibration displays, menu displays, and variables are shown in FULL CAPITALS. • The names of keys on the front panel are shown in BOLD CAPITALS. Safety Messages Instructions in this manual may require special precautions to ensure the safety of the personnel performing the operations. Please read the safety information before performing any operation preceded by this symbol. There are two levels of safety messages: warnings and cautions. The distinction between the two is as follows: WARNING FAILURE TO OBSERVE COULD RESULT IN DEATH OR SERIOUS INJURY. CAUTION FAILURE TO OBSERVE MAY CAUSE MINOR INJURY OR DAMAGE THE EQUIPMENT viii REC 4192 Rev B Thermo Fisher Scientific Micro-Tech 3102 General Precaution Do not install, operate, or perform any maintenance procedures until you have read the safety precautions presented. WARNING FAILURE TO FOLLOW SAFE INSTALLATION AND SERVICING PROCEDURES COULD RESULT IN DEATH OR SERIOUS INJURY. MAKE SURE ONLY QUALIFIED PERSONNEL PERFORM INSTALLATION AND MAINTENANCE PROCEDURES IN ACCORDANCE WITH THE INSTRUCTIONS IN THIS MANUAL. ALLOW ONLY QUALIFIED ELECTRICIANS TO OPEN AND WORK IN THE ELECTRONICS CABINET, POWER SUPPLY CABINET, CONTROL CABINET, OR SWITCH BOX. COVERS OVER THE ELECTRONICS AND ROTATING PARTS MUST ALWAYS REMAIN IN PLACE DURING NORMAL OPERATION REMOVE ONLY FOR MAINTENANCE, WITH THE MACHINE’S POWER OFF. REPLACE ALL COVERS BEFORE RESUMING OPERATION. DURING MAINTENANCE, A SAFETY TAG (NOT SUPPLIED BY THE FACOTRY) IS TO BE DISPLAYED IN THE ON/OFF SWITCH AREAS INSTRUCTING OTHERS NOT TO OPERATE THE UNIT (ANSI:B157.1). WARNING HIGH VOLTAGE THAT MAY BE PRESENT ON LEADS COULD CAUSE ELECTRICAL SHOCK. ALL SWITCHES MUST BE OFF WHEN CHECKING INPUT AC ELECTRICAL CONNECTIONS, REMOVING OR INSERTING PRINTED CIRCUIT BOARDS, OR ATTACHING VOLTMETERS TO THE SYSTEM. USE EXTREME CAUTION WHEN TESTING IN, ON, OR AROUND THE ELECTRONICS CABINET, PC BOARDS, OR MODULES. THERE ARE VOLTAGES IN EXCESS OF 115 V OR 230 V IN THESE AREAS. WARNING USE ONLY THE PROCEDURES AND NEW PARTS SPECIFICALLY REFERENCED IN THIS MANUAL TO ENSURE SPECIFICATION PERFORMANCE AND CERTIFICATION COMPLIANCE. UNAUTHORIZED PROCEDURES OR PARTS CAN RENDER THE INSTRUMENT DANGEROUS TO LIFE, LIMB, OR PROPERTY. ix REC 4192 Rev B Thermo Fisher Scientific Micro-Tech 3102 WARNING KEEP HANDS AND CLOTHING AWAY FROM ALL MOVING OR ROTATING PARTS. WARNING DO NOT PLACE OR STORE OBJECTS OF ANY KIND ON THE MACHINE. WARNING THIS MACHINE SHOULD NOT BE OPERATED AT MORE THAN THE PRODUCTION RATE STATED ON YOUR EQUIPMENT SPECIFICATION SHEET OR USED IN APPLICATIONS OTHER THAN THOSE STATED IN THE ORIGINAL ORDER. x REC 4192 Rev B Thermo Fisher Scientific Chapter 1 Introduction to the Micro-Tech 3102 This instruction manual contains information on the installation, operation, calibration, and maintenance of the Micro-Tech™ 3000 Model 3102 or 3202 Batch Controller. The Model 3102 is designed for noncommercial use and the Model 3202 for higher accuracy and in cases where weights and measures approval is required. The manual refers to Model 3102 only as both operate the same. 1.1 Unpacking and Inspection The Micro-Tech 3102 has been properly packaged for shipment and storage, when necessary. Refer to the appropriate manual in the appendix section for unpacking procedures for optional equipment. Inspect all packages for damage before opening; sometimes the carrier may be responsible for shipping damage. Refer to the appropriate manual in the appendix for inspection procedures for optional equipment. 1.2 Storage The Micro-Tech 3102 can be safely stored, with cover, latches secured and hole plugs installed, between -40° to +158° F (-40° to +70° C). The units should be protected against moisture. 1.3 Application The Micro-Tech Model 3102 /3202.Field Mount and Panel Mount is a microprocessor based menu driven controller designed to accurately weigh and control the batching process of the selected recipe. In its maximum configuration, the controller accepts up to four scale inputs and forty components. The Micro-Tech 3102 interfaces with the batching system through digital and analog inputs and outputs. The batch controller can be expanded by installing optional plug-in circuit boards. The following table shows the maximum expansion of the system. Number of scales 4 Components 40 Digital Inputs 52 Digital Outputs 52 Analog Outputs 4 BCD Inputs 16 multiplexed (4 digits) BCD Outputs 16 multiplexed (4 digits) Recipes 100 Recipe Lines 500 1.4 Main Features REC 4192 Rev B Thermo Fisher Scientific 1-1 Micro-Tech 3102 The Micro-Tech 3102 (Figure 1-1) or panel mount (Figure 1-2) has many hardware anf software features necessary to control most any batching process. Other features are listed in specific sections of this manual. - Menu driven scroll entries on a multiple line display - Five LED status indicator - Visible and electrical outputs representing load measurement - Automatic zero and span calibration - Auto zero tracking - Several software options that may be turned on keypad entry or by installing optional plug-in PC boards - Opto-coupled digital inputs and outputs - Alarms and failure detection - Communication standards : RS423/RS232C For point-to-point asynchronous bidirectional communications, maximum 50 ft (15 m). Modem capability. RS485/RS422 For point-to-point multidrop 4 wire bidirectional communications, maximum 4000 ft (1200 m). Current Loop Passive only. 1-2 For high immunity bidirectional asynchronous communications. - Allen-Bradley Remote I/O - PROFIBUS-DP REC 4192 Rev B Thermo Fisher Scientific Micro-Tech 3102 Figure 1-1: Micro-Tech 3102/3202 Field Mount Batch Controller Figure 1-2: Micro-Tech 3102/3202 Panel Mount Batch Controller 1.5 Configuration The standard configuration of the Batch Controller includes the following: • Single channel load cell input to a max of 6 load cells • Single current output on Mother Board • 5 programmable digital inputs • 4 programmable outputs • 1 fault output • Serial communications on Mother Board • Solid state output 1-3 REC 4192 Rev B Thermo Fisher Scientific Micro-Tech 3102 • • 4 digital inputs/16 digital outputs I/O board 2 circuit board expansion slots that can accommodate the following boards if needed. 1. A/D board 2. Premium A/D board 3. Single channel current output board 4. Dual channel current output board 5. 16 digital inputs/4 digital outputs board 6. 4 digital inputs/16 digital outputs board 7. Serial communication board 8. Allen-Bradley remote I/O 9. Profibus-DP board 10. DeviceNet 1.6 Monitoring Functions The batch controller is supplied with an alarm and indication system. Indication can be in the form of : - Status indications - Process alarms - Programming errors - Equipment failures If any of the controlled conditions takes place, it is signaled by the lighting of a LED on the front and by a digital output. Through the keypad it is possible to call on the display all the existing alarms and acknowledge them. - - - 1. Status Indications Controller on automatic: The “AUTO” LED is lighted. Controller on remote set-point: The “REM” LED is lighted, the relevant output is closed provided the controller is also on automatic mode. This output is used to indicate to external equipments that the controller can be remotely controlled. Feeder ready: The “RUN” LED will flash and the relevant output will close when all the conditions listed below become true: FEEDER NOT RUNNING NO FAILURE ALARM NO SHUT DOWN CONDITION NO CALIBRATE MODE CONTROLLER ON AUTOMATIC MODE Feeder running: When the feeder running input contact is closed. The “RUN” LED is lighted 2. Process Alarms 1-4 REC 4192 Rev B Thermo Fisher Scientific 
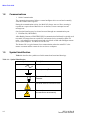
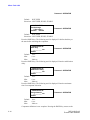
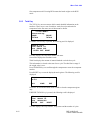
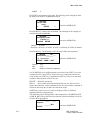
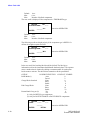
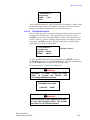
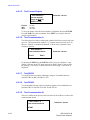
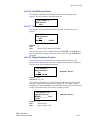
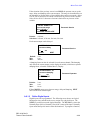
Micro-Tech 3102 The following process conditions are monitored and may produce alarm or shut-down according to keypad selection. A delay time before the abnormal condition is monitored may be set for each individual alarm. - High Load - Low Load - Bad Start Weight - Stop Cycle - End Cycle - Abort Cycle - Component Timeout Each abnormal conditions may be set as: - NONE: Neither alarm nor shut-down - ALARM: Warning, the feeder continues to run. - SHUT-DOWN: The feeder stops. 3. Programming Errors Errors may occur only during programming or calibration as conseguence of entering data above or below the operating range of the feeder controller. If data above or below the limits are entered, the system will display a warning message and the minimum/maximum limits will be shown. 4. Equipment Failure The feeder controller has an internal diagnostic system which detects the following instrument failures: - Clock Calendar circuit failure - Load Cell failure - RAM failure - ROM failure - Power on - Default constants installed at power on - Power down during calibration - Calibration time expired - General purpose external alarms - Communication Error - BCD Error - Mathematical Error 1.7 Print Functions Available print functions are: - Print on command - Print at preselected times of dey (up to four) - Print a preselected intervals of time - Print Set-Up - Print alarms 1-5 REC 4192 Rev B Thermo Fisher Scientific Micro-Tech 3102 1.8 Communications 1. Serial Communication The communication protocol allows a remote intelligent device to read and eventually write the contents of the registers. During the communication activity, the Mod.3102 always acts as a Slave, meaning it responds to a request from a Master device on the line, but never attempts to send messages out. One electrical interface may be selected accessed through one communication port. 2. Field Bus I/O (OPTIONAL) Allen-Bradley Remote or PROFIBUS DP I/O communication link board is typically used to transfer I/O images between a main PLC and remote devices (normally remote I/O racks – rack adapters) or to transfer (read and write blocks of data with intelligent remote devices (node adapters). The Mod.3102 in this case. The Remote I/O is a typical master/slave communication where the main PLC is the master or scanner and the remote devices are slaves or adapters. 1.9 Symbol Identification Table 1-1 describes the symbols used in this manual and associated drawings. Table 1-1: Symbol Identification Symbol Description ALTERNATING CURRENT EARTH (GROUND) TERMINAL PROTECTIVE CONDUCTOR TERMINAL CAUTION, RISK OF ELECTRIC SHOCK CAUTION (REFER TO ACCOMPANYING DOCUMENTS) 1-6 REC 4192 Rev B Thermo Fisher Scientific Micro-Tech 3102 1.10 Technical Specifications Enclosure Field Mount NEMA 4X (IP65), dust and watertight 17 x 13 x 7 inches Fiberglass reinforced polyester 2 position-mounting feet Steel chassis providing EMI/RFI shielding Panel Mount Size: 12 x 4 x 7.5 inches Material: Chromated mild steel Environmental Conditions Mounting Should be mounted as close to the load cells as possible without being exposed to excessive heat or moisture Field Mount suitable for outdoor mounting Temperature (Ambient) Storage: -40° to +158° F (-40° to +70° C) Operating: +14Ε to +122Ε F (-10Ε to +50Ε C) Relative Humidity Up to 95%, non-condensing Pollution Degree 2 Altitude Up to 6,561 ft (2000m) Power Requirements Voltage Range Nominal voltage +10%, -15% Nominal Voltage 115/230 VAC, selectable Nominal Frequency 50/60 Hz Fusing 400mA Slo-Blo, 110/120 VAC, Type T 200mA Slo-Blo 220/240 VAC, Type T Power Consumption 50 VA max 1-7 REC 4192 Rev B Thermo Fisher Scientific Micro-Tech 3102 Maximum Non-Destructive Input Voltage 150/300 VAC for 1 minute Over voltage Category Category II DC Power Supply Auxiliary Power Supply Output (Alarm Contacts, etc.) Output voltage: 24 VDC Isolation: Yes – 500 volts Output ripple: 1.0 V peak to peak typical Output current: 600 mA maximum Short circuit protection Load Cell (Weight) Load cell input circuits Number: Sensitivity: Input Impedance: Maximum Usable Signal: Displayed A/D counts Isolation: Max non-destructive input voltage: Load Cell Cable Shield: Up to six (6) 350-ohm load cells in parallel. Cable distance 200 ft or less (3000 ft with sense) 0.5mV/V to 3.5 mV/V (keyboard selectable) 100 k-ohm minimum 114% of 3mV/V (3mV/V):112368 Non-isolated ± 6 V relative to ground Connected to earth ground Load Cell Excitation Power Supply 10 VDC ±10%, 220 mA Minimum load impedance (operating) 58 ohms Output short circuit, 1.5 A maximum Excitation-Sense Circuitry 6 Wire System; cable distance over 200 ft. (not to exceed 3000 ft.). Nominal input voltage: 1-8 ±5 VDC (10 volts) Input impedance: 100 k-ohm minimum Jumper selectable: Local or remote sense REC 4192 Rev B Thermo Fisher Scientific Micro-Tech 3102 Digital Input (on Motherboard) 4 High Frequency Input (DC). Optocoupled Internal Power supply for dry contact input. Power Supply: +24V external Tec. Features: 24VDC, 6 mA Minimum Current Level: 0,25 mA or less Maximum Current Level: 3 mA or great Cable Length: 2500 mt. cross section 1,5 mmsq (150 Ω Max.) Digital Output (on Motherboard) 3 Configurable Digital Output; interface with TTL,CMOS, RELAY 1 Failure Digital Output (safe output) “On” State Delay: 10ms Tec. Features: 28 VDC, 100mA DC max. With Power Supply or Instrument Error the contact is kept normally OFF Input source Current -2 mA nom. at 0 VDC Max. non-destructive Input voltage ±50 peak, continuous 4 In/16 Out Digital I/O Board 1. (4) programmable inputs (See Appendix C specifications) 2. (16) programmable outputs (See Appendix C specifications) 3. Connector 25 pin D connector (female). Connector is intermateable with a 20 or 22 pin subminiature D connector dimensionally complying with MIL-C-24308. 1-9 REC 4192 Rev B Thermo Fisher Scientific Micro-Tech 3102 Current Output 1 current output (on Motherboard) Output range: User selectable 0 – 20 mA or 4-20 mA, representing 0 to 100% variable. Resistive load: 800 ohm max. Loop Capacitive load:No limit Standard Communication (on Motherboard) Serial Interface Type: Interfacing: Data rate: Data Format: Optical Isolation: Input Voltage: Cable Length: Conforms to RS-232C, RS-485/422, and 20 mA standards; supports 2 and 4 wire multi-drop in RS-485. 20 mA loop is passive ONLY. RS-485 supports 2-wire or 4-wire multi-drop networking; RS 232 C provides support for modem. 110 to 19200, operator selectable from the keyboard. Asynchronous, bit-serial, selectable parity, data length, and stop bits. 250 VRMS max. ±30 Vdc max. (RS-232C) ±15/-10 Vdc max. (RS-485) 50 feet max. (RS-232C) 4000 feet max (Rs-485 and 20 mA) 1-10 REC 4192 Rev B Thermo Fisher Scientific Chapter 2 Installing the Micro-Tech 3102 This chapter describes the Batch Controller installation procedure, hardware configuration, and initial programming. Initial programming is a machine directed procedure prompting the operator to enter required conveyor and belt scale parameters. After all parameters have been entered, the Batch Controller performs an unassisted zero and span calibration. 2.1 Safety Precautions CAUTION DO NOT INSTALL, OPERATE, OR PERFORM ANY MAINTENANCE PROCEDURES UNTIL YOU HAVE READ THE SAFETY PRECAUTIONS THAT FOLLOW. CAUTION DO NOT CONNECT POWER TO THE ELECTRONICS OR TURN ON THE UNIT UNTIL YOU HAVE READ AND UNDERSTOOD THE PRECAUTIONS AND THIS ENTIRE MANUAL. PROCEDURES PRESENTED IN THIS MANUAL MUST BE FOLLOWED CAREFULLY IN ORDER TO PREVENT EQUIPMENT DAMAGE AND PROTECT THE OPERATOR. WARNING THE INSTRUMENT DOOR SHOULD ALWAYS REMAIN CLOSED DURING OPERATION, AND ONLY OPENED FOR MAINTENANCE PROCEDURES. BE SURE TO CLOSE THE COVER BEFORE RESUMING OPERATION. REC 4192 Rev B Thermo Fisher Scientific 2-1 Micro-Tech 3102 WARNING ALL SWITCHES (SUCH AS CONTROL OR POWER) MUST BE OFF WHEN CHECKING INPUT AC ELECTRICAL CONNECTIONS, REMOVING OR INSERTING PRINTED CIRCUIT BOARDS, OR ATTACHING VOLT METERS TO THE SYSTEM. INCOMING VOLTAGES VOLTMETER BEFORE ELECTRONICS. MUST BE CHECKED WITH A BEING CONNECTED TO THE WARNING EXTREME CAUTION MUST BE USED IN TESTING IN, ON, OR AROUND THE ELECTRONICS, PC BOARDS, OR MODULES. THERE ARE VOLTAGES IN EXCESS OF 115 V OR 230 V IN THESE AREAS. AVOID HIGH VOLTAGE AND STATIC ELECTRICITY AROUND THE PRINTED CIRCUIT BOARDS. WARNING MAINTENANCE PROCEDURES SHOULD BE PERFORMED ONLY BY QUALIFIED SERVICE PERSONNEL AND IN ACCORDANCE WITH PROCEDURES/INSTRUCTIONS GIVEN IN THIS MANUAL. WARNING DURING MAINTENANCE, A SAFETY TAG (NOT SUPPLIED BY THERMO SCIENTIFIC) SHOULD BE DISPLAYED IN THE ON/OFF SWITCH AREAS AS A PRECAUTION INSTRUCTING OTHERS NOT TO OPERATE THE UNIT. WARNING ONLY QUALIFIED SERVICE TECHNICIANS SHOULD BE ALLOWED TO OPEN AND WORK IN THE ELECTRONICS, POWER SUPPLY, CONTROL, OR SWITCH BOXES. 2-2 REC 4192 Rev B Thermo Fisher Scientific Micro-Tech 3102 WARNING THIS EQUIPMENT SHOULD NOT BE OPERATED OR UTILIZED IN APPLICATIONS OTHER THAN THOSE STATED IN THE ORIGINAL ORDER. TO ADAPT PRODUCTION RATES OR APPLICATIONS, CONSULT THERMO SCIENTIFIC PRODUCTS CUSTOMER SERVICE FOR RECOMMENDATIONS. WARNING ALL PANELS COVERING THE ELECTRONICS MUST BE IN PLACE AND TIGHT BEFORE WASH DOWN PROCEDURES. DAMAGE TO THE ELECTRONICS COULD RESULT FROM MOISTURE, OR CONTAMINATION IN THE WATER, ELECTRONICS HOUSING. 2.2 Incoming Power CAUTION VERIFY THAT THE AC VOLTMETER INSTRUMENT. INPUT VOLTAGE IS CORRECT WITH AN BEFORE YOU CONNECT IT TO THE CAUTION EARTH GROUND MUST BE PROVIDED TO THE INSTRUMENT. DO NOT USE CONDUIT TO PROVIDE THIS GROUND. CAUTION A READILY ACCESSIBLE DISCONNECT DEVICE SHALL BE INCORPORATED IN THE FIELD WIRING. THIS DISCONNECT DEVICE SHOULD BE IN EASY REACH OF THE OPERATOR AND IT MUST BE MARKED AS THE DISCONNECTING DEVICE FOR THE EQUIPMENT. 2-3 REC 4192 Rev B Thermo Fisher Scientific Micro-Tech 3102 2.2.1 Critical Wiring Conditions 1. Ensure power is off at the mains 2. Do not route load cell and signal cables in the same conduit with power cables or any large source of electrical noise. 3. Earth ground all enclosures and conduits. A ground connection between all conduits is required. 4. Connect the shields ONLY where shown. 5. Check that all wires are tight in their connections. 6. Never use a “megger” to check the wiring. 7. A readily accessible disconnect device shall be incorporated in the field wiring. This disconnect should be in easy reach of the operator and it must be marked as the disconnecting device for the equipment. 8. All conduits should enter the bottom of the enclosure. Do not run conduit through the top or sides of the enclosure. 2.3 Field Mount Installation The field mount Batch Controller should be mounted in a controlled environment not be exposed to excessive vibration, heat, or moisture, and protected from direct sunlight. The Batch Controller may be mounted up to 3,000 feet from the scale (Figure 2-1). 2.3.1 Mounting Mount the Batch Controller to a rigid, flat, vertical surface using four mounting holes provided on the back of the enclosure. Care should be taken to ensure the mounting surface is flat so as not to twist or warp the fiberglass enclosure when tightening the mounting bolts. Figure 2-1: Typical Micro-Tech 3102/3202 Installation 2-4 REC 4192 Rev B Thermo Fisher Scientific Micro-Tech 3102 Figure 2-2: Electrical and Mounting Guidelines of the Micro-Tech Model 3102/3202 (Field Mount) Batch Controller CAUTION REFER TO THE FILED WIRING DIAGRAM AS A GUIDE IF YOU DO NOT HAVE A SPECIFIC WIRING DIAGRAM FOR YOUR SYSTEM. FOLLOW YOUR LOCAL ELECTRICAL CODES AND REGUATIONS FOR MINIMUM WIRE SIZE AND ROUTING. 2.3.2 Connecting Incoming Power - Field Mount To connect the incoming power, use the following procedure. Note: All units shipped from the factory are configured for 115 VAC. If you desired 230 VAC make sure the power selector switch is set to 230 VAC (Section 2.5.1). 1. Loosen the screw latch mounted on the front chassis. Open the door (see Figure 2-3). 2. Route incoming power wiring through a conduit hole at the bottom right of the enclosure. Leave ample loose wiring (typically 8”) to facilitate removing the terminal connectors. 3. Wire safety ground terminal located on the side of the chassis. 4. Wire HOT to Terminal L on Power Input Terminal. 5. Wire NEUTRAL to Terminal N on Power Input Terminal. 6. If additional I/O is required at the line voltages, these wires should be routed through a conduit hole on the bottom right of the enclosure. Leave ample loose wiring (typically 8”) to facilitate removing the terminal connectors. 2-5 REC 4192 Rev B Thermo Fisher Scientific Micro-Tech 3102 7. All additional field wiring operation at voltages less then 30 V must be located on the left bottom of the enclosure. Leave ample loose wiring (typically 8”) to facilitate removing the terminal connectors. 8. Close the inside panel and tighten the screw to secure the cover. Figure 2-3: Field Mount Inside Front Panel A90869 2.4 Panel Mount Installation The panel mounted Batch Controller is suitable for mounting in a control panel. The control panel should not be exposed to excessive vibration, heat, or moisture. The front bezel, when properly seated, forms a dust seal. A two (2) inch clearance around the top and bottom of the Batch Controller is required for convection cooling. Additional clearances may be required if equipment mounted directly below generates excessive heat. Clearance in the back is necessary for wiring access and fuse replacement. Clearance on the side is necessary for inserting the chassis holding brackets from the back after insertion of the Batch Controller. 2.4.1 Mounting Provide a cutout in the panel and insert the Batch Controller after removing the holding brackets. From the back, insert the holding brackets on both sides of the instrument. Tighten the holding brackets to support the Batch Controller and form the dust seal. 2-6 REC 4192 Rev B Thermo Fisher Scientific Micro-Tech 3102 Figure 2-4: Electrical and Mounting Guidelines Micro-Tech 3102 (Panel Mount) A90851 Figure 2-5: Installation Micro-Tech Model 3102 (Panel Mount) A00884 • • See Figure 2-4 for panel cutout, outline, and mounting dimensions. The large rubber band shipped with the unit can be used to hold clamp brackets in place during installation. Remove clamp brackets and slide chassis assembly through front of cut-out. Reinstall clamp brackets into chassis and tighten threaded rods against the back of the panel until the unit is secure. 2-7 REC 4192 Rev B Thermo Fisher Scientific Micro-Tech 3102 2.4.2 Connecting Incoming Power – Panel Mount To connect incoming power for panel mount installation, use the following procedure. Note: All units shipped from the factory are configured for 115 VAC. If 230 VAC is desired, refer to Section 2.5.1, motherboard configuration Jumpers and Switches. • For input power, use 14 AWG standard wire • Wire the safety ground terminal located on the right backside of the enclosure. • Wire the HOT to terminal labeled 1 of Terminal L on the Power Input Terminal. • Wire the NEUTRAL to the terminal labeled 2 of Terminal N on the Power Input Terminal. 2.5 Batch Controller Configuration The Micro-Tech 3102/3202 is one of a family of products that is supported by a common hardware platform. Configuration of the hardware platform and additional circuit boards enable the hardware platform to be used for several discrete instruments. Wire jumpers are installed at the factory for the instrument ordered and should not have to be reconfigured in the field. Switches and removable jumpers are described in this section. The default position is noted in each description and, in most cases, is not changed. 2.5.1 Mother Board Configuration Jumpers and Switches TO BE PERFORMED BY QUALIFIED SERVICE PERSONNEL ONLY. 1. General Purpose Digital Inputs Located on the motherboard are provisions for 5 programmable status inputs.On the Digital I/O (4 In/16 Out) board are available others N°4 digital input The programmable inputs may be configured as normally open or normally closed. Inputs are desigend for dry contacts. Refer to Table 2-1 for configuration information. 2-8 REC 4192 Rev B Thermo Fisher Scientific Micro-Tech 3102 Figure 2-6: Micro-Tech Motherboard OP 26 EPROM – U66 EPROM – U58 Lithium Battery Audit Trail Card Slots Slot 3 Slot 2 Slot 1 Slot 4 – Relay Output Area of detail in Figure 2-7 A90870 2-9 REC 4192 Rev B Thermo Fisher Scientific Micro-Tech 3102 Table 2-1: Programmable Input Choices External Alarm 1 Abort S4 External Alarm 2 Charge interl. External Alarm 3 Charge interl. S1 Reset Alarm Charge interl. S2 Print rec Charge interl. S3 Print comp Charge interl. S4 Start/Set tare Disch. Interl. Start/Set tare S1 Disch. Interl. S1 Start/Set tare S2 Disch. Interl. S2 Start/Set tare S3 Disch. Interl. S3 Start/Set tare S4 Disch. Interl. S4 Stop/Reset tare Disch. dev. Stop/Reset tare S1 Disch. dev. S1 Stop/Reset tare S2 Disch. dev. S2 Stop/Reset tare S3 Disch. dev. S3 Stop/Reset tare S4 Disch. dev. S4 End cycle Auto / Man End cycle S1 Auto / Man S1 End cycle S2 Auto / Man S2 End cycle S3 Auto / Man S3 End cycle S4 Auto / Man S4 Abort Go on Abort S1 Reset alarms Abort S2 Reset Tot r Abort S3 Reset Tot c Remote cntrl (only if high level communication) 2. Digital Outputs A relay output board (all dry contacts) and is plugged into slot 4 of the motherboard. One of the realy outputs is permanently assigned as the fault output and cannot be programmed to any other function. The other 3 relays can be programmed to one of the choices shown below in either a normally open or normally closed position. There is an additional solid-state output (located on the mothrboard), which can also be programmed to one of the functions shown below. On the Digital I/O (4 In/16 Out) board are available others N°16 digital outputs (see Appendix C for specifications) The programmable output choices are listed in Table 2-2. 2-10 REC 4192 Rev B Thermo Fisher Scientific Micro-Tech 3102 Table 2-2: Programmable Output Choices Comp. 1 High rate S3 Comp. 2 High rate S4 Comp. 3 Low rate Comp. 4 Low rate S1 Comp. 5 Low rate S2 Comp. 6 Low rate S3 Comp. 7 Low rate S4 Comp. 8 End charge Comp. 9 End charge S1 …………………. End charge S2 Comp. 40 End charge S3 Alarm End charge S4 Shut down End discharge Ready End discharge S1 High load End discharge S2 High load S1 End discharge S3 High load S2 End discharge S4 High load S3 End cycle High load S4 End cycle S1 Low load End cycle S2 Low load S1 End cycle S3 Low load S2 End cycle S4 Low load S3 Need refill Low load S4 Need refill S1 High rate Need refill S2 High rate S1 Need refill S3 High rate S2 Need refill S4 Additional outputs can be selected by adding additional DIO boards. 2.5.2 A/D Jumpers – Load Cell Sense Load cell sense is controlled by selectable jumpers OP6 and OP7 located on the motherboard (Figure 2-7). The jumpers should be in position “A” local sense if the distance is less than 200 feet between load cell and Batch Controller. For distances greater than 200 feet and less than 3,000 feet, the jumper should be in position “B.” A special 6-wire cable is required. Refer to the field-wiring diagram for jumper requirement in the scale junction box. Table 2-3: Load Cell Jumper Settings Mode 2-11 LOAD CELL JUMPERS OP6 OP7 Less than 200 feet “A” “A” Greater than 200 feet “B” “B” DEFAULT REC 4192 Rev B Thermo Fisher Scientific Micro-Tech 3102 Figure 2-7: Area of Detail OP 13 OP 11 OP 10 OP 5 OP3 2-12 OP2 OP1 OP7 OP6 REC 4192 Rev B Thermo Fisher Scientific Micro-Tech 3102 Table 2-4: Micro-Tech Motherboard Jumpers Jumper Location OP1 Foil/Jumper Jumper Default Position A Comm A=RS-485/20mA B=RS-232 OP2 Jumper A Comm A=RS-485/20mA B=RS-232 OP3 Jumper A Comm A=RS-485/20mA B=RS-232 OP5 Jumper A SPU Contact Closure Input (Slow Speed) OP6 Jumper A Sense Jumper A = Less than 200 ft B= Greater than 200 ft OP7 Jumper A Sense Jumper A = Less than 200 ft B= Greater than 200 ft OP10 Jumper A Comm A = RS-485/232 OP11 Jumper A Comm A = Terminated B = Not Terminated C = 20 mA OP13 Jumper A Comm A = Normal B = Multidrop OP26 Jumper A OIML Calibration Jumper A = Allows Cal B = Restricts Cal Description B = 20 mA Table 2-5: Terminal Wiring Configurations TB1 Digital Input/Out Input #1 Output #4 TB2 Digital Input Sig 2 8 Com 1 9 3 10 4 11 + 24 VDC 5 12 Sig SIG 6 13 Com COM 7 14 Sig 2-13 TB3 COMM +24 V Shield 15 Com 16 Sig 17 Com 18 Sig 19 Com TB4 Load cells See 37 Shield Table 2-8 36 Table 2-9 32 +Exc Table 2-10 33 -Exc 34 +Sense 35 -Sense 30 +Sig 31 -Sig TB5 Analog Out Motherboard 38 + 39 - 40 Shield In2 In3 In4 In5 REC 4192 Rev B Thermo Fisher Scientific Micro-Tech 3102 Table 2-6: Relay Output Board Micro-Tech 3100 Relay Output Board 1 NC 2 COM 3 NO 4 NC 5 COM 6 NO 7 COM 8 NO 9 COM 10 NO Relay K1 Fault Output Relay K2 Output #1 Relay K3 Output #2 Relay K4 Output #3 *Relays Rated 33VAC 0.5A – 70VDC 0.5A 2.5.3 Analog Output (Motherboard) A current output signal is available for customer use on motherboard Terminal Block 5. The net weight, gross weight, or diff can be selected by the customer to be sent to a recorder, or controller. The output range is adjustable from 0-20 mA, 4-20 mA, 200 mA, or 20-4 mA. Table 2-7: Motherboard Current Output - TB 5 Motherboard Current Output #1 TB5 38 + 39 - 40 Shield 2.5.4 Analog Input/Output Board (Option) The (option) analog input/output board is available in two configuration described below. (A) has one current output only; whereas, (B) has two voltage inputs and two current outputs . No configuration switches or jumpers exist on the analog boards. Board type (A) One user definable 0-20/4-20 or 20-4/20-0 mA output. 2-14 REC 4192 Rev B Thermo Fisher Scientific Micro-Tech 3102 The Gross Weight, Net Weight or Diff can be selected by the customer to be sent to a recorder, or controller. Board type (B) Two user definable 0-20/4-20 or 20-4/20-0 mA output. The Gross Weight, Net Weight or Diff can be selected by the customer to be sent to a recorder, or controller. 2.5.5 Communications Configuration (Motherboard) COMM This section describes the setup procedure and hardware configuration for the communications from the motherboard. Use the following steps to configure the communications: Select the jumper positions for the desired communication standard (see Table 2-4 and 2-11). Refer to Figure 2-7 for jumper locations. 1. Wire to the Terminal Block 3 on the motherboard for the communication standard selected, RS-485, RS-232c, 20 mA current loop. 2. Refer to REC 3949, Chapter 3 for the remainder of the communication setup. Table 2-8: Motherboard COMM 1 Communications Wiring Configuration - TB3 – RS-485 Motherboard RS-485 Communications TB 3 25 Shield 29 -RX 28 +Rx 24 Common 21 +TX 20 -TX Maximum cable length 4000 ft Use Belden 9830 or equivalent 2-15 REC 4192 Rev B Thermo Fisher Scientific Micro-Tech 3102 Table 2-9: Motherboard Wiring Configuration TB 3 – RS-232 Communications Motherboard RS-232 Communications TB 3 25 Shield 23 CTS 24 Common 22 RxD 21 TxD 20 RTS Maximum cable length 50 ft Use Belden 9538 or equivalent Table 2-10: Motherboard Wiring Configuration TB 3 – 20mA Serial Communications Motherboard 20 mA Serial Communications TB 3 25 Shield 26 +20 mA (out) 27 -20 mA (out) 28 +20 mA (in) 24 -20 mA (in) Maximum cable length 4000 ft Use Belden 9829 or equivalent 2-16 REC 4192 Rev B Thermo Fisher Scientific Micro-Tech 3102 Table 2-11: Mother Board Communication Jumper Settings Mode OP1 OP2 OP3 JUMPERS OP10 OP13 RS-485 “A” “A” “A” “A” “A” Normal ”B” Multi-drop RS-232 “B” “B” “B” “A” 20 mA “A” “A” “A” “B” 2.6 OP11 “A” Terminated ‘B” Not Terminated Default “A” Normal “B” Not Terminated ”A” Terminated Default “A” “C” Initial Setup Procedure Following mechanical and electrical installation, it is necessary that you program field data that is specific to your application into the Micro-Tech 3102 Batch Controller memory. The following setup procedure should be completed before programming your static weight indicator. Refer to Chapter 3 of this manual for more details or assistance. 2.7 Programming the Micro-Tech 3102 (Initial Setup) When power is first applied to the Batch Controller, the system steps the operator through menus and options that bring the system to a weighing state. Soft keys, numeric keys, and the scroll control keys are used to select choices. The RUN and MENU control keys are inactive during this procedure. After successful initial programming and scale calibration, proceed to Main Menu 4, I/O Scroll setup. CAUTION VERIFY 115/230 VOLT SELECTION IS CORRECT. IMPROPER CONNECTION MAY RESULT IN DAMAGE TO YOUR INSTRUMENT. • When the unit is powered on the first time,some data must be entered before the unit can be operated. The user has to enter each parameter according to the plant specifications. During this procedure, the RUN and MENU keys are inactive. 2.7.1Selecting the language -- MEMORY ERASED -Chose the language key to continue to ESP USA The Batch Controller is a dual language instrument. USA is always the first language. The standard configuration profides Spanish (ESP) as the second language. Other languages, such as German (GER), are available upon request (consult factory). Press the DOWN SCROLL key 2-17 REC 4192 Rev B Thermo Fisher Scientific Micro-Tech 3102 Initial scale setup and calibration Press down SCROLL. Press the DOWN SCROLL key. Press key under HELP for more information. “HELP” is flashing HELP Press the HELP soft key. Key with dot (soft key) performs action of of word above it. MORE RETURN When RETURN is pressed, the user is returned to the previous screen. Pressing MORE advances the sytem to the next screen. Press MORE Use down SCROLL key to advance through the menus MORE RETURN Pressing MORE or RETURN reverts the screen back to previous screens in the series. By pressing the DOWN SCROLL key, the system is enabled to proceed through the menus needed for system setup. NOTE: Menus appearing during initial setup may operate differently in normal operation. 2.7.2Define the Number of Scales The Batch Controller can control from one to four independent scales. The number of scales can be programmed according to the number of A/D are installed. If is available only the A/D (on Motherboard) this scroll is not displayed 2-18 -- SC DATA SCROLL 1 -Number of scales 1 ENTER REC 4192 Rev B Thermo Fisher Scientific Micro-Tech 3102 Default: Min: Max: 1 1 The absolute maximum number of scales is 4. The actual maximum depend of the combination of A/D boards installed. - Plant scale A/D 1channel - Plant scale A/D 2channel - Premium scale A/D 1channel In cases where more scale are defined, it is necessary to define how these scales should be handled by the batch controller. This option can only be changed during the cold start procedure. The two ways to handle the scales in multi-scale mode is described in Appendix B. -- SC DATA SCROLL 1A -Mode to handle the scales > Single < CHOICE ENTER Default: SINGLE Selections: SINGLE, GROUP 2.7.3The SCALE Soft Key The scale soft key There are many parameters that must be entered for each scale. If you have more than 1 scale, the SCALE soft keys is displayed. in the scroll position where data needs to be entered. This keys has double function, first it indicates which scale the parameter is referring, for Example : 1 indicates that you are entering a parameters for scale 1. Second, it allows you to change scales by pressing the soft key below the indication. The scale number changes. In the manual, this key is indicated by SCALE #. 2.7.4 Measure Units Press SCROLL DOWN to accept the default unit, or CHOICES to scroll selections. Press ENTER to confirm your selection. Scroll down. NOTE : Menus appearing during initial setup may operate differently in normal operation. Measure units can be individually selected. The user must first decide if the English units will be used or the Metric ones, or combination of both. 2-19 -- DISPLAY SCROLL 1 -Measure units > English < CHOICE ENTER REC 4192 Rev B Thermo Fisher Scientific Micro-Tech 3102 Default: Choices: ENGLISH (if USA language) METRIC (if ESP language) ENGLISH, METRIC, MIXED If English, all units in English If Metric, all units Metric If Mixed, units may be a combination of English and Metric Press ENTER soft key to accept the default unit, or CHOICES soft key to scroll selections. Press ENTER to confirm your selection. Scroll down. Note: If the Measure units are changed from English to Metric (or vice versa) after the scale is calibrated, the span number changes but the calibration remains the same. 2.7.5 Weight Units The weights will be displayed according to the units selected here. -- DISPLAY SCROLL 2 -Weight Units > pounds < CHOICE ENTER SCALE # English Default: Pounds Choice: Pounds Tons, LTons Metric Default: kg Choice: kg Tonnes If Mixed Default: Pounds Choice: kg,Tonnes, Pounds, Tons, LTons Press ENTER soft key to accept the default unit, or CHOICES soft key to scroll selections. Press ENTER to confirm your selection. Scroll down. 2.7.6 Total Units The totals are diaplayed according to the units selected here. -- DISPLAY SCROLL 3 -Total Units > Tons < CHOICE ENTER SCALE # English Default: Tons Choices: Tons, Ltons, Pounds Metric Default: Tonnes Choices: Tonnes, kg Ltons, Tonnes, kg If Mixed Default: Tons Choices: Tons, Pounds, Press ENTER soft key to accept the default unit, or CHOICES soft key to scroll selections. Press ENTER to confirm your selection. Scroll down. 2-20 REC 4192 Rev B Thermo Fisher Scientific Micro-Tech 3102 2.7.7 Max Scale Capacity The next entry is the scale capacity, which is the maximum capacity of the scale. This entry also defines the default number of decimal places that are used for displaying weight values. Use numeric keys for entering the number, confirm with ENTER. Scroll down. -- SC DATA SCROLL 2 -Max. scale capacity 500.0 lbs ENTER SCALE # Default: Min: Max: 500.0 1 1000000 2.7.8 Scale Divisions When the Scale capacity is entered, the number of decimal places is also defined. If, for example, the User enters 500.0, this sets the "Scale Divisions" parameter to 0.1. Advancing to the next scroll, the User then sees first the Scale Division corresponding to the just entered Scale Capacity (in the example 0.1). If required, the User is able to alter the Scale Division to any of the available options. Press the ENTER soft key to accept the default divisions, or the CHOICES soft key to scroll selections. Press ENTER to confirm your selection. Scroll down. -- SC DATA SCROLL 3 -Scale Divisions > 0.1 < CHOICE ENTER SCALE # Default: 0.1 Choice: 0.1, 0.2, 0.5, 1, 2, 5, 10, 20, 50, 0.01, 0.02, 0.05, 0.001, 0.002, 0.005 2.7.9 Load Cells Number Enter the number of load cells of your scale. -- SC DATA SCROLL 5 -# of load cells 1 ENTER SCALE # Default: Min: Max: 2.7.10 2-21 1 1 6 Defining Load Cells Capacity REC 4192 Rev B Thermo Fisher Scientific Micro-Tech 3102 Enter the load cell capacity as it appears on the label placed on the load cell. -- SC DATA SCROLL -6Load cell capacity 250.0 Lbs ENTER SCALE # If English or Mixed: Default: 250.0 Lbs Min: 10 Lbs Max: 500000 Lbs If Metric Default: 100 kg Min: 5 kg Max: 5000 kg Enter the load cell sensitivity in mV/V as marked on the label of the load cell. Thermo Scientific load cells are normally 2.000 or 3.000 mV/V. -- SC DATA SCROLL -7Load cell sens. 3.000 mV/V ENTER Default: Min: Max: SCALE # 3.000 mV/V 0.500 mV/V 3.500 mV/V Load cell resistance is entered on this screen. The resistance for the load cell has been recorded on the System Data Sheet in the front of your scale manual. (It is also stamped on the load cell cable.) Enter the ohms for the load cell. The number of scrolls depends on the number of load cells installed. -- SC DATA SCROLL –8ALoad cell #1 Res 350.000 Ohms ENTER SCALE # Default: 350 Ohms Min: 10 Ohms Max: 2000 Ohms • If # of Load Cells is more than 2: -- SC DATA SCROLL –8BLoad cell #2 Res 350.000 Ohms ENTER 2-22 SCALE # REC 4192 Rev B Thermo Fisher Scientific Micro-Tech 3102 Some default and limits of load cell #1 • If # of Load Cells is more than 3: -- SC DATA SCROLL –8CLoad cell #3 Res 350.000 Ohms ENTER SCALE # Some default and limits of load cell #1 • If # of Load Cells is more than 4: -- SC DATA SCROLL –8DLoad cell #4 Res 350.000 Ohms ENTER SCALE # Some default and limits of load cell #1 • If # of Load Cells is more than 5: -- SC DATA SCROLL –8ELoad cell #5 Res 350.000 Ohms ENTER SCALE # Some default and limits of load cell #1 • If # of Load Cells is 6: -- SC DATA SCROLL –8FLoad cell #6 Res 350.000 Ohms ENTER SCALE # Some default and limits of load cell #1 2.7.11 Quick Automatic Calibration of the Scale (s) The system performs a quick calibration of the scale (s). The scale is first zeroed (3 seconds) and than calibrated using the load cell capacity, sensitivity resistance just entered. During this time, the following screen is displayed : CALIBRATION IN PROGRESS 2-23 REC 4192 Rev B Thermo Fisher Scientific Micro-Tech 3102 When calibration procedure is completed, the “SCALE CALIBRATE” or, in case the load cell is not connected or a failure is detected, “SCALE NOT CALIBRATED” message is displayed. At this point, the procedure is complete and the following message is displayed. Press RUN to start or MENU for scrolls The field data entered during this procedure enabled the Micro-Tech 3102 to perform an unassisted zero balance and span calibration. Assuming no mistakes were made, the scale is calibrated and is ready for use at this time. NOTE : The span number was calculated from the data that was entered during this initial calibration setup procedure. This span number is based on a perfect mechanical installation of the scale. Therefore, verify this by performing a span calibration procedure. 2-24 REC 4192 Rev B Thermo Fisher Scientific Chapter 3 Micro-Tech 3102 Operation Your Thermo Scientific Batch Controller is capable of accurate weighing, provided it is installed, calibrated, operated, and maintained in complete accordance with the instructions contained in this manual. 3.1 Overview Micro-Tech 3102/3202 Batch Controller is a microcomputer-based instrument that accepts and conditions weight signals and provides visual and electrical outputs for total weight . A stable 10-volt DC excitation voltage capable of exciting up to six 350 ohm strain gauge load cells is produced by the Batch Controller. Sense lead terminations are also provided for six wire load cell cables. Auto Zero (AZ) Track enables the scale system to automatically zero itself during extended periods when the scale is empty. Auto Zero Track is menu selectable. The letter “Z” appears on the first line of the display indicating Auto Zero Track option is enable. Life expectancy of the RAM support battery is approximately ten years, if power is not applied. Under normal operation where power is on continuously, life expectancy is much longer. Errors may occur during initial calibration and their reason must be corrected during initial calibration. During normal operation, an error would most likely indicate a failure in system or improper operation. 3.2 Front Panel The front panel (Figure 3-1) contains the necessary status indicators and keys to enable the operator to perform calibrations and all required operations after the Batch Controller has been configured in Section 2.5. Figure 3-1: Micro-Tech 3102 Front Panel REC 4192 Rev B Thermo Fisher Scientific 3-1 Micro-Tech 3102 3.2.1 LED Status Indicators The five red status indicators show the status of the Batch Controller. INTERLOCK ON indicates the cycle is waiting for an external signal to proceed, or STOP indicates it is waiting for a restart command. If a cycle is not running, this indicator stays off. AUTO AUTO indicator is ON when the instrument is in automatic. ALARM Alarm indication flashes if an alarm is pending, either the alarm is NEW or has been ACKNOLOWLEDGED. BATCH BATCH indicator is ON when a cycle is running. It also stays ON if the cycle is in stop condition. READY READY indicates the batch weigher is ready and a cycle can be started. It turns ON when the following conditions are satisfied : - The batch weigher is calibrated (a span calibration has been executed). The batch weight indicator is in automatic. No shutdown conditions are active. The cycle is not running. If more scales are defined, the status indication refers to the displayed scale. 3.2.2 LCD Graphic Display The LCD graphic display indicates actual running information or displays menu entry information. 3.2.3 Keypad The keypad is comprised of pad touch keys consisting of the following: • RUN – gives access to the RUN menu and returns the Batch Controller to Run mode whenever pressed. • MENU – gives access to the Micro-Tech 3102 menus • UP/DOWN ARROW KEYS – scrolls up or down in the selected menu. • SOFT KEYS – selects the displayed function directly above the key. Also moves the cursor left and right during string editing. • ALPHL/NUMERIC KEYS 1 THROUGH 0 – used to enter letters and numerals when string editing. Similar to a telephone keypad. • DECIMAL POINT KEY – enters a decimal point • CLEAR KEY – removes incorrect entries prior to pressing ENTER. 3-2 REC 4192 Rev B Thermo Fisher Scientific Micro-Tech 3102 • • • • 3.3 TOTAL KEY – accesses menus that contain detailed informations on the totalizer.. AUTO/MAN KEY – switches batch controller from automatic to manual and back. START– interrupts load out. Aborts load out if already interrupted. STOP– stop keys are only active with Load Out option. General Navigation Navigating the menus is the same throughout the setup and operation of the Micro-Tech 3102. To follow are a few general guidelines to help in menu navigation. • Press the DOWN SCROLL key to advance through the menus, • UP SCROLL key to return to the previous item displayed on the screen, • RETURN to go back to the previous menu, • CHOICES soft key to view the choices for a selected menu option, and • ENTER to confirm you menu selection 3.4 Menu Displays The Batch Controller is a menu driven machine that allows the operator to access all setup, test, and calibration parameters. Main menu screens 1 through 6 can be accessed at anytime by pressing MENU until the desired menu screen is displayed. Pressing the soft key directly below the desired scroll, and then using the UP/DOWN scroll key select menu scrolls. If the Batch Controller is password protected, the appropriate password must be entered prior to making changes or performing routine calibration. Menus may be viewed without entering a password, but no entries are allowed unless the password is entered. Optional menu scrolls are only available if the option has been installed. The MENU key activates the following screens. -- MAIN MENU 1 -Press MENU for more ZERO SPAN CAL CAL -- MAIN MENU 2 -Press MENU for more SCALE CALIB DISPLAY DATA DATA -- MAIN MENU 3 -Press MENU for more PROT 3-3 DIAG TEST REC 4192 Rev B Thermo Fisher Scientific Micro-Tech 3102 -- MAIN MENU 4 -Press MENU for more I/O ALARMS LOAD DEF. DEFIN. OUT -- MAIN MENU 5 -Press MENU for more COMM A COMM B PRINT * *Can be AB RIO or PRO DP -- MAIN MENU 6 -Press MENU for more AUDIT TRAIL LINEAR 3.5 Normal Power On When the Batch Controller is powered on after initial programming, the Run menu is displayed unless the hardware configuration has been changed. C1 cccccc 000.00 Lbs ABORT 3.6 ALARM Hardware Configuration If the hardware configuration detected at power on differs from the one recorded in memory, the following screen displays. This only happens if a circuit board has been added or removed during power off, or a board has failed. --SLOT # n CHANGED Acquire new configuration? YES NO This screen disappears after 10 seconds if the question is not answered. The Batch Controller assumes the answer is NO. “HW CONFIG. CHANGED” 3-4 REC 4192 Rev B Thermo Fisher Scientific Micro-Tech 3102 alarm is on and cannot be reset. The above screen appears each time power is cycled. If a board is removed or added, and this is a permanent change in configuration, answer YES. 1. A board is removed and is not replaced: The Batch Controller cancels from memory the setup data of the board that is removed. If the board is added again, the setup data for the board has to be entered again. 2. A board is added: The Batch Controller acquires the new hardware configuration. Setup data for the new board must be entered. Note: Check the setup configuration in the I/O DEFINITION SCROLL if an I/O board is removed or added. I/O assignments change when the number of I/O boards change. If YES is pressed, the alarm “HW CONFIG” is cleared. If the reason for the message is not known, or if the change in configuration is temporary and the operator does not want to lose the original setup, answer NO. 1. A board is removed: 2. The Batch Controller resumes operation, retaining setup data of the board that was removed. All other boards continue working normally. No change occurs in the I/O Definition. 3. A board is added: 4. The Batch Controller resumes normal operation without recognizing the new board. If NO is pressed, the “HW CONFIG CHANGED” alarm stays on. 3.7 Run Menu When the Batch Controller is normally powered on after initial programming, the Run menu is displayed. The RUN menu can always be accessed by pressing the RUN key on the front panel. The Run Menu is made up of four scrolls that can be scrolled during scroll DOWN and scroll UP keys. In the first scroll, all the informations about the cycle is collected. It appears as follow : 3.7.1 Main Run Scroll C1 cccccc ABORT 000.00 W.U. ALARM Line 1: The component number and name are displayed with the actual weight on the scale. The weight could be net or gross weight depending on the phase of the cycle. If the cycle is not running, it is the gross weight. Line 2: When the cycle is not running, it is blank. Otherwise, the component set-point is displayed. Line 3: A message is displayed to indicate the phase of the cycle. 3-5 REC 4192 Rev B Thermo Fisher Scientific Micro-Tech 3102 Line 4: ABORT key appears when the cycle is running. It allows the operator to abort the running cycle. ALARM key is displayed if an alarm is pending. 3.7.2 Recipe Scroll The second scroll allows the operator to define which recipe must be executed or it is executing if the cycle is running. It appears as follows. Recipe to run ________rrrrrrrr ENTER SCALE# NEXT If the cycle is running, ENTER and NEXT key disappear because it is not possible to change the recipe number while it is running. NEXT key can be used to scroll existing recipes. 3.7.3 Cycles Scroll The third scroll allows the operator to define how many cycles should be executed. It appears as follows: Cycles run __________ Cycles to run _________ (or Cycle running _____) (AUTO) ENTER END C. The number of executed cycles is displayed in the first line. The number of cycles to run is displayed in the second line. This value can be changed during a cycle. If at least one cycle remains to be executed, the END C. Key is displayed. The END C. Key disappears when pressed, stopping the cycle sequence. The running cycle is the last one. Zero can be entered as cycles to run. In this case, the AUTO message appears instead of 0, AUTO REPEAT mode becomes active. After a START command, the recipe is repeated until END C. key is pressed. 3.7.4 Weight and Message Scroll The fourth scroll appears as follows : Net 0000.00 W.U. (1) (2) PRINT SCALE# ALARM (or Gross 0000.00 W.U.) The first line displays the actual NET WEIGHT or GROSS WEIGHT if no tare weight has been acquired. The second (1) and third (2) line are by default blank, but can be programmed to show: - The tare weight - The gross weight 3-6 REC 4192 Rev B Thermo Fisher Scientific Micro-Tech 3102 - Date and time A bar graph indicator The SCALE# key allows the operator to switch between scales if more scales are selected If an alarm is pending, ALARMS key is assigned to key F3. 3.7.5 Alarm Pending The message ALARM appears in the right soft key if an alarm is pending. The alarm status indicator is flashing. C1 cccccc 000.00 lbs “Flashing” ABORT ALARM The following menu is displayed after pressing the ALARM soft key ALARM NEW (5) xxxxxxxxxxxxxxxxxxxx MM-DD-YYYY RESET NEXT The keyword “NEW”is indicating an alarm that has not been acknowledged yet. When the operator presses the RESET key to clear the alarm, the alarm disappears only if the reason that caused the alarm to occur does not exist any more. If the alarm is still pending, the keyword “ACK”is displayed instead of “NEW”. The third line shows date and time . The NEXT key is used to scroll between the pending alarms. The string “xxxxxxxxxxxxxxxxxxxx”represents one of the following alarm conditions. Pressing RUN returns to the main RUN menu 1. Clock Fail 2. through 6. Load Cell Fail S# 7. RAM Fail 8. ROM Fail 9 through 13. High Load S# 14 through 18. Low Load S# 19. Warm Start 20. Cold Start 21. P.D. Calibration 22 through 26. Calib Time S# 27 through 29. Ext. Alarm n 30 through 35. HW Conf. Changed 36. BCD Overflow 37. Math Error 38. Printer Error 3-7 REC 4192 Rev B Thermo Fisher Scientific Micro-Tech 3102 39. Communication Error 40 through 44. Bad Start Weight S# 45 through 49. Stop Cycle S# 50 through 54. End Cycle S# 55 through 59. Abort Cycle S# 60 through 64. Comp. Time Out 65 through 69 Deviation S# 70. Allen-Bradley RI/O Error 71. PROFIBUS-DP Error Refer to Chapter 4.0, Maintenance, for more information. 3.7.6 Print Key The PRINT key is active if selected in COMM scroll. The following screen is displayed: When PRINT is pressed, the following screen displayed :. - PRINTER SCROLL COM #1 no data Start print TOTALS PRINT RETURN COM Password : Not Required The second line is the status of the printer : NO DATA Indicates the printer is idle, no data is being sent to the printer. IS RUNNING The system is sending data to the printer. The third line indicates what kind of data is printed , if the PRINT key is pressed. The UP and DOWN keys select between : TOTALS C. Print component totals (all scales if more scales are defined) TOTALS R. Print recipe totals (all scales if more scales are defined) SETUP Print the setup data of the instrument. TRAILS If audit trails option is active, print audit trails data. Print starts after the PRINT key is pressed. The COM key allows printer selection if more than one printer is installed. Examples of data that can be printed : Print TOTALS, default : COMPONEN TOTALS DATE : 03-10-1998 TIME : 8:12a C1 comp_name : 3-8 0.00 Tons REC 4192 Rev B Thermo Fisher Scientific Micro-Tech 3102 C2 comp_name: 0.00 Tons …………………………………….. Cn comp_name 0.00 Tons RECIPE TOTALS DATE : 11-10-2002 TIME : 8:12a R1 rec_name 0.00 Tons 0 cyc R2 rec_name 0.00 Tons 0 cyc ……………………………………………………….. Rn rec_name 0.00 Tons 0 cyc The batch report can be printed automatically at the end of a batch. BATCH REPORT RECIPE CYCLE EX.TIME 1 rec_name 1/5 1h 12’25” (max. 8 hours) C1 comp_name 0.00 Tons ……………………………………………………….. Cn comp_name 0.00 Tons ----------------0.00 Tons Print ALARM : 11-10-2002 8:14a Clock fail Print AUDIT TRAILS : When print AUDIT TRAILS command is given, enter the number of records to print. This allows printing of a portion of the recorded trails rather than all the recorded trails. TRAIL RECORD NR. 1 DATE 11-10-2002 TIME 11:59p VARIABLE scale cap NEW 400.00 OLD 500.00 TRAIL RECORD NR. 2 DATE 11-11-2002 TIME 11:35p VARIABLE span 3-9 REC 4192 Rev B Thermo Fisher Scientific Micro-Tech 3102 NEW 250000 OLD 300000 3.8 COMMAND KEYS Command keys define the batch weight indicators mode of operation, components and recipes. 3.8.1 AUTO/MAN Key The AUTO/MAN key allows switching from manual to automatic and back.. Switching from auto to manual while the recipe is running causes the cycle to abort. A warning message is displayed. Running cycle will be aborted. Press YES to confirm YES NO The AUTO/MAN key is inhibited when remote AUTO/MAN is selected. 3.8.2 Recipe Key The DATA key allows the operator to define components and recipes for each scale. After pressing RECIPE, the following scroll is displayed. DATA SCROLL COMP. REC. DEFINE TOTALS DEFINE 1. Components Definition Choose COMP. DEFINE to define a new component or change an exixting one. The following scroll is displayed. COMP. DEFINE _ Component number ___ cccccc ENTER CHNG > EDIT The number of the first component is displayed along with the component name is defined. Use UP DOWN scroll keys to scroll between existing components or when entering component numbers. A list of components is available to make the component definition easier. The function key F3 meaning can be changed by pressing the CHNG > key. EDIT 3-10 Edit the selected component data. REC 4192 Rev B Thermo Fisher Scientific Micro-Tech 3102 COPY Copy the data of the selected component in another one. DELETE Delete a pre-defined component. Press EDIT to approach the component data. Define the component type. -- COMPONENT #-Component type > Not used < CHOICE ENTER Default: Password: SERVICE NOT USED Selections: NOT USED, BATCH CHARGE, BATCH DISCH, DISCHARGE, REFILL, TIME BASED Press the DOWN key if more scales are defined. The following scroll is displayed. -- COMPONENT #-Assigned to scale > SCALE 1 < CHOICE ENTER Password: OPERATOR Default: SCALE 1 Selections: SCALE 1, SCALE 2, SCALE 3 (if defined), SCALE 4 (if defined) Press the DOWN key. The following scroll is displayed. Enter the name of the component name in 6 alphanumeric digits. -- COMPONENT #-Component name cccccc < ENTER Password: OPERATOR > Press the DOWN key. If a CHARGE BATCH or DISC. BATCH component and BCD optional input has been configured as setpoint, the following scroll is displayed. -- COMPONENT #-Setpoint source > Local < CHOICE ENTER Password: OPERATOR Default: LOCAL Selections: LOCAL, BCD INPUT The next scroll defines preset weight. 3-11 -- COMPONENT #-Preset weight _____________ W.U. ENTER Password: OPERATOR REC 4192 Rev B Thermo Fisher Scientific Micro-Tech 3102 Default: 0 Min: 0 Max: Scale Capacity Press the DOWN key if a CHARGE BATCH or DISC. BATCH component. The next scroll is displayed. Enter the cut-off correction mode. -- COMPONENT #-Cut-off correction > Manual < CHOICE ENTER Password: OPERATOR Default: MANUAL Selections: MANUAL, AUTOMATIC If AUTOMATIC is selected, the following scroll shows the actual value of the correction. If MANUAL is selected, the cut-off can be entered in this scroll. -- COMPONENT #-Cut-off weight __________ T.U. ENTER Default: Min: Max: Password: OPERATOR 0 0 Scale Capacity If AUTOMATIC was selected above, the following scroll is displayed. Enter the maximum cut-off correction. -- COMPONENT #-Cut-off max corr. __________ T.U. ENTER Default: Min: Max: Password: OPERATOR 0 0 Scale Capacity Press the DOWN key. If a CHARGE BATCH or DISC. BATCH component was selected, the next scroll is displayed. This defines the high and low rate outputs during high rate batch. -- COMPONENT #-High rate mode > High only < CHOICE ENTER Password: OPERATOR Default: HIGH ONLY Selections: HIGH ONLY, HIGH + LOW The next scroll defines if a component is to be automatically executed at the end 3-12 REC 4192 Rev B Thermo Fisher Scientific Micro-Tech 3102 of all the recipes.Typical application is for the discharge component but a refill component can also be used. This avoid the need to define the end recipe component in all the memorized recipes because only one component can be defined as the end recipe component. If it has already been defined, the next scrolls are not displayed. They are not displayed in any case if the component is not a REFILL or DISCHARGE type. -- COMPONENT #-Automatic at recipe end ? > no < CHOICE ENTER Password: OPERATOR Default: NO Selections: NO, YES The following three scrolls are displayed only if a REFILL component has been defined as end recipe component. The first scroll defines the amount of material to refill. -- COMPONENT #-Refill high load __________ W.U. ENTER Default: Min: Max: Password: OPERATOR 0 0 10000 The second scroll defines how to handle the CHARGE INTERLOCK input -- COMPONENT #-Charge interlock > Not used < CHOICE ENTER Password: OPERATOR Default: NOT USED Selections: NOT USED, PULSE, STABLE And the third scroll defines how to handle the END CHARGE output. -- COMPONENT #-End charge > Not used < CHOICE ENTER Password: OPERATOR Default: NOT USED Selections: NOT USED, PULSE, STABLE The following two scrolls are displayed only if a DISCHARGE components has been defined as end recipe component. They define how to handle the DISCHARGE INTERLOCK input and the END DISCHARGE output. 3-13 -- COMPONENT #-Disch. interlock > Not used < CHOICE ENTER REC 4192 Rev B Thermo Fisher Scientific Micro-Tech 3102 Password: OPERATOR Default: NOT USED Selections: NOT USED, PULSE, STABLE -- COMPONENT #-End discharge > Not used < CHOICE ENTER Password: OPERATOR Default: NOT USED Selections: NOT USED, PULSE, STABLE Press the DOWN key. The following scroll is displayed. It defines the delay at the start before activating the component. -- COMPONENT #-Start delay __________ sec ENTER Default: Min: Max: Password: OPERATOR 0 sec 0 sec 3600 sec Press the DOWN key. The following scroll is displayed. Enter the stabilization delay. -- COMPONENT #-Stabilization delay __________ sec ENTER Default: Min: Max: Password: OPERATOR 0 sec 0 sec 3600 sec Press the DOWN key. The following scroll is displayed. Enter the maximum time for component activation. -- COMPONENT #-Charge timeout __________ sec ENTER Default: Min: Max: Password: OPERATOR 0 sec 0 sec 3600 sec Component definition is now complete. Pressing the DOWN key returns to the 3-14 REC 4192 Rev B Thermo Fisher Scientific Micro-Tech 3102 first component scroll. Pressing RUN returns the batch weigher to the RUN mode. 3.8.3 Total Key The TOTAL key accesses menus which contain detailed information on the totalizers. There are two sets of totalizers: totals for recipe and totals for component. In the first menu, one of them must be chosen. -- TOTALS MENU-Choose total regs COMP. RECIPE TOTALS TOTALS If COMP. TOTALS key is pressed, the following scroll is displayed. COMP. # cccccc Total 0000.00 T.U. Last 0000.00 W.U. ENTER EXIT RESET First line displays the component number and name. Second line displays the cumulative total. Third line displays the amount of material batched out in the last cycle. This information is cleared at the start of new cycle. The third line is empty if the weight value is zero. Press UP/DOWN keys to scroll through the components or enter the component number. Press RESET key to reset the displayed total registers. The following scroll is displayed. Only the total of the component or all ? ALL COMP EXIT Press ALL to clear all the totals. Press COMP to clear the component register only. If RECIPE TOTALS key is pressed, the following scroll is displayed. R# rrrrrrrr 0000 Cyc Total 0000.00 T.U. Last 0000.00 W.U. ENTER EXIT RESET First line displays the recipe number, recipe name and the number of cycles. 3-15 REC 4192 Rev B Thermo Fisher Scientific Micro-Tech 3102 Second line displays the cumulative total. Third line displays the amount of material batched out in the last cycle. The third line is empty if the weight value is zero. Press UP/DOWN keys to scroll through the recipes or enter the recipe number. Press RESET key to reset the total registers. The following scroll is displayed. Only the total of the recipe or all ? ALL RECIPE EXIT Press ALL to clear all the totals. Press RECIPE to clear the register of that recipe only. 3.8.4 Recipes Definition Choose RECIPE DEFINE to define a new recipe or change an existing one. The following scroll is displayed. RECIPE DEFINE Recipe number _____ rrrrrrrrrr ENTER CHNG > EDIT Recipe number and name (if defined) is displayed. Use UP/DOWN keys to scroll existing recipes or enter a recipe number directly. A series of recipes is available to make the recipes definition easier. The meaning of the function key F3 can be changed by pressing the CHNG > key be: EDIT Edit the selected recipe COPY Copy the selected recipe in another one. Number of the destination recipe is required. DELETE Delete the recipe VERIFY Check if the recipe is correct. PRINT Print the recipe. Example : PRINT RECIPE DATE: 12-20-1998 TIME: 8:03a RECIPE 10 – rec_name C1 comp_name SET DEV LABEL 0 C2 comp_name SET DEV 3-16 10.0 Tons 1.0% 30.0 Tons 1.0% REC 4192 Rev B Thermo Fisher Scientific Micro-Tech 3102 LABEL 0 Press EDIT to approach the recipe data. The following scroll is displayed. Enter the name of the recipe in 8 alphanumeric digits. - RECIPE # Recipe name rrrrrrrr < ENTER > Protection: OPERATOR Press DOWN key if more scales are defined. The following scroll is displayed. It defines the scale membership. - RECIPE # Assigned to scale > SCALE 1 < CHOICE ENTER Protection: OPERATOR Default : SCALE 1 Selections : SCALE 1, SCALE 2, SCALE 3 (if defined), SCALE 4 (if defined) Press DOWN key. The following scroll is displayed. Enter the component. - RECIPE _____ LIN ____ Component _________ # cccccccccc ENTER CHNG > EDIT Default: Min: Max: Protection: OPERATOR 0 sec 1 sec Number of defined components Use UP/DOWN keys to scroll through the recipe lines. Press EDIT if you want to display the line’s data, EXIT to come back to (2). Component 0 means end recipe. In this case, EDIT key is substituted by EXIT key. Press it to come back to pint(2). Other functions of the F3 key are : DELETE Delete the current line INS/CP Insert a line between the actual and the next one. The new line is equal to the actual one, so this command can also be used as COPY command. If used in the last recipe line, it adds a new line to the recipe. If EDIT key pressed a series of scrolls are displayed. They are different, depending upon the component type. The following scroll is displayed only if the component is a CHARGE BATCH or DISCH. BATCH type and if the set-point source has been defined as LOCAL (if active BCD input option). - RECIPE _____ LIN ____ Setpoint _______ W.U. ENTER 3-17 Protection: OPERATOR REC 4192 Rev B Thermo Fisher Scientific Micro-Tech 3102 Default: 0 sec Min: 0 sec Max: Number of defined components The next scroll is displayed if the component is a TIME BASED type. - RECIPE _____ LIN ____ Activation time _______ sec ENTER Default: Min: Max: Protection: OPERATOR 0 sec 0 sec Number of defined components The following scrolls are displayed only if the component type is REFILL. It defines the weight set-point for refill. - RECIPE _____ LIN ____ Refill high load _______ W.U. ENTER Default: Min: Max: Protection: OPERATOR 0 sec 0 sec 10000 In the next scroll, the batching label should be defined. The label gives information on how the instrument should handle that batch phase. The operator enters a number that is obtained by adding a constant number for each option he/she wants to activate. The table below summarizes all the possibilities. OPTION Refill Mode (1) POSSIBLE SELECTION CONSTANT NUMBER Auto 0 Forced 2 Charge/Disch. Interlock None 0 Pulse 4 Stable 8 End Charge/Disch. None 0 Pulse 16 Stable 32 Restart Batch if neg err (2) No 0 Yes 64 (1) Only for REFILL type components. (2) Only for BATCH CHARGE or BATCH DISCH. components - RECIPE _____ LIN ____ Label _______ ENTER DETAIL 3-18 Protection: OPERATOR REC 4192 Rev B Thermo Fisher Scientific Micro-Tech 3102 Default: 0 sec Min: 0 sec Max: 32767 Pressing the DETAIL key makes it possible to select the batch options without entering the label. The label number is computed automatically by the instrument. The following scrolls are displayed in this case. Only for REFILL type components, it defines how to refill function works. If FORCED, a refill starts independently by the actual weight on the scale. If AUTO, the refill cycle starts each time before doing a DISCH BATCH component if the set-point of this component is higher than the actual weight on the scale. - RECIPE _____ LIN ____ Refill mode > Auto < CHOICE ENTER Protection: OPERATOR Default: AUTO Selections:: AUTO, FORCED The next two scrolls are diaplayed only if component is BATCH DISCHARGE or DISCHARGE type. The first scroll defines how to check the DISCHARGE INTERLOCK input. - RECIPE _____ LIN ____ Disch. interlock > Not used < CHOICE ENTER Protection: OPERATOR Default: NOT USED Selections:: NOT USED, PULSE, STABLE The second scroll defines how to handle the END DISCHARGE output. - RECIPE _____ LIN ____ End discharge > Not used < CHOICE ENTER Protection: OPERATOR Default: NOT USED Selections:: NOT USED, PULSE, STABLE The next three scrolls are displayed only if a component is BATCH CHARGE or REFILL type. The first scroll defines how to check the CHARGE INTERLOCK input. - RECIPE _____ LIN ____ Charge interlock > Not used < CHOICE ENTER 3-19 Protection: OPERATOR REC 4192 Rev B Thermo Fisher Scientific Micro-Tech 3102 Default: NOT USED Selections:: NOT USED, PULSE, STABLE The second scroll defines how to handle the END CHARGE output. - RECIPE _____ LIN ____ End charge > Not used < CHOICE ENTER Protection: OPERATOR Default: NOT USED Selections:: NOT USED, PULSE, STABLE The third scroll enables the instrument to restart the batch, reactivating the component, if at the end of the stabilization time, the net weight is below the component set-point. - RECIPE _____ LIN ____ Restart batch if neg err > No < CHOICE ENTER Protection: OPERATOR Default: NO Selections:: NO, YES The next two scrolls are displayed only if the component is a TIME BASED type. The first one defines how to check the COMPONENT INTERLOCK input. - RECIPE _____ LIN ____ Comp. interlock > Not used < CHOICE ENTER Protection: OPERATOR Default: NOT USED Selections:: NOT USED, PULSE, STABLE The second scroll defines how to handle the END COMP. output. - RECIPE _____ LIN ____ End Component > Not used < CHOICE ENTER Protection: OPERATOR Default: NOT USED Selections:: NOT USED, PULSE, STABLE NOTE: “Charge Interlock” and “Charge End” outputs are used as “Comp. Interlock”and “End Comp.”in case of time based components. 3.8.5 3-20 START Key REC 4192 Rev B Thermo Fisher Scientific Micro-Tech 3102 START key has a double function. If the instrument is in AUTOMATIC, it starts a batch cycle. If the instrument is in MANUAL,it can be used to acquire the tare weight (SET TARE). If more than one scale is defined, both the functions are inherent only to the displayed scale. 3.8.6 STOP Key STOP key has a double function. If the instrument is in AUTOMATIC, it stops the batch cycle. Stopping a cycle means temporaily suspending the cycle, a suspended cycle can be restarted and terminated with a start command or aborted with an abort command. If the instrument is in MANUAL, the STOP key can be used to clear the tare weight (RESET TARE). If more than one scale is defined, both the functions are inherent only to the displayed scale. 3.8.7 The MENUS The setup data of the Micro-Tech 3000 are collected into menus which are accessed using MENU key. Once the MENU key has been pressed, use the scroll keys to select the menu that you need. 3.9 Calibration MAIN MENU 1 contains the CALIBRATION menu. MENU 1 is selected by pressing MENU until MAIN MENU 1 displays. Desired calibration scrolls are selected by pressing the soft keys directly below the desired scroll. -MAIN MENU 1 -Press MENU for more ZERO SPAN CAL CAL 3.9.1 Zero Calibration Scroll The Zero Calibration is implemented as a machine directed procedure 1. Auto Zero If only one scale defined : -ZERO CAL -Empty scale, then press START START SCALE # MANUAL 3-21 Password: Operator REC 4192 Rev B Thermo Fisher Scientific Micro-Tech 3102 The scale must be kept empty during auto zero. A complete zeroing procedure requires 10 seconds, but can be reduced by pressing END in the next scroll. Indication S# in the following scrolls will appear only if more than one scale is defined. # represents the active scale number. When START is pressed, the following screen is displayed : S# AUTO ZEROING Time remaining 0000 Gross: 000.0 W.U. END ABORT During Auto Zero, weight resolution is 10 times higher than normal. The number of seconds in line 2 corresponds to the time remaining for completing the test. When zero is reached or END is pressed, the system displays the following screen : S# AUTO ZERO COMPLETE Error ±000.00% Change zero? YES NO The word COMPLETE is flashing. The percentage of error is related to the scale capacity. If YES is pressed, the next screen is shown : S# ZERO # CHANGED Old zero #00000 New zero #00000 RUN MENU The old and new zero constants are shown in A/D counts. 2. Manual Zero The Manual Zero procedure allows the operator to directly enter the zero constant if known. -MANUAL ZERO -Gross 000.0 W.U. Zero # 00000 ENTER SCALE # ADV Default: Min: Max: 3-22 Password: Operator 40000 0 120000 REC 4192 Rev B Thermo Fisher Scientific Micro-Tech 3102 3.9.2 Span Calibration Scroll The span calibration can be done in two different ways : R-CAL or Test Weights. The system allows the operator to select which one of the two methods to be used for normal calibration and calibration’s check. The selection is made in CAL DATA SCROLL 1.The Auto Span procedure requires 10 seconds. 3.9.2.1 Automatic Span Calibration With R-CAL 1. Starting an R-Cal Calibration The following screen displays AUTO SPAN R CAL Empty scale, then press START START SCALE # MANUAL Password: Operator When START is pressed, the Rcal relay energizes. A half second delay occurs after START for the weight to stabilize. NOTE : The operator must be insure that the scale is empty before pressing start. 2. Executing the Span Calibration Indication S# in the following scrolls appears only if more than one scale is defined. # represents the active scale number. After START is pressed, the following screen is displayed : (1) Entry point when REPEAT is pressed (see below). S# AUTOSPANNING Time remaining 0000 Gross 000.0 W.U. END ABORT During Auto Span, the weight resolution is 10 times higher than normal. The number of seconds in line 2 corresponds to the time remaining for completing the test. The END key can be used to conclude the function in less time. 3. Record the Material Factor This part of the procedure is only executed if a span calibration with test weights was done before, and if R-CAL has not been factored yet. It is very important to understand that when this procedure is executed, the system will not alter the span. The system assumes the span is set correctly based on a test weight calibration. The system acquires the R-CAL FACTOR factoring. R-CAL to the test weight span calibration. Subsequent R-CAL calibration is factored to the test weights. CAUTION SPAN SHOULD ONLY BE CHANGED BASED ON A TEST WEIGHT CALIBRATION 3-23 S# AUTO SPAN COMPLETE Error +/- 00.00 % Unfactored Calcon EXIT FACTOR REPEAT REC 4192 Rev B Thermo Fisher Scientific Micro-Tech 3102 The word “COMPLETE” is flashing. If EXIT is pressed, the system acknowledges that the R-CAL factor is not used. The effect of this is that the system does not ask for a factor any more for this calibration method unless a manual span entry is done. By pressing EXIT, the operator tells the system that he does not want to use material factors, but wants to use the test results for changing the span number. After EXIT is pressed, go to point (2) below. If REPEAT is pressed, go to (1) above. If FACTOR is pressed, the following screen is displayed : FACTORING R-CAL New factor 000.00 % Change factor ? YES NO If NO is pressed, the old factor is preserved, go to point (2) below. If YES is pressed, the following screen is displayed : R-CAL Matl FACTOR Old factor : 00.00 % New factor : 00.00 % RUN Can be R-CAL, TEST WEIGHTS, REPEAT The REPEAT key return the operator (1) above. Pressing RUN ends the procedure. After this point is reached, the system does not proceed to the next section. 4. Recording the New Span The system calculates the new span. (2) S# AUTO SPAN COMPLETE Error +/- 00.00 % Change span ? YES NO FACTOR The word “COMPLETE” is flashing. FACTOR key is displayed only if an autospan with test weight has been previously executed. If YES is pressed, the following screen is displayed : 3-24 S# SPAN # CHANGED Old span # 000000 New span # 000000 RUN REPEAT REC 4192 Rev B Thermo Fisher Scientific Micro-Tech 3102 REPEAT moves back to (1) above, and calibration restarts. If NO is pressed, the following screen is displayed : S# SPAN # UNCHANGED Old span # 000000 New span # 000000 RUN REPEAT Note the Old span and the New span are shown equally. This is because no change to the span has been done. If FACTOR is pressed, the RCal factor is computed. The following screen is displayed : S# FACTOR ACQUIRING New fact 000000 % Change factor ? YES NO NO moves back to point (2.) above. YES acquires new factor. If pressed, the following screen is displayed : S# FACTOR CHANGED Old fact 000000 % New fact 000000 % RUN REPEAT 5. Ending an Auto Span Procedure with R-CAL Press RUN. The Rcal relay is de-energized and the display is locked for 3 seconds. 3.9.2.2 Automatic Span Calibration With Test Weights 1. Starting a Test Weights Calibration AUTO SPAN Weights Apply Weights then press START. START SCALE# MANUAL Password: Operator The operator must apply the test weights on scale before pressing START. When START is pressed, the span function begin. 2. Executing the Span Calibration Indication S# in the following scrolls appear only if more than one scale is 3-25 REC 4192 Rev B Thermo Fisher Scientific Micro-Tech 3102 defined. # represents the active scale number. After START is pressed, the following screen is displayed (1) Entry point when REPEAT is pressed (see below). S# AUTOSPANNING Time remaining 0000 Gross 000.0 W.U. END ABORT During Auto Span, the weight resolution is 10 times higher than normal. The entire function takes 60 seconds to be completed, remaining time is displayed in line 2. The END key can be used to conclude the function in less time. 3. Recording the New Span The system calculates the new span based on the result of the test performed with the selected method : S# AUTOSPAN COMPLETE Error +/- 00.00 % Change span ? YES NO The word “COMPLETE” is flashing. If YES is pressed, the following screen is displayed : (2) S# SPAN # CHANGED Old span # 000000 New span # 000000 RUN REPEAT FACTOR FACTOR key is displayed only if an autospan with R-Cal has been previously executed. REPEAT moves back to (1) above, and calibration restarts. If NO is pressed, the following screen is displayed : S# SPAN # UNCHANGED Old span # 000000 New span # 000000 RUN REPEAT Note the Old span and the New span are shown equally. This is because no change to the span has been done. If FACTOR is pressed, the R-cal factor is computed. The following screen is displayed : 3-26 S# RCAL FACTORING New fact 000000 % Change factor ? YES NO REC 4192 Rev B Thermo Fisher Scientific Micro-Tech 3102 NO moves back to (2) above. YES acquires new factor. If pressed, the following screen is displayed : S# FACTOR CHANGED Old fact 000000 % New fact 000000 % RUN REPEAT 3.9.2.3 Manual Span If the span constant is known, the manual span procedure allows the operator to manually change span. NOTE. If the span is manually entered, the R-cal factor is set to INVALID. MANUAL SPAN Gross 000.0 W.U. Span # 0000000 ENTER Default: Min: Max: SCALE # Password: Operator EXIT 1166667 500000 45000000 The RUN keys return to Run Menu. 3-27 REC 4192 Rev B Thermo Fisher Scientific Micro-Tech 3102 **** THIS PAGE LEFT BLANK INTENTIONALLY **** 3-28 REC 4192 Rev B Thermo Fisher Scientific Chapter 4 Micro-Tech 3102 Maintenance The maintenance information in this manual should meet your service needs. If problems occur requiring technical assistance, please call (763) 783-2500. Thermo Scientific has a repair center located at our plant in Minneapolis, Minnesota. Contact our Repair Representative at (763) 783-2774 for assistance. To expedite your service request, please have your machine model and serial number available. 4.1 Frequent Checkpoints The Micro-Tech 3102 Batch Controller is a solid-state device and should require very little maintenance. The front panel can be wiped clean with a damp cloth, and if necessary, a mild detergent (never use abrasive cleaners, especially on the display window). As a preventative measure, check to ensure all wires, plugs, and integrated circuits are tight in their connectors. Also, keep the enclosure door tightly closed to prevent dirt infiltration. More often than not, a quick visual inspection leads to the source of trouble. If a problem develops, check the following before proceeding to more specific troubleshooting procedures: • Check Power 1. Check the Line Voltage Selector Switches are set to the correct line voltage 2. Check the fuse • 3. Check that the power switch in ON and that power is supplied to the unit. Check Connections 1. Check that all terminations are secure. 2. Check to ensure the Display Module and Keyboard connectors are firmly seated in their connectors. 3. Check that all Jumpers are in their correct position. 4.2 Troubleshooting This unit has built-in troubleshooting capabilities. A number of possible problems are automatically detected and screen messages are displayed. Also, refer to the Diagnostics Test Scrolls in MAIN MENU 3. REC 4192 Rev B Thermo Fisher Scientific 4-1 Micro-Tech 3102 4.3 Alarm Messages The ALARM message is assigned to the right hand soft key when an alarm is pending. The Alarm message and its LED flash at the same time. The following screen is displayed when the right hand soft key is pressed. ALARM NEW xxxxxxxxxxxxxxxxxxxxxx MM-DD-YYYY HH:MM RESET NEXT • • • NEW indicates an alarm that has not yet been acknowledged. When the operator presses RESET to clear the alarm, the alarm disappears only if the treason that caused the alarm to occur does not exist any more. If the alarm is still pending, ACK is displayed instead of NEW. NEXT is used to scroll between the pending alarms. XXXXXXXXXXXXXXXXX represents one of the conditions listed in Section.4.3.1. 4.3.1Alarms List 1 - Clock Fail The system has detected a failure on the clock calendar circuit. Go to the DIAGNOSTICS screen and re-enter the date and time. Check the battery Replace the motherboard. 2/6 - Load Cell Fail S# S# identifies the scale if more scale are defined. The system has detected an error on the load cell signal. Check the load cell connections. Check the load cell(s). 7 - RAM Fail The system has detected an error on the RAM (Random Access Memory) checksum during the internal periodic test. The RAM is used to store variables and set up data. Replace the motherboard. 8 - ROM Fail The system has detected a failure on the ROM (Read Only Memory) checksum during the internal periodic test. The ROM is used to store the program. Replace the mother board 4-2 REC 4192 Rev B Thermo Fisher Scientific Micro-Tech 3102 9/13 – High Load S# S# identifies the scale if more than one scale is defined. The high load limit has been reached. 14/18 – Low Load S# S# identifies the scale if more scales are defined. The low load limit has been reached. 19 - Warm Start The system has detected a power loss condition, or power was removed for an undefined period. 20 - Cold Start The system has detected the loss of the set up data after power was removed. The instrument needs to be setup and calibrated. Replace the motherboard 21 – P.D. Calibration When the system is powered off while a calibration sequence is in progress, the scale may not be properly calibrated. Check calibration 22/26 – Calib. Time S# S# identifies the scale if more than one scale are defined. If a calibration check time period is entered and the time expires, this alarm occurs. The purpose is to remind the operator that the calibration has not been checked for a considerably long period of time. Check Calibration 27/29 - Ext. Alarm n Digital inputs can be programmed to detect external alarm conditions such as emergency switches, max level switches or other. This alarm is associated to the external alarm #n. Check External alarm #n. 30/35 - HW Conf. Changed When a new board is installed or an old board removed, this message displays. 36 – BCD Overflow This message is only displayed if the optional BCD output board is installed. If the variable to be converted in the BCD format has more than 4 digits, the alarm is generated. Check the size of variable and the BCD data setup. 37 - Math Error A divide by zero or overflow error is encountered during internal calculations. This message indicates some abnormal dimensional parameter is entered in setup. 4-3 REC 4192 Rev B Thermo Fisher Scientific Micro-Tech 3102 Check setup data 38 - Printer Error This message is displayed if the system has data to print and the printer is disconnected or the paper feed is empty. 39 - Communication Error Indicates a time out or handshake error is detected during a data transfer on the COMM line. Check the COMM line connections. Check the COMM line setup data. 40/44 – Bad Start Weight S# A cycle has started but the weight on the scale is over the threshold of “zero start batch set” weight in case of charge batch or below the threshold if in case of discharge batch. The instrument executes this control only if the first component of the recipe is a “charge batch” component. 45/49 – Stop Cycle S# This alarm is generated when a cycle is suspended. There can be Three causes: 1. After stop command from keyboard, contact or serial line. 2. Following a shutdown condition 3. A stop condition has been detected by the instrument during the batch phase. 50/54 – End Cycle S# An END CYCLE command has been given from the keyboard, contact or serial line. 55/59 – Abort Cycle S# A cycle has been aborted. There can be two causes: 1. After an abort command from the keyboard, contact or serial line. 2. An abort condition has been detected by the instrument during the batch phase. 60/64 – Comp. Time Out The component is taking more than maximum time to complete its batch. An interlock input is missing or a stop condition has occurred. 65/69 – Deviation S# The maximum deviation limit for the component has been exceeded. 70 – Allen-Bradley Remote I/O COMM Error This message is displayed if communication is interrupted. The green LED on the A_B R I/O board will be flashing. The alarm does not come on if communication has never started. 4-4 REC 4192 Rev B Thermo Fisher Scientific Micro-Tech 3102 71 – PROFIBUS-DP COMM Error This messages in only displayed if the optional Profibus board is installed. The following two conditions activate the alarm. The Siemens SPC3 Controller installed on the Profibus interface board does not recognize any successful data transfer within the watchdog timer interval. The received data contains errors (value overlaps limits, register number does not exist, group number does not exist). 4.4 Micro-Tech 3102 Cold Start It may be necessary to cold start the Batch Controller in the event memory becomes corrupted. You have the option of installing the factory default constants or simply returning the Micro-Tech to its previous running state. Steps required to cold start are: Press and hold at the same time the LEFT HAND ARROW and the CLEAR keys until the following screen displays. Install Factory Defaults? NO YES No, Returns to Run Mode Yes, the following screen displays: -- MEMORY ERASED -Choose the language key to continue to ESP USA When this screen displays, all field entry data has been replaced by the factory default constants. Proceed to Section 2.7and follow the Initial Setup procedures. Note: If the software corruption was catastrophic and the memory will not erase do the following: Press and hold in the LEFT ARROW and the CLEAR key. While holding in both keys, cycle line power. In the event the MEMORY ERASED screen does not appear, consult the factory. 4.5 Internal Test Procedure Pressing START on the screen (located in MAIN MENU 3) initiates a self-test of the internal processor. The following screen displays: -- TEST SCROLL 2 -Internal test of microprocessor. START 4-5 Password: Service REC 4192 Rev B Thermo Fisher Scientific Micro-Tech 3102 Press START, the following screens display in sequence: -- TEST SCROLL 2A -Testing ROM Test PASSED -- TEST SCROLL 2B -Testing RAM Test PASSED -- TEST SCROLL 2C -Testing E2PROM Test PASSED The message “Test PASSED” is displayed if the test runs correctly. If something wrong is detected, the message “Test FAILED” is displayed and the soft key CONTINUE is shown. Press CONTINUE and move to the next test. If the internal test has failed, call Thermo Scientific Customer Service. 4.6 Load Cell Excitation and Signal Voltage 1. Measure excitation voltage across terminal 21 negative and 20 positive in the scale junction box. This should be 10 VDC ± 5%. 2. If the excitation voltage is incorrect then measure the excitation voltage in the Batch Controller across terminal TB4-33 negative and the TB4-32 positive. This should be 10 VDC ± 5%. 3. Measure DC millivolt signal voltage across terminal 31 positive and 32 negative in the scale junction box. This should be within 0-30 millivolts DC (3 mV/V load cell). 4. Measure DC millivolt signal voltage across terminal TB4-30 positive and TB4-31 negative in the Batch Controllerr. This should be the same as Step 3 above. 5. The millivolt output is in direct relation to weight applied. As weight is increased, output should increase. 4.7 Resetting Master Total Use the following steps to reset the Master Total or the Remote Counter Overflow. 4.7.1No Password Installed 1. 2. 3. 4. 4-6 If there is no password installed, select MAIN MENU 3 Press DIAG soft key and scroll down to the SRVICE PASSWORD screen. Type in a password (example: 123) and press ENTER Re-enter the password and press ENTER REC 4192 Rev B Thermo Fisher Scientific Micro-Tech 3102 5. 6. 7. 8. 9. 10. 11. 12. 13. Select MAIN MENU 3 Select PROT scroll, press PROT Press NONE Enter the password 7832500 and press ENTER. The protection level should be RAMSEY. Press TOTAL; scroll up or down if needed to reach the MASTER TOTAL screen. Press RESET and select YES to “Reset Master Total?” Select MAIN MENU 3. Press DIAG and scroll to SERVICE PASSWORD. Press ENTER twice, erasing the password installed in Step 3. Press RUN to return to normal operation. 4.7.2Active Password 1. 2. 3. 4. 5. 6. 7. 8. 4.8 Select MAIN MENU 3 Select PROT scroll, press PROT Press NONE Enter the password 7832500 and press ENTER. The protection level should be RAMSEY. Press TOTAL; scroll up or down if needed to reach the MASTER TOTAL screen. Press RESET and select YES to “Reset Master Total?” Select MAIN MENU 3 Press PROT and choose the password level desired. Removing a Forgotten Password Use the following steps to remove a forgotten password from Instrument memory. 1. Select MAIN MENU 3 2. Select the PROTECT scroll and press PROT 3. Press NONE 4. Enter the password 7832500 and press ENTER. The protection level should be RAMSEY. 5. Press NONE 6. Select MAIN MENU 3 7. Press DIAG and scroll to SERVICE PASSWORD 8. Press ENTER twice. The display should respond with NEW PASSWORD ACQUIRED. 9. Scroll down to OPERATOR PASSWORD. Press ENTER twice. The display should respond with NEW PASSWORD ACQUIRED. 10. Select MAIN MENU 3. The PROT soft key should not appear, indicating all passwords have been erased. If PROT does appear, repeat Steps 1 through 9. 11. See Section for entering new passwords. 4-7 REC 4192 Rev B Thermo Fisher Scientific Micro-Tech 3102 4.9 Lithium Battery Replacement The Micro-Tech volatile memory backup battery can be replaced without any special tools. WARNING DANGER OF EXPLOSION INCORRECTLY REPLACED. IF BATTERY IS Replace only with same or equivalent type recommended by Thermo Scientific. Dispose of used battery according to manufactures instruction on battery or return to Thermo Scientific. (Refer to Section 4.10.) 1. Record all configuration, setup, and calibration data before removing battery. All information is lost when the battery is removed. 2. Turn the Micro-Tech power off at the mains. 3. Remove the battery from its compression socket. 4. Observe the polarity markings on the battery socket base before inserting the new battery. The lithium battery is .3V, 1.2 AH, 2/3 A, Thermo Scientific part number 037188. 5. Insert battery 6. Restore power to the Micro-Tech. 7. Cold start the Micro-Tech. See Section 4.4 for cold start procedures. 8. Re-enter all data recorded in Step 1. 4.10 Disposal of Hazardous Waste Disposal of Lithium batteries and soldered print circuit boards should be in accordance with your local Hazardous Waste Policy. As an alternative, you may return product supplied by Thermo Scientific, freight prepaid for disposal. Contact Thermo Scientific Repair Department for a Return Authorization Number before shipping any product for disposal. 4.11 Cleaning Instructions The Micro-Tech 3102 is a solid-state device requiring very little maintenance. The front panel can be wiped clean with a damp cloth, and if necessary, a mild detergent (never use abrasive cleaners, especially on the display window). As a preventative measure, check all wires, plugs, and integrated circuits are tight in their connectors. Keep the enclosure door tightly closed to prevent dirt infiltration. 4-8 REC 4192 Rev B Thermo Fisher Scientific Chapter 5 Micro-Tech 3102 Replacement Parts This section gives information on how to order replaceable parts for your Batch Controller and includes drawings with corresponding parts lists to enable you to identify parts quickly and accurately. 5.1 Order Information For faster service when ordering parts, fax or telephone Products Parts Department. Your regional field service representative will also be happy to assist you with parts orders, but his normal scheduling time may delay shipment of your parts order. The recommended procedure for order parts is as follows: 1. Determine the broken or faulty part(s). 2. Locate the part(s) in the parts list given. 3. Find the part number(s) for the item(s) needed and determine the quantity you require. 4. Fax or telephone: Thermo Scientific Customer Service Department 501 90th Ave. NW Minneapolis, MN 55433 Customers A through M Customers N through Z Repair and Returns Fax: - (763) 783-2775 (763) 783-2773 (763) 783-2774 (763) 783-2525 Normal Customer Service hours are 8:00 a.m. to 4:30 p.m., Central time. 5. With your order, list the following information: Machine model and serial number Purchase order number Date required Method of shipment preferred List of parts, including part number, description and quantity Your parts order will be handled as expeditiously as possible. REC 4192 Rev B Thermo Fisher Scientific 5-1 Micro-Tech 3102 5-2 REC 4192 Rev B Thermo Fisher Scientific Micro-Tech 3102 REC 4192 Rev B Thermo Fisher Scientific 5-3 Micro-Tech 3102 5.1.1Parts List Table 5-1: Parts List EQUIPMENT PART NUMBER 073285 Chassis Assembly, Panel Mount Chassis Assembly, Field Mount 073279 PCBA, MOTHERBOARD 073283 PCBA, Display Assembly 073281 Touch Panel Bezel Assembly 073289 Fuse, Slo-Blo, 200mA (F1 230V) (Type T) 001366 Fuse, Slo-Blo, 400mA (F1 115V) (Type T) 002443 Prom, U54, MT-3000 Audit Trail 073300 Battery, Lithium, 3.0 V, 1.2 AH, 2/3 A. 037188 Program Disk 068137 Power Module 073280 Table 5-2: Optional Plugin Boards PCBA, Analog Output (1 out) PART NUMBER 071637 PCBA Analog Output (2 in/2 out) 071636 PCBA, DIO (4 in/16 out) 046841 PCBA, DIO (16 in/4 out) 046844 PCBA, COMM "A" Select one only 068053 EQUIPMENT RS-232C RS-485, std. (point to point) RS-485, multi-drop 20 mA (digital) current loop PCBA, Load Out DIO (4 in/16 out) 049475 PCBA, Load Out DIO (16 in/4 out) 049476 PCBA, Allen-Bradley RI/O 055517 PCBA, PROFIBUS-DP 056713 PCBA DeviceNet 068147 Field Marshall PCA 058842 DeviceNet PCBA 067097 Relay Output Board 5-4 073284 REC 4192 Rev B Thermo Fisher Scientific Appendix A Micro-Tech 3102/3202 Menus The Batch Controller is a menu driven machine that allows the operator to access all setup, test, and calibration parameters. MAIN MENU screens 1 through 6 can be accessed at any time by pressing MENU key until the desired screen is displayed. Pressing the SOFT KEY directly below the desired scroll and then using the UP/DOWN, arrow scroll key selects the MENU scrolls. If the Batch Controller is password protected, the appropriate password must be entered prior to making changes or performing routine calibration. Menus may be viewed without entering a password, but no entries are allowed unless the password is entered. A.1. Menu Displays Optional menu scrolls are only available if the option has been installed. Pressing menu activates the following screens: -- MAIN MENU 1 -Press MENU for more ZERO SPAN CAL CAL -- MAIN MENU 2 -Press MENU for more SCALE CALIB DISPLAY DATA DATA -- MAIN MENU 3 -Press MENU for more PROT DIAG TEST -- MAIN MENU 4 -Press MENU for more I/O ALAMS DEFINE DEFINE REC 4192 Rev B Thermo Fisher Scientific A-1 Micro-Tech 3102 -- MAIN MENU 5 -Press MENU for more COMM A COMM B PRINT * * Can be AB RIO or PRO DP -- MAIN MENU 6 -Press MENU for more AUDIT TRAIL LINEAR A.2. Common Key Functions The following functions are common from all scrolls at all times and the use of these keys is not repeated for each procedure: • Run – pressing RUN return the Batch Controller to the RUN menu • Exit – exit appears at the bottom of some screens as a soft key option. Pressing exit moves you back a menu. A.3. MAIN Menu 1 – Calibration Menu MAIN MENU 1 contains the CALIBRATION MENU. MENU 1 is selected by pressing MENU until MAIN MENU 1 displays. Desired CALIBRATION scrolls are selected by pressing the SOFT keys directly below the desired scroll. Calibration scrolls consist of the following: • Zero Calibration • Span Calibration -- MAIN MENU 1 -Press MENU for more ZERO SPAN CAL CAL A.3.1. Zero Calibration Scroll The Zero Calibration is implemented as a machine directed procedure. Auto Zero If only one scale defined : -ZERO CAL -Empty scale, then press START START SCALE # MANUAL A-2 Password: Operator REC 4192 Rev B Thermo Fisher Scientific Micro-Tech 3102 The scale must be kept empty during auto zero. A complete zeroing procedure requires 10 seconds, but can be reduced by pressing END in the next scroll. Indication S# in the following scrolls will appear only if more than one scale is defined. # represents the active scale number. When START is pressed, the following screen is displayed : S# AUTO ZEROING Time remaining 0000 Gross 000.0 W.U. END ABORT During Auto Zero, weight resolution is ten times higher than normal. The number of seconds in Line 2 corresponds to the time remaining for completing the test. When zero is reached or END is pressed, the system displays the following screen : S# AUTO ZERO COMPLETE Error ±000.00% Change zero? YES NO The word COMPLETE is flashing. The percentage of error is related to the scale capacity. If YES is pressed , the next screen is shown : S# ZERO # CHANGED New zero #00000 Old zero #00000 RUN MENU If NO is pressed, the next screen is shown : S# ZERO # UNCHANGED New zero #00000 Old zero #00000 RUN MENU The zero constants are shown in A/D counts. A.3.1.1 Manual Zero The Manual Zero procedure allows the operator to directly enter the zero constant if known. REC 4192 Rev B Thermo Fisher Scientific A-3 Micro-Tech 3102 -MANUAL ZERO -Gross 000.0 W.U. Zero # 00000 ENTER SCALE # EXIT Default: Min: Max: A.3.2. Password: Operator 40000 0 120000 Span Calibration The span calibration can be done in two different ways : R-Cal or Test Weights. The system allows the operator to select which one of the two methods to be used for normal calibration and calibration’s check. The selection is made in CAL DATA SCROLL 1. The Auto Span procedure require 10 seconds. A.3.2.1 Automatic Span Calibration With R-Cal Use the following steps to begin an R-Cal Calibration: 1. Starting an R-Cal Calibration AUTO SPAN R CAL Empty scale, then press START START SCALE # MANUAL Password: Operator When START is pressed, the Rcal relay energizes. A half second delay occurs after START for the weight to stabilize. Note: The operator must insure that the scale is empty before pressing START. 2. Executing the Span Calibration Indication S# in the following scrolls appears only if more than one scale is defined. # represent the active scale number. Whichever method is used to start automatic span calibration, after START is pressed, the follwing screen is displayed : (1) Entry point when REPEAT is pressed (see belw). S# AUTOSPANNING Time remaining 0000 Gross 000.0 W.U. END ABORT A-4 REC 4192 Rev B Thermo Fisher Scientific Micro-Tech 3102 During Auto Span, the weight resolution is 10 time higher than normal. The number of seconds in line 2 corresponds to the time remaining for completing the test. The END key can be used to conclude the function in less time. entire function takes 60 seconds to be completed, remaining time is displayed in line 2. The END key can be used to conclude the function in less time. 3. Record the Material Factor This part of the procedure is only executed if a calibration with test weights was done before, and if R-CAL has not been factored yet. It is very important to understand that when this procedure is executed, the system will not alter the span. The system assumes the span is set correctly based on a test weight calibration. The system acquires the R-CAL Factor. The factored R-CAL can then be used to check the span between test weight calibrations. CAUTION SPAN SHOULD ONLY BE CHANGED BASED ON A TEST WEIGHT CALIBRATION AUTO SPAN COMPLETE Error +/- 00.00% Unfactored Calcon EXIT FACTOR REPEAT The word COMPLETE is flashing. If EXIT is pressed, the system acknowledges that the R-CAL factor is not used. The effect of this is that the system does not ask for a factor any more for this calibration method unless a manual span entry is done. By pressing EXIT, the operator tells the system that he does not want to use material factors, but wants to use the test results for changing the span number. After EXIT is pressed, go to point (1) above. If FACTOR is pressed, the following screen is displayed : FACTORING R-CAL New Factor : 000.00 % Change factor ? YES NO If NO is pressed, the old factor is preserved, go to point (2) below. If YES is pressed, the following screen is displayed : R-CAL Matl FACTOR Old factor : 00.00 % New factor : 00.00 % RUN REPEAT REC 4192 Rev B Thermo Fisher Scientific Can be R-CAL or TEST WEIGHTS A-5 Micro-Tech 3102 The REPEAT key returns the operator to (1) above. Pressing RUN ends the procedure. After this point is reached, the system does not proceed to the next section. 4. Recording the New Span The system calculates the new span (2) S# AUTO SPAN COMPLETE Error +/- 00.00% Change span ? YES NO The word “COMPLETE” is flashing. If YES is pressed, the following screen is displayed : S# SPAN# CHANGED Old span # 000000 New span 000000 RUN REPEAT REPEAT moves back to (1) above, and calibration restarts. If NO is pressed, the following screen is displayed : S# SPAN# UNCHANGED Old span # 000000 New span 000000 RUN REPEAT Note the Old span and the New span are shown equally. This is because no change to the span has been done. If FACTOR is pressed, the R-CAL factor is computed. The following screen is displayed: S# FACTOR ACQUIRING New fact 000000 % Change factor ? YES NO NO moves back to point (2) above. YES acquires the new factor. If pressed, the following screen is displayed : A-6 REC 4192 Rev B Thermo Fisher Scientific Micro-Tech 3102 S# FACTOR CHANGED Old fact # 000000 % New fact 000000 % RUN REPEAT 5. Ending an Auto Span Procedure with R-CAL Press RUN. The R-Cal relay is de-energized and the display is locked for 3 seconds. A.3.2.2 Automatic Span Calibration With Test Weights 1. Starting Span Calibration With Test Weights AUTOSPAN Weights Apply Weights, then press START START SCALE # MANUAL Password: Operator The operator must apply the test weights on the scale before pressing start. When START is pressed, the span function begins. 2. Executing the Span Calibration Indication S# in the following scrolls appear only if more than one scale is defined. # represents the active scale number. Whichever method has been used to start automatic span calibration, after START is pressed, the following screen is displayed : (1) Entry point when REPEAT is pressed (see below) S# AUTOSPANNING Time remaining 0000 Gross 000.0 W.U. END ABORT During Auto Span, the weight resolution is 10 times higher than normal. The number of seconds in line 2 corresponds to the time remaining for completing the test. The END key can be used to conclude the function in less time. 3. Recording the New Span The system calculates the new span based on the result of the test performed with the selected method : S# AUTOSPAN COMPLETE Error +/- 000.00% Change span? YES NO REC 4192 Rev B Thermo Fisher Scientific A-7 Micro-Tech 3102 The word COMPLETE is flashing. If YES is pressed, the following screen is displayed : (2) S# SPAN # CHANGED Old span # 000000 New span # 000000 RUN REPEAT FACTOR FACTOR key is displayed only if an autospan with R-Cal has been previously executed. REPEAT moves back (1) above, and calibration restarts. If NO is pressed, the following screen is displayed : S# SPAN# UNCHANGED Old span # 000000 New span # 000000 RUN REPEAT Note the Old span and the New span are shown equally. This is because no change to the span has been done. If FACTOR is pressed, the RCAL factor is computed. The following screen is displayed : S# RCAL FACTOR New fact 000000 % Change factor ? YES NO NO moves back to (2) above. YES acquires new factor. If pressed, the following screen is displayed : S# FACTOR CHANGED Old fact # 000000 % New fact 000000 % RUN REPEAT A.3.2.3 Manual Span If the span constant is known, the manual span procedure allows the operator to manually change span. NOTE : If the span is manually entered, the RCAL factor is set to INVALID. -MANUAL SPAN -Gross 000.0 W.U. Span # 0000000 ENTER SCALE # EXIT Password: Operator Default : 1166667 Min : 5000000 Max : 45000000 The RUN key return to Run Menu. A-8 REC 4192 Rev B Thermo Fisher Scientific Micro-Tech 3102 A.4. Main Menu 2 – Setup and Configuration Menus MAIN MENU 2 contains the SETUP AND CONFIGURATION MENUS. MENU 2 is selected by pressing MENU until MAIN MENU 2 displays. Desired SETUP AND CONFIGURAITON scrolls are selected by pressing the SOFT keys directly below the desired scroll. Scrolls for MAIN MENU 2 consist of the following: • Display • Scale Data • Calibration Data A.4.1. Display The Display scroll sets up the parameters for how the information at the Batch Controller interface will display. A.4.1.1 Measure Units Measure units can be individually selected. The operator must first decide if the English or Metric units will be used, or a combination of both will be used.. Press ENTER soft key to accept the default unit, or CHOICES soft key to scroll selections. Press ENTER to confirm your selection. Scroll down. -- DISPLAY SCROLL 1 Measure units >ENGLISH< CHOICE ENTER Default: Choices: -Password: Service ENGLISH In other language Default : METRIC ENGLISH, METRIC, MIXED The weights are displayed according to the units selected here. Press ENTER soft key to accept the default unit, or CHOICES soft key to scroll selections. Press ENTER to confirm your selection. Scroll down. -- DISPLAY SCROLL 2 -Weight units > lb < CHOICE ENTER Password: Service Default: Choices: English = POUNDS PERC%, POUNDS, TONS, LTONS Default: Choices: Metric = KG PERC%, KG, TONNES Default: Choices: Mixed = POUNDS PERC%, KG, TONNES, POUNDS, TONS, LTONS The weights are displayed according to the units selected here. Press ENTER soft key to accept the default unit, or CHOICES soft key to scroll selections. Press ENTER to confirm your selection. Scroll down. REC 4192 Rev B Thermo Fisher Scientific A-9 Micro-Tech 3102 -- DISPLAY SCROLL 3 -Total units >tons< CHOICE ENTER Password: Service Default: Choices: English = TONS PERC%, TONS, LTONS, POUNDS Default: Choices: Metric = TONNES TONNES, KG Default: Choices: Mixed = TONS TONS, LTONS, POUNDS, TONNES, KG Press ENTER soft key to accept the default unit, or CHOICES soft key to scroll selections. Press ENTER to confirm your selection. Scroll down. A.4.1.2 Language The Mod.3102 is a dual language instrument. English (ENG or USA) is always the first language, the second can be one from the following list. Press DOWN SCROLL key. -- DISPLAY SCROLL 4 -Language >USA< CHOICE ENTER Default: Choices: A.4.1.3 Password: Operator USA USA, ENG, (ESP), FRA, GER, DUT, ITA Time and Data Mode The operator defines the format for displaying and printing time and date. -- DISPLAY SCROLL 5 -Time >am/pm < CHOICE ENTER If USA or English : If other language : Selection : Default : am/pm Default : 24 h am/pm, 24 h -- DISPLAY SCROLL 6 -Date >MM-DD-YYYY< CHOICE ENTER If USA : If other language : Selection : A-10 Password: Service Password: Service Default : MM-DD-YYYY Default : DD-MM-YYYY DD-MM-YYYY, MM-DD-YYYY, YYYY-MM-DD REC 4192 Rev B Thermo Fisher Scientific Micro-Tech 3102 A.4.1.4 Line 2 and 3 of the RUN Menu The RUN MENU can be configured to display on line 2 and/or 3 either tare, gross, peak, master total, reset total, date and time and graphic indication of the net weight.. -- DISPLAY SCROLL 7 -Run display line 2 > No Display < CHOICE ENTER SCALE# Default: Choices: NO DISPLAY NO DISPLAY, GROSS, TARE, DATE/TIME, BARGRAPH -- DISPLAY SCROLL 8 -Run display line 3 >No Display< CHOICE ENTER SCALE# Default: Choices: A.4.1.5 Password: Operator Password: Operator NO DISPLAY NO DISPLAY, GROSS, TARE, DATE/TIME, BARGRAPH Damping Factors for the Display The process variable when displayed on the screen can be damped by a programmable factor, to filter out variations that can be introduced by mechanical vibrations. To tune a damping filter, enter the number of seconds corresponding to the desired time constant. If, for example, 10 seconds is entered, the process variable reaches the stability after a step change in 10 seconds. -- DISPLAY SCROLL 9 -Display weight sec Damping ENTER SCALE# Password: Operator Default : 0sec Min : 0sec Max : 16sec A.4.1.6 Enable ALTERNATE Function on RUN Scroll The ALTERNATE function allows skipping automatically from one scale to the next without without pressing the SCALE # key in the RUN scroll. Time interval in seconds can be entered in this scroll. 0 disables this function.. -- DISPLAY SCROLL 10 -Alternate scales in sec RUN ENTER REC 4192 Rev B Thermo Fisher Scientific Password: Operator A-11 Micro-Tech 3102 Default : 0sec (Function disabled) Min : 0sec Max : 60sec A.4.2. Scale Data Scroll Scale data defines the specific parameters of the scale. A.4.2.1 Number and Type of Scales The Batch Controller can control from one to four independent scales. The number of scales that can be programmed according to the number of A/D are installed. -- SC DATA SCROLL 1 -Number of scales ___ ENTER Password: Service Default: 1 Min: 1 Max: The Absolute number of scale is 4. The actual maximum depend of the combination of A/D boards installed - Plant scale A/D 1 channel - Plant scale A/D 2 channel - Premium scale A/D 1 channel Normally, more scales are defined and it is necessary to define how these scales should be handled by the batch controller. This option can only be changed during the cold start procedure. Mode is only didplayed here. The two ways to handle the scales in multi scale mode is described in the “Appendix B”. -- SC DATA SCROLL 1A -Mode to handle the scales > Single < A.4.2.2 Scale Capacity and Divisions The next entry is the scale capacity, which is the maximum capacity of the scale. This entry also defines the default number of decimal places that are used for display weight values. Use numeric keys for entering the number, confirm ENTER. Scroll down. -- SC DATA SCROLL 2 -Max. scale capacity 500.0 lbs ENTER SCALE # A-12 REC 4192 Rev B Thermo Fisher Scientific Micro-Tech 3102 Default: Min: Max: 500.0 1 100000 When the scale capacity is entered, the number of decimal places is also defined. If, for example, the operator enters 500.0, this sets the “Scale Division” parameter to 0.1. Advancing to the next scroll, the operator then sees first the Scale Division corresponding to the just entered Scale Capacity (in the example 0.1).If required, the operator is able to alter the Scale Division to any of the available options. -- SC DATA SCROLL 3 -Scale divisions >0.1< CHOICE ENTER SCALE # Default: Choices: 0.1 0.1, 0.2, 0.5, 1, 2, 5, 10, 20, 50, 0.01, 0.02, 0.05, 0.001, 0.002, 0.005 The next entry is the set of start batch. This value is used for different purposes: - As a reference to end the discharge phases - To generate the BAD START WEIGHT alarm if at the start of new cycle the weight on the scale is above this value and the first component to batch is a charge batch type. - To generate the BAD START WEIGHT alarm if at the start of new cycle the weight on the scale is below this value and the first component to batch is a discharge batch type. -- SC DATA SCROLL 4 -Zero – start batch set 0.0 lbs ENTER SCALE # Default: Min: 0.0 0.0 Max: Scale Capacity A.4.2.3 Number of Load Cells of Your Scale Enter the number of load cells of your scale. -- SC DATA SCROLL 5 -# of load cell 1 ENTER SCALE # Default: Min: Max: REC 4192 Rev B Thermo Fisher Scientific Password: Service 1 1 6 A-13 Micro-Tech 3102 A.4.2.4 Defining the Load Cell(s) Enter the load cell capacity as it appears on the label placed on the load cell. -- SC DATA SCROLL 6 -Load cell capacity 250 Lbs ENTER SCALE # English/Mixed Default: 250.0 Lbs Min: 1 Lbs Max: 15000 Lbs Metric Default: Min: Max: Password: Service 100 kg 10 kg 15000 kg Enter the load cell sensitivity in mV/V as marked on the label of the load cell. Thermo Scientific load cells are normally 2.000 or 3.000 mV/V. -- SC DATA SCROLL 7 -Load cell sens. 3.00 mV/V ENTER SCALE # Default: Min: Max: Password: Service 3.0 mV/V 0.500 mV/V 3.500 mV/V The resistance of the bridge of each load cell has to be entered here. The number of scroll depends on the number of load cells specified per each scale. -- SC DATA SCROLL 8A -Load cell # 1 350.0 Ohms ENTER SCALE # Default: Min: Max: Password: Service 350 Ohms 10 Ohms 1000 Ohms If # of Load Cells is 2 or more : -- SC DATA SCROLL 8B -Load cell # 2 350.0 Ohms ENTER SCALE # Password: Service Same default and limits of load cell #1 If # of Load Cells is 3 or more : -- SC DATA SCROLL 8C-Load cell # 3 350.0 Ohms ENTER SCALE # A-14 Password: Service REC 4192 Rev B Thermo Fisher Scientific Micro-Tech 3102 Same default and limits of load cell #1 If # of Load Cells is 4 or more : -- SC DATA SCROLL 8D-Load cell # 4 350.0 Ohms Res ENTER SCALE # Password: Service Same default and limits of load cell #1 If # of Load Cells is 5 or more : -- SC DATA SCROLL 8E-Load cell # 5 Res 350.0 Ohms ENTER SCALE # Password: Service Same default and limits of load cell #1 If # of Load Cells is 6 : -- SC DATA SCROLL 8F-Load cell # 6 350.0 Ohms Res ENTER SCALE # Password: Service Same default and limits of load cell #1 A.4.2.5 Selecting a W&M Mode This scroll only appears if the Micro-tech Model 3202 Static Weight Indicator is used in an approved scale. The selection details specific requirements of local Weight & Measure offices in certain countries -- SC DATA SCROLL 10 -W&M Mode >NO< CHOICE ENTER Password: Service Default: No Selections: No, OIML A.4.2.6 Maximum Number of Components and Recipes The next two scrolls defines the maximum number of components of the system and the maximum number of recipes. The only purpose of entering these values is to simplify the use of the scrolls when data for recipes and components are displayed and entered. REC 4192 Rev B Thermo Fisher Scientific A-15 Micro-Tech 3102 -- SC DATA SCROLL 10 -Max components 11 ENTER Default: Min: Min: 11 1 40 -- SC DATA SCROLL 11 -Max recipes 10 ENTER Default: Min: Min: A.4.3. Password: Operator Password: Operator 10 1 100 Calibration Data Scroll The CAL DATA Scroll allows the operator to set parameters which relate to the calibration of the scale. A.4.3.1 Calibration Mode Select which simulated method of automatic calibration is to normally by used. The select method is the only one displayed in the calibration section MENU 1. -- CAL DATA SCROLL 1 -Calibration mode: < R-CAL< CHOICE ENTER SCALE# Default: Choice: Password: Operator R-CAL R-CAL, WEIGHTS, DETAILING THE R-CAL PARAMETERS This section only applies if R-CAL mode was selected as the preferred method. Enter the resistance in Ohms of the R-CAL resistor installed in your batch controller. If no changes have been made after the batch controller has left Thermo Scientific, the default value applies. -- CAL DATA SCROLL 3 -R-Cal selected res 165000 ohms ENTER SCALE # Default: Min: Max: A-16 Password: Service 165000 Ohms 10 Ohms 1000000 Ohms REC 4192 Rev B Thermo Fisher Scientific Micro-Tech 3102 The system calculates the CALCON (Calibration Constant) based on the mechanical and electrical parameters entered in the Scale Data Scroll. This menu is for reference only. -- CAL DATA SCROLL 4 -R-Cal constant _______ lbs SCALE # The R-Cal factor can be computed during the autospan function and it is used to make equal the result of two span methods. -- CAL DATA SCROLL 5 -R-Cal factor % ENTER +/- SCALE # A.4.3.2 Detailing the Test Weight Parameters This section only applies if TEST WEIGHTS mode was selected as the preferred method. Enter the weight of the test weights that you are going to use for calibration. -- CAL DATA SCROLL 2 -Total test weight on scale 0.000 lbs ENTER SCALE # Password: Service If ENGLISH or MIXED Default: Min: Max: 0.000 Lbs 0.000 Lbs 500.000 Lbs If METRIC Default: Min: Max: A.4.3.3 0.000 kg 0.000 kg 500.000 kg Calibration Interval The system can be programmed to prompt the operator when a certain amount of time has passed since the last calibration. If you do not want to use this option, confirm the default 0 days interval, otherwise enter the number of days. The calibration date displayed in Scroll 7 is automatically updated whenever a calibration is performed. If a non zero value is entered, an alarm appears after the time is elapsed. The alarm can only be cleared after a calibration check is executed. REC 4192 Rev B Thermo Fisher Scientific A-17 Micro-Tech 3102 -- CAL DATA SCROLL 6 -Calibration interval Days ENTER Default: Min: Max: Password: Operator 0 Days (function disabled) 0 Days 365 Days This scroll displays the date of the last calibration and the expected date of the next one, based on the entry in the previous screen. -- CAL DATA SCROLL 7 -Calibration date Last MM-DD-YYYY Nest MM-DD-YYYY SCALE# A.5. Main Menu 3 MAIN MENU 3 is used for protecting and un-protecting the system using passwords, and to perform diagnostic and test functions. The diagnostic functions can only be operated after removing all password protection, and should only be used by experienced technical personnel. Most test functions are not password protected. -- -MAIN MENU 3 Press MENU for more PROT DIAG TEST The PROTECTION menu only becomes visible after passwords have been defined (see the DIAGNOSTICS Menu). A.5.1. Changing the Protection Level The Micro-Tech 3102 has three protection levels to which specific passwords are related. Appendix Table A-1: Password Protection Levels Protection NONE Password SERVICE Status The system is completely unprotected; all data can be read or changed. LIMITED OPERATOR Operator functions and data are unprotected. All setup and calibration data are protected except zero calibrate. PROTECTED A-18 The system is totally protected, process data can be read, no change allowed. REC 4192 Rev B Thermo Fisher Scientific Micro-Tech 3102 A SERVICE password is required to access the NONE level. An OPERATOR or a SERVICE password is required to access the LIMITED level. Use the NONE key to access the NONE protection level. If the current level is not already NONE, the SERVICE password is required. Use the LTD key to access the limited protection level. If the system is in level NONE, change is immediate. If it is in PROT level, the SERVICE or OPERATOR password is required. Use the PROT key to access the protected level. No password is required. - PROTECTION LEVEL > NONE < NONE Default: Selections: Password: LTD PROT NONE NONE, LIMITED, PROTECTED from NONE to LTD or PROT: not required from LTD to PROT: not required from LTD to NONE: SERVICE from PROT to NONE: SERVICE from PROT to LTD: OPERATOR or SERVICE Pressing the soft key gives entry to desired level. Going from a low level to a higher level forces the password entry. A.5.1.1 Online Procedure for Changing Protection Level The protection level can be temporarily changed by entering a password "on the fly" during normal operation. When the operator tries to enter a variable or select a function, which is password protected, and the password is installed, the following screen is displayed. - SYSTEM PROTECTED PLEASE ENTER PASSWORD ENTER The operator can enter either the OPERATOR or the SERVICE passwords. However, if the operator enters the OPERATOR password and the variable or function requires the SERVICE password instead, the access is denied and the following screen is displayed. - SYSTEM PROTECTED PLEASE ENTER SERVICE PASSWORD ENTER If the operator fails to enter the correct password, the following screen displays. REC 4192 Rev B Thermo Fisher Scientific A-19 Micro-Tech 3102 - SYSTEM PROTECTED INVALID PASSWORD ACCESS DENIED RETURN Pressing RETURN returns the program to the previous function. If the operator enters the correct password, the previous screen appears and access is allowed. When the protection level is changed using the on line procedure, the system automatically returns to protected status if no keyboard entries are made within 60 seconds. A.5.2. A.5.2.1 Diagnostics A/D Raw Data Diagnostic Scroll 1 shows the raw data from the A/D converter of the Integrator (A/D gross) and the net value after the zero constant has been subtracted. The range of the A/D converter is from 0 to 262140 numbers. -DIAGNOST. SCROLL 1A/D gross 00000 A/D net 0000 SCALE # A.5.2.2 Readout Load Cell mV The system displays the mV output of the load cell. The reading must be positive and must increase when the load increases. -DIAGNOST. SCROLL 2Weight on load cell 0.000 mV CALIB SCALE # Password: Service If CALIB is pressed, the next two scrolls are displayed and can be used to finetune the readout of mV/V. -DIAGNOST. SCROLL 2A Loadcell output zero 15 A/D counts ENTER SCALE # Default: Min: Max: 15 0 10000 -DIAGNOST. SCROLL 2B Loadcell output span 3497 ENTER SCALE # A-20 Password: Service Password: Service REC 4192 Rev B Thermo Fisher Scientific Micro-Tech 3102 Default: Min: Max: A.5.2.3 3497 0 30000 Change Passwords Change the password by entering a new one. The user can enter up to eight characters (numeric keys entries). The entered numbers are not echoed on the screen. Pressing just the ENTER key removes the password. -DIAGNOST. SCROLL 3ENTER SERVICE PASSWORD ******** ENTER Default: Password: Service No password After the password has been entered, the system asks for confirmation. This prevents losing access control due to a typing mistake while entering passwords. -DIAGNOST. SCROLL 4REENTER SERVICE PASSWORD ******** ENTER If the password entered the second time matches the first, the following message confirms the entry. -DIAGNOST. SCROLL 4NEW PASSWORD ACQUIRED RETURN If the two passwords do not match, the system does not accept the new password. -DIAGNOST. SCROLL 4INVALID PASSWORD RETURN -DIAGNOST. SCROLL 4ENTER OPERATOR PASSWORD ******** MENU ENTER Password: Operator Default: No password The OPERATOR password is double checked similarly to the service one. It is strongly suggested to write down the password and preserve a copy in a safe place. If the password is forgotten, refer to Section 4.8 to remove a forgotten password. REC 4192 Rev B Thermo Fisher Scientific A-21 Micro-Tech 3102 A.5.2.4 Display Software Version The software version is displayed for reference only. -DIAGNOST. SCROLL 5Main software version: 72.XX.XX.XX A.5.2.5 Setup Date and Time The user can set the current date and time. A battery operated clock calendar then maintains time and date even if power is removed. Day, Month, and Year are entered in sequence. -DIAGNOST. SCROLL 6Date: MM-DD-YYYY DAY: DD ENTER Default: Min: Max: Password: SERVICE 00-00-0000 01-01-0000 31-12-2096 Time is entered in a similar way. The AM/PM key is used when time is in the English mode. See DISPLAY SCROLL 7 IN MAIN MENU 2. -DIAGNOST. SCROLL 7Time: HH:MM HOURS: HH ENTER AM/PM Default: Min: Max: A.5.2.6 24-hour am/pm 00.00 00.00 23:59 01.00 01.00 12:59 Check Hardware Configuration The system automatically recognizes when optional boards are installed. The following scrolls are used to show the configuration. Remember that when a board is acknowledged, the related information stays in memory even if the board is removed, until the operator deletes it by responding YES to the message shown at power on. The following screen is displayed for each board installed in each slot. A-22 REC 4192 Rev B Thermo Fisher Scientific Micro-Tech 3102 -DIAGNOST. SCROLL 8Board type slot #1 BOARD TYPE -DIAGNOST. SCROLL 9 Board type slot #2 BOARD TYPE -DIAGNOST. SCROLL 10 Board type slot #3 BOARD TYPE Appendix Table A-2: List of Optional Plug-in Board Types - Dig I/O 16in/4out Optional digital input output board. - #16 Optocoupled Digital Inputs - #4 Optocoupled digital outputs - Dig I/O 16out/4in Optional digital input output board. - #4 Optocoupled Digital Inputs - #16 Optocoupled digital outputs - Load Out 16in/4in Optional digital input output board dedicated to the Load Out. - #16 Optocoupled digital inputs - #4 Optocoupled digital inputs - Load Out 16out/4in Optional digital input output board dedicated to the Load Out. - #4 Optocoupled digital inputs - #16 Optocoupled digital inputs - Current Out Optional current output board. - #1 Current output - Communication A Serial communication board (RS232, RS485) - Communication B Allen-Bradley Remote I/O PROFIBUS-DP REC 4192 Rev B Thermo Fisher Scientific A-23 Micro-Tech 3102 A.5.3. A.5.3.1 Tests Lamp Test Press START to begin a Lamp Test of the Batch Controller. All LED's and digits of the display blink for a number of seconds. - TEST SCROLL 1 LAMP TEST - START A.5.3.2 Self Test of the Unit The system can perform some internal test functions, which can be used to detect malfunctions to the hardware devices. - TEST SCROLL 2 Internal test of microprocessor START Password: Service After START is pressed, the following screens are displayed in sequence. TEST SCROLL 2A Testing ROM Test PASSED TEST SCROLL 2B Testing RAM Test PASSED TEST SCROLL 2C Testing E2Prom Test PASSED Only if Audit trail option Is installed The message "Test PASSED" is displayed if the test runs correctly. If something wrong is detected, then the message "Test FAILED" is displayed, and the soft key CONTINUE is shown. The operator has to press the key to go on to the next test. A.5.3.3 Test Digital Inputs The next screen is used to check the digital input circuitry. The display shows a 1 if the specific input is closed, 0 if open. If more digital I/O boards are installed, the NEXT soft key appears, allowing the operator to scroll between boards. Slots are numbered 1-3; slot 0 is the motherboard. A-24 REC 4192 Rev B Thermo Fisher Scientific Micro-Tech 3102 - TEST SCROLL 3 Dig input test Slot#0 ----000-NEXT ‘Digit’ (displayed instead of ‘slot#’) identifies the four Digitizer’s inputs. Inputs are shown from left to right. If a board has 16 inputs, two screens are used to show the first and the second half, the lower half is shown first. A.5.3.4 Test Digital Outputs This test shows the status of each digital output and allows the operator to force the output for testing purposes. The output, when forced, stays on until the CLEAR soft key is pressed or the Run Menu is entered. If an output is forced and the scroll key is used for reaching some other menu, the output stays in the forced status until RUN is pressed. This allows the operator to check inputs while outputs are still in the forced status. - TEST SCROLL 4 Dig output test output # 1 : ON/OFF ENTER ON/OFF Password: Service To force an output, enter the desired number followed by ENTER. Then use the ON/OFF key to force it to the ON or OFF status. After the output has been forced, the CLEAR soft key appears in the middle position. Slots are numbered 1-3; slot 0 is the motherboard. WARNING FORCING THE DIGITAL OUTPUTS MAY CAUSE MACHINERY TO START. AFTER THE USER TRIES TO FOURCE AN OUTPUT, THE FOLLOWING MESSAGE DISPLAYS. WARNING EQUIPMENT MAY START CONTINUE ABORT WARNING IF THE USER PRESSES CONTINUE, BE AWARE THE ACTION MAY CAUSE DAMAGE OR INJURY. IF THE USER PRESSES ABORT, THE SYSTEM RETURNS TO THE PREVIOUS SCROLL. REC 4192 Rev B Thermo Fisher Scientific A-25 Micro-Tech 3102 A.5.3.5 Test Current Outputs - TEST SCROLL 5 Current output #1 should be 00.0 mA ENTER CLEAR Default: Min: Max: Password: Service 0.0 mA 0.0 mA 20.0 mA To force the output, enter the desired number of milliamps and press ENTER. Press CLEAR to free the mA channel. Press NEXT key to pass to the next current output channel. A.5.3.6 Test Communication A The following screen allows checking the installed serial lines using a loop back type test. The maximum line number is 2; Transmit must be tied to receive for this test. "Port 1" is standard and "Port 2" is shown only if optional Comm boards are detected. - TEST SCROLL 7 Test Communication A Port 1 Password: Service Port 2 By pressing the PORT 1 or the PORT 2 soft key, the test is initiated. A test pattern is sent out on the TX output and read on the RX input. If the test fails, the message "Test Failed" is shown; otherwise, the message "Test Passed" is displayed. A.5.3.7 Test RS232 To test RS232 the test requires a hardware jumper to be installed between terminals TB3-22 (RX) and TB3-21 (TX). A.5.3.8 Test RS485 To test the RS485 the test requires a hardware jumper to be installed between terminals TB3-21 and TB3-28 to TB3-20 and TB3-29. A.5.3.9 Test Communication B This test is similar to the previous one but works for the field bus version of the communication board. - TEST SCROLL 8 Test communication B Password: Service START A-26 REC 4192 Rev B Thermo Fisher Scientific Micro-Tech 3102 A.5.3.10 Test BCD Input Board If an optional 16In/4Out load out board is detected, the following screen appears. The test is similar to the digital input test. - TEST SCROLL 9 BCD Input test 0000 A.5.3.11 Test BCD Output Board If an optional 16 Out/4 In load out board is detected, the following screen appears. - TEST SCROLL 10 BCD Output test 0000 ENTER CLEAR Default: Min: Max: 0 0 9999 or 7999 if parity check enable The force the outputs, enter a number followed by ENTER . The CLEAR key appears indicating the output is being forced to a value. Pressing CLEAR frees the output. A.5.3.12 Weight Simulation Function The following scrolls are inherent to the weight simulation function. This function allows the operator to simulate a weight trend during the batch phases. The first scroll allows enabling the function. - TEST SCROLL 11 Weight simulation NO CHOICE ENTER Password: Service Default: NO Selections: NO, YES The second scroll defines the speed of increasing and decreasing of the weight during the charge and discharge phases at high speed. The weight variation during the low speed batch phases is automatically determined by the instrument at 50% of the entered value. This value is weight per second. - TEST SCROLL 11A High speed sim rate (W/SEC) ________ W.U. ENTER Default: Min: 1.0 Scale Division Max: Scale Capacity / 100 REC 4192 Rev B Thermo Fisher Scientific Password: Service A-27 Micro-Tech 3102 A.5.3.13 Test the Keyboard and Switches - TEST SCROLL 13 Keyboard + switches Key: --------switches 00000000 Use the RUN key to end the keyboard test. After RUN is pressed, all the keys are executed. A.6. Main Menu 4 The following section defines the input output (I/O), alarms and optionally of the load out batch.. - MAIN MENU 4 Press MENU for more I/O ALARMS DEFINE DEFINE A.6.1. I/O Definition The input output section of the system is fully configurable. All inputs and outputs are conventionally numbered and can be assigned to physical input and output terminals depending on the needs. The following section explains how to configure I/O. However, the standard configuration as provided by the factory is normally satisfactory. A.6.1.1 Define Current Outputs The following menus are shown for configuring the current output(s). Use the CHOICE key to change the variable and the ENTER key to confirm. The NEXT key allows the operator to set up to four (4) current outputs if installed. - I/O DEF SCROLL 1 Current Output define #1 > Net < CHOICES ENTER NEXT Password: Service Default: NONE, Selections: NONE, NET, GROSS, DIFF Or, if more than one scale is defined : Selections: NONE, NET S1, GROSS S1, DIFF S1 (2 Scales) NET S2, GROSS S2, DIFF S2 (2 Scales) NET S3, GROSS S3, DIFF S3 (3 Scales) NET S4, GROSS S4, DIFF S4 (4 Scales) A-28 REC 4192 Rev B Thermo Fisher Scientific Micro-Tech 3102 If the selection of the previous screen is not NONE, the operator can set up the range, delay and damping of the current output. The range is selectable between the standard 0 to 20 mA and 4 to 20 mA both in direct and reverse mode. Select 0-20 or 4-20 if an increase in current is desired for any increase of the variable. Select 20-0 or 20-4 if a decrease of current is desired for any increase of the variable. - I/O DEF SCROLL 1ACurrent out range #1 > 4-20 mA < CHOICES ENTER NEXT Password: Service Default: 4-20 mA, Selections: 0-20 mA, 4-20 mA, 20-0 mA, 20-4 mA Each current output can be delayed. I/O DEF SCROLL 1BCurrent out delay #1 sec ENTER NEXT Default: Min: Max: Password: Service 4 sec 0 sec 300 sec A damping factor can also be selected for each current channel. This damping only affects the current output, not the displayed variable, which has a separate damping factor, selectable in Main Menu 2, Display. - I/O DEF SCROLL 1CCurrent out damping #1 ______ sec ENTER NEXT Default: Min: Max: Password: Operator 2 sec, 0 sec 16 sec UP and DOWN arrows move between range, delay and damping. NEXT moves to the next current output. A.6.1.2 Define Digital Inputs Digital inputs can be programmed. The following screen shows one logical function per time, and allows the user to assign it to a physical input. The NEXT key scrolls between the logical functions. The NC/NO key selects the Normally Open (NO) or Normally Closed (NC) status of the input. Normally Open means the input is inactive when disconnected. To program a function, REC 4192 Rev B Thermo Fisher Scientific A-29 Micro-Tech 3102 scroll with NEXT until the function is displayed, then enter the physical input number and confirm with ENTER; finally scroll with NC/NO until the desired mode is displayed. By assigning a function to 0, the function is disabled. - I/O DEF SCROLL 4 Dig. Input def. Ext Alarm 1 ___ NC ENTER NC/NO NEXT Password: Service The following table shows the available logical selections that can be assigned to any available physical input. Typical field wiring drawings show input wired to the DEFAULT physical input as listed in the table below. Default selection can be assigned to any physical input if desired. External alarms 1, 2 and 3 can be assigned to logical functions not on the selection list. Logical selections should not be reassigned after the physical inputs have been wired. CAUTION LOGICAL INPUTS RETURN TO THE INSTRUMENT IS COLD STARTED. DEFAULT IF THE Appendix Table A-3: Available Logical Selections Selections: A-30 Default: External alarm 1 0 NO (0 = function disabled) External alarm 2 0 NO External alarm 3 0 NO Print rtot 0 NO Print ctot 0 NC Start/Set tare 1 NO Start/Set tare S1 0 NO (Only if more than 1 scale installed) Start/Set tare S2 0 NO (Only if more than 2 scales installed) Start/Set tare S3 0 NO (Only if more than 3 scales installed) Start/Set tare S4 0 NO (Only if more than 4 scales installed) Stop/Reset tare 2 NO Stop/Reset Tare S1 0 NO (Only if more than 1 scale installed) Stop/Reset Tare S2 0 NO (Only if more than 2 scales installed) Stop/Reset Tare S3 0 NO (Only if more than 3 scales installed) Stop/Reset Tare S4 0 NO (Only if more than 4 scales installed) REC 4192 Rev B Thermo Fisher Scientific Micro-Tech 3102 End cycle 4 NO End cycle S1 0 NO (Only if more than 1 scale installed) End cycle S2 0 NO (Only if more than 2 scales installed) End cycle S3 0 NO (Only if more than 3 scales installed) End cycle S4 0 NO (Only if more than 4 scales installed) Abort 3 NO Abort S1 0 NO (Only if more than 1 scale installed) Abort S2 0 NO (Only if more than 2 scales installed) Abort S3 0 NO (Only if more than 3 scales installed) Abort S4 0 NO (Only if more than 4 scales installed) Charge interl. 6 NO Charge interl. S1 0 NO (Only if more than 1 scale installed) Charge interl. S2 0 NO (Only if more than 2 scales installed) Charge interl. S3 0 NO (Only if more than 3 scales installed) Charge interl. S4 0 NO (Only if more than 4 scales installed) Disch. interl. 7 NO Disch. interl. S1 0 NO (Only if more than 1 scale installed) Disch. interl. S2 0 NO (Only if more than 2 scales installed) Disch. interl. S3 0 NO (Only if more than 3 scales installed) Disch. interl. S4 0 NC (Only if more than 4 scales installed) Disch. dev. 5 NO Disch. dev. S1 0 NO (Only if more than 1 scale installed) Disch. dev. S2 0 NO (Only if more than 2 scales installed) Disch. dev. S3 0 NO (Only if more than 3 scales installed) Disch. dev. S4 0 NO (Only if more than 4 scales installed) Auto/Man 8 NO Auto/Man S1 0 NO (Only if more than 1 scale installed) Auto/Man S2 0 NO (Only if more than 2 scales installed) Auto/Man S3 0 NO (Only if more than 3 scales installed) Auto/Man S4 0 NO (Only if more than 4 scales installed) Reset alarms 1 NO REC 4192 Rev B Thermo Fisher Scientific A-31 Micro-Tech 3102 Reset rtot 0 NO Reset ctot 0 NO Remote cntrl 0 NO (only if high level communication) Appendix Table A-4: Mother Board Inputs PHYSICAL INPUT NUMBER ASSIGNED FUNCTION 2 TB2-12 TB2-13 3 TB2-14 TB2-15 4 TB2-16 TB2-17 5 TB2-18 TB2-19 Additional assignable logical inputs from the above table can be selected by adding I/O boards. Available are 4in/16out, 16in/4out (option) or 20in/20out by adding both boards. Appendix Table A-5: Digital Input/Output Board Inputs PHYSICAL INPUT NUMBER 6 A-32 ASSIGNED FUNCTION 4IN/16OUT ONLY J15 - 2 INSTALLED BOARDS 16IN/4OUT 4IN/16OUT ONLY AND 16IN/4OUT J16 - 17 J15 – 2 7 J15 - 15 J16 - 5 J15 - 15 8 J15 - 3 J16 - 18 J15 – 3 9 J15 - 16 J16 - 6 J15 - 16 10 J16 - 19 J16 - 17 11 J16 - 7 J16 – 5 12 J16 - 20 J16 - 18 13 J16 - 8 J16 – 6 14 J16 - 21 J16 - 19 15 J16 - 9 J16 – 7 16 J16 - 22 J16 - 20 17 J16 - 10 J16 – 8 18 J16 - 23 J16 - 21 19 J16 - 11 J16 – 9 20 J16 - 24 J16 - 22 21 J16 - 12 J16 - 10 22 J16 - 23 23 J16 - 11 24 J16 - 24 25 J16 - 12 REC 4192 Rev B Thermo Fisher Scientific Micro-Tech 3102 WARNING CHANGING THE DEFINITION OF THE DIGITAL INPUTS MAY CAUSE MACHINERY TO START. AFTER THE USER TRIES TO CHANGE A DEFINITION, THE FOLLOWING MESSAGE IS DISPLAYED. WARNING EQUIPMENT MAY START CONTINUE ABORT IF THE USER PRESSES CONTINUE, BE AWARE THE ACTION MAY CAUSE DAMAGE OR INJURY. IF THE USER PRESSES ABORT, THE SYSTEM WILL RETURN TO THE PREVIOUS SCROLL. A.6.1.3 Define Digital Outputs Digital outputs can be programmed. The following screen shows one logical function per time, and allows the user to assign it to a physical output. The NEXT key scrolls between the logical functions. The NC/NO key selects the Normally Open (NO) or Normally Closed (NC) status of the output. Normally Open means the output is not energized in normal conditions. To program a function, scroll with NEXT until the function is displayed, then enter the number of the physical output and confirm with ENTER; finally scroll with NC/NO until the desired mode is displayed. By assigning a function to 0, the function is disabled. - I/O DEF SCROLL 5 Dig. Output def. Alarm: ____ NC ENTER NC/NO NEXT Password: Service The following table shows the available logical selections that can be assigned to any available physical output. Typical field wiring drawings and customer specific field wiring drawings show outputs wired to the DEFAULT physical output as listed in the table below. Default selections can be reassigned to any physical output if desired. Logical selections should not be reassigned after the physical outputs have been wired. CAUTION LOGICAL SELECTIONS RETURN TO THE DEFAULT IF THE INSTRUMENT IS COLD STARTED. REC 4192 Rev B Thermo Fisher Scientific A-33 Micro-Tech 3102 Appendix Table A-6: Available Logical Assignment Selections A-34 Comp. 1 Default 9 NO (Only if comp. 1 defined) Comp. 2 10 NO (Only if comp. 2 defined) Comp. 3 11 NO (Only if comp. 3 defined) Comp. 4 12 NO (Only if comp. 4 defined) Comp. 5 13 NO (Only if comp. 5 defined) Comp. 6 14 NO (Only if comp. 6 defined) Comp. 7 15 NO (Only if comp. 7 defined) Comp. 8 16 NO (Only if comp. 8 defined) Comp. 9 17 NO (Only if comp. 9 defined) ………………………………………….. ……. …………………………………………. Comp. 40 0 NO (Only if comp. 40 defined) Shut down 2 NC Ready 3 NO High load 0 NO (Only if high load option enabled) High load S1 0 NO (Only if more than 1 scale installed) High load S2 0 NO (Only if more than 1 scale installed) High load S3 0 NO (Only if more than 2 scales installed) High load S4 0 NO (Only if more than 3 scales installed) Low load 0 NO (Only if low load option installed)) Low load S1 0 NO (Only if more than 1 scale installed) Low load S2 0 NO (Only if more than 1 scale installed) Low load S3 0 NO (Only if more than 2 scales installed) Low load S4 0 NO (Only if more than 3 scales installed) H rate 4 NO H rate S1 0 NO (Only if more than 1 scale installed) H rate S2 0 NO (Only if more than 1 scale installed) H rate S3 0 NO (Only if more than 2 scales installed) H rate S4 0 NO (Only if more than 3 scales installed) L rate 5 NO REC 4192 Rev B Thermo Fisher Scientific Micro-Tech 3102 L rate S1 0 NO (Only if more than 1 scale installed) L rate S2 0 NO (Only if more than 1 scale installed) L rate S3 0 NO (Only if more than 2 scales installed) L rate S4 0 NO (Only if more than 3 scales installed) Charge end 6 NO Charge end S1 0 NO (Only if more than 1 scale installed) Charge end S2 0 NO (Only if more than 1 scale installed) Charge end S3 0 NO (Only if more than 2 scales installed) Charge end S4 0 NO (Only if more than 3 scales installed) Disch. end 7 NO Disch end S1 0 NO (Only if more than 1 scale installed) Disch end S2 0 NO (Only if more than 1 scale installed) Disch end S3 0 NO (Only if more than 2 scales installed) Disch end S4 0 NO (Only if more than 3 scales installed) Cycle end 8 NO Cycle end S1 0 NO (Only if more than 1 scale installed) Cycle end S2 0 NO (Only if more than 1 scale installed) Cycle end S3 0 NO (Only if more than 2 scales installed) Cycle end S4 0 NO (Only if more than 3 scales installed) Need refill 0 NO Need ref S1 0 NO (Only if more than 1 scale installed) Need ref S2 0 NO (Only if more than 1 scale installed) Need ref S3 0 NO (Only if more than 2 scales installed) Need ref S4 0 NO (Only if more than 3 scales installed) There are 5 outputs, 4 assignable and 1 non-assignable Fault output standard on the motherboard. REC 4192 Rev B Thermo Fisher Scientific A-35 Micro-Tech 3102 Appendix Table A-7: Relay Board and Motherboard Outputs PHYSICAL OUTPUT NUMBER FAULT RELAY ASSIGNED FUNCTION FAULT RELAY BOARD COM NO 1 2 3 4 5 6 2 7 8 3 9 10 1 PHYSICAL OUTPUT NUMBER SOLID STATE ASSIGNED FUNCTION 4 ____________ NC Mother Board Terminals TB1-5 Power TB1-6 Signal TB1-7 COM Additional assignable logical selections from the above table can be selected by adding I/O boards. Available are 4in/16out or 16in/4out (option) by adding both boards. Appendix Table A-7: Digital Input/Output Board Outputs PHYSICAL OUTPUT NUMBER 5 A-36 ASSIGNED FUNCTION 4IN/16OUT ONLY J15-17 INSTALLED OPTIONS 16IN/4OUT 4IN/16OUT ONLY AND 16IN/4OUT J16 - 2 J16 - 2 6 J15 - 5 J16 - 15 J16 - 15 7 J15 - 18 J16 - 3 J16 - 3 8 J15 - 6 J16 - 16 9 J15 - 19 J15 - 17 10 J15 - 7 J15 - 5 11 J15 - 20 J15 - 18 12 J15 - 8 J15 - 6 13 J15 - 21 J15 – 19 14 J15 - 9 J15 – 7 15 J15 - 22 J15 – 20 16 J15 - 10 J15 – 8 17 J15 - 23 J15 – 21 18 J15 - 11 J15 – 9 19 J15 - 24 J15 – 22 20 J15 - 12 J15 – 10 J16 - 16 21 J15 – 23 22 J15 – 11 23 J15 – 24 24 J15 – 12 REC 4192 Rev B Thermo Fisher Scientific Micro-Tech 3102 WARNING CHANGING THE DEFINITION OF THE DIGITAL OUTPUTS MAY CAUSE MACHINERY TO START AFTER THE USER TRIES TO CHANGE A DEFINITION. THE FOLLOWING MESSAGE IS DISPLAYED. WARNING EQUIPMENT MAY START CONTINUE ABORT IF THE USER PRESSES CONTINUE, BE AWARE THE ACTION MAY CAUSE DAMAGE OR INJURY. IF THE USER PRESSES ABORT, THE SYSTEM RETURNS TO THE PREVIOUS SCROLL. A.6.1.4 Define BCD Output Data If an optional load out board is installed, the user can select the related BCD variable. - I/O DEF SCROLL 6 BCD Output variable > Net < CHOICES ENTER Password: Service Default: NONE Selections: NONE, NET, GROSS, DIFF Or, if more than one scales are enabled : Selections: NONE, NET S1, GROSS S1, DIFF S1, (2 scale) NET S2, GROSS S2, DIFF S2, (2 scale) NET S3, GROSS S3, DIFF S3, (3 scale) NET S4, GROSS S4, DIFF S4, (4 scale) If a selection other than NONE is made, the following screens allow the user to define the polarity and the parity check of the BCD output. The polarity selection reverses the signals from NO to NC and vice versa. If a parity criterion is selected, the most significant bit of the BCD output is used for parity check. - I/O DEF SCROLL 6ABCD Output polarity > Positive < CHOICES ENTER Password: Service Default: NEGATIVE Selections: POSITIVE, NEGATIVE REC 4192 Rev B Thermo Fisher Scientific A-37 Micro-Tech 3102 - I/O DEF SCROLL 6BBCD Output parity > Yes < CHOICES ENTER Password: Service Default: NO Selections: NO, YES A.6.1.5 Define BCD Input Data If a optional load out input board is installed, the operator can select the related variable.. I/O DEF SCROLL 7 BCD input variable > Thresholds < CHOICES ENTER Password: Service Default: NONE Selections: NONE, RECIPE (R), CYCLE (C), SET POINT (S), R+C, R+C+S If a selection other than NONE is made, the following screen allows the operator to define the polarity of the BCD input. The polarity selection reverses the signals from NO to NC and vice versa. - I/O DEF SCROLL 7ABCD input polarity > Positive < CHOICES ENTER Password: Service Default: NEGATIVE Selections: POSITIVE, NEGATIVE A.6.2. Alarms Definition The alarms of the Micro-Tech 3102 can be programmed. Process alarms such as low and high rate can be set to the desired range. In addition, all alarms can be defined to be: • ALARM-When an alarm occurs, the front panel ALARM status indicator illuminates. An ALARM message flashes in the lower, right hand RUN display. Pressing ALARM displays the alarm. • Pressing RESET clears the alarm message if the alarm parameter has cleared. If the alarm parameter has not cleared, the message "ACK" appears when RESET is pressed. When the alarm parameter clears, the alarm indication clears. Pressing RUN at any time returns the operator to the RUN menu. Alarms can be automatically printed if the print option is enabled. A-38 REC 4192 Rev B Thermo Fisher Scientific Micro-Tech 3102 • • A.6.2.1 SHUT DOWN The alarm handler operates as above except the READY status indicator goes off a the same time as the ALARM status indicator comes on. In the I/O definition scroll, alarm and ready can be assigned to N/C or N/O physical outputs. The output activates and deactivates at the same time as the front panel status indicators. NONE Alarm is deactivated. Define High and Low Load Alarm - ALARM SCROLL 1 High load alarrm Password: Operator > NO < CHOICE ENTER SCALE # Default: NO Selections: YES, NO If the selection in the previous screen was YES, enter the high load set points for the alarm. The UNITS key allows the operator to specify the set points in engineering units. The % key selects set points in percent referring to scale capacity - ALARM SCROLL 1A High load set % ENTER UNITS SCALE # Default: Min: Max: Password: Operator 100% 0% 105 % Enter the desired delay time before the alarm is monitored. - ALARM SCROLL 1B High load delay s ENTER SCALE # Default: Min: Max: Password: Operator 2 sec 0 sec 90 sec Use the CHOICE key to turn on or off the low load alarm.Confirm with ENTER. - ALARM SCROLL 1 Low load alarm > no < CHOICE ENTER SCALE # REC 4192 Rev B Thermo Fisher Scientific Password: Operator A-39 Micro-Tech 3102 Default: NO Selections: YES, NO If the selection in the previous screen was YES, enter the low load set points for the alarm. The UNITS key allows the operator to specify the set points in engineering units. The % key selects set points in percent referenced to scale capacity. - ALARM SCROLL 1A Low load set _________ % ENTER UNIT SCALE # Default: Min: Max: Password: Operator 10 % 0% 105% Enter the desired delay time before the alarm is monitored. - ALARM SCROLL 2B Low load delay _________ s ENTER SCALE # Default: Min: Max: A.6.2.2 Password: Operator 2s 0s 90 s Setup Alarm Modes The following message is displayed for 3 seconds. - ALARM SCROLL 2 ALARM DEFINITION Use NEXT key or enter alarm number After 3 seconds, the following screen is displayed. The user can use the CHOICE soft key to select the desired mode between ALARM (just a warning message), SHUT DOWN (Warning plus fault output) and NONE (no action).Confirm with ENTER. Use the NEXT key to scroll between alarms, or enter the alarm number. - ALARM NUMBER # _____ Clock Fail Set as > ALARM < CHOICE ENTER NEXT A-40 Password: Service REC 4192 Rev B Thermo Fisher Scientific Micro-Tech 3102 A.6.3. Alarm List 1 CLOCK FAIL 2-6 LOAD CELL FAIL S# 7 RAM FAIL 8 ROM FAIL 9-13 HIGH LOAD S# 14-18 LOW LOAD S# 19 WARM START 20 COLD START 21 POWER DOWN DURING CALIBRATION 22-26 CALIB TIME S# 27-29 EXTERNAL ALARM n 30-35 HW CONF. CHANGED 36 BCD OVERFLOW 37 MATH ERROR 38 PRINTER ERROR 39 COMMUNICATION ERROR 40-44 BAD START WEIGHT S# 45-49 STOP CYCLE S# 50-54 END CYCLE S# 55-59 ABORT CYCLE S# 60-64 COMP. TIME OUT 65-69 DEVIATION S# 70 ALLEN-BRADLEY RI/O ERROR 71 PROFIBUS-DP ERROR A.7. MAIN MENU 5 Main Menu 5 is dedicated to the serial communication on the motherboard and for optional board communication. COMM A is used to set up the serial line and PRINT for setting up the printer output.COMM B is used for the optional communication B (fieldbus) board. - MAIN MENU 5 Press MENU for more COMM A COMM B REC 4192 Rev B Thermo Fisher Scientific PRINT A-41 Micro-Tech 3102 A.7.1. Communication A Scroll The MT 3102 has one serial channel, which can be configured using jumpers as an RS232 or an RS485 channel. The serial channel can be used for printing or for a serial communication with an intelligent device such as a PLC or a PC. An additional COMM A board can be installed and programmed, typically one for the printer and one for networking. The following screens define the communication parameters for the first and the second channel. COMM A SCROLL 1 Baud Rate port #1 > 2400 < CHOICE ENTER Password: Service Default: 9600 Selections: 110, 150, 300, 600, 1200, 2400, 4800, 9600, 19200 - COMM. A SCROLL 2 Set parity port #1 > No < CHOICE ENTER Password: Service Default: NO Selections: NO,EVEN, ODD - COMM. A SCROLL 3 Stop bits port #1 > 1 stop bit < CHOICE ENTER Password: Service Default: 1 STOP BIT Selections: 1 STOP BIT, 2 STOP BITS - COMM. A SCROLL 4 Wordlength port #1 > 8 bits < CHOICE ENTER Password: Service Default: 8 BITS Selections: 7 BITS, 8 BITS Some commonly used protocols are implemented in the system. See Communication Protocols, REC 3949, for the details. Possible selections are: • PC-MASTER -Thermo Scientific proprietary protocol: Multi Drop, Master Slave. • SIEMENS 3964R - A proprietary protocol of Siemens. Point to point, Multi Master. • ALLEN BRADLEY DF1 - A proprietary protocol of Allen Bradley. Multi Drop, Master Slave. A-42 REC 4192 Rev B Thermo Fisher Scientific Micro-Tech 3102 • • MODBUS - A proprietary protocol of AEG. Multi Drop, Master Slave. PRINTER - Not a protocol, selects printer output. -COMM. A SCROLL 5 Protocol port #1 > PC MASTER < CHOICE ENTER Default: Selections: Password: Service MODBUS PC-MASTER, SIEMENS 3964R, ALLEN BRADLEY DF1, MODBUS, PRINTER If a second communication A board is installed, the following screen appears. These screens operate exactly as the ones dedicated to communication 1. -COMM. A SCROLL 6 Baud rate port #2 > 2400 < CHOICE ENTER Default: Selections: Password: Service 9600 110, 150, 300, 600, 1200, 2400, 4800, 9600, 19200 -COMM. A SCROLL 7 Parity port #2 Password: Service > NO < CHOICE ENTER Default: NO Selections: NO, EVEN, ODD -COMM. A SCROLL 8 Stop bits port #2 > 1 stop bit < CHOICE ENTER Default: Selections: 1 STOP BIT 1 STOP BIT, 2 STOP BIT - COMM. A SCROLL 9Wordlength port #2 > 8 bits < CHOICE ENTER Default: Selections: REC 4192 Rev B Thermo Fisher Scientific Password: Service Password: Service 8 BITS 7 BITS, 8 BITS A-43 Micro-Tech 3102 -COMM. A SCROLL 10 Protocol port #2 > PC MASTER < CHOICE ENTER Default: Selections: Password: Service PRINTER PC MASTER, SIEMENS 3964R, ALLEN BRADLEY DF1, MODBUS, PRINTER If the selected protocol is not PRINTER on one of two lines, the following screens define the use of the CTS handshake signal, the ADDRESS of the device in the multi drop line, and the access permission from the remote supervisor. If NONE is selected, the supervisor has full access to the device. If LIMITED is selected, the supervisor can only access those variables that are accessible with the OPERATOR password. If PROTECTED is selected, the unit can only be read by the supervisor. - COMM. A SCROLL 11 Cts > Disactive < CHOICE ENTER Default: Selections: DISACTIVE DISACTIVE, ACTIVE - COMM. A SCROLL 12Address __________ ENTER SCALE # Default: Min: Max: Password: Service 1, 2 for scale 2, 3 for scale 3, 4 for scale 4 1 255 - COMM. A SCROLL 13Access lev. > None < CHOICE ENTER Default: Selections: A.7.2. Password: Service Password: Service NONE NONE, LIMITED, PROTECTED Communication B (Field Bus) Refer to the Field Bus manual if this option is installed. A-44 REC 4192 Rev B Thermo Fisher Scientific Micro-Tech 3102 A.7.3. Print The Micro-Tech 3102 has a fully programmable printer format. The following section explains how to program it according to the specific needs. 1. Define Handshaking The system can be configured to operate without a handshake (NONE), or using the Clear to Send signal (CTS) or the XON-XOFF sequence. Refer to the printer instruction manual to define which selection is required. The selection NONE is only used for testing purposes. It is not recommended for normal use. If NONE is selected, the system is not able to recognize if the printer is on line or not, or if the paper is empty. The most commonly used protocol is the CTS, which is a signal generated by the printer to indicate whether it is ready to receive data or not. -PRINTER SCROLL 1 Handshaking > None < CHOICE ENTER Default: Selections: Password: Service NONE NONE, CTS, XON-XOFF Different printers use different end of line patterns. Select the one you need for your printer. -PRINTER SCROLL 2 End of line > CR + LF < CHOICE ENTER Default: Selections: Password: Service CR + LF CR, LF, CR+LF Some printers cannot accept characters while they are printing. In some cases, the handshake is not well controlled by the printer, so a delay at end of line is helpful. -PRINTER SCROLL 3 Delay end of line ______ sec ENTER Default: Min: Max: Password: Service 0 sec 0 sec 5 sec It is possible to define if at the end of the report a FORM FEED character must be sent to the printer. This character is used by most printers to move paper at the end of the page. If NO is selected, a normal END OF LINE character(s) is (are) printed at the end of the report. REC 4192 Rev B Thermo Fisher Scientific A-45 Micro-Tech 3102 PRINTER SCROLL 4 Form Feed > NO < CHOICE ENTER Default: Selections: A.7.3.1 Password: Service NO NO, YES Optional Reports By selecting YES in the following screen, the system is instructed to print a batch report at the end of a recipe execution. PRINTER SCROLL 5 Print batch > NO < CHOICE ENTER Default: Selections: Password: Service NO NO, YES By selecting YES in the following screen, the system is instructed to print one line each time a new alarm condition occurs. The alarm is printed as follows : xx-xx-xxxx yy:yyz kkkkkkkkkkkkkkkkkkkk Where: xx-xx-xxxx Day, Month, Year, printed according to the local format as defined in Main Menu 2 - yy:yyz Hour, Minutes, am/pm printed according to the local format as defined in Main Menu 2 - kkkkkkkkkkkkkkkkkkkk Alarm message, same message appearing on the screen For example: 01-22-1998 8:14a Clock Fail - PRINTER SCROLL 6 Print alarms > No < CHOICE ENTER Default: Selections: A-46 Password: Operator NO YES, NO REC 4192 Rev B Thermo Fisher Scientific Micro-Tech 3102 Define if you want to add a heading string in your report. String can be used to add the Customer name as well as other information that you want to include in the print format. - PRINTER SCROLL 7 Contents string #1 > yes < CHOICE ENTER Default: Selections: Password: Operator NO. NO, YES If you selected YES, next scroll is displayed. Use the alphanumeric keypad to enter the string (20 digits). Press the numeric key corresponding to the letter that you want to type. All the times you press a new key, cursor moves to the right on place. If you need to use two times the same key (example for double letters), move the cursor right using the arrow keys (left and right soft keys). - PRINTER SCROLL 7A Contents String #1 ____________________ < ENTER > Default: = Password: Operator = Define if you want to add a second heading string in your report. - PRINTER SCROLL 8 String #2 < yes > CHOICE ENTER Default: Password: Operator NO Selections: YES, NO If you selected YES, next scrolls are displayed. - PRINTER SCROLL 8A Contents String #2 ____________________ < ENTER > Default: = Password: Operator = There is a third string. If only scale is defined, it is a third heading string exactly as the previous two. If more scale is defined, it may be used to define a scale identifier. String definition is different for each scale and it is used as scale heading. REC 4192 Rev B Thermo Fisher Scientific A-47 Micro-Tech 3102 - PRINTER SCROLL 11 String #3 < yes > CHOICE ENTER Default: Password: Operator NO Selections: YES, NO If you selected YES, the next scroll is displayed. SCALE# key allows the operator to select the scale. - PRINTER SCROLL 11A Contents String #3 ____________________ SCALE# Default: = Password: Operator = If 1 scale is defined only or if more scales, when numeric or alphanumeric key is pressed, ENTER and ARROWS keys in the fourth line of the display. A.8. MAIN MENU 6 Main Menu 6 is dedicated to Audit Trails and Linearization. - MAIN MENU 6 Press MENU for more AUDIT TRAIL LINEAR A.8.1. Audit Trails This menu is only displayed if the Audit Trails option is installed. The Audit Trails function is a method for recording all changes in setup data for creating a permanent record of the history of the scale. This is a specific requiorement of the W&M in USA for approved scales, and is an alternative to the European method, which is to seal the unit. Instead of preventing change of parameters, the Audit Trails method allows changes but keeps track of them. All the time the operator changes a value which affects weighing, the new parameter is recorded with time and date. Also, tracking of same functions or events is kept. A list of recorded variables and functions is reported below. All changes can be printed when required. Entering in the menu, the following screen appears for a short time (3 seconds) A-48 REC 4192 Rev B Thermo Fisher Scientific Micro-Tech 3102 - AUDIT TRAILS Use scroll keys or enter trail number After 3 seconds, the next screen is shown: TRAIL EVENT No. 000 hh:mm mm-dd-yyyy ss nnnnnn = vvvvvvv/O (ld) ss nnnnnn = vvvvvvv/N (ew) hh:mm mm-dd-yyyy ss nnnnnn vvvvvv Time of change Date of change, the format may vary depending on the Countr Country. Identifies the scale (only if more scales are defined) Parameter’s name Parametr’s value, before change (old) and after change (new). The user can scroll between events which are displayed in order of date and time. The user can also enter a number to display a specific event. Audit Trails Variables and Functions List Parameter’s Name Meaning w unit Weight unit t unit Total unit damp w Damping weight s cap Scale capacity s div Scale division Ic sen Load cell sensitivity lc cap Load cell capacity lc nr Load cells number lc r1 Load cell 1 resistance ………………………… ……………………… lc r6 Load cell 6 resistance test w Test weights for WTS span calib. rcal r Rcal resistance for Rcal span calib. line 1 Linearization factor 1 (0-10%) REC 4192 Rev B Thermo Fisher Scientific A-49 Micro-Tech 3102 A.8.2. …………………………………… ……………………………………. line 10 Linearization factor (90-100%) span Span zero Zero Function’s Name Meaning Autozero Autozero function has been executed Autospan Rcal Autospan with Rcal method has been excecuted Autospan WTS Autospan with test weight method has been executed Cold Start All instrument data has been lost Linearization Manual linearization can be accomplished by applying a known test weight(s) or loading the bin with pre-weighed material and calculation the scale error. Pressing the ACQuire soft key display the scale weight for the applied known weight. The operator can ten enter in a correction factor. Up to five correction factors can be installed in any order and will be internally sorted by scale loading. Linearization must first enable in Main Menu 6 before any menu screens will appear. NOTE: Prior to performing a manual linearization, the scale should be properly zeroed. 1. Press the MENU key repeatedly until Main Menu 6 appears. - MAIN MENU 6 Press MENU for more LINEAR Press LINEAR soft key to access the Linearization scroll. The following screen appears. Press CHOICE for selections, YES to enable, or NO to disable linearization. Once enabled, no linearization is done until the operator manually enters the linearization factors. - LINEARIZATION 1 Linearization NO CHOICE ENTER Password: Service Default: NO Selections: YES, NO A-50 REC 4192 Rev B Thermo Fisher Scientific Micro-Tech 3102 NO turns off linearization and sets all factors to 1.00. YES turn on linearization. 2. Set linearization to NO and return to the RUN screen. 3. Apply bin loading at the points to be linearized. Record the indicated weight for each point. 4. Calculate the correction factor for each point using the following formula : Correction Factor = Actual or reference weight / Displayed weight 5. Enter linearization factors Once the factors have been computed, they must be entered. Press the MENU key repeatedly until the LINEAR soft key is displayed. Press this soft key and then DOWN ARROW. Set linearize to YES, press ENTER. Press the DOWN ARROW key to LINEARIZ #1. Type in the first weight recorded in Step 4 and press ENTER - LINEARIZ #1 Weight 0.0 lb Fact. 1.00000 ENTER WTS If ENGLISH or MIXED Default: Min: Max: 0.0 lbs 0.0 lbs 500.0 lbs If METRIC Default: Min: Max: 0.0 lbs 0.0 lbs 226.8 lbs Type in the first factor calculated in Step 4 and press ENTER If you enter 1.000 (default value), the load will not be corrected in that portion of the range. A number lower than 1.000 will reduce the span, while a number larger than 1.000 will increase the span. Default: Min: Max: 1.000000 0.000000 1.500000 Press the DOWN ARROW. Repeat Step 5 for all remaining calculated factors. REC 4192 Rev B Thermo Fisher Scientific A-51 Micro-Tech 3102 **** THIS PAGE LEFT BLANK INTENTIONALLY **** A-52 REC 4192 Rev B Thermo Fisher Scientific Appendix B Micro-Tech 3102 Cycle Sequence B.1. Overview Purpose of this document is to give to the user an overview of all the elements inherent to the batch and a guide to understand and solve all the situation that could happen during a cycle. Moreover, this document can be useful also for who is doing the first initialization of the system. The order on which the arguments are explained is the logical order on which the user has to approach the configuration of the instrument. The Mod.3102 is an instrument able to handle a whole till four scales. In its maximum configuration it can handle 4 scales and 40 components. In the following sections will be considered the functioning with a single scale, for multiscale mode refers section 7. Interface with the system is done through programmable digital and analog inputs and outputs. The instrument can be expanded, installing optional boards in order to fit in the best way the system characteristics. The following table sums up the maximum dotation of the instrument: Scales number 4 Components 40 Digital inputs 52 Digital outputs 52 Analog outputs 4 BCD inputs 16 multiplexed (4 digits) BCD outputs 16 multiplexed (4 digits) Recipes 100 Recipes lines 500 B.2. Definition of the components All the elements of the system, handled by the instrument by means of digital output, that determine, when activated, a variation of weight on the scale are considered components by the instrument. That means that also discharge and refill devices are components. Each component we want to use in your system should be previously defined, that means that a series of data should be entered to tell to the instrument how to handle them. These data are briefly listed below: Name It is a 6 digit alphanumerical string of identification of the component. REC 4192 Rev B Thermo Fisher Scientific B-1 Micro-Tech 3102 Type Is the main characteristic of the component, from this selection depends the sequence to start when the component is met in the running recipe. The component types are : CHARGE BATCH, DISCHARGE BATCH, DISCHARGE REFILL and TIME BASED, they are explained in detail in the next sections. By default the type selection is NOT USED, a component is defined only when the component type has been selected. A following data are not displayed before this operation. Next data are different in basis of the type of component selected: CHARGE BATCH AND DISCHARGE BATCH COMPONENT Setpoint source In case the system is provided by a BCD input, it is possible to define if the component setpoints should be manually entered in the recipe (LOCAL) or read from an external preset (BCB INP) Preset Define the amount of material to be dosed at low rate Cut off mode Define how to handle the queue of material after component deactivation. Choices are: MANUAL, the amount of material is manually entered AUTO, the queue is computed by the instrument with subsequent approach method. Cut off value Is the amount of material of the queue Cut off max corr If cut off mode is AUTO, is the maximum value that the queue can reach. Start delay It is a delay before the activation of the component Stabilization time It is a delay at the end of the component batch before totals are updated. Max component time Is the maximum time for component batch DISCHARGE COMPONENT Automatic at recipe end ? Defines if this component should be executed automatically at the end of each recipe. This has the same effect to define the component in all the recipes, but it is surely more practice. Naturally, it is possible to define only one component, if you select YES here, this scroll will not appear in other component definitions. B-2 REC 4192 Rev B Thermo Fisher Scientific Micro-Tech 3102 Discharge interlock Only if is the end batch component (see above) Defines if the instrument must wait for the discharge interlock input before to start the discharge and, in this case, if this input should stay fix for all the batch or not. End discharge Only if it is the end batch component (see above). Defines if at the end of the batch the end discharge output must be activated and, in this case, if should be steady or simply a pulse. Start delay It is a delay before the activation of the component. Stabilization time It is a delay at the end of the component batch. Max component time Is the maximum time for the component batch. REFILL COMPONENT Automatic at recipe end ? Defines if this component should be executed automatically at the end of each recipe. This has the same effect to define the component in all the recipes, but it is surely more practice. Naturally, it is possible to define only one component, if you select YES here, this scroll will not appear in other component definitions. High refill setpoint Only if it is the end batch component (see above) Defines the amount of material to refill Charge interlock Only if it is the end batch component (see above). Defines if the instrument must wait for the charge interlock input before to start the refill and, in this case, if this input should stay fix for all the batch or not. End charge Only if it is the end batch component (see above). Defines if at the end of the batch the end charge output must be activated and , in this case, if it should be steady or simply a pulse. Start delay It is a delay before the activation of the component. Stabilization time It is a delay at the end of the component batch. Max component time Is the maximum time for the component batch. REC 4192 Rev B Thermo Fisher Scientific B-3 Micro-Tech 3102 TIME BASED Start delay It is a delay before the activation of the component. Stabilization time It is a delay a the end of the component batch Max component time Is the maximum time for the component batch The instrument is able to handle up to 40 components. In SCALE DATA menu is possible to define the max number of components required by the system. Its purpose is to avoid to display and print data of never used components. The last operation we have to do to complete the components definitions is to assign them an output, this operation will be explained in section B.4 “Definition of the I/O”. B.2.1 Charge Batch Component A CHARGE BATCH component is a component from which a defined amount of material is extract into the scale. The extraction procedure takes place in two phases, the first at high rate and second at low rate. In the second phase the rate of extraction decreases to allow a best accuracy. The PRESET value defined in the component data determines when the low rate phase should start. The accuracy is checked at the end of the batch, if the difference between the setpoint and the quantity of material extracted is higher then a defined value an alarm is generated. B.2.2 Discharge Batch Component A DISCHARGE BATCH component is a component that when active causes a loss of material from the scale. The amount of material to exctract from the scale is defined in the recipe. Also in this case the extraction procedure takes place in two phases, the first at high rate and a second at low rate. In the second phase the rate of extraction decreases to allow a best accuracy. The PRESET value defined in the component data determines when the low rate phase should start. The accuracy is checked at the end of the batch, if the difference between the setpoint and the quantity of material extracted is higher then a defined value an alarm is generated. B.2.3 Discharge Component A DISCHARGE component is used to empty the scale, the component will stay active until the weight on the scale reach the zero weight value. The discharge is all the same rate and there is not deviation check at its end. Zero weight value is defined in the SCALE DATA scroll. B.2.4 Refill Component A REFILL component is used to refill the scale. It is normally used in recipe in which there are DISCHARGE BATCH components. When a REFILL component is defined in a recipe, the instrument asks for its mode of operation. There are two possibilities: B-4 REC 4192 Rev B Thermo Fisher Scientific Micro-Tech 3102 FORCE, when encountered in the recipe, the component is activated if the weight in the scale is lower then a defined threshold of weight. Material will drop into the scale until the threshold has been reached. AUTO, before a discharge batch cycle the instrument checks if there is enough material into the scale. If not, the REFILL component is activated until the refill threshold has been reached. So the refill is automatically started only if necessary. In any case the refill is done at a fixed rate and there is not deviation check at its end. B.2.5 Time Based Component The time based are components activated for a defined period. They do not have a weight set point to reach but only a time to be activate. This kind of component can be used for example to have a mixer running in between two components. B.3. Definition of the recipe When all the components you need have been defined, you can precede defining a recipe. Still pressing the RECIPE key we can accede to the RECIPE DEFINITION scroll. A recipe is composed by a series of data, the first two are: Recipe name It is a 8 digit alphanumerical string of identification of the recipe. The other data are organized in recipe lines. A line contains all informations regarding a single batch phase. When a recipe is started, the instrument reads and executes line per line all the recipe, each line should contain a component number and all the parameters that instrument needs for its handling. In detail the data for line are: Component number Enter the component to be activated in this phase of the recipe. Then, in basis of the type of selected component: CHARGE BATCH COMPONENT Set point Defines the amount of material to batch out. Only if set point source selection in component definition is LOCAL. Max deviation Defines the maximum deviation between the set point and the amount of material batch out. Label Gives to the instrument information about how to handle this phase of the batch. The operator has to enter a number, this number is obtained adding a constant number for each option he want to activate. The table below resumes the available options and the corresponding number: REC 4192 Rev B Thermo Fisher Scientific B-5 Micro-Tech 3102 Discharge interlock End discharge Restart batch if neg err. - not used - 0 - pulse - 4 - steady - 8 - not used - 0 - pulse - 16 - steady - 32 - yes - 40 - no - 0 Charge interlock Defines if the instrument must wait for the charge interlock input before to start the batch and, in this case, if this input should stay fix for all the batch or not. End charge Defines if at the end of the batch the end charge output must be activated and, in this case, if it should be steady or simply a pulse. Restart batch if negative error At the end of the batch, after stabilization time, if batched weight is less then the set point, the batch can be restarted until the set point is reached. DISCHARGE BATCH COMPONENT Set point Defines the amount of material to batch out. Only if set point source selection in component definition is LOCAL. Max deviation Defines the maximum deviation between the set point and the amount of material batch out. Label Gives to the instrument information about how to handle this phase of the batch. The operator has to enter a number, this number is obtained adding a constant number for each option he want to activate. The table below resumes the available options and the corresponding number: Discharge interlock End discharge Restart batch if neg err. B-6 - not used - 0 - pulse - 4 - steady - 8 - not used - 0 - pulse - 16 - steady - 32 - yes - 40 - no - 0 REC 4192 Rev B Thermo Fisher Scientific Micro-Tech 3102 Discharge interlock Defines if the instrument must wait for the discharge interlock input before to start the batch end, in this case, if this input should stay fix for all the batch or not. End discharge Defines if at the end of the batch the end charge output must be activated and, in this case, if it should be steady or simply a pulse. Restart batch if negative error At the end of the batch, after stabilization time, if batched weight is less then the set point, the batch can be restarted until the set point is reached. DISCHARGE COMPONENT Label Gives to the instrument information about how to handle this phase of the batch. The operator has to enter a number, this number is obtained adding a constant number for each option he want to activate. The table below resumes the available options and the corresponding number: Discharge interlock - not used 0 - pulse 4 - steady 8 End discharge - not used 0 - pulse 16 - steady 32 Discharge interlock Defines if the instrument must wait for the discharge interlock input before to start the batch and, in this case, if this input should stay fix for all the batch or not. End discharge Defines if at the end of the batch the end charge output must be activate and, in this case, if it should be steady or simply a pulse. REFILL COMPONENT Label Gives to the instrument information about how to handle this phase of the batch. The operator has to enter a number, this number is obtained adding a constant number for each option he want to activate. The table below resumes the available options and the corresponding number: Refill mode Discharge interlock End discharge . REC 4192 Rev B Thermo Fisher Scientific - auto - 0 - forced - 2 - not used - 0 - pulse - 4 - steady - 8 - not used - 0 - pulse - 16 - steady - 32 B-7 Micro-Tech 3102 Refill mode Define if the refill should be executed at this point of the recipe (FORCED) or if the instrument should check the weight into the scale before start a batch discharge component and only in this case, if necessary, to execute the refill (AUTO). High refill setpoint Defnes the amount of material to refill. Charge interlock Defines if the instrument must wait for the charge interlock input before to start the batch and, in this case, if this input should stay fix for all the batch or not. End charge Defines if at the end of the batch the end charge output must be actived and, in this case, if it should be steady or simply a pulse. TIME BASED COMPONENT Activation time Defines the time of activation of the component. Label Gives to the instrument information about how to handle this phase of the batch. The operator has to enter a number, this number is obtained adding a constant number for each option he want to activate. The table below resumes the available options and the corresponding number: Discharge interlock End discharge . - not used - 0 - pulse - 4 - steady - 8 - not used - 0 - pulse - 16 - steady - 32 Comp.interlock Defines if the instrument must wait for the component interlock input (charge interlock is used in this case) before to start the batch end, in this case, if this input should stay fix for all the batch or not. End comp. Defines if at the end of the batch the end component output (charge interlock is used in this case) must be activated and, in this case, if it should be steady or simply a pulse. A recipe can be composed by the number of line you need, the recipe end is identified by inputting 0 as component number, message “RECIPE END” will be displayed in this case. The instrument is able to store till 100 recipes for a total of 500 lines. In SCALE DATA menu is possible to define the max number of recipe required by the system. Its purpose is to avoid to display and print data of never used recipes. B-8 REC 4192 Rev B Thermo Fisher Scientific Micro-Tech 3102 B.3.1 Recipe Verify Once a recipe has been written, it can be verified using a function implemented in the software of the instrument. This function can be manually activated by keyboard but it is also automatically executed by the instrument when it receives a start command. While in the first case the instrument gives indication to the user about the problem encountered and the recipe line where the problem has been detected, in the second the user will get only a BAD RECIPE message and the cycle will be aborted. Detected anomalies are: Total over max The sum of the set point (for discharge batch component set points is considered negative). Suggested action Check component set points in the recipe lines and scale data value in SCALE DATA scroll. Check “Zero – start batch set in SCALE DATA scroll. Total under zero The sum of set points (for discharge batch component set point is considered negative) of the component is negative. Suggested action Check component set points in the recipe lines. Check “Zero – start batch set in SCALE DATA scroll. Recipe empty The recipe is empty. Component number 0 has been defined in the first line of the recipe. Suggested action Check recipe number. B.4. Definition of the I/O Through the inputs and outputs the instrument commands and controls the different phases of the cycle. In the next sections, all the digital and analog inputs and outputs available on the instrument and inherent to the batch sequence will be summarized. B.4.1 Digital Inputs Start/Set tare Start command, see Section 6.2 “START COMMAND”. Stop/Reset tare Stop command, see Section 6.3 “STOP COMMAND”. Abort Abort command, see Section 6.4 “ABORT COMMAND” REC 4192 Rev B Thermo Fisher Scientific B-9 Micro-Tech 3102 End cycle Start command, see Section 5.5, “END CYCLE COMMAND”. Charge interlock This input enables the instrument to begin a charge phase. How the instrument should check this input is defined in recipe for each line. Discharge interlock This signal enables the instrument to start a discharge phase. How the instrument must check this input is defined in recipe for each line. Discharge device This input indicates to the instrument that the discharge device is off for discharge gate is closed. It is tested continuously during the charge phases, if it becomes open the batch will be stopped. It is not tested during discharge phases. If the instrument finds it open when the charge interlock signal comes, the batch is stopped. At the restart both the signal must be present. Auto/Man Switch the instrument from automatic to manual and back. Pass in manual during a cycle will cause an abort. Reset Comp. tot Clear the total register for all the components. Reset Rec. tot Clear the total register for all the recipes Print Comp. tot Print the total register for all the components. Print Rec. tot Print the total register for all the recipes. Remote cntrl When close, it disables the keyboard and the command digital inputs (start, stop, end cycle and abort). It could be used when the instrument is connected to a supervisor or PLC that takes control above it. NOTE: It is possible to assign the same physical input to two different logical functions. So, for example, the charge interlock and discharge interlock can be assigned to the same input. B.4.2 Digital Outputs Component 1 – Component 40 It is the component activation, for charge and discharge batch components it works together with the high rate and low rate outputs. In these cases it uses also as common signal to read the external setpoint of the component if the BCD input option is installed and in the recipe has been defined that the setpoint should be read from BCD input. B-10 REC 4192 Rev B Thermo Fisher Scientific Micro-Tech 3102 High rate It is activated during the high rate phase of a charge or discharge batch. Low rate It is activated during the low rate phase of a charge or discharge batch. If specified in the recipe, it is activated during the low rate phase of a charge or discharge batch. If specified in the recipe, it is activated also during the high rate phase. Charge end End charge signal. In the recipe for each line it is specified how the instrument should handle this output at the end of charge batch or refill phase. Discharge end End discharge signal. In the recipe for each line it is specified how the instrument should handle this output at the end of a discharge or discharge batch phase. Cycles end The output is activated at the end of the last cycle, it will be deactivated at the next start. End recipe The output is activated at the end of the recipe, it will be deactivated when a new cycle start or a new start command is given. Ready It is on when all following conditions are true: - Instrument has been calibrated - No calibration function is running - No shut down conditions is present - Instrument is in AUTO - Cycle is not running Alarms On when an alarm is active, becomes off when the alarm is acknowledged. Shutdown On when an alarm is active, becomes off when the alarm is acknowledged and the cause of the shutdown returns normal. Need refill It is activated during execution of a refill phase if time out component alarm is generated. It indicates that the bin from which the material is token to refill is empty. The output can be connected to the STOP input to generate a stop condition in order to give the time to change the bin. The output is turned off at the restart or at the end of the refill. NOTE: It is possible to assign the same physical output to two different logical functions. So, for example, the charge end and discharge end can be assigned to the same output. REC 4192 Rev B Thermo Fisher Scientific B-11 Micro-Tech 3102 B.4.3 Current Outputs Current outputs are generally used to transfer weight values to remote indicators. The transferred value can be: the net weight, the gross weight and difference between the setpoint and the net weight that is the amount of material needing to complete the batch. This last possibility has meaning only during a batch, it will stay to 0 if the cycle is not running. B.4.4 BCD Input Optionally the expansion board Digital Inputs 16in/4out can be used to read data from external presets in BCD format. The BCD input can be used to read the recipe to execute, the number of cycles and the set point of the component. The value is read as an integer value on 4 digits and multiplied for the scale division to obtain the same format of the scale. The polarity can be selected between POSITIVE nd NEGATIVE. The 4 outputs present on the board are used to select the value to read, see the following table: Out# 1 Out# 2 Out# 3 Out# 4 Variable OFF OFF OFF OFF Not reading ON OFF OFF OFF Reading cycles and recipe OFF ON OFF OFF Reading component set point OFF OFF ON OFF Not used The code stay active for 0.5 seconds then BCD input is read. B.4.5 BCD Output Optionally the expansion board Digital Output 16out/4in can be used to transmit data in BCD format. The BCD output can be used to transmit the net (NET) or gross (GROSS) weight and the remaining weight to complete the batch (DIFF). The value is transmitted as an integer value on 4 digits, obtained dividing the value for the scale division. If the result overcomes the maximum value, an alarm is generated. The polarity can be selected between POSITIVE and NEGATIVE. The parity bit can be enabled, in this case the output data will be on 3 digits and half, the range will change from 9999/0 to 7999/0. The variable to be transmit can be selected by keyboard, selecting AUTO it is possible to use the 4 inputs present on the board for this purpose, see the following table: B-12 REC 4192 Rev B Thermo Fisher Scientific Micro-Tech 3102 In# 1 In# 2 In# 3 In# 4 Variable to send OPEN OPEN OPEN OPEN Not used CLOSE OPEN OPEN OPEN Net weight CLOSE OPEN OPEN Gross weight CLOSE CLOSE OPEN OPEN Diff weight OPEN The refresh time for the BCD output is 200 mSec, the selection code must stay active at least for the same time. B.5. The Run Scroll In the RUN scroll it is possible to define the recipe to be executed, the number of cycles and to get all the information about the running cycle. B.5.1 Select the Recipe In the second RUN scroll the number and name of the selected recipe is displayed. If the cycle is not running it is also possible to change this selection. When the cycle is running it is not allows. B.5.2 Define the Cycles Number In the third RUN scroll it is possible to define the number of cycles to be executed from the next start that is the number of time the selected recipe should be repeated. This value can be changed also if a cycle is running.Entering 0 enables the AUTOREPEAT mode, the 0 value will be substitute by the “AUTO” message. In this way, when a start is given, the selected recipe will be executed until an END CYCLE or ABORT command, see section 5 “THE COMMANDS”.The END CYCLE command can be give in this scroll by pressing the END C. key (F3). B.5.3 Status of the Cycle In the first RUN scroll the user has the possibility to see the actual state of the cycle while the cycle is running. Available information are: Line 1 : C10 ___ cccccc 0000.0 kg ______ _________ Actual weight on thescale Component’s name Component’s number The weight on the right will be the net weight during a batch charge or a batch discharge and the gross weight during a refill, a discharge and at the end of the batch. Line 2 : Setpoint 0000.0 kg _________ The component’s setpoint REC 4192 Rev B Thermo Fisher Scientific B-13 Micro-Tech 3102 This line will be empty at the end of the batch. If a time based component is active, following message will be displayed: Time 0.0 s The remaining time to complete the different phases of the component (start delay, activation and stabilization) will be displayed. Line 3 : In this line is displayed a message that indicates the actual status of the batch or the action that the instrument is executing. Follows a complete list of the message that can appear on line 3: End cycle Last cycle has been completed, now it is not running. Start cycle Received a START command CB – Wait ch. Interl. Charge Batch – waiting for the charge interlock. CB Start delay Charge Batch – waiting for the delay at the start. CB – High rate charge Charge Batch – charging at high rate. CB – Low rate charge Charge Batch – charging at low rate. CB – End batch delay Charge Batch – charge ended, waiting for stabilization delay. R – Wait ch. Interl. Refill – waiting for change interlock. R – Start delay Refill – waiting for the delay at the start R – Refilling Refill – refilling R – End refill delay Refill – refill ended, waiting for stabilization time. AR – Wait ch. Interl. Auto Refill – waiting for charge interlock. AR – Start delay Auto Refill – waiting for the delay at the start. AR – Refilling Auto Refill – refilling AR – End refill delay Auto Refill – refill ended, waiting for stabilization time. DB – Wait dch. Interl. Discharge Batch – waiting for discharge interlock. DB – Start delay Discharge Batch – waiting for start delay. DB – High rate disch. Discharge Batch – high rate discharging. DB – Low rate disch. Discharge Baqtch – low rate discharging. DB – End disch. delay Discharge Batch – discharge end, waiting for stabilization time. D – Wait dch. Interl. Discharge – waiting for discharge interlock. B-14 REC 4192 Rev B Thermo Fisher Scientific Micro-Tech 3102 D – Start delay Discharge – waiting for start delay. D – Discharging Discharge – discharging. D – End disch. delay Discharge – discharge end, waiting for stabilization time. T – Wait interl. Time based – waiting for component interlock. T – Start delay Time based – waiting for start delay. T – Activation Time based – component activation. T – End delay Time based – activation end, waiting for stabilization time. End recipe line Recipe line execution end. Next recipe line Go to the next recipe line. The following messages appear when the cycle is stopped, they give information about the cause. In this case the second part of the message (after “-“) will flash. STOP – Stop command A stop command has been received. STOP – Disch. device The discharge device opened during a charge cycle. STOP – Charge interlock The charge interlock opened during a charge cycle while in recipe it was defined as STABLE. STOP – Disch. interlock The discharge interlock opened during a discharge cycle while in recipe it was defined as STABLE. STOP – Shut down active A shut down condition has became active. STOP – Power down The power supply turned off while the cycle was running. The following messages appear when the cycle is aborted, they give information about the cause. In this case the second part of the message (after “-“) will flash also. The ABORT message will stay on the display until the next start. In this way it is always possible to see for which reason the last cycle has been interrupted. ABORT – Abort command An abort command has been received. ABORT – Bad recipe A start has been received but the selected recipe is not correct. ABORT – Bad cycles The number of cycles read from the external device is not valid. ABORT – Bad setpoint The set point read from the external device is not valid. ABORT – Manual The instrument has been switched in manual while the cycle was running. Line 4 : During the batch, F1 key is assigned to the ABORT function, pressing it will interrupt the cycle. REC 4192 Rev B Thermo Fisher Scientific B-15 Micro-Tech 3102 F2 key is assigned to AUTO/MANUAL function, it allows to switch the instrument from MANUAL to AUTO and back. If you try to set the instrument in MANUAL during a batch, a confirmation scroll will be displayed because of this operation will cause the abort of the running cycle. B.5.4 The Weight Indicator The fourth RUN scroll can be usefull when the scale is used as weight indicator. In the first line the NET or GROSS weight is displayed. In the second and third line can be displayed one of the following : tare weight, a bargraph indicator, date and time. In fourth line the PRINT key allows to active the print outs while the ALARM key, it appears flashing if an alarm is pending, allows to acknowledge and reset the active alarms. B.6. The Commands The commands can be give to the instrument in three ways : by keyboard, by contact and by serial line. The action engaged by the instrument when it receives one of this commands depends by the situation. B.6.1 Start Command It is the command used to start a cycle but depends from the instrument condition. If instrument is in manual : Execute a set tare If cycle is not running: Start the execution of the selected recipe for the selected number of cycles. If cycle is running but has been suspended (stop condition): Restart the cycle from the point at which it had been suspended. The command is ignore if the instrument is in automatic but one of the following condition is not true: B.6.2 - The ABORT contact or STOP contact are on. - A shut down condition is present. - The scale has not been calibrated. - A calibration is running. Stop Command The STOP command suspends temporarily the execution of a cycle. The cycle can be restarted later or definitively aborted. When a cycle is suspended, all the digital outputs inherent the cycle (components, charge end ….) are turned off, the STOP CYCLE alarm is asserted when the command is executed. The STOP command is ignored if a cycle is not running while a RESET TARE is executed if the instrument is in manual. B-16 REC 4192 Rev B Thermo Fisher Scientific Micro-Tech 3102 A STOP command can be indirectly activated if during a cycle one of the following circumstances happens: - Charge/discharge interlocks opens during the batch when it was selected as STABLE. - Discharge device input opens during a charge phase. - A generic SHUT DOWN occurs. Note that all the alarms can be selected as SHUT DOWN, so all the alarm conditions are able to suspends the cycle. - The instrument turns off during a cycle. During the stop, the timer used to check the component max time and the running time (for the end recipe report) continue to be updated. B.6.3 Abort Command The ABORT command interrupts definitively the running cycle., all the digital outputs inherent the cycle (components, charge end …) are turned off and the ABORT CYCLE alarm is asserted. The ABORT command is ignored if a cycle is not running. An ABORT command can be indirectly activated if during a cycle one of the following circumstances happens: - The instrument has been forced in MANUAL. - The selected recipe is not correct. - The values read from the external presets (recipe, cycles or set point) are not valid. An ABORT command can be manually given through keyboard. In this case a confirmation message will be displayed. Do you really want to abort the batch ? YES NO YES should be pressed to confirm the command. B.6.4 End Cycle Command The END CYCLE command interrupts the sequence of cycles, the current cycle is completed but after it no others cycle are executed independently by the number of cycle to execute. The END CYCLE alarm is asserted. The END CYCLE commands has no effect if the sequence of cycles, the current cycles is completed but after it no other cycle are executed independently by the number of cycle to execute. The END CYCLE command has no effect if the running cycle is already the last of the series and it ignored if a cycle is not running. B.6.5 AUTO / MANUAL Auto/Manual is not properly a command but it is important because switching is in manual during a cycle its acts an ABORT, and when in manual it changes function to the START and STOP commands. REC 4192 Rev B Thermo Fisher Scientific B-17 Micro-Tech 3102 A key on the front panel allows to switch from AUTO to MANUAL. If this key is pressed during a cycle, a warning message is displayed WARNING It will abort the running cycle. Press YES to confirm YES NO Pressing YES the cycle is aborted and the instrument turns in manual, NO cancels the action. If the MANUAL command is given in the same conditions through input contact, the commutation, thus the abort of the cycle, is immediate. When the instrument is in MANUAL, the ready led stays OFF to indicate that cycle can not be started. A led in the front panel is lights when the instruments is in AUTO. B.7. The Sequence Are here briefly resumed all the operations executed by the instrument from the start to the end of the cycle. All the sequence is then automatically repeated if more cycles are set. B.7.1 After the Start 1. Clear end cycle output 2. Increase cycle number. 3. If recipe number from external device A. Read external recipe number B. Check recipe number is valid, if not -> ABORT – BAD RECIPE 4. Verify recipe, if error -> ABORT – BAD RECIPE 5. If cycles number from external device A. Read cycles number B. Check cycles number is valid, if not -> ABORT – BAD CYCLES 6. Clear component totals, “last register”. B.7.2 Execute the Recipe Line 1. Set max time timer for component execution. 2. Read the recipe line to be executed and check the component type to see what kind of action to execute. The Charge Batch 1. Deactivate outputs: END CHARGE and END CYCLE. 2. Wait for charge interlock, in this phase interlock led will be on. 3. Check discharge device, if it is open -> STOP – DISCH. DEVICE B-18 REC 4192 Rev B Thermo Fisher Scientific Micro-Tech 3102 4. If set point should be read from external device A. Read set point B. Check if set point is valid, if it is less then zero or higher then scale capacity -> ABORT – BAD SET POINT 5. Check weigh on the scale if higher then zero weight NOT ZERO alarm. 6. Wait component start delay In this phase, charge interlock must stay on if selected as STABLE, otherwise -> STOP – CHARGE INTERLOCK and check discharge device input, it also must stay closed during this period, otherwise -> STOP – DISCH. DEVICE. 7. Set tare 8. Activate high rate charge. High rate output and component output are activated if HIGH+LOW is selected as high rate mode in the component data. During all this phase discharge device and charge interlock (if selected as stable) are tested. 9. When preset threshold (set – preset) is reached active low rate batch, only low rate output and component output are active. Same as above for change interlock and discharge device. 10. When end threshold (set – queue) is reached, end batch. A. Deactivate low rate output and component output. 11. Wait stabilization time. 12. Activate end charge output. 13. Update component total register 14. Correct cut off weight. 15. Check component deviation, if higher then max, MAX DEVIATION alarm 16. End recipe line, go to section 6-3 The Discharge Batch 1. Deactivate outputs: END DISCHARGE and END CYCLE 2. If a refill component has been encountered in the previous lines of the recipe and it was set as AUTO, check weight on the scale. If it is below the component set point, execute an auto refill function. 3. Wait for discharge interlock, in this phase interlock led will be on. 4. If set point should be read from external device A. Read set point B. Check if set point is valid, if it is less then zero or higher then scale capacity-> ABORT – BAD SET POINT 5. Wait component start delay. In this phase, discharge interlock must stay on if selected as STABLE, otherwise-> STOP – DISCH. INTERLOCK REC 4192 Rev B Thermo Fisher Scientific B-19 Micro-Tech 3102 6. Set tare 7. Activate high rate discharge. High rate output and component output are activated. Low rate output is also activated if HIGH+LOW is selected as high rate mode in the component data. During all this phase discharge interlock (if selected as stable) is tested. 8. When preset threshold (set – preset) is reached active low rate batch, only low rate output and component output are active. Same as above for discharge interlock. 9. When end threshold (set – queue) is reached, end batch. Deactivate low rate output and component output. 10. Wait for stabilization time. 11. Activate end discharge output. 12. Update component total registers 13. Correct cut off weight. 14. Check component deviation, if higher then max, MAX DEVIATION alarm. 15. End recipe line, go to Section 6.3. The Refill and Autorefill 1. Deactivate outputs: END CHARGE and END CYCLE. 2. Wait for charge interlock, in this phase interlock led will be on. 3. Check discharge device, if it is open -> STOP – DISCH. DEVICE 4. If set point should be read from external device. A. Read set point B. Check if set point is valid, if it is less then zero or higher then scale capacity-> ABORT – BAD SET POINT 5. Check weigh on the scale if higher than zero weight NOT ZERO alarm. 6. Wait component start delay. In this phase, charge interlock must stay on if selected as STABLE, otherwise -> STOP – CHARGE INTERLOCK and check discharge device input, it also must stay closed during this period, otherwise -> STOP – DISCH. DEVICE. 7. Reset tare 8. Activate high rate charge. High rate output and component output are activated. Low rate output is also activated if HIGH+LOW is selected as high rate mode in the component data. During all this phase discharge device and charge interlock (if selected as stable) are tested. 9. When end threshold (set) is reached, end charge. Deactivate high rate, low rate and component outputs. 10. Wait for stabilization time. B-20 REC 4192 Rev B Thermo Fisher Scientific Micro-Tech 3102 11. Update component total registers. 12. Activate end charge output. 13. End recipe line, go to Section 6.3. If it was an autorefill, repeat recipe line. The Discharge 1. Deactivate outputs: END DISCHARGE and END CYCLE. 2. Wait for discharge interlock, in this phase interlock led will be on. 3. Wait component start delay. In this phase, discharge interlock must stay on if selected as STABLE, otherwise -> STOP – CHARGE INTERLOCK. 4. Reset tare 5. Activate high rate discharge. High rate output and component output are activated. Low rate output is also activated if HIGH+LOW is selected as high rate mode in the component data. During all this phase discharge interlock (if selected as stable) is tested. 6. When the zero weight value is reached, end discharge. Deactivate high rate, low rate and component outputs. 7. Wait for stabilization time. 8. Update component total register. 9. Activate end discharge output. 10. End recipe line, go to Section 6.3 The Time Based Batch 1. Deactivate outputs: END CHARGE and END CYCLE. 2. Wait for component (charge) interlock, in this phase interlock led will be on. 3. Wait component start delay. In this phase, charge interlock must stay on if selected as STABLE, otherwise -> STOP – CHARGE INTERLOCK. 4. Set tare 5. Activate component output. 6. After the activation time defined in the recipe, component outputs is deactivated. 7. Wait for stabilization time. 8. Update component total registers. 9. Activate end charge output. 10. End recipe line, go to Section 6.3 REC 4192 Rev B Thermo Fisher Scientific B-21 Micro-Tech 3102 B.7.3 End Recipe Line and Recipe End 1. Reset tare 2. Check if there are other lines in recipe or there are no more lines but a component has been defined as end batch component. In these case repeat all the procedure from Section 6.3, otherwise go ahead. 3. Check 4. Update recipe total registers. 5. Print recipe if automatic batch print enabled. 6. Check if there are other cycles to be executed, if yes repeat all the procedure from Section 6.2, otherwise go ahead. 7. Set end cycles output, the sequence is finished, waits for another start command. B.8. Multiscales How already said in the overwiew, the Mod.3102 is able to handle till 4 scales. When more then 1 scale is active, it can handle these scale in two different ways. In the first, called SCALE MODE, it considers to have four independent scales, each one with an own set of commands (start, stop, auto/man…), a recipe to be execute, a number of cycles etc… In few word is the same as to have four single scale instruments in one hardware. In the second way, called GROUP MODE, it considers each scale as a part of a group. Each scale will have a set of inputs and outputs to interacts with own portion of the system but the set of commands, recipe, the number of cycles etc…will be unique for all the scales. The main difference is that in SCALE MODE you will create recipes containing only components of the scale on which the recipe will be executed and it is possible to run simultaneously the four scales with four different recipes. In GROUP mode the recipe can contain all the component, independently by the scale and only one recipe can be executed at time. In the next two sections the differences in the setup instrument when it operates in multiscale mode will be listed separately for the two modes. Definition of the component In the component definition should selected the membership scale. This independently by the component type. Definition of the recipe Also for the recipe should be specified the membership scale. Recipe verify A new anomaly can be detected executing the recipe verify function if the component in the recipe do not belong to the same scale at which belongs the recipe. The message will be: “Scale error”. B-22 REC 4192 Rev B Thermo Fisher Scientific Micro-Tech 3102 Definition of the I/O – Digital inputs and outputs Digital inputs and outputs listed below must be defined for each scale active, the message will be completed by the S# indication to indicate the scale number: Inputs: Start/Set tare s# Stop/Reset tare s# Abort s# End cycle s# Charge interlock s# Discharge interlock s# Discharge device s# Auto/Man s# Go on s# Outputs: High rate s# Low rate s# Charge end s# Discharge end s# Cycles end s# Need ref s# Ready, Alarm and Shutdown outputs are cumulative. So, for exemple, the ready output will turn on only if all the scales are ready. Definition of the I/O – Current outputs Same selections are available for all the scales. Definition of the I/O – BCD input Same selections are available for all the scales. If in AUTO mode, this is the table of selection: Out #1 Out #2 Out #3 Out #4 Variable OFF OFF OFF OFF Not reading ON OFF OFF OFF Cycles and recipe scale #1 OFF ON OFF OFF Component set point scale #1 OFF ON OFF OFF Not used OFF ON OFF ON OFF OFF ON ON ON ON ON ON OFF OFF OFF OFF Not reading Cycles and recipe scale #2 Component set point scale #2 Not used OFF ON OFF ON OFF OFF ON ON OFF OFF OFF OFF OFF OFF OFF OFF Not reading Cycles and recipe scale #3 Component set point scale #3 Not used OFF ON OFF ON OFF OFF ON ON ON ON ON ON OFF OFF OFF OFF Not reading Cycles and recipe scale #4 Component set point scale #4 Not used REC 4192 Rev B Thermo Fisher Scientific B-23 Micro-Tech 3102 Definition of the I/O – BCD output Same selections are available for all the scales. If in AUTO mode, this is the table of selections: In #1 OPEN CLOSE OPEN CLOSE In #2 OPEN OPEN CLOSE CLOSE In #3 OPEN OPEN OPEN OPEN In #4 OPEN OPEN OPEN OPEN Variable to send Not used Net scale #1 Gross scale #1 Diff scale #1 OPEN CLOSE OPEN CLOSE OPEN OPEN CLOSE CLOSE CLOSE CLOSE CLOSE CLOSE OPEN OPEN OPEN OPEN Not used Net scale #2 Gross scale #2 Diff scale #2 OPEN CLOSE OPEN CLOSE OPEN OPEN CLOSE CLOSE OPEN OPEN OPEN OPEN CLOSE CLOSE CLOSE CLOSE Not used Net scale #3 Gross scale #3 Diff scale #3 OPEN CLOSE OPEN CLOSE OPEN OPEN CLOSE CLOSE CLOSE CLOSE CLOSE CLOSE CLOSE CLOSE CLOSE CLOSE Not used Net scale #4 Gross scale #4 Diff scale #4 The RUN scroll The SCALE# key (it allows to switch the displayed scale) will compare in all the RUN scrolls. Using it will be possible to define recipe and cycles number and control the batching phases of all the active scales. The commands Each scale has an own series of digital input commands. If the commands are given by keyboard, they will be executed only by the scale actually displayed, the other scale will not be affected. Same for the LEDS, they refers only to the displayed scale. B.8.1 Multiscales – Group Mode Definition of the component In the component definition should selected the membership scale. This independently by the component type. Definition of the recipe No differences. Definition of the I/O – Digital inputs and outputs Digital inputs and outputs listed below must be defined for each active scale, the message will be completed by the S# indication to indicate the scale number: Inputs : Charge interlock s# B-24 REC 4192 Rev B Thermo Fisher Scientific Micro-Tech 3102 Discharge interlock s# Discharge device s# Outputs : High rate s# Low rate s# Charge end s# Discharge end s# Ready, Alarm and Shutdown outputs are cumulative. So, for example, the ready output will turn on only if all the scales are ready. Definition of the I/O – Current outputs Same selections are available for all the scales. Definition of the I/O – BCD input and output Same selections are available for all the scales. If in AUTO mode, this is the table of selection . Out #1 OFF ON OFF OFF Out #2 OFF OFF ON ON Out #3 OFF OFF OFF OFF Out #4 OFF OFF OFF OFF Variable Not reading Cycles and recipe scale #1 Component set point scale #1 Not used OFF ON OFF ON OFF OFF ON ON ON ON ON ON OFF OFF OFF OFF Not reading Cycles and recipe scale #2 Component set point scale #2 Not used OFF ON OFF ON OFF OFF ON ON OFF OFF OFF OFF OFF OFF OFF OFF Not reading Cycles and recipe scale #3 Component set point scale #3 Not used OFF ON OFF ON OFF OFF ON ON ON ON ON ON OFF OFF OFF OFF Not reading Cycles and recipe scale #4 Component set point scale #4 Not used Definition of the I/O – BCD input and output Same selections are available for all the scales. If in AUTO mode, this is the table of selection : In #1 OPEN CLOSE OPEN CLOSE In #2 OPEN OPEN CLOSE CLOSE In #3 OPEN OPEN OPEN OPEN In #4 OPEN OPEN OPEN OPEN Variable to send Not used Net scale #1 Gross scale #1 Diff scale #1 OPEN CLOSE OPEN OPEN CLOSE CLOSE OPEN OPEN Not used Net scale #2 REC 4192 Rev B Thermo Fisher Scientific B-25 Micro-Tech 3102 OPEN CLOSE CLOSE CLOSE CLOSE CLOSE OPEN OPEN Gross scale #2 Diff scale #2 OPEN CLOSE OPEN CLOSE OPEN OPEN CLOSE CLOSE OPEN OPEN OPEN OPEN CLOSE CLOSE CLOSE CLOSE Not used Net scale #3 Gross scale #3 Diff scale #3 OPEN CLOSE OPEN CLOSE OPEN OPEN CLOSE CLOSE CLOSE CLOSE CLOSE CLOSE CLOSE CLOSE CLOSE CLOSE Not used Net scale #4 Gross scale #4 Diff scale #4 The RUN scroll The SCALE# key (it allows to switch the displayed scale) will compare in the first RUN scroll, where the batch phases are displayed. A new message can compare in the third line . “Batch completed” It is displayed when a scale has completed its batch and it is waiting for the others finish theirs before to give the end cycle. The commands The set commands is unique. When a start is given, all the scales will start. Same for set tare, reset tare , abort, stop, end cycle and auto/man commands. Also if the stop comes from an external condition on one of the scales (ex. Discharge device open), all the scales will go in stop. The sequence When a cycle is started, each scale scrolls the recipe looking for an own component. When a scale finds an own component it executes that recipe line and then restart to looking for until all the recipe lines containing its components have been executed. During recipe execution each scale works independently be the others. Each sort of synchronism should be optained by using the inputs and outputs that each scale has got (charge and discharge interlocks, charge and discharge end outputs). Only when a recipe has completed its batch, it locks to the other and it waits until they complete their batch. At this point the ccycle will end. B.9 Troubleshooting Anomalies and problems during a cycle can be signaled by the instrument by means of messages displayed in the RUN scroll menu or alarms B-26 REC 4192 Rev B Thermo Fisher Scientific Micro-Tech 3102 B.9.1 Status Messages (RUN Scroll) Message Cause Suggested action STOP – Stop command A stop command has been received. Check stop input is used. If in “multiscale – group mode” the stop command can arrive for an other scale that has gone in stop for un external condition, check the other scales. STOP – Disch. device The discharge device opened during a charge cycle. Check disc. device input. STOP – Charge interlock The charge interlock opened during a charge cycle while in recipe it was defines as STABLE. Check charge int.input. The discharge interlock opened during a discharge cycle while in recipe it was defined as STABLE Check discharge int.input STOP – Shut down active A shut down condition has became active. Check in alarm scroll what alarm has generated the stop condition. STOP – Power down The power supply turned off while the cycle was running Check power supply connection ABORT – Abort command An abort command has been received. Check abort input is used. If “multiscale – group mode” the abort command can arrive for an other scale that has aborted for an external condition, check the other scales. ABORT – Bad recipe A start has been received but the selected recipe is not correct. Check recipe number in run scroll. ABORT – Bad cycles The number of cycles read from the external device is not valid. Check ext. preset value connections and setup, polarity can be wrong. ABORT – Bad setpoint The setpoint read from the external device is not valid. Check ext. preset value connections and setup, polarity can be wrong. ABORT - Manual The instrument has been switched in manual while the cycle was running. Check manual input is used. STOP – Disch. interlock REC 4192 Rev B Thermo Fisher Scientific Check if charge interl. mode defined correctly in recipe Check if discharge interl. mode defined correctly in recipe Check recipe data. B-27 Micro-Tech 3102 B.9.2 Alarms Alarms Cause Suggested action Not zero A the start of a recipe, the weight in the scale was over the “zero weight” value entered in setup. Check zero weight value in scale data scroll. Stop cycle A stop command or a stop condition has been detected. Check all the stop conditions Verify stop input if used. Abort cycle An abort alarm or an abort condition has been detected. Check all the abort conditions Verify abort input if used. End cycles An end cycle command has been given. Verify end cycle input if used Deviation The max deviation limit for the component has been overcome. Check max deviation limit in recipe. Check queue value in component definition. Comp. time out B-28 The active component is taking more then the max time to complete the batch. Check max component time in component’s table. The batch can be suspended or waiting for an external input. REC 4192 Rev B Thermo Fisher Scientific Appendix C Digital and Analog Input/Output The Batch Controller has provision for up to 24 programmable digital input and 24 programmable digital outputs. Located on Mother Board are 5 programmable inputs, four programmable outputs and one non-programmable Micro-Tech hardware fault output. Additional I/O are located on DIO Board (4In/16Out) and OPTION on DIO Board (16In/4Out). C.1 Mother Board Digital I/O C.1.1 Digital Inputs Five (5) programmable digital (DC) inputs (Appendix Figure C-1) • Optically isolated • Powered by internal 24 V DC supply, 5 mA • Cable Length: 150 ohm maximum (7500 ft of 20 AWG) Appendix Figure C-1: General Purpose Digital Inputs REC 4192 Rev B Thermo Fisher Scientific C-1 Micro-Tech 3102 C.1.2 Digital Outputs Four (4) programmable, and one (1) non-programmable failure, outputs (Appendix Figure C-2). • Isolated Relay Outputs • Solid state Output Appendix Figure C-2: Isolated Relay Outputs Appendix Figure C-3: Solid State Output C-2 REC 4192 Rev B Thermo Fisher Scientific Micro-Tech 3102 C.2 Digital Input/Output Board Configuration In addition to the programmable digital inputs and outputs on the motherboard, Digital I/O (DIO) expansion boards can be added. Available boards are DIO input board (OPTION) 16 inputs/4 outputs , output board 16 outputs/4 inputs or 20 inputs/20 outputs by adding both boards. Both DIO boards provide isolated contact closure inputs and 24-volt current sinking (default) or current coursing (consult Factory) isolated outputs. The DIO input board connector J16 is male 25 pin sub-miniature D Connector and the DIO output board connector J15 is a female connector. Selectable jumpers OP1 and OP2 located on the lower right hand side of the DIO boards control internal or external 24 VDC power for the DIO boards. All inputs and outputs use the same selected power supply. Appendix Table C-1: DIO Board Jumper Settings (OP1/OP2) DIO BOARD JUMPER SETTINGS POWER SOURCE OP1 OP2 INTERNAL “A” “A: EXTERNAL “B” “B” The isolated contact closure inputs are activated by completing the circuit from the input to the negative side of the 24 VDC supply. Approximately 5 mA of current flows out of each input during contact closure. The outputs of the DIO boards use 2803 current sinking (default) type IC’s. The output IC’s are installed in sockets to allow replacing the output IC only rather than the board if the IC is damaged. The output IC’s can be replaced with 2981 type IC’s for current sourcing applications. Wire jumpers W1 through W4 must be relocated for current sourcing. In most cases, it is recommended the boards be returned to the factory for converting from current sinking (default) to current sourcing. Appendix Table C-2: DIO Board Jumper Settings for Current Sourcing CURRENT REC 4192 Rev B Thermo Fisher Scientific JUMPERS W1 W2 W3 W4 Sinking (default) “Yes” “No” “Yes” “No” Sourcing “No” “Yes” “No” “Yes” C-3 Micro-Tech 3102 C.2.1 16 In/4 Out DIO Board Specifications (OPTION) • (16) Programmable inputs - Optically isolated - Powered by internal +24V DIO supply, 6 mA maximum - Cable length: 150 ohm maximum (7500 ft 0f 20 AWG) • (4) Programmable outputs - Able to drive TTL, CMOS, or relay solenoids - Current sinking socketed drivers - +24 VDC internal supply, 100 mA DC maximum output • Connector 25 pin D connector (male). Connector is interchangeable with a 20 or 22 pin subminiature D connector dimensionally complying with MIL-C-24308. C.2.2 4 In/16 Out DIO Board Specifications • - (4) Programmable inputs Optically isolated Powered by internal +24V DIO supply, 6 mA maximum Cable length: 150 ohm maximum (7500 ft of 20 AWG) • (16) Programmable outputs - Able to drive TTL, CMOS, or relay solenoids - Current sinking socketed drivers - +24 VDC internal supply, 100 mA DC maximum output • Connector 25 pin D connector (female). Connector is interchangeable with a 20 or 22 pin subminiature D connector dimensionally complying with MIL-C-24308. C-4 REC 4192 Rev B Thermo Fisher Scientific Micro-Tech 3102 REC 4192 Rev B Thermo Fisher Scientific C-5 Micro-Tech 3102 C-6 REC 4192 Rev B Thermo Fisher Scientific Micro-Tech 3102 Appendix Figure C-4: Digital Inputs/Outputs REC 4192 Rev B Thermo Fisher Scientific C-7 Micro-Tech 3102 C.3 BCD Input Option BCD can remotely enter load sizes for load out or batching applications. An optional Load Out input board is required. See Appendix Figure C-5 for wiring instructions. Appendix Figure C-5: BCD Input Option Wiring C-8 REC 4192 Rev B Thermo Fisher Scientific Micro-Tech 3102 C.4 Analog I/O Boards The analog I/O board is available in two configurations described below. Type A (option) has one current output only, whereas, Type B has two voltage inputs and two current outputs. The Micro-Tech 3100 can support up to four analog inputs and four analog outputs. Type A: Current Output Board is a user definable 0-24/4-20 or 204/20-0 mA output (Appendix figure C-7). Net Weight, Gross Weight, Diff Optically isolated Isolated power source Voltage output by adding an internal dropping resistor Output range: User selectable 0-20mA or 4-20 mA, representing 0 to 100% variable. Resistive load: 800 ohms max. Capacitive load: No limit Field wiring: Connections are made to the terminal strip on bottom edge of the analog board. Note that connector is removable for ease of termination. Appendix Figure C-6: Current Output A00701 REC 4192 Rev B Thermo Fisher Scientific C-9 Micro-Tech 3102 Appendix Figure C-7: Current Output PC Board (Type A) C-10 REC 4192 Rev B Thermo Fisher Scientific Micro-Tech 3102 Appendix Figure C-8: Current Output Board Wiring Diagram (Type A) Type B: Analog Input/Output board has two ±5 VDC differential inputs (Appendix Figure C-9) and two user definable 0-20/4-20 or 20-4/20-0 mA outputs (Appendix Figure C-6). Inputs Outputs None (Default) Net Weight Gross Weight Diff. Analog inputs are +/-5 VDC. Jumpers W3 and/or W4 are used to select 240 ohm impedance for 0-20/4-20 mA inputs (see Appendix Figure C-10). Type: Differential voltage input (0-20 mA or 4-20 mA with internal resistor, jumper selectable) Range: 0-5 volt, or ±5 volt, programmable Input impedance: 100 k nominal (differential) Maximum usable input voltage: 106% of full scale Non-isolated Max. non-destructive input voltage: 12 V peak Field wiring: Connections are made to the terminal strip on bottom edge of the analog board. Note that connector is removable for ease of termination. REC 4192 Rev B Thermo Fisher Scientific C-11 Micro-Tech 3102 Appendix Figure C-9: Analog Input A00922a 2 current outputs (see Appendix Figure C-6). Same as described in Type A board C-12 REC 4192 Rev B Thermo Fisher Scientific Micro-Tech 3102 Appendix Figure C-10: Analog I/O PC Board (Type B) REC 4192 Rev B Thermo Fisher Scientific C-13 Micro-Tech 3102 C.5 Communications Options The following table gives references for specific communications options. Appendix Table B-3: Communications Options Reference C.5.1 Part Number 068053 Reference Manual Standard Comm A Board REC Number REC 3949 055517 Allen Bradley RIO REC 4012 056713 Profibus-DP REC 4063 068147 DeviceNet REC 4150 Standard Comm A Board Refer to REC 3949 if the optional communication board is installed. C.5.2 Allen-Bradley Remote I/O Refer to Allen-Bradley Remote I/O, REC 4012 if this option is installed. C.5.3 Profibus-DP Refer to Profibus-DP, REC 4063 if this option is installed. C.5.4 DeviceNet Refer to REC 4150 if this option is installed. C-14 REC 4192 Rev B Thermo Fisher Scientific Appendix D Optional Documentation This appendix contains references to documents that may be useful for installation and operation of your Micro-Tech 3102. - Serial Communications Manual Micro-Tech 3000 - Allen-Bradley Remote I/O Manual Micro-Tech 3000 - PROFIBUS-DP Slave Protocol Micro-Tech 3000 - DeviceNet Comm Manual MT 3000 REC 4192 Rev B Thermo Fisher Scientific D-1 REC 4192 Rev B Thermo Fisher Scientific D-1