1
Battistinis
Custom
Cycles
1109 Langton drive
San Ramon, CA 94582
925.270.4211 Tech line
www.battistinisusa.com
Quantity
1
1
BILL OF MATERIALS
Part
Left ‘shift-side’ foot control assembly
Right ‘brake-side’ foot-control assembly
Chrome billet
forward controls
&
Black anodized
forward controls
BASIC TOOLS
MEDIUM:
30 minutes
to install
(approx.)
MAINTENANCE: To keep your new
forward controls looking their best, apply
a high-quality chrome polish to them (for
chrome controls) or clean them thoroughly
(for black controls) every time you detail your
motorcycle.
WARNING: Your safety depends onthe correct installation of this kit. Use
appropriate service manual procedures. If the procedures are not within your
capability or you do not have the correct tools, have a trained mechanic/
technician install this part for you. Improper installation of this part could result
in injury or death.
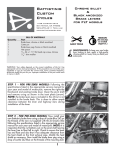
STEP 1: Follow the procedures listed in the appropriate service manual for your year and model of
motorcycle to remove the existing forward controls. This is an excellent time to check you rrear brake
pads for wear and also to ensure that the shifter rod and shift arm on your transmission are functioning
properly.
STEP 2: Next, following the procedure listed in the appropriate service manual for your year and
model of motorcycle, install the new Battistinis brake-side foot control. Continue by following your
manual’s recommendations for brake fluid type, and rear brake bleeding procedure.
1
Battistinis
Custom
Cycles
Chrome billet
forward controls
&
Black anodized
forward controls
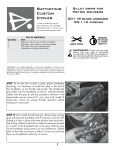
STEP 3: Continue the installation by following the procedure listed in the appropriate service manual
for your year and model of motorcycle and install the new Battistinis shift-side foot control. Follow your
manual’s recommendations for proper adjustment of the shift rod and foot lever.
STEP 4: Prior to test riding your motorcycle, ensure the proper function of the rear brake and shifter. Also
verify that the foot levers are int he correct position to allow ease of function in addition to rider comfort.
2