1
The Parts Drop: (201)387-7776 www.partsdrop.com
®
7328 family
(WorkCentre ) 7228/7235/7245, 7328/7335/7345/7346*
www.partsdrop.com
Tech Info Sheets
Originally published as an article in ENX Magazine: “WC-7328 family … A
Breath of Fresh Air (PWS not required… no need to run)”
Finally there is a group of Xerox models which fall into the
“C32 style” which technicians can repair without the fear of needing
a “PWS” (Portable Work Station). The WorkCentre 7328, 7335,
7345, & 7346 Multifunction Copiers are refreshingly approachable.
The predecessor models (C32, M24, DC1632, C2128, etc.) were
plagued with problems relating to a lack of User Interface
diagnostics. Not so for this most recent group, thank goodness. These are great machines…
They’re well-built and capable of making some beautiful prints and copies. In this article, we’ll
look into the more important parts & supply items and how to reset their counters. Then we’ll
also look at how to get into the UI (User Interface) Diagnostics.
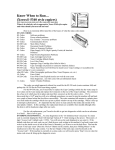
Drum Cartridges: Replacing the “Print Cartridge”
(13R624) or the Connector CRUM (Customer Replaceable Unit
Monitor) on the underside of the front end of the cartridge will reset
the drum counter. The cartridges for the previous models are
13R624 Drum Ctg.
physically extremely similar however the CRUM being different
makes them not interchangeable. Reconditioning these cartridges is possible thanks to the fact
that they use the same Drum, Blade, & Charge Roll as the C32’s etc. which came before them.
Fuser Modules (8R13040 / 8R13055): The fusers are
considered to be Customer Replaceable Units. The models 7328,
7335, 7345 use fuser part# 8R13040, and 7346 uses a slightly
different one (8R13055). They are capable of resetting the fuser
counter automatically. If you want to repair a fuser, and you want
7328 Fuser
the counter to reset automatically, you would need to replace 3 picofuses on a little board at the rear of the fuser module. (The 7346 version would require
replacement of 1 pico-fuse). You can also choose to go into the Diagnostics and reset the HFSI
counter for the fuser from there (read below about “Resetting Counters”).
Transfer Roll Assembly (2nd BTR) (604K19991): The 7328 family uses the same
Transfer Roll Assembly as the C2128/2636/3545 models used (the C32/DC1632 version would
not fit on the 7328). The counter is reset similarly to the fuser module (read below).
Transfer Belt Cleaner Assembly (IBT Cleaner) (604K07060 / 604K07061): This is
another counter which can be reset from the diagnostics (read below). Keep in mind that the
primary part which fails in the Cleaner Assembly is the IBT Cleaning Blade (C32IBTCB)… if
the assembly is not otherwise broken, you can replace the blade and reset the counter and save
some money over the cost of a complete assembly.
7328 family Tech Info Sheets
Page 1 of 8
* Xerox® and all of their model names & numbers are trademarks of Xerox Corporation and are used here only as
references. Xerox is in no way affiliated with The Parts Drop.
The Parts Drop: (201)387-7776 www.partsdrop.com
Entering Diagnostic mode (CE Diagnostic Mode):
Hold ‘0’ for at least 10 seconds, then press ‘Start’… a password prompt should show up. Enter
‘6789’ followed by ‘Confirm’. Now press the ‘Machine Status’ button. You’ll see a set of Tabs
as follows:
• ‘Machine Information’ Tab: Serial Number, IP Address, and a convenient way to Print
Reports the “Copy Report” which turns out to be 4 double-sided pages covering all of the
machine’s features including the things having to do with Printing, Scanning, Network
settings, etc.)
• ‘Faults’ Tab: Current Faults, Fault History
• ‘Supplies’ Tab: Shows Toner & Drum Cartridge % life remaining as well as status on
things like the fuser, staple ctg, toner waste bottle, etc.
• ‘Billing Information’ Tab: Copy / Print counts.
• ‘Tools’ Tab: Lots and lots of stuff in this tab as you’ll see below.
Choose ‘Tools’ and you will see 3 columns of choices… the one on the left will have 4
choices… choose the top one “System Settings”. The middle column has the heading “Group”
and has a scrollable list.
For “System Settings” you will see these choices:
• ‘Common Service Settings’ This is the one we’ll be concentrating on.
• ‘Copy Service Settings’
• ‘Connectivity & Network Setup’
• ‘Print Service Settings’
• ‘Scan Service Settings’
• ‘Fax Service Settings’
• ‘Email / Internet Fax Service Settings’
• ‘Mailbox Service Settings’
• ‘Job Flow Service Settings’
• ‘Stored Document Settings’
From that middle column, choose ‘Common Service Settings’ to get to most of the good stuff.
Under the right column (the heading which says ‘Features’) you will find yet another scrollable
list of possibilities:
• ‘Machine Clock / Timers’
• ‘Audio Tones’
• Screen / Button Settings’
• ‘Paper Tray Settings’
• ‘Image Quality Adjustments’
• ‘Reports’
• ‘Maintenance / Diagnostics’ – Important for Component Tests, NVM Memory
Settings, Counter Resets, etc.
• ‘Watermark’
• ‘Print Universal Unique ID’
• ‘Other Settings’
7328 family Tech Info Sheets
Page 2 of 8
* Xerox® and all of their model names & numbers are trademarks of Xerox Corporation and are used here only as
references. Xerox is in no way affiliated with The Parts Drop.
The Parts Drop: (201)387-7776 www.partsdrop.com
There are other menu choices which may be worth exploring, however, most of the stuff us
Techs would want are found by touching “System Settings”, followed by “Common Service
Settings”, and then “Maintenance / Diagnostics”. Here you will find two pages of choices in
the form of buttons. Among other choices, you will find:
• Initialize Hard Disk
• NVM Read / Write – Adjust memory settings & reset some fault conditions (read below
under “Resetting some Fault Codes”).
• IO Check - Access to Component Control for testing sensors, motors, etc.
• Max Setup - Tools for setting up the color calibration & Registration.
• Adjustment / Others: Reset Counters for things like the Transfer Roller or Belt Cleaner
Assembly (read below under “Resetting Counters”).
Resetting Counters:
For these models, you will need to get into the “UI Diagnostic Mode”: as explained above. Once
you are in the Tools tab… choose the following from left to right: System Settings, Common
Service Settings, and then in the right column, scroll down and touch “Maintenance /
Diagnostics”. Scroll down and touch the button for “Adjustment / Others”. There you’ll find
two choices: ‘Machine ID / Billing’ and ‘HFSI Counters’. Touch the ‘HFSI Counters’ button
(High Frequency Service Items). Here you’ll be prompted to enter a “Chain-link” number…
enter the appropriate number from this list:
1. 954-801 = IBT Belt (Transfer Belt)
2. 954-802 = 2nd BTR (Transfer Roll)
3. 954-803 = IBT Cleaner (Transfer Belt Cleaner Assembly)
4. 954-804 = Fuser Module
Then press ‘Confirm’ and some data shows up, including the current count on the part in
question. If you then touch “Reset Current Value”… the machine will go to a confirmation
screen where you need to touch ‘Reset’.
Resetting some Fault Codes:
Some fault conditions will result in the machine locking-up until the fault is cleared by changing
a memory setting back to ‘0’. This is true for Fuser Overheat faults, & Belt Home Position
Failures. The machine locks up like this for good reason… it does not want to do any more
damage to itself. Before you go and clear one of these faults, you must first make sure that
whatever condition caused the fault in the first place has been repaired… otherwise the problem
will happen again and probably right away.
Enter “UI Diagnostics Mode” (read above), press the ‘Machine Status’ button followed
by the ‘Tools’ Tab. Choose ‘System Settings’, ‘Common Service Settings’, and in the right
column touch ‘Maintenance / Diagnostics’. From the menu of buttons which appear, choose
“NVM Read / Write”. Enter the NVM (Non Volatile Memory) Chain-Link code from the list
below for the fault code you want to reset. Touch the button which says “Confirm/Change”.
The Current Value will show up in the “Current Value” field. Enter a ‘0’ in the ‘New Value’
Field and then press ‘Save’. This will write the new value to memory. .The next time the
machine reboots, it will attempt to start up normally. Of course the source of the fault must be
repaired first otherwise the fault condition will return.
Resetting - Belt Home Position Failure Codes: 04-346 (or 09-350):
First check the IBT Belt (transfer belt) to make sure it is not damaged and if you need to replace
the belt, make sure that whatever damaged the belt in the first place is no lot going to destroy
7328 family Tech Info Sheets
Page 3 of 8
* Xerox® and all of their model names & numbers are trademarks of Xerox Corporation and are used here only as
references. Xerox is in no way affiliated with The Parts Drop.
The Parts Drop: (201)387-7776 www.partsdrop.com
another belt. When you’re confident that the physical problem is repaired and solved, then
follow the instructions above. Use Chain-Link ‘741-056’: Belt Home Failure”… Reset it to ‘0’.
Resetting - Fuser Overheat codes: 10-348 or 10-350 If the code 10-348 or 10-350 come up
even once, then the machine will lock up. Check for reasons for an over-heat condition. Replace
or repair the Fuser Module and make sure the Fuser Cooling Fan isn’t all clogged up. Make sure
there is adequate room around the machine to allow for good ventilation. To reset this one, you
must enter diagnostic mode with the Front Door Interlock open. Reset Chain-Link code ‘744003’ to “0’ if it shows a value of ‘1’ or ‘2’.
Resetting ATC Sensor Faults (Automatic Toner Concentration): 09-380, 09-381, 09-382, 09383, or 09-548 Check for trouble in toner dispensing or a loose ATC Sensor one is on each color
developer unit. To reset the code, reset ‘Chain-link’ code ‘752-109 through 752-112’ back to
‘0’.
Component Control (Testing motors, sensors, etc.)
Testing of various parts in the machine can be done from the ‘IO Check’ feature. Get into the
“UI Diagnostics” as explained earlier… Press the ‘Machine Status’ button and choose the
‘Tools’ tab. Then choose ‘Common Service Settings’ & ‘Maintenance / Diagnostics’ and look
for a button which says ‘IO Check’. Touching that button will bring up a screen with two
choices: “Component Control” or “Analog Monitor”. If you touch ‘Component Control’, the
screen will ask you for a ‘Chain – Link’ number. Unfortunately you need to know which code
you want to enter for the appropriate component and the machine does not give you a scrollable
list to choose from. You’ll need to get the Chain-Link codes. Maybe a future article in the
making?
Toner Cartridges and related problems:
Now let’s talk about the Toner Cartridges. The machines initially came with the original
“Fuji” cartridge part numbers : 6R01280 (black), 6R01281 (yellow), 6R01282 (magenta), and
6R01283 (cyan). Then the cartridges folks buy here in the U.S. are 6R01175 (black), 6R01176
(yellow), 6R01177 (magenta), and 6R01178 (yellow). The two sets of ctgs are interchangeable
with one another.
New Toner Cartridges do not have a CRUM chip nor a fuse on them as you might expect.
Instead they signal to the machine that they’re new cartridges, using a physical actuator which
pushes a switch. On the rear end of the cartridge, on top, you will see a metallic piece which
changes positions when the toner dispense first kicks-in. As the coupling at the rear of the
cartridge begins to turn, the metallic piece gets pushed away from the center, towards the top
edge of the cartridge. This metallic piece pushes the “new cartridge switch” in the machine.
If a new cartridge is installed and it fails to push the “new cartridge switch”, the machine
goes into a fault code: 009-390 (for black), 009-391/392/393 (for Cyan/Magenta/Yellow) and
must be reset manually from diagnostics. The Service Manual is a little vague and a tad-bit
confusing on which NVM (Non Volatile Memory) codes need to be reset to clear the fault codes.
In the procedure for these fault codes, they tell you that if the metallic actuator did not move out
to the top edge of the cartridge, you should move it up by hand and then go and reset what they
call the “Accumulative Dispense Time” back to “0”. Looking at the list of memory codes in the
service manual (NVM Chain – Link codes), the ones mentioned in the procedure are not shown
in the list. Instead there is another set of 4 codes which are named “Fail Dispense Unusual”.
The description says the code means that when the toner dispense turned on with a new toner
7328 family Tech Info Sheets
Page 4 of 8
* Xerox® and all of their model names & numbers are trademarks of Xerox Corporation and are used here only as
references. Xerox is in no way affiliated with The Parts Drop.
The Parts Drop: (201)387-7776 www.partsdrop.com
cartridge, it failed to shift from “new to old”. Try resetting both memory settings relating to the
color you’re dealing with. See the list of codes below:
To clear “New Toner Cartridge not Detected” fault codes: 009-390(K), 009-391(C), 009392(M), 009-393(Y), reset the appropriate NVM (memory) location / locations back to “0”:
Color
NVM chain-link Code Description
Black
752-787
Fail Dispense Unusual (K)
Black
752-686
Accumulative Dispense Time (K)
Cyan
752-786
Fail Dispense Unusual (C)
Cyan
752-685
Accumulative Dispense Time (C)
Magenta 752-785
Fail Dispense Unusual (M)
Magenta 752-684
Accumulative Dispense Time (M)
Yellow
752-784
Fail Dispense Unusual (Y)
Yellow
752-683
Accumulative Dispense Time (Y)
Toner Dispense problems have the potential to lead to deeper complications… especially
if they were to go-on unchecked. For this reason, the machine will “lock up” if it sees that the
developer in the DV Unit is starving for toner. An ATC (Automatic Toner Concentration)
sensing fault will be called depending on which color is having trouble. You’ll want to
troubleshoot the problem. Check to be sure the Toner Dispense Motor (drives the coupling at the
rear end of the toner cartridge) is working and that nothing is clogged up preventing the toner
from moving into the DV unit from the toner cartridge.
A loss of developer material in the DV Unit (or contamination of the developer) can also
cause ATC Sensor Failures. If you remove the drum cartridge, you can see the mag roller to
make sure it’s not getting bald from lack of developer material. Once you’ve repaired the cause
of the failure, you will need to reset the Fault Code by changing a memory (NVM) setting back
to ‘0’. Below are the Fault Codes and the corresponding NVM (memory) locations for each
color.
ATC Sensor Failures – Fault Codes and Memory locations to reset:
Color
Black
Fault Code NVM location
(Reset to ‘0’ to NVM description
clear fault)
09-383
752-112
ATC Sensor Failure [K]
Cyan
09-382
752-111
ATC Sensor Failure [C]
Magenta 09-381
752-110
ATC Sensor Failure [M]
Yellow 09-380
752-109
ATC Sensor Failure [Y]
This series uses a developer trickle system in which each new toner cartridge has a small
bit of developer material mixed in with the toner. The older developer gets pushed out as the
new material from the toner takes its place. The idea being that you’ll always have fresh
developer in there. This makes it difficult to properly test any aftermarket toner refills or refilled
cartridges because even if the compatible toner makes a glorious copy to begin with… if the
developer which the manufacturer has mixed into the toner is not quite right, it’ll take 5-6
cartridges before the compatible developer replaces a majority of the original developer. If that
new developer is “off” the copy quality will gradually fail.
Now what happens if you have to replace a complete Developer Unit? DV units have a
stated yield of approximately 650K. Be forewarned it’s a relatively big job to get one or more
of the DV Units out of the machine. You have to get at them from the front end. This means
7328 family Tech Info Sheets
Page 5 of 8
* Xerox® and all of their model names & numbers are trademarks of Xerox Corporation and are used here only as
references. Xerox is in no way affiliated with The Parts Drop.
The Parts Drop: (201)387-7776 www.partsdrop.com
removing panels, loosening up the metal front plate and removing the dispense assemblies.
Once you grab a new Developer Unit, you’ll need to remove a reference tag from the label on
the new unit’s ATC sensor. That tag has a 3 digit number on it. You’ll need the numbers off of
the tag in order to calibrate the new ATC Sensor. If you thought that the physical replacement
procedure was complicated, you’ll really cringe at how complicated the ATC Sensor calibration
is.
The 3 digit code can be found on the 3rd line of text on the label. The first digit will
always be a ‘0’ . To calibrate the new ATC Sensor , first enter the Diagnostic Mode (Hold ‘0’
for at least 10 seconds, then press ‘Start’… a password prompt will show up. Enter ‘6789’
followed by ‘Confirm’. Then press the ‘Machine Status’ button). Choose the “Tools” tab and
then “System Settings” followed by “Common Service Settings” and then choose “Maintenance /
Diagnostics” followed by “Max Setup”. Finally you will touch the “ATC Sensor Setup” button.
Select the boxes in columns 1 and 2 of the ATC Sensor Setup screen that are for the color
you are dealing with (Y, M, C or K). Find your ATC Calibration Code (from the ATC Sensor’s
tag mentioned earlier) on the chart below and enter the “Sensitivity Gradient Value” and the
“Standard TC Output Default Value” in the empty fields. Press ‘Start’ to run the routine. When
it’s done, touch the “Close” button and go ahead and exit diagnostics. The machine will reboot
and the new settings will be stored.
ATC Sensor Calibration Chart:
ATC Sensor Calibration Code Sensitivity Gradient Value
Standard TC Output Default Value
000
526
169
001
572
166
002
617
162
003
663
158
004
708
154
005
753
150
006
799
146
007
844
142
008
889
138
009
934
134
010
526
171
011
572
168
012
617
164
013
663
160
014
708
156
015
753
152
016
799
148
017
844
144
018
889
140
019
934
136
020
527
174
021
572
169
022
617
166
023
663
162
024
708
158
7328 family Tech Info Sheets
Page 6 of 8
* Xerox® and all of their model names & numbers are trademarks of Xerox Corporation and are used here only as
references. Xerox is in no way affiliated with The Parts Drop.
The Parts Drop: (201)387-7776 www.partsdrop.com
ATC Sensor Calibration Code Sensitivity Gradient Value
Standard TC Output Default Value
025
753
154
026
799
150
027
844
146
028
889
142
029
934
138
030
527
176
031
572
172
032
617
168
033
663
164
034
708
160
035
753
156
036
799
152
037
844
148
038
889
144
039
934
140
040
527
178
041
572
174
042
617
170
043
663
166
044
708
162
045
753
158
046
799
154
047
844
150
048
889
146
049
934
142
050
526
179
051
572
176
052
617
172
053
663
168
054
708
164
055
753
160
056
799
156
057
844
152
058
889
148
059
934
144
060
526
181
061
572
178
062
617
174
063
663
170
064
708
166
065
753
162
066
799
158
067
844
154
068
889
150
069
934
146
7328 family Tech Info Sheets
Page 7 of 8
* Xerox® and all of their model names & numbers are trademarks of Xerox Corporation and are used here only as
references. Xerox is in no way affiliated with The Parts Drop.
The Parts Drop: (201)387-7776 www.partsdrop.com
ATC Sensor Calibration Code Sensitivity Gradient Value
Standard TC Output Default Value
070
526
183
071
572
180
072
617
176
073
663
172
074
708
168
075
753
164
076
799
160
077
844
156
078
889
152
079
934
148
080
526
185
081
572
182
082
617
178
083
663
174
084
708
170
085
753
166
086
799
162
087
844
158
088
889
154
089
934
150
090
526
187
091
572
184
092
617
180
093
663
176
094
708
172
095
753
168
096
799
164
097
844
160
098
889
156
099
934
152
Hopefully the information here will prove helpful to everyone.
7328 family Tech Info Sheets
Page 8 of 8
* Xerox® and all of their model names & numbers are trademarks of Xerox Corporation and are used here only as
references. Xerox is in no way affiliated with The Parts Drop.