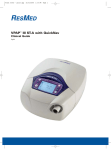
Download VPAP® III, VPAP III ST, VPAP III ST-A
Transcript
VPAP® III, VPAP III ST, VPAP III ST-A Reorder No. 248106/3 05 04 SERVICE MANUAL English www.resmed.com Waking people up to sleep Manufactured by: ResMed Ltd 1 Elizabeth MacArthur Drive Bella Vista NSW 2153 Australia Tel: +61 (2) 8884 1000 or 1 800 658 189 (toll free) Fax: +61 (2) 8883 3114 Email: [email protected] ResMed Offices: ResMed Corp 14040 Danielson Street Poway CA 92064-6857 USA Tel: +1 (858) 746-2400 or 1-800-424-0737 (toll free) Fax: +1 (858) 746-2900 Email: [email protected] ResMed (UK) Ltd 65 Milton Park Abingdon Oxfordshire OX14 4RX UK Tel: +44 (1235) 862 997 Fax: +44 (1235) 831 336 Email: [email protected] ResMed Asia Pacific Ltd 97 Waterloo Road North Ryde NSW 2113 Australia Tel: +61 (2) 9886 5000 or 1 800 991 900 (toll free) Fax: +61 (2) 9889 1471 Email: [email protected] ResMed Finland Niittykatu 6 FIN 02200 Espoo Suomi Tel: +358 9 8676820 Fax: +358 9 86768222 Email: [email protected] ResMed GmbH & Co. KG Rudolfstraße 10 D-41068 Mönchengladbach Deutschland Tel: +49 (0) 2161-3521-0 (Reception), +49 (0) 180 22 22 668 (Service-Telefon; 0.06 s/Anruf), +49 (0) 180 22 66 888 (Wartungstelefon; 0.06 s/Anruf) Fax: +49 (0) 2161-3521-1499 Email: [email protected] ResMed Hong Kong Ltd Room 1714 Miramar Tower 132-134 Nathan Road Tsim Sha Tsui Hong Kong Tel: +852 2366 0707 Fax: +852 2366 4546 Email: [email protected] ResMed Japan Nihonbashi Hisamatsu Bldg. 4F 2-28-1 Nihonbashi-Hamacho Chuo-Ku, Tokyo 103-0007 Japan Tel: +81 (3) 3662 5056 Fax: +81 (3) 3662 5040 ResMed Malaysia Sdn Bhd Suite E-10-20, Plaza Mon’t Kiara No. 2, Jalan 1/70C Mon’t Kiara 50480 Kuala Lumpur Malaysia Tel: +60 3 6201 7177 Fax: +60 3 6201 2177 Email: [email protected] ResMed NZ Ltd PO Box 51-048 Pakuranga Auckland New Zealand Tel: +0800 737 633 (NZ toll free) or +64 25 737 633 Fax: +0800 737 634 (NZ toll free) or +64 9 239 0193 Email: [email protected] ResMed SA Parc de la Bandonnière 2 rue Maurice Audibert 69800 Saint-Priest France Tel: +33 (0) 4 37 251 251 Fax: +33 (0) 4 37 251 260 Email: [email protected] ResMed Singapore Pte Ltd 238A Thomson Road # 12-03/04 Novena Square Tower A Singapore 307684 Tel: +65 6284 7177 Fax: +65 6284 7787 Email: [email protected] ResMed Spain SL C/ Arturo Soria, 245 28033 Madrid España Tel: +34 (93) 590 8154 Fax: +34 (93) 590 8153 Email: [email protected] ResMed Sweden AB Industrigatan 2 S-461 37 Trollhättan Sverige Tel: +46 520 420 110 Fax: +46 520 397 15 Email: [email protected] Labhardt AG Thannerstrasse 57 CH-4054 Basel Schweiz Tel: +41 (061) 307 9711 Fax: +41 (061) 307 9722 Email: [email protected] ResMed Corp ResMed (UK) Ltd Internet: www.resmed.com US DESIGNATED AGENT: EU AUTHORISED REPRESENTATIVE: Protected by patents: AU 697652, AU 699726, AU 713679, EP 0661071, EP 0858352, US 4944310, US 5199424, US 5522382, US 6213119, US 6240921, US 6705315. Other patents pending. Protected by design registrations: AU 147283, AU 147335, AU 147336, CH 128.709, CH 128.710, CH 128.711, CH 128.712, DE 40201723, DE 40202007, DE 40202008, DE 40202020, ES 153514, ES 153515, ES 153516, ES 153518, ES 156135, ES 156136, FR 02 1407, GB 3001791, GB 3001819, GB 3001820, GB 3001821, JP 1164087, JP 1164265, JP 1164266, JP 1164267, JP 3638613, SE 75598, SE 75599, SE 75600, SE 75715, US D467335, US D468011, US D476077, US D477868, US D487311. Other designs pending IPAP MAX, IPAP MIN, SmartStart, TiCONTROL, VPAP, Vsync and Vsync logo are trademarks of ResMed Ltd and IPAP MAX, SmartStart, and VPAP are Registered in U.S. Patent and Trademark Office. © 2005 ResMed Ltd. 248106/3 05 04 Contents 1 How to use this manual ............................................................. .............................................................4 4 2 Introduction ................................................................................ ................................................................................5 5 Intended users of this manual Nasal CPAP 5 5 Features of the VPAP III, VPAP III ST Features of the VPAP III ST-A 5 5 HumidAire 2i™ ResLink Software changes VPAP III, VPAP III ST VPAP III ST-A 3 6 6 6 General inspection and servicing ..............................................7 ..............................................7 Instructions for general inspection procedures Equipment required For VPAP III ST-A only Software buttons Function keys VPAP III and VPAP III ST keypad and LCD VPAP III ST-A keypad and LCD 1 Clean the flow generator 2 Record clinical settings 3 External examination 4 Internal examination (if necessary) 5 Replace the air filter 6 Keypad test 7 Pressure calibration test 8 Flow calibration test 9 Blower test 10 Audible alarm test 11 VPAP III ST-A alarm test (VPAP III ST-A only) 12 DC power test (VPAP III ST-A only) 13 HumidAire 2i test 14 Reload clinical settings 15 Complete the Service record results form 16 Fill out product problem report 7 7 7 8 8 8 8 9 9 10 10 11 11 11 12 12 12 12 13 13 15 15 15 4 Static Precautions .....................................................................16 .....................................................................16 5 Replacing major subassemblies ..............................................17 ..............................................17 Outer components of the flow generator Opening the flow generator Remove the front muffler assembly Removing the interface assembly Remove the filter Remove the top case Replacing the blower module assembly Replacing the blower inlet and outlet connectors Replacing the fuse (for VPAP III and VPAP III ST models only) Replacing the power supply (VPAP III and VPAP III ST models) 2 5 5 VPAP® III, VPAP III ST, VPAP III ST-A Service Manual 17 18 18 19 20 20 21 25 28 29 Replacing the power supply (VPAP III ST-A models) Replacing the Main PCB Installing the serial number and default settings Replacing the cable harness with switch and humidifier connector Replacing the switch (for VPAP III and VPAP III ST models only) Placing decals on replacement bottom cases Replacing interface assembly components Closing the flow generator Replacing front muffler components The HumidAire 2i Opening the HumidAire 2i Removing components from the water chamber The water chamber lid The water chamber base 6 42 44 46 46 47 47 48 Replacement parts list ............................................................. 51 Outside cases Air filter components Interface assembly Internal components PCBs Main wiring harnesses HumidAire 2i spare parts 7 30 31 34 34 37 40 41 51 51 52 53 53 54 55 Calibration procedures ........................................................... 56 Warnings and cautions Equipment required Software calibration buttons Order of calibration procedures 1 Pressure calibration 2 Flow calibration 3 Motor noise calibration (VPAP III ST-A only) 56 56 56 57 57 58 59 8 Troubleshooting guide ............................................................ 60 9 System specifications ............................................................... 62 VPAP III, VPAP III ST VPAP III ST-A 62 63 10 Recommended maintenance schedule ................................. 64 Appendix A: Service request form ................................................. 65 Appendix B: Noise reduction upgrade .......................................... 66 Equipment required Adding foam pads to the blower assembly Fit cable tie and replace blower outlet connector 66 66 68 Appendix C: Installing the service software .................................. 70 Contents 3 1 How to use this manual Each of the sections in this manual has been written with a specific purpose in mind. Use this guide to help you find the material which is relevant to your task at the moment. 2 Introduction – Gives a brief overview of the VPAP III family of flow generators. 3 General inspection and servicing – Gives a procedure to help you examine a flow generator which has been brought into a service centre. The general inspection procedures should be performed before any other work is done on the flow generator. 4 Static precautions – Lists procedures to be followed whenever PCBs are removed from the flow generator unit. These procedures minimize the chance of ICs being damaged by static electricity. 5 Replacing major subassemblies – Highlights points to note when replacing subassemblies, reassembling the flow generator and indications of when recalibration is necessary. 6 Replacement parts – Shows labelled pictures and part numbers of all the spare parts and subassemblies available from ResMed. 7 Calibration procedures – Lists procedures to follow after a fault has been isolated to a PCB or blower and the part has been replaced. Follow these procedures to calibrate the unit and to restore the owner's individual settings. 8 Troubleshooting guide – Gives you a way to quickly locate the problem and fix it if you know the symptoms of a faulty machine. 9 System specifications – Lists electrical and mechanical specifications of flow generator and air tubing. 10 Recommended maintenance schedule – Provides a brief description of the maintenance which the owner of the flow generator should carry out. If the owner is performing regular cleaning and maintenance, there is no need for regular servicing by a service technician. Some countries require all medical equipment to have a periodic service to confirm that the equipment is in good working order. Section 3 General inspection and servicing may be used in this situation. Appendix A: Service Request Form - Whenever you locate a fault in a flow generator, fill out this form and return it to ResMed for logging. Appendix B: Noise reduction upgrade - Lists procedures to follow to reduce noise in problem flow generators. Appendix C: Installing the service software - Lists procedures for installing the service software. Note: 4 Schematics of all PCBs in this flow generator are available to authorised service centres. To order, please contact your local ResMed office. VPAP® III, VPAP III ST, VPAP III ST-A Service Manual 2 Introduction This manual is a guide to servicing and repairing the VPAP III, VPAP III ST and VPAP III ST-A flow generator and humidifier. It is written for ResMed distributors, and gives instructions for replacing subassemblies and for recalibration as appropriate. Work at the component level will normally be carried out by ResMed. Intended users of this manual Before attempting any repair work, please ensure that you: • are familiar with the operating manual and the clinical manual for the flow generator • have suitable electrical and mechanical training to satisfy the requirements of the relevant regulatory authorities • use the correct antistatic procedures described in this manual Use only approved ResMed parts and never use parts that have failed, show excessive wear, have been contaminated, or are ineffective for their intended use. Note: Schematics of all PCBs in this flow generator are available to authorised service centres. To order, please contact your local ResMed office. Nasal CPAP Nasal Positive Airway Pressure systems are used to treat obstructive sleep apnea, a disorder that causes a physical obstruction in a person’s airway while sleeping. The principle of treatment is that filtered air is delivered by a flow generator through flexible tubing to a nasal mask worn by the patient while sleeping. The flow generator maintains a positive pressure in the patient’s airway which acts as a pneumatic splint, preventing the airway from collapsing during sleep. Features of the VPAP III, VPAP III ST The VPAP III system provides continuous positive airway pressure (CPAP) and bi-level therapy to patients with obstructive sleep apnea (OSA). The device delivers a treatment pressure with a maximum range of 2 to 25 cm H2O depending on the unit’s configuration. The data storage and processing capabilities of the VPAP system facilitate patient management. The system provides summary data for a variety of time intervals, which can be viewed via the LCD menus. The patient’s usage hours, mask leak, tidal volume, respiratory rate, minute ventilation, apnoea + hypopnoea index (AHI), and apnoea index (AI) are displayed in the Results section of the Clinical menu. Features of the VPAP III ST-A The VPAP III ST-A provides bi-level therapy. It combines the features of the VPAP III series along with adjustable trigger and cycle thresholds, and a range of clinician and patient alarms.The device delivers a treatment pressure with a maximum range of 2 to 30 cm H2O depending on the unit’s configuration. HumidAire 2i™ The HumidAire 2i is designed to integrate with the VPAP III system to form a single heated humidification and VPAP unit. ResLink The ResLink clinical therapy management module is designed to integrate with the VPAP III system. It provides greater insights into therapy and visible, objective evidence that the device is delivering effective ventilation during sleep. 2 Introduction 5 Software changes ResMed continually develops and improves its products. The VPAP III, VPAP III ST and VPAP III ST-A have undergone a number of software changes as outlined below: VPAP III, VPAP III ST Software version Significant features SX365-0108 • Original issue SX365-0109 • Maintenance update • Update to shipper states • First VPAP III ST release SX365-0200 • Number of used hours displayed extended to 8760 VPAP III ST-A 6 Software version Significant features SX384-0106 • Original issue SX384-0107 • Maintenance upgrade with language fixes. SX384-0108 • Maintenance upgrade SX384-0203 • Number of used hours displayed extended to 8760 SX384-0200 (Teijin only) • Original issue SX384-0202 (USA only) • Original issue VPAP® III, VPAP III ST, VPAP III ST-A Service Manual 3 General inspection and servicing Instructions for general inspection procedures Carry out the procedures on the following pages to confirm that the flow generator is in good electrical and mechanical condition. These tests will highlight any major mechanical or electrical problem with the unit. Enter the results in the electronic form provided in the service software. Equipment required • ResMed Spirit 2.1 Service Software (30967) or available in service software kit 30966, which includes null modem cable, oxygen sideport connector, closed Bubble Cushion®, standard mask frame and security key. Note: Instructions for installing the Spirit 2.1 Service Software can be found in Appendix C: Installing the service software. • Calibrated flow meter with flow regulation valve Note: The flow meter must be capable of measuring air flows ranging from 0 to 150 L/min with an accuracy of 3% or better over this range • 2 metre air hose • Manometer (0-30 cm H2O range) • A computer running Windows NT 4.0, 2000 or XP. Note: There is only partial support for the VPAP III ST-A on a computer running Windows NT 4.0. Some command settings will not be available. • HumidAire 2i docking station For VPAP III ST-A only • DC-24/30 converter (ResMed part# 22015) • DC power supply (12V battery or bench top power supply capable of supplying 3 amps or more) 3 General inspection and servicing 7 Software buttons Flow generator settings dialog Perform the audible alarm test Perform the pressure calibration test Service record results form Perform the flow calibration test Record Perform the blower test Function keys VPAP III and VPAP III ST keypad and LCD LCD Screen Right key Left key Keypad Up/down key Front key VPAP III ST-A keypad and LCD LCD screen Quickview LEDs Right key Left key Alarm mute Start/Stop Up/down key 8 VPAP® III, VPAP III ST, VPAP III ST-A Service Manual 1 Clean the flow generator Before servicing the unit it should be wiped down using a lint free cloth and a cleaning agent with a high alcohol content, for example, isopropyl alcohol. Caution ! When using a cleaning agent with a high alcohol content refer to the appropriate Material Safety Data Sheet to ensure safe handling of the cleaning agent. Remove any stains from the cases. When removing any stains from the flow generator or mask system use soap or detergent-based cleaning solutions. Remove excess and wipe dry after use. Do not use thinners, trichlorethylene, bleach or other solvents. Do not apply oil to any component of the flow generator. 2 Record clinical settings 1 Open AutoSet Spirit Service Software 2.1. Main window in service software 2 Select Settings>Flow generator settings from the main window, or press the Open flow generator settings dialog button at the top of the main window. 3 The following screen will appear with the flow generator settings: 4 Select File>Save screen settings to file, or select the floppy disk icon and save the settings under the unit’s serial number. Warning ! If the clinical settings can not be recorded, press the Default button and save the file with the default settings for the faulty unit. Notify the patient that the unit has been reset to default settings. 3 General inspection and servicing 9 3 External examination 1 Visually examine the flow generator for external damage such as: • deformation or cracking of the upper or lower cases • damaged components such as the mains power inlet or mains power switch • damage to the front panel decal or bottom decal If either of the outside cases are fractured and require replacement, take particular care in inspecting all other components within the cases for damage. 2 Press the Service record results button. 3 Open the file saved earlier, containing the unit’s clinical settings. 4 Check the appropriate box for the external examination. 4 Caution ! Internal examination (if necessary) The VPAP III uses an isolated power supply, however, it is recommended that isolation transformers are also used for added safety while working with the cases opened up and power switched on. Remove the front cover, interface assembly and the top case of the flow generator by following the instructions given in Section 5 Replacing major subassemblies. Inspect the flow generator for the following, recording any irregularities: • The blower assembly is seated correctly • The Power Supply PCB is seated correctly Inspect the unit for the following, recording any irregularities: • all mechanical components are seated correctly • all electrical components are mounted correctly and secured in position • there are no loose terminals, loose wires or incomplete insulation on electrical components or connections • there are no loose pieces of wire or other objects trapped in the PCB Use an antistatic cloth or brush to remove dust or dirt from components and from the insides of the flow generator case. Repair or replace any missing or damaged external components. Rectify any problems either identified by the user or noted during servicing. Should any major components such as the blower assembly or the Main PCB require replacement, the recalibration procedure as given in Section 7 Calibration procedures must be performed before the unit is returned to the patient. Reassemble the flow generator. Record the results by checking the appropriate box in the Record of Service window. Caution ! 10 Printed circuit boards can be damaged by static electricity. Please read the instructions in Section 4 Static Precautions before attempting to replace any PCBs. Thread cutting screws are used to fasten the cases of the flow generator. When replacing a thread cutting screw, turn the screw anti-clockwise until it fits into the previously cut thread. Otherwise the original thread may be stripped out. VPAP® III, VPAP III ST, VPAP III ST-A Service Manual 5 Replace the air filter 1 Remove the filter cartridge from the flow generator. 2 Replace the air filter, with the blue side of the filter material facing out from the unit. 3 Check the appropriate box in the Record of Service window. Caution ! 6 Only use genuine ResMed spare parts, because the filter affects the flow characteristics of the flow generator, which in turn affects the pressure supplied to the patient. Keypad test 1 Switch off the flow generator, then switch it back on. Wait for the Welcome message to appear and check that the LCD back light and LEDs beneath the keypad are illuminated. Note: The LCD backlight and LEDs may not be clearly visible in bright light. 2 Press the Left key to enter the patient menu. Use the up/down button to cycle through the menu and the Left and Right keys to set and change options. Confirm that all button presses produce the appropriate response. 3 Press the start button and confirm that the flow generator starts. Press the button again and confirm that the flow generator stops. 4 Record the results by checking the appropriate box in the Record of Service window. 5 Press the Floppy disk button to save the results. If the flow generator fails this test, replace the keypad by following the procedures given in Section 5 Replacing major subassemblies. Once the keypad has been replaced, repeat the keypad test procedure. 7 Caution ! Pressure calibration test Make sure the flow generator has been warmed up for at least 15 minutes before proceeding with the remaining tests 1 Close the Record of Service window. 2 Press the Record button and select the file which contains the flow generator settings. 3 Select Performance Tests>Pressure calibration test from the main window, or press the Perform the pressure calibration test button. 4 Set up the test equipment as instructed by the software. 5 Select Next and follow the steps as instructed. If the flow generator fails this test, follow the procedures outlined in Section 7 Calibration procedures to do a full recalibration of the flow generator. 3 General inspection and servicing 11 8 Flow calibration test 1 Select Performance Tests>Flow calibration test, or press the Perform the flow calibration test button at the top of the main window. 2 Set up the test equipment as instructed by the software. 3 Select Next and follow the steps as instructed. If the flow generator fails this test, follow the procedures outlined in Section 7 Calibration procedures to do a full recalibration of the flow generator. 9 Blower test The blower test is used to test the performance of the motor and to determine whether there are any impediments in the air path. 1 Select Performance Tests>Blower test, or press the Perform the blower test button at the top of the main window. 2 Set up the test equipment as instructed by the software. 3 Select Next and follow the steps as instructed. If the flow generator fails this test, check the flow generator airpath is clear and ensure the test set-up is correct. If the unit continues to fail, replace the blower then follow the procedures outlined in Section 7 Calibration procedures to do a full recalibration of the flow generator. 10 Audible alarm test 1 Select Performance Tests>Audible alarm test, or press the Perform the audible alarm test button at the top of the main window. 2 The following window will appear: 3 Follow the instructions on screen. Once complete press the Pass or Fail button to close the window. If the flow generator fails this test, the buzzer on the Main PCB will need to be replaced. After replacing the buzzer, repeat the Pressure calibration test, Flow calibration test and Audible alarm test from the general inspection procedures. 11 VPAP III ST-A alarm test (VPAP III ST-A only) 1 Hold down the alarm mute key for 3 seconds. 2 Once the key is released the alarm should sound and the LED should flash for 10 seconds. 12 VPAP® III, VPAP III ST, VPAP III ST-A Service Manual 12 DC power test (VPAP III ST-A only) 1 Turn off the flow generator at the mains. 2 Take the DC-24/30 converter and adjust the voltage to 24V. 3 Place the converter on a level surface with the ResMed logo facing upwards. 4 Plug the flat connector end of the DC-24/30 converter into the DC input socket. 5 Connect the DC-24/30 converter to a DC power source (12V battery or bench top power supply capable of supplying 3 amps or more) 6 Turn on the unit at the DC connector and confirm that the unit powers up. 7 Turn off the unit and reconnect it to mains power. 13 HumidAire 2i test The VPAP III, VPAP III ST and VPAP III ST-A is designed to integrate with the ResMed HumidAire 2i heated humidifier. The units automatically detect the HumidAire 2i docking station when it is connected to the flow generator. Warning ! The HumidAire 2i heating plate may reach temperatures in excess of 60°C. 1 Switch off the flow generator. 2 Remove the VPAP III front cover by referring to the instructions given in Section 5 Replacing major subassemblies 3 Plug the HumidAire 2i docking station without the water chamber into the front of the flow generator as shown in the picture below. Note: The docking station may not attach correctly to the flow generator if docking is attempted with the water chamber installed. 4 Switch the flow generator on and observe the LCD screen. After a welcome message is displayed, the LCD screen should display the warm-up feature prompt. 3 General inspection and servicing 13 Note: The VPAP III ST-A will display the standard patient menu or advanced patient menu series after the welcome message. Press the right key until the warm-up feature prompt is displayed. 5 Turn the knob to 5. 6 Press the right key to start the HumidAire 2i warming up. Ensure the light on the humidifier turns on to indicate the unit is warming. Light indicating humidifier warming 7 For VPAP III and VPAP III ST units press the right button again to stop the warm-up feature. 8 Switch off the flow generator and remove the HumidAire 2i docking station. Warning ! The HumidAire 2i heating plate will be extremely hot (in excess of 60°c). 9 Refit the front cover. 10 Switch on the flow generator and observe the LCD screen. Confirm that the warm-up feature prompt is not displayed in the LCD screen. If the flow generator fails this test, switch off and remove the power cord. Remove the top cover and blower assembly by referring to the instructions given in Section 5 Replacing major subassemblies. Check that all cables inside the flow generator are connected correctly. 14 VPAP® III, VPAP III ST, VPAP III ST-A Service Manual 14 Reload clinical settings 1 Select Settings>Flow generator settings from the main window. 2 Select File>Read settings from file, or select the folder icon. 3 Navigate to where the settings file was saved and open the file. 4 Once the settings are displayed on the screen, click the Set button to upload them to the flow generator. 5 Close the Flow generator settings window. 15 Complete the Service record results form 1 Press the Service record results form button and open the file with the unit’s settings. 2 Press the Service details tab. • Check the Reload clinical settings box at the base of the window. • Check the Clean flow generator box to indicate if the unit was cleaned according to the procedures outlined in step 1 Clean the flow generator. • Check the appropriate HumidAire 2i test box. • Check the appropriate DC power test box. • Check the appropriate VPAP III ST-A alarm test box. 16 Fill out product problem report 1 If any problems are found with the flow generator, fill out the Service request form in Appendix A of this manual, and send it to ResMed in Sydney for review and logging. (The address may be found on the first page of this manual.) 2 Check the appropriate Fill out product problem report box in the Service details window. 3 Save the file. If a hard copy of the form is needed, press the Print button at the top of the window. 4 Close the Record of Service window. 3 General inspection and servicing 15 4 Static Precautions Warning ! Prior to disassembly or assembly, make sure that the power is not connected to the flow generator. Integrated circuits (ICs) within the various PCBs can be badly damaged by electrostatic discharge or transient voltages. The following procedures are recommended to avoid component damage: 1 Work benches where handling and repairs are done must have surfaces of suitable conducting material connected via a 1 MΩ resistor to an electrical ground. 2 The area under and also in front of the work bench must be coated with a suitable conductive floor paint, or alternatively covered with a conductive floor mat. The conductive paint coating or floor mat must be connected to an electrical ground. 3 Soldering irons or solder baths must be at the same reference (ground) potential as the work bench. 4 A wrist strap must be worn by service personnel working at the bench. The wrist strap must have a conductive lead (1 MΩ) connected to the bench surface. Alternatively, a heel grounding strap to ground the operator to the floor may be used. (Such a wrist or heel strap should not create an electrical hazard for the wearer). 5 Handling of ICs should be kept to a minimum. If handling is required, avoid directly touching the leads. The recommended procedure is to first touch the container in which the ICs are stored, or the PCB in which they are mounted, before touching the ICs. Service personnel should take every precaution that the items will see the same reference potential when moved. 6 All ICs and PCB assemblies containing ICs should be stored in antistatic bags until use. 7 Service personnel should wear clothing which minimizes the build up of static charges. Cotton is preferable to wool or synthetic fibres. 8 Service personnel should avoid electrostatic build up through the movement of air over plastic material. 9 Plastic materials should wherever possible be kept away from the ICs as they develop and maintain high levels of static charge. 10 Low humidity increases potential static problems. Maintaining humidity levels above 60% is one of the most effective ways to guard against static handling problems. 16 VPAP® III, VPAP III ST, VPAP III ST-A Service Manual 5 Replacing major subassemblies This section contains brief instructions and points to be aware of as you replace major subassemblies and reassemble the flow generator. Caution ! When a Main PCB or motor is replaced, the flow generator must be recalibrated by following the procedures in Section 7 Calibration procedures. Outer components of the flow generator Handle Top case Interface panel Filter Front muffler assembly Bottom case Water chamber Docking station VPAP III with HumidAire 2i attached 5 Replacing major subassemblies 17 Opening the flow generator Remove the front muffler assembly 1 Press the latch underneath the front muffler assembly. 2 While pressing on the latch, pull away the front muffler assembly from the unit. 18 VPAP® III, VPAP III ST, VPAP III ST-A Service Manual Removing the interface assembly 3 Using a screwdriver, release the two front lock tabs while pulling the interface assembly upwards. Front lock tabs Use a screw driver to push against locking tabs 4 Lift up the module carefully, so as not to place any strain on the flexible cable or PCB underneath. 5 Replacing major subassemblies 19 5 Turn the module upside down and release the locking tabs that are holding the flexible cable. Locking tabs 6 Gently pull out the flexible cable. Remove the filter 7 Take hold of the lower end of the air filter cover and pull it out and away from the unit. Remove the top case 8 With the interface assembly removed, turn the unit upside down and undo the four screws holding on the top case, using a Phillips head screwdriver. Screws Screws 20 VPAP® III, VPAP III ST, VPAP III ST-A Service Manual 9 Turn the unit right-side up and carefully lift off the top case, allowing the flexible cable to slip through the top case. VPAP III with top case removed Power Supply PCB Blower module Flexible cable Replacing the blower module assembly Caution ! The following procedures should be completed exactly as written to ensure sensor tubes are not kinked or compressed. If replacing the blower to reduce noise from the unit complete the procedures in Appendix B: Noise reduction upgrade. The application of foam, rather than replacing the blower, may help to reduce noise. 1 Disconnect the sensor tube and elbow from the blower outlet connector on the blower. Sensor tube and elbow 2 With both hands, ease the blower module up and out of the lower case. 5 Replacing major subassemblies 21 3 Turn it over towards the left and rest it on the jig. 4 Using a small screw driver, carefully prize off the two silicone tubes connected to the base of the blower. 5 Disconnect the motor cable assembly from the Main PCB. 6 Place the new blower module on the jig. 7 The sensor tube that was connected to the blower outlet connector is connected to the third sensor port on the Main PCB. Ensure that the elbow is facing towards the side of the case as shown below: 22 VPAP® III, VPAP III ST, VPAP III ST-A Service Manual 8 Connect silicone tube 1 to the right hand side of the module base from pressure sensor port 1 on left. This tube must pass behind the vibration mount once the blower is located. 9 Connect the motor cable assembly, which should run over the top of sensor tube 1. 1 2 1 2 VPAP III and VPAP III ST models 3 4 1 2 VPAP III ST-A model with Ferroxcube Toroid Ferroxcube Toroid 1 2 3 4 10 Take the second silicone tube running from sensor port 2 and connect it to the second port free in the blower base. It should also run underneath the motor cable and behind the vibration mount, with sensor tube 1. Note: The fourth port is left open to measure atmospheric pressure 5 Replacing major subassemblies 23 11 Bend tube 3 to the front of the unit, as shown below: 12 Turn the blower assembly over and install it in the lower case, taking care with the location of the blower inlet connector and blower outlet connector. Pay special attention to the routing of the silicon tubes so that no kinking or compression occurs. Blower outlet connector slides onto post Blower inlet connector slides onto inlet seal post Note: Ensure the three vibration mounts are sitting firmly between the blower module and the lower case. Location of the vibration mounts 24 VPAP® III, VPAP III ST, VPAP III ST-A Service Manual 13 Connect tube 3 to the blower outlet connector on the blower. 14 Ensure that the flexible cable is not stuck underneath the blower. Note: If replacing the sensor tubes ensure they are cut to the following lengths: Slimline pressure port fitting Tube 1 170 ± 5 mm Tube 2 225 ± 5 mm "L" shaped connector Tube 3 120 ± 5 mm Replacing the blower inlet and outlet connectors 1 Grasp both halves of the blower module near the blower outlet connector in order to pull it apart. 5 Replacing major subassemblies 25 2 Remove the top half of the blower casing. Blower inlet connector Volute Blower outlet connector 3 Remove the volute from the bottom half of the blower casing. 4 The blower inlet connector and blower outlet connector can then be removed from the volute. 5 Fit the new blower outlet connector, ensuring it is seated properly on the volute, as shown below: Lip of blower outlet connector seated on volute 26 VPAP® III, VPAP III ST, VPAP III ST-A Service Manual 6 Fit the new blower inlet connector, ensuring it is seated correctly on the volute. Blower inlet connector flush to wall of volute 7 Before placing the volute in the casing, check that the motor cable is located under the tab, as shown below: Motor cable located under tab 8 Place the volute in the blower casing. Ensure the blower inlet and outlet connectors are seated as shown below: 9 Place the motor cable grommet in the slot as shown below: Grommet in slot in blower casing 5 Replacing major subassemblies 27 10 Take the top half of the blower casing and place it on the lower half of the casing. Ensure the top half of the casing sits behind the blower outlet connector as shown below: Correct Incorrect 11 Press evenly around the edge of the casing the reseal the blower casing. Replacing the fuse (for VPAP III and VPAP III ST models only) 1 With the blower module removed the fuse casing is now accessible. It is located under the folded PCB insulator. 2 Pull out the wires to remove the fuse casing from behind the insulator. PCB insulator which covers the fuse casing 3 Push the casing together, and twist in an anti-clockwise direction. The fuse casing will separate, giving access to the fuse. 4 Replace the blown fuse. 5 Reconnect the fuse casing 28 VPAP® III, VPAP III ST, VPAP III ST-A Service Manual 6 Locate the wires and fuse to their original position. 7 Refit the blower module. Replacing the power supply (VPAP III and VPAP III ST models) 1 With the blower module removed, lift the power supply out of its mounting slots. 2 Disconnect the AC input cable and the DC output cable. AC input cable DC output cable 3 Install the new power supply, reconnecting both cables, and ensuring that the power supply is correctly located in the mounting slots. Make sure the wires are located as shown below: 5 Replacing major subassemblies 29 Replacing the power supply (VPAP III ST-A models) 1 With the blower module removed, lift the power supply out of its mounting slots. 2 Disconnect the AC cable, DC cable, PSU cable harness and the humidifier mains cable. AC cable from switch Humidifier mains cable PSU cable harness DC cable from switch 3 Install the new power supply, reconnecting all cables, and ensuring that the power supply is correctly located in the mounting slots. Make sure the wires are located as shown below: 30 VPAP® III, VPAP III ST, VPAP III ST-A Service Manual Replacing the Main PCB 1 Remove the blower module, disconnecting the sensor tubes from both the sensors on the PCB and from the blower module. Note: Remove the sensor tubes from the PCB by gently twisting and pulling upwards on the tubes to ensure that the pressure ports are not damaged. 2 Disconnect the power supply and the humidifier interface cable. Screw holding Main PCB Humidifier interface cable 3 Undo the screw securing the PCB to the bottom of the case. 4 Place a small screw driver under one of the front lock tabs and lift carefully while releasing the lock tab. Location of lock tabs 5 Replacing major subassemblies 31 5 Release the other front lock tab. 6 Continue to lift the PCB while progressively releasing the remaining lock tabs. 7 Take out the PCB and remove the serial connector seal. Note: Not all units will contain the serial connector seal. Connector seal R300-7109 can be installed in those units that do not currently have a seal. 8 Very carefully release the locking device on each side of the flexible cable using a small screw driver and pull out the cable. 9 Take the new Main PCB and fit the serial connector seal. Serial connector seal 10 Install flexible cable in the locking device, then carefully close both sides of the locking device at the same time. 11 Fold the flexible cable as shown below: Fold cable 32 VPAP® III, VPAP III ST, VPAP III ST-A Service Manual 12 Place the Main PCB in the bottom case, positioning it so that the two D-connectors align with the corresponding openings in the bottom case. The locating pin goes through the hole as shown below: Locating pin 13 Gently press down the edges of the PCB progressively from the back, working your way to the front of the PCB, until all the lock tabs have clicked into place. 14 Fit the screw to hold the PCB in place. Caution ! This is a thread cutting screw. When replacing a thread cutting screw, turn the screw anticlockwise until it fits into the previously cut thread, otherwise the original thread may be stripped out. 15 Loop the humidifier cable, as shown below and reconnect it. 16 Refit the blower assembly following the instructions outlined in “Replacing the blower module assembly” on page 21. 17 Once the Main PCB has been replaced, reinstall the flow generator’s settings by following the instructions "Reload clinical settings" on page 15. 5 Replacing major subassemblies 33 Note: After loading the clinical settings and options ensure the time and date settings are correct for your region. Select Settings>Set tme and date to view and modify these settings as required. Installing the serial number and default settings If the Main PCB has been replaced and the original settings could not be downloaded from the flow generator, the default settings and serial number for the unit will need to be installed. 1 With AutoSet Spirit Service Software 2.1 open, select Settings>Flow generator settings from the main window, or press the Flow generator settings dialog button at the top of the main window. 2 The following screen will appear: 3 Enter the unit’s product code and serial number, which is located on the base of the unit. 4 Press the Default button to enter the default settings. 5 Press the Set button to load the settings into the flow generator. Note: Warning ! Ensure the time and date settings are correct for your region. Select Settings>Set tme and date to view and modify these settings as required. If the clinical settings could not be recorded, and the unit was reset to the factory default settings the patient will need to be notified, so they can have their settings reloaded. Replacing the cable harness with switch and humidifier connector 1 With the blower assembly and Main PCB removed, remove the PCB insulator. PCB insulator VPAP III, VPAP III ST 34 VPAP® III, VPAP III ST, VPAP III ST-A Service Manual VPAP III ST-A 2 Slide the humidifier connector out of its housing by depressing the two locks at the side of the connector while pushing it upwards. Location of locks 3 Locate the switch at the rear of the unit. • For older version VPAP III and III ST units push down the tabs on the top of the switch while also pushing it forwards out of the rear aperture. • For all other units press on the four clips indicated to remove the switch from the bottom case. 2 1 1 2 4 3 3 4 VPAP III, III ST VPAP III ST-A 4 Remove the cable harness from the bottom case. 5 Feed the new cable harness through the rear aperture. 5 Replacing major subassemblies 35 6 Push the switch into place, with the pins located under the rocker switch. Ensure the switch clicks securely into place. Switch - VPAP III, III ST Switch - VPAP III ST-A 7 Take the humidifier connector and slide it into the housing, ensuring it "clicks" into place. 8 Locate the wires in the route shown below. Route cable behind second clip Route cable under clip Caution Wires must not overlap or ! cross over ribs VPAP III, VPAP III ST Blue wire must be on top Slot brown wire between posts on either side of fuse casing VPAP III ST-A Slot both wires between posts 9 Refit the PCB insulator. 10 Replace the Main PCB and blower. 36 VPAP® III, VPAP III ST, VPAP III ST-A Service Manual Slot both wires between posts Replacing the switch (for VPAP III and VPAP III ST models only) 1 With the cable harness removed from the bottom case, remove the cable tie from around the recepticals. For older version cable harnesses, remove the cable ties indicated below. Remove cable ties 2 Disconnect the cable harness wires from the switch. 3 Take the new switch and connect the long wires from the cable harness. Connect the brown wires to terminal 2, and the blue wires to terminal 1, as shown over page: Terminal 2 Terminal 2a Switch front Terminal1a Terminal 1 Terminal L (Active) Terminal N (Neutral) Switch back 5 Replacing major subassemblies 37 4 Feed the short blue wire in the gap between the brown and blue wires running to the AC connector, as shown below: Short blue wire 5 Connect the short blue wire to terminals 1a and N. Short blue wire connected to terminal 1a and N 38 VPAP® III, VPAP III ST, VPAP III ST-A Service Manual 6 Connect the short brown wire to terminals 2a and L. Short brown wire connected to terminals 2a and N 7 Take a 100 mm cable tie and fasten it around the receptacles on terminals 1, 1a, 2 and 2a. The cable tie must be approximately half way down the recepticals. 8 The position of the cable tie knot must be located as shown below: Position of cable tie knot 9 Reinstall the main wiring harness with switch into the bottom case. 5 Replacing major subassemblies 39 Placing decals on replacement bottom cases When replacing the bottom case for the VPAP III family of products the necessary warning decals need to be installed on the replacement cases. VPAP III, VPAP III ST 1 Take the replacement fuse label (R300-305) and stick it inside the bottom case, as shown below: Replacement fuse label 2 Place the mains voltage label (R300-303) on the outside of the bottom case, below the gaps for the humidifier connector. Mains voltage label VPAP III ST-A 1 Place the mains voltage sticker (R300-303) on the outside of the bottom case, below the gaps for the humidifier connector. Mains voltage sticker 40 VPAP® III, VPAP III ST, VPAP III ST-A Service Manual 2 Take the AC switch label (R241-406) and place it on the outside of the bottom case, next to the AC switch, as shown below: Note: The AC switch label is not required for Teijin VPAP III ST-A units. AC switch label Replacing interface assembly components 1 Turn the interface assembly upside down and release the clips holding in the LCD module. Clips Clips Take care not to touch the gold contacts on the back of the LCD module. (VPAP III LCD pictured) Do not touch the gold contacts 5 Replacing major subassemblies 41 2 Remove the LCD module keypad, taking care not to touch the pills on the keypad. (VPAP III keypad pictured) Do not touch the pills 3 Insert the keypad into the interface panel, once again taking care not to touch the pills on the keypad. 4 Fit the LCD module to the interface panel by engaging the clips on the right and left of the interface panel. If this is a new LCD module, remove the protective backing from the LCD module window, taking care not to touch the gold contacts. Closing the flow generator 1 Take the flexible connector and carefully feed it through the top case. 2 Turn the unit upside down and fix the top case to the bottom case with the Phillips head screws. Screw in the rear screws first. Caution ! 42 Thread cutting screws are used in the flow generator. When replacing a thread cutting screw, turn the screw anti-clockwise until it fits into the previously cut thread, otherwise the original thread may be stripped out. VPAP® III, VPAP III ST, VPAP III ST-A Service Manual 3 Turn the unit right side up, and refit the filter, with the blue side of the filter material facing out from the flow generator. 4 Take the interface assembly and turn it upside down so that the LCD module is facing upwards. 5 Insert the flexible connector into the locking device. 6 Carefully close both sides of the locking device at the same time. 7 Fold the cable as shown below, according to the make of flow generator: VPAP III, VPAP III ST VPAP III ST-A 5 Replacing major subassemblies 43 Note: Ensure the flexible cable is not pinched between the top case and interface panel. 8 Fit the interface panel. Ensure that all four clips in the interface panel are clipped properly. For VPAP III ST-A units, push down on the points indicated below. These points are above the retaining clips located on the underside of the interface panel. 9 Refit the front muffler assembly, ensuring the snap lock on the base engages. Replacing front muffler components 1 Take the front muffler and remove the four screws which hold the chassis to the front cowl. Screws Chassis Front cowl Screws 2 Remove the chassis from the front cowl. 44 VPAP® III, VPAP III ST, VPAP III ST-A Service Manual 3 The locking plate can then be removed from the chassis, Locking plate while the front muffler seal can also be removed from the front cowl. Front muffler seal 4 Slide the locking plate onto the chassis and place the chassis in the front cowl. 5 Connect the chassis to the front cowl with the four screws. Caution ! Thread cuttings screws are used in the front muffler seal. When replacing a thread cutting screw, turn the screw anti-clockwise until it fits into the previously cut thread, otherwise the original thread may be stripped out. 5 Replacing major subassemblies 45 The HumidAire 2i Opening the HumidAire 2i 1 Separate the water chamber from the docking station by pushing upwards on the latch on the bottom of the water chamber. 2 Turn the unit on its side and hold the flow generator with one hand, while releasing the bottom catch with the other hand. 3 Pull the humidifier away from the unit. 46 VPAP® III, VPAP III ST, VPAP III ST-A Service Manual Removing components from the water chamber 1 Lift the catches on the side of the water chamber. 2 Separate the water chamber lid and base. Water chamber lid Water chamber base The water chamber lid 1 Inside the chamber lid is the seal. To remove the seal, peel it away from the lid. 5 Replacing major subassemblies 47 The water chamber base The heater plate 1 Remove the cross-member from the supports in the water chamber base. Cross member 2 Push down on the heater plate from inside the chamber to remove it from the chamber. 3 The O-ring can be removed from the tub heater plate. When placing in the new O-ring, make sure it is fitted snugly inside the channel of the heater plate. Caution Ensure the replacement O-ring is not punctured or nicked. ! 48 VPAP® III, VPAP III ST, VPAP III ST-A Service Manual 4 Turn the water chamber base upside down and insert the heater plate with the open side facing down. 5 Firmly press the plate into the chamber. 6 Turn the water chamber base right-side up and place the cross-member on its supports inside the chamber. 7 Take the seal removed from the water chamber lid and fit it firmly onto the rim of the water chamber base. 8 Fit the water chamber lid on top of the water chamber base and ensure the assembly is sealed. 9 Lock the clips on the side of the water chamber. 5 Replacing major subassemblies 49 The latch 1 Turn the water chamber base upside down. 2 Gently pull up and away from the chamber until separated from the base. 3 Take the new latch and insert the feet with locking tabs into the slots as shown below: Ensure the tab latch clicks securely into both slots 4 Push the tab at the top of the latch into the slot at the top of the heater plate. 50 VPAP® III, VPAP III ST, VPAP III ST-A Service Manual 6 Replacement parts list Outside cases Top case (VPAP III, III ST) 19201 Top case (VPAP III ST-A) 19310 Also available Handle R300-794 Bottom case (base pad and base decal not included) 19199 Base pad and base decal kit (VPAP III, III ST) 19276 Base pad and base decal kit (VPAP III ST-A) 19307 Bottom case (Teijin) R241-731 Note: For instructions on inserting the serial number when replacing the bottom decal refer to Tech note 106318. Front muffler assembly 19282 Female D9 connector cover Z9201-D9 Male D9 connector cover Z9202-D9 Air filter components These parts are available as accessories. Filter cover Filter 1 pk Filter 2 pk Filter 3 pk Filter 11 pk Filter 50 pk 30909 30919 30920 30907 30921 30908 6 Replacement parts list 51 Interface assembly VPAP III, VPAP III ST Interface panel (VPAP III Germany) Interface panel (VPAP III ST Germany) Interface panel (VPAP III) Interface panel (VPAP III ST) LCD module 19277 R241-701 R241-702 R241-703 R241-704 Keypad R300-716 VPAP III ST-A Interface panel Interface panel (Germany) Interface panel (Teijin) LCD module LCD module (Teijin) 52 19301 19302 VPAP® III, VPAP III ST, VPAP III ST-A Service Manual Keypad R241-724 R241-726-A R241-726-B R241-726-C Internal components Blower (VPAP III, III ST) Blower (VPAP III ST-A) 19272 19303 (VPAP III ST-A pictured) Blower outlet connector R300-7108 Clipped upper airpath R300-7032 Blower inlet connector R300-7056 Clipped lower airpath R300-7033 Motor retaining flange R241-706 Vibration mount R300-736 Motor mounting R241-705 PCBs Main PCB (VPAP III) Main PCB (VPAP III ST) 19273 19274 Buzzer E9026 Serial connector seal R300-7109 Main PCB (VPAP III ST-A) Main PCB (VPAP III ST-A)(US) PCB insulator R300-7107 19304 19305 Flexible cable 19208 6 Replacement parts list 53 Power supply assembly (VPAP II, III ST) 19275 Also available for VPAP III, III ST, III ST-A Cable harness (24V DC output) R300-744 Power supply assembly (VPAP III ST-A) 19306 Main wiring harnesses Main wiring harness (VPAP III, III ST) (includes IEC switch) R241-729 IEC socket/switch (VPAP III, III ST) R300-7111 Main wiring harness (VPAP III ST-A) (includes switch) R241-735 Available as an accessory (VPAP III ST-A): Power cord clip 2pk 54 26914 VPAP® III, VPAP III ST, VPAP III ST-A Service Manual Also available Silicone tubing (1 m length) Slimline pressure port fitting "L" shaped connector 19210 R330-7057 Z331 HumidAire 2i spare parts HumidAire 2i knob assembly 19233 Note: The following HumidAire 2i spare parts are available as accessories. Contact your local ResMed office for prices. Tub assemblies and docking station Tub assembly, UDEL Tub assembly, PC Docking station HumidAire 2iC tub assembly, PC 30941 30951 30949 30956 (Americas only) Other accessories Water chamber heating plate Water chamber O-ring Latch, UDEL Latch, PC Side catches, PC Tub main seal Lid (side catches) PC Lid (side catches) UDEL Base (side catches) PC Base (side catches) UDEL Side catches, UDEL 30914 30915 30917 30939 30955 30958 30959 30960 30961 30962 30963 6 Replacement parts list 55 7 Calibration procedures All calibration procedures should be carried out whenever the Main PCB or blower has been replaced. Warnings and cautions Warning ! Incorrect connection of mains voltage can result in dangerous voltages being present on the equipment chassis. Incorrect orientation of leads and plugs during reassembly can lead to equipment damage upon power-up. While the VPAP III uses an isolated power supply, it is recommended that isolation transformers are used for added safety while working with the cases opened up and power switched on. Note: Always wait at least 10 seconds after the mains power is switched off before switching it on again. This allows the capacitors in the power supply to discharge. Any abnormal resonance, noise or vibration of the unit must be investigated before the unit is returned to the owner. Equipment required • ResMed Spirit 2.1 Service Software (30967) or available in service software kit 30966, which includes null modem cable, oxygen sideport connector, closed bubble cushion, standard mask frame and security key. Note: Instructions for installing the Spirit 2.1 Service Software can be found in Appendix C: Installing the service software. • Calibrated manometer (0 - 30 cm H2O range) • Calibrated flow meter with flow regulation valve Note: The flow meter must be capable of measuring air flows ranging from 0 to 150 L/min with an accuracy of 3% or better over this range. • 2 metre air hose • A computer running Windows NT 4.0, 2000 or XP • Note: There is only partial support for the VPAP III ST-A on a computer running Window NT 4.0. Some command settings will not be available. Software calibration buttons Pressure calibration Flow calibration Motor noise calibration 56 VPAP® III, VPAP III ST, VPAP III ST-A Service Manual Order of calibration procedures The calibration procedures must be performed in the following order: 1 Pressure calibration 2 Flow calibration 3 Motor noise calibration (VPAP III ST-A only) Cautions ! The flow generator clinical settings must be recorded before any calibration procedure is performed. Refer to the instructions provided in Section 3 General inspection and servicing. If the clinical settings can not be recorded, reset the unit to the factory default settings via the Flow generator settings window in the service software. The unit can also be reset to factory default settings via the clinical menu. Once the default settings have been reloaded, notify the patient. Warm up the flow generator for at least 15 minutes before commencing the calibration procedures. When performing any calibration ensure the humidifier setting in the Settings menu is set to "none". 1 Pressure calibration 1 Open the service software. 2 Press the Record button and select the file which contains the flow generator’s settings. Record button 3 Select Calibration>Pressure calibration, or press the Pressure calibration button at the top of the main window. 7 Calibration procedures 57 4 Follow the prompts on the screen. Once the calibration is complete the following screen will appear: 2 Caution ! Flow calibration The pressure calibration must be performed before the flow calibration. 1 Select Calibration>Flow calibration, or press the Flow calibration button at the top of the main window. 2 Follow the prompts on the screen. Once the calibration is complete the following screen will be displayed: 58 VPAP® III, VPAP III ST, VPAP III ST-A Service Manual 3 Caution ! Motor noise calibration (VPAP III ST-A only) The flow calibration must be performed before the motor noise calibration. 1 Select Calibration>Motor noise calibration, or press the Motor noise calibration button at the top of the main window. 2 Follow the prompts on screen. Once the calibration is complete the following screen will appear: Once the calibrations are complete, repeat tests 6 - 12 from Section 3 General inspection and servicing. If the unit fails calibration, ensure the test set-ups are correct. If the unit continues to fail, send the flow generator with product problem report (found on page 65 of this manual) to ResMed for further servicing. 7 Calibration procedures 59 8 Troubleshooting guide Symptom Possible Cause Flow generator not operating at all (no display when power switch turned on) • Blown fuse in power supply • Faulty Main PCB • Faulty power supply • Replace and investigate cause of the blown fuse. • Replace Main PCB • Replace Power Supply PCB No display on LCD (air flow starts when front key is pressed) • Faulty LCD • Flexible cable not connected properly • Replace LCD module • Check flexible cable connections Buttons not working or intermittent • Pills on the back of the keypad or LCD have been damaged • Replace keypad or LCD LCD displays black squares • Faulty LCD • Flexible cable note connected properly • Faulty Main PCB • Replace LCD module • Check flexible cable connections • Replace Main PCB Unit is noisy • Old style blower module • Upgrade blower by following procedures outlined in “Appendix B: Noise reduction upgrade” on page 66. • Replace motor • Faulty motor Welcome displayed but self-test fails • Software failure • Reset by turning power off, wait 10 seconds and turn on again. Replace Main PCB if problem persists SmartStart can’t be enabled • Full face mask is selected or Mask Alarm is enabled • Check settings and change as required SmartStart can’t be enabled or disabled • Faulty Main PCB • Replace Main PCB Poor or insufficient air flow • Air tubing not connected properly • Air tubing kinked or punctured • Inlet air filter is clogged up • Check and refit tubing as required • Refit or replace as required • Check and replace filter as required • Replace motor • Replace Main PCB • Faulty motor • Damaged pressure sensor Unit continually fails pressure calibration • Torn blower outlet connector • Replace blower outlet connector Humidifier not heating up • Humidifier not docked properly • Locate humidifier docking station onto the unit, then place the chamber in the docking station. The flow generator menu indicates when humidifier is connected. • Replace docking station. • Replace docking station. • Humidifier component failure • Thermal overload protector activated • Flow generator interface failure 60 Solution VPAP® III, VPAP III ST, VPAP III ST-A Service Manual • Replace humidifier connector Symptom Possible Cause Solution Flow generator with humidifier attached continues to restart • Humidifier not attached correctly • Ensure humidifier is firmly attached to flow generator Error message: Check hoses!! Key if done • Pressure sensor adaptor is not connected properly to flow generator • Damage to internal air tubing • Pressure sensor adaptor or external hose is damaged • Check and refit pressure sensor adaptor as required Error message: System error! Call Service (during normal operation) • Transducer error • Replace Main PCB • Replace blower assembly VPAP III ST-A only: Message "PRESSURE ERROR!" displayed • Treatment pressure delivered above 40 cm H2O • Replace Main PCB VPAP III ST-A only: Message "IPAP LOWER ALARM" displayed • VPAP III ST-A is operating outside device specifications (based on pressure support and breath rate) • IPAP is automatically reduced until the operation is back within specifications. If breath rate decreases, IPAP will return to its previous value. VPAP III ST-A only: Message "SENSOR ERROR!" displayed • Device motor speed, pressure and flow sensors out of range • Replace Main PCB • Replace blower assembly VPAP III ST-A only: Message "HIGH LEAK!!!" displayed • High mask leak (greater than 40 L/min) for more than 20 seconds • Check and refit tubing as required • Check mask fit VPAP III ST-A only: Message "LOW PRES ALARM" displayed • Air pressure at mask has fallen below set level • Mask is removed and SmartStop has been disabled • Check and refit tubing as required. • Turn flow generator off and on again at the power switch • Replace Main PCB • Replace blower assembly VPAP III ST-A only: Message "HIGH PRES ALARM" displayed • Mask pressure exceeds the alarm setting for more than 700 milliseconds • Reduce CPAP or IPAP setting VPAP III ST-A only: Message "LOW MV ALARM" displayed • Measured level drops below set limit for 30 seconds • Consult clinician VPAP III ST-A only: Message "NVENT ALARM" displayed • Mask leak is < 10 L/min (indicating connection of non vented mask) for at least 30 seconds • Use vented mask • Disable non-vented mask alarm if oxygen is being entrained into patient circuit • Replace or repair as required • Replace as required 8 Troubleshooting guide 61 9 System specifications VPAP III, VPAP III ST Dynamic pressure characteristics IPAP: 2 cm H2O to 25 cm H2O (measured at the end of standard 2 m air tubing) EPAP: 2 cm H2O to 25 cm H2O (measured at the end of standard 2 m air tubing) Maximum single fault pressure: 40 cm H2O Dynamic flow characteristics 130 L/min at 2 to 20 cm H2O Sound pressure level: < 30 dB (tested in accordance with the requirements of ISO 17510-1:2002) Dimensions (L x W x H): 270 mm x 230 mm x 141 mm Weight: 2.3 kg Air outlet: 22 mm taper, compatible with EN 1281-1:1977 Anaesthetic & Respiratory Equipment - Conical Connectors Pressure measurement: Internally mounted pressure transducer Flow measurement: Internally mounted flow transducer Power supply: Input range 100-240V, 50-60 Hz, 40VA (typical power consumption), <100VA (maximum power consumption) Housing construction: Flame retardant engineering thermoplastic Environmental conditions Operating temperature: +5°C (41°F) to +40°C (104°F) Operating humidity: 10%-95% non-condensing Storage and transport temperature: -20°C (-4°F) to +60°C (140°F) Storage and transport humidity: 10%-95% non-condensing Electromagnetic compatibility Product complies with all applicable electromagnetic compatibility requirements (EMC) according to IEC60601-1-2, for residential, commercial and light industry environments. Air filter: Two layered, powder-bonded, polyester non-woven fiber Air tubing: Flexible plastic, 2 m or 3 m length IEC 60601-1 Classifications Class II (double insulated), Type CF i Note: The manufacturer reserves the right to change these specifications without notice. Symbols which may appear on the product Attention, consult accompanying documents Class II equipment Type CF equipment 62 VPAP® III, VPAP III ST, VPAP III ST-A Service Manual Drip proof top it rt/S sk-f Sta Ma Start/Stop or Mask-Fit VPAP III ST-A Dynamic pressure characteristics IPAP: 2 cm H2O to 30 cm H2O (measured at the end of standard 2 m air tubing) EPAP: 2 cm H2O to 25 cm H2O (measured at the end of standard 2 m air tubing) Maximum single fault pressure: 40 cm H2O Dynamic flow characteristics 130 L/min at 2 to 30 cm H2O Sound pressure level: < 30 dB (tested in accordance with the requirements of ISO 17510-1:2002) Dimensions (L x W x H): 270 mm x 230 mm x 141 mm Weight: 2.3 kg Air outlet: 22 mm taper, compatible with EN 1281-1:1977 Anaesthetic & Respiratory Equipment - Conical Connectors Pressure measurement: Internally mounted pressure transducer Flow measurement: Internally mounted flow transducer Power supply: Input range 100-240V, 2.2A ~ 50-60 Hz, DC 24V, 2A Housing construction: Flame retardant engineering thermoplastic Environmental conditions Operating temperature: +5°C (41°F) to +40°C (104°F) Operating humidity: 10%-95% non-condensing Storage and transport temperature: -20°C (-4°F) to +60°C (140°F) Storage and transport humidity: 10%-95% non-condensing Electromagnetic compatibility Product complies with all applicable electromagnetic compatibility requirements (EMC) according to IEC60601-1-2, for residential, commercial and light industry environments. Air filter: Two layered, powder-bonded, polyester non-woven fiber Air tubing: Flexible plastic, 2 m or 3 m length IEC 60601-1 Classifications Class II (double insulated), Type CF Continuous operation This flow generator is not suitable for use in the presence of a fammable anaesthetic mixture with air or with oxygen or nitrous oxide entrained in the flow generator airpath. i Note: The manufacturere reserves the right to change these specifications without notice. Symbols which may appear on the product Attention, consult accompanying documents Class II equipment Alarm LEDs Type CF equipment Alarm mute Start/Stop QuickView Mask-Fit AC switch only 9 System specifications 63 10 Recommended maintenance schedule The ResMed VPAP III series of flow generators are designed to give years of trouble-free operation. The filter strip should be replaced at least every six months, and regular cleaning recommendations are given in the section, “Cleaning and maintenance” of the User Manual. All of these procedures can be carried out by the owner, so no regular servicing by a service agent is required. The HumidAire 2i should be regularly cleaned, according to the recommendations in the section "Cleaning and maintenance" of the User Manual. Some countries require all medical equipment to have a periodic service to confirm that the equipment is in good working order. Section 3 General inspection and servicing may be used in this situation. 64 VPAP® III, VPAP III ST, VPAP III ST-A Service Manual Appendix A: Service request form ResMed Service Request Form Distributor details Reported by Contact details (Email or phone) Company name Equipment owner Problem details Product details Product code Mask type Product name Pressure settings Serial/Lot number Hourmeter reading Under warranty? Yes No Humidifier? Yes No SmartStart? Yes No Problem description Effect on user Date problem occurred Date of purchase Or If the purchase date is unknown, please indicate below the time the product was used before the problem occurred < 3 months 3 - 6 months When did the fault occur? 6 - 12 months 1 - 2 years 2 - 5 years > 5 years Not being used During use Start up Unknown Is this device being returned to ResMed? Yes No Service details ResMed reference number Distributor reference number (if applicable) Today’s date AUF 19019-01/3 Appendix A: Service request form 65 Appendix B: Noise reduction upgrade To reduce the noise level of a VPAP III or VPAP III ST unit (with serials numbers earlier than 20040018972), you may prefer to perform the build standard upgrade rather than replacing the motor. To perform the build standard upgrade it is necessary to make the following changes: 1 Add 4 x R300-7017 blower top foam pads to the volute. 2 Add 2 x R300-7017 blower top foam pads to the outside of the upper airpath. 3 Add 3 x R300-733 top foam pads to the lower airpath. 4 Fit a cable tie to the main power switch and replace the blower outlet connector. Equipment required • 6 x blower top foam pad part # R300-7017 • 3 x top foam pad part # R300-733 • Blower outlet connector part # R300-7018 • 1 x 100 mm cable tie Adding foam pads to the blower assembly 1 Remove the blower assembly from the flow generator following the procedures outlined in Section 5 Replacing major subassemblies. Separate the upper airpath from the lower airpath. 2 Remove the volute from the lower airpath. 3 Remove the backing from each self-adhesive foam pad and apply four foam pads to the volute. When complete, the volute should have one foam pad on each of the four sides as shown: 66 VPAP® III, VPAP III ST, VPAP III ST-A Service Manual Note: Ensure that each foam pad overlaps two ribs on both the upper and lower sections of the volute as shown: 4 Add the remaining two R300-7017 foam pads to the outside of the top airpath. Position them as shown: 1 2 5 Remove the two existing R300-733 foam pads from the airpath. 1 2 Appendix B: Noise reduction upgrade 67 6 Add three R300-733 foam pads to the inside of the lower airpath. Position them as shown: 3 1 2 Fit cable tie and replace blower outlet connector 1 With the blower removed, position a 100 mm cable tie under the top set of terminals on the power switch as shown below: 2 Fasten the cable tie around the wires and terminals so that they are bundled together. 68 VPAP® III, VPAP III ST, VPAP III ST-A Service Manual 3 When complete, the protruding wires from the switch should be no more than 40 mm from the inside of the flow generator case. 40 mm 4 Replace the blower outlet connector following the instructions outlined in Section 5 Replacing major subassemblies. 5 Reassemble, test and calibrate the flow generator. Appendix B: Noise reduction upgrade 69 Appendix C: Installing the service software The Spirit 2.1 Service Software is available by itself (30967), and in a kit (30966) which includes: • Null modem cable • Closed bubble cushion • Oxygen sideport connector • Standard mask frame • Security key The software should be installed on a computer running Windows NT, 2000 or XP. The minimum requirement is a Pentium II with 64 MB RAM. The install file will open automatically after the CD is inserted. If the install file does not open, follow the instructions below. Installing the software 1 Insert the CD into the CD drive. 2 In the Start menu select Run. 3 Browse to locate the CD drive and click on the Setup.exe file. 4 Press the OK button in the Run dialog box. 5 Follow the prompts on screen. 6 You will then be prompted to restart the computer in order to complete the installation. Press the OK button to finish the installation. 70 VPAP® III, VPAP III ST, VPAP III ST-A Service Manual


