1
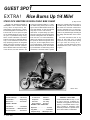
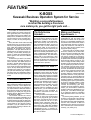
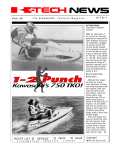
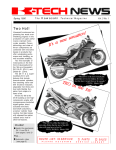
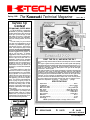
Spring 1989
The Kawasaki Technical Magazine
Vol. 2 No. 1
Service Tip
Contest
TECHNICIANS, ENTER NOW!
K-TECH NEWS is a magazine
dedicated to providing Kawasaki
Dealer technicians with technical
service tips. Tips that will save you time
and make you money. These tips
come from the Hot Line Specialists,
Technical Training classes, and from
YOU!
To make it easy for you to submit
your tips and suggestions, we’ve
provided a pre-addressed, postagepaid Service Tips form. Just fill in the
blanks, fold and tape the page and mail
it to us. If we print your suggestion,
you will be awarded $50.00 CASH!!!
Duplicate suggestions may happen, so
mail in your tip early. To submit
suggestions from more than one
person in your shop, photocopy a
Service Tips Form and mail it in
separately. Credit will be awarded
based on KMC’s technical staff’s
evaluation and your promptness in
sending in your tip. The only other
qualification is that you MUST be
employed by an authorized Kawasaki
dealership.
The feature article on page five
continues our series on turning your
service department into a successful
service operation. An overview of the
K-BOSS service system will lead you
through proven methods of controlling
and operating your service department. The service merchandising
article on page six gives you tips on
developing a service menu, selling
services and taking care of new
customers. All of which result in higher
customer satisfaction and higher
service profits.
Remember to file each issue of
K-TECH NEWS in your Service and
Warranty binder under the ‘Training
Bulletins” tab. If you need more copies
or back issues, just call the Hot Line or
your Technical Training Instructor.
FIRST THE ZX-10, AND NOW THE ZX-7
Just as the Ninja 1000 was father to the ZX-10, the Ninja 750 sires the incredible
ZX-7.
The engine is lighter and more powerful, with an all-new cylinder head sporting
downdraft carburetors feeding intake ports that shoot straight into the 11.3:1
combustion chambers. The one-piece, forged crankshaft is almost two pounds
lighter for even quicker revving. Quiet power is the goal of the ultra-light,
4-into-2-into-1 exhaust system.
The front fork tubes are huge: 43mm in diamerter; and feature cartridge-type
construction. The result is razor-sharp handling under the most adverse
conditions. Preload and damping are adjustable. The Uni-Trak shock absorber is
gas-charged to prevent shock fluid aeration, and controls an extra rigid, braced
swingarm. The rear suspension has adjustable preload and rebound damping
The new front brakes have Balanced Action Calipers with not two, but four pistons
per caliper, damping onto full-floating, stainless steel discs on aluminum carriers.
Radial tires complete this racy-looking . . . and performing . . . package!
SPECIFICATIONS
Displacement . . . . . . . . . . . . . . . . . . . . . . . . . . . . . . . . . . . . . . . . 748 cc
Sore&Stroke . . . . . . . . . . . . . . . . . . . . . . . . . . . . . . . . . 68.0 x 51.5mm
Compression Ratio . . . . . . . . . . . . . . . . . . . . . . . . . . . . . . . . . . . . . 11.3:1
Max. Horse Power . . . . . . . . . . . . . . . . . . . . . . . . . . . . 107 @ 10,500 rpm
Max. Torque . . . . . . . . . . . . . . . . . . . . . . . . . . . . . . 58 ft-lb. @ 9,500 rpm
Carburetor . . . . . . . . . . . . . . . . . . . . . . . . . . . . . . . . Keihin CDK-D 36 x 4
Front Tire Size . . . . . . . . . . . . . . . . . . . . . . . . . . . . . . . . . . .120/70 VR-17
Rear Tire Size . . . . . . . . . . . . . . . . . . . . . . . . . . . . . . . . . . . 170/60 VR-17
Wheelbase . . . . . . . . . . . . . . . . . . . . . . . . . . . . . . . . . . . . . . . . . . 57.3 in.
Fuel Tank Capacity . . . . . . . . . . . . . . . . . . . . . . . . . . . . . . . . . . . . 4.7 gal.
Seat Height . . . . . . . . . . . . . . . . . . . . . . . . . . . . . . . . . . . . . . . . . . 30.3 in.
NOTE: Specifications subject to change without notice.
ROUTE LIST:
o
SERVICE MGR
o
PARTS
o
SALES
RETURN TO SERVICE
The Technical Magazine
l
1
SHOP TALK/ TECHNICAL
Kawasaki Integrated Power-Valve System
by Ken Ploeser
Enduro KIPS? You bet!
Making something better than the
best is what we at Kawasaki are very
good at. That’s exactly what we did to the
KDX200-E1. We took the KIPS
technology from the KX125-F1 and
applied it to the mild port timing inherent
in the KDX’s enduro engine. This makes
for a very strong low end while adding
just the right amount to top-end
horsepower. Technically speaking, the
KlPS valves are basically the same as
those used in the KX125F1. There are
three valves. Two are located adjacent to
the exhaust port and connect to exhaust
sub-ports. The resonance chamber
connects to the left side KlPS valve port.
The third valve is located at the top of the
exhaust port. This is what changes the
exhaust duration for more top end
horsepower. The shape and size of the
KlPS port allows just the right exhaust
gas flow without causing radical peaks in
the horsepower curve.
The guys at Team Green tell me there
have been no problems with the KlPS
valves at all. The only thing that needs
attention is that a top end inspection and
decarboning job should be performed on
a regular basis. The interval depends
greatly on the brand of two stroke oil and
of course the mix ratio. Kawasaki
recommends Kawasaki two stroke race
oil, (P/N K61020-022A) at a mix ratio of
32:1. If the customer is following these
recommendations, you can suggest that
decarbon work be done as frequently as
the top end is disassembled for
inspection. This means the customer
should be advised of the periodic
maintenance chart in the owners
manual. The chart indicates inspection
should be performed every 1000 Km or
621 miles of operation. Offer a service
special for this job. Contact every
customer that bought a KX or KDX from
your store in the last 90 days. Go back to
the service files to get more names to
contact. Here’s a tip: Have all KX and
KDX customers put their names on your
“preferred customer” list when they have
any work done. That way you have a list
of customers who expect you to contact
them in the near future.
2 K-Tech News
l
KDX200-E1 KIPS
1. Exhaust Valves
2. Idle Gear
3. Punch Mark
4. Guide
5. Main Exhaust Valve
COMMUNICATIONS
MICRO-
by “Micro” Mike Jeffers, Parts Publications
We have just finished producing roughly 75 new microfiche for 1989. included are
the new KX’s, the liquid cooled KDX200-E1, and the JB650-A1:JET MATE. Because
of the constant updating of parts and service information it’s essential to have a
Micro-K update subscription. Each microfiche covering the ’88 and ’89 model years
has been updated to include all service, parts and racing bulletins that have been
released. The bulletins are found on row “N”, and are extremely helpful in checking
any FDM’s, FAR’s or RECALLS concerning a particular model. The new Motorcycle
Identifier microfiche now includes the ’88 models. Refer to the new parts bulletin, Gen.
89-01, for full details about the new subscription policies. We continue to offer a “Full
tine” microfiche deck which includes Motorcycles, ATV’s, JET SKI® Watercraft, and
Generators. And now we offer individual decks for each product line, so you can pick
only the fiche you need!
If you have any questions concerning parts information, call Mike Jeffers at
(714) 770-0400, ex. 2573.
FLAT RATE
CHANGE
CARD
P/N M99994-153
Use this card to tell us of a flat rate
time you feel needs our review. The
cards come with the microfiche
mailing. Order more cards by part
number.
Package Qty of 1
Dealer Cost: FREE
AVOID FRUSTRATION
Look For A Repair Verification Label
by Ray St John, Senior Technical Writer
Q: Why should I look for a Repair Verification Label?
A: It can save you money. Before you tear into an FDM repair,
look for a repair label. If you find one, you know the repair has
already been done. You can’t claim a repeat repair on this
type of work! Also, your customer has visible proof that the
job is done. He knows that you and Kawasaki are taking care
of him.
Q: What is a Repair Verification Label?
A: It’s a sticky vinyl rectangle one inch wide and two inches long.
It lists the model, describes the repair, and tells you what
bulletin to look for if you have any questions.
Q: When? do I find these labels on a repaired unit?
A: The label goes in a standard place on each kind of product.
Motorcycles have labels inside the right side cover.
SERVICE BULLETINS ON KIPS
The service bulletins listed below give you some trick
information and mods you can do to the KIPS on some KX
models.
RS87-04–covers race tuning the 1987 model KX125-E2
including exhaust sub-port modification.
RS87-06–covers race tuning the 1987 model KX500-C1
including exhaust sub-port modification.
RS88-01–covers race tuning the 1988 model KX500-D1
including exhaust sub-port and valve modification.
RS88-03–covers race tuning the 1988 model KX250-F1
including exhaust sub-port modification.
REMEMBER, you take full responsibility for anything you do to
modify a bike for any reason. No one but you is responsible for the
results, so BE CAREFUL!
Call the Team Green assistance hot line for more tips. The DEALER
ONLY telephone number is 714/458-5612.
ATV labels get stuck on the rear fender or inside the trunk.
On JET SKI@ watercraft you’ll find them inside the hood. The
idea is to put the label some place that’s easy to get to
without exposing it to the hazards of weather and curious
fingers.
Q: Where do I get these labels?
A: A supply of labels comes to you with a copy of the service
bulletin in a special envelope marked “SERVICE SERVICE
SERVICE” and “IMPORTANT SERVICE INFORMATION.”
Expect to receive this special envelope about one week after
the bulletin first shows up in the weekly package of stuff you
get from Kawasaki. To get more labels, call the Hot Line. Tell
them the bulletin number and how many labels you want.
They’ll see that you get them right away.
NEW MANUALS
AVAILABLE:
®
JET SKI Watercraft Training Manual
The JET SKI® Watercraft Training Manual is now available
to all Kawasaki dealers. It explains how all the systems of the
JET SKI@ watercraft work including the pump, the carburetor,
the fuel vent check valve, the stop switch relay circuit and many
others. The book is 46 pages long and includes many detailed
drawings and diagrams. Order yours today, P/N
99929-1033-01.
®
JET SKI Watercraft
Service Specifications Handbook
A Service Specifications Handbook is now available
covering all JET SKI@ watercraft from 1974 through 1988.
Information on timing, port durations, oil capacities, carburetor
adjustments, engine clearances, and pump thrust are but a few
of the many specifications listed. Order P/N 99926-1013-01.
The Technical Magazine 3
l
GUEST SPOT
EXTRA!
Rice Burns Up 1/4 Mile!
STEVE RICE WESTERN DIVISION FUNNY BIKE CHAMP
Late last year, Steve Rice wrapped up
DRAGBIKE! USA’s Western Division
Funny Bike Championship. His
turbocharged, alcohol-burning, 1200cc,
Z1-based drag bike turned a best run of
8.02 seconds at 171.42 mph in his quest
for the championship last year, his first
full year of professional drag racing.
Steve, a native Californian, is a Product
Support Technician for Kawasaki Motors
Corp., U.S.A. Sometimes he works in the
shop preparing products for magazine
testing; other days he works the Hot Line
answering dealer technical questions.
Steve attended Utah Technical College
in the mid-70’s, and has worked in the
motorcycle mechanics field for 11 years.
He started racing motorcycles in 1973 at
age 18. Steve’s bike started out life as a
1975 Z1B dresser. Its first documented
drag strip run was 13.06 seconds . . .
dead stock. To speed things up a little,
Steve first chopped everything that didn’t
look like a drag bike. Then he added a
turbo the size of a small watermellon,
Hilborn fuel injection that pumps about
five quarts of alcohol through the motor
every run, 78 mm forged pistons, and a
10-inch wide rear tire. It just doesn’t seem
like the same bike any more, but it’s heart
is pure Kawasaki. It’s still running a stock
crankshaft, a stock KZ1100-81 cylinder
by Ray St John
head, the original Z1B forks (though in
modified form), and most of the frame is
the same as it was when it was built in
Lincoln, Nebraska over 13 years ago.
Steve does all his own work on the bike
within a very limited budget, including all
the design and fabrication of the custom
parts.
And what does Steve have to say
about all this? Well, he’s not letting
anyone in on any secrets, but he did say
he’s got some fine tuning to do.
“Ya know, just a little tweak here and an
adjustment there, then it will be j-u-s-t
r-i-g-h-t. ”
Steve Rice
Publisher . . . Kawasaki Technical Services
Joe Nowocinski
Bob Ellison
Executive Editor . . . . . . . . . .Gary Herzog
Handy Davis
Editor-in-Chief . . . . . . . . . . . . Ken Ploeser
John Pomo
Tevis Moffett
Ken Osberg
Gregg Thompson
Steve Rice
REGIONAL EDITORS
North and East . . . . . . . . . . . Fred DeHart
Central and South . . . . . Walter Rainwater
West and Corporate . . . . . . . Ken Ploeser
4
TECHNICAL SUPPORT SPECIALISTS:
Publications Manager . . . . . . Don Church
l
K-Tech News
GRAPHICS AND PRODUCTION:
Graphic Art . . . . . . . . . . . . . . . . Tim Sean
Copy Editor . . . . . . . . . . . . . . Pat Shibata
Computer Design . . . KMC Graphic Svcs.
KAWASAKI K-TECH NEWS
©1989 Kawasaki Motors Corp., U.S.A.
All rights reserved. Published by:
Kawasaki. All suggestions become the
property of Kawasaki Motors Corp.,
U.S.A. Sending a suggestion gives
Kawasaki permission to publish and or
use it without further consideration
FEATURE
K-BOSS
by Ken Ploeser
Kawasaki Business Operation System for Service
“Building a successfuI business
is rather like building a fine-tuned
race motorcycle, you get the right parts and. . .
L ast edition we introduced three key
parts in building your service business for
future growth and profit. These being the
cost of labor hours you are selling, the
billable hours available each day, and
your first service to new unit sales ratio.
These, of course, are only the beginning
steps.
Now, let’s take a look at the next step
towards fine tuning your service business
structure. Every business must have a
plan. A plan that outlines the business
approach to operating your service
department. Your plan must include the
identification of the service product you
are selling. It must identify the ways you
expect to market and merchandise the
service product. We call it the K-BOSS
Service Plan.
So where do you start? You should
have a record of the last 90 days of
service business. We talked about that
process in the last feature article. From
that information, you can figure how
many hours the service department was
open in 90 days. Ninety days of business
represents one quarter of your business
year (the fiscal business year). It helps to
get advice from your bookkeeper relating
to the best month of the year to start your
review.
The K-BOSS Manual —
Next, you need to get control of the
daily activities that result in profits and
losses in service. That’s where the
K-BOSS Service Plan is very effective. If
you were unable to attend the Service
Profit Seminar at last year’s dealer show,
make sure you order your copy of the
K-BOSS Service Management Manual
(P/N 99995761) NOW!
The manual outlines the control
methods and support materials you’ll
need. It is essential that you study the
K-BOSS manual as well as attend the
next Service Department Operations
course offered on the Technical Training
schedule. If you can’t attend, then call
your Regional Training Instructor for
personal assistance.
The Daily Service
Schedule —
Making and Keeping
Appointments —
The major factor critical to a
successful service operation is the way
that work is checked in to the service
department. Divided it into sales work,
parts and accessory work, work for the
service department itself, work to be
sublet out, and, of course, warranty and
retail work. Next is the process of
dispatching the jobs and the flow of the
paperwork as each job progresses. The
Service Schedule (P/N 99995-762) is
used to determine sellable work hours,
make appointments, and effectively
assign work to your technicians. It also
provides a quick reference regarding the
status of all vehicles to be serviced. It is
the most important tool in an efficient and
productive service operation.
Group appointments into two
classifications: soft and hard. If the
appointment is made over the phone or
the unit is not immediately available to be
checked into the service area, make a
“soft” appointment. When the unit arrives,
ready to be checked in, enter that job on
the “hard” (daily) service schedule in the
appropriate priority category.
The service writer or manager controls
the service schedule, but the technicians
must do their part in updating the status
of jobs in process by informing the service writer or manager of any changes. It
is imperative that the daily shop schedule
be updated with information provided by
the technician working on each job. The
service manager should formally review
the status of jobs several times during the
day and update the job status on the service schedule. Each job status must be
current for the dispatching process to be
accurate. Remember: the most urgent
concern of the customer is that the work
will be completed before the time
promised. Keep the customer advised of
job status whenever it may affect the
completion time you promised! Build into
the time promised some extra time for
possible problems or additional repairs.
Completing repairs prior to promised time
is great for customer relations. After
learning the capabilities of your technicians, and matching your daily
schedule with hours available for appointments, you will be able to maximize
profits by selling every available hour you
possibly can. The K-BOSS manual goes
on to outline the steps for scheduling
sales department work on new and used
units.
By following these guidelines, you will
be able to control the flow of work through
your service department. Smooth work
flow allows both the sales department
and the new customer to take full
advantage of the services you have to
offer. The bottom line is that if work flows
smoothly, your profits go up.
Labor Hours For Sale —
The daily service schedule should
take into account the hours that the
dealership is open versus the shop time
available to service customers. Usually
there is some time required to complete
various dealership operational tasks
which do not result in billable hours. It is
critical to plan the schedule so that these
necessary but unbillable hours are part of
the schedule. The next step is making
appointments that fit within the time
available in the daily and weekly
schedule. With the available shop time
dearly shown, you can effectively utilize
the remaining hours available to
schedule in new work from the “soft
appointment sheet.
A daily schedule can be split into four
sections. An 8-hour day would become
four P-hour segments (per qualified
technician). The types of jobs to be done
that day would fall into one of four
different priority categories: sales jobs,
warranty jobs, customer pay jobs, and
emergency jobs. With daily available
work hours established and the priority
classifications set, a method for
establishing appointments to fill those
time slots is needed.
The Technical Magazine 5
l
SERVICE MERCHANDISING
How To Develop A Service Menu
by Ken Ploeser
W hen you go to a restaurant, you
order what you want from their menu.
The menu may offer lunch specials, the
“Catch of the Day,” or items that are
specially prepared by the chef. Menus
also tell you (the customer) the extras
that go with the meal, the price, and
maybe even a picture of what you can
expect to get. The menu is the
restaurant’s way of showing off their
product in the best way possible. It’s the
best way for the customer to select and
purchase the product.
SPECIALIZATION —
SELLING YOUR
SERVICES
If you specialize in certain services, tell your customers about them.
Advertise! Don’t wait for customers to
ask. KX race support, specialized engine
building, paint and body work are a few
examples of specialized services.
Having a JET SKI@ watercraft test tank
is like having a “dyno-tuner” that can
draw in customers from many miles
away.
DEVELOP A MENU —
How do your new customers know
what your service product is? By offering
your services on a menu, your customers
will be able to select the services they
want. And, with your help, they can
choose of the services they need.
So, how do you develop a menu for
your customers? Start by reviewing a
90-day history of repair order hard
copies. List those jobs that reflect the
“regular” or typical work you’ve been
selling. Set up categories of jobs such as
first service, tire change, chains and
sprockets, brake work, tune and service,
clutch job, etc. This list will tell you what
types of jobs you usually do. It also will
clue you into the typical use of tools,
materials, supplies and parts you have to
obtain to support these jobs. This is also
a list of the market demands your
customers expect of your shop.
CATERGORIZE
THE JOBS —
A menu reflects the services your
service department can offer at the best
retail value to the customer. This is
because what you list on your menu are
the services that you do best and do most
effectively. “Most effectively” means
what your shop can do at acceptable
profit margins. Now, I’m not saying sell
only what you make the most money on,
I’m saying that you need to know what
services your shop can provide at
competitive prices and that you can do
with high quality. Those are the services
that you probably have been doing
already.
6 K-Tech News
l
Next, categorize these jobs. Review
these categories with your technicians.
Determine ways you can develop
systems to streamline the operation.
Share goals and objectives of the
department with all your technicians.
Develop incentive programs that are
directly related to individual efficiency
and high-quality workmanship. Develop
an awareness of effective time utilization
within the department. Use suggestions
by the technicians that can be
implemented to improve procedures.
They are on the front lines!
FIGURING
FLAT RATE —
Next, determine the profit or loss of
each job. Figure the technician’s time
invested in each job. Determine how
many actual hours are spent on the job
compared to the flat rate times you
allowed. Obviously, some jobs aren’t
super profit makers. This kind of work
may have to be done regardless of profit
potential. Either find better ways of
handling these jobs to reduce the labor
costs involved.
You will eventually have a clear idea
of the jobs your shop can do. You can
see what types of jobs your customers
have been paying for at your shop. Take
these jobs and begin a service menu that
reflects your shop’s services. I think you
will find that the time invested will be well
worth the immediate return in service
sales.
STREAMLINING
THE OPERATION —
The other aspect of menu selling is
the way the jobs are written up on the
repair orders. Once you get a handle on
your past service offerings, you can
package and sell work much more
effectively. The job descriptions on the
repair order should match the menu.
This way the technicians know exactly
the time allotted for the jobs as written.
The parts needed for menu jobs can be
stocked. Work that does not match the
menu can be priced and scheduled more
accurately.
It may work out that you do not list the
menu on a large board for your
customers to see. You may want to keep
the menu as an internal listing of job flat
rate times and retail charges. Whichever
you choose, a service menu system will
result in better work flow through your
department. Your service team will work
together much more effectively. And,
best of all, your customers will see the
value in doing business with a
professional Kawasaki Service
Department.
INSIDE TECH SERVICES
NEW Repair Campaign System
Keeps Customers Happy!
by Don Church
Kawasaki’s Repair Campaign System
is an important strategy for customer
satisfaction. The purpose of repair
campaigns, otherwise known as Recalls
and Factory Directed Modifications, is to
fix a potential product problem before it
actually happens. This is important to
maintain customer confidence and
satisfaction in Kawasaki products, your
dealership, and KMC.
Obviously your efforts are essential in
meeting these common goals. And what
are these goals?
FIRST, repair all eligible units which
have already been sold to customers.
SECOND, repair all remaining eligible
units before they are sold to customers.
In order to help you accomplish this,
we have recently added three new dealer
reports to the Repair Campaign System.
When a Recall or Factory Directed
Modification Campaign is initiated,
Kawasaki’s computer system links up
data on the eligible units and produces
two dealer reports. The first report tells
you what eligible units were sold by your
dealership. These customers will be
receiving letters from Kawasaki and will
be calling you for a service appointment.
With this report you can order the
necessary quantity of parts and even call
the customers yourself to schedule an
appointment. The second report tells you
how many eligible units are in your
inventory or on your sales floor. Be sure
to repair these units before delivering
them to customers.
These two reports are sent to you only
at the beginning of a repair campaign. So
what happens if you get an eligible unit
from Kawasaki several months after you
receive the service bulletin and the first
two dealer reports? The Repair
Campaign System has it handled. When
you purchase a unit from Kawasaki that
needs a presale repair, we send you an
Important Notice as a reminder. It tells
you the VlN(HIN) of the unit and refers to
the applicable service bulletin. Tape this
notice to the crate if you don’t set up the
unit right away.
#1 ELIGIBLE UNlTS RETAILED TO CUSTOMER
#2 ELIGIBLE UNITS IN DEALER INVENTORY
#3 UNITS SOLD WlTHOUT REPAIR
There are other elements of the
Repair Campaign System, but you are
probably already familiar with them:
Service Bulletins, Warranty Request
Forms, and Repair Verification Labels.
Have you ever “repaired” the same
unit twice? Have you ever spent twenty
minutes going through old repair orders
or warranty requests to see if a particular
unit was repaired? Do you USE the
Repair Verification Labels? They really
will save you time. Instructions on where
to place them are in the service bulletin.
Labels are supplied with the second copy
of the service bulletin mailed to your
service department. If you need more,
call the Hot Line. Read the article on
page three for more information on the
Repair Verification Labels.
What about the third dealer report?
This is the “report card” that tells you how
well you’re doing. It’s a monthly report
that lists all eligible units you sold without
completing the required repairs. These
customers will be getting a letter from
Kawasaki assuming you already sent in
their warranty registration cards. If you
call these customers and have them
return their units immediately, you will at
least save yourself some embarrassment. You can explain that you are
making a required repair and that they
can disregard the letter they will receive
from Kawasaki.
If you have questions about any
elements of the Repair Campaign
System or if you need more Repair
Verification Labels, who do you call?
THE HOT LINE.
The Technical Magazine 7
l
TIPS FROM THE SPECIALISTS
PUMP SERVICING TIPS FOR
JS650, JF650, TS650, JB650
A common customer complaint is the
feeling that the watercraft is just not as
“strong” as it used to be. While power
tuning the watercraft you find you’re
getting a great deal of “pump slippage.”
After inspecting the pump area for
foreign material, you find that the pump
housing is good but the impeller is
damaged. You know that the impeller
needs to be replaced, so you remove the
pump and R&R the impeller. After
installing the pump, you reseal the pump
inlet area with silicone. You must allow
the silicone to cure about 6 hours. If you
retest the watercraft before the silicone
has time to cure, it will suck out between
the pump case and hull! If the pump is not
sealed properly, it will suck air from the
back side causing a drastic reduction in
pump thrust.
To avoid this problem and finish this
impeller R & R in one working day, you
TEST TANK
UPDATE
by Kenny Osberg
by Ken Ploeser
can remove the impeller with the pump
housing still bolted to the hull! You must
first make sure the pump housing is
properly sealed and not damaged. On
the JB650 JET MATE, the exhaust
gasses exit beside the pump. You can
diagnose a bad pump housing seal by
looking for exhaust carbon residue on the
inlet area of the pump. If all is in order,
simply remove the engine pan bolts so
that you can raise the engine up enough
to slide the drive shaft out about 15 cm
(6 in.). This will allow access to the
impeller with the special holder tool.
Remove the grate, ride plate, stationary
nozzle, and bearing cap. R&R the
impeller and reassemble the craft. This
will allow you to power tune the craft in
the test tank without having to wait for the
silicone to set-up between the pump
housing and the hull.
If you are going to build a Jet Ski
test tank, you should consider the new
Kawasaki watercraft products. The
JB650, “JET MATE” and the JF650-B,
“TS” models are considerably larger
than the traditional skis. The overall
dimensions are about 5’ x 9’ for the
JET Mate and 4’ x 9’ for the “TS”. You
can enlarge the test tank dimensions
(given in the last issue of K-TECH
NEWS) to accommodate these two
new boats. Another item regarding the
construction of the test tank is the
need to reinforce the corners and
walls with re-bar. This is critical when
running the larger boats. The water
capacity and thrust will be greater
requiring all the reinforcement you
can build into the tank. You may want
to build a drain system into the floor or
bottom of a wall of the tank. This sure
makes it easier when it comes time to
flush and clean your test tank.
R&R JET SKI® Watercraft and ATV Decals
by Gregg Thompson
Removal:
There are two approaches to
removing the large decals found on
Kawasaki JET SKI® watercraft and
ATVs. If the decals are fairly fresh, they
can be removed (leaving very little of the
adhesive stuck to the paint) by using a
heat gun. With the heat gun, keep the
decal warm but not hot at the point where
it is being pulled from the surface. If the
decal begins to stretch rapidly and break,
it’s too hot. Pull from different areas of the
decal to avoid separating too wide an
area from the surface at any one time.
This will help minimize the amount of
adhesive left on the surface. Pulling if off
s-l-o-w-l-y also helps. The adhesive
that’s left can be softened with lacquer
thinner and then scraped off with a
plastic body putty applicator (squeegee).
Adhesive can also be removed using 3M
brand ‘Woodgrain and Stripe adhesive
8
l
K-Tech News
remover” No. 08908. Older decals are
sometimes more difficult to remove, the
second approach to decal removal
(chemical warfare!) comes in handy
here. The 3M Corporation offers a
two-part decal removal system that
includes the above-mentioned adhesive
remover. The other half is called 3M
Woodgrain and Stripe remover
No. 08907. Just follow the directions on
the can.
Replacement:
Installing these large decals is a
genuine piece-o-cake if you know the
secret . . . soapy water. First, wash the
surface with a soapy solution to remove
grease and oil. Rinse off the surface with
clean water. Any particles or bumps on
the finish can become very obvious once
the decal is in place and dried. For decal
installation, use a solution with enough
soap in it to make your fingers feel
slippery. Common dish soap or liquid
hand soap works well. Peel the
protective backing off the decal leaving
the protective sheet on the front of it.
Either dip the decal in the soapy solution
or if it’s too large, just wet the adhesive
side with a very wet towel. Then, with the
towel, wet the surface of the part with the
same solution. The wetter the better. Do
not use a spray bottle to apply the
solution. That creates lots of bubbles that
have to be squeegeed out later. Apply
the decal to the surface and position it.
Proper positioning of the decal is easiest
with the part installed on the vehicle.
Now, use a plastic squeegee to force out
any air bubbles. Always work from the
middle toward the outer edges. Dry off
the part with a towel, and then let it air dry
for at least two hours before removing
the remaining protective sheet.
Clarion
Audio System
Parts Policy
“Kawasaki warrants for a period of
twelve months from the date of retail
purchase, Clarion audio system
components found to have defects in
material or workmanship.”
If this sounds like an old story, you’re
right! However, many dealerships are
not aware of the procedures for a claim
under this policy. We still get calls from
service personnel wanting us to explain
the details of the policy. The full
explanation is found in the new Warranty
Policies and Procedures Manual
(P/N 99969-0210-01) on page 25. Follow
these procedures and you will avoid lost
time and save money for your customers,
your parts department and yourself. Also,
be sure to have the Audio Systems
Troubleshooting Manual handy before
attempting any repairs on the system.
The part numbers for the manuals
are 99924-1088-01 for the ZG1200
(Voyager XII) and 99963-0059-01 for the
ZN1300 (Voyager 1300).
“How Important Are Your Customers?”
by Flo Freeman
Customers today are using much
more discretion when choosing where
and how they spend their money. When
quality and price are similar, customers
are going to go where the service is best;
where there is genuine interest in their
concerns. You can’t fake genuine
interest. Consider these points from
Robert L. Desatnick’s, “Managing to
Keep Customers.”
l
It’s five times more expensive to
get a new customer than to keep an
old one.
l
Many companies get so caught up
with attracting new customers that
they lose touch with their existing
ones.
What drives customers away is
rude, discourteous, inept,
incompetent service.
We are in an era of consumer
sovereignty. Dealerships that fail to
provide top-notch customer service will
loose the competitive edge. Customer
service cannot be isolated to the sales
floor.
Sales people get commissions to do
what they are supposed to be doing. Why
not reward customer-service excellence
in the service area? Your customer
relations usually mirrors your employee
relations.
l
Air Leak Check
KX Mode/Air Box Leak
by John Pomo
BEFORE you remove the top end on a two stroke to inspect
for possible piston seizure, perform a pressure and vacuum test
on the engine. If you disturb the gaskets before testing, you will
never be able to verify an air leak. The procedure is simple once
you are set up to do the test We find by using Kawasaki’s
crankcase pressure/vacuum tester, (P/N T96000-001) the job
goes quickly and accurately.
by John Pomo
The retainer nuts (P/N 92015-1259) on the KX air box duct
fitting plate (P/N 13183-1046) may loosen, allowing dirt to enter
the engine. The nuts are located at the front of the air box and
hold the intake duct securely to the air box with the studs of the
air filter cage. We recommend that you use a thread locking
agent to prevent the nuts from backing off.
P/N T96000-001—PRESSURE/VACUUM TESTER
The Technical Magazine 9
l
TIPS FROM THE SPECIALISTS
SKIING IN THE SKIES
1986 and later JS550-A’s in use at
altitudes of 4,500 ft. and higher, may
have some areas of special concern for
JET SKI® watercraft technicians.
First to consider is an improperly
adjusted carburetor. Three adjustable
mixture screws can be somewhat
confusing. A sideview of the carburetor
will reveal three distinctly staggered
heights of the mixture screws. These
heights relate directly to the engine RPM
band controlled for each, with the lowest
being idle, the second highest being
mid-range, and the top being wide open
throttle. We have found the following
settings to work well at higher altitudes:
Pilot (bottom rear screw):
1 turn out
l
Low speed (front screw):
1-1/4 turns out
l
High speed (top rear screw):
7/8 turn out
If it bogs on acceleration, try enriching
the low speed screw 1/16 of a turn at a
time. The engine must be thoroughly
warmed up and in good mechanical
condition to perform correctly. If the
performance is still poor, check for low
compression.
Second on the list is piston ring or
cylinder wear. As the rings and cylinder
l
“Q”-Tip Drip Tip
by Tevis Moffett
Prevent that nasty little fuel drip from
the carburetor float bowl overflow.
Whenever you replace the float needle
and seat, try using a little rubbing
compound on a “Q”-tip to polish the
sealing contact area of the seat. This
allows the float needle to “bed in” right
away.
wear, overall volumetric efficiency of the
engine is decreased, resulting in typical
symptoms of hard starting and what
seems like inconsistent carburetion, i.e.,
one time it idles down lean and the next
rich. Typically, the ring wear is not
detectable with a compression
measurement. Remove the cylinder
head and look for any unusual wear
patterns. Next, the ring end gap must be
measured in the cylinder, with .6 mm
(.024 in.) being a practical service limit.
Follow all the procedures in the service
manual regarding top end servicing. Be
sure to use #220 grit hone stones to
deglaze the cylinders. The use of a “ball”
type flex-hone is recommended. It is
critical to ring and cylinder lubrication that
the #220 grit hone be used. The cylinder
finish crosshatch angle should be 60
degrees (as measured between the hone
pattern lines, or 30 degrees from
horizontal) to assure proper oil retention
during break-in.
When all mechanical problems have
been repaired, you may also wish to
consider raising the compression ratio on
late model JS550-A’s for high altitude
usage. This will result in a more
consistent performance level and better
plane off ability, particularly for heavier
riders. The practice of head milling
l
K-Tech News
normally aspirated engines is a standard
in the marine industry to compensate for
the lack of air density at higher altitudes.
Try milling 1 mm (.039 in) off the head,
then using a standard head gasket
during reassembly. The resulting
increase in compression should not
exceed the maximum service limit as
shown in the service manual for that year
JS550. Early JS550’s had higher
compression than late models. The early
JS550 compression specs. can be
considered to be absolute maximum for
any model JS550. Be sure to mark the
head as one that is for high altitude use
only! Make this very clear to the
customer. NOTE: The use of a milled
head will void a warranty claim on a
related failure.
Milling the head to obtain the
maximum stock specs will not change
the fuel octane requirement. By using
premium unleaded fuel, your customers
will generally obtain a more-consistent
higher-quality fuel. In all cases, avoid the
use of “light” fuels, these are known to
contain volatile elements such as
alcohols or cosolvents. They tend to
increase vapor problems even more so
at higher altitudes, possibly leading you
to believe you have an air leak in the fuel
system or carburetor needing repair.
JET SKI TWIN CYLlNDER TIP
A baffling challenge of a service job
is a twin cylinder that has lost power,
runs rich on the rear cylinder or fouls the
rear spark plug. On the JS650’s, these
troubles may be accompanied by a
melted drain valve on the crankcase.
These symptoms point to an unusual
problem: a slipped crankshaft. The rear
crankshaft has slipped on the center
journal, throwing it out of synch with the
ignition timing, controlled by the front of
the crankshaft.
To determine if a crankshaft has
slipped is simple.
1. Remove both spark plugs.
2. Take out the magneto access
plug.
10
by Keith Pestotnik, Rocky Mountain Kawasaki
by Chuck Crawford
3. Position the magneto flywheel at
“T” index mark for Top Dead
Center.
l
The front piston should be at
Top Dead Center.
l
The rear piston should be a
Bottom Dead Center, 180
degrees opposite the front
piston.
4. Push down on the rear piston
with a wooden dowel.
l
If the piston doesn’t move, the
crankshaft is fine.
l
If the piston moves downward
any amount, the rear crankshaft
has slipped and needs to be
replaced.
l
Use dial indicator to detect
slight movement of the front
piston while pushing down on
the rear piston.
4 X 4 Differential
R&R
by Ken Ploeser
The KLF300-C1 limited slip differential can be removed very easily by
following this time saving procedure:
1. Raise the front of the ATV with a jack
stand (P/N 57001-1238) and secure it.
2. Remove both front wheels.
3. Remove the three cap bolts that fasten
each front axle to the differential
housing.
4. Remove the three differential case
support bolts.
5. Remove both the top and bottom right
side suspension arm pivot bolts.
Support the suspension arms with tie
downs or bungee cords.
6. Pull the right front axle from the
differential.
7. You can now remove the differential
case from the frame and the left front
axle simultaneously.
Quick Check Charge System Tools
Two old standby’s for battery and
charging system troubleshooting are the
Yuasa hydrometer (P/N 57001-1800)
and the Yuasa digital voltmeter
(P/N K56019-012). Both these tools help
you quickly diagnose charging system
problems. Hydrometer use is old
business, but some technicians don’t
realize some old tricks using the digital
battery tester. Besides testing battery
surface voltage, the charging voltage can
also be tested. Simply compare the
battery’s surface voltage reading to the
voltage reading at idle, 3000 rpm, and at
approximately 6000 rpm. There should
be an increase in readings as the engine
rpm increases. If there is no rise in
by Ken Ploeser
voltage (above the readings with the
engine not running) the stator and
regulator/rectifier needs to be tested. If
the voltage rises to the allowable
maximum (usually around 15 VDC) the
battery is the culprit. The approximate
drop in voltage due to starting the vehicle
can be determined by observing the
voltage readings while cranking the
engine over. If the voltage drops
drastically, there may be a short in the
starter motor. If the battery surface
voltage drops and stays below 11 volts,
the battery is probably weak enough to
need replacement. And remember, any
terminal that is a D.C. voltage connection
can be tested with the digital meter.
HYDROMETER
P/N 52001-1800
This procedure avoids the disassembly of the steering knuckles, saving
considerable time and hassle. By
reinstalling the suspension arm pivot
bolts and both wheels, the ATV can be
rolled off your lift for easy storage.
Torx Tips
DIGITAL VOLTMETER
P/N K56019-012
by Randy Davis
The KLF 300C1, 4x4 limited slip
differential has special “Torx” bolts
holding the differential unit together. The
tool required to remove these bolts is
mailable from Snap-On tools. Snap-On’s
part number for this special socket is FLE
100. When removing the torx bolts to
access the “LSD” clutches, YOU WILL
STRIP THE BOLT HEADS unless you
heat the bolts with a propane torch to
break loose the locking agent on the
threads. Do not hammer on the torx bolts
to “shock” the locking agent loose. That is
not a good method of removing locked-in
fasteners!
Generating The Rev’s
If a Kawasaki generator has the problem of not revving up to the proper
RPM’s, or it just will not pull an electrical
load, follow this simple troubleshooting
trick: gain access to the brush holder and
remove the brush assembly from contacting the slip rings. Start the engine. If
the engine will rev up now, the stator is
shorted! What’s happening is the short
by Bob Ellison
causes the field coils to be energized
with an excessive amount of current and
tries to over-magnetize the fields. The
engine is not designed to handle that
amount of magnetism and simply is not
able to rev up. Obviously there are other
problems that occur with a short in the
stator so it must be replaced.
The Technical Magazine
l
11
REGIONAL NEWS
The Slow Season? No Way!
By the time you receive this issue of
K-Tech News, we will be in what some
people say is the “slow season”. The
weather may not be cooperative, but the
service department should not be slow!
Now is the time to get out your customer
service files. Make a list of those customers
who put off those “suggested repairs”
because they didn’t have the “time or
money.” Call or send a postcard, and
suggest: Now is the time to get that pesky
oil leak fixed, bald tire replaced, fork oil
changed or any service specials you offer
during the winter.
While going through the repair order
files, select all the customersthat should be
on your complete service customer mailing
list. You will need a complete list for
springtime mailers and promotions.
Make sure you build into the follow-up
plan a way to track the results of your
efforts. Include a coupon or voucher that
must be redeemed at your store. Be sure
to have a time limit or expiration date on
your coupons.
You could offer a winterizing service for
JET SKI® watercraft and motorcycles.
How about reconditioning some of those
used bikes on the sales floor or stuffed in a
corner of your shop? Get ready for the
spring season. A thorough overhaul of the
service department might be just what the
doctor ordered!
Service Training classes fill up quickly
this time of year so look for the schedule
and get a head start on the spring season!
Fred DeHart
Office: 201 Circle Drive North, #107
Piscataway, NJ 08854 l (201) 469-1221
Road School Training
A valuable service we provide for the
dealer network is the Technical Training
Classes for all the products we sell. There
are many dealers that need technical
training but do not attend the classes. The
most common response given is “I cannot
afford to send my employees to school”.
Some dealers even think that there is a fee
or tuition for the classes. There is NO FEE
FOR TRAINING, NO TUITION for the
classes presented at our regional training
centers.
Kawasaki’s Road Schools are the
answer fort hose dealers who are not close
to their regional training center. These
classes are designed to be held in a trade
school or hotel. This way you can take
advantage of the training without incurring
a large bill for travel and room expenses.
We do require a $25.00 payment for each
student attending the class. This is a token
amount to help us cover the high cost of
providing the training closer to your
dealership. Look for the special bulletin
describing the classes that are scheduled
for your region. Be sure to sign up early,
these classes fill quickly! Contact the
instructor in your region to schedule road
schools you would like us to provide. Now,
I ask you “How can you afford NOT to send
your employees to training classes?”
Walter Rainwater
Office: 6110 Boat Rock Blvd. SW.
Atlanta, GA 30378 l (404) 349-2000
Service Labor: A Valued Commodity
Hourly Labor Rate used to be determined by simply taking the total time it took
a mechanic (with average expertise) to get
the job done, and adding up the mechanic’s
hourly pay. If the mechanic was paid $3.50
an hour, the labor rate was probably set at
$5.00 an hour. The customer got nothing
special, just a job well done, the dealer
realized a small profit or basically broke
even. In the “old days” that’s the way it was.
There was no concept of Flat Rate either.
In today’s market place service labor is a
very valuable commodity. Hi-tech
everything makes it nearly impossible for
the customer to perform anything beyond
an oil change. That is where specialization
and training add considerable value to the
services you provide to your customers.
Today’s technician brings a new
opportunity to the dealership. The ability to
value the services rendered at an amount
higher than simply the “straight time”
clocked on the job. Basically, the straight
time should match the Flat Rate time
12 K-Tech News
l
you’ve allowed for the job. Then, by
determining the true costs of the services
your shop provides, their “Retail Market
Value” can be determined. This would be
an amount that covers all costs involved
with the job and which yields an acceptable
profit. Then you can determine what is
called the “Maximum Perceived Retail
Value” of the job.
Just how valuable IS this service to the
customer? Are you the only shop that has
this particular tool, equipment, race
experience, or skilled technician? If you
have something really special, it will be
worth more to the customer than the
“straight time” work some shops provide.
Labor rate is the dollar value you put
on one hour of a technician’s labor, it is
not just the amount that covers costs.
The special skills that trained technicians
posses is a commodity that has a “Value
Added” affect on labor rate. Promote
these skills by offering service specials.
These jobs can be supported by a
Ken Ploeser
Office: 9950 Jeronimo Road
Irvine, CA 92718 l 770-0400
complete parts stock, trained personnel
and flat rate times you determine. The
retail’ price for these jobs will far exceed
the costs, showing a healthy bottom line
on your next service department profit
and loss statement.